Applies ToWindows 11 Windows 10
Ответы на распространенные вопросы о 32-разрядной и 64-разрядной версиях Windows.
Чтобы выполнить обновление с 32-разрядной до 64-разрядной версии Windows, требуется переформатировать жесткий диск, установить 64-разрядную версию Windows, а затем переустановить все программы, которые были установлены на вашем устройстве. Дополнительные сведения см. в статье Создание установочного носителя для Windows.
Примечание: Windows 11 и более поздних версий являются только 64-разрядными.
Windows 11 не имеет 32-разрядной версии и является только 64-разрядной. Чтобы подтвердить, выполните приведенные далее действия.
-
Нажмите кнопку Пуск , а затем выберите Параметры > Системный > О программе .
Или выберите следующий ярлык О программе :
Открыть о программе
-
В открывавшемся окне System> About (О системе) версию архитектуры Windows можно найти рядом с полем Тип системы в разделе Спецификации устройств. Он указан как тип операционной системы .
Windows 11 не имеет 32-разрядной версии и является только 64-разрядной. Установка всегда будет 64-разрядной.
Windows 11 не имеет 32-разрядной версии и является 64-разрядной, поэтому любое устройство под управлением Windows 11 поддерживает 64-разрядную версию Windows. Чтобы подтвердить, выполните приведенные далее действия.
-
Нажмите кнопку Пуск , а затем выберите Параметры > Системный > О программе .
Или выберите следующий ярлык О программе :
Открыть о программе
-
В открывавшемся окне System> About (О системе) версию архитектуры Windows можно найти рядом с полем Тип системы в разделе Спецификации устройств. Он указан как тип процессора .
Узнайте, как выбрать 64-разрядную или 32-разрядную версию Office.
Нужна дополнительная помощь?
Нужны дополнительные параметры?
Изучите преимущества подписки, просмотрите учебные курсы, узнайте, как защитить свое устройство и т. д.
Estimated reading time: 2 minutes
In this guide, you will learn:
- How to Check if Windows 11 is 32-bit or 64-bit
- How to Check if Windows 10 is 32-bit or 64-bit
- How to Check if Windows 8 is 32-bit or 64-bit
- How to Check if Windows 7 is 32-bit or 64-bit
- The Difference between 32-bit and 64-bit
- Can You Switch Between 32-bit and 64-bit Windows?
- Pro Tips for a Smooth-Running Windows PC
Knowing whether your computer is 32-bit or 64-bit is crucial for installing the right software. Our guide makes it simple to check your system type, especially for Windows 11 users.
How to Check if Windows 11 is 32-bit or 64-bit
- Click on Start > Settings > System > About.
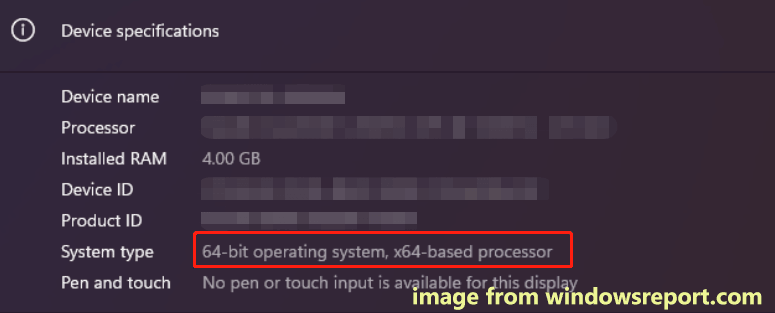
- Under Device specifications, find the System type to see if your Windows 11 is 32-bit or 64-bit.
How to Check if Windows 10 is 32-bit or 64-bit
- Press the Start button, then select Settings.
- Click on System.
- Go to About and look for the System type field to check your bit version.
How to Check if Windows 8 is 32-bit or 64-bit
- On the Start Screen, type computer; the search will open automatically.
- Click on Computer, then select Properties. Your bit version is under System.
How to Check if Windows 7 is 32-bit or 64-bit
- Click the Start menu.
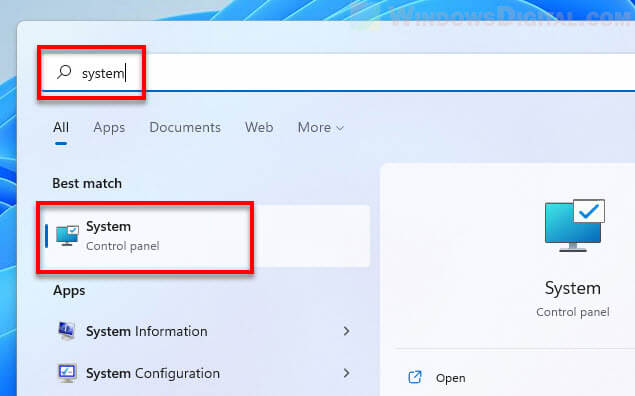
- Type system into the search box and select System from the Programs list without pressing ENTER right away.
- The System type under System will tell you your operating system’s bit version.
The Difference between 32-bit and 64-bit
A 32-bit PC processes data in smaller pieces, which can limit performance and software compatibility. A 64-bit PC processes larger chunks of data, often leading to better performance. Like having the right-sized shoes, the correct bit version ensures your software runs smoothly on your PC.
Can You Switch Between 32-bit and 64-bit Windows?
Switching from one bit version to another is a substantial change, akin to moving to a new house. It requires reinstalling your operating system, which means backing up your data and possibly getting technical support. If in doubt, it’s usually best to continue with the version your PC came with.
Pro Tips for a Smooth-Running Windows PC
Here are some final tips to keep your PC in top shape:
- Stay Updated: Regularly update your operating system to access the latest features and security enhancements.
- Check Software Requirements: Before installing any software, ensure it’s compatible with your system’s bit version.
- Backup Regularly: Always back up important files before making system changes or updates to avoid data loss.
- Get Expert Advice: Considering a switch from 32-bit to 64-bit? Talk to a professional for a smooth transition.
- Use Official Sources: Download drivers and software from official or reputable sources to minimize the risk of malware.
Protect your Windows PC from Threats and Scams
Now that you’ve determined your PC’s bit version, it’s crucial to keep it secure from online threats and scams.
Download Trend Micro Maximum Security to help secure your digital life safely when online. Try it NOW!
How helpful was this article?
-
It wasn’t helpful at all.
-
Somewhat helpful.
-
Just okay.
-
It was somewhat helpful.
-
It was helpful.
- *Feedback submitted will only be used as reference for future product, service and article improvements.
-
Home
-
News
- How to Tell If Your Windows 11 PC Is 64-Bit or ARM64? (3 Ways)
By Vera | Follow |
Last Updated
How to tell if Windows 11 is 64-bit or ARM64? This is a hot topic and it is easy to find the system type on your computer. In this post, MiniTool introduces three ways to help you know what bit your Windows 11 PC is.
Sometimes it is necessary to know the system type and processor type to help you know which version of software or device driver should be downloaded for installation or update. For Windows 10, 32-bit, 64-bit, and ARM64 are the used system architectures. To know what bit Windows 10 is, you can refer to our previous post – Is My Computer 64 Bit or 32 Bit? Try the 5 Ways to Judge out.
If you are using Windows 11, you should know there is no 32-bit version and this system only supports 64-bit and ARM64 versions. Well then, how to tell if your computer is 64-bit or ARM64? The steps are a bit different from the ones in Windows 10. Let’s move on to the next part to find what you need.
How to Tell If Windows 11 Is 64 or ARM64
Is Windows 11 64-bit or ARM64? In this part, 3 common ways are introduced. Look over them and try one if you need.
Related post: ARM64 vs X64: What’s the Difference
See If Your Processor Is 64-Bit or ARM via Windows 11 Settings
One of the simplest ways to check your system type in Windows 11 is using the Settings app.
See the steps:
Step 1: Open Settings by pressing the key combination – Win + I.
Step 2: Click System on the left side and tap on About.
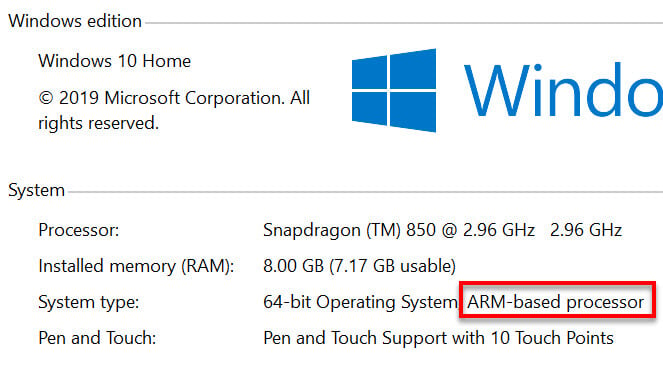
Step 3: Under the Device specifications section and locate System type to find what bit your computer is. If the screen says 64-bit operating system, x64-based processor, Windows 11 is 64-bit. If you see 64-bit operating system, ARM-based processor, it means the system type is ARM64.
Tell If Your PC is ARM64 or 64-Bit via System Information
How do I know what bit my Windows 11 is? To find the answer to this question, you can also go to check your PC specifications including system architecture via the msinfo32 command (System Information).
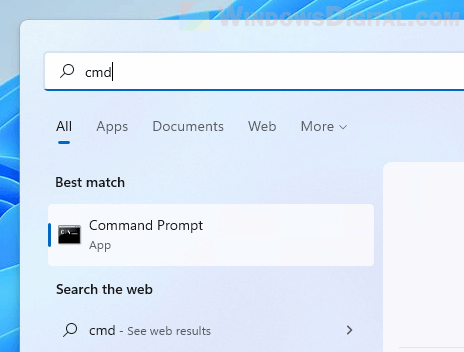
Step 1: Press Win and R to open the Run dialog, type into msinfo32 and click OK. Alternatively, you can type system information into the search box and click the result to open this app.
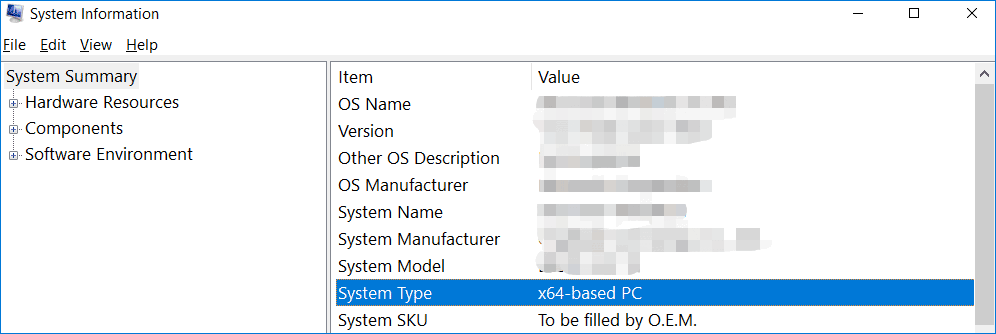
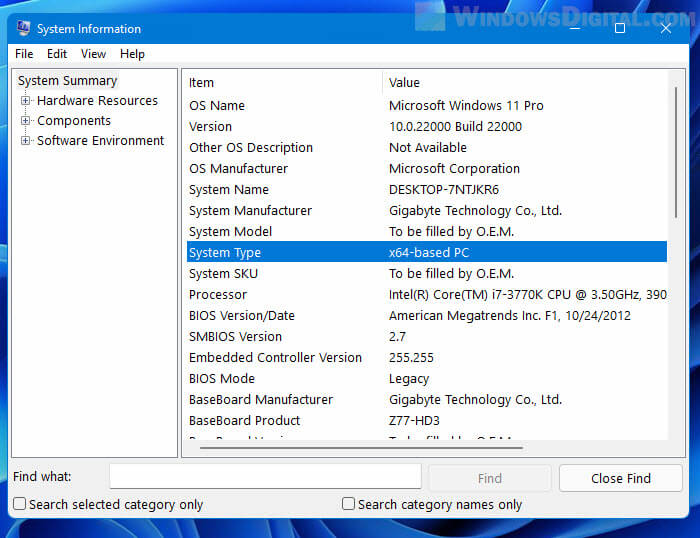
Step 2: Under the System Summary tab on the left side, locate the System Type section and see if it is ARM64-based PC (ARM64) or x64-based PC (64-bit).
How to Tell If Windows 11 Is 64 or ARM64 via CMD
Apart from checking Windows 11 system type via Settings and System Information, you can also do this thing using Command Prompt.
See how to tell if your PC is ARM64 or 64-bit in Windows 11 CMD:
Step 1: Launch Command Prompt as an administrator.
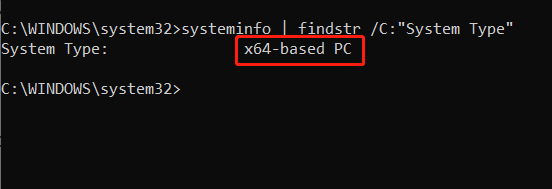
Step 2: In the CMD window, type systeminfo | findstr /C:”System Type” and press Enter. Then, you will get the related information. If it says x64-based PC, your CPU is 64-bit. If it says ARM-based PC, you have an ARM64-based processor.
Verdict
Is Windows 11 64-bit or ARM64? How to tell if Windows 11 is 64 or ARM64? After reading this post, you know three common ways to check system type in Windows 11. Then, you can download a proper version of software or device drivers based on the system architecture and install the compatible version for your PC.
About The Author
Position: Columnist
Vera is an editor of the MiniTool Team since 2016 who has more than 7 years’ writing experiences in the field of technical articles. Her articles mainly focus on disk & partition management, PC data recovery, video conversion, as well as PC backup & restore, helping users to solve some errors and issues when using their computers. In her spare times, she likes shopping, playing games and reading some articles.
There are often times when you need to choose which version of setup or installer of a software you should download based on your computer’s system type and processor type. For example, a 64-bit software will not work on 32-bit operating system, while a computer or device with a ARM-based processor can only run software designed for ARM-based PC. This guide will show you how to check if your computer is 64-bit, 32-bit, ARM64 or ARM in Windows 11.
Most modern computers and devices have one of the following CPU architectures:
- 32-bit (x86-based)
- 64-bit (x64-based)
- ARM-based
There are several differences between these CPU architectures. If you have a 32-bit processor, you will only be able to install 32-bit OS and use 32-bit software. However, 64-bit will be able to handle both 32-bit and 64-bit operating system and software. It’s worth noting that Windows 11 can only run on 64-bit CPU.
Another major difference between 32-bit and 64-bit is that there is a limit of RAM that a 32-bit operating system can use. A 32-bit architecture can only utilize up to 4 GB of memory, while a 64-bit architecture can theoretically utilize up to 16 exabytes of memory. That said, it is recommended you install 64-bit operating system if you have a 64-bit processor in order to fully utilize your RAM and other hardware resources.
How to check if your processor is 64-bit, 32-bit or ARM in Windows 11
Method 1: System > About
The easiest way to quickly check the system and processor type of your computer is by going to Settings > System > About in Windows 11. For detailed instructions on how to open the System’s About page, follow the steps below.
1. Press Win + i keys to open Settings app. On the right pane, scroll down and select About.
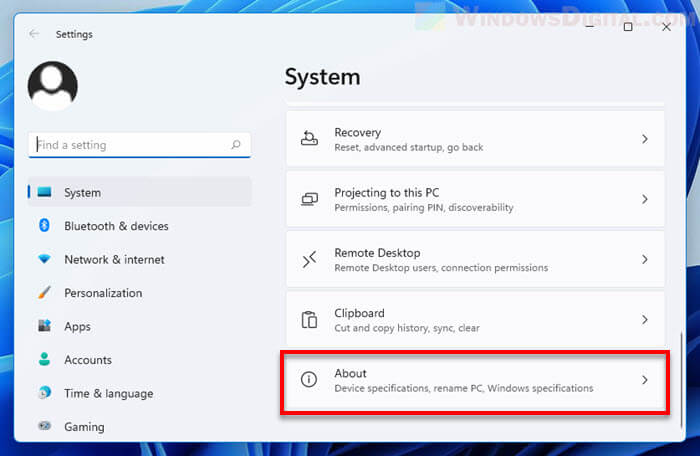
Alternatively, you can search for and open System directly from the Start menu.
2. In the System > About page, the System type along with the processor type is listed under Device specifications.
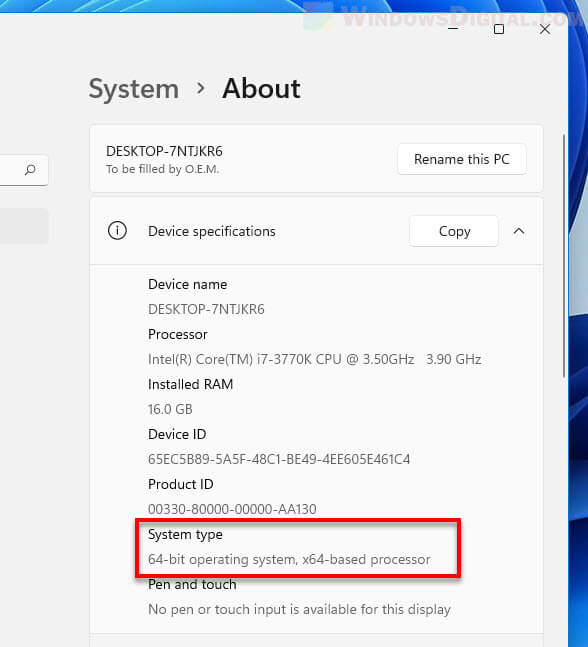
For instance, in the screenshot above, my computer is running 64-bit Windows 11 on a x64-based processor.
On the other hand, if your computer is running a ARM-based processor, it will show “ARM-based” next to the system type. For example, the screenshot below shows the system and processor type of my ARM-based (ARM64) Lenovo laptop computer.
Method 2: System Information
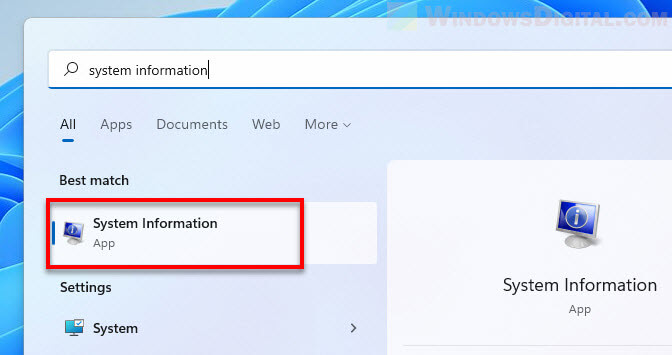
Another way to check your computer’s details including the system architecture and processor type is by opening the System Information app. Simply go to Start, search for “System Information” and open it.
Next, select System Summary in the left pane. You can then check if your system is a x64-based, x86-based or ARM-based PC next to “System Type” in the right pane as shown in the screenshot below.
Method 3: Command Prompt (CMD)
Apart from checking the system type via apps, you can check the CPU architecture type using a command line instead in Command Prompt.
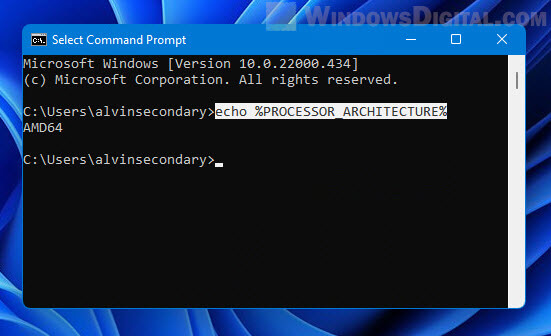
1. Search for “CMD” and open Command Prompt via Start. The command to check processor architecture does not require administrative privilege. Thus, you don’t need to run command prompt as admin in this case.
2. In the command prompt window, enter the following command line.
echo %PROCESSOR_ARCHITECTURE%
3. This command will output one of the following values based on the processor architecture you have.
- x86 if you have a 32-bit based processor
- AMD64 if you have a 64-bit processor
- ARM64 if you have a ARM-based processor