Содержание статьи:
- Способы переименовать ПК
- Вариант 1: через параметры и окно свойств системы
- Вариант 2: через командную строку
- Если вылетают ошибки о недостаточности прав (и прочее)
- Вопросы и ответы: 0
Вопрос от пользователя
Здравствуйте.
Подскажите, как переименовать компьютер и перевести его в другую рабочую группу.
Пытаюсь дома организовать локальную сеть из 3-х компьютеров (по вашей статье двое уже объединил, все работает, а вот на третьем устройстве — вылетает какая-то ошибка «Нет прав доступа…» / если не вылетает — то просто окно закрывается и ничего не происходит).
Доброго времени.
Возможно, у вас просто нет администраторских прав (либо установлена какая-то «кривая» сборка. Точнее можно сказать, если самому покопаться с вашим устройством…).
Ниже в заметке предложу несколько вариантов решения вопроса. Рекомендую действовать последовательно. 👌
*
Способы переименовать ПК
Вариант 1: через параметры и окно свойств системы
Наиболее простой способ узнать и поменять имя и рабочую группу ПК — это воспользоваться параметрами системы (для Windows 10/11). Чтобы их открыть — достаточно войти в меню ПУСК или нажать сочетание Win+i.
Далее нужно открыть вкладку «Система / о системе» и выполнить требуемое действие. 👇
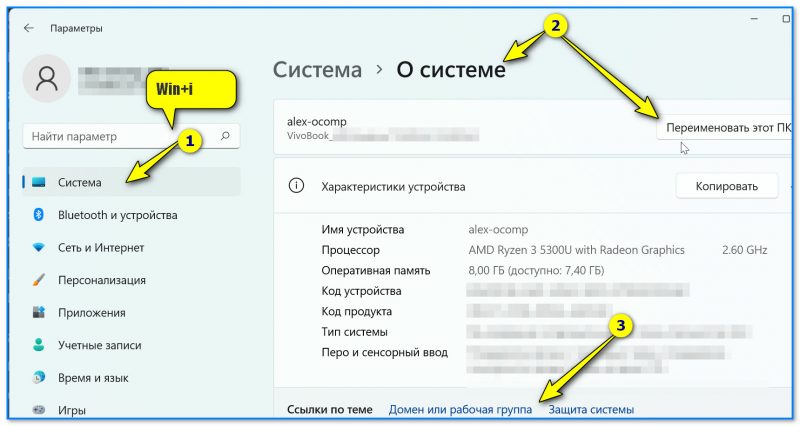
Win+i — открываем параметры системы
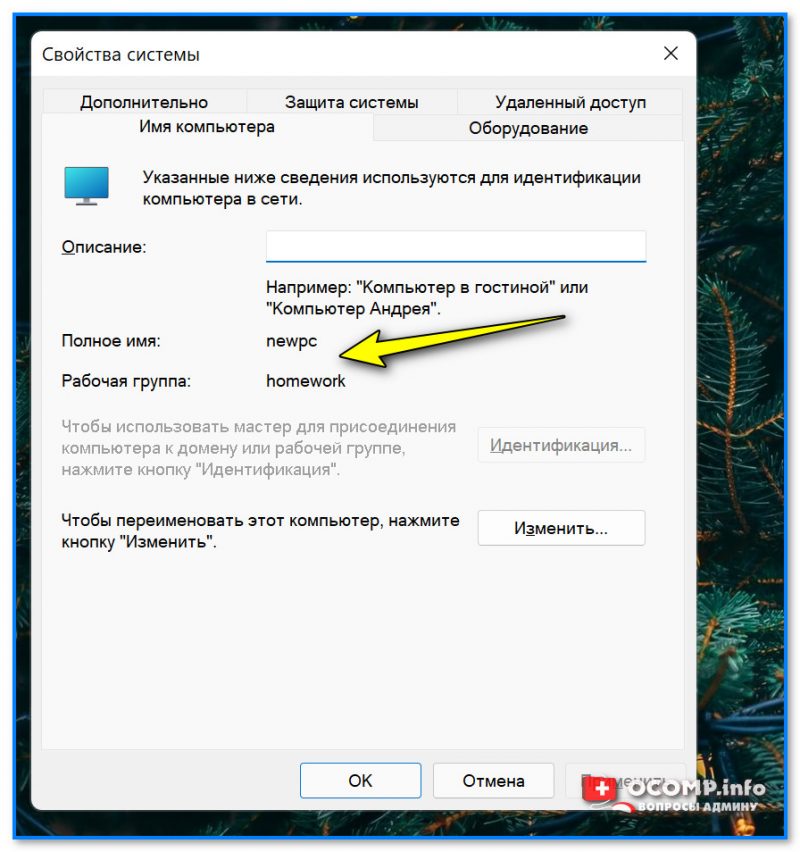
Также можно воспользоваться 📌 окном свойств системы — чтобы его открыть, требуется нажать Win+R, и ввести команду sysdm.cpl (подтвердить по Enter). Далее во вкладке «Имя компьютера» нажать по кнопке «Изменить». См. пример ниже. 👇
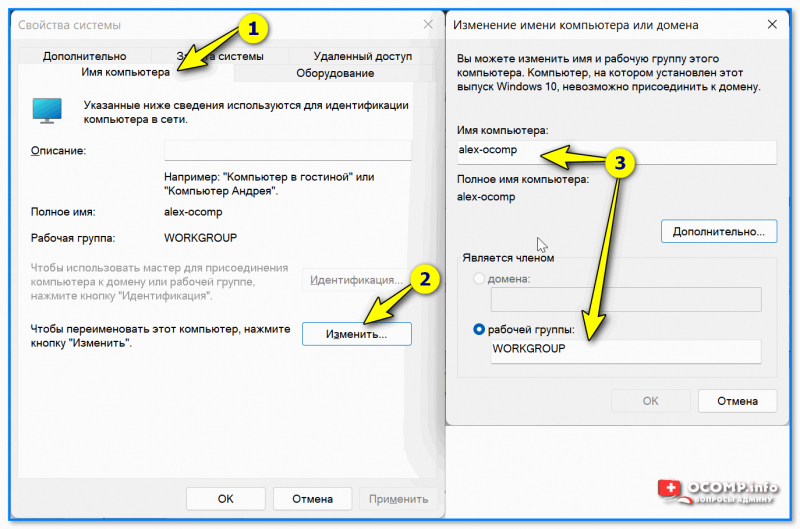
Свойства системы — изменяем имя ПК и рабочую группу
*
Вариант 2: через командную строку
1) Сначала необходимо запустить 📌 командную строку от имени администратора.
2) Далее, чтобы узнать текущее имя ПК и рабочую группу, можете использовать команду systeminfo (или hostname).
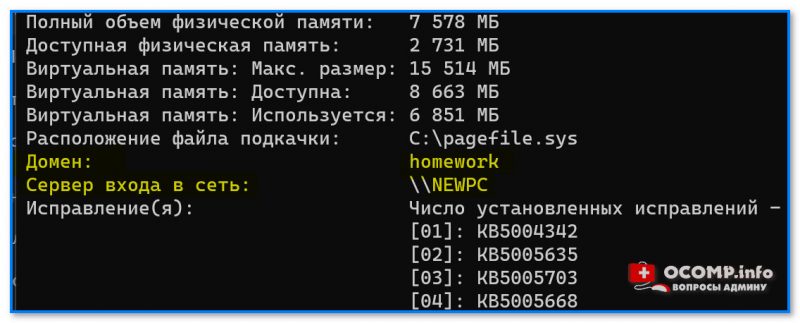
systeminfo — см. строки домен и сервер
3) Чтобы сменить рабочую группу введите следующее:
wmic computersystem where name=»%computername%» call joindomainorworkgroup name=»homework»
Обратите внимание, что вместо «homework» — нужно ввести требуемое имя рабочей группы (лучше, чтобы оно было на латинице и без различных разделителей!).
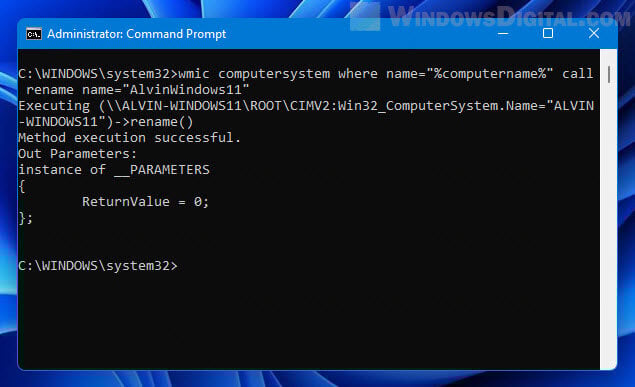
Команда для переименования ПК (требования те же):
wmic computersystem where name=»%computername%» call rename name=»newpc»
После ввода этих двух команд — ПК требуется перезагрузить!
4) После перезагрузки — имя и раб. группа должны измениться!
Имя ПК и раб. группа стали другими!
*
Если вылетают ошибки о недостаточности прав (и прочее)
1) Посоветовал бы попробовать создать нового пользователя (с правами администратора), зайти под ним, и попробовать ввести вышеперечисленные команды. Ниже покажу, как это можно сделать (без лишней суеты…).
2) Для работы нам понадобиться LiveCD-флешка от Сергея Стрельца. Как ее создать 📌 описывал здесь. Рекомендую завести себе ее, выручит при самых разных проблемных ситуациях с ПК! 👌
3) Загрузившись с этой флешки, необходимо открыть инструмент «Windows Login…». 👇
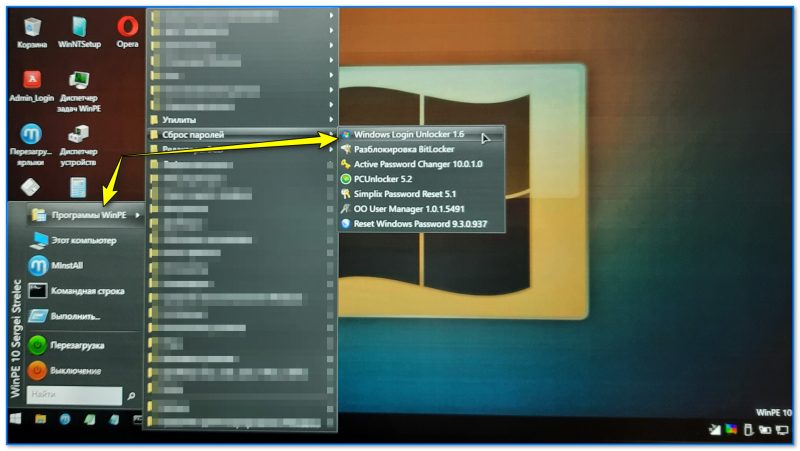
WinPE — Windows Login
4) Далее нам нужно выбрать диск с «проблемной» ОС Windows (в которой нужно задать новое имя компьютера) и кликнуть по кнопке «New user» — сразу же задать имя пользователю и нажать OK. 👇
Примечание: если утилита не видит диск — попробуйте зайти в «Мой компьютер» и посмотреть, нет ли знака замка на иконке накопителя. Возможно, он просто зашифрован BitLocker (на новых устройствах это может происходить в авто-режиме).
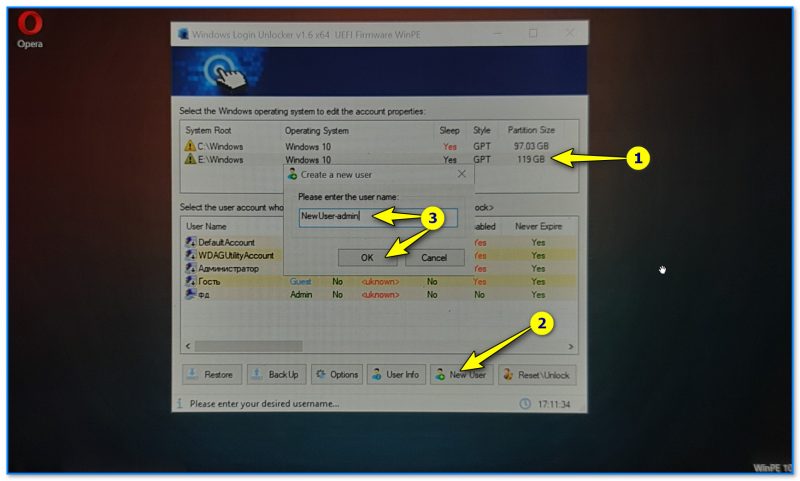
Создание нового пользователя
5) Обратите внимание на то, что новый пользователь является администратором (группа — Admin). Всё — теперь можно перезагрузить компьютер (вынув при этом LiveCD-флешку, сегодня она больше не нужна).
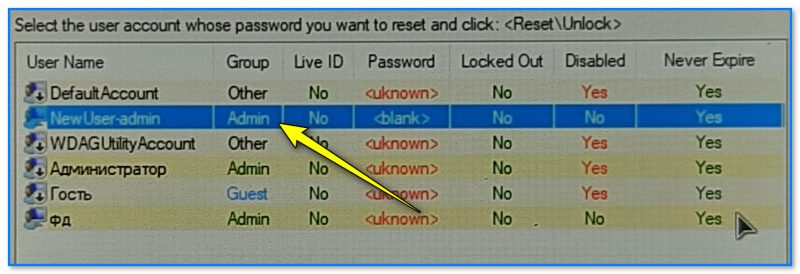
Новый пользователь явл. админом (так-то лучше)
6) Если Windows загрузилась автоматически и появился рабочий стол — нажмите сочетание Win+L, и перезайдите под новым пользователем (которого мы создали в предыдущем шаге). В моем случае — это «New user — Admin».
Далее просто попробуйте переименовать ПК и рабочую группу первыми тремя способами (см. начало статьи).

Заходим под админом
*
Если вышеприведенные варианты у вас не «сработали», и вырешили вопрос иначе — сообщите в комментариях! Заранее благодарю.
Успехов!
👋
This article describes steps to change the Workgroup using a Windows 11 machine.
Every Windows machine comes with a default workgroup name, WORKGROUP. A Workgroup is a collection of network devices related to each other or in the same domain.
A workgroup provides the basis for files and printer sharing and allows the sharing of network resources within the same Workgroup. Devices members of the same Workgroup will access and share resources within that Workgroup.
Below is how to change a workgroup a computer belongs to with Windows 11.
Change the Workgroup a PC belongs to in Windows 11
As described above, a workgroup provides the basis for file and printer sharing and allows the sharing of network resources within the same workgroup.
Below is how to change the Workgroup on a PC with Windows 11
First, open the Windows Settings app.
You can do that by clicking on the Start menu and selecting the Settings app. Press the keyboard shortcuts (Windows key + I) to launch the Settings app.
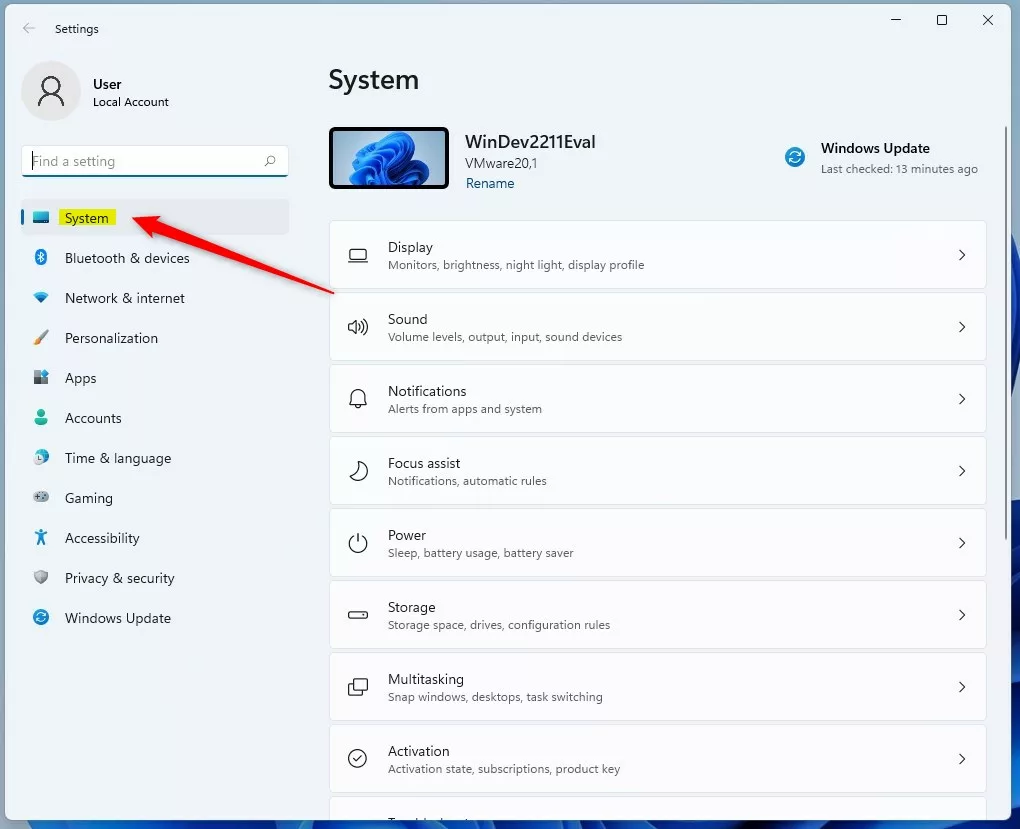
When the Settings app opens, click the System button on the left.
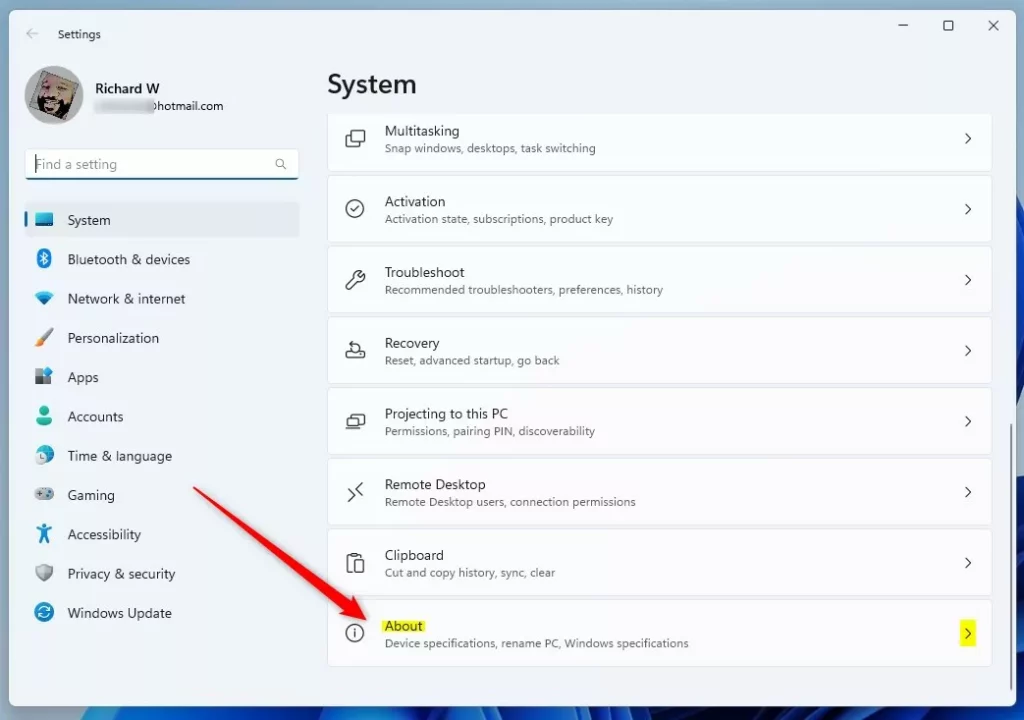
On the right, click on the About tile to expand.
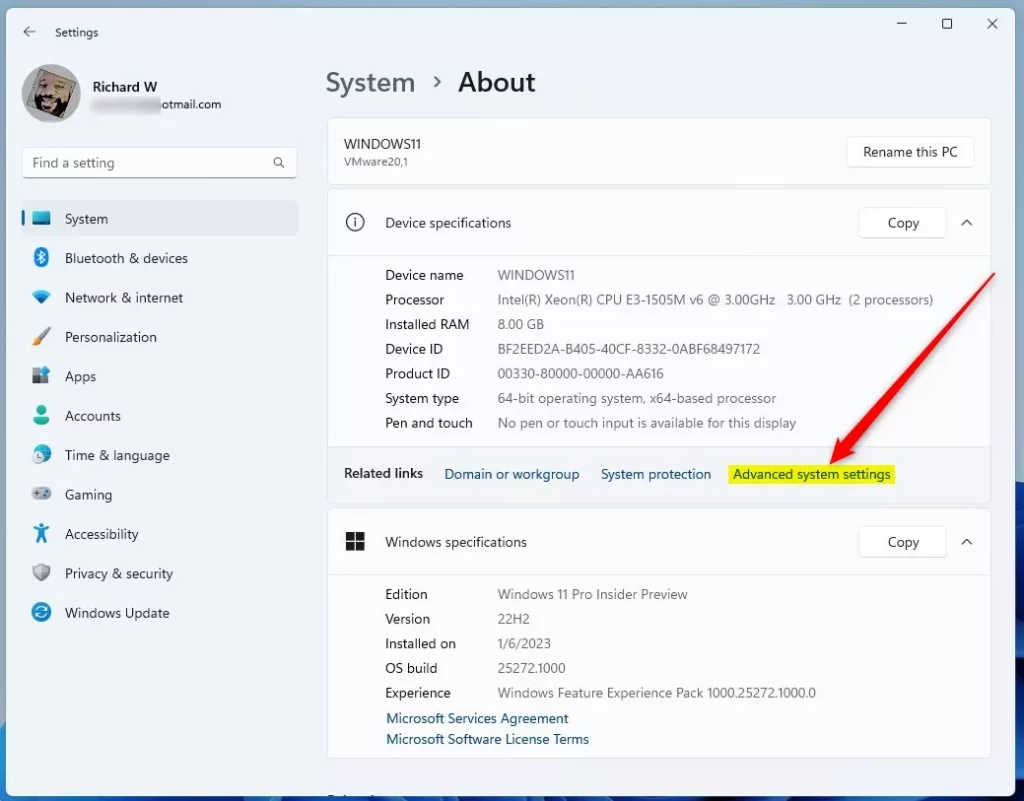
On the System -> About settings pane, click the Advanced system settings link as highlighted below.
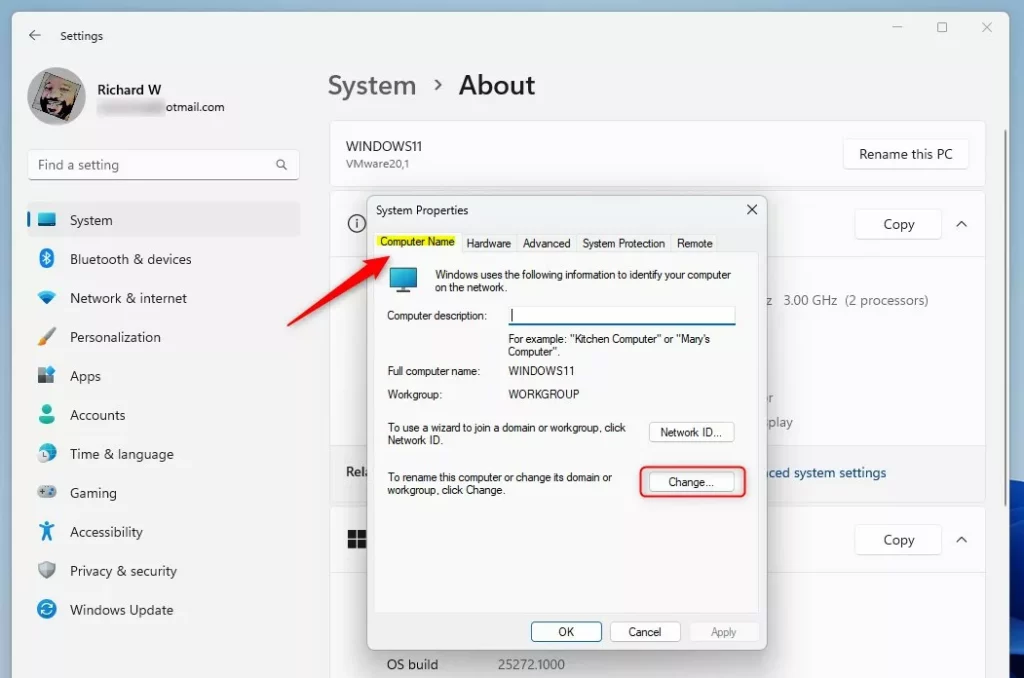
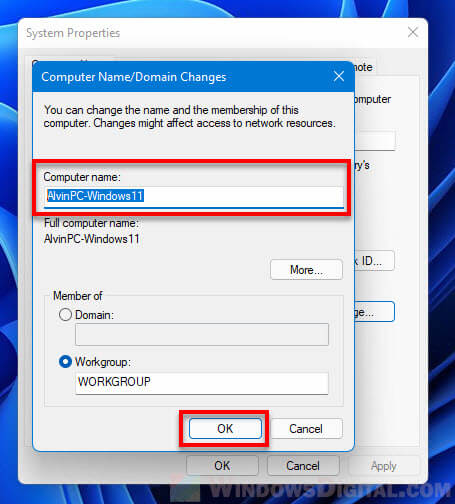
On the pop-up System Properties window, select the Computer Name tab. Then click on the Change button, as highlighted below.
On the pop-up Computer Name/Domain Changes window, select the Workgroup radio button, then type a new workgroup name in the box below Workgroup.
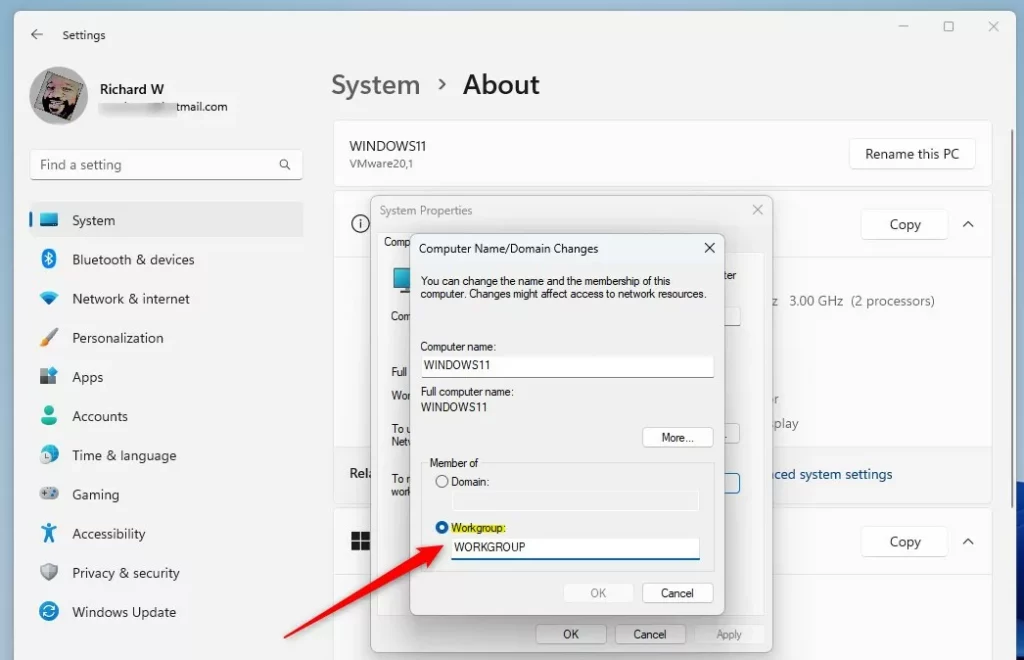
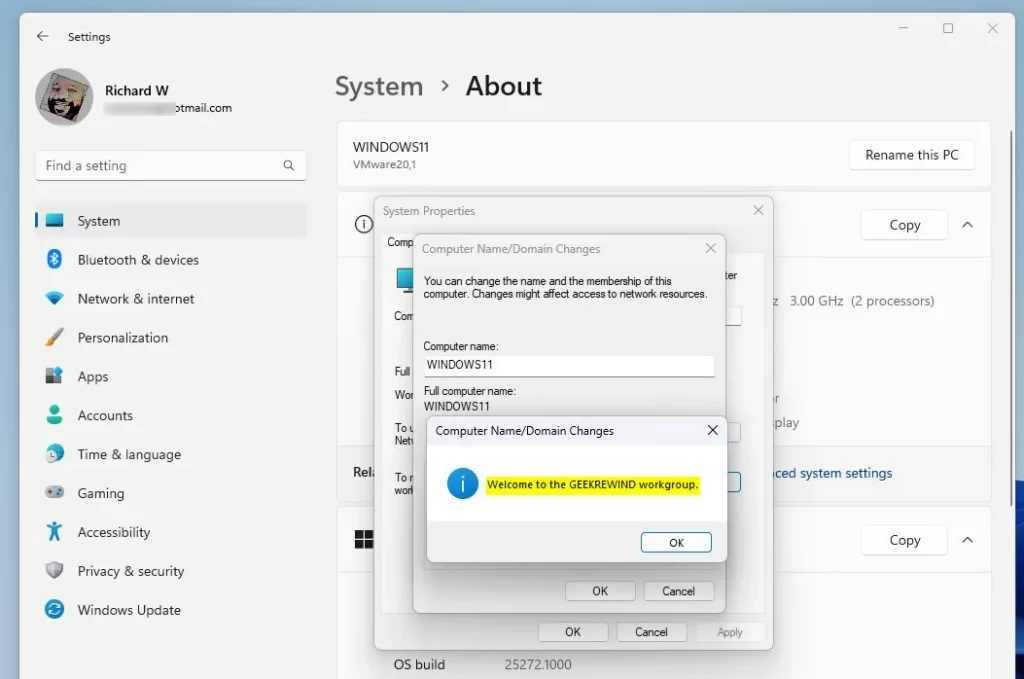
When you do that, you will get a prompt welcoming you to the new workgroup name. A workgroup name cannot contain spaces or special characters, including the ones below:
` ~ @ # $ % ^ & ( ) = + [ ] { } | ; : , ‘ “ . < > / ?
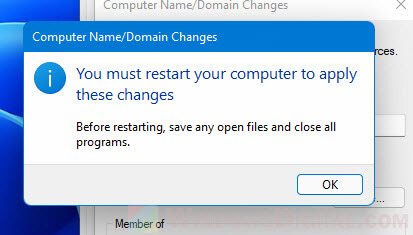
Click on OK, restart your computer, and you are done.
Change the workgroup name via Command Prompt
If you want to use the Command Prompt to change the workgroup name on a Windows 11 computer, then use the steps below.
First, open the Command Prompt as administrator.
Then run the format of the command below:
wmic computersystem where name="%computername%" call joindomainorworkgroup name="Type-Workgroup-Name"
Replace “Type-Workgroup-Name” with the name you want to change to. For example, type the command below to change to a new workgroup called GEEKREWIND.
wmic computersystem where name="%computername%" call joindomainorworkgroup name="GEEKREWIND"
Restart your computer for the changes to apply.
Change the workgroup name via Windows PowerShell
Users can also use the Windows PowerShell app to change the Workgroup for a PC running Windows 11. Below is how to do that.
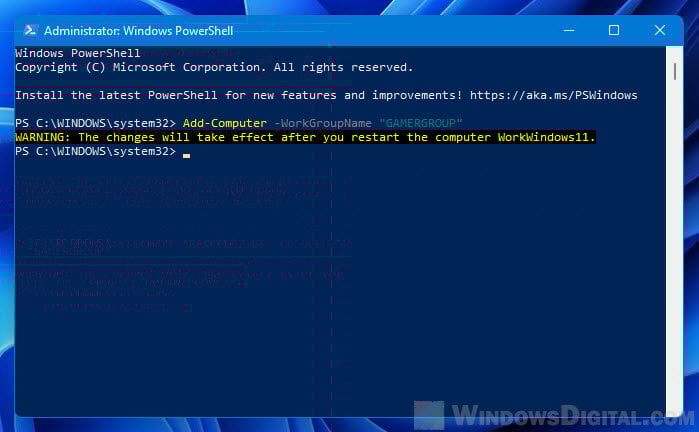
First, open the Windows PowerShell app as administrator.
Then run the command format below:
Add-Computer -WorkGroupName "Type-Workgroup-Name"
Replace “Type-Workgroup-Name” with the name you want to change to. For example, type the command below to change to a new workgroup called GEEKREWIND.
Add-Computer -WorkGroupName "GEEKREWIND"
Restart your computer for the changes to apply.
That should do it!
Conclusion:
- Changing the workgroup name on a Windows 11 PC is essential for organizing network resources and enabling efficient file and printer sharing.
- The process can be completed with step-by-step guidance, whether using the Windows Settings app, Command Prompt, or Windows PowerShell.
- Remember to choose a workgroup name without spaces or special characters and restart your computer to apply the changes.
- Following these instructions, you can effectively modify the workgroup name on your Windows 11 PC and streamline network operations.
In Windows 11, Computer name is the name used to identify your computer when you are connected to a local network, for example, your home network via WiFi or Ethernet. It is the name that will appear on other computers or devices connected to the same network and workgroup, while theirs will also appear on yours, when network discovery and file sharing is turned on.
Workgroup, on the other hand, is a peer to peer network setup using Microsoft Windows. Computers in the same local area network needs to also be in the same workgroup in order to share resources and allow access to each other. For example, if you have two computers connected to the same local network, both needs to have the same Workgroup name in order to share files, printers, etc. with each other.
In this guide, we will show you several methods on how to change the Computer name or Workgroup name in Windows 11 via Settings, System Properties, Command Prompt or Windows PowerShell.
Also see: How to login to Windows 11 without password or PIN
How to change Computer name in Windows 11
Method 1: Advanced System Settings
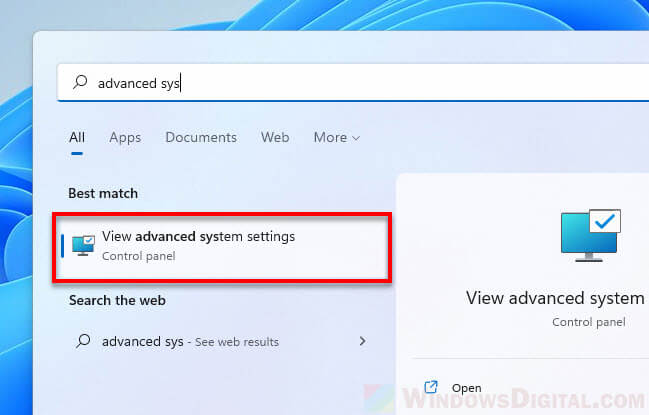
1. Click Start and search for “Advanced system settings”. Select the first result – “View advanced system settings“.
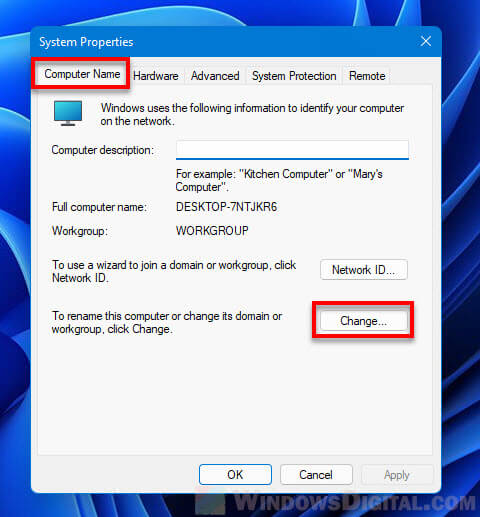
2. In the System Properties window, select Computer Name tab. Then, click the Change button next to “To rename this computer or change its domain or workgroup, click change“.
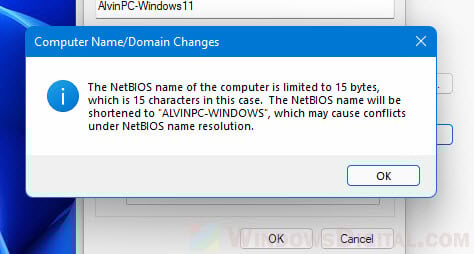
3. In the Computer name field, enter any new name you want and click OK. The computer name is recommended to not exceed 15 characters.
4. You will then be prompted to restart your computer to apply the changes. Restart your computer for the changes to take effect.
If you enter a name longer than 15 characters, since the NetBIOS name of the computer is limited to 15 bytes, it will try to shortened the name you’ve entered, or you can re-enter a new name not more than 15 characters. To use a longer name, follow method 2 instead.
Method 2: About > Rename this pc
1. Click Start, search for and open “Rename your PC“.
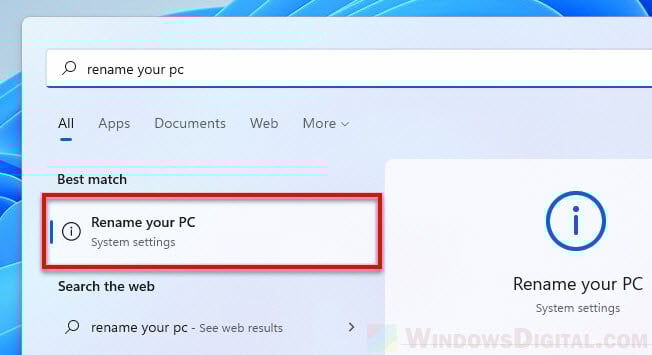
2. In the System > About settings page, click the Rename this PC button next to the current name of your computer.
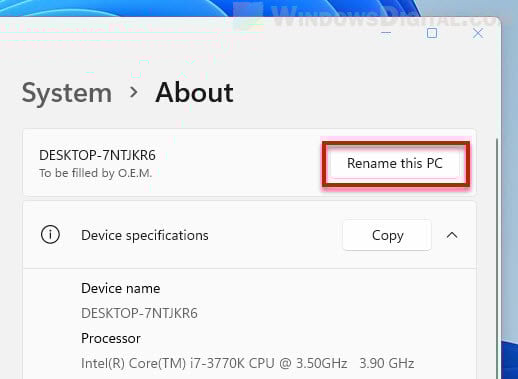
3. In the Rename your PC window, enter a new name and click Next to proceed.

4. Restart your computer for the changes to take effect.
This method is recommended if you need to use a name longer than 15 characters, or if you are using Microsoft Surface Pro or Windows 11 Tablet Mode.
Method 3: Change Computer name via CMD
To change computer name in Windows 11 via Command Prompt, follow the steps below.
1. Click Start, search for CMD, right-click Command prompt and select Run as administrator. Administrative privilege is required to execute the computer name change command.
2. In the command prompt window, enter the following command. Replace new-computer-name with the actual computer name you want to change to. Press enter to execute the command.
wmic computersystem where name="%computername%" call rename name="new-computer-name"
3. Restart your computer for the changes to take effect.
Things to consider when assigning computer names
A same network or workgroup should not have two or more computers with the same name. Duplicate computer names will cause problems such as IP conflicts and connection errors. Thus, each computer should have a unique computer name to avoid causing unnecessary conflicts and errors when connected to the same network and workgroup.
Additionally, though the computer name is usually decided when you first setup your Windows during installation, it is safe to change your computer name any time after Windows installation.
How to change Workgroup in Windows 11
Method 1: System Properties
Windows 11 automatically assigns computers to a default workgroup called “Workgroup” when Windows is installed. To change your computer to a different workgroup, follow the steps below.
1. Search for and open “sysdm.cpl” (Control panel item) via Start.
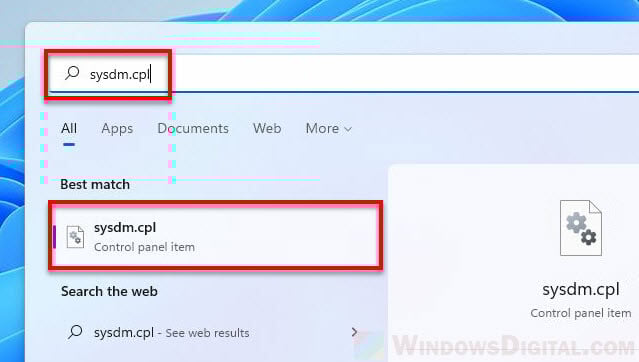
2. In the Computer Name tab, click the Change button next to “To rename this computer or change its domain or workgroup, click change“.
3. In the “Member of” section, enter a new name in the Workgroup field.

4. Click OK and restart your PC for the changes to take effect.
Method 2: Change Workgroup via CMD
To change Workgroup in Windows 11 via Command Prompt, follow the steps below.
1. Search for Command Prompt or CMD via Start, right-click the first result and select Run as administrator. Administrative permission is required to execute the command to change your computer’s workgroup.
2. In the elevated CMD window, enter the following command. Replace new-workgroup-name with the actual Workgroup name you want to change to. Then, press enter to execute the command.
wmic computersystem where name="%computername%" call joindomainorworkgroup name="new-workgroup-name"

3. Restart your computer for the changes to take effect.
Method 3: Change Workgroup from PowerShell
To change Workgroup in Windows 11 via PowerShell or Windows Terminal, follow the steps below.
1. Click Start and search for Windows PowerShell. Right-click the first result and select Run as administrator.
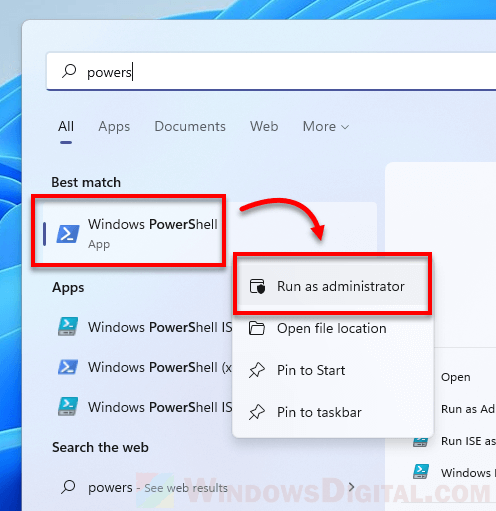
2. In the PowerShell window, enter the following command. Replace new-workgroup-name with the actual Workgroup name you want to change to. Then, press enter to execute the command.
Add-Computer -WorkGroupName "new-workgroup-name"
3. Restart Windows for the changes to take effect.
Все способы:
- Шаг 1: Активация и назначение имени рабочей группе
- Шаг 2: Настройка общего доступа
- Шаг 3: Открытие доступа к папкам и файлам
- Вопросы и ответы: 0
Поскольку рабочая группа представляет собой набор сетевых протоколов для взаимодействия устройств в одной сети, название должно совпадать на всех компьютерах, поэтому Шаг 1 необходимо выполнить на всех машинах.
Шаг 1: Активация и назначение имени рабочей группе
Для начала стоит проверить, правильные ли настройки у рабочей группы на всех компьютерах под управлением Windows 10. По умолчанию система задает имя «WORKGROUP», но иногда, вследствие различных действий или вмешательства стороннего ПО, оно оказывается изменено. Также важно активировать саму рабочую группу в настройках:
- Нажмите на клавиши «Win + R» — отобразится диалоговое окно «Выполнить», где в текстовом поле нужно ввести команду
sysdm.cplи нажать на кнопку «ОК» или клавишу «Enter». - На вкладке «Имя компьютера» кликните по кнопке «Изменить».
- В открывшемся окне можно задать имя конкретного компьютера (название у всех устройств должно различаться), а также имя рабочей группы. Если нужно, сначала обязательно активируйте ее, затем введите название или оставьте то, которое выставлено по умолчанию («WORKGROUP»).


Название не должно состоять из одних цифр, а также недопустимы символы, которые запрещены в использовании имен файлов в Windows. Кроме того, если имя состоит из двух или более слов, то между ними не должно быть пробелов. Вместо этого можно разделить их нижним подчеркиванием.
Проверьте имя рабочей группы на всех компьютерах, находящихся в локальной сети, — оно должно быть одинаковым. Если на каком-либо устройстве оно не совпадает, исправьте на то, что установлено на главной машине. Чтобы изменения вступили в силу, необходимо перезагрузить компьютер.
Существует еще один способ переименования рабочей группы, который предполагает использование всего одной команды в консоли «Командная строка», запущенной с расширенными правами.
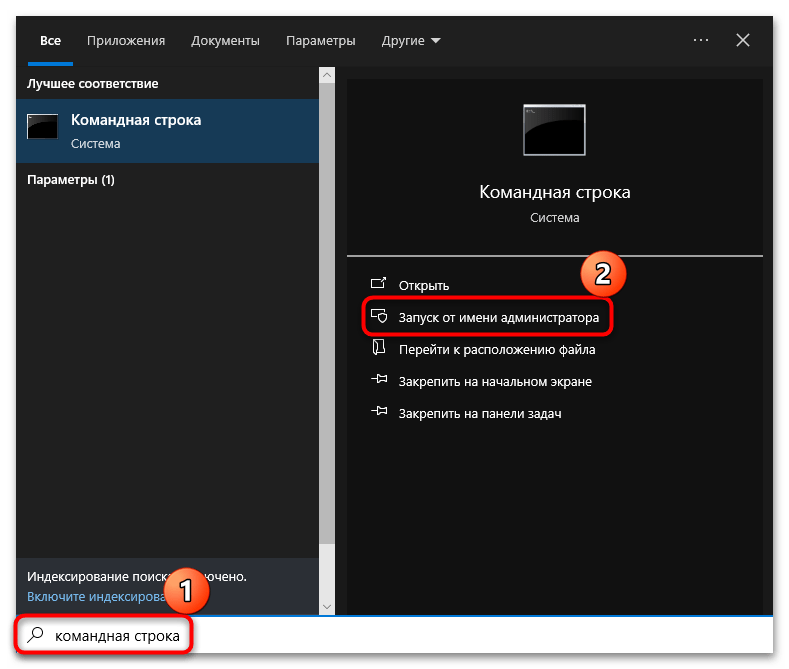
- Откройте «Командную строку» (или «Windows PowerShell») от имени администратора – можно воспользоваться для этого строкой системного поиска.
- Скопируйте команду
wmic computersystem where name="%computername%" call joindomainorworkgroup name="name_group"и вставьте ее в окно используемой консоли, а для выполнения нажмите на клавишу «Enter». Под сочетанием «name_group» из нашего примера подразумевается ваше имя рабочей группы на латинице с учетом всех рекомендаций о названиях выше.

Те же самые действия понадобится проделать на всех компьютерах, чтобы изменить имя рабочей группы для каждого из них. Но проверить, подключено ли устройство к ней, а не к домену, придется через окно «Свойства системы» (первая инструкция из этого шага).
Шаг 2: Настройка общего доступа
Далее стоит проверить настройки общего доступа, чтобы функции рабочей группы смогли полноценно работать в системе. Следует открыть устройства для обнаружения в локальной сети, соответственно, инструкция ниже актуальна для всех связанных компьютеров:
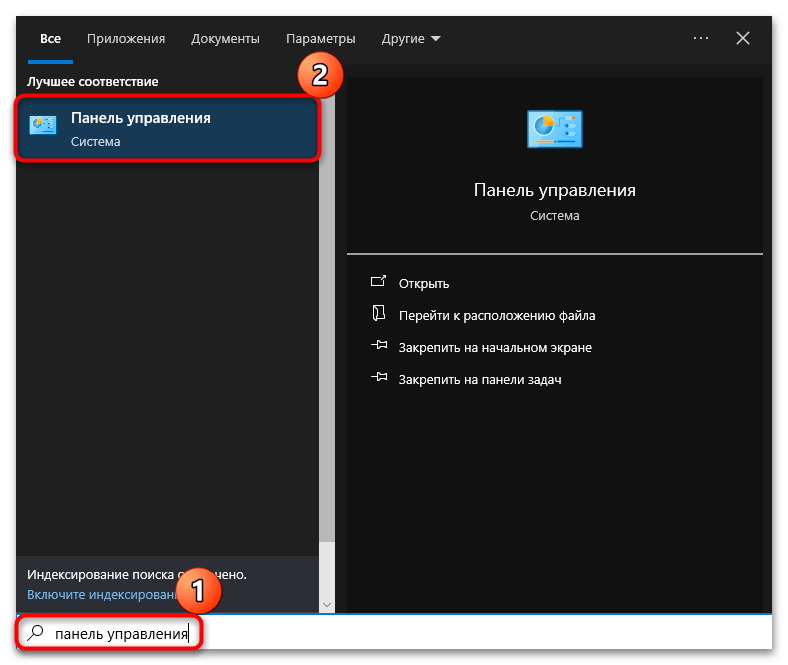
- Запустите стандартное приложение «Панель управления», отыскав его, например, с помощью системного поиска.
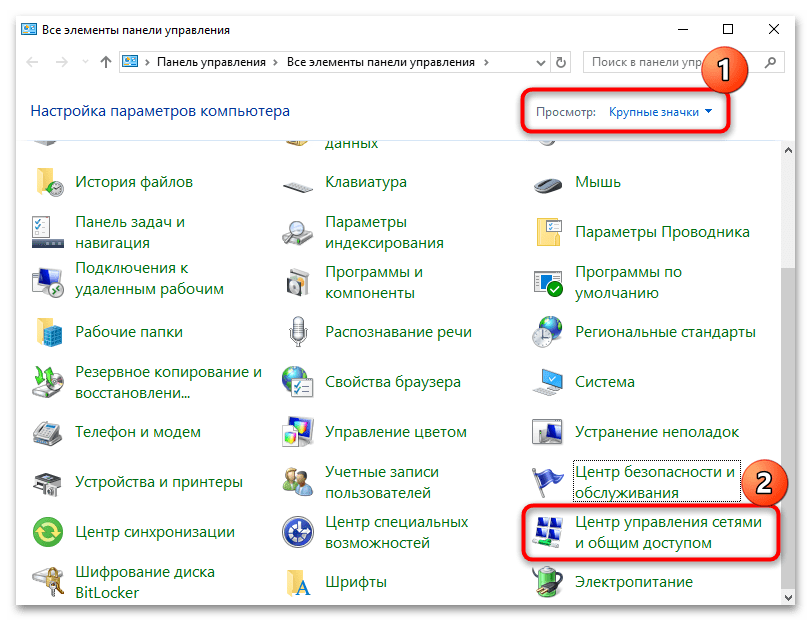
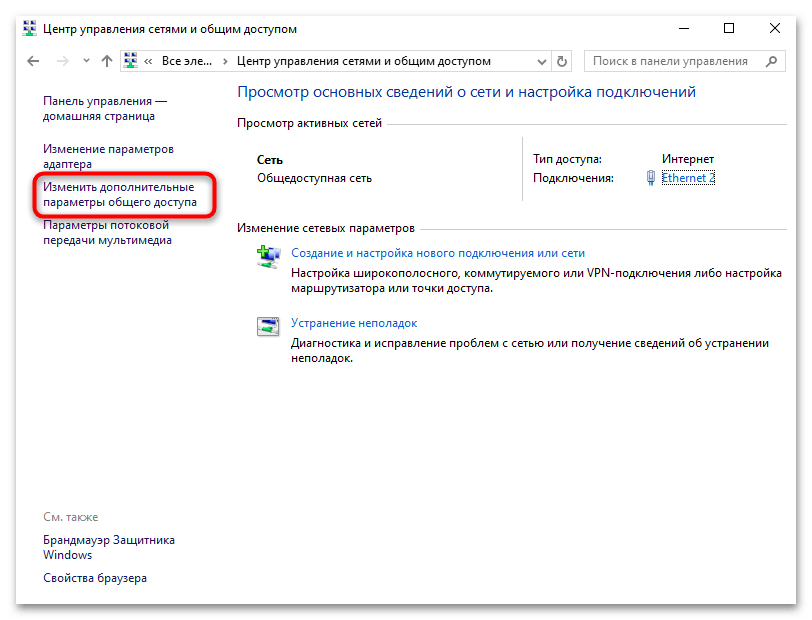
- Просмотр разделов выставьте как значки, затем переходите в раздел «Центр управления сетями и общим доступом».
- На панели слева кликните по строке «Изменить дополнительные параметры общего доступа».
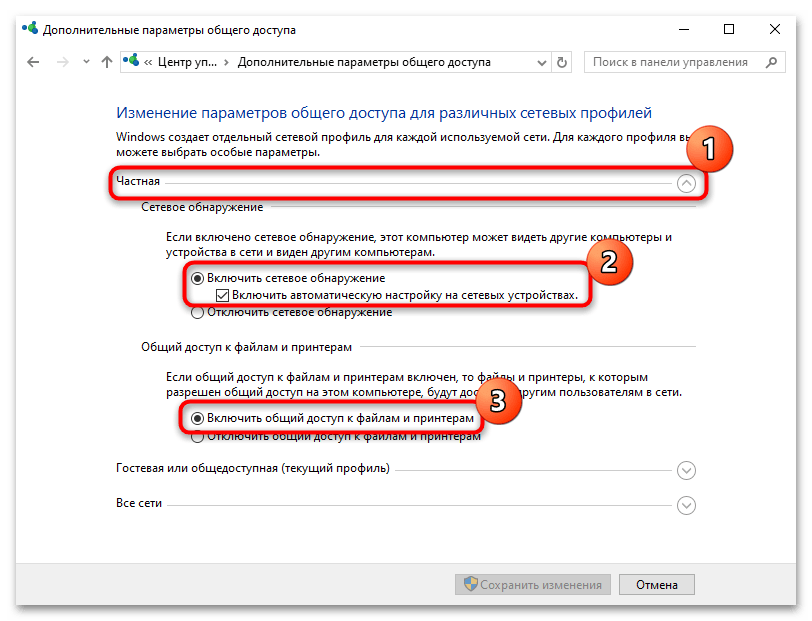
- Разверните меню «Частная» и включите для профиля сетевое обнаружение и общий доступ к файлам и принтерам. Также лучше активировать дополнительную опцию – «Включить автоматическую настройку на сетевых устройствах».
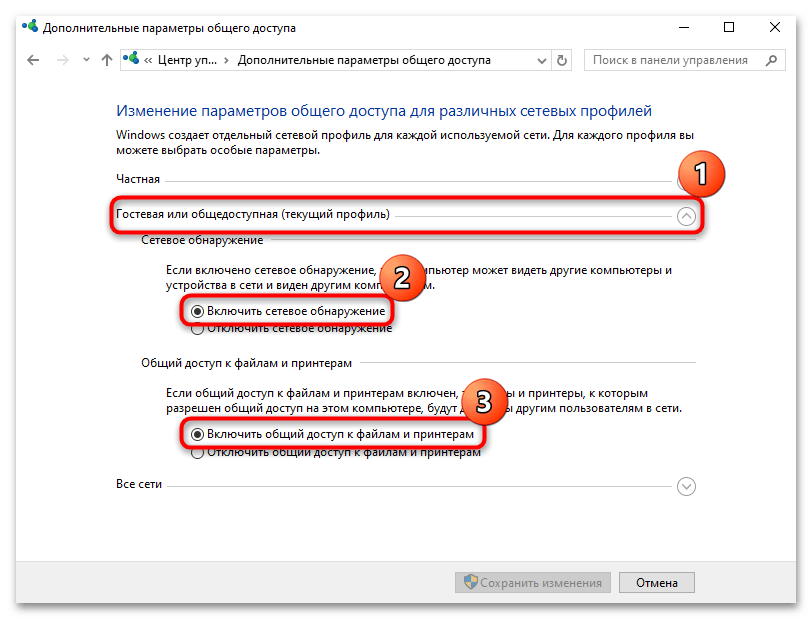
- Те же самые действия проделайте для «Гостевого» профиля.
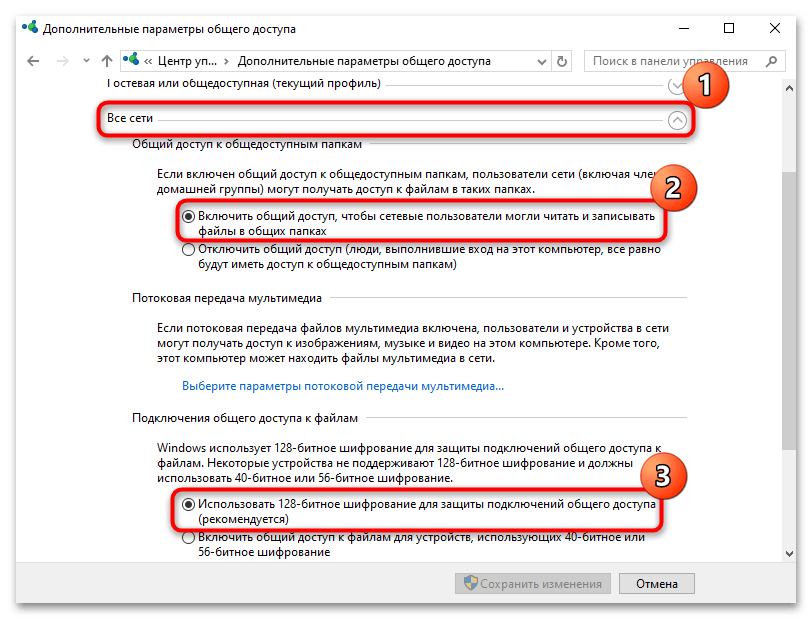
- В разделе «Все сети», помимо активации общего доступа, также нужно выбрать 128-битное шифрование для защиты подключений общего доступа.
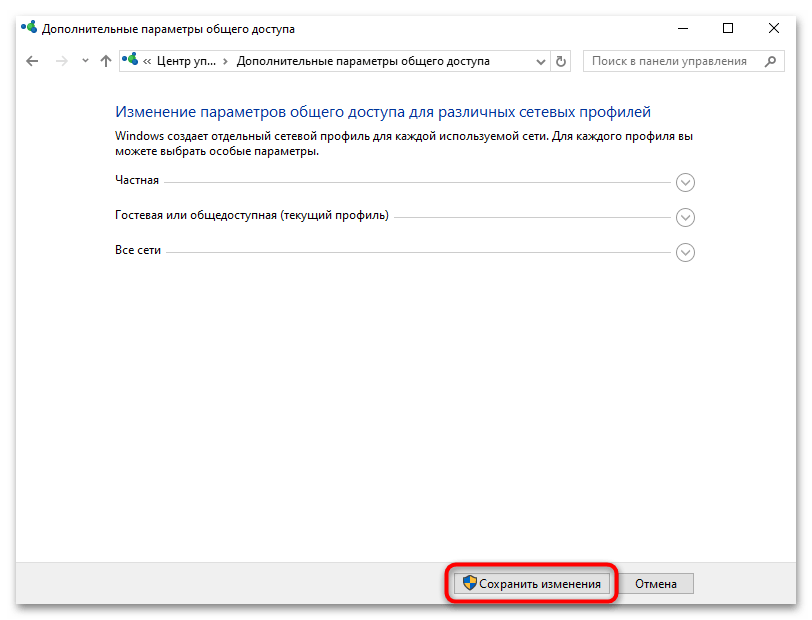
- Сохраните настройки, нажав на соответствующую кнопку внизу.
На этом глобальные настройки сетевого обнаружения устройства завершены. Далее при желании можете переходить еще и к открытию доступа к данным на компьютерах в сети.
Шаг 3: Открытие доступа к папкам и файлам
Для того чтобы компьютеры в рабочей группе могли обмениваться файлами или позволять просматривать данные на других устройствах, нужно создать общую папку, то есть каталог, к которому могут получить доступ все машины в сети:
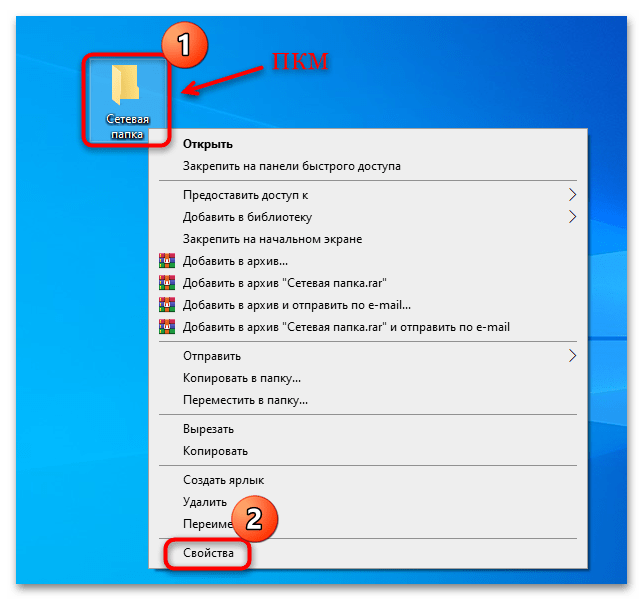
- Кликните правой кнопкой мыши по выбранной/созданной папке и из контекстного меню выберите пункт «Свойства».
- Через вкладку «Доступ» вызовите «Расширенную настройку».
- Поставьте галочку у опции «Открыть общий доступ к этой папке» и нажмите на кнопку «ОК».
- Вернитесь к окну со свойствами папки и перейдите на вкладку «Безопасность», где нужно выбрать «Изменить».
- Далее кликните по кнопке «Добавить».
- В текстовом поле открывшегося окна вручную введите «Все», затем нажмите на «Проверить имена». Если все в порядке, подтвердите новые параметры, кликнув по кнопке «ОК».
- Затем потребуется определиться с разрешениями для пользователей в сети – в соответствующем разделе окна «Разрешения» внизу отметьте пункт «Полный доступ», после чего юзеры из этой рабочей группы смогут не только просматривать файлы, но и копировать, и редактировать их удаленно. Сохраните настройки.

Такие действия можно проделать только на основном компьютере, чтобы другие устройства могли обращаться к выбранной папке в любой момент. Если нужно открыть доступ к файлам на других машинах, проделайте то же самое на каждой из них.
Наша группа в TelegramПолезные советы и помощь

This tutorial will show you how to change the workgroup on your Windows 10 and Windows 11 PC to join an existing workgroup on a network or create a new one.
When you connect to a network, Windows automatically creates a new workgroup and gives it the name WORKGROUP by default. You can join any existing workgroup on a network or create a new one. Workgroups provide a basis for file and printer sharing, but a workgroup doesn’t actually set up sharing for you.
A workgroup is a group of PCs connected to a local area network on the same subnet that share resources, such as printers and files. Each PC that is a member of the same workgroup can access the resources being shared by the others, and can share its own resources.
- All PCs are peers; no PC has control over another PC.
- Each PC has its own user accounts. To log on to any PC in the workgroup, you must have an account on that PC.
- A workgroup is not protected by a password.
- All PCs in the same workgroup must have a different computer name.
- If your PC was a member of a domain before you joined the workgroup, it will be removed from the domain.
You must be signed in as an administrator to change the workgroup.
A workgroup name cannot contain special characters such as the following:
` ~ @ # $ % ^ & ( ) = + [ ] { } | ; : , ‘ “ . < > / ?
Contents
- Option One: Change Workgroup in Settings
- Option Two: Change Workgroup in Command Prompt
- Option Three: Change Workgroup in PowerShell
Option One
Change Workgroup in Settings
1 Open Settings.
2 Click/tap on System on the right side, click/tap on About on the right side. (see screenshot below)

3 Click/tap on the Advanced system settings link to open System Properties (sysdm.cpl). (see screenshot below)

4 Click/tap on the Computer Name tab, and click/tap on the Change button. (see screenshot below)

5 Perform the following steps: (see screenshot below)
- Select (dot) Workgroup.
- Type the name (ex: «BRINKGROUP») of the workgroup you want to join or create.
- Click/tap on OK.

6 Click/tap on OK when prompted. (see screenshot below)
7 Click/tap on OK. (see screenshot below)
This does not restart the computer yet.

8 Click/tap on Close. (see screenshot below)
9 Click/tap on Restart now when ready to restart the computer. (see screenshot below)

Option Two
Change Workgroup in Command Prompt

Add or Remove WMIC command Feature in Windows 11
This tutorial will show you how to add or remove the WMIC command as an optional feature for all users in Windows 11. The WMI command-line (WMIC) utility provides a command-line interface for Windows Management Instrumentation (WMI). WMIC is compatible with existing shells and utility commands…
www.elevenforum.com
1 Open an elevated Windows Terminal, and select Command Prompt.
2 Type the command below into the elevated command prompt, and press Enter. (see screenshot below)
wmic computersystem where name="%computername%" call joindomainorworkgroup name="Workgroup-Name"
Substitute Workgroup-Name in the command above with the actual name of the workgroup you want to join or create.
For example: wmic computersystem where name="%computername%" call joindomainorworkgroup name="BrinkGroup"
3 When successfully finished, close the elevated command prompt.
4 Restart the computer. to apply.

Option Three
Change Workgroup in PowerShell
1 Open an elevated Windows Terminal, and select Windows PowerShell.
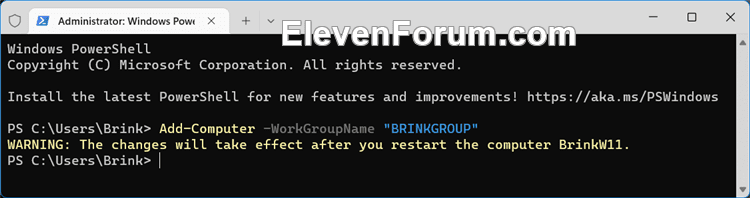
2 Type the command below into the elevated PowerShell, and press Enter. (see screenshot below)
Add-Computer -WorkGroupName "Workgroup-Name"
Substitute Workgroup-Name in the command above with the actual name of the workgroup you want to join or create.
For example: Add-Computer -WorkGroupName "BRINKGROUP"
3 When successfully finished, close the elevated PowerShell.
4 Restart the computer. to apply.
That’s it,
Shawn Brink
-

WorkGroup_PowerShell.png
18.6 KB
· Views: 150