
Ah, Windows 11—the sleek, modern operating system that promises a seamless user experience. But wait, what’s that? Your File Explorer font feels more like a stealthy ninja than a bold, readable hero? Fear not! Whether you’re squinting at tiny text or simply craving a more prominent display, enlarging your File Explorer font is easier than convincing your cat to take a bath. Let’s embark on this font-astic journey together, shall we?
Before we dive into the how-to, let’s ponder the why. Picture this: you’re navigating through a labyrinth of folders, and the text is so minuscule that you need a magnifying glass just to find your favorite documents. Frustrating, right? Enlarging the font can:
- Improve Readability: Say goodbye to eye strain and hello to comfortable viewing.
- Enhance Accessibility: Make your system more user-friendly, especially for those with visual impairments.
- Boost Productivity: Quickly locate files without the constant squinting.
In essence, a larger font transforms your File Explorer from a cryptic maze into a clear, navigable path.
Method 1: Scaling the Display Settings Mountain
The first and most straightforward method involves tweaking the Display Settings. It’s like adjusting the brightness on your screen—simple, yet effective.
Step-by-Step Guide:
- Right-Click on the Desktop: Start by giving your desktop a little right-click action. It’s like shaking the tree to see what falls out.
- Select Display Settings: From the context menu, choose Display settings. It’s the gateway to visual customization.
- Adjust the Scale: Under the Scale & layout section, you’ll find a dropdown menu labeled Scale. Increase this percentage to enlarge text, apps, and other items. Common increments are 125%, 150%, or even 175%.
- Apply and Confirm: Once you select your desired scale, Windows will prompt you to sign out and sign back in to apply changes. Think of it as a quick refresh for your display.
Pros and Cons:
| Pros | Cons |
|---|---|
| Easy to adjust | Affects all display elements |
| No technical expertise required | Might cause some apps to appear blurry |
| Immediate visual feedback | Requires signing out |
Method 2: Diving into Advanced Font Settings
If you’re a customization enthusiast who craves more control, diving into Advanced Font Settings is your next adventure. It’s akin to fine-tuning your guitar—precise and satisfying.
Step-by-Step Guide:
- Open Settings: Press Win + I to open the Settings app. Quick and efficient, like a ninja slash.
- Navigate to Accessibility: In the sidebar, click on Accessibility. Because making your system accessible is, well, accessible.
- Select Text Size: Under the Vision section, choose Text size.
- Use the Slider: Drag the slider to increase the text size. You’ll see a live preview—like watching your font grow in real-time.
- Apply Changes: Click Apply to implement your new, larger text. Voilà! Your File Explorer should now boast a more readable font.
Pros and Cons:
| Pros | Cons |
|---|---|
| Targeted font size adjustment | Limited to text, doesn’t affect icons |
| User-friendly interface | May require tweaking for optimal size |
| Immediate preview before applying | Not as comprehensive as scaling |
Method 3: Registry Edits for the Brave
For those who enjoy a bit of a challenge, editing the Windows Registry offers the most granular control over your font settings. Warning: This is not for the faint-hearted. Proceed with caution, and maybe have a backup plan (or a therapist) ready.
Step-by-Step Guide:
- Open Registry Editor: Press Win + R, type regedit, and press Enter. It’s like opening the secret vault of Windows.
- Navigate to Font Settings: Go to
HKEY_CURRENT_USER\Control Panel\Desktop\WindowMetrics. - Modify Font Size: Look for values related to font size, such as IconFont or MenuFont. Double-click to edit and input your desired size.
- Restart Explorer: For changes to take effect, restart the File Explorer or reboot your system. Think of it as giving your system a mini nap to remember the new settings.
Pros and Cons:
| Pros | Cons |
|---|---|
| Maximum control over font appearance | Risk of system instability |
| Can target specific elements | Time-consuming and complex |
| Ideal for power users | Not recommended for beginners |
Method 4: Third-Party Software to the Rescue
When Windows settings just don’t cut it, third-party software steps in like a superhero with a utility belt. Tools like Winaero Tweaker or System Font Size Changer can provide additional customization options.
Step-by-Step Guide:
- Download the Software: Visit the official website of your chosen tool and download it. Be sure to avoid the shady corners of the internet—no one needs more malware.
- Install and Launch: Follow the installation prompts and launch the application.
- Adjust Font Settings: Use the software’s interface to adjust the File Explorer font size. These tools often offer a range of customization options beyond what’s available in Windows.
- Apply and Restart: Apply your changes and restart File Explorer to see the magic happen.
Pros and Cons:
| Pros | Cons |
|---|---|
| Enhanced customization options | Requires additional software |
| User-friendly interfaces | Potential security risks |
| Often includes other tweaks and tools | May not be free |
Comparing Your Options: Which Method Wins the Font Size Race?
To help you decide which path to take, here’s a quick comparison:
| Method | Ease of Use | Control Level | Risk | Best For |
|---|---|---|---|---|
| Display Settings Scaling | ⭐⭐⭐⭐⭐ | ⭐⭐ | ⭐⭐ | General users wanting a quick fix |
| Advanced Font Settings | ⭐⭐⭐⭐ | ⭐⭐⭐ | ⭐⭐⭐ | Users needing text-specific changes |
| Registry Edits | ⭐⭐ | ⭐⭐⭐⭐ | ⭐⭐⭐⭐⭐ | Power users seeking detailed tweaks |
| Third-Party Software | ⭐⭐⭐ | ⭐⭐⭐⭐ | ⭐⭐ | Users wanting extensive customization |
Final Thoughts: Choose Your Font Adventure
Enlarging the File Explorer font in Windows 11 doesn’t have to be a tedious chore. Whether you opt for the simplicity of adjusting display settings, the precision of advanced font tweaks, the daring path of registry edits, or the versatility of third-party software, there’s a solution tailored just for you.
Remember, the goal is to create a comfortable, efficient, and visually pleasing environment that enhances your productivity and reduces eye strain. So, go ahead—enlarge that font and navigate your files with newfound clarity and confidence. After all, life’s too short to squint at tiny text!
Вариант 1: Операционная система
Для того чтобы увеличить шрифт и/или масштабировать интерфейс всей ОС Windows 11, необходимо обратиться к ее параметрам.
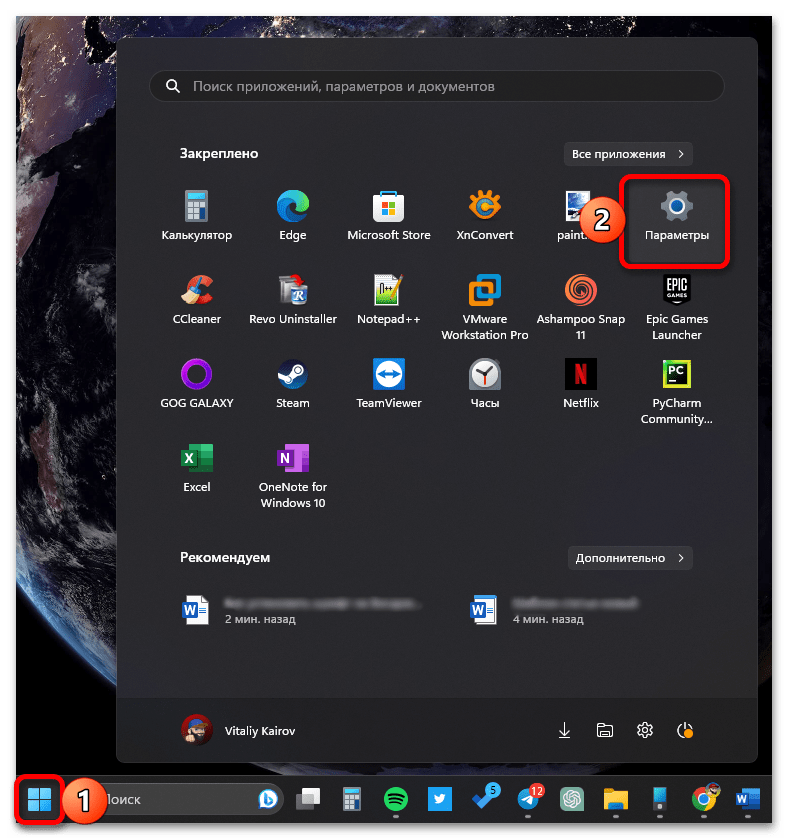
- С помощью сочетания клавиш «Win+I» или закрепленного в меню «Пуск» ярлыка вызовите «Параметры».
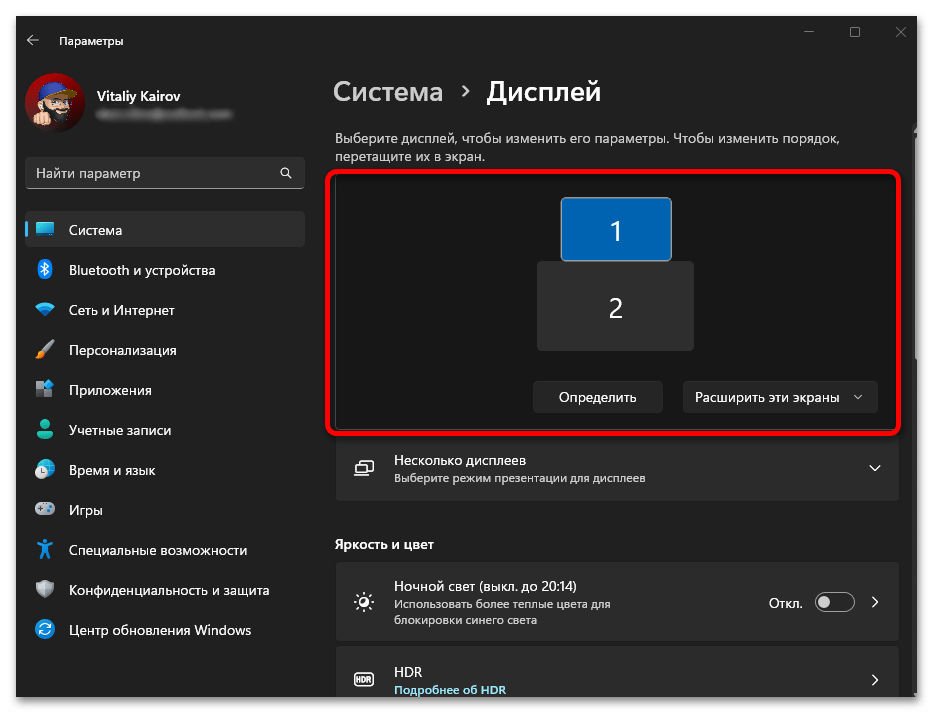
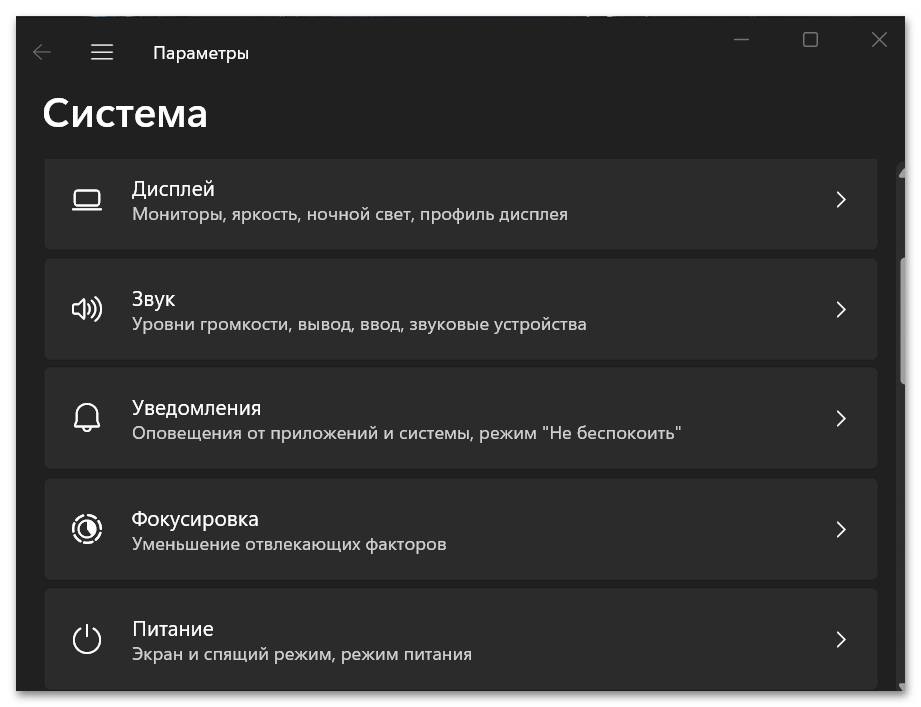
- Находясь в открывшейся по умолчанию вкладке «Система», перейдите к разделу «Дисплей».
- Если вами используется более одного монитора, прежде всего выберите тот, размер шрифта и/или масштабирование для которого требуется изменить.
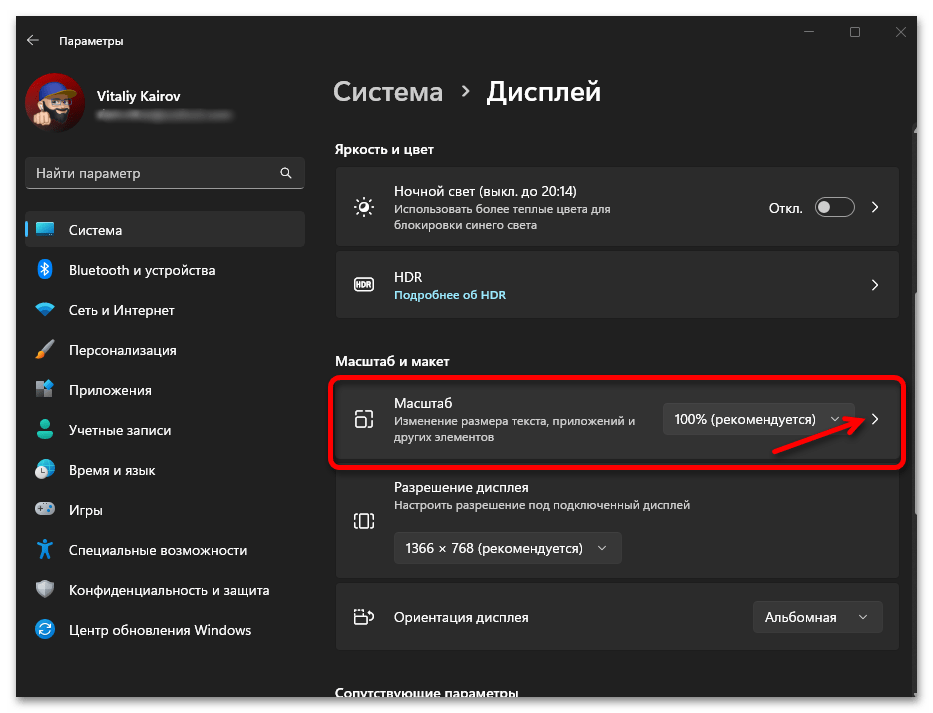
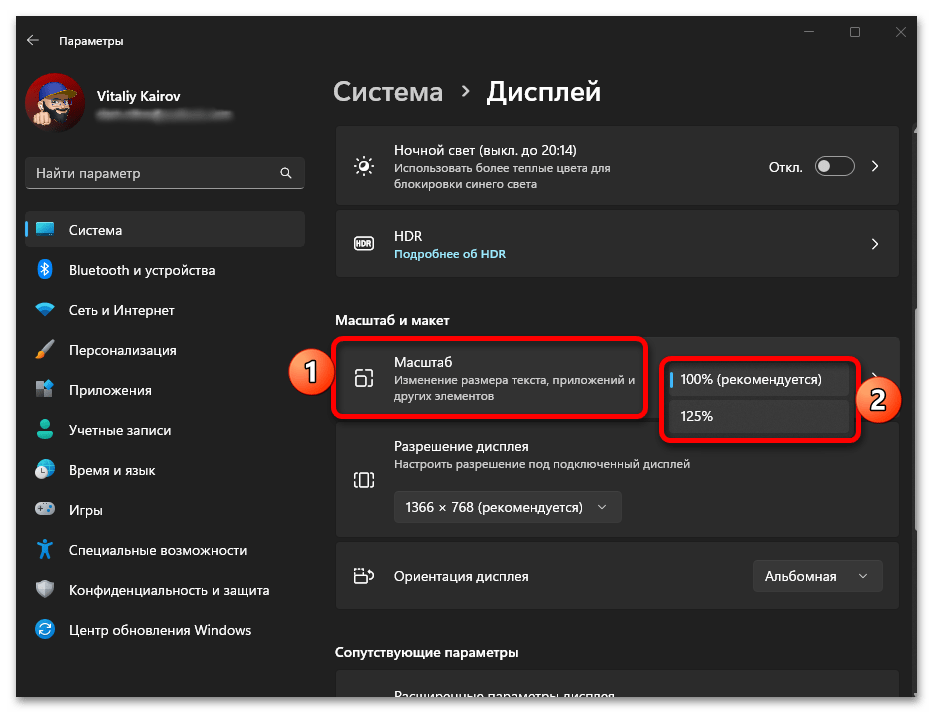
- Прокрутите окно настроек немного ниже и разверните подраздел «Масштаб».
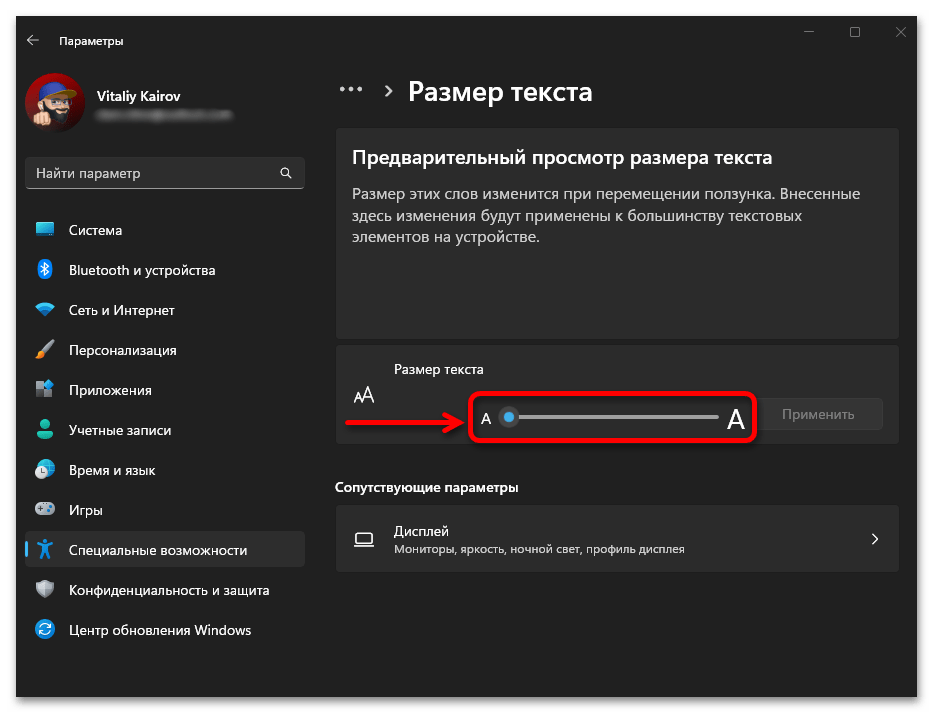
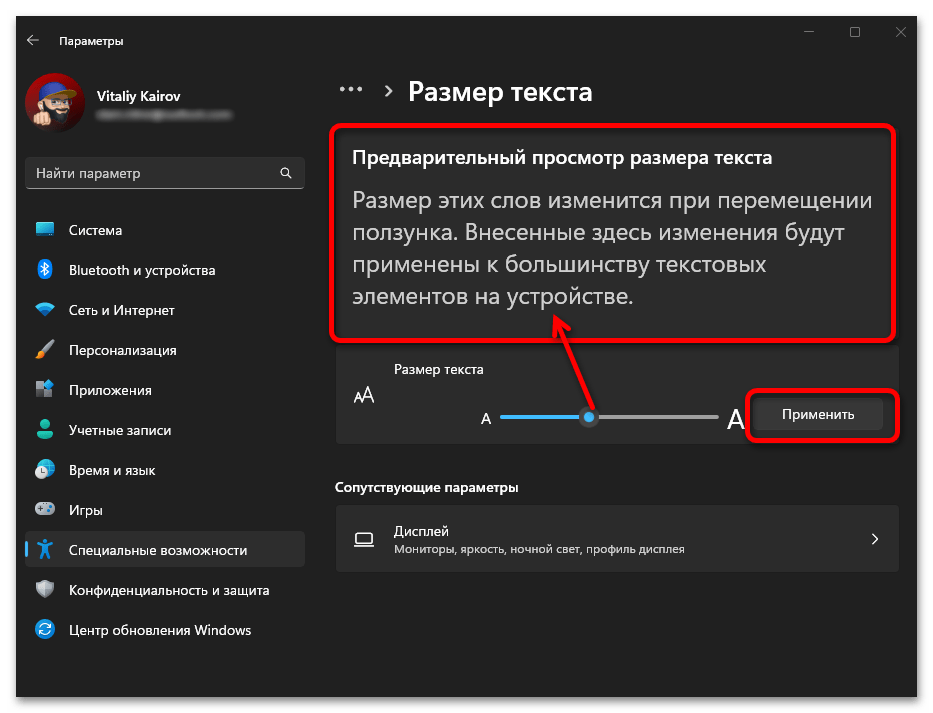
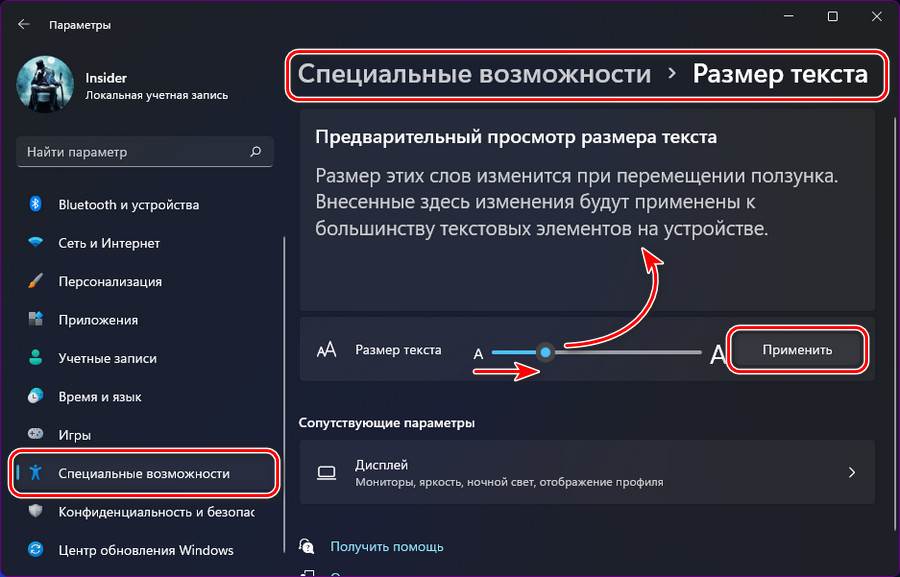
- Далее перейдите к блоку «Размер текста».
- Переведите ответственный за размер текста ползунок вправо, чтобы увеличить шрифт.
- Ориентируясь на пример в области предварительного просмотра, оцените результат внесенных изменений, после чего кликните «Применить» для их сохранения.
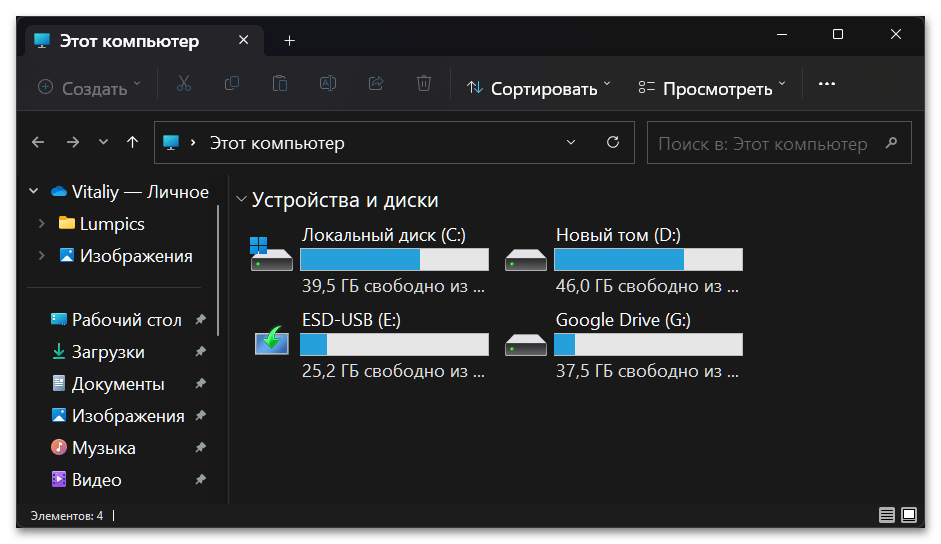
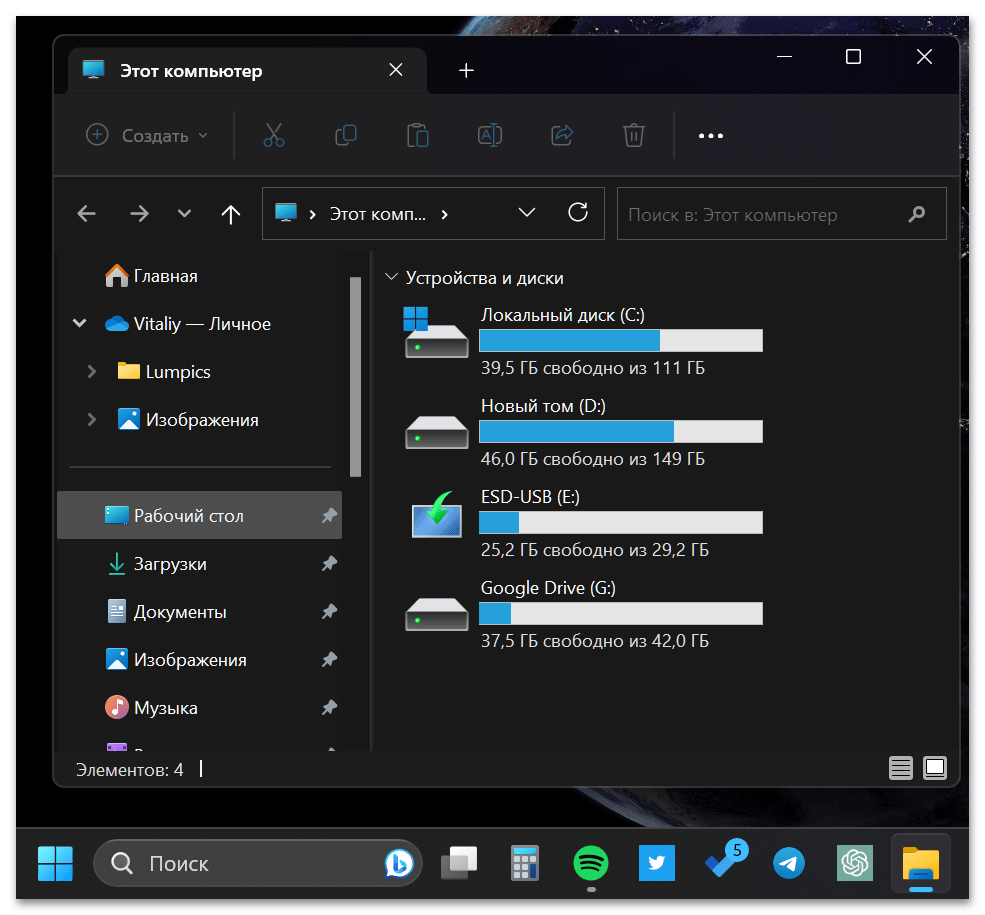
- Шрифт будет увеличен во всей операционной системе и используемых в ней программах,

в чем вы можете убедиться лично,

открыв любое произвольное окно.

Примечание: Если потребуется восстановить стандартный размер шрифта, переведите ответственный за данное значение бегунок в его начальное положение и подтвердите данное действие.
- Несмотря на то что увеличение шрифта и так влечет за собой некоторое увеличение элементов интерфейса, последние можно масштабировать как отдельно от текста, так и в дополнение к нему. Для этого:
- Повторите действия из трех первых пунктов текущей инструкции;
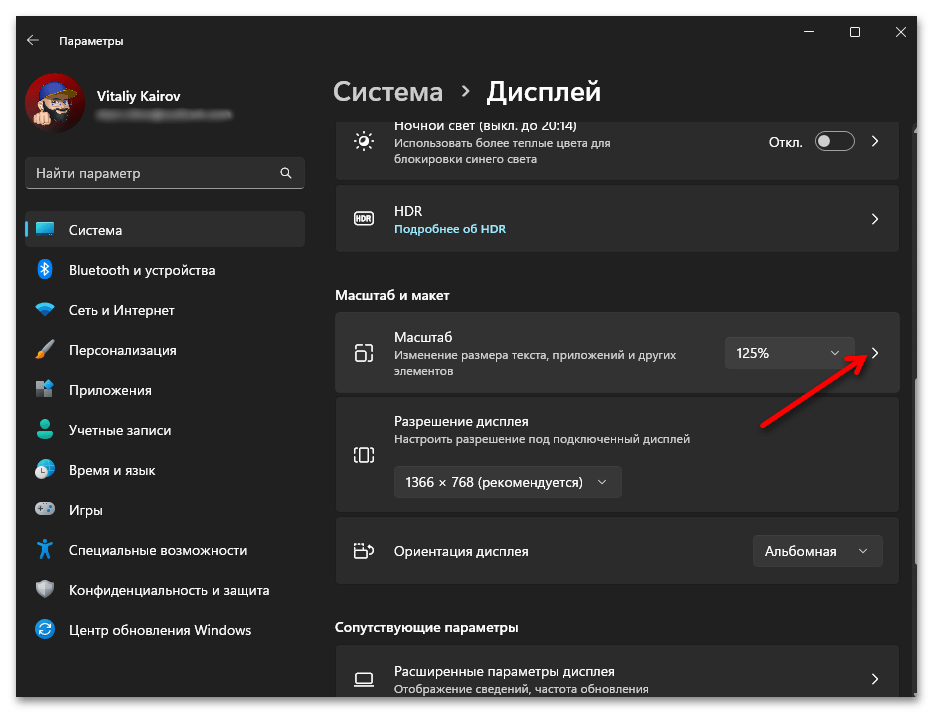
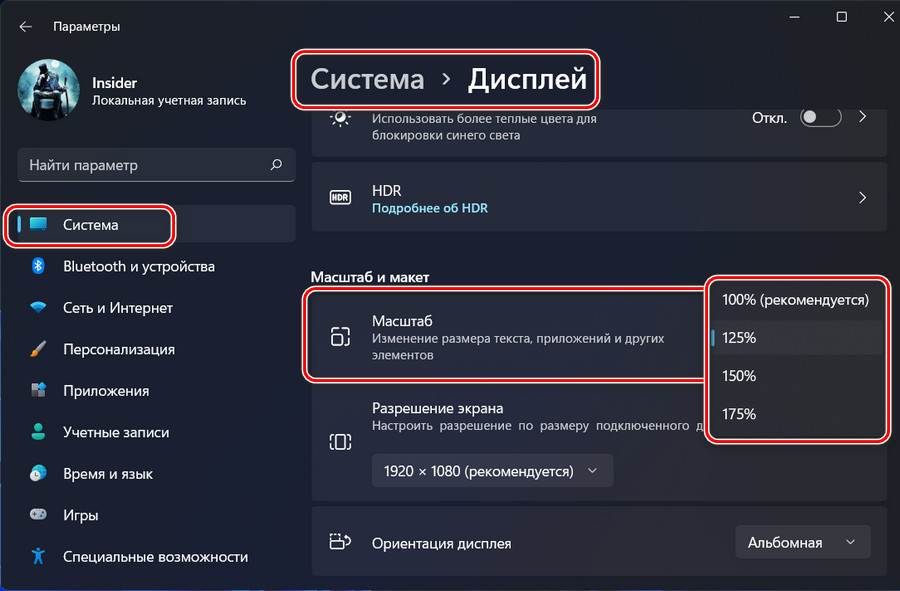
- Разверните выпадающий список в подразделе «Масштаб» и выберите в нем значение «125%» или более, если таковое будет доступно;
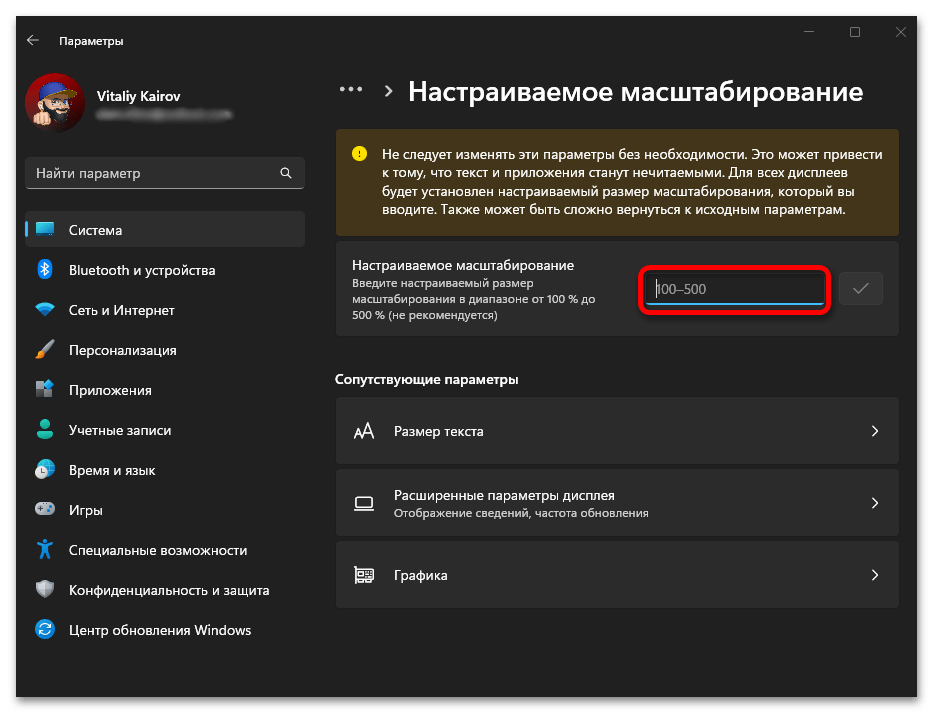
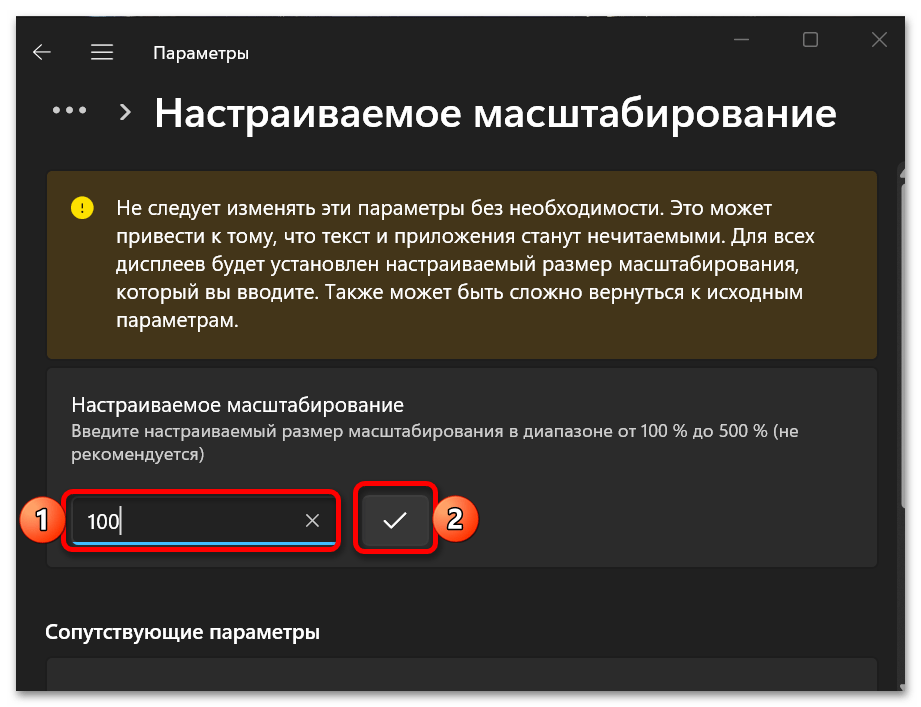
- Если же требуется задать отличное от доступных по умолчанию значение, разверните подраздел «Масштаб»,
введите желаемые проценты (в диапазоне от 100% до 500%),
после чего кликните на кнопку с изображением галочки;
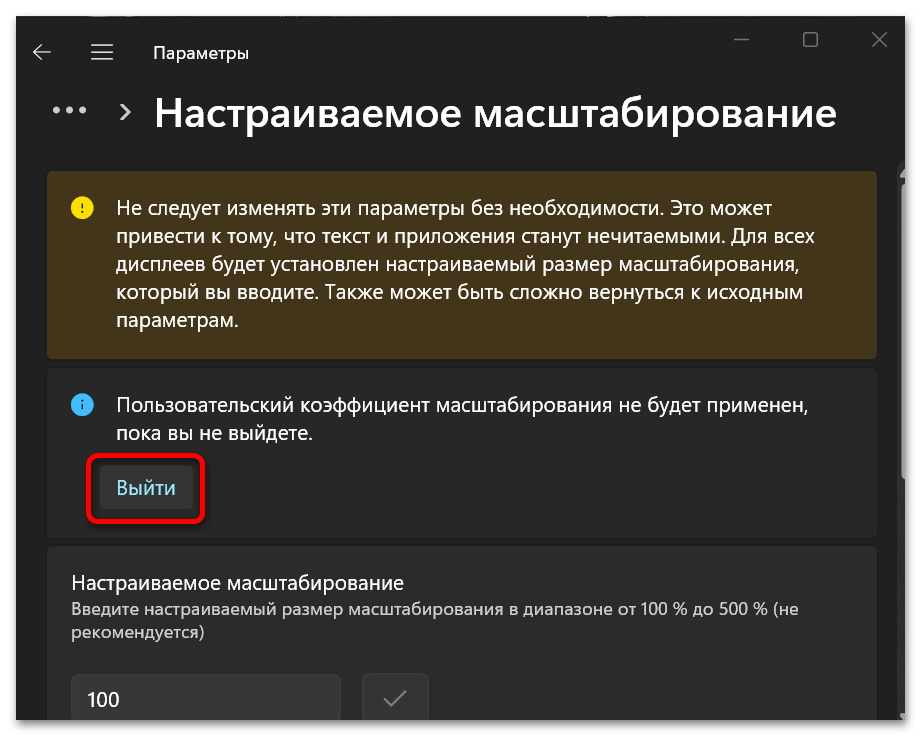
- Для сохранения внесенных изменений потребуется «Выйти» из операционной системы, а затем войти повторно, что вам и будет предложено сделать в настройках.
Выполненное данным образом увеличение

также будет применено ко всем элементам операционной системы.


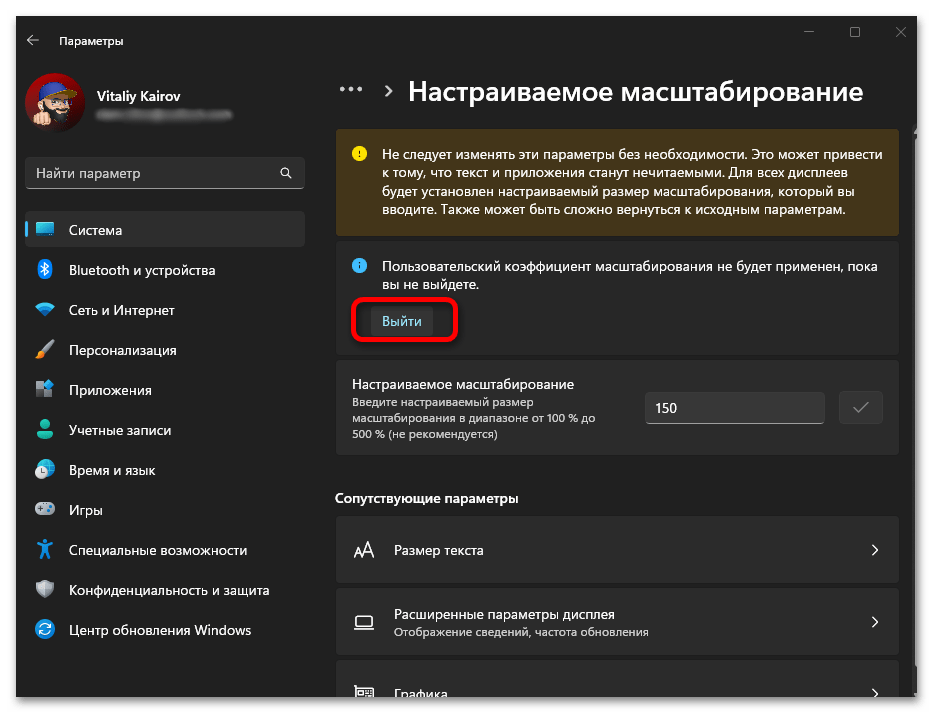
Если же вы захотите восстановить стандартный масштаб, в поле «Настраиваемое масштабирование» введите «100», нажмите на галочку,
а затем выйдите из ОС и войдите повторно.
Читайте также: Как поменять шрифт в Виндовс 11
Вариант 2: Отдельные программы
Во многих приложениях также имеется возможность увеличения размера шрифта, и далее мы рассмотрим несколько таких примеров.
Браузер
Несмотря на то что нами используется Google Chrome, предложенную ниже инструкцию вполне можно назвать универсальной для большинства подобного рода программ.
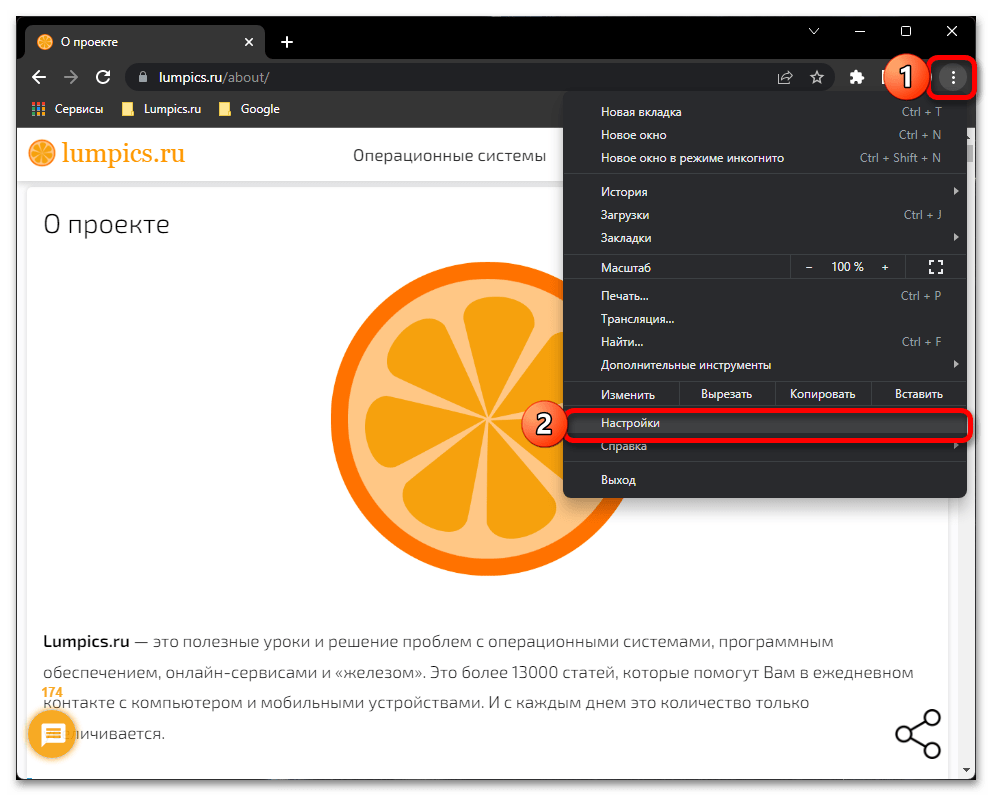
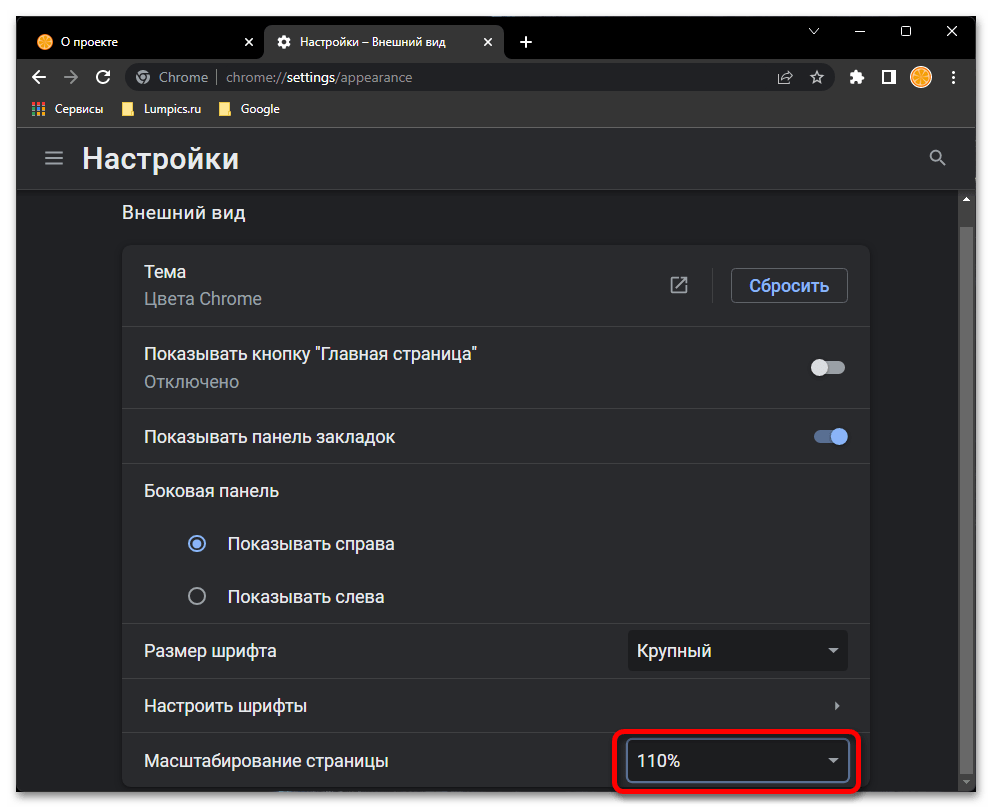
- Вызовите меню браузера и перейдите в «Настройки».
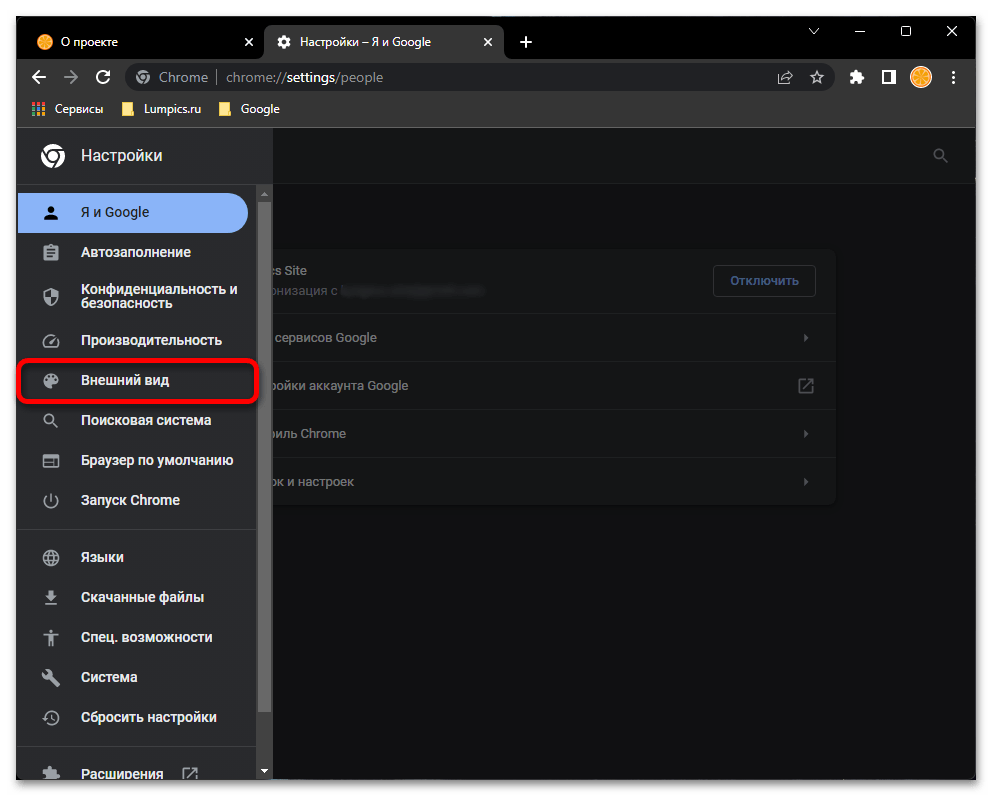
- Откройте раздел «Внешний вид».
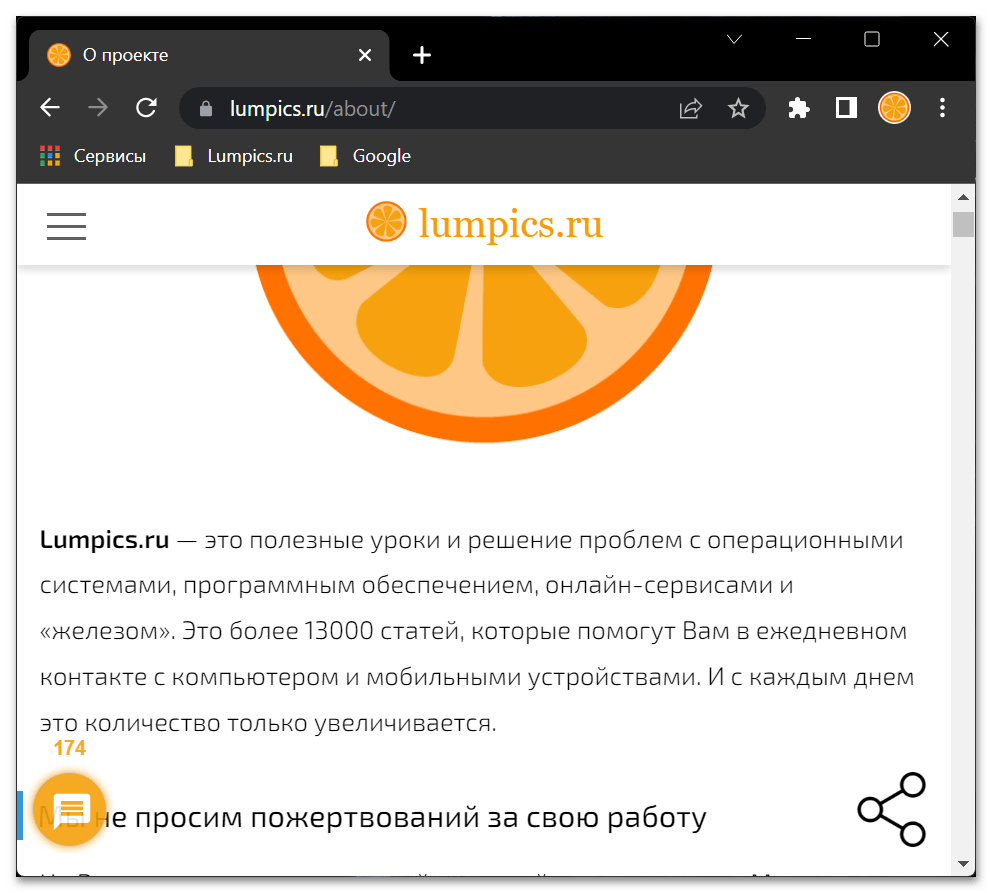
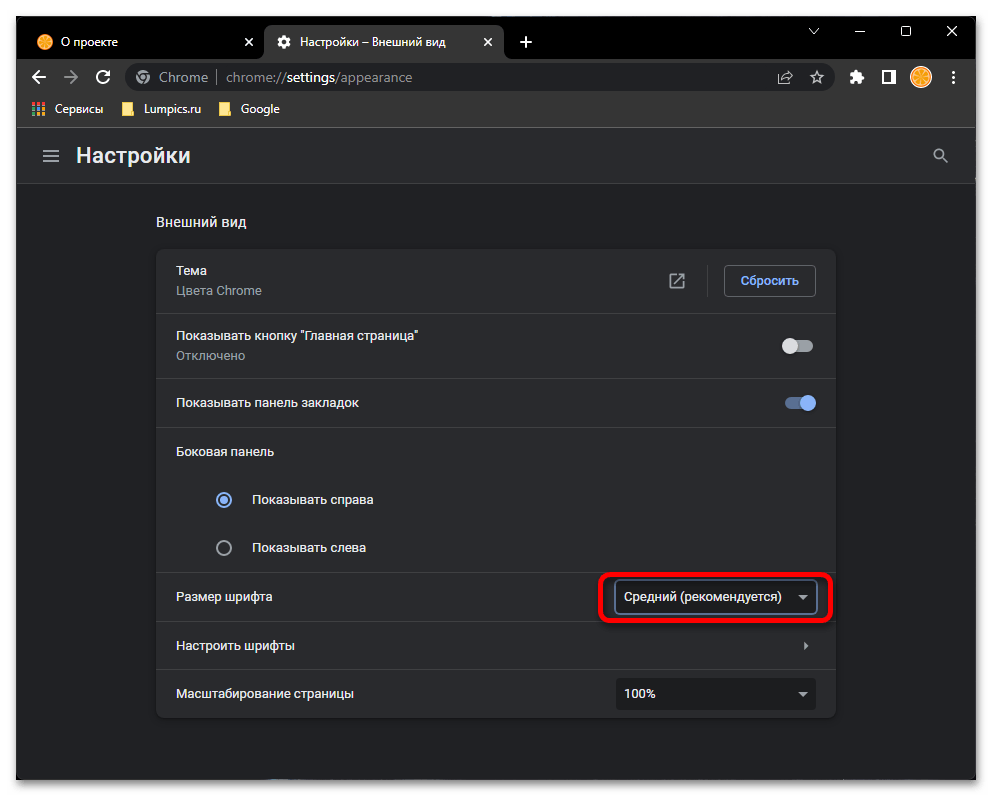
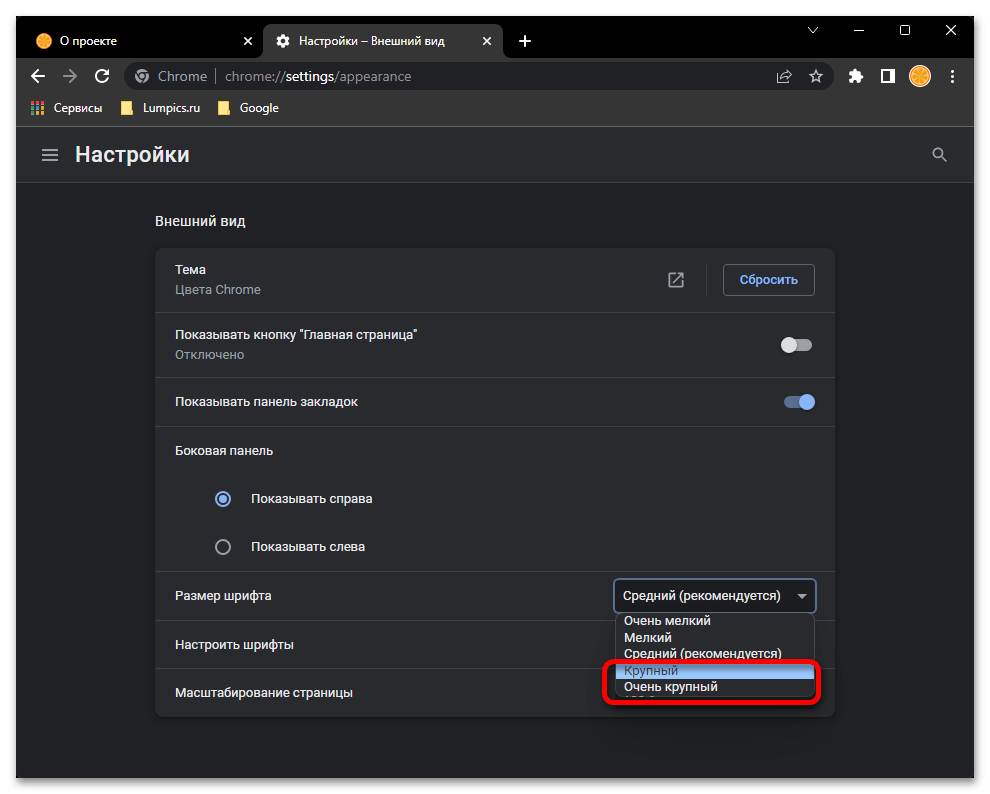
- Разверните выпадающий список напротив пункта «Размер шрифта»

и выберите значение, превышающее установленное по умолчанию (в случае с Chrome это «Крупный» и «Очень крупный»).
Помимо размера шрифта, вы также можете увеличить и стандартное масштабирование страницы, о чем мы ранее рассказывали в отдельной статье.
Подробнее: Как увеличить страницу в браузере
Мессенджер
Далее нами рассматривается Telegram, а в случае с другими подобными приложениями потребуется действовать по аналогии.
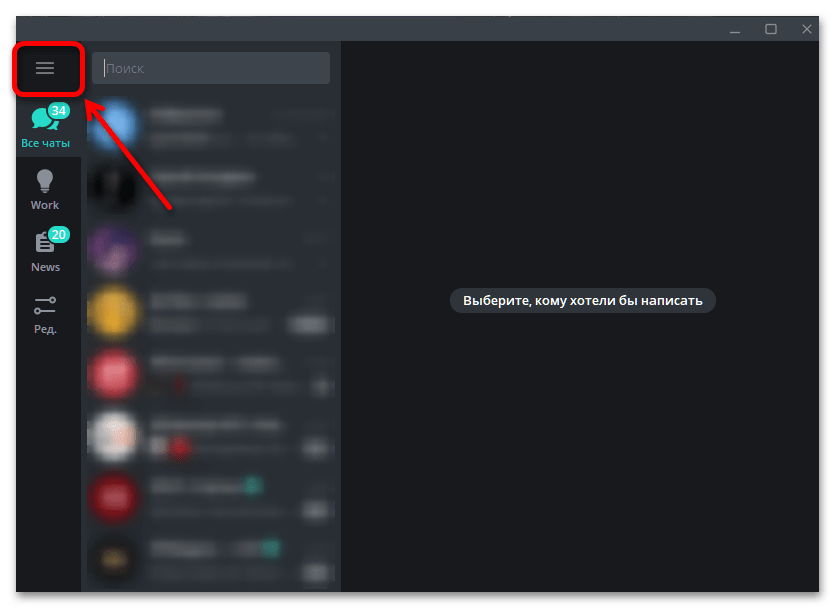
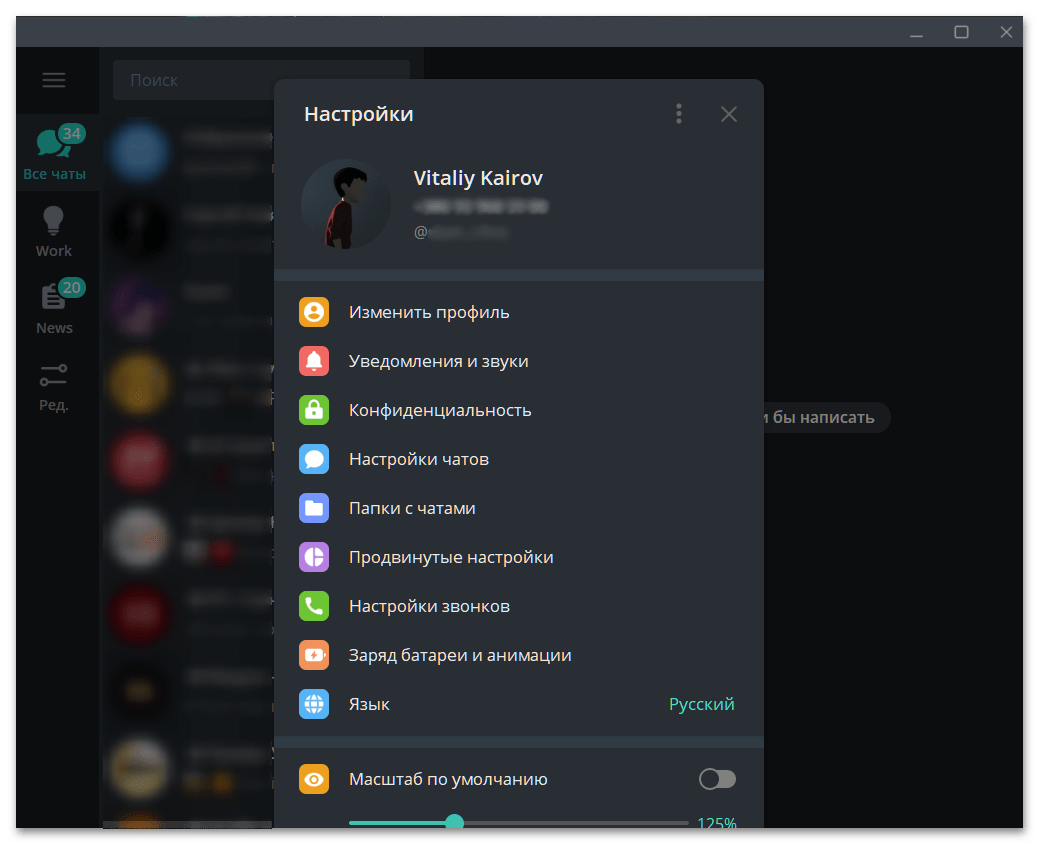
- Вызовите меню мессенджера.
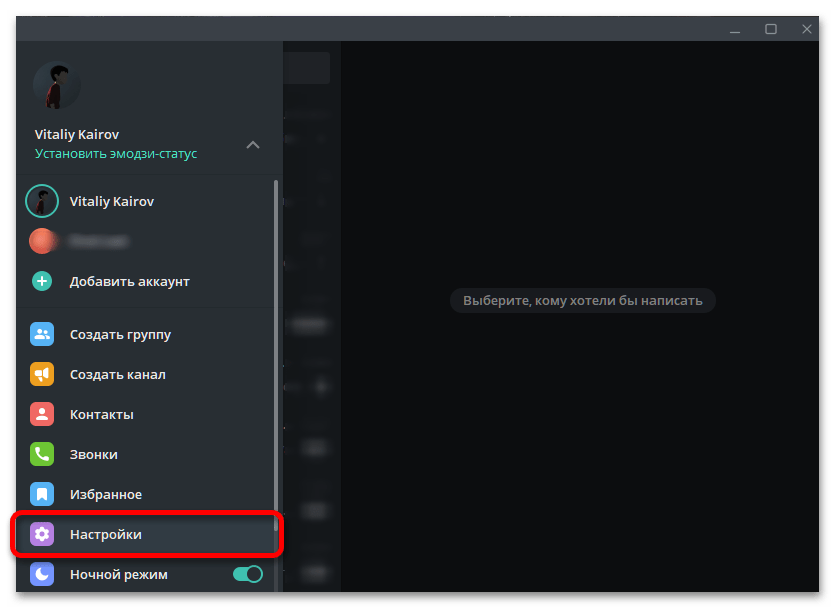
- Перейдите в «Настройки».
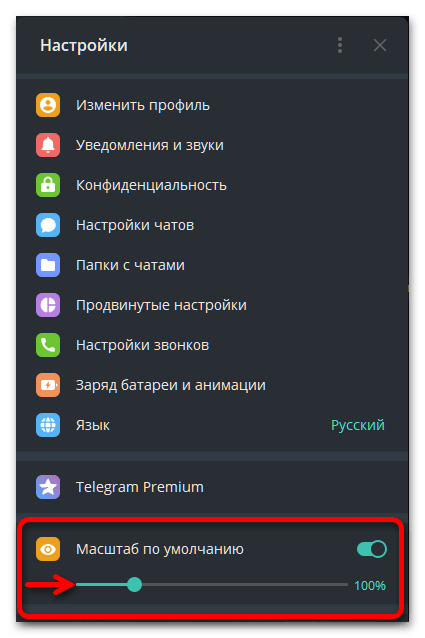
- Передвиньте вправо ползунок под строкой «Масштаб по умолчанию», сделав его таким образом более 100%.
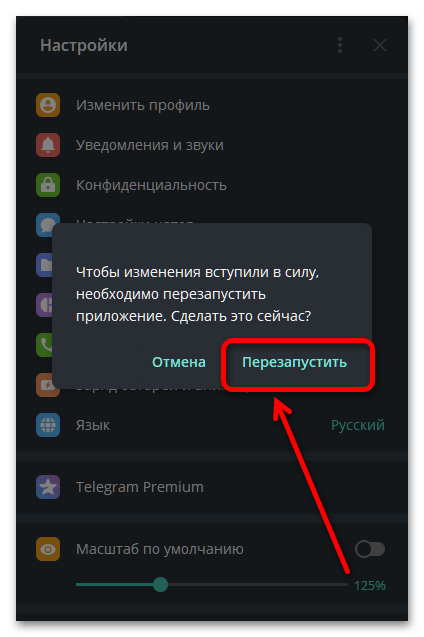
- Согласитесь «Перезапустить» приложение.
- Ознакомьтесь с результатом внесенных изменений – шрифт станет больше.
Читайте также: Как увеличить шрифт в Телеграм на Андроид
Текстовый редактор
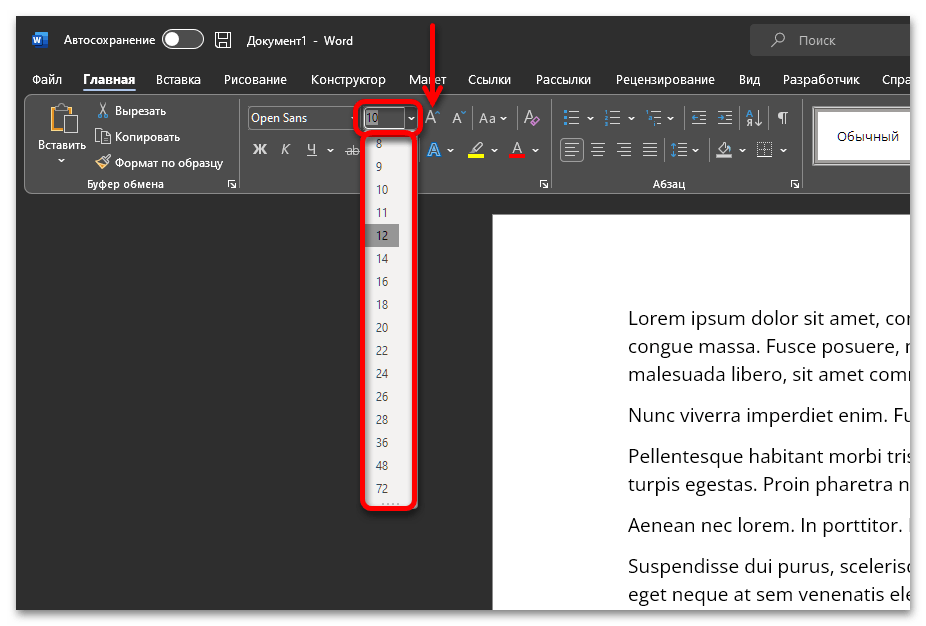
В большинстве программ для работы с документами, и Microsoft Word далеко не уникальный в данном плане продукт, возможность увеличения шрифта (для записи, а не интерфейса) предусмотрена на верхней панели вкладки с основными рабочими инструментами (средства форматирования). Помимо выпадающего списка с вариантами размера, нередко имеется и отдельная кнопка, позволяющая выполнить пошаговое увеличение текста.
Читайте также: Как изменить размер шрифта в Майкрософт Ворд
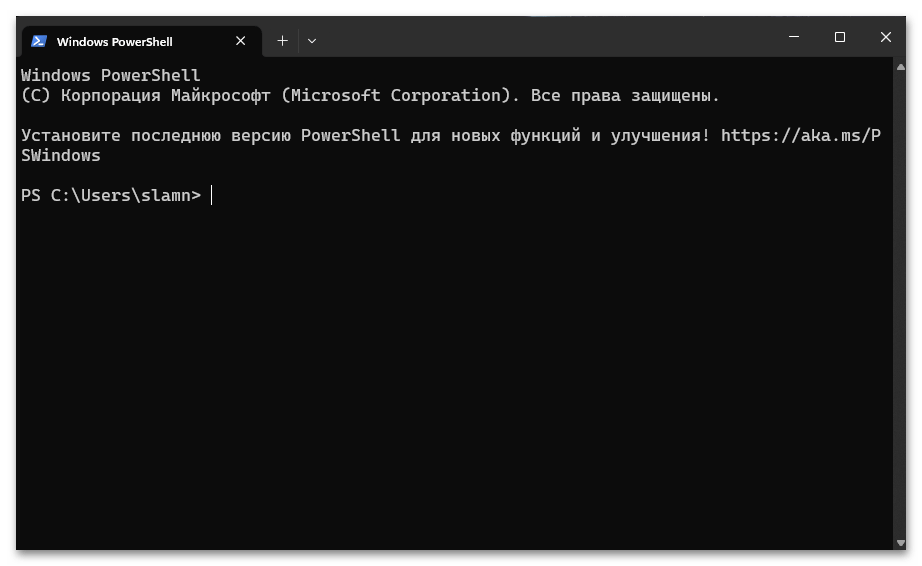
Консоль
Далеко не все знают, что в системной консоли, будь то «Командная строка», «PowerShell» или «Терминал», также имеется возможность увеличения шрифта. Для этого достаточно зажать клавишу «Ctrl» и прокрутить колесико мышки вперед.
Читайте также: Как открыть «Командную строку» / «Терминал» в Виндовс 11
Если же вы не хотите каждый раз выполнять данное действие, сделайте следующее:
- Используя «Проводник», перейдите в указанное ниже расположение:
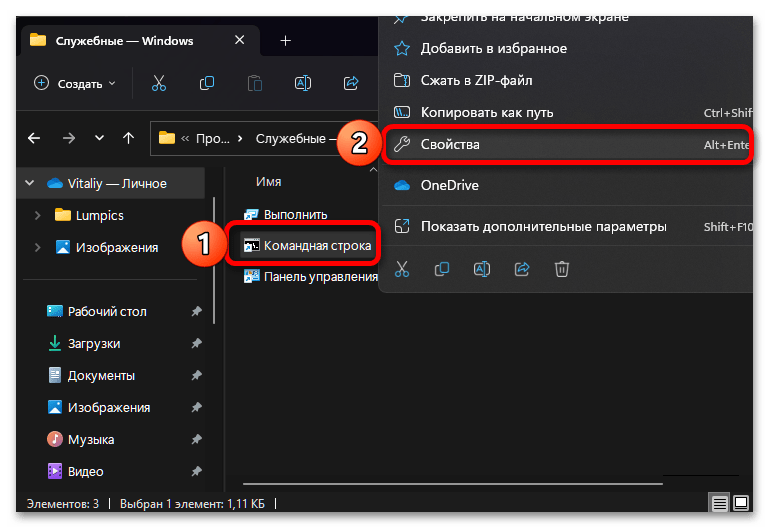
C:\Users\slamn\AppData\Roaming\Microsoft\Windows\Start Menu\Programs\System Tools - Кликните правой кнопкой мышки по приложению «Командная строка» и откройте ее «Свойства».
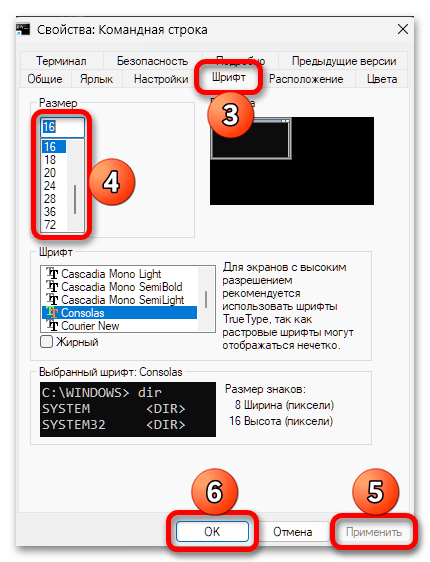
- В появившемся окне перейдите во вкладку «Шрифт», выберите предпочтительный его размер, по необходимости ниже измените тип. Воспользуйтесь кнопками «Применить» и «ОК», чтобы сохранить внесенные изменения.
Наша группа в TelegramПолезные советы и помощь
Changing Font Size in File Explorer Windows 11
Changing the font size in File Explorer in Windows 11 is a fairly simple task. You’ll need to head to the settings menu and adjust a few options to make those text changes in your file explorer. This guide will walk you through each step so you can customize the font size to your liking.
Adjusting the font size in File Explorer will help make text easier to read or fit more information on your screen. Here are the steps to accomplish this:
Step 1: Open the Settings App
Click on the Start button, then select the «Settings» gear icon.
The Settings app is your go-to place for all system adjustments. You can also open it by pressing Windows + I on your keyboard.
Step 2: Go to «Accessibility»
In the Settings app, scroll down and click on «Accessibility.»
Accessibility settings are designed to make your computer easier to use, including changing text size and other visual elements.
Step 3: Select «Text Size»
Under the Accessibility menu, find and click on «Text size.»
This option allows you to increase or decrease the text size, which will also affect the font size in File Explorer.
Step 4: Adjust the Slider
Move the slider left or right to decrease or increase the text size, then click «Apply.»
The slider provides a visual representation of how large or small the text will appear. You can see a preview while you adjust it.
Step 5: Wait for Changes to Apply
Wait a few seconds for the changes to take effect system-wide.
Once you click apply, your system will adjust the text size across all applications, including File Explorer.
After completing these steps, the font size in your File Explorer will change to match your new settings. It’s that easy!
Tips for Changing Font Size in File Explorer Windows 11
- Adjust DPI Settings: If you need even more customization, consider adjusting the DPI settings under Display options.
- Use Magnifier Tool: For quick changes while working, use the built-in Magnifier tool (Windows + Plus key).
- Check Compatibility: Some applications may not fully support text size changes. Restarting the app may help.
- Update Drivers: Ensure your display and graphics drivers are up-to-date for the best experience.
- Experiment First: Before making a permanent change, try different settings to see what works best for you.
Frequently Asked Questions
Can I change the font style in File Explorer?
No, Windows 11 currently allows you to change the font size but not the font style directly through the settings.
Will changing text size affect other applications?
Yes, adjusting the text size will affect all text across your system, not just File Explorer.
Can I revert back to the default settings?
Yes, you can easily revert to the default text size by adjusting the slider back to its original position.
What if the text size change doesn’t take effect?
Try restarting your computer if the changes don’t appear immediately.
Is there a shortcut to open the Settings app?
Yes, you can press Windows + I to open the Settings app quickly.
Summary
- Open the Settings App
- Go to «Accessibility»
- Select «Text Size»
- Adjust the Slider
- Wait for Changes to Apply
Conclusion
There you have it! Changing the font size in File Explorer on Windows 11 is an easy process that can greatly enhance your user experience. Whether you need larger text for better readability or smaller text to fit more information on your screen, these simple steps will help you achieve your goal. Don’t forget to experiment with different settings and make use of the tips provided to get the best results.
If you have more questions or run into issues, Microsoft’s support website offers detailed guides and forums for additional help. Now that you know how to adjust the font size in File Explorer, feel free to customize your system to fit your preferences better. Happy customizing!
Matt Jacobs has been working as an IT consultant for small businesses since receiving his Master’s degree in 2003. While he still does some consulting work, his primary focus now is on creating technology support content for SupportYourTech.com.
His work can be found on many websites and focuses on topics such as Microsoft Office, Apple devices, Android devices, Photoshop, and more.
Increasing the font size in Windows 11 is a cinch and can make your computer screen easier on the eyes. First, open the Settings app, then navigate to Accessibility. Click on Text size, adjust the slider until you find a size that suits you, and then click Apply. Voila! Your text should now be bigger and clearer across apps and the system interface.
Adjusting the font size in Windows 11 can greatly enhance your viewing comfort. Follow these steps to customize your text size for a better experience.
Step 1: Open Settings
To get started, click on the Start menu and select Settings.
The Settings app is where you can change most of your computer’s configurations, including text size. You can also use the shortcut Windows + I to open it quickly.
Step 2: Navigate to Accessibility
In Settings, find and click on the Accessibility option.
This section is specially designed to help improve the usability of your system for all users. You’ll find various options here to tailor your experience according to your needs.
Step 3: Click on Text Size
Once you’re in Accessibility, click on the Text size option.
Here, you can directly manipulate the size of the text displayed across all system interfaces and applications.
Step 4: Adjust the Slider
Move the slider to increase or decrease the font size to your liking.
As you adjust the slider, you’ll see a live preview of how your text will look. This helps you find the perfect balance for comfort without too much guesswork.
Step 5: Click Apply
Once you’re satisfied with the size, click Apply to make the change permanent.
After hitting Apply, your changes will take effect almost immediately. You should notice larger text in system apps and various applications.
After completing these steps, you’ll notice that the text across your Windows 11 system is bigger, making it easier to read. This change impacts how text appears in applications, system menus, and more, providing a more comfortable viewing experience.
Tips for Increasing Font Size in Windows 11
- Explore other accessibility options like Magnifier to enhance your viewing experience further.
- Remember that changing font size might affect application layouts.
- If the text size feels awkward, you can always reset it back to default.
- Adjusting display scaling can also help if you need everything on your screen to be larger.
- Consider pairing text size adjustments with a dark theme for less eye strain.
Frequently Asked Questions
Can I adjust the font size for specific apps?
No, changing the text size in Windows 11 adjusts it system-wide, affecting all apps and menus uniformly.
Will increasing the font size affect screen resolution?
Increasing font size doesn’t change your screen resolution; it only affects the text size.
Can I revert to default settings?
Yes, you can move the slider back to its original position in the Text size settings to revert to default.
Does it affect web browsers?
Most web browsers have their own settings for text size, so these changes might not affect them.
Is there a keyboard shortcut for adjusting font size?
There isn’t a keyboard shortcut for adjusting the text size in Windows 11 system settings, but you can use Windows + I to open Settings quickly.
Summary
- Open Settings.
- Navigate to Accessibility.
- Click on Text Size.
- Adjust the Slider.
- Click Apply.
Conclusion
Tinkering with the font size in Windows 11 is a simple yet effective way to customize your computing experience. Whether you’re squinting at tiny text or just want a more comfortable view, this feature can be a real game-changer. It’s like putting on a pair of reading glasses for your entire screen, minus the hassle of actually wearing glasses.
Remember, a system that fits your needs can make every interaction smoother and more pleasant. Plus, this isn’t the only tweak you can make! Windows 11 offers a plethora of customization options, from changing themes to switching up start menu layouts. So, don’t stop at just adjusting the font size. Dive into the settings and explore what else you can tweak to make your PC truly yours.
And if you’re looking to keep your eyes healthy in the long run, pair this with other accessibility features like night light or high contrast themes. It’s your computer, your rules. Get comfortable, make it yours, and enjoy the digital world with ease.
Matthew Burleigh has been writing tech tutorials since 2008. His writing has appeared on dozens of different websites and been read over 50 million times.
After receiving his Bachelor’s and Master’s degrees in Computer Science he spent several years working in IT management for small businesses. However, he now works full time writing content online and creating websites.
His main writing topics include iPhones, Microsoft Office, Google Apps, Android, and Photoshop, but he has also written about many other tech topics as well.
Read his full bio here.
В этой публикации, друзья, поговорим о том, как в Windows 11 изменить шрифт. Для начала мы разберём вопрос изменения системного масштаба. Если вас не устраивает шрифт из-за того, что он слишком мелкий, увеличение системного масштаба будет комплексным решением, которое сделает крупнее все элементы системного интерфейса, включая шрифт. Но если вас не устраивает размер только шрифта, его можно отдельно настроить в настройках специальных возможностей Windows 11. А если вам не нравится сам системный шрифт, вы можете поэкспериментировать с другими шрифтами, но для этого придётся прибегнуть к помощи сторонних программных инструментов. Давайте со всем этим разбираться подробно.
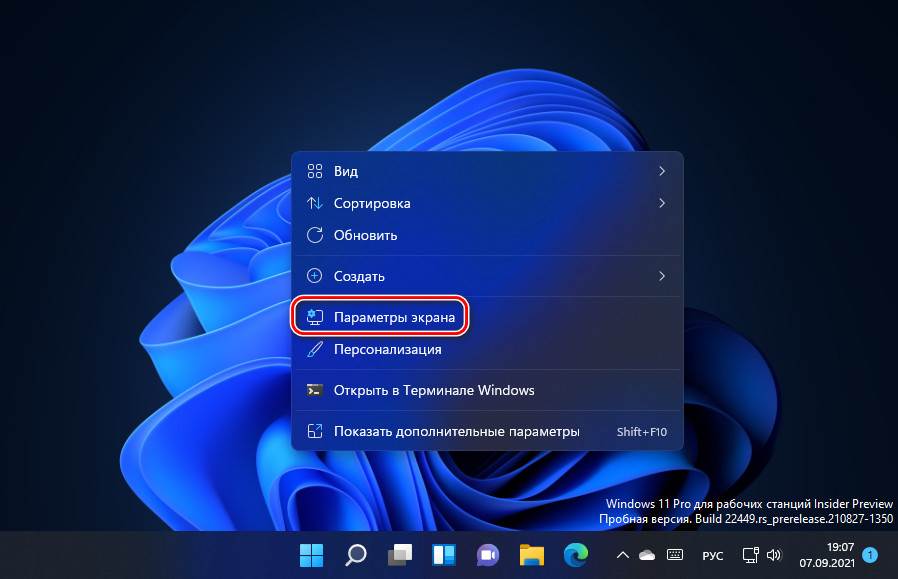
Итак, друзья, вас не устраивает системный шрифт Windows 11, шрифт, который реализован в меню «Пуск», контекстных и прочих меню, на панели задач, в проводнике, приложении «Параметры» и прочих системных областях. Как это изменить? Если шрифт вам слишком мал, попробуйте изменить масштаб системного интерфейса, это пропорционально увеличит все элементы интерфейса Windows 11. И, возможно, именно так вам будет комфортнее. А может быть, наоборот, вам достался компьютер с уже увеличенным системным масштабом, и вы хотите уменьшить размер шрифта, но вам надо просто уменьшить масштаб. В любом случае делаем на рабочем столе клик правой клавишей мыши и выбираема «Параметры экрана».
Попадём в раздел системных параметров «Система → Дисплей». Здесь в блоке настроек «Масштаб» выставляем отличный от существующего масштаб системного интерфейса и смотрим результат. Устраивает или нет.
Ещё, друзья, в Windows 11 можно устанавливать для программ и игр свой масштаб.
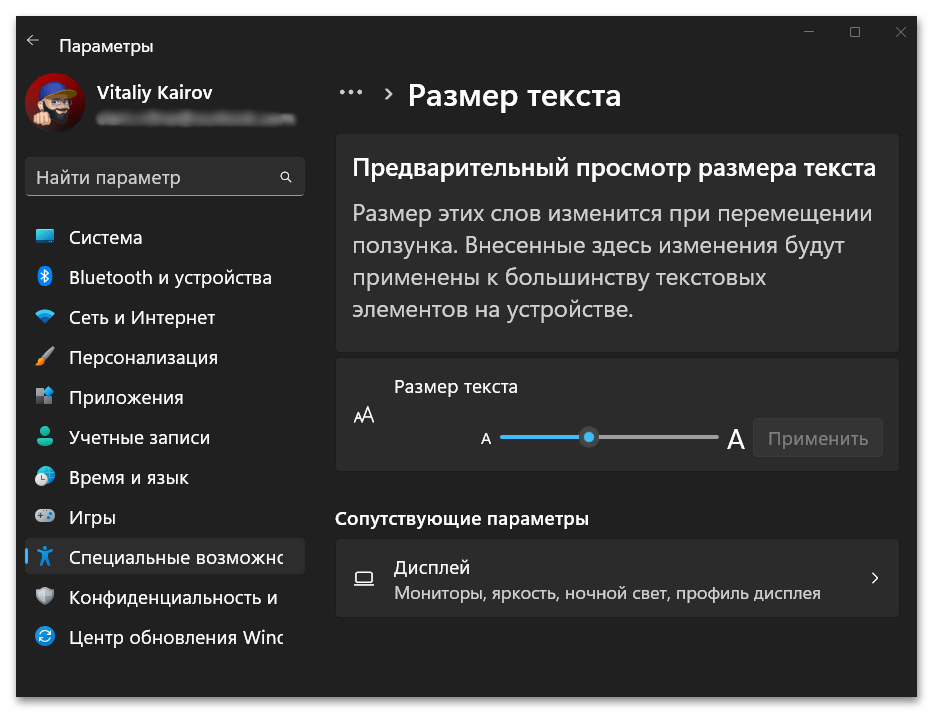
Если не устраивает, возвращаем масштаб назад и меняем отдельно размер системного шрифта. В приложении «Параметры» идём в раздел «Специальные возможности», заходим в подраздел «Размер текста». Здесь есть шкала увеличения размера текста, т.е. размера системного шрифта. Двигаем её, отслеживаем размер шрифта в блоке предварительного просмотра выше. При достижении оптимального размера жмём «Применить».
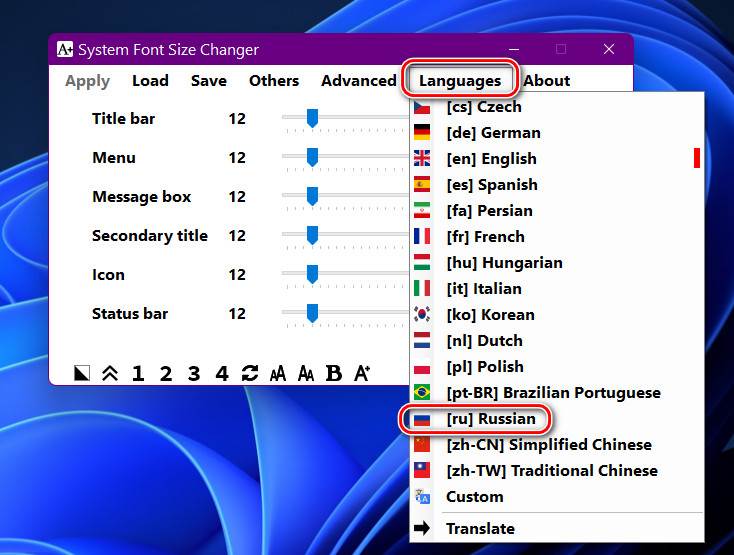
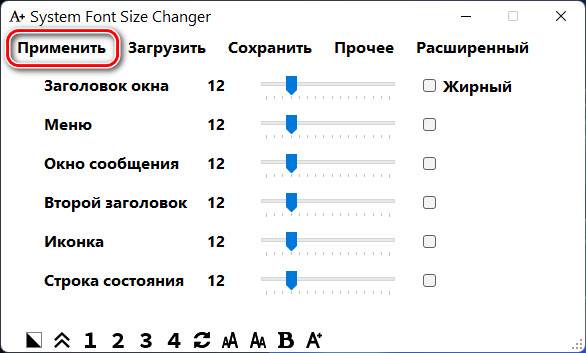
А изменить сам шрифт средствами Windows 11, друзья, у нас не получится, операционная система нативно такую возможность не предусматривает. Но мы можем обратиться за помощью к стороннему инструменту – к бесплатной утилите System Font Size Changer. Очень простая утилита, но позволяет нам более гибко настроить системный шрифт – настроить его размер для разных областей, настроить формат, выбрать иной сам шрифт для отдельных системных областей. Утилита предусматривает многопрофильность настроек, это позволит нам подобрать разные настройки системного шрифта для разных случаев, а потом оперативно переключаться между профилями этих настроек. Скачать System Font Size Changer можно на сайте утилиты. Запускаем её, устанавливаем русский язык.
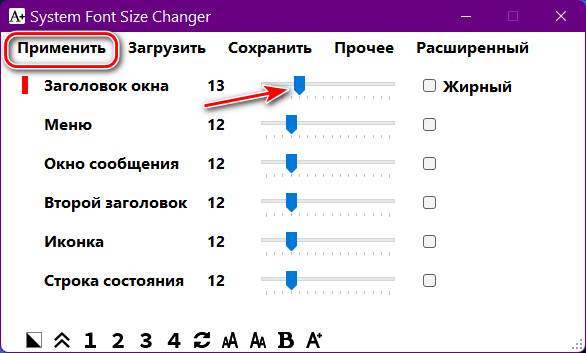
И в окошке утилиты можем настроить разный размер системного шрифта для разных системных областей – меню, окон, сообщений, строк состояния и т.п. Двигаем ползунок по шкале размера шрифта и в итоге применяем изменения кнопкой «Применить».
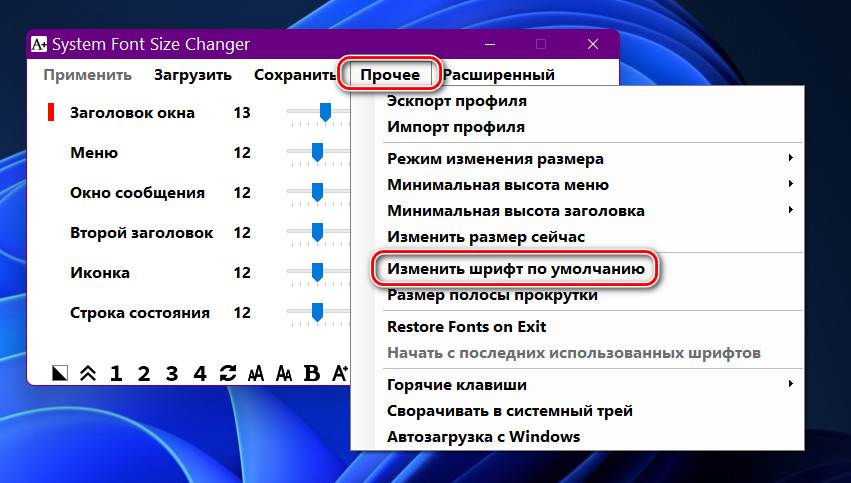
Если вам надо изменить сам шрифт, кликаем меню «Прочее», в нём — «Изменить шрифт по умолчанию».
Выбираем шрифт из предложенного перечня вариантов. Жмём «Ок».
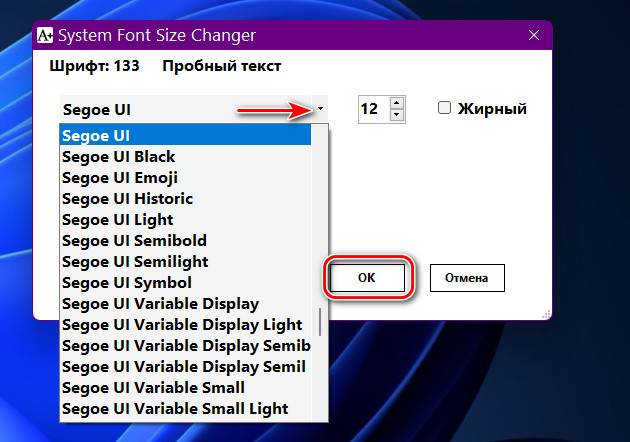
И потом «Применить».
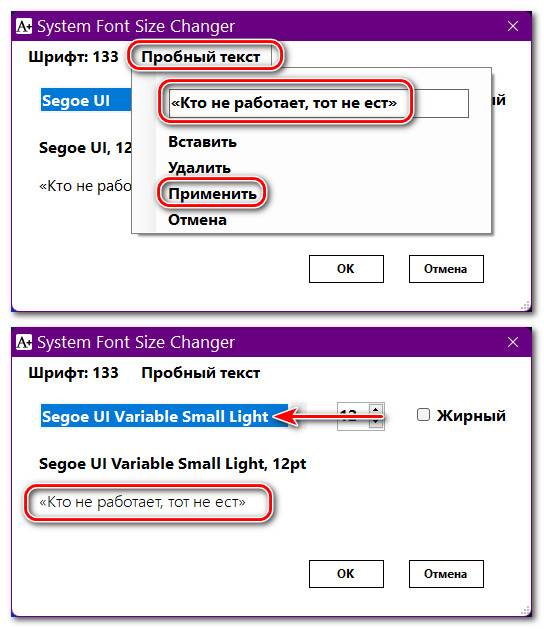
Обратите внимание, друзья, что при выборе шрифта есть возможность его просмотра ниже. А чтобы там отображался тестовый текст на русском, введите во вкладке «Пробный текс» русскоязычную фразу и примените.
Однако выбранный шрифт не будет применён во всех системных областях. Изменённый шрифт будет на рабочем столе, в проводнике, в меню отдельных системных классических утилит. Но в меню «Пуск», на панели задач, в современных системных приложениях UWP будет исходный шрифт Windows 11.
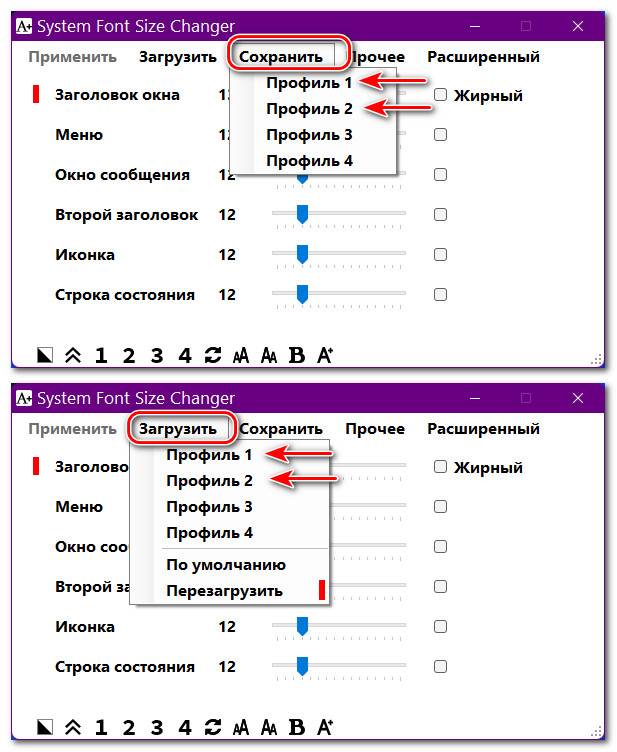
Если вы хотите поэкспериментировать с разными настройками системного шрифта, создайте несколько профилей, а потом загружайте их.
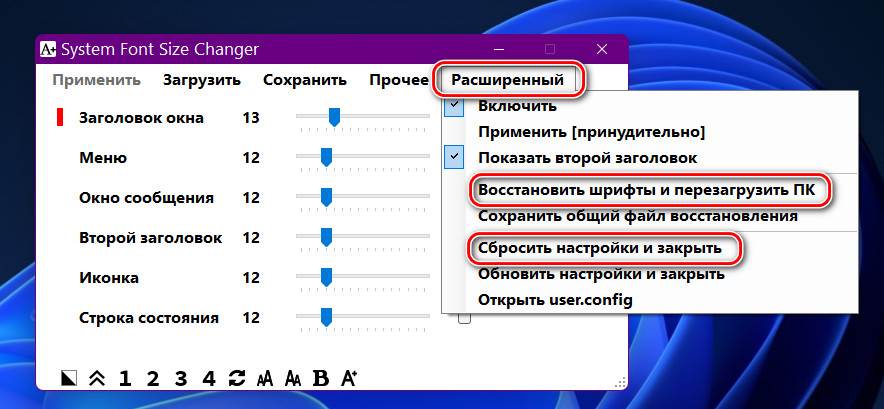
Бояться экспериментировать с настройками System Font Size Changer не нужно, в случае неудачных экспериментов она позволяет легко вернуть всё в дефолт. В меню утилиты «Расширенный» жмём «Включить».
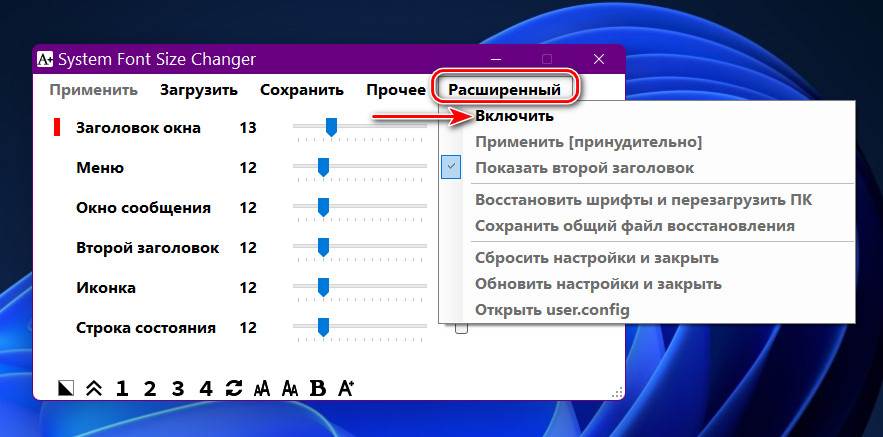
Включатся расширенные настройки. Здесь нас интересуют прежде всего две:
- «Восстановить шрифты и перезагрузить ПК» — восстановление исходных настроек системного шрифта;
- «Сбросить настройки и закрыть» — восстановление исходных настроек самой утилиты System Font Size Changer.
Альтернатива предыдущей утилите – известный твикер для Windows, программа Winaero Tweaker. Она только может менять сам шрифт, но примечательна комплексностью системных настроек, многие из которых невозможно применить с использованием штатных настроек Windows 11. Скачать Winaero Tweaker можно на сайте программы. В программе идём в раздел «Advanced Appearance Settings», кликаем «System Font». Активируем «Use the following font», т.е. использовать другой шрифт. Кликаем кнопку смены шрифта «Change system font».
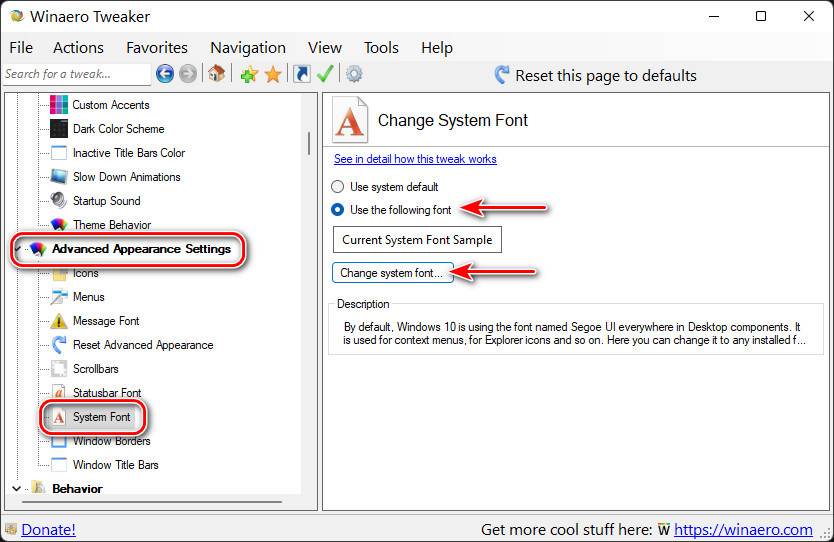
Выбираем шрифт из перечня, его образец будет внизу окошка. Кликаем «Ок».
Выходим из системы.
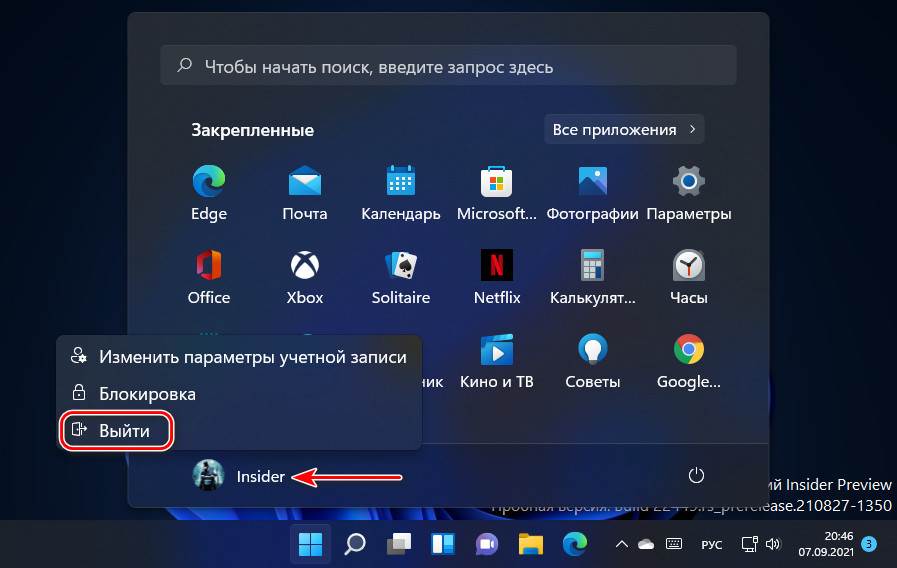
Входим по новой, и у нас уже будет в системе новый шрифт. Но, друзья, здесь та же ситуация, что и в случае с предыдущей утилитой для смены шрифта – другой шрифт будет применён не ко всем системным областям из возможных. Если понадобится вернуть дефолтный системный шрифт, по тому же пути в программе Winaero Tweaker активируем «Use system default» и перезаходим в систему.

Вот это, друзья, как изменить шрифт в Windows 11. О других возможностях по настройке интерфейса Windows 11 смотрите в статьях сайта:
- Персонализация Windows 11,
- Как включить тёмный режим в Windows 11,
- Специальные возможности Windows 11.