
Yarn is a package manager developed by Facebook as an alternative to the NPM client. It allows teams to develop JavaScript code and share it through software packages.
Yarn brings a host of improvements compared to NPM, such as higher speed, reliability, and greater compatibility. There are several methods of installing Yarn, from using the MSI installation file to using other package managers and installing it from the Windows PowerShell.
In this tutorial, we will offer a step-by-step process for different methods of installing Yarn on Windows.
Prerequisites
- A system running Windows
- Access to a user account with administrator privileges
- Access to the PowerShell
- A copy of Node.js installed
Note: Bare Metal Cloud was build by a DevOps team for DevOps teams. It supports IaC tools and automated server provisioning via API and CLI. Launch a Windows-powered Bare Metal Cloud server and follow this guide to configure Yarn on it.
Get a development sandbox environment for as low as $0.10/hour!
Install Yarn on Windows via MSI Installer
1. Download the Yarn installation file from GitHub.
2. Run the installation file and click Next to proceed.

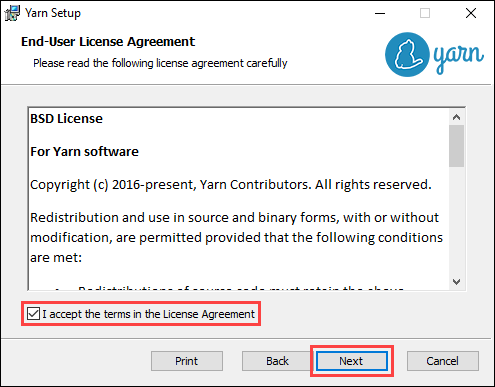
3. Check the box to accept the license agreement and click Next to continue.
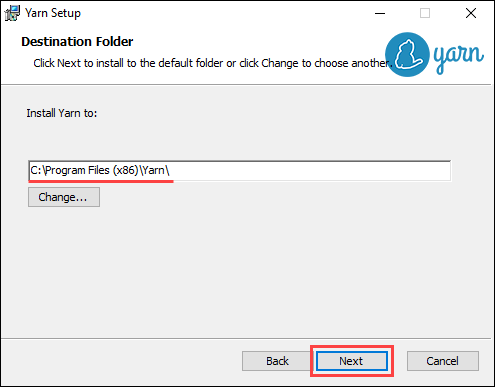
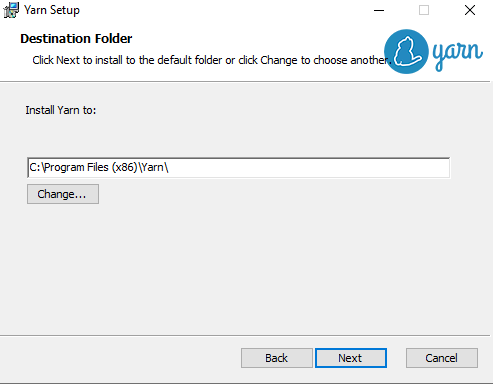
4. Select the destination where you want to install Yarn and click Next to proceed.
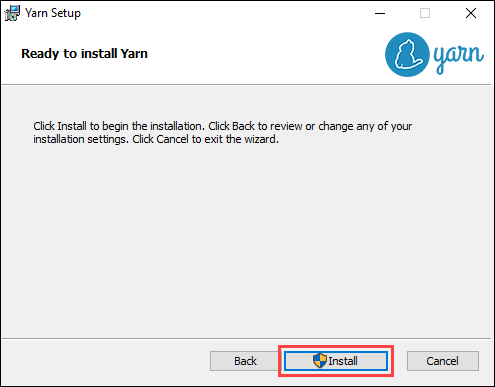
5. Click Install to start the installation process.
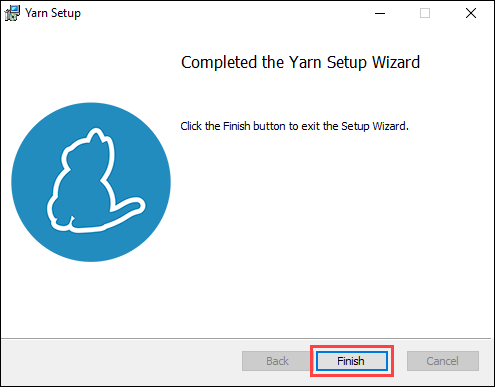
6. Once the installation is complete, click Finish to exit the installation wizard.
7. Run the following command in the PowerShell to verify the installation:
yarn --version
Install Yarn on Windows via Chocolatey Package Manager
Another method is to use the Chocolatey package manager to install Yarn. Using Chocolatey also helps resolve dependencies since it automatically installs Node.js:
1. Open the PowerShell as an administrator.
2. Check the status of the execution policy with:
Get-ExecutionPolicy
3. If the execution policy status is Restricted, set it to AllSigned using:
Set-ExecutionPolicy AllSigned4. When prompted, type Y and press Enter to confirm.

5. Install the Chocolatey package manager by using:
Set-ExecutionPolicy Bypass -Scope Process -Force; [System.Net.ServicePointManager]::SecurityProtocol = [System.Net.ServicePointManager]::SecurityProtocol -bor 3072; iex ((New-Object System.Net.WebClient).DownloadString('https://community.chocolatey.org/install.ps1'))6. Run the following command to install Yarn:
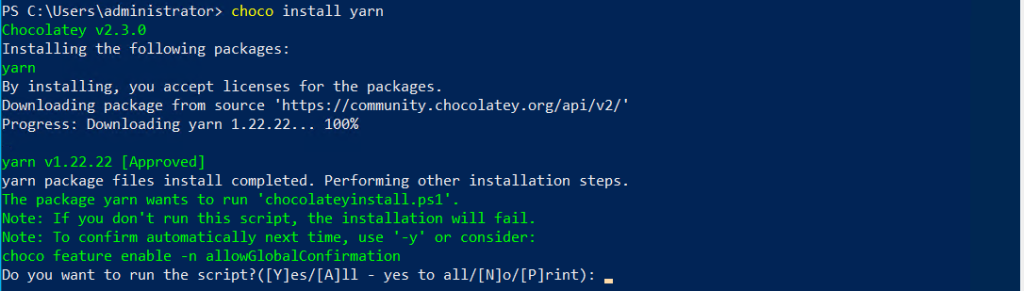
choco install yarn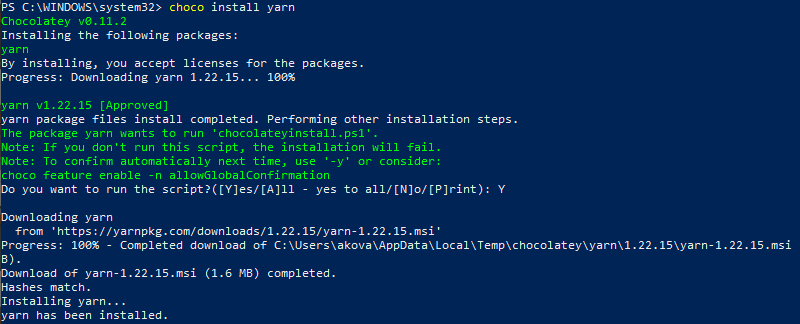
7. Type Y and press Enter when prompted to confirm the install.
8. Restart the PowerShell for the changes to take effect. Verify the installation with:
yarn --version
Install Yarn on Windows via Scoop CLI
The Scoop CLI (command line installer) works in a similar way to Chocolatey, with the main difference being that Scoop does not automatically install Node.js.
1. Open the PowerShell as an administrator.
2. Set the execution policy to allow PowerShell to run local scripts:
set-executionpolicy remotesigned -scope currentuser3. When prompted, type Y and press Enter to confirm.

4. Install Scoop CLI by using:
iwr -useb get.scoop.sh | iex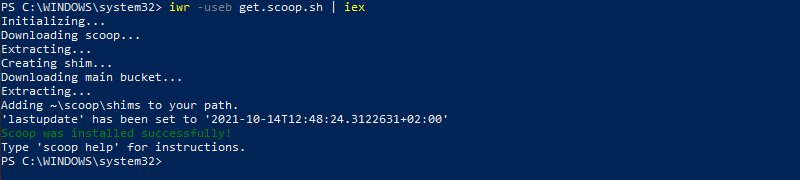
5. Start the Yarn installation with:
scoop install yarn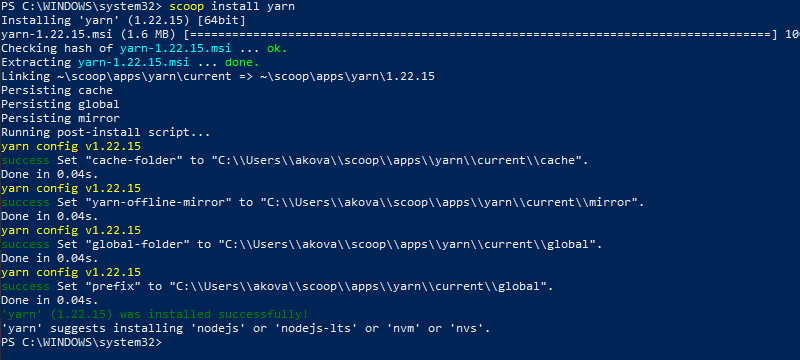
6. Verify the installation using:
yarn --version
Install Yarn on Windows via NPM
NPM (Node Package Manager) is a package manager included with the Node.js installation. It is used for developing and sharing JavaScript code, but it also provides another method of installing Yarn:
1. Open the PowerShell as an administrator.
2. Install Yarn by running the following command:
npm install --global yarn
3. Verify the Yarn installation with:
yarn --version
Conclusion
After following this tutorial, you should have a copy of Yarn installed and ready to use.
If you are interested in using Yarn on a Linux system, check out our guide to installing Yarn on Ubuntu 18.04.
Was this article helpful?
YesNo
Yarn is a popular package manager for JavaScript projects developed by Facebook. It offers several advantages over npm such as faster dependency installation better security and more reliable package management. While it is primarily associated with Node.js development Yarn can be used for various JavaScript based applications.
In this post, we will cover the process of installing Yarn on Windows operating system using different methods and configurations along with troubleshooting steps.
Installation Methods
Following are four methods described below while installing yarn on Windows operating system:
Method 1: Install Yarn via NPM
The most common way to install Yarn is through npm which comes bundled with Node.js. If you have not already installed Node.js refer to our guide on how to install Node.js and NPM on Windows operating system.
After installing, open the start menu and type “Command Prompt”. To verify that npm is installed correctly, run the following command:
npm -v
If npm is installed you will see its version number.

After that, run the following command to install Yarn globally:
npm install -g yarn
This will download and install Yarn to your system’s global directory.

After the installation is complete verify it by running the following command:
yarn --version
This command should display the version of Yarn installed on your system.

Method 2: Install Yarn via MSI Installer
Another method to install Yarn is by using the MSI installer. This method is simple and user-friendly.
Go to the official Yarn website and download the MSI installer.
Double click the downloaded .msi file in your “Download” folder to launch the installer.
The installation setup wizard will appear, Click “Next” to continue.
Accept the End user License agreement, Click “Next” to continue.
Set the directory path which is usually “Program Files (x86)” for installation.
After that, the installation started immediately. When the installation is complete verify by running the version command.
Method 3: Install Yarn via Chocolatey
Chocolatey is a package manager for Windows that simplifies the installation of software. If you have Chocolatey installed on Windows you can use it to install Yarn.
Open PowerShell as Administrator by pressing Win + X and select “Windows PowerShell (Admin)”. Run the following command to install Yarn:
choco install yarn
After the installation is complete verify it by running the version command.
Method 4: Install Yarn via Scoop
Scoop is another package manager for Windows that can be used to install Yarn. Note that Scoop does not automatically install Node.js so you need to have Node.js installed beforehand.
Open PowerShell as Administrator by pressing Win + X and select “Windows PowerShell (Admin)”. If you have not installed Scoop run the following command:
Set-ExecutionPolicy RemoteSigned -Scope CurrentUser
iwr -useb get.scoop.sh | iex
Run the following command to install Yarn:
scoop install yarn
Install Yarn On Our NodeJS Hosting!
Unlock the full potential of your Node.js applications with Ultahost’s reliable hosting solutions. From seamless deployment to robust performance, we’ve got you covered.
Configuring Yarn
After Yarn Windows installs you might want to configure it to suit your development environment. Here are some common configurations:
Set Yarn Registry
You can set the Yarn registry to a custom URL if needed:
yarn config set registry <registry_url>
Enable Offline Mode
Yarn supports offline mode which allows you to install packages without an internet connection:
yarn config set yarn-offline-mirror <path_to_mirror>
Global Packages
You can install packages globally using Yarn:
yarn global add <package_name>
Using Yarn
Once Yarn is installed you can start using it to manage your JavaScript projects. Here are some basic commands:
1. Initialize a New Project: To create a new project navigate to your project directory and run:
yarn init
2. Add Dependencies: To add a new dependency to your project, run:
yarn add <package_name>
3. Remove Dependencies: To remove a dependency, run:
yarn remove <package_name>
4. Install All Dependencies: To install all dependencies listed in your package.json file, run:
yarn install
5. Upgrade Dependencies: To upgrade a dependency to the latest version, run:
yarn upgrade <package_name>
Troubleshooting Steps
If you encounter issues while installing or using Yarn, here are some common troubleshooting steps:
- Ensure you have installed the latest versions of Node.js and npm.
- Sometimes clearing the Yarn cache can resolve issues.
- If all else fails try uninstalling and reinstalling Yarn.
Conclusion
Installing Yarn on Windows is a straightforward process and you have multiple methods to choose from. Whether you prefer using npm the MSI installer Chocolatey or Scoop, you can easily set up Yarn and start managing your JavaScript projects efficiently. With its speed reliability and security features, Yarn is a valuable tool for any developer working with JavaScript.
While installing Yarn on Windows is straightforward managing dependencies and ensuring compatibility across different server environments can be technical. Upgrading to Ultahost’s Windows VPS hosting plan empowers you with a robust solution that helps you to install the latest package managers and repositories simplifying Yarn installation and updates.
FAQ
What is Yarn?
Yarn is a package manager for JavaScript that helps you manage project dependencies.
Why should I install Yarn on Windows?
Yarn makes it easier to handle libraries and packages in JavaScript projects.
How do I install Yarn on Windows?
You can install Yarn via the installer from the official website or through npm.
Do I need Node.js to install Yarn?
Yes, Yarn requires Node.js to be installed on your system.
Can I install Yarn using npm?
Yes, you can install Yarn globally using the command.
How do I check if Yarn is installed on Windows?
Run the version command in your terminal to check if it’s installed.
What should I do if Yarn isn’t working after installation?
Try restarting your terminal or reinstalling Yarn to fix any issues.
Last Updated :
05 Oct, 2021
Prerequisite: Difference between npm and yarn
Yarn in layman’s term is a package manager that can be used in your code or a project that is currently being built, what yarn does is it helps to share the code with fellow mates or within a community of developers, and they can even run the project that we are building on their end.
But how actually is that code shared with other people, well that’s done by sharing the code files that are used to develop the project and with a package.json file, and this package.json file describes what all yarn package is used in the project, also which are required with its version used while developing the project. So, what the other fellow mate can do is install yarn on his/her machine and do
yarn install
To install all the dependencies and packages required to get started with the project.
MacOS
Method 1: Using NPM.
In the OS X terminal you need to type:
npm install --global yarn
NOTE: You will need to have NPM (Node package manager pre-installed on the pc)
If some error comes you need to give admin privileges to the terminal so that it can access npm already installed on your pc.
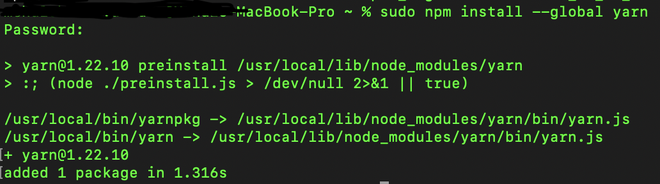
installing yarn using npm on macOS
Method 2: Using HomeBrew Package Manager:
brew install yarn
Method 3: Using curl:
You need to type the following command in the terminal
curl -o- -L https://yarnpkg.com/install.sh | bash
NOTE: the above command works for both Linux and macOS.

Ubuntu/Debian (Linux)
Method 1: Using npm manager.
It’s valid to use the standard method to install with npm, using the following commands in the terminal
npm install --global yarn

Method 2: Using curl.
Step 1: You can install it with the Debian package repository by first configuring the repository first using the following commands.
curl -sS https://dl.yarnpkg.com/debian/pubkey.gpg | sudo apt-key add -
echo "deb https://dl.yarnpkg.com/debian/ stable main" | sudo tee /etc/apt/sources.list.d/yarn.list

Demo of the above 2 commands
Step 2: And then once after successful install of the above command use
sudo apt install yarn
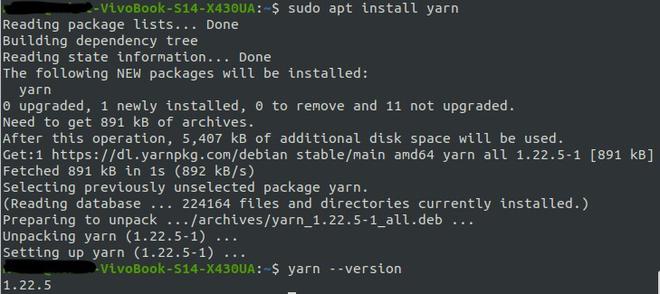
installing yarn and checking the version installed
Windows
Method 1: Using msi file.
Using the .msi file which can be downloaded from here (from the official yarn-site)
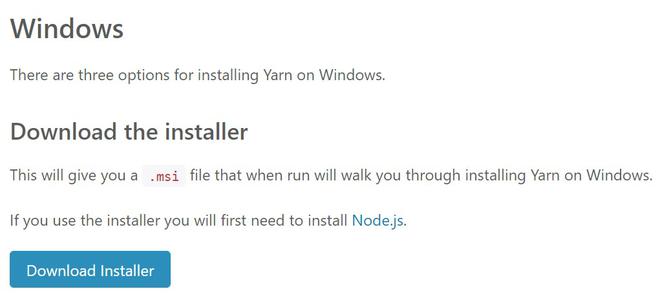
Source: yarn official site
Method 2: Using chocolatey package manager.
Step 1: Install choco package in your windows, for that you need to go here.
Basically, you need to type the following command shown below with administrative privileges
Set-ExecutionPolicy Bypass -Scope Process -Force; [System.Net.ServicePointManager]::SecurityProtocol = [System.Net.ServicePointManager]::SecurityProtocol -bor 3072; iex ((New-Object System.Net.WebClient).DownloadString(‘https://chocolatey.org/install.ps1’))
Step 2: After installing head over to PowerShell and follow the instructions below.
Open up the windows PowerShell or any preferable terminal and type the following command
choco install yarn

Yarn installation
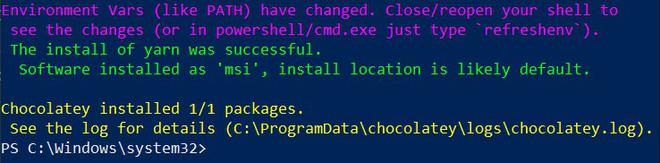
Successful install of yarn
CentOS / Fedora / RHEL
Step 1: Using RPM package manager type the following command in the terminal.
curl --silent --location https://dl.yarnpkg.com/rpm/yarn.repo | sudo tee /etc/yum.repos.d/yarn.repo
Step 2: After performing the above steps type the following commands in the terminal
curl --silent --location https://rpm.nodesource.com/setup_12.x | sudo bash -
Step 3: At last, type the following to install yarn completely in the machine
sudo yum install yarn
How to Install Yarn on Windows. Yarn is a Package Manager for Node.js that replaces NPM. Yarn has been developed and expanded by companies and developers to improve the problems that exist in NPM. Due to Yarn’s good features, the project’s Github stars are now almost double the number of NPMs. In this article, we will teach you how to install Yarn in Windows.
Windows Virtual Private Server
Table of Contents
What is a Package Manager?
Package Manager is a tool that installs, updates and manages the software packages you need. With the help of such tools, you can always have the latest version of the libraries you need with your software. You can also think only of developing the core of your software without having to search for packages and their peripherals.
Yarn uses the NPM repository and is highly compatible with this tool, so migrating from NPM to Yarn is easy. In comparison with npm, Yarn is considered to be a better alternative and surpasses NPM in the following parameters:
- more speed
- More security
- Simultaneous installation of libraries
- More integration
- Offline installation requirements (also added in the new NPM version)
Note: Node.js must be installed before installing Yarn.
MSI Installation
To install Yarn, you must first download the Yarn .msi installer from the official Yarn website. Once downloaded, install it on your local computer.
Next, you will run the .msi installer.
accept the license agreement.
Then, click Install.
And finally, click on the Finish button.
Now, you can verify Yarn was installed using the following CLI commands:
C:\Windows\system32>yarn --version 1.22.4 C:\Windows\system32>Chocolatey Installation
Another way to install Yarn is by using the Chocolatey package manager for Windows. This method is convenient because Chocolatey will determine whether node.js is already installed and if not, it will automatically install it for us. It is important to do everything as an administrator.
Once Chocolatey is set up, you can install Yarn using the following command:
C:\Windows\system32>choco install yarn Chocolatey v0.10.15 Installing the following packages: yarn By installing you accept licenses for the packages. yarn v1.22.4 [Approved] yarn package files install completed. Performing other installation steps. The package yarn wants to run 'chocolateyinstall.ps1'. Note: If you don't run this script, the installation will fail. Note: To confirm automatically next time, use '-y' or consider: choco feature enable -n allowGlobalConfirmation Do you want to run the script?([Y]es/[A]ll - yes to all/[N]o/[P]rint): Y Downloading yarn from 'https://yarnpkg.com/downloads/1.22.4/yarn-1.22.4.msi' Progress: 100% - Completed download of C:\Users\Dmitry\AppData\Local\Temp\chocolatey\yarn\1.22.4\yarn-1.22.4.msi (1.57 MB). Download of yarn-1.22.4.msi (1.57 MB) completed. Hashes match. Installing yarn... yarn has been installed. #< CLIXML <Objs Version="1.1.0.1" xmlns="http://schemas.microsoft.com/powershell/2004/04"><Obj S="progress" RefId="0"><TN RefId="0"><T>System.Management.Automation.PSCustomObject</T><T>System.Object</T></TN><MS><I64 N="SourceId">1</I64><PR N="Record"><AV>Preparing modules for first use.</AV><AI>0</AI><Nil /><PI>-1</PI><PC>-1</PC><T>Completed</T><SR>-1</SR><SD> </SD></PR></MS></Obj><Obj S="progress" RefId="1"><TNRef RefId="0" /><MS><I64 N="SourceId">1</I64><PR N="Record"><AV>Preparing modules for first use.</AV><AI>0</AI><Nil /><PI>-1</PI><PC>-1</PC><T>Completed</T><SR>-1</SR><SD> </SD></PR></MS></Obj><S S="debug">Host version is 5.1.18362.752, PowerShell Version is '5.1.18362.752' and CLR Version is '4.0.30319.42000'.</S><S S="verbose">Exporting function 'Format-FileSize'.</S><S S="verbose">Exporting function 'Get-ChecksumValid'.</S><S S="verbose">Exporting function 'Get-ChocolateyUnzip'.</S><S S="verbose">Exporting function 'Get-ChocolateyWebFile'.</S><S S="verbose">Exporting function 'Get-EnvironmentVariable'.</S><S S="verbose">Exporting function 'Get-EnvironmentVariableNames'.</S><S S="verbose">Exporting function 'Get-FtpFile'.</S><S S="verbose">Exporting function 'Get-OSArchitectureWidth'.</S><S S="verbose">Exporting function 'Get-PackageParameters'.</S><S S="verbose">Exporting function 'Get-PackageParametersBuiltIn'.</S><S S="verbose">Exporting function 'Get-ToolsLocation'.</S><S S="verbose">Exporting function 'Get-UACEnabled'.</S><S S="verbose">Exporting function 'Get-UninstallRegistryKey'.</S><S S="verbose">Exporting function 'Get-VirusCheckValid'.</S><S S="verbose">Exporting function 'Get-WebFile'.</S><S S="verbose">Exporting function 'Get-WebFileName'.</S><S S="verbose">Exporting function 'Get-WebHeaders'.</S><S S="verbose">Exporting function 'Install-BinFile'.</S><S S="verbose">Exporting function 'Install-ChocolateyDesktopLink'.</S><S S="verbose">Exporting function 'Install-ChocolateyEnvironmentVariable'.</S><S S="verbose">Exporting function 'Install-ChocolateyExplorerMenuItem'.</S><S S="verbose">Exporting function 'Install-ChocolateyFileAssociation'.</S><S S="verbose">Exporting function 'Install-ChocolateyInstallPackage'.</S><S S="verbose">Exporting function 'Install-ChocolateyPackage'.</S><S S="verbose">Exporting function 'Install-ChocolateyPath'.</S><S S="verbose">Exporting function 'Install-ChocolateyPinnedTaskBarItem'.</S><S S="verbose">Exporting function 'Install-ChocolateyPowershellCommand'.</S><S S="verbose">Exporting function 'Install-ChocolateyShortcut'.</S><S S="verbose">Exporting function 'Install-ChocolateyVsixPackage'.</S><S S="verbose">Exporting function 'Install-ChocolateyZipPackage'.</S><S S="verbose">Exporting function 'Install-Vsix'.</S><S S="verbose">Exporting function 'Set-EnvironmentVariable'.</S><S S="verbose">Exporting function 'Set-PowerShellExitCode'.</S><S S="verbose">Exporting function 'Start-ChocolateyProcessAsAdmin'.</S><S S="verbose">Exporting function 'Test-ProcessAdminRights'.</S><S S="verbose">Exporting function 'Uninstall-BinFile'.</S><S S="verbose">Exporting function 'Uninstall-ChocolateyEnvironmentVariable'.</S><S S="verbose">Exporting function 'Uninstall-ChocolateyPackage'.</S><S S="verbose">Exporting function 'Uninstall-ChocolateyZipPackage'.</S><S S="verbose">Exporting function 'Update-SessionEnvironment'.</S><S S="verbose">Exporting function 'Write-ChocolateyFailure'.</S><S S="verbose">Exporting function 'Write-ChocolateySuccess'.</S><S S="verbose">Exporting function 'Write-FileUpdateLog'.</S><S S="verbose">Exporting function 'Write-FunctionCallLogMessage'.</S><S S="verbose">Exporting alias 'Get-ProcessorBits'.</S><S S="verbose">Exporting alias 'Get-OSBitness'.</S><S S="verbose">Exporting alias 'Get-InstallRegistryKey'.</S><S S="verbose">Exporting alias 'Generate-BinFile'.</S><S S="verbose">Exporting alias 'Add-BinFile'.</S><S S="verbose">Exporting alias 'Start-ChocolateyProcess'.</S><S S="verbose">Exporting alias 'Invoke-ChocolateyProcess'.</S><S S="verbose">Exporting alias 'Remove-BinFile'.</S><S S="verbose">Exporting alias 'refreshenv'.</S><S S="verbose">Exporting function 'Format-FileSize'.</S><S S="verbose">Exporting function 'Get-ChecksumValid'.</S><S S="verbose">Exporting function 'Get-ChocolateyUnzip'.</S><S S="verbose">Exporting function 'Get-ChocolateyWebFile'.</S><S S="verbose">Exporting function 'Get-EnvironmentVariable'.</S><S S="verbose">Exporting function 'Get-EnvironmentVariableNames'.</S><S S="verbose">Exporting function 'Get-FtpFile'.</S><S S="verbose">Exporting function 'Get-OSArchitectureWidth'.</S><S S="verbose">Exporting function 'Get-PackageParameters'.</S><S S="verbose">Exporting function 'Get-PackageParametersBuiltIn'.</S><S S="verbose">Exporting function 'Get-ToolsLocation'.</S><S S="verbose">Exporting function 'Get-UACEnabled'.</S><S S="verbose">Exporting function 'Get-UninstallRegistryKey'.</S><S S="verbose">Exporting function 'Get-VirusCheckValid'.</S><S S="verbose">Exporting function 'Get-WebFile'.</S><S S="verbose">Exporting function 'Get-WebFileName'.</S><S S="verbose">Exporting function 'Get-WebHeaders'.</S><S S="verbose">Exporting function 'Install-BinFile'.</S><S S="verbose">Exporting function 'Install-ChocolateyDesktopLink'.</S><S S="verbose">Exporting function 'Install-ChocolateyEnvironmentVariable'.</S><S S="verbose">Exporting function 'Install-ChocolateyExplorerMenuItem'.</S><S S="verbose">Exporting function 'Install-ChocolateyFileAssociation'.</S><S S="verbose">Exporting function 'Install-ChocolateyInstallPackage'.</S><S S="verbose">Exporting function 'Install-ChocolateyPackage'.</S><S S="verbose">Exporting function 'Install-ChocolateyPath'.</S><S S="verbose">Exporting function 'Install-ChocolateyPinnedTaskBarItem'.</S><S S="verbose">Exporting function 'Install-ChocolateyPowershellCommand'.</S><S S="verbose">Exporting function 'Install-ChocolateyShortcut'.</S><S S="verbose">Exporting function 'Install-ChocolateyVsixPackage'.</S><S S="verbose">Exporting function 'Install-ChocolateyZipPackage'.</S><S S="verbose">Exporting function 'Install-Vsix'.</S><S S="verbose">Exporting function 'Set-EnvironmentVariable'.</S><S S="verbose">Exporting function 'Set-PowerShellExitCode'.</S><S S="verbose">Exporting function 'Start-ChocolateyProcessAsAdmin'.</S><S S="verbose">Exporting function 'Test-ProcessAdminRights'.</S><S S="verbose">Exporting function 'Uninstall-BinFile'.</S><S S="verbose">Exporting function 'Uninstall-ChocolateyEnvironmentVariable'.</S><S S="verbose">Exporting function 'Uninstall-ChocolateyPackage'.</S><S S="verbose">Exporting function 'Uninstall-ChocolateyZipPackage'.</S><S S="verbose">Exporting function 'Update-SessionEnvironment'.</S><S S="verbose">Exporting function 'Write-ChocolateyFailure'.</S><S S="verbose">Exporting function 'Write-ChocolateySuccess'.</S><S S="verbose">Exporting function 'Write-FileUpdateLog'.</S><S S="verbose">Exporting function 'Write-FunctionCallLogMessage'.</S><S S="verbose">Exporting alias 'Get-ProcessorBits'.</S><S S="verbose">Exporting alias 'Get-OSBitness'.</S><S S="verbose">Exporting alias 'Get-InstallRegistryKey'.</S><S S="verbose">Exporting alias 'Generate-BinFile'.</S><S S="verbose">Exporting alias 'Add-BinFile'.</S><S S="verbose">Exporting alias 'Start-ChocolateyProcess'.</S><S S="verbose">Exporting alias 'Invoke-ChocolateyProcess'.</S><S S="verbose">Exporting alias 'Remove-BinFile'.</S><S S="verbose">Exporting alias 'refreshenv'.</S></Objs> 0 Only an exit code of non-zero will fail the package by default. Set `--failonstderr` if you want error messages to also fail a script. See `choco -h` for details. The install of yarn was successful. Software installed as 'msi', install location is likely default. Chocolatey installed 1/1 packages. See the log for details (C:\ProgramData\chocolatey\logs\chocolatey.log). C:\Windows\system32>You can verify your installation of yarn using the following command:
C:\Windows\system32>yarn --version 1.22.4 C:\Windows\system32>Scoop Installation
The third method of installing Yarn is by using the Scoop command line installer for Windows.
Scoop has functionality that is similar to Chocolatey, but the main difference being that Chocolatey will install node.js if we do not already have it installed but scoop will not.
Scoop can be installed using the information found at the scoop website. To install node.js using scoop, run the following command:
scoop install nodejsNext, you can install yarn using following command:
scoop install yarndThe best method to review many of the Yarn commands is to run the help command:
yarn helpStart a New Project
To create a new project, run the following command:
yarn initInstalling Dependencies
Use one of the two following commands, to install all the dependencies for a project:
yarn yarn installTo add a dependency to a project, use one of the following command formats:
yarn add [package] yarn add [package]@[version] yarn add [package]@[tag]To add dependencies to a specific category, you can use one of the following three options:
1) dev Dependencies
2) peer Dependencies
3) optional Dependencies
yarn add [package] --dev # dev-dependency yarn add [package] --peer # peer-dependency yarn add [package] --optimal # optimal-dependencyTo upgrade an existing dependency, you can use the yarn up command.
yarn up [packagename] yarn up [packagename]@[version] yarn up [packagename]@[tag]To remove an existing dependency, you should use the following command:
yarn remove [package]Upgrade Yarn
To upgrade Yarn to the latest version, run one of the following commands:
yarn set version latest yarn set version from sourcesDear user, we hope you would enjoy this tutorial, you can ask questions about this training in the comments section, or to solve other problems in the field of Eldernode training, refer to the Ask page section and raise your problem in it as soon as possible. Make time for other users and experts to answer your questions.
Goodluck.
If you are looking for how to install Yarn on Windows operating system, you are in the right place. Yarn is a fast and safe package manager for JavaScript, and the process of installation on Windows is pretty straightforward.
The npm package manager for JavaScript tools and libraries has been used for a long time. However, it suffers from issues like security, performance, and consistency. The issues become exponential when you plan to use npm for a large and concurrency software development project.
However, you can bypass all these issues and still get access to the npm registry by using Yarn. Additionally, it is a future-ready package manager with robust features and simple commands. Continue reading as we show you how to install yarn packages on your Windows PC from scratch.
PS: If you are a newbie and don’t know what Yarn is, what it does, its workflow and benefits, scroll to the bottom as we’ve got you covered too!
Prerequisites to Install Yarn on Windows

Installing developer runtimes and other tools has become effortless these days. Yarn’s installation process is no different. You can instantly start maintaining and managing JavaScript libraries and dependencies on your Windows computer using Yarn. You just need to type a few codes and make a few clicks.
Before you can learn how to install Yarn on Windows, you need to ensure whether the device is appropriately conditioned. For example, consider the followings:
- You will need .NET Framework 4.0 or later.
- Administrative access to Windows Command Prompt.
- Similarly, you will need admin access to PowerShell.
- The latest Node.js version runtime is also mandatory to run Yarn.
If you are working on a Windows 10 or Windows 11 workstation logged in as an admin, then you have taken care of the first three prerequisites. However, learn more about the Node.js installation below:
Checking for Node.js Installation on Your Windows Computer
#1. Click on the Search icon on your Windows 10 PC and type in CMD.
#2. You will see the Command Prompt app under the Best match section.

#3. Right-click on the Command Prompt link and then select Run as administrator.
#4. Command Prompt app will open with the following command line output:
C:\Windows\system32>#5. Now, type the following syntax and hit Enter.
node --version
#6. If CLI output shows that 'node' is not recognized as an internal or external command, operable program, or batch file text, it means you need to install Node.js.
Installing Node.js on Your Windows PC
#1. Visit the Node.js portal to download the latest version of it.

#2. Select any version to download below the Download for Windows.
#3. Double-click on the Node.js installation package.
#4. Click Next once the installer verifies the space requirement.

#5. Now, you must accept the end user license and click Next.
#6. Select Next again on the Destination Folder screen.
#7. Do not make any changes on the Custom Setup screen. Just click Next.

#8. Select Next again on the Native Modules Tool, and then click Install.
#9. Once the installation is complete, click Finish.
Install Yarn on Windows Using the Yarn MSI Installer
Now, you are all set to install Yarn on Windows.
Get Yarn MSI Installer
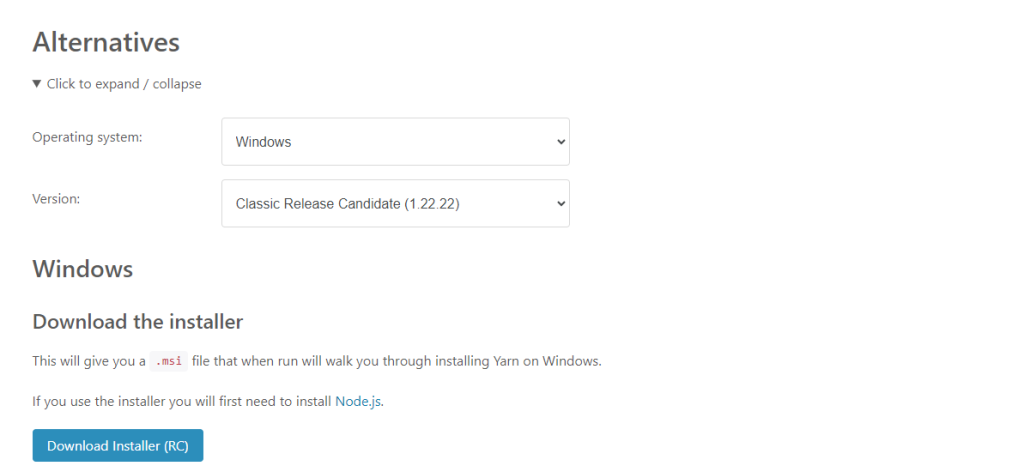
#1. Visit the Yarn download portal.
#2. You must see the Click to expand/collapse text below the Alternatives header.

#3. Click on the drop-down list arrow near the above message to expand Yarn installation alternatives.
#4. On the Operating system option, select Windows.
#5. Select Classic Stable on the Version option.
#6. Now, just click on Download Installer.
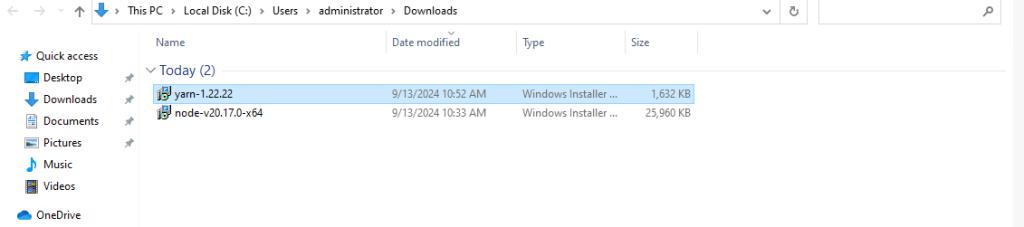
That is it! You should find the .msi installer of Yarn in the Downloads folder.
Running the Yarn MSI Installer
#1. Go to the Downloads folder on your Windows PC.
#2. Double-click on the Yarn installation package.

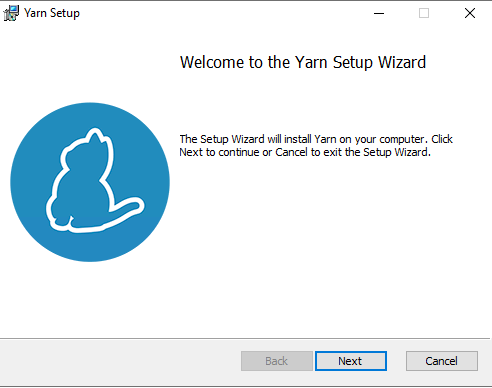
#3. You will see the Welcome to the Yarn Setup Wizard screen. Click Next.
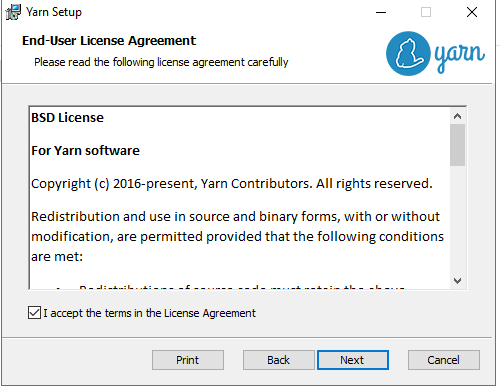
#4. The Yarn installer will now show the End-User License Agreement screen.
#5. On the above screen, checkmark the I accept box and then select Next.

#6. You shall now see the Destination Folder where the Yarn installer is installing Yarn. You may keep that as is. Just select Next.

#7. Finally, you are at the Ready to Install screen. Simply click Install to allow the Yarn MSI installer to install Yarn on Windows.
The process is complete when you see the Completed the Yarn Setup Wizard. Just click Finish and you are all set.
Verifying the Yarn Installation on Your Windows PC
#1. Open the Command Prompt as an admin user.
#2. After the CLI output C:\Windows\system32> type yarn –version.
#3. You should see the following script as an output:
1.22.19<br>C:\Windows\system32>
The above script means that you have successfully installed Yarn on Windows PC. The Yarn version that you have installed is 1.22.19.
Install Yarn on Windows Using the Command Prompt App
Expert developers may not always like to install development runtimes or packages through an MSI installer. Hence, for seasoned developers like you, Yarn also offers command line interface installation. You can follow the steps here:
#1. Start the process on a Windows 11 or Windows 10 computer so that you do not need to install the latest .NET Framework, Command Prompt, PowerShell, etc., separately.
#2. Ensure that you have already installed Node.js on that PC. You can confirm that by trying the steps mentioned above in the “Checking for Node.js Installation” section.
#3. If you get a CLI output with the version number of Node.js, it means you already have Node.js.
#4. If you do not get any version information, you need to install Node.js. You can follow the steps mentioned earlier in the ‘Installing Node.js on Your Windows PC’ section.
#5. Your Node.js installation should have installed Corepack already. Just activate it using a Command Prompt. Execute the following command to enable this feature:
corepack enable
#6. Once done, you can execute the following script on Command Prompt to install Yarn on Windows:
npm install --global yarn
#7. The CLI output will be added 1 package, and audited 2 packages in 1s when the installation is successful.
You can check the Yarn version installed to confirm whether the installation was successful or not. That is it!
Install Yarn on Windows Using Scoop

Another convenient way to install Yarn on Windows without running any installer is Scoop. It is a package installer for Windows. The tool works through the PowerShell app. Most expert developer use Scoop, so it is considered that you already have this on your Windows system.
If you do not have Scoop on your Windows PC, you can get it from GitHub by following the official installation guide. Access the Scoop Quick Start GitHub portal to install Scoop in a few minutes.
Once done, open the PowerShell app and run the following Scoop command to install Yarn:
scoop install yarnScoop will not continue with the installation if there is no Node.js runtime on your PC. It will suggest you install that. Here is the command to run:
scoop install nodejs Install Yarn on Windows Using Chocolatey

Seasoned devs regularly use Chocolatey for Windows package management. If you have it on your PC, then you can install Yarn using Chocolatey as well.
If you do not have this tool, you can visit Installing Chocolatey to get it. Once done installing Chocolatey, open the Command Prompt to run the following command which installs Yarn automatically:
choco install yarnIf you do not have Node.js runtime, Chocolatey will install that on its own.
What is Yarn?

Google, Facebook, Tilde, and Exponent collaborated on a JavaScript package management tool that can replace npm. The result of the project is the Yarn package manager released as an open source tool in 2016.
Yarn is a novel package manager that eases off and modifies the existing workflow for maintaining and managing JavaScript packages on npm or other package managers. However, the Yarn tool will still support the npm registry to fetch pre-programmed JS libraries, tools, etc.
Find below the novel features of Yarn that make it an extraordinary tool for every developer:
- It fetches and installs JS libraries, tools, packages, etc., faster.
- Its core engine ensures integrity, reliability, and version control of installed packages.
- A simple software development project can include thousands of dependencies. Yarn makes dependency management workflow effortless.
- It supports mixing registries.
- Yarn is compatible with Bower and npm workflows.
- It offers installed module license restrictions.
- Comes with a public JS API for consumption of API data via build tools.
- Yarn also offers beautiful CLI outputs, minimal code lines, and a readable user interface.
This future-ready package manager has a somewhat similar or more straightforward process for DevOps package management. However, the Yarn tool is highly reliable, faster, and extremely secure when compared with Yarn alternatives.
What Does Yarn Do?

Yarn simply solves common package management problems that npm suffers. The followings are some popular functionalities of Yarn:
- Yarn supports plugins. Users can use Yarn plugins, third-party plugins for Yarn, or write their own plugins.
- The Constraints functionality enables developers to enforce rules and policies for manifest fields or dependencies across scoped workspaces.
- Yarn lets a programmer use an offline cache on the local machine using a single file.
- The Plug’n’Play option lets users run Node.js projects minus the node_modules folder. The resultant Node.js application starts faster when compared with apps that contain the node_modules folder.
- The Protocols functionality enables developers to define the protocol for package resolution. For instance, you will be using the patch protocol to create a patched version of the original package. Another example could be the git protocol to fetch public packages from any Git repository.
- The Release Workflow option helps a software developer automatically upgrade relative packages distributed in several monorepos. For this, a programmer needs to upgrade the root packages and Release Workflow handles the rest.
- Yarn Workspaces is an intuitive functionality. It allows programmers to install dependencies all in one go from multiple package.json files in many subfolders of a single root package.json file.
The Yarn Workflow

Whenever you switch from one package manager to another, the main challenge is the change of workflow. Facebook’s goal was to create a package manager that will be easy to use while supporting the existing standard workflows from popular package repos like npm. Hence, Yarn did not make any drastic changes. Here is a snapshot of the basic workflow of Yarn:
- Create or start a new app development project:
yarn init. - Adding, removing, or updating various dependencies:
yarn add [package],yarn upgrade [package],yarn remove [package]. - Installing or reinstalling a code library or dependency:
yarn install,yarn install --force, etc. - Managing versions of packages being created, updated, patched, etc., using Gits.
- Integrating with related tools continuously like AppVeyor, CirleCI, Codeship, Semaphore, Codefresh, etc.
The Benefits of Yarn
- Yarn allows the developers to maintain several local cache files for multiple projects. Hence, using or updating numerous packages for multiple app development projects becomes easy and faster.
- Tech giants like Facebook, Google, etc., support the Yarn community. Hence, you can find the latest patches, upgrades, and new releases frequently.
- Yarn comes with a detailed migration guide if you are moving an existing JavaScript development project to Yarn.
- Yarn guarantees baseline installation throughout all systems via the deterministic manner of installing operations and a lock file format.
- Yarn ensures the integrity of all the imported packages by running checksums.
- Yarn avoids request waterfalls when getting packages from cloud sources. This process increases network efficiency.
Apart from these Yarn’s core engine comes with powerful algorithms to allow faster installation of packages. When you fetch and install thousands of packages in your software project, Yarn installs them in parallel. On contrary, npm does this one by one. Hence, the project time frame increases drastically.
Final Words for Install Yarn on Windows
So far the article has discussed the basics of Yarn, like what it is, its benefits, purpose, and more. Additionally, you also have discovered several ways to install Yarn from scratch.
If you are new to JavaScript-based development projects, you will benefit tremendously from the steps. You will cut short the guessing and Google searching part for how to install Yarn on Windows and start maintaining and managing JavaScript packages on Yarn.
Read More on Development
-
Best JavaScript (JS) UI Libraries to Build Modern Applications