
Уровень сложностиСредний
Время на прочтение8 мин
Количество просмотров308K
Руководство по анализу трафика сети посредством Wireshark
1. Что такое Wireshark?

Wireshark – это широко распространённый инструмент для захвата и анализа сетевого трафика, который активно используется как для образовательных целей, так и для устранения неполадок на компьютере или в сети. Wireshark работает практически со всеми протоколами модели OSI, обладает понятным для обычного пользователя интерфейсом и удобной системой фильтрации данных. Помимо всего этого, программа является кроссплатформенной и поддерживает следующие операционные системы: Windows, Linux, Mac OS X, Solaris, FreeBSD, NetBSD, OpenBSD.
В этом руководстве мы рассмотрим основной функционал программы Wireshark, соотнесём её с моделью OSI, научимся анализировать сетевой трафик и обезопасим своё нахождение в глобальной сети Интернет.
2. Как установить Wireshark?
Для начала нам необходимо скачать и установить программу Wireshark. Так как программа распространяется под лицензией GNU GPL v2 (т.е. может свободно распространяться), то несложно найти любую версию программы в свободном доступе. В руководстве мы будем использовать функционал более ранней версии программы (1.12.3). Это вызвано тем, что в этой версии сразу встроен протокол SSL, который используется в главе 6. Установка более ранней версии облегчает подготовку к работе с программой, поэтому мы выбрали её. Найти установщик можно на официальном сайте.
Дальнейшая установка программы проста – нажимаем «Next» — «Next» — «Next».

После успешной установки на Вашем рабочем столе появится ярлык Wireshark. Мы можем приступать к рассмотрению функционала!
3. Как пользоваться программой Wireshark?
Одна из главных возможностей программы – это захват трафика сети. Поэтому для начала необходимо научиться захватывать трафик Вашей сети.
Запустим программу! Нас сразу встречает стартовое меню, на котором можно увидеть доступные для захвата интерфейсы компьютера, руководства от разработчиков программы и множество других интересных вещей.

Из всего этого нам необходимо обратить внимание на эту область программы.

Здесь нужно выбрать тот сетевой интерфейс, через который Вы подключены к Интернету.
Сетевой интерфейс – это программное обеспечение, которое взаимодействует с сетевым драйвером и с уровнем IP. Он обеспечивает уровню IP доступ ко всем имеющимся сетевым адаптерам, трафик которых мы будет перехватывать. Чаще всего в программе Wireshark можно встретить сетевой интерфейс беспроводной (Wi-Fi) и кабельный (Ethernet).
В руководстве используется Wi-Fi, поэтому мы выполняем захват «Беспроводной сети», после чего нажимаем «Start».
Если Вы выбрали правильный интерфейс, то сможете увидеть следующее.

Рассмотрим подробнее это окно по пунктам, указанным на нём:
-
Панель фильтров, позволяющая найти необходимую информацию. Подробнее о неё рассказано в пятой главе руководства.
-
Панель наименований, разделяющая информацию из пункта 3 на номер, временя с начала захвата трафика, источник и адресат, а также используемый протокол, размер пакета и небольшую информацию о сетевом пакете.
-
Панель пакетов, обновляющаяся в реальном времени. Здесь информация о пакетах разделена по столбцам, определённым на панели наименований.
-
Панель уровней, описывающая уровни модели OSI выбранного сетевого пакета.
-
Панель метаданных, представляющая данные в шестнадцатеричном коде и символах.
Поздравляем! Вы успешно захватили трафик Вашей сети. Теперь можно увидеть пакеты данных, проходящих по сети, а также некоторую информацию о них: адреса отправителя и получателя, использующиеся протоколы и содержание пакета.
Теперь можно приступить к анализу сетевого трафика.
4. Как найти скрытую информацию?
Перед началом анализа трафика необходимо иметь базовые знания о протоколах сетевой модели OSI. Достаточно прочитать статью в Википедии.
Во многих программах для передачи информации используется протокол HTTP, который позволяет получать различные ресурсы из Интернета и обратно. Рассмотрим один из пакетов, переданных по протоколу HTTP.

В протоколе HTTP для передачи данных используются запросы GET (предназначен для получения данных) и POST (предназначен для отправки данных).
На рисунке в поле 1 мы видим IP-адрес адресата (в данном случае, это адрес моего компьютера). В поле 2 мы узнаём, что сервер антивируса послал запрос GET для того, чтобы запросить некоторые данные о моём компьютере. Это необходимо для корректного обновления программы. И в поле 3 мы видим то, как выглядит этот запрос в виде URL (Интернет-ссылки).
Небольшое домашнее задание!
Для закрепления материала попробуйте проанализировать любой пакет протокола HTTP на Вашем компьютере и попытайтесь объяснить, для чего он был отправлен.
5. Как среди всех пакетов найти необходимые?
При выполнении домашнего задания у Вас могла возникнуть проблема нахождения необходимого пакета. Для её решения в программе Wireshark есть решение – фильтрация! В специальном поле «Filter» можно ввести необходимые команды или воспользоваться подсказками.

Чаще всего используется фильтрация по IP-адресам, по номерам порта и по протоколам. Давайте посмотрим, как это происходит.
Фильтрация по IP-адресу позволяет нам просматривать все пакеты, приходящие от кого-либо или уходящие кому-либо. Например, отберём все пакеты, приходящие от IP-адреса 10.1.30.46 с помощью ввода в фильтре «ip.src == x.x.x.x».

Также можно отфильтровать трафик сети по IP-адресу получателя пакетов с помощью команды «ip.dst == x.x.x.x».

Кроме того, можно увидеть пакеты вне зависимости от направления трафика с помощью «ip.addr == x.x.x.x».

Для фильтрации по номеру порта используется «.port = x» после названия протокола. Например, для просмотра TCP-порта 80, используемого для незашифрованного трафика HTTP, используем команду «tpc.port == 80».

И, наконец, для фильтрации трафика по используемым пакетами протоколам необходимо просто ввести название протокола.
Обратите внимание, что фильтры можно комбинировать при помощи логических операторов И «and/&&», ИЛИ «or/||» и НЕ «not/!»

Снова домашнее задание!
Чтобы попрактиковаться в поиске необходимой информации, попробуйте посмотреть количество пакетов того или иного протокола и подумайте, почему их так много.
6. Как перехватить данные, передающиеся по защищённым каналам связи?
Разобравшись с основным функционалом Wireshark, мы можем приступить к более сложному и полезному.
Передача данных в глобальной сети Интернет является небезопасной, особенно если никак не защищать их. В современных браузерах используется протокол SSL/TLS, который шифрует информацию и позволяет безопасно передать её.
Иногда пользователю или системного администратору необходимо проверить трафик на наличие подозрительной активности или на корректную работу программы. Из-за этого возникает необходимость расшифровывать перехваченный защищённый трафик.
Для начала разберёмся в том, как работает протокол SSL/TLS. Перед обменом шифрованными данными используется процесс установки соединения, также называемый рукопожатием.
На этапе рукопожатия клиент и сервер проходят аутентификацию (проверку подлинности), обмениваются информацией о своих возможностях и лишь после этого начинают согласование общего сеансового ключа.
Для согласования по незащищённому каналу связи существует множество алгоритмов. Выбор происходит из списка алгоритмов, которые поддерживаются клиентом, на начальной стадии рукопожатия.
Наиболее распространённым алгоритмом обмена сеансовым ключом является RSA. Рассмотрим инфографику, описывающую механизм работы алгоритма.

В момент рукопожатия клиент создаёт случайное число, называемое предварительным секретом, и отправляет его, зашифровав открытым ключом сервера. Далее обе стороны конвертируют предварительный секрет в главный и создают сеансовый ключ, который и используется для дальнейшего обмена информацией.
Теперь попробуем перехватить защищённую информацию в программе Wireshark. Выполним подготовительные действия, а именно проверим используемый для согласования сеансовых ключей алгоритм и настроим браузер. Для начала находим рукопожатие с помощью фильтра, введя «ssl.handshake», и проверяем сообщение сервера.

В поле «Cipher Suite» мы можем увитель «TLS_RSA». Это значит, что мы можем приступать к дальнейшим действиям.
Настройка браузера в операционной система Windows довольно проста. Открываем свойства компьютера, затем «Дополнительные параметры системы» и выбираем «Переменные среды…».

Добавляем новую пользовательскую переменную «SSKEYLOGFILE» и указываем путь до файла, куда мы ходим его сохранять.
Рассмотрим ответное сообщение клиента: оно содержит зашифрованное значение предварительного секрета текущей сессии.

Далее переходим к настройке программы Wireshark. Комбинацией клавиш «Ctrl+Shift+P» открываем меню «Preferences», затем раскрываем ветку «Protocols» и выбираем «SSL».

Проверяем установку необходимых полей, показанных на картинке, и жмём кнопку «Edit». В появившемся окне нажимаем на кнопку «New» и заполняем следующие поля: IP Address (IP-адрес SSL-сервера), Port (порт SSL-сервера), Protocol (протокол, использующий шифрацию SSL. При неизвестном указывать data), Key File (путь к файлу с секретным ключом сервера, который мы указывали в Переменных средах) и Password (если секретный ключ защищён паролем).

Теперь можно подтвердить настройки и приступить к просмотру расшифрованного трафика. Не забывайте использовать фильтр!
Закрепление пройденного материала!
Попробуйте самостоятельно подключиться к серверу какого-либо сайта и посмотреть, какими пакетами обменивается Вам компьютер с ним.
7. Какие возможности даёт захват защищённого трафика?
Захват защищённого трафика даёт множество возможностей. Одной из них является перехват HTTPS-запросов пользователей, подключённых к сети. Давайте рассмотрим, как это сделать и какой результат мы получим.
Для начала повторяем действия из предыдущего пункта, но в качестве IP-адреса SSL-сервера указываем адрес необходимого сайта. Для передачи паролей зачастую используется протокол передачи данных HTTP. О используемых в нём методах мы уже говорили в главе 4. Чтобы использовать фильтрацию HTTP-трафика по методам, можно использовать команду «http.request.method == “название метода”». Так как мы хотим перехватить данные, отправленные клиентом на сервер, то будем рассматривать POST-запросы. Для этого применим фильтр «http.request.method == “POST”».

Проделав эти несложные действия, мы получили важные данные другого пользователя. Поэтому следует помнить, что общедоступные сети являются небезопасными и представляют угрозу даже для защищённого трафика.
Небольшая практика!
Попробуйте захватить защищённый трафик сервера электронной почты и авторизуйтесь, используя логин и пароль. Найдите POST-запрос и посмотрите, что там находится.
Скорее всего, важные данные будут зашифрованы. Таким способом почтовый сервис защищает Ваши данные, но риск взлома всё равно остаётся.
8. Как можно соотнести модель OSI и программу Wireshark?
Рассмотрев весь функционал программы Wireshark, мы можем соотнести её с сетевой моделью OSI. Но для начала следует вспомнить, что из себя представляет эта модель.
OSI – это набор сетевых протоколов, посредством которого различные сетевые устройства взаимодействуют друг с другом. Модель определяет семь уровней взаимодействия систем. Рассмотрим таблицу уровней модели OSI.
|
Уровень |
Тип данных |
Функции |
Примеры |
|
7. Прикладной |
Данные |
Доступ к сетевым службам |
HTTP, FTP |
|
6. Представления |
Данные |
Представление и шифрование данных |
ASCII, JPEG |
|
5. Сеансовый |
Данные |
Управление сеансом связи |
RPC, PAP |
|
4. Транспортный |
Сегменты |
Прямая связь между конечными пунктами и надёжность |
TCP, UDP |
|
3. Сетевой |
Пакеты |
Определение маршрута и логическая адресация |
IPv4, IPv6, ICMP |
|
2. Канальный |
Кадры |
Физическая адресация |
Ethernet, ARP |
|
1. Физический |
Биты |
Работа со средой передачи, сигналами и двоичными данными |
USB, RJ |
Теперь соотнесём эти уровни с Wireshark. Рассмотрим наиболее часто встречающиеся при анализе трафика протоколы, а именно HTTP, TCP и ICMP.
Протокол HTTP в программе Wireshark имеет 4 уровня по модели OSI, а именно прикладной (Hypertext Transfer Protocol), транспортный (TCP), сетевой (IPv4) и канальный (Ethernet II).

Протокол TCP имеет 3 уровня по модели OSI, в которые входят транспортный (TCP), сетевой (IPv4) и канальный (Ethernet II).

Протокол ICMP вообще имеет лишь 2 уровня по модели OSI: сетевой (IPv4) и канальный (Ethernet II).

Всего в программе Wireshark определяется лишь 5 уровней модели OSI: прикладной, транспортный, сетевой, канальный и физический. В зависимости от протокола можно увидеть разные уровни.
Подведение итогов
Прочитав это руководство, мы научились анализировать трафик и искать скрытую информацию, а также перехватывать защищённую информацию. Для будущих специалистов по информационной безопасности это очень важные навыки, которые обязательно пригодятся в будущем и послужат фундаментом для будущего профессионального развития.
Wireshark is a free tool that should be part of every networking professional’s arsenal. While it can be a rather intimidating and cumbersome tool, it allows for inspection of packets in their dissected form.
The beauty of that is packets never lie. When you’re experiencing networking issues or just need to know what’s going on in your network you can trust the data from Wireshark.
Wireshark is potentially one of the best packet analyzer tools available today.
Fortunately, downloading and installing Wireshark is super simple.
How to Download Wireshark for Windows 10 (or Windows Server)
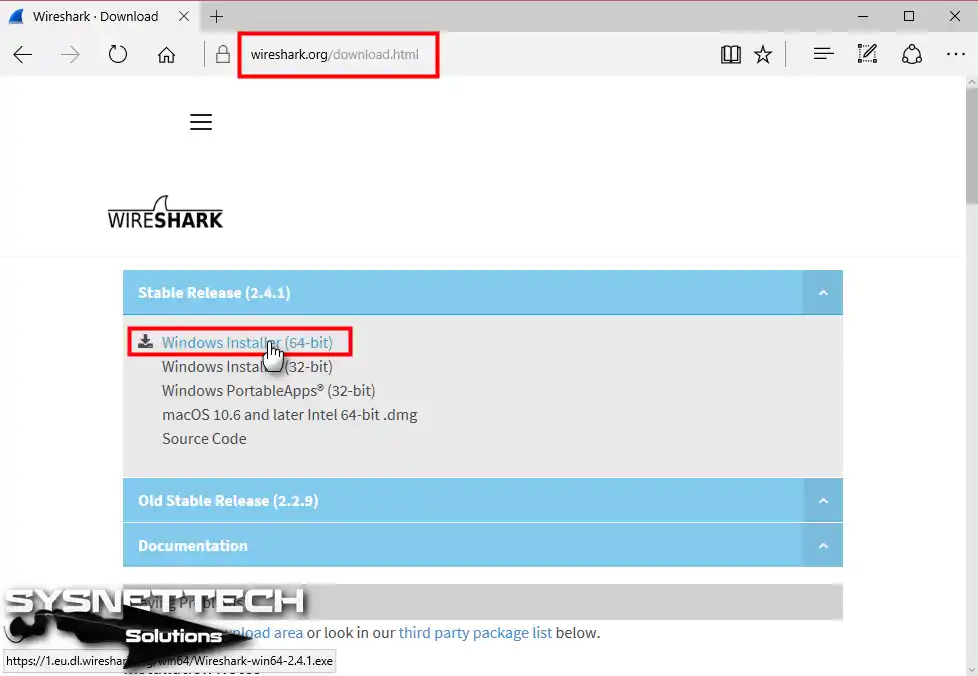
- Head over to https://www.wireshark.org/download.html and click on the appropriate installer for your operating system (Windows 10 64-bit in this example, would also apply to Windows Server).
-

- Note that a Wireshark-win64-2.6.1.exe file (file name as of July 2018) will be saved to your default downloads location.

- Run the exe installer that was downloaded.
- Click Next on the Welcome to Wireshark screen.

- Read the license agreement and click I Agree.

- At the Choose Components screen leave the defaults checked and click Next. You can read more about the different components here.
- At the Select Additional Tasks screen choose your preferred shortcuts and leave the radio button for “associate trace file extensions to Wireshark” selected. Click Next.

- Choose the install location you prefer and click Next.

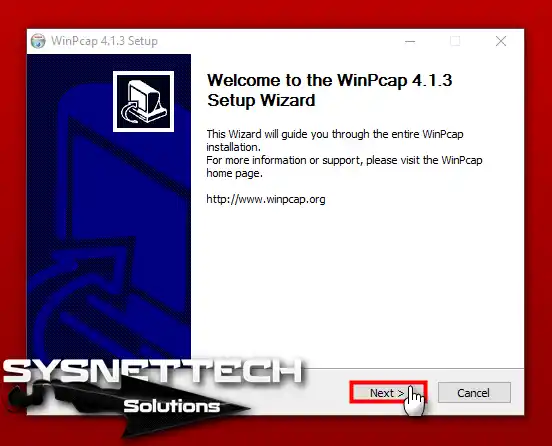
- At the Packet Capture page make sure Install WinPcap 4.1.3 is selected. You need this to capture traffic with Wireshark. Without it you can still view Wireshark capture files. Click Next.

- At the USB Capture page you can choose to Install USBPcap. Check the box next to Install USBPcap 1.2.0.3 if you desire to capture raw usb traffic as well (such as from a USB to RJ45 Ethernet adapter). Click Install.
-

- The software will begin installing.
- Eventually the installer will pause at “Execute: “C:\Program Files\Wiresharek\WinPcap_4_1_3.exe” and lunch a new installer window for WinPcap. Click Next in this window.

- Read the license agreement and click I Agree.
- Make sure the check box is checked next to “Automatically start the WinPcap driver at boot time” unless you have a good reason for disabling this and click Install.
- The install will begin and eventually complete. Click Finish.
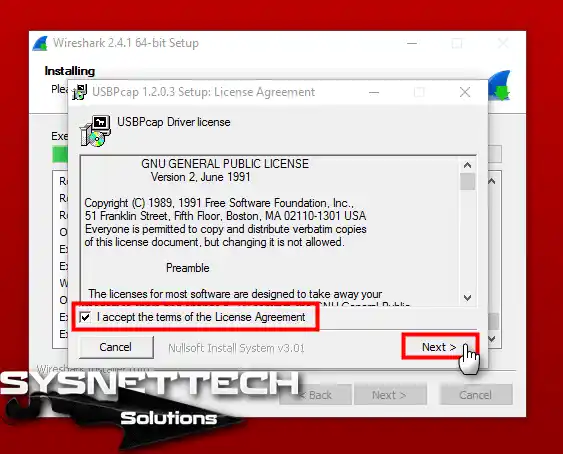
- Next the installer for USBPcap will launch. Read the USBPcap Driver license agreement, check the “I accept” box, and click Next.

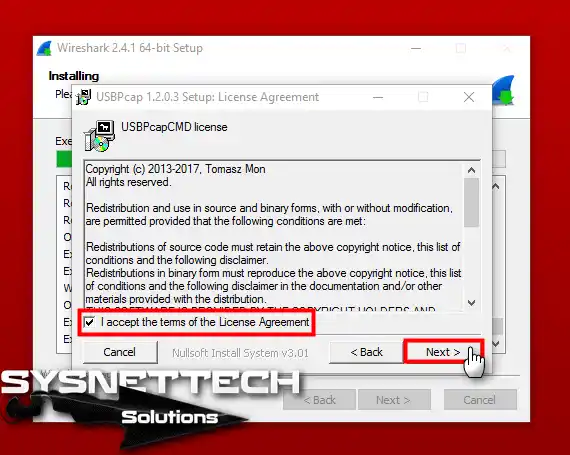
- Read the USBPcapCMD license, check the “I accept” box, and click Next.

- Leave the Installation Options set to Full and click Next.
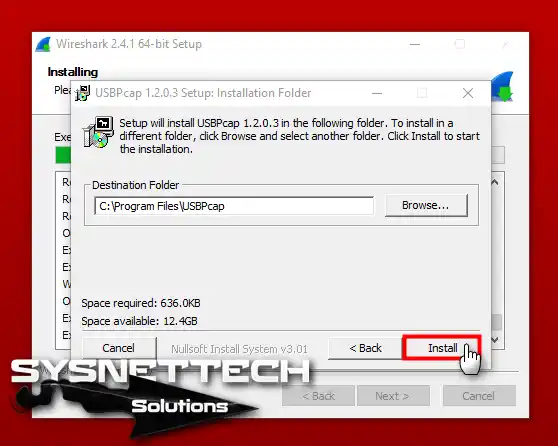
- Choose your Installation Folder and click Install. The install will begin.

- When the USBpcap install finishes click close and the Wireshark install will continue.
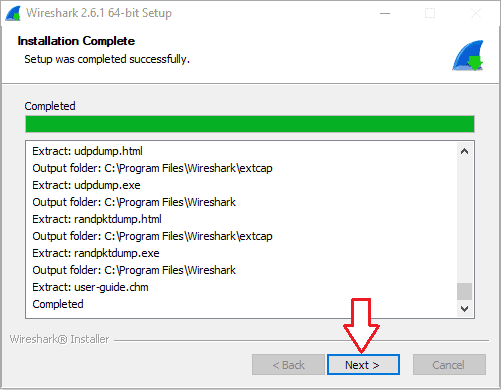
- At the Installation Complete screen click Next.

- Wireshark will now ask to reboot your machine to complete installation. You can either choose to reboot now or manually reboot later. You will not be able to run packet captures until you reboot your machine. I suggest rebooting right away.


Once your machine has rebooted you should find the Wireshark shortcuts in the locations you specified in the install. For this example the shortcut was found in the Start Menu.
Related: Wireshark User Interface (GUI) Overview
Things You Can Do with Wireshark
- Deep inspection of numerous protocols
- Live capture with offline analysis
- Standard three-pane packet browser
- Run it on Windows, Linux, OS X, Solaris, FreeBSD, NetBSD, and many others
- Browse captured network data via a GUI, or via the TTY-mode TShark utility
- Rich VoIP analysis
- Read/write numerous capture file formats
- Read live data from Ethernet, IEEE 802.11, PPP/HDLC, ATM, Bluetooth, USB, Token Ring, Frame Relay, and FDDI
- Apply coloring rules to the packet list for quick, intuitive analysis
- Export output to XML, PostScript, CSV, or plain text
Recommended Tool: ManageEngine OpManager

- Multi-vendor Network Monitoring
- Simple Installation & Setup
- Intuitive UI
- Complete Visibility
- Intelligent Detections
- Easy Resolutions
Network Engineer III
I am a Senior Network Engineer who has spent the last decade elbow deep in enterprise System Administration and Networking in the local government and energy sectors. I can usually be found trying to warm up behind the storage arrays in the datacenter.
Table of Contents
In this article, we will see how to install wireshark on Windows 10. If you are from computer networking background or aware of the concepts of networking then you might have heard many times about the concepts of OSI Layer or TCP Layer and the protocols used in each layer to transfer data from one place to another. But have you ever thought how cool it would be if you just able to capture that data and break it down for analysis and interpretation purposes so that it will help you in doing all kinds of network troubleshooting. Wireshark is the tool created just for that purpose. It is a tool used for understanding the data captured from network interface.
The captured data is interpreted and presented in individual packet form for analysis, all within Wireshark. As you probably already know, packets are the chunks of data streaming on a network. Chunks of data are also called frames, datagrams, packets, or segments depending on a particular context level you are talking about but just for understanding purpose we will refer it as packets. Wireshark is a network and protocol analyzer tool, free for download and can be easily installed and used on Linux and Windows based systems. Here we will the steps to install on Windows 10 System.
![How to Install Wireshark on Windows 10 [Step by Step]](https://www.cyberithub.com/wp-content/uploads/2022/10/installsha.jpg)
Also Read: How to Install FOXPRO Programming Software in Windows 10
Step 1: Prerequisites
a) You should have a running Windows 10 System.
b) You should have access to install software in the System.
c) You should have an active Internet connection.
Step 2: Download Wireshark
You need to visit official website and download wireshark for 64-bit Windows system using below highlighted link.
![How to Install Wireshark on Windows 10 [Step by Step] 2](https://www.cyberithub.com/wp-content/uploads/2022/10/dwireshark-e1666028303328.jpg)
Once you click on the download link, it will start downloading in your local system as shown below.
Step 3: Install Wireshark
Then double click on local downloaded installer to start the installation. It will first show you below setup wizard asking to make sure Wireshark is not running. Click Next to Continue.
![How to Install Wireshark on Windows 10 [Step by Step] 4](https://www.cyberithub.com/wp-content/uploads/2022/10/awireshark-e1666028506695.jpg)
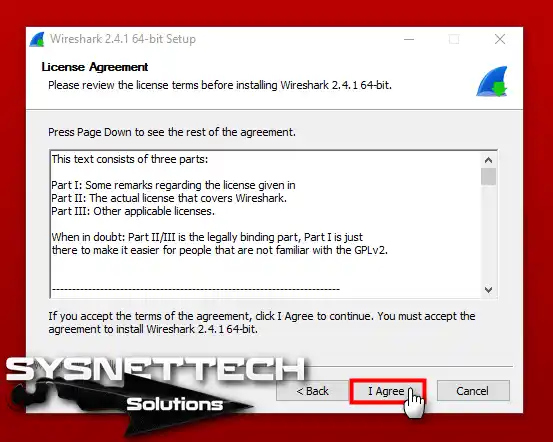
You will see below License Agreement. Please go through it and review all the License terms under this agreement before installing Wireshark. Click Noted to continue.
![How to Install Wireshark on Windows 10 [Step by Step] 5](https://www.cyberithub.com/wp-content/uploads/2022/10/cwireshark-e1666028592250.jpg)
You can select all the Wireshark features to install. Below are the main features available to install. You can select all the required features and then click on Next to continue.
![How to Install Wireshark on Windows 10 [Step by Step] 6](https://www.cyberithub.com/wp-content/uploads/2022/10/ewireshark-e1666030137922.jpg)
In additional tasks, you can choose to create shortcuts and associate file extensions from below. Once selected, Click Next to continue.
![How to Install Wireshark on Windows 10 [Step by Step] 7](https://www.cyberithub.com/wp-content/uploads/2022/10/fwireshark-e1666030842264.jpg)
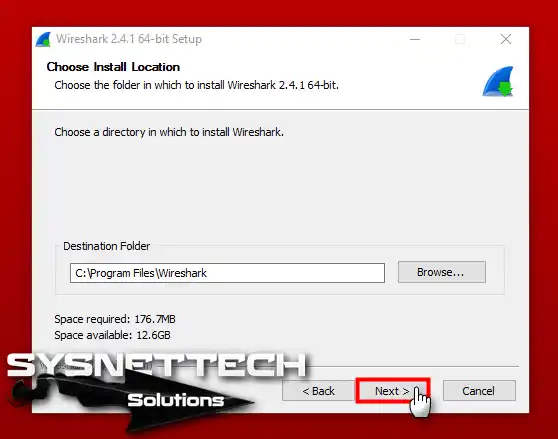
You need to choose the destination folder by browsing to the location where you need to install wireshark. By default, it will install under C:\Program Files\Wireshark folder as shown below. Once chosen, Click on Next to proceed.
![How to Install Wireshark on Windows 10 [Step by Step] 8](https://www.cyberithub.com/wp-content/uploads/2022/10/gwireshark-e1666030903604.jpg)
To capture live network data, Wireshark requires either Npcap or WinPcap to be installed or else by default it will install Npcap in your System. If you would like to install this program then just click on Next. Otherwise, you need to unselect and then click on Next.
![How to Install Wireshark on Windows 10 [Step by Step] 9](https://www.cyberithub.com/wp-content/uploads/2022/10/hwireshark-e1666030975700.jpg)
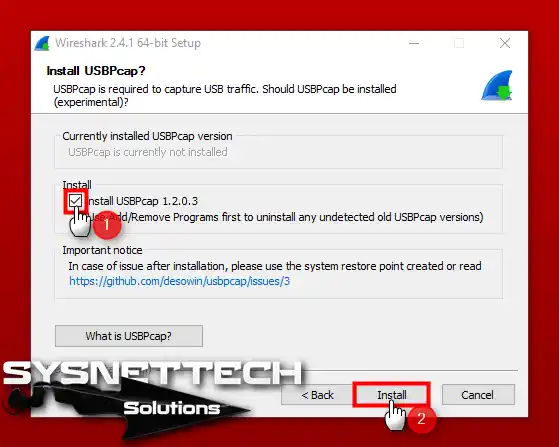
Similarly, for capturing USB traffic, wireshark needs to install USBPcap tool in your System. It won’t be selected by default, so you need to select it manually in case you want to install this tool. Then Click on Install.
![How to Install Wireshark on Windows 10 [Step by Step] 10](https://www.cyberithub.com/wp-content/uploads/2022/10/iwireshark-e1666031047543.jpg)
You can see that Wireshark installation will be started as shown below.
![How to Install Wireshark on Windows 10 [Step by Step] 11](https://www.cyberithub.com/wp-content/uploads/2022/10/jwireshark-e1666031127360.jpg)
Once the installation started, you will see below Npcap screen popped up where you will be asked to select below option. Once done, click on Install to complete the installation of this tool first.
![How to Install Wireshark on Windows 10 [Step by Step] 12](https://www.cyberithub.com/wp-content/uploads/2022/10/ncap-e1666031589219.jpg)
You can track the progress of Npcap installation from below wizard screen.
![How to Install Wireshark on Windows 10 [Step by Step] 13](https://www.cyberithub.com/wp-content/uploads/2022/10/ncapa-e1666031664465.jpg)
After a while you will see the installation of wireshark is completed as shown below. Click on Next to continue.
![How to Install Wireshark on Windows 10 [Step by Step] 14](https://www.cyberithub.com/wp-content/uploads/2022/10/kwireshark-e1666031837120.jpg)
Finally, you need to click on Finish to exit the wireshark setup wizard.
![How to Install Wireshark on Windows 10 [Step by Step] 15](https://www.cyberithub.com/wp-content/uploads/2022/10/lwireshark-e1666031913752.jpg)
Step 4: Launch Wireshark
After successful installation, the first launch of wireshark should look like below. You need to select the ethernet interface from where you need to capture the packets.
![How to Install Wireshark on Windows 10 [Step by Step] 16](https://www.cyberithub.com/wp-content/uploads/2022/10/launchwi-e1666032037888.jpg)
Here we are selecting wi-fi interface and then clicking on start capture to capture the packets from this interface as shown below.
![How to Install Wireshark on Windows 10 [Step by Step] 17](https://www.cyberithub.com/wp-content/uploads/2022/10/capture-e1666032216292.jpg)
You will see all the live packets getting captured as shown below. To stop the capture, you need to click on Stop button from the toolbar.
![How to Install Wireshark on Windows 10 [Step by Step] 18](https://www.cyberithub.com/wp-content/uploads/2022/10/scapture-e1666032320986.jpg)
The official Windows packages can be downloaded from the Wireshark main page or the download page.
Installer names contain the version and platform.
For example, Wireshark-4.5.0-x64.exe installs Wireshark 4.5.0 for Windows on 64-bit Intel processors.
The Wireshark installer includes Npcap which is required for packet capture.
Windows packages automatically update.
See Section 2.8, “Updating Wireshark” for details.
Simply download the Wireshark installer from https://www.wireshark.org/download.html and execute it.
Official packages are signed by Wireshark Foundation.
You can choose to install several optional components and select the location of the installed package.
The default settings are recommended for most users.
2.3.1. Installation Components
On the Choose Components page of the installer you can select from the following:
- Wireshark — The network protocol analyzer that we all know and mostly love.
-
TShark — A command-line network protocol analyzer. If you haven’t tried it
you should. -
External Capture (extcap) — External Capture Interfaces
- Androiddump — Provide capture interfaces from Android devices.
- Etwdump — Provide an interface to read Event Tracing for Windows (ETW) event trace (ETL).
- Randpktdump — Provide an interface to the random packet generator. (see also randpkt)
- Sshdump, Ciscodump, and Wifidump — Provide remote capture through SSH. (tcpdump, Cisco EPC, wifi)
- UDPdump — Provide capture interface to receive UDP packets streamed from network devices.
2.3.2. Additional Tasks
- Wireshark Start Menu Item — Add a shortcut to the start menu.
- Wireshark Desktop Icon — Add a Wireshark icon to the desktop.
- Associate trace file extensions with Wireshark — Associate standard network trace files to Wireshark.
2.3.3. Install Location
By default Wireshark installs into %ProgramFiles%\Wireshark on 32-bit Windows
and %ProgramFiles64%\Wireshark on 64-bit Windows. This expands to C:\Program on most systems.
Files\Wireshark
2.3.4. Installing Npcap
The Wireshark installer contains the latest Npcap installer.
If you don’t have Npcap installed you won’t be able to capture live network
traffic but you will still be able to open saved capture files. By default the
latest version of Npcap will be installed. If you don’t wish to do this or if
you wish to reinstall Npcap you can check the Install Npcap box as needed.
For more information about Npcap see https://npcap.com/ and
https://wiki.wireshark.org/Npcap.
2.3.5. Windows installer command line options
For special cases, there are some command line parameters available:
-
/Sruns the installer or uninstaller silently with default values. The
silent installer will not install Npcap. -
/desktopiconinstallation of the desktop icon,=yes— force installation,
=no— don’t install, otherwise use default settings. This option can be
useful for a silent installer. -
/Dsets the default installation directory ($INSTDIR), overriding InstallDir
and InstallDirRegKey. It must be the last parameter used in the command line
and must not contain any quotes even if the path contains spaces. -
/NCRCdisables the CRC check. We recommend against using this flag. -
/EXTRACOMPONENTScomma separated list of optional components to install.
The following extcap binaries are supported.-
androiddump— Provide interfaces to capture from Android devices -
ciscodump— Provide interfaces to capture from a remote Cisco router through SSH -
randpktdump— Provide an interface to generate random captures using randpkt -
sshdump— Provide interfaces to capture from a remote host through SSH using a remote capture binary -
udpdump— Provide a UDP receiver that gets packets from network devices
-
Example:
> Wireshark-4.2.5-x64.exe /NCRC /S /desktopicon=yes /D=C:\Program Files\Foo

> Wireshark-4.2.5-x64.exe /S /EXTRACOMPONENTS=sshdump,udpdump
Running the installer without any parameters shows the normal interactive installer.
2.3.6. Manual Npcap Installation
As mentioned above, the Wireshark installer also installs Npcap.
If you prefer to install Npcap manually or want to use a different version than the
one included in the Wireshark installer, you can download Npcap from
the main Npcap site at https://npcap.com/.
2.3.7. Update Npcap
Wireshark updates may also include a new version of Npcap.
Manual Npcap updates instructions can be found on the Npcap web
site at https://npcap.com/. You may have to reboot your machine after installing
a new Npcap version.
2.3.8. Uninstall Wireshark
You can uninstall Wireshark using the Programs and Features control panel.
Select the “Wireshark” entry to start the uninstallation procedure.
The Wireshark uninstaller provides several options for removal. The default is
to remove the core components but keep your personal settings and Npcap.
Npcap is kept in case other programs need it.
2.3.9. Uninstall Npcap
You can uninstall Npcap independently of Wireshark using the Npcap entry
in the Programs and Features control panel. Remember that if you uninstall
Npcap you won’t be able to capture anything with Wireshark.
Knowing network traffic is crucial in today’s digital world. For this reason, we need the right tools to keep things secure and efficient. One example is Wireshark, a potent tool for analyzing network data. With this software, we can closely examine the data moving through our network.
In this article, I will show you how to install Wireshark on Windows 10 and 11. This way, you can quickly watch and check your network traffic. Also, you can improve your security by finding LAN problems.

Wireshark is a network analysis tool that checks all incoming and outgoing IP packets. It works on any internet-connected interface. So, it helps you quickly monitor network traffic.
No matter what your operating system is, downloading Wireshark is easy. Installing it is also simple and fast, so you can set up the program quickly.
After installing the packet analyzer software on Windows 10 and 11, you can analyze data, filter network protocols like USB, Bluetooth, and Ethernet, and make data transfer easier.
It helps you find problems in your LAN quickly. Also, you can check web activities. That is, you can spot leaks easily.
The Wireshark packet sniffer improves your network security. It also works with Windows, Linux, MacOS, and other systems. So, it ensures easy use on different platforms.
The software is open-source, so its code is free to access. Developers can change, improve, and adjust it to their needs. It also gives you the freedom to meet your personal needs. Thus, users can adjust it as needed.
Stage 1: How to Download Wireshark for Windows 11 & 10
Ensure your processor speed is 1 GHz or higher. You also need 300-500 MB of free disk space. Thus, 1 GB or 2 GB of memory is required.
Now, you can start installing the packet analyzer software on your system.
Step 1
To download the setup file, check your PC’s OS. So, choose the version that fits you.
Step 2
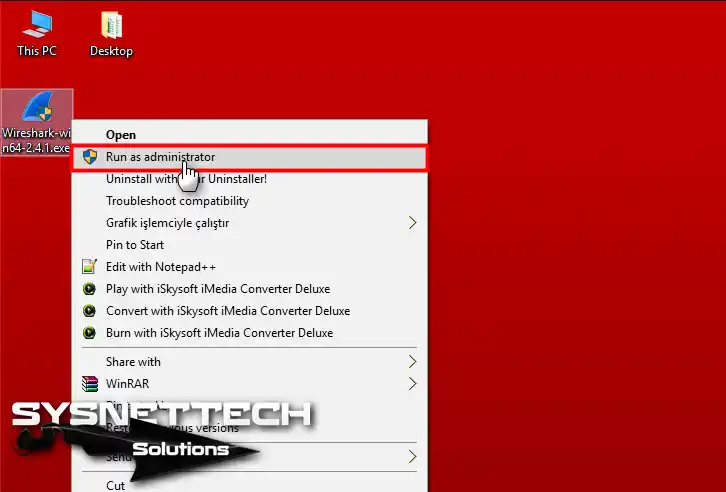
Now, find the EXE file on your PC and right-click on it. After that, you can choose “Run as administrator” from the popup menu. That is, this gives the app the permissions it needs to work correctly.
Stage 2: Run the Wireshark Setup File
Step 1
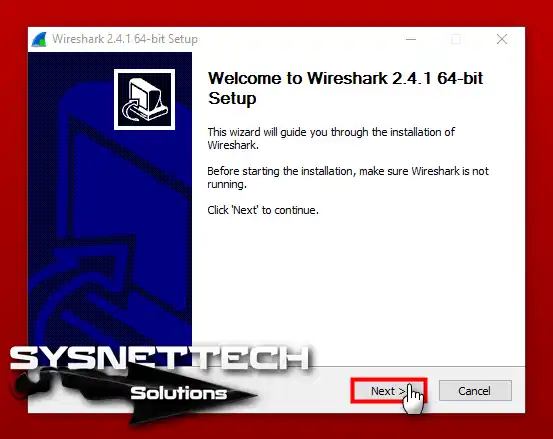
To start installing, find the Wireshark setup file and double-click it. When it opens, click “Next” to continue with the steps.
Step 2
Please read the packet analyzer app’s license text carefully and accept the terms.
Step 3
The Choose Components screen selects tools by default. But pick the right options to continue.

Step 4
In the Select Additional Tasks window, change the shortcuts you need. Also, set up file extension diagnostics on your PC.

Step 5
On the Choose Install Location screen, keep the default location. Thus, the setup will work correctly and continue.
Stage 3: Install WinPcap & USBPcap
Step 1
WinPcap is the most essential tool in this software. We recommend installing it, so select the Install WinPcap option in this window and hit Next.

Step 2
The USBPcap software is needed to capture USB devices. If you want to install it, select the Install USBPcap option to continue.
Step 3
Please wait while the installation starts and the required files for the app are extracted.

Step 4
Click the Next button to install the WinPcap software.
Step 5
Click “I Agree” to accept the WinPcap license agreement.
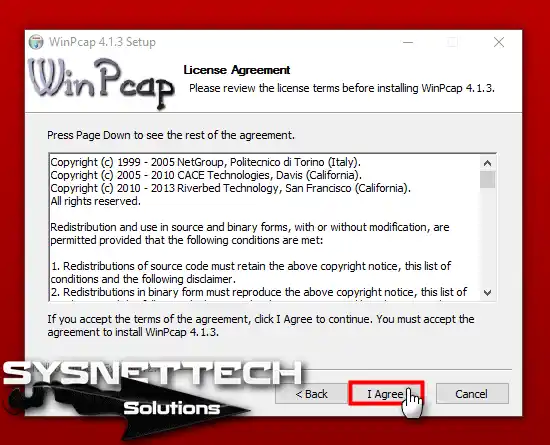
Step 6
Choose the option to start the WinPcap driver when your computer starts.

Step 7
When the WinPcap installation is done, click Finish to start the USBPcap installation.

Step 8
Accept the USBPcap driver’s license agreement.
Step 9
Accept the USBPcapCMD license and proceed to the installation.
Step 10
Keep the USBPcap installation options as they are and continue with the installation.

Step 11
Start the USBPcap by following the setup steps.
Step 12
After the installation is complete, the wizard will keep going to finish the setup.

Stage 4: Completing Wireshark Setup
Step 1
Wait while the network analysis program copies the needed files to your system.
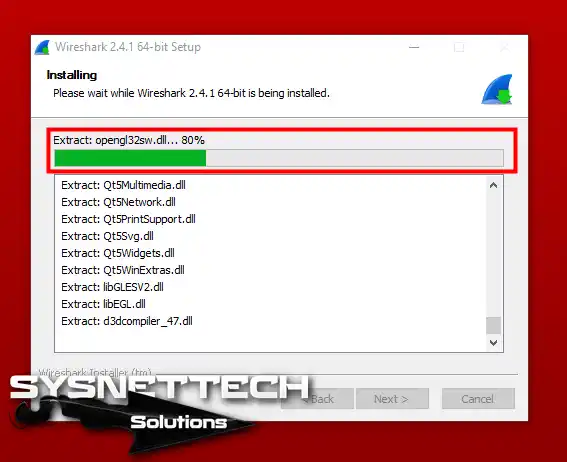
Step 2
After completing the installation, press Next to move to the next phase.

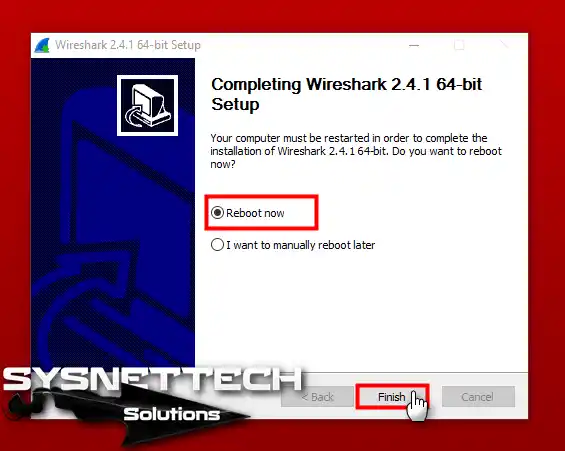
Step 3
Once the steps are finished, it is a good idea to restart your PC to make sure the changes work.
How to Use Wireshark in Windows 10 & 11
Step 1
After restarting your computer, open the network control program. The first screen will appear. Here, select the LAN card connected to your network. In short, this will allow you to analyze LAN and WAN traffic.
Provided you are utilizing a Wifi adapter for Internet connectivity, access the adapter by double-clicking on it.

Step 2
While using the Internet, the program checks IP packets. Also, it reports the results as follows.

Step 3
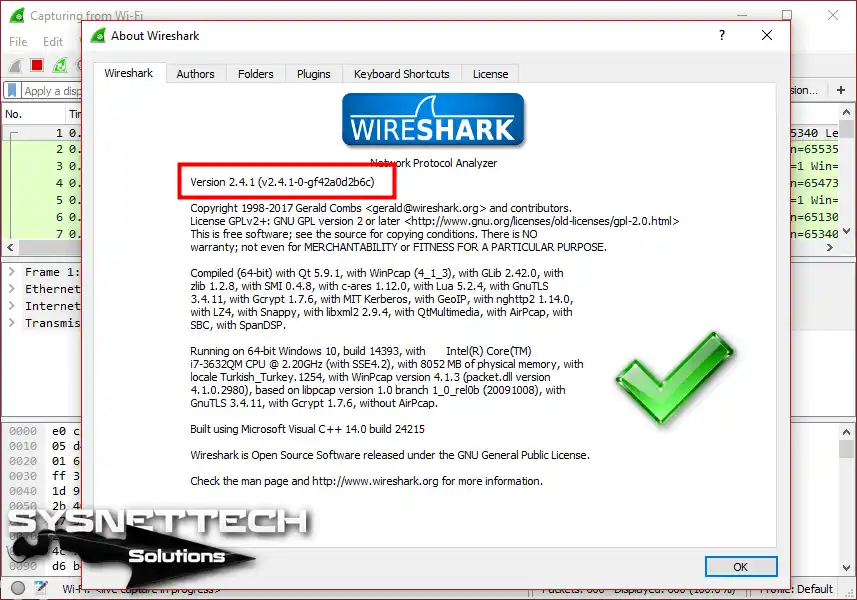
You can check the version of the program on your computer by going to Help / About.
Video
Frequently Asked Questions (FAQ)
- On which platforms can I use Wireshark?
You can run the Wireshark program on Windows, macOS, and different Linux versions. You can also choose a version that works with your system.
- How do I download Wireshark?
Of course, you can download it from its official website at wireshark.org. To do this, go to the download section and select the installer for your OS.
- Are there any special system requirements for Wireshark?
Yes, Wireshark requires minimum system requirements to run correctly. Usually, Windows 10 or later, with at least 2 GB RAM, is sufficient. For macOS systems, you should have enough disk space and version 10.12 or later. Most Linux distributions support this software. You should check your specific requirements according to your distribution version.
- How do I install Wireshark on Windows?
To install it on Windows, download the .exe file from wireshark.org. Then, run the file and follow the steps in the setup guide. You can also install extra tools like WinPcap or Npcap. When done, finish the installation and open it from the Start menu.
- Do I need administrative privileges?
Yes, you usually need admin rights to install this software. You also need permission to install WinPcap or Npcap libraries. So, you should have the same permissions for Linux OS.
Conclusion
As a result, you can easily install Wireshark on your Microsoft OS and start checking your network. Also, you can do a detailed check to improve your system’s security.
By following our guide, you have taken the necessary steps to check your LAN traffic. This way, you can fix problems and analyze the data flow with this software.
As a result, you can protect your network from security risks. You will also make smart network decisions while exploring its features. Also, look out for future articles on its advanced uses and features!