
winget is an open-source Windows package manager designed by Microsoft for Windows 10 and Windows 11. The client installs and manages applications using a CLI, similar to the apt package manager in Linux.
In this tutorial, you will learn to install and use the winget package manager for Windows.
Prerequisites
- A computer running Windows 10 or 11.
- Administrator privileges.
- A network connection.
How to Install winget
There are two ways to install winget:
- From the Microsoft Store.
- Manually, using a package installer from GitHub.
Note: The winget client requires Windows 10 1809 (build 17763) or newer. Windows Server 2019 isn’t supported because the Microsoft Store and other dependencies are not available for Windows Server.
If you are already running Windows 10 1809 or newer, the client may already be available on your system. Check if winget is available by invoking the winget command in the Command Prompt or PowerShell:
1. Open the Windows Start menu, type powershell, and press Enter.
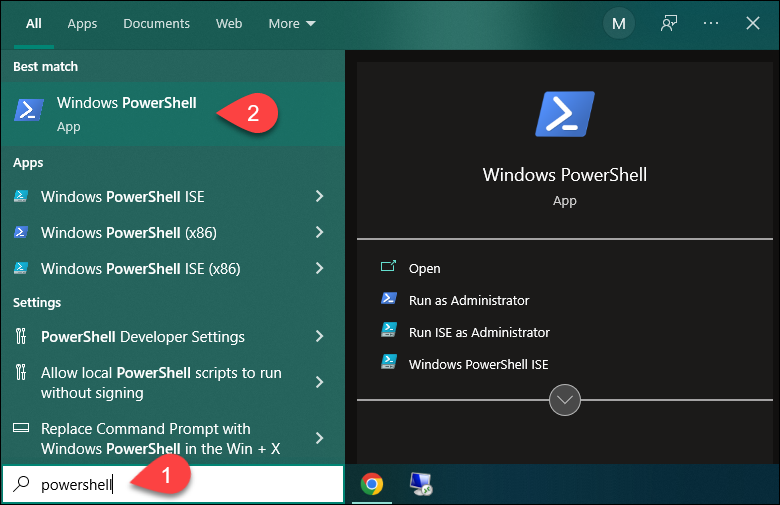
2. In the PowerShell, run winget to check if the app is installed:

In the example above, invoking the command states that winget is not recognized, which means it isn’t installed on the system.
Method 1: Install winget via Microsoft Store
Follow the steps below to install winget from the Microsoft Store:
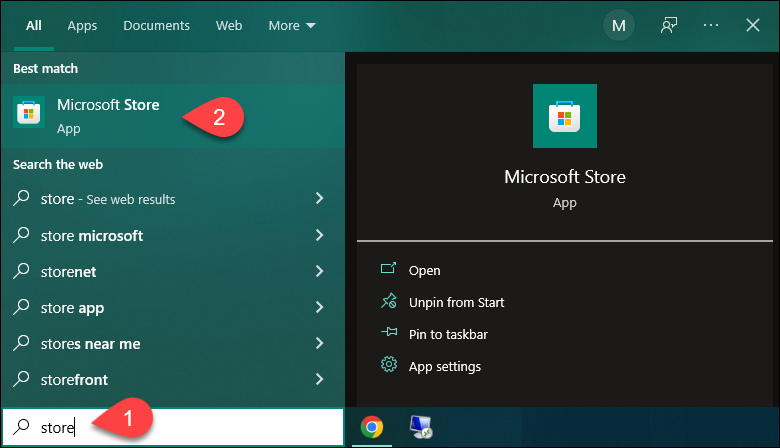
1. Open the Windows Start menu, type store, and press Enter to open the Microsoft Store app.
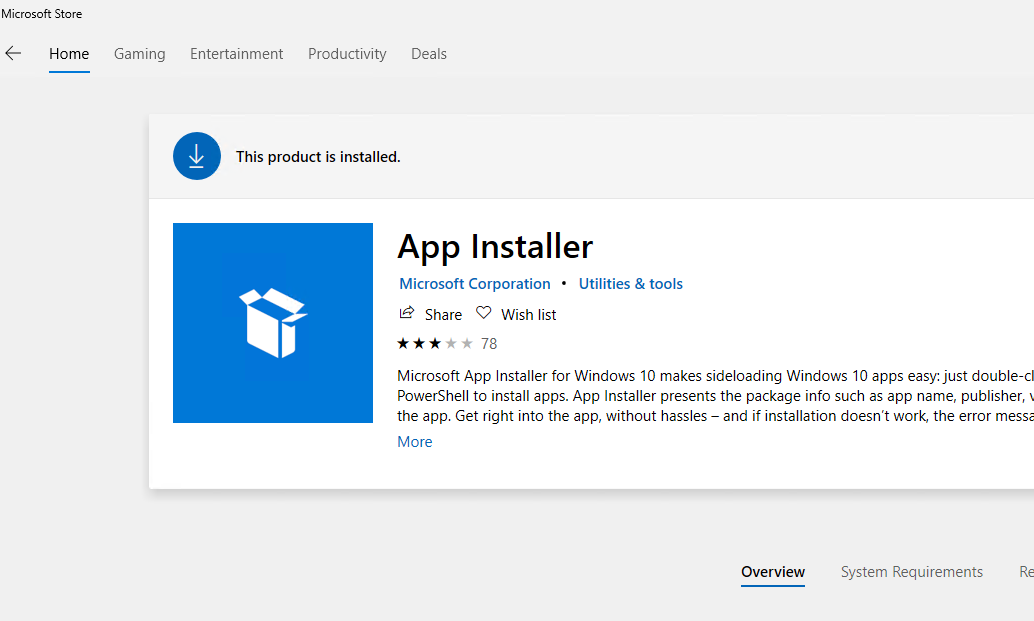
2. In the search bar, type winget and press Enter. In the results, click the App Installer application.
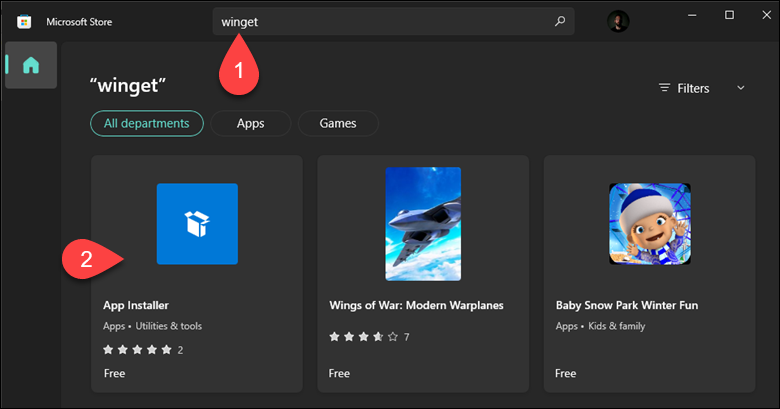
Note: The winget client is distributed within the App Installer package.
3. On the App Installer page, click Get to install the app.
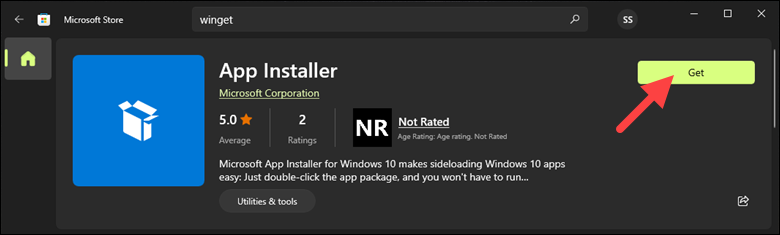
Wait for the installation to finish.
4. Verify the installation by invoking winget in Windows PowerShell or the Command Prompt:

The command prints the program version, syntax, and available options.
Method 2: Install winget via GitHub
Another way to install winget is by downloading the installer from GitHub. Follow the steps below:
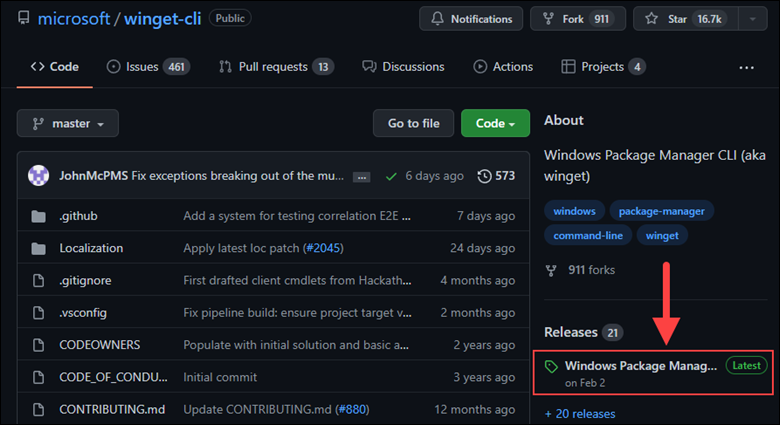
1. Navigate to the winget GitHub page.
2. Under the Releases section, click the latest available release.
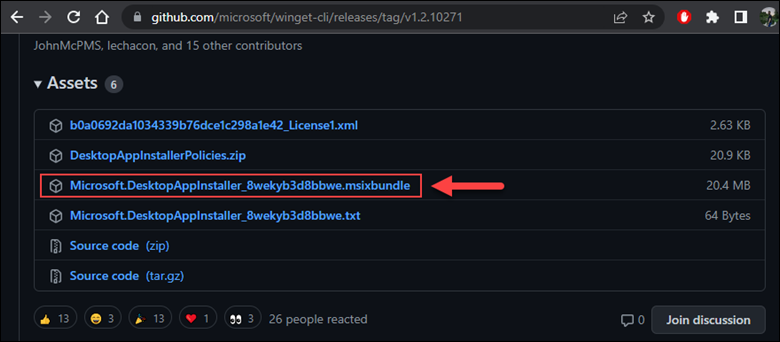
3. On the Version page, scroll down to the Assets section and click the .msixbundle file to start the download.
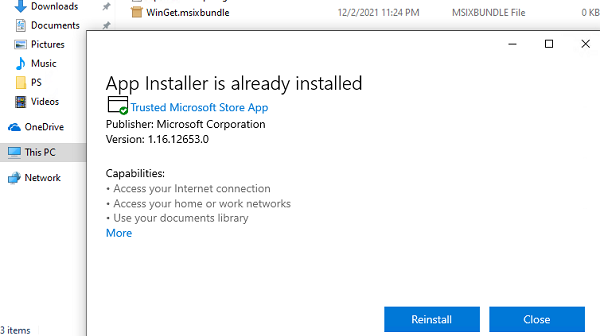
4. Run the downloaded file and click Update:
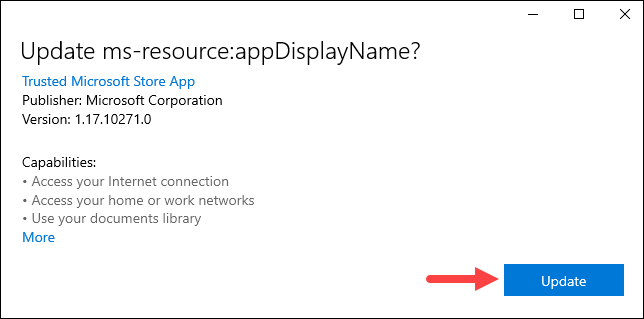
Wait for the installation process to finish. The app may automatically install additional dependencies required for winget to work.
5. Verify the installation by running winget in PowerShell or Command Prompt.
How to Use winget
The winget client allows you to search, install, update, and remove packages. This section shows how to manage packages with winget.
The first time you use winget, a prompt appears asking if you agree to Microsoft’s transaction terms. This is because the Microsoft Store repository requires your geographic region to function correctly.
Read the terms, and if you agree, type y and press Enter to confirm.
Install Packages
Install a package with winget using the following syntax:
winget install [package_name]For [package_name], specify the exact application ID. In the following example, we instruct winget to install Notepad++, and winget prompts for the app ID since Notepad++ is available in two repositories.

After specifying the exact application ID, winget automatically downloads and installs Notepad++.

Search for Packages
Use winget to search for available packages in the public Windows Package Manager Community repository or in the Microsoft Store. The syntax is:
winget search [package_name]In the following example, we search for the MySQL server:
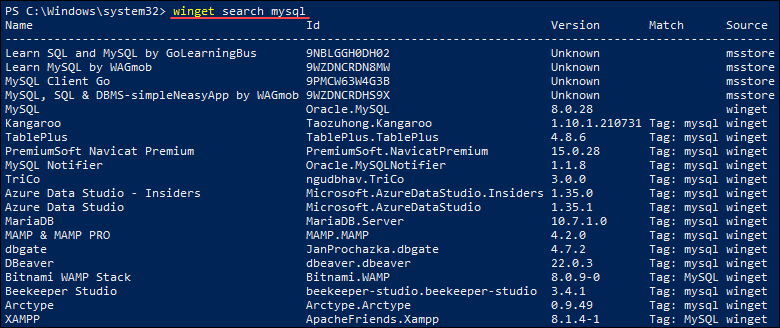
The output is a list of all available packages containing the mysql keyword.
Show Package Details
Display information about installed packages using the following command:
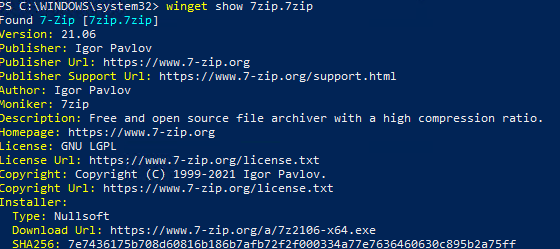
winget show [package_name]For example:
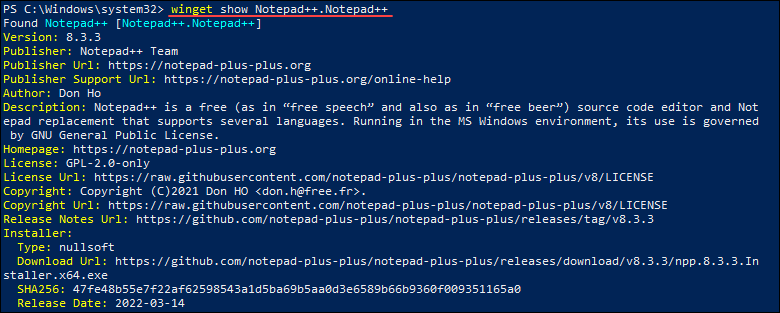
The output shows the specified app information, including the program version, publisher, author, and program description.
Manage Sources
winget installs packages from online repositories. The two official winget repositories are:
msstore. The Microsoft Store repository.winget. Thewingetsoftware repository maintained by Microsoft.
Use the winget source command to add, remove, list, or update the repositories.
1. List Repositories
See which repositories winget is using by running:
winget source list
The output shows a list of repositories currently in use.
2. Add Repository
Add a third-party repository to winget using the add subcommand. The syntax is:
winget source add --name [name] [url]For [name], specify the name you want for the repository, and for [url], specify the repository URL.
For example:

In this example, we have added the official winget repository.
3. Update Repositories
Force an update to the existing repositories using the update subcommand. Run:
winget source update
The command updates the existing repositories with the latest package information.
4. Remove a Repository
Remove a repository from winget using the remove subcommand. The syntax is:
winget source remove --name [name]For example:

The specified repository is automatically removed.
5. Reset winget Sources
Use the reset --force subcommand to reset winget back to its original configuration, removing all third-party repositories and setting the sources to the default ones.
For example:
winget source reset --forceList Packages
See a list of all installed packages using the list option. Run:
winget list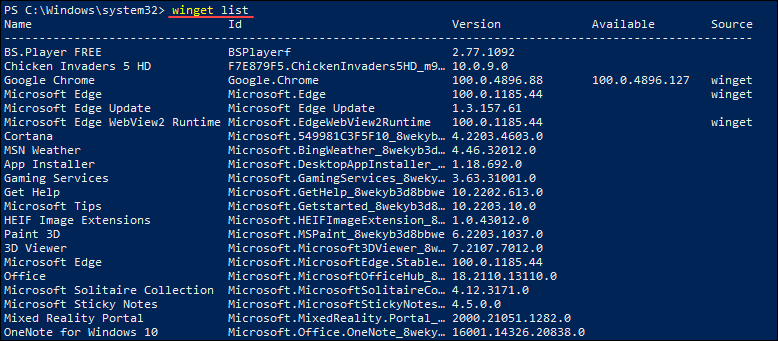
In the example above, the output includes the list of installed applications, including the application ID, version, and available updates.
Uninstall Packages
Uninstall an application using the uninstall option. The syntax is:
winget uninstall package_nameFor example:

Conclusion
This tutorial showed how to install and use the winget package manager on Windows. Use winget to automate package management, installation, and configuration, while keeping your apps up to date and system secure.
Was this article helpful?
YesNo

Install WinGet from PowerShell
WinGet, a command line package manager, doesn’t have a command line installer? 🤣 Now it does! 😊
Note
What’s New?
- Addded
-AlternateInstallMethodoptional parameter to force previous method of installation before use ofRepair-WinGetPackageManager.
Table of Contents
- Requirements
- Features
- Script Functionality
- Setup
- Method 1 — PowerShell Gallery
- Usage
- Method 2 — One Line Command (Runs Immediately)
- Option A: asheroto.com short URL
- Option B: WinGet.pro short URL
- Option C: direct release URL
- Method 3 — Download Locally and Run
- Method 1 — PowerShell Gallery
- Parameters
- Example Parameters Usage
- Global Variables
- Example Global Variables Usage
- Troubleshooting
- Contributing
Requirements
- Requires PowerShell running with Administrator privileges — OR — execution under the SYSTEM context
- Compatible with:
- Windows 10 (Version 1809 or higher)
- Windows 11
- Server 2019/2022
- Windows Sandbox
- Not compatible with:
- Server 2016 or lower (WinGet not supported)
Features
- Installs WinGet directly from PowerShell
- Always fetches the latest WinGet version
- Automatically verifies OS compatibility
- Determines and installs the appropriate prerequisites based on OS version
- Supports x86/x64 and arm/arm64 architectures
- Allows bypassing of existing WinGet installation verification through
-Forceparameter or$Forcesession variable - Supports irm/iex one-line command using short URL
- Supports automatically relaunching in
conhostand ending active processes associated with WinGet that could interfere with the installation - Code is hosted on PowerShell Gallery
- Supports running under the SYSTEM context
Script Functionality
- Identifies processor architecture to decide which prerequisites are needed (x86/x64 or arm/arm64)
- Checks Windows OS version for compatibility (Windows 10, Windows 11, Server 2019/2022)
- If Windows 10, verifies release ID for compatibility (must be 1809 or newer)
- All OSes except Server 2019
- Installs the NuGet package provider for PowerShell Gallery (if not already present)
- Installs the Microsoft.WinGet.Client from PowerShell Gallery
- Runs
Repair-WinGetPackageManager -AllUserswhich actually installs WinGet and its dependencies, fixing any issues along the way
- Server 2019 only
- Uses the UI.Xaml and VCLibs as recommended by Microsoft
- The WinGet-cli license is downloaded using the latest version from GitHub
- Installs Visual C++ Redistributable if version 14 or higher is not already installed
- WinGet-cli is then installed using the latest version from GitHub
- Adjust access rights & PATH environment variable
- Runs command registration if the WinGet command is not detected at the end of installation
Setup
Method 1 — PowerShell Gallery
This is the recommended method, because it always gets the public release that has been tested, it’s easy to remember, and supports all parameters.
Open PowerShell as Administrator and type
Install-Script winget-install -Force
Follow the prompts to complete the installation (you can tap A to accept all prompts or Y to select them individually.
Note: -Force is optional but recommended, as it will force the script to update if it is outdated. If you do not use -Force, it will not overwrite the script if outdated.
Usage
If WinGet is already installed, you can use the -Force parameter to force the script to run anyway.
The script is published on PowerShell Gallery under winget-install.
Method 2 — One Line Command (Runs Immediately)
The URL asheroto.com/winget always redirects to the latest code-signed release of the script.
If you just need to run the basic script without any parameters, you can use the following one-line command:
Option A: asheroto.com short URL
irm asheroto.com/winget | iex
Due to the nature of how PowerShell works, you won’t be able to use any parameters like -Force with this command line. You can set the global variable $Force to $true and the script should pick up on it (more info), but if for some reason that doesn’t work or you absolutely need to use a one-line command with parameters, you can use the following:
&([ScriptBlock]::Create((irm asheroto.com/winget))) -Force
Option B: WinGet.pro short URL
To make it easier to remember, you can also use the URL WinGet.pro which redirects to the same URL. This URL is provided courtesy of Omaha Consulting.
Due to the nature of how PowerShell works, you won’t be able to use any parameters like -Force with this command line. You can set the global variable $Force to $true and the script should pick up on it (more info), but if for some reason that doesn’t work or you absolutely need to use a one-line command with parameters, you can use the following:
&([ScriptBlock]::Create((irm winget.pro))) -Force
Option C: direct release URL
Alternatively, you can of course use the latest code-signed release URL directly:
irm https://github.com/asheroto/winget-install/releases/latest/download/winget-install.ps1 | iex
Method 3 — Download Locally and Run
As a more conventional approach, download the latest winget-install.ps1 from Releases, then run the script as follows:
You can use the -Force or -ForceClose parameters if needed, or use $Force = $true and $ForceClose = $true global session variables if preferred.
Tip
If for some reason your PowerShell window closes at the end of the script and you don’t want it to, or don’t want your other scripts to be interrupted, you can wrap the command in a powershell "COMMAND HERE". For example, powershell "irm asheroto.com/winget | iex".
Note
On Windows 11 IoT, you may need to run the following command. Unlike other editions that may prompt about Execution Policy, IoT might not:
powershell -ep B "irm asheroto.com/winget | iex"
Parameters
No parameters are required to run the script, but there are some optional parameters to use if needed.
| Parameter | Description |
|---|---|
-Debug |
Enables debug mode, showing additional information for troubleshooting. |
-Force |
Ensures the installation of WinGet and its dependencies, even if they are already present. |
-ForceClose |
If Windows Terminal has trouble installing WinGet, use this parameter to relaunch the script in conhost.exe and automatically end any active processes associated with WinGet that could interfere with the installation. |
-AlternateInstallMethod |
Alternate installation method if primary installation method fails. |
-CheckForUpdate |
Checks if there is an update available for the script. |
-Wait |
By default, the script exits immediately after completion. Although this is not supposed to close the PowerShell window, sometimes it still occurs. Use this parameter to pause the script for several seconds before exiting to observe the output. |
-NoExit |
By default, the script exits immediately after completion. Although this is not supposed to close the PowerShell window, sometimes it still occurs. Use this parameter to pause the script indefinitely after execution; pressing Enter will exit the script. |
-UpdateSelf |
Updates the script to the latest version. |
-Version |
Displays the version of the script. |
-Help |
Displays the full help information for the script. |
Example Parameters Usage
Global Variables
Global variables are optional and are only needed if you don’t want to use parameters. They can be set before running the script, or you can set them in your PowerShell profile to always use them.
| Variable | Description |
|---|---|
$Debug |
Enables debug mode, which shows additional information for debugging. |
$Force |
Ensures installation of WinGet and its dependencies, even if already present. |
$ForceClose |
Windows Terminal sometimes has trouble installing WinGet; run the script with the -ForceClose parameter to relaunch the script in conhost.exe and automatically end active processes associated with WinGet that could interfere with the installation |
Example Global Variables Usage
$Force = $true
winget-install
Troubleshooting
- Before releasing a new version, the script is tested on a clean install of Windows 10 22H2, Server 2022 21H2, and Windows 11 22H2.
- If you run into an issue, please ensure your system is compatible & fully updated.
- Sometimes PowerShell closes the window before you can read the output. To prevent this, you can use the
-Waitparameter to pause the script for a few seconds or the-NoExitparameter to keep the window open indefinitely. Improving script exit functionality is on our TODO list. - Try running
winget-installagain, sometimes the script will fail due to a temporary issue with the prerequisite server URLs. - Try using the
-Debugparameters to see if it provides any additional information. - If you’re getting a
resource in useerror message, run the script again with the-ForceCloseparameter. - Try installing WinGet manually to see if the issue exists with WinGet itself.
- If the issue occurs when installing WinGet manually, please open an issue on the WinGet-cli repo (unrelated to this script).
- Check the WinGet-cli Troubleshooting Guide.
- If the problem only occurs when using this script, please open an issue here.
Contributing
If you’d like to help develop this project: fork the repo, edit the code, then submit a pull request. 😊
В Windows 10 и 11 появился собственный встроенный менеджер пакетов WinGet (Windows Package Manager), который можно использовать для установки приложений из командной строки (по аналогии с пакетными менеджерами Linux, например yum, dnf, apt и т.д.).
WinGet.exe
это консольная утилита, которая позволяет упростить установку программ в Windows. Благодаря winget, вам не нужно искать официальные сайты, скачивать установочные файлы, и устанавливать программы вручную. С помощью Windows Package Manager вы можете установить любую программу из репозитория с помощью всего одной команды.
Содержание:
- Установка менеджера пакета WinGet в Windows 10
- Установка программ в Windows с помощью WinGet
- Winstall – графической интерфейс для менеджера пакетов WinGet
- WinGet: Обновление и удаление программ в Windows
- Экспорт и импорт установленных приложений на другие компьютеры
Установка менеджера пакета WinGet в Windows 10
Менеджер пакетов WinGet можно установить в Windows 10, начиная с билда 1709. В актуальных билдах Windows 11 21H2 и Windows 10 21H1 winget уже встроен в образ.
Чтобы проверить, установлен ли winget на вашем компьютере, откройте консоль PowerShell и выполните команды:
Get-AppPackage *Microsoft.DesktopAppInstaller*|select Name,PackageFullName
В нашем случае winget (имя UWP приложения Microsoft.DesktopAppInstaller) установлен.

Winget поддерживается только для десктопных версий Windows (10 и 11). Для Windows Server 2022 winget официально не поддерживается, но может быть установлен в экспериментально режиме.
Вы можете установить WinGet через Microsoft Store (там он называется App Installer) по ссылке https://www.microsoft.com/en-us/p/app-installer/9nblggh4nns1#activetab=pivot:overviewtab
Для установки Winget на вашем компьютере должен работать MS Store (если Microsoft Store удален или поврежден, можно восстановить его).
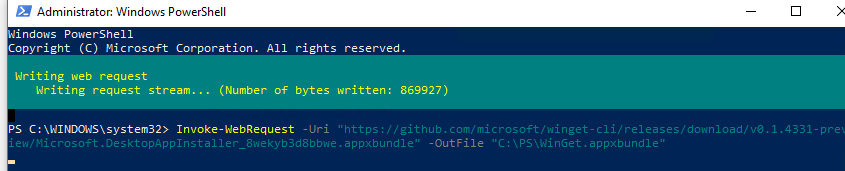
Также вы можете установить winget вручную через PowerShell (если вы удаляли предустановленные приложения). Для этого нужно с помощью PowerShell скачать msixbundle файл winget с GitHub (https://github.com/microsoft/winget-cli/releases) и установить его (на момент написания статьи доступна версия Windows Package Manager v1.1.12653):
Invoke-WebRequest -Uri "https://github.com/microsoft/winget-cli/releases/download/v1.1.12653/Microsoft.DesktopAppInstaller_8wekyb3d8bbwe.msixbundle" -OutFile "C:\PS\WinGet.msixbundle"
Add-AppxPackage "C:\PS\WinGet.msixbundle"
Также можно скачать и установить пакет WinGet вручную:
Проверьте установленную версию winget командой:
winget --version
Основные команды winget:
-
winget install <пакет>
— установка пакета -
winget uninstall <пакет>
— удаление пакета -
winget upgrade
– обновление пакета программы -
winget list
– вывести установленные пакеты -
winget show < пакет >
— показать информацию о пакете -
winget source < опции >
— управление репозиториями пакетов -
winget search < поисковая строка >
— поиск пакетов в репозиториях -
winget export
– экспорт списка установленных программ в файл -
winget import
– установка программ (пакетов) по списку в файле -
winget hash < пакет >
— получить хэш установщика пакета -
winget validate < пакет >
— проверить файл манифеста

Настройки winget хранятся в файле settings.json (в «C:\Users\%username%\AppData\Local\Packages\Microsoft.DesktopAppInstaller_8wekyb3d8bbwe\LocalState»). Вы можете изменить настройки Winget с помощью команды:
winget settings
Установка программ в Windows с помощью WinGet
Для установки программ с помощью менеджера пакета WinGet используются онлайн репозитории. Их список можно вывести командой:
winget source list
По умолчанию в WinGet доступны два официальных репозитория WinGet:
- msstore — репозиторий Microsoft Store
- winget (https://winget.azureedge.net/cache) репозиторий программ, поддерживаемый Microsoft
Вы можете подключить стороннни репозитории в WinGet. Добавить другие источники можно с помощью команды
winget source
.
Прежде чем установить программу из репозитория WinGet, нужно узнать имя пакета. Для поиска пакетов используется команда search. Например, чтобы найти zip архиваторы во всех доступных репозиториях, выполните команду:
winget search zip
Если вы хотите искать программу только в репозитории Microsoft Store, выполните:
winget search zip -s msstore
Команда вернет список пакетов (с названиями и версиями), соответствующих вашему запросу. Обратите внимание на столбец Source. В нем указан репозиторий, в котором найден пакет.

Можно получить информацию о конкретном пакете:
winget show 7zip.7zip
В репизитории может хранится несколько версий пакета, чтобы показать список доступных версий пакета, выполните:
winget show 7zip.7zip --versions
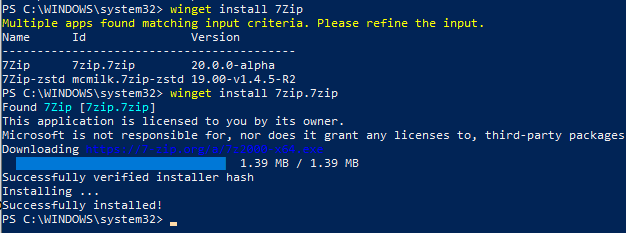
Например, вы хотите установить архиватор 7zip. Скопируйте его имя или ID и выполните команду установки:
winget install 7zip.7zip
По-умолчанию устанавливается последняя доступная версия программы. Можно установить определенную версию пакета:
winget install 7zip.7zip -v 21.05
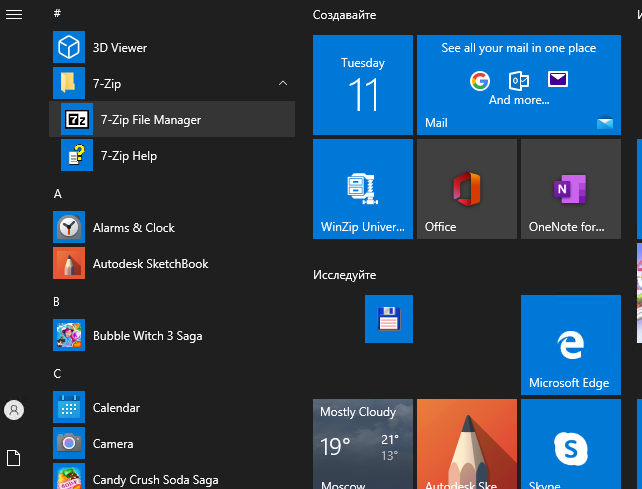
Как вы видите, менеджер пакетов WinGet автоматически скачал и установил приложение. Всего одной командой. Программа появилась в списке установленных программ в стартовом меню Windows.
Теперь установим, например, Windows Terminal и VSCode для написания PowerShell скриптов:
Сначала ищем имена пакетов:
winget search terminal
winget search "visual studio"
Затем устанавливаем их по очереди:
winget install Microsoft.WindowsTerminal –e ; winget install Microsoft.VisualStudioCode –e
Если вы хотите запустить установку пакета программы в фоновом режиме, используйте параметр
--silent
:
winget install "VLC media player" --silent
При установке некоторых программ можно автоматически принять условия использования. Например, при установке набора утилит sysinternals:
winget install sysinternals --accept-package-agreements
По умолчанию программы устанавливаются на системный диск в каталоги Program Files. Вы можете изменить каталог установки программы:
winget install microsoft.visualstudiocode --location "D:\Programs"
Обратите внимание, что при запуске winget без прав администратора, при установке некоторых программ может появится запрос UAC на повышение привилегий. При запуске winget в командной строке/консоли PowerShell с правами администратора, все программы устанавливаются без запроса UAC (будьте внимательными, устанавливайте только те приложения, которым доверяете).
Winstall – графической интерфейс для менеджера пакетов WinGet
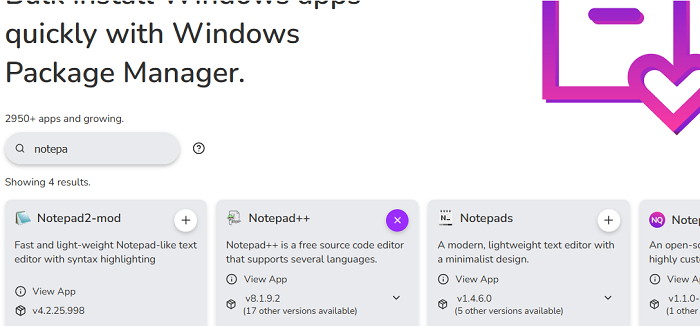
Пользователи, которым некомфортно работать в командной строке winget, могут использовать веб-сервис Winstall (https://winstall.app/). Winstall представляет собой графический интерфейс для репозитория WinGet (для установки доступно более 2900 программ).
С помощью сервиса Winstall можно сгенерировать скрипт установки нужных вам программ. Найдите программы в репозитории и нажмите + для добавления их в скрипт установки.
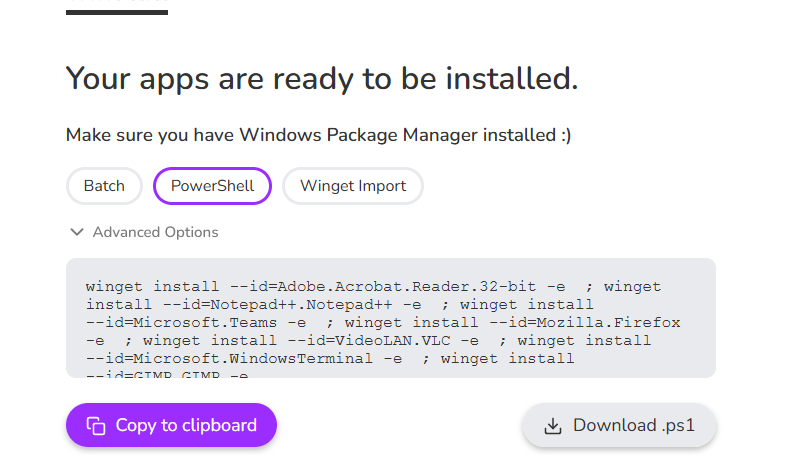
Затем нажмите на кнопку Generate Script и сервис сформирует для вас команду установки выбранных приложений.
Скопируйте код со вкладки Batch или PowerShell и вставьте его соответственно в cmd.exe или PowerShell консоль.
Так, с помощью всего одной команды вы можете установить необходимые вам программы.
WinGet: Обновление и удаление программ в Windows
WinGet позволяет не только устанавливать программы, но и обновлять или удалять их. Для вывода списка установленных программ на компьютере выполните:
Winget list
Команда выведет полный список программ, установленных на компьютере (включая программы, установленные не через winget). Если для программы доступно обновление, в столбце Available будет указана новая версия.

Для обновления приложения, установленного через winget, выполните команды:
winget upgrade --id 7zip.7zip
Можно обновить сразу все установленные программы:
winget upgrade --all
Для удаления программ используется команда:
winget uninstall --name 7zip.7zip
Вы также можете удалить приложения, установленные не через WinGet по их ID:
winget uninstall --id "{0F693AA3-4387-4ACB-A6FD-3A396290587}"
Экспорт и импорт установленных приложений на другие компьютеры
С помощью WinGet вы можете экспортировать в JSON файл список приложений, установленных на компьютере и затем использовать этот файл для быстрой установки того же набора приложений на другом компьютере.
Для экспорта списка приложений в файл, выполните:
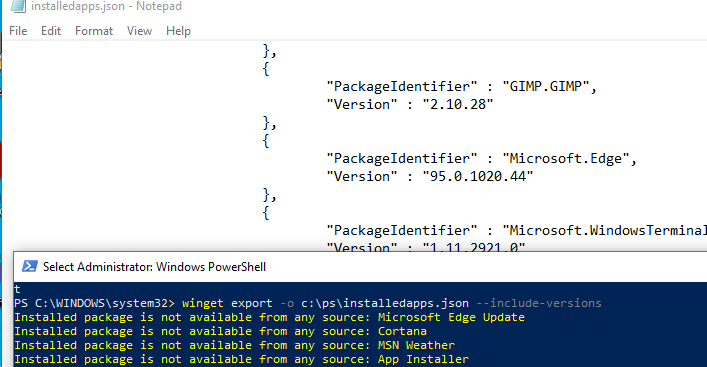
winget export -o c:\ps\installedapps.json --include-versions
Если для программы отсутствует манифест, то команда выведет ошибку «
The installed package is not available in any source
«.
Файл содержит список программ, установленный через Windows Package Manager.
Чтобы установить список программ из json файла на другом компьютере, выполните команду:
winget import -o .\installedapps.json
Можно указать, чтобы менеджер пакетов игнорировал версии и недоступные программы при установке, нужно добавить параметры
--ignore-unavailable
и
--ignore-versions
.
What is WinGet?
The Windows Package Manager is a tool designed to help you quickly and easily discover and install those packages that make your PC environment special. By using the Windows Package Manager, from one command, you can install your favorite packages. -https://github.com/microsoft/winget-cli
- Log into the Windows device
- Run the following commands in a PowerShell window
# change directory to user downloads
cd $ENV:UserProfile\Downloads
# download latest winget installer
$ProgressPreference = ‘SilentlyContinue’; $t = Invoke-WebRequest ‘https://api.github.com/repos/microsoft/winget-cli/releases/latest’ -UseBasicParsing; $null = ($t.content -Match ‘,»content_type»:»application/octet-stream»,.*?»browser_download_url»:»(.*\.msixbundle)»‘); Invoke-WebRequest $Matches[1] -OutFile .\winget-latest.msixbundle;
# lookup prerequisites
$pre = Invoke-WebRequest «https://store.rg-adguard.net/api/GetFiles» -Method POST -Body @{type=’CategoryId’;url=’f855810c-9f77-45ff-a0f5-cd0feaa945c6′;ring=’Retail’;lang=’en-US;q=0.6′} -UseBasicParsing
# download prerequisites
# Microsoft.UI.Xaml
$null = ($pre.content -Match ‘<td><a href=»(.*?)» rel=»noreferrer»>Microsoft\.UI\.Xaml\.2\.7_7\.2207\.21001\.0_x64__8wekyb3d8bbwe\.appx<\/a><\/td>’); Invoke-WebRequest $Matches[1] -OutFile .\Microsoft.UI.Xaml.appx;
$null = ($pre.content -Match ‘<td><a href=»(.*?)» rel=»noreferrer»>Microsoft\.VCLibs\.140\.00\.UWPDesktop_14\.0\.30704\.0_x64__8wekyb3d8bbwe\.appx<\/a><\/td>’); Invoke-WebRequest $Matches[1] -OutFile .\Microsoft.VCLibs.appx;
$null = ($pre.content -Match ‘<td><a href=»(.*?)» rel=»noreferrer»>Microsoft\.DesktopAppInstaller_2022\.728\.1939\.0_neutral_~_8wekyb3d8bbwe\.msixbundle<\/a><\/td>’); Invoke-WebRequest $Matches[1] -OutFile .\Microsoft.DesktopAppInstaller.msixbundle; $ProgressPreference = ‘Continue’;
# install prerequisites
Add-AppxPackage .\Microsoft.UI.Xaml.appx
Add-AppxPackage .\Microsoft.VCLibs.appx
Add-AppxPackage .\Microsoft.DesktopAppInstaller.msixbundle
# install winget
Add-AppxPackage .\winget-latest.msixbundle
# list installed applications
winget list - WinGet is now installed and ready to be used
- To test WinGet, continue with the following commands in PowerShell
# search winget
winget search notepad++
# when prompted, type y and press enter
# install notepad++
winget install notepad++
Are you tired of the tedious process of searching, downloading, and installing applications on your Windows 11 system? Look no further! Windows Package Manager, aka winget, is here to completely change the way you handle your app management. In this article, we will learn how to install and use winget to manage your apps effortlessly using simple commands on Windows 11 or 10.

Table of Contents
winget is short form for Windows Package Manager, is an official command-line package manager offered by Microsoft for Windows 11 and 10. It provides a centralized way to install, update, and uninstall applications on your system. With winget, you can search for apps, view package details, and perform various app management tasks using the command line interface.
Requirements to Install winget
Before proceeding with the installation of winget, ensure that your system meets the following requirement:
- Windows 10 1709 (build 16299) or a later version.
How to Download and Install winget On Windows 11 or 10
To install winget on Windows 11, follow these steps
1. Open the Start menu and search for Windows PowerShell.
2. Right-click on Windows PowerShell and select Run as administrator to open PowerShell with administrative privileges.
3. In the PowerShell window, copy and paste the following command and press Enter:
Get-AppxPackage Microsoft.DesktopAppInstaller | Remove-AppxPackage

This command removes the pre-installed version of the Microsoft Store app, which includes the App Installer package that contains winget.
4. Next, copy and paste the following command to install the latest version of the Microsoft Store app, which includes winget:
start ms-windows-store://pdp/?productid=9nblggh4nns1

This command will open the Microsoft Store app page for the App Installer package. Click on the Get or Install button to install it.

5. After the installation is complete, you can close the Microsoft Store.
6. Finally, open PowerShell again with administrative privileges and enter the following command to verify that winget is installed:
winget --version

If winget is successfully installed, it will display the version number.
Also Read: How to Change Country in Microsoft Store in Windows 11
How to Use winget on Windows 11
Once winget is installed, you can start using it to manage your apps. Here are some common tasks you can perform with winget:
1. Searching and installing apps
1. Open Windows Terminal or PowerShell with administrative privileges.
2. Use the command winget search <AppName> to search for an app.
3. If prompted, press Y to agree to the source agreements terms (this only appears the first time you use the winget command line).
4. To install an app, use the command winget install <PackageID>.
5. If asked, press Y to agree to the terms of the app.
6. Wait for the installation process to complete, and then launch the application.

2. Updating apps
1. Use the command winget update or winget upgrade to check for available updates for your installed packages.

2. To update a specific package, use the command winget update <ID>.
3. Uninstalling apps
1. Use the command winget list to view all installed packages.

2. Use the command winget uninstall <ID> to uninstall a specific app.
4. Exporting and importing packages
1. Use the command winget export -o <output> to export a list of installed packages to a file. Replace <output> with the path and filename where you want to save the package list.

If you see the error message Installed package is not available from any source while using the winget export command, it means that winget couldn’t find some of the installed apps in its list of recognized sources.
Note: To understand why this happens, winget needs specific information about each app, such as its metadata and details from the Add/Remove Programs feature in Windows. If this information is missing or doesn’t match what winget expects, it can’t properly identify and include the app in the export.
Once the export process is finished, you’ll have a JSON file containing the list of installed packages. You can open this file in a text editor of your choice. From there, you have the freedom to customize the list by removing any apps you don’t want to import in the future. This allows you to tailor the exported package list according to your preferences and needs.
2. Use the command winget import -i <import-file> to import a list of packages from a file. Replace <import-file> with the path and filename of the file containing the package list.

Also Read: How to Disable USB Selective Suspend Settings in Windows 11
Why Should you Use winget?
Windows Package Manager (winget) offers several advantages for app management on Windows 11 or 10:
- Centralized app installation and management from the command line interface.
- Faster installation and updates, especially for multiple apps.
- Ability to automate app installations and updates.
- Integration with the Microsoft Store, allowing installation of both Store and non-Store apps.
We hope this guide helped you learn how to install winget on Windows 11 or 10. Utilizing winget’s powerful command line interface, you can easily manage your apps and streamline your app management workflow on Windows 11 or 10. If you have any suggestions or queries for us, please let us know in the comment section.