
В этой статье мы рассмотрим детально как установить Windows Server 2019 и самую первичную настройку, что нужно сделать сразу после установки системы. Как детально настроить Windows Server 2019 читайте в нашей следующей статье.
1) Итак, первое — Вам нужно скачать дистрибутив. Скачать его можете на следующей странице.
2) После скачивания дистрибутива — его нужно записать на флешку, сделав ее загрузочной. Инструкция как записать дистрибутив на флешку.
3) Далее Вам нужно загрузиться с флешки из под биоса для начала самой установки. Краткая инструкция как загрузиться с флешки.
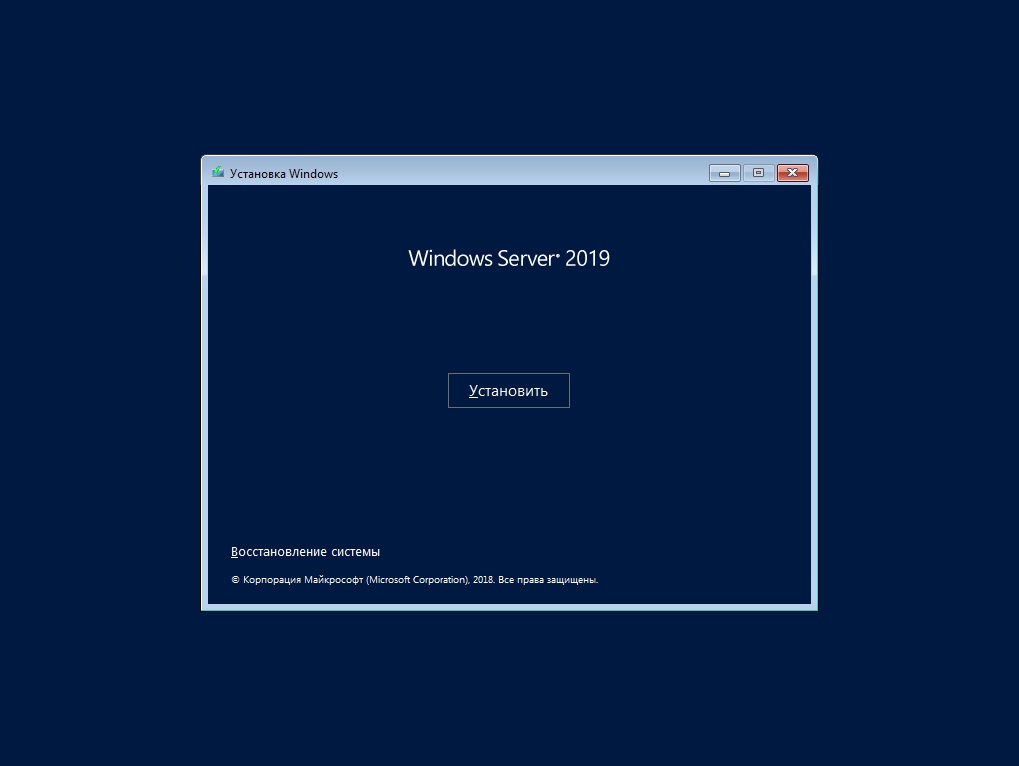
4) Теперь после того, как Вы загрузились с флешки, приступаем к началу установки.

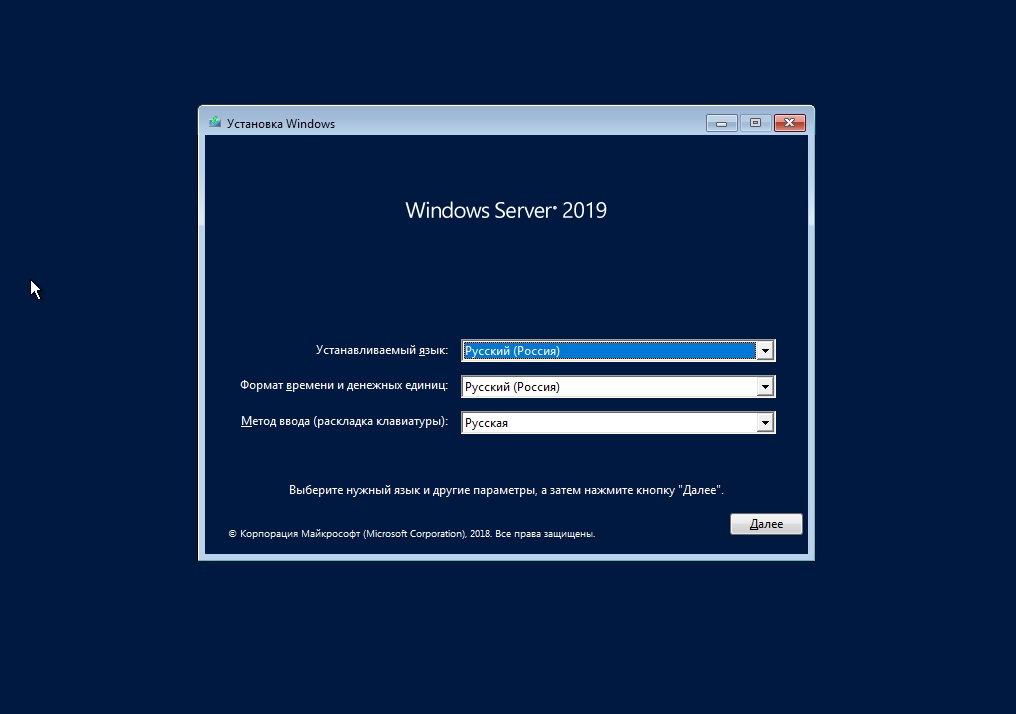
Выбираем язык операционной системы, выберем русский.
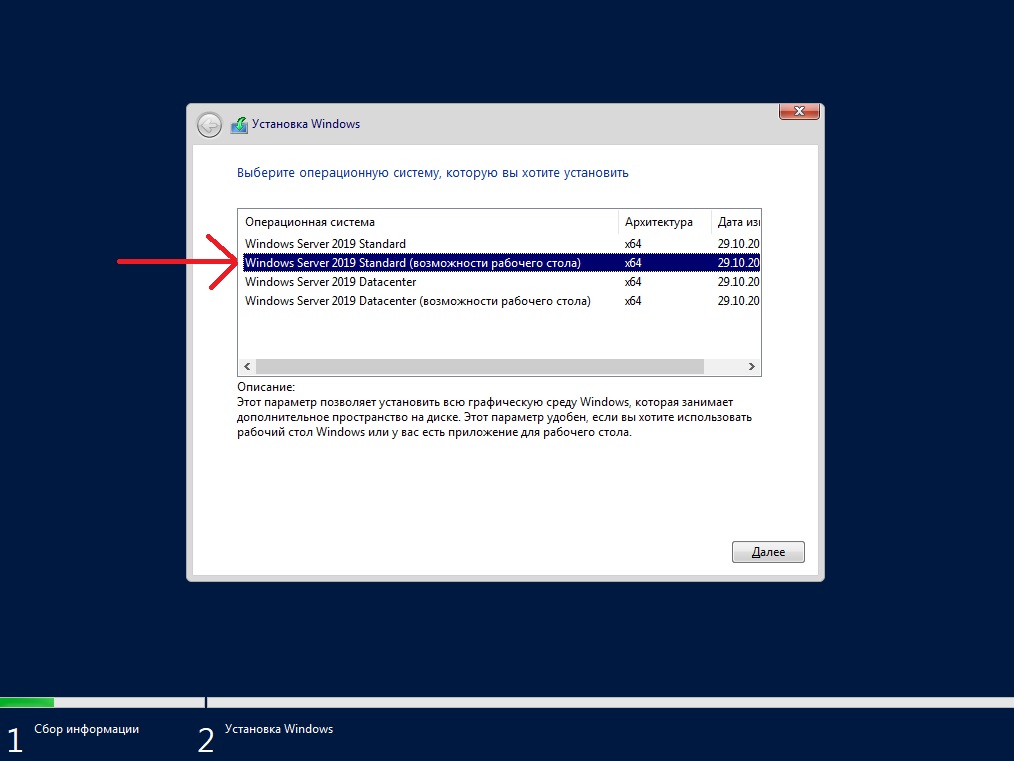
Далее выбираем желаемую редакцию Windows Server 2019 для установки. В данной статье мы установим версию Standard, но Вы можете выбрать другую версию, к примеру Datacenter. Порядок установки в ней аналогичный.
А так же, обязательно выбираете дистрибутив с «Возможности рабоче стола», иначе у Вас система установится без графической оболочки и управление операционной системой будет только из под консоли.
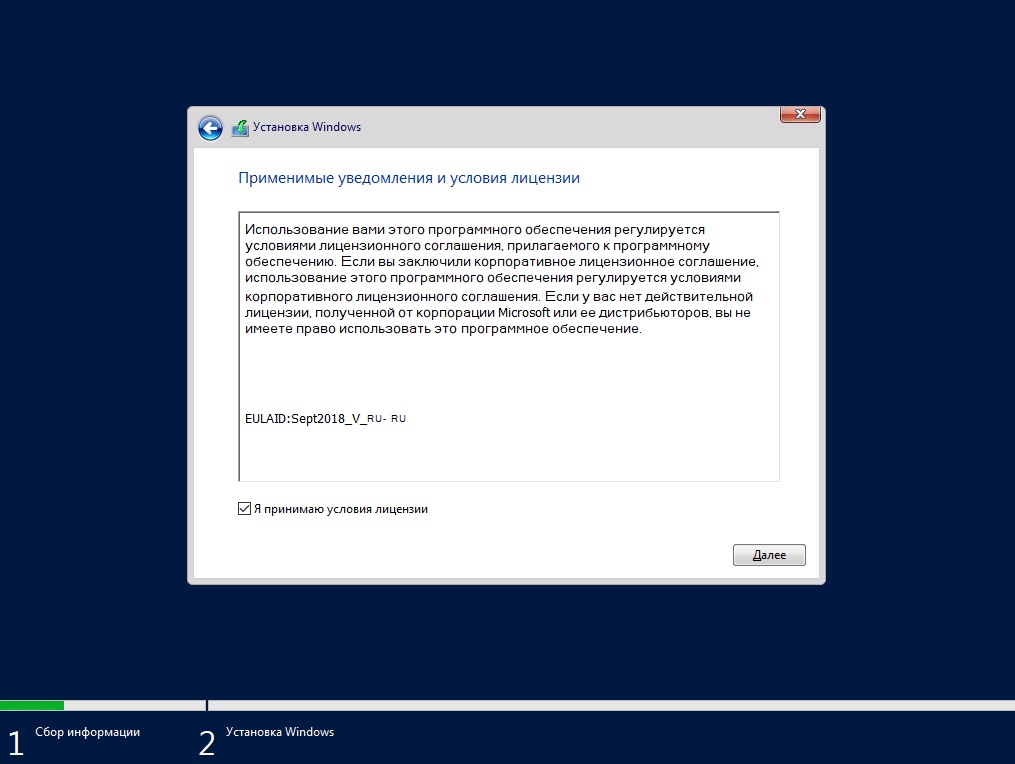
Принимаем условия лицензирования.
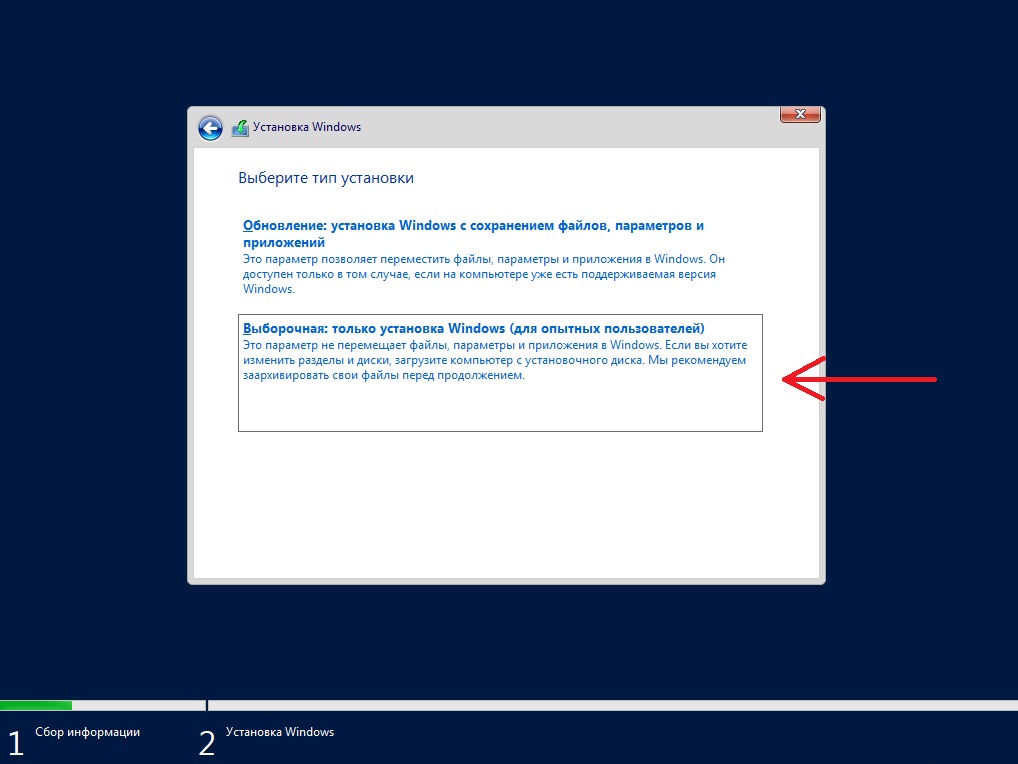
Далее, выбираем выборочную установку, т.к мы устанавливаем систему с нуля.
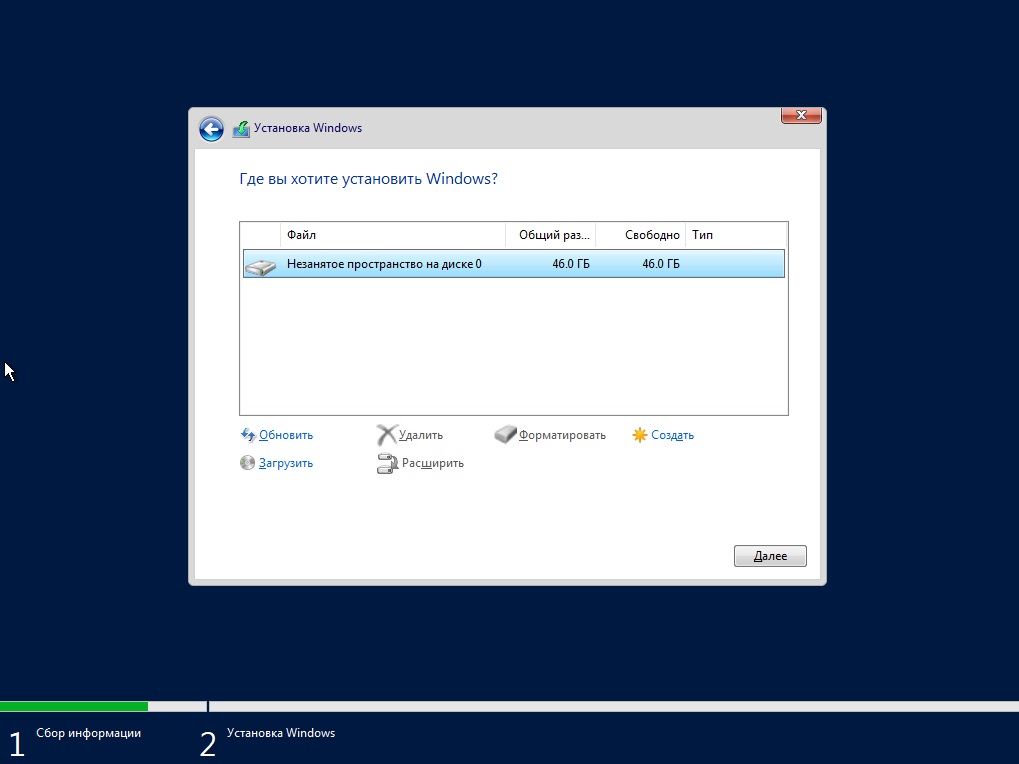
После у Вас будет меню выбора диска куда установить систему. На нашем примере только один диск, у Вас же их может быть больше. Выбираете нужный диск для установки и нажимаем «Далее».
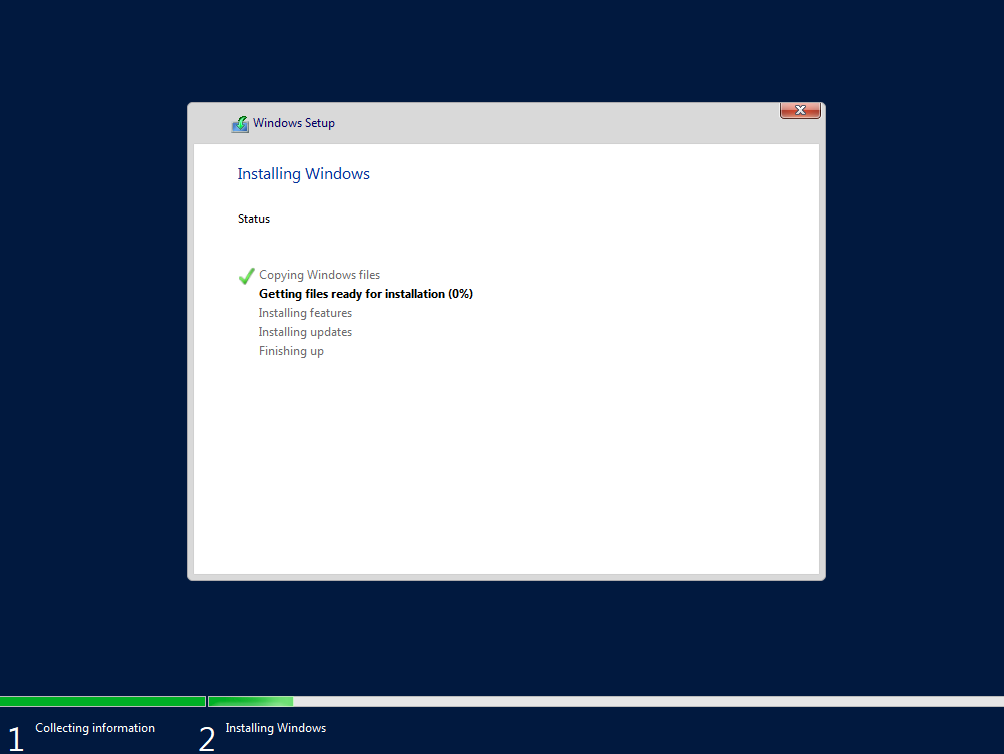
И теперь начинается непосредственно сама установка, ожидайте ее окончание.

Во время установки система перезагрузится несколько раз.
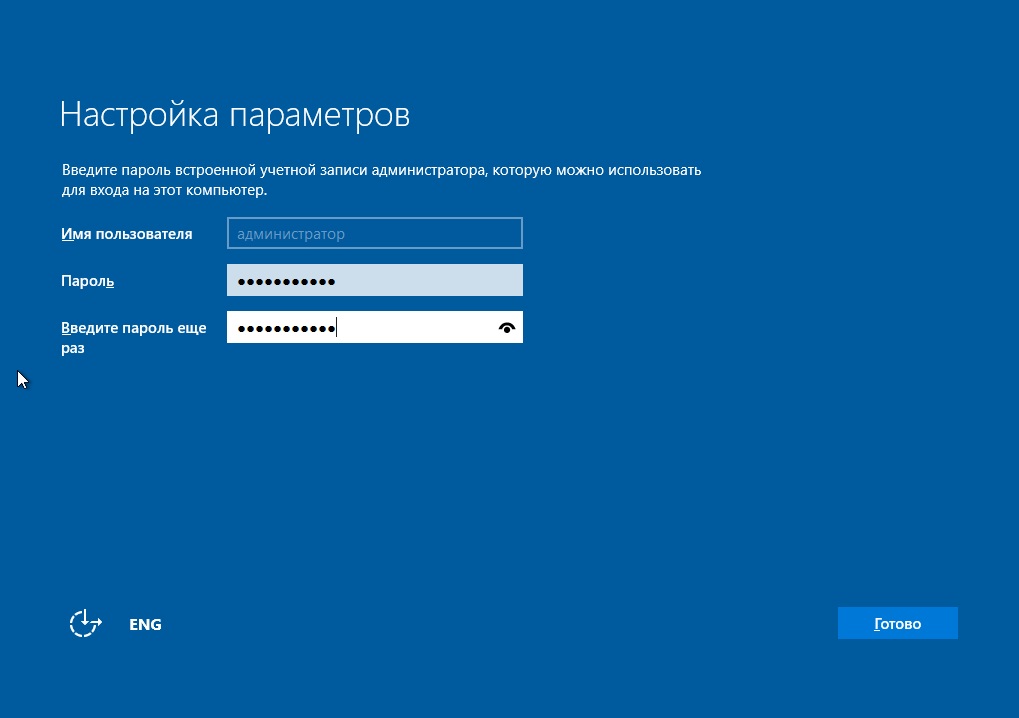
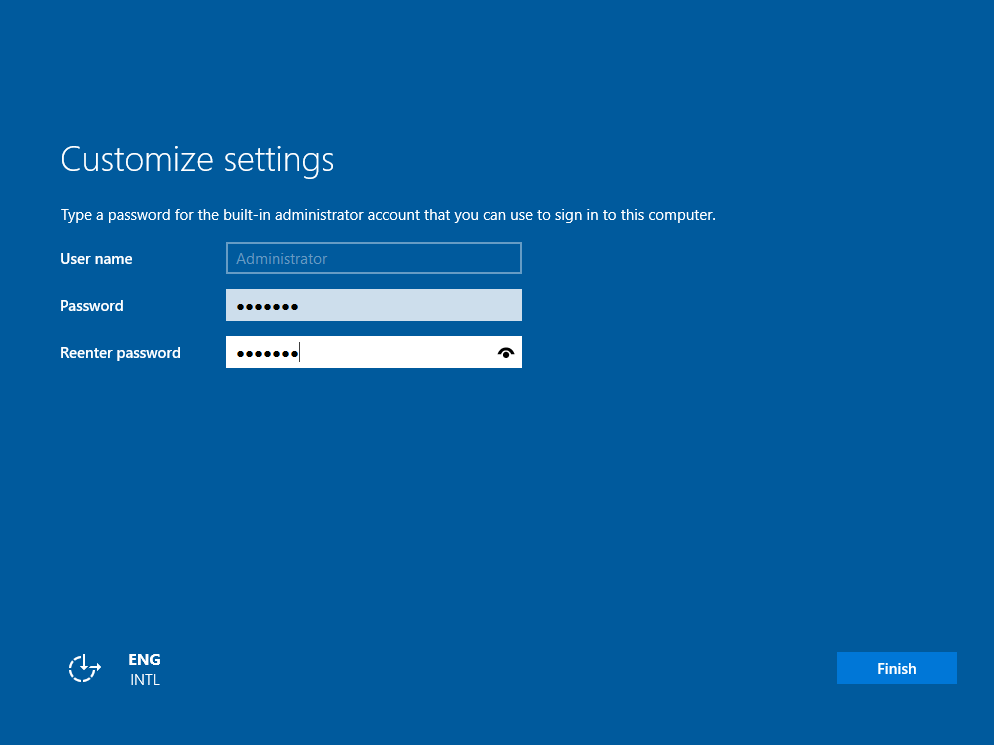
После завершения установки Вам нужно будет задать пароль для учетной записи администратора. Пароль лучше задавать латинскими буквами с цифрами.
Далее заходим под учетной записью администратора в систему.
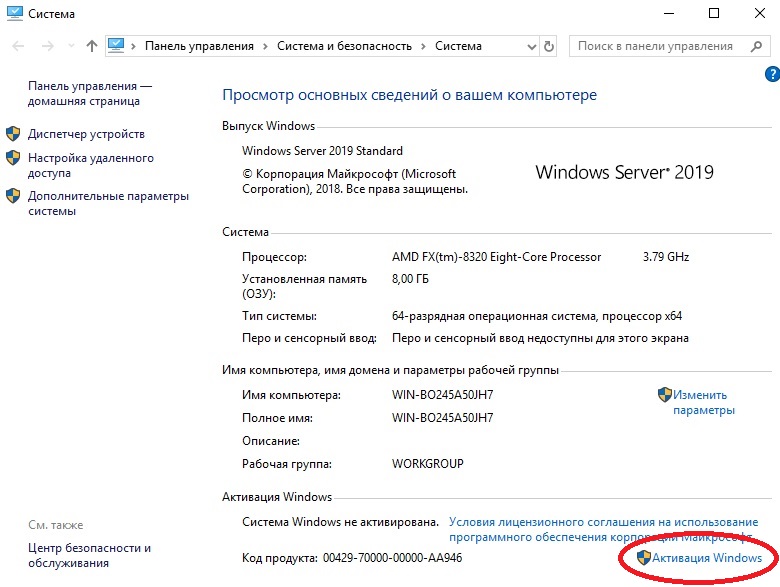
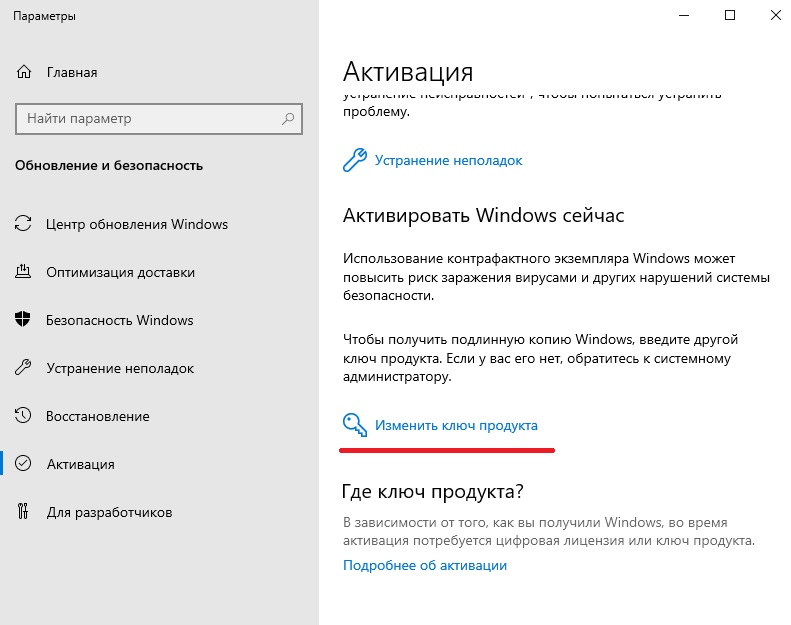
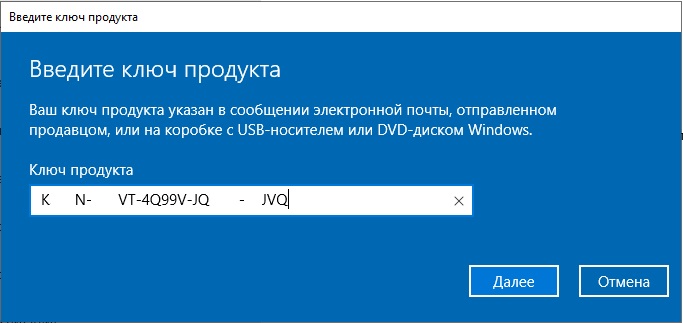
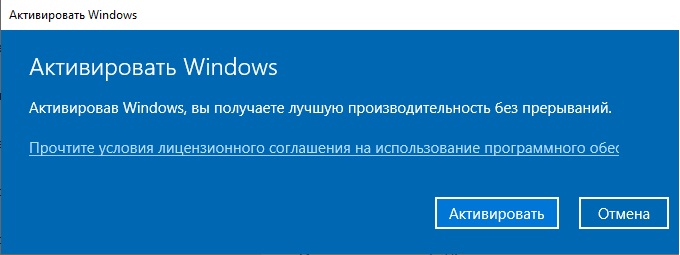
5) После установки переходим к первичной настройке, что нужно сделать сразу после установки — это активировать систему и загрузить все актуальные обновления. Приступим для начала к активации. Заходим меню в «Свойства системы» => Активация Windows => Изменить ключ продукта => и вводите Ваш ключ в поле ввода. Если у Вас нет ключа, то приобрести ключ активации можете в нашем интернет-магазине по самым низким ценам на следующей странице. Моментальная доставка ключа на Вашу электронную почту не заставит Вас должно ожидать активации системы!
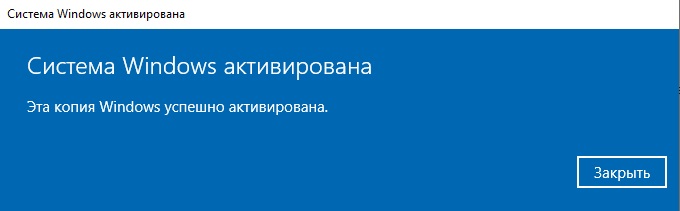
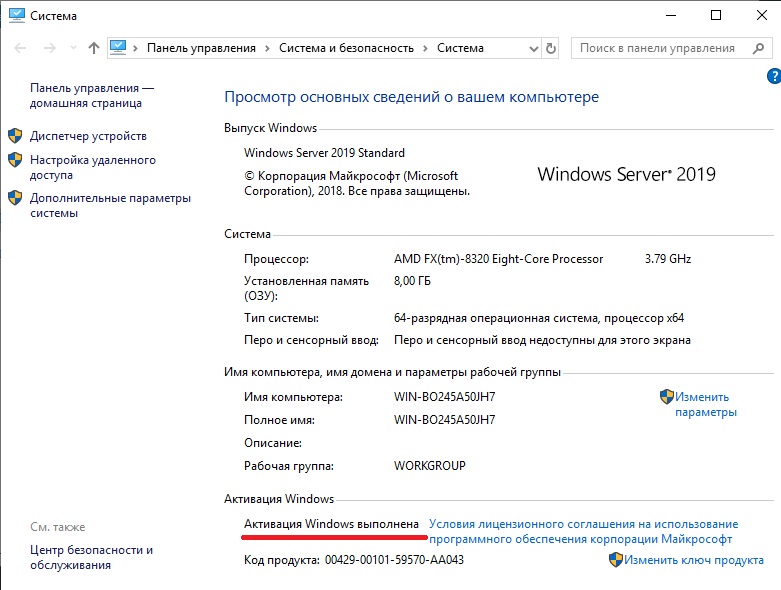
После активации переходим снова в меню «Свойства системы» и проверяем все ли активировалось. Если да, то переходим к загрузке актуальных обновлений.
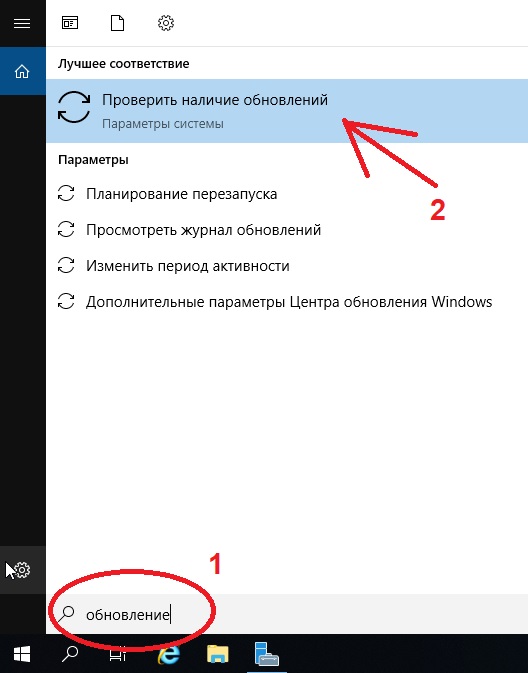
Нажимаем на кнопку «Проверить наличие обновлений».
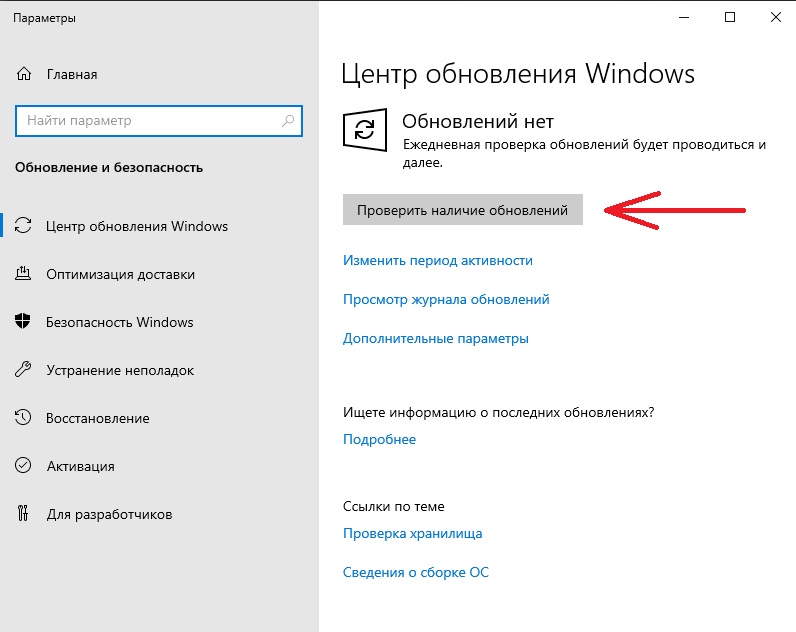
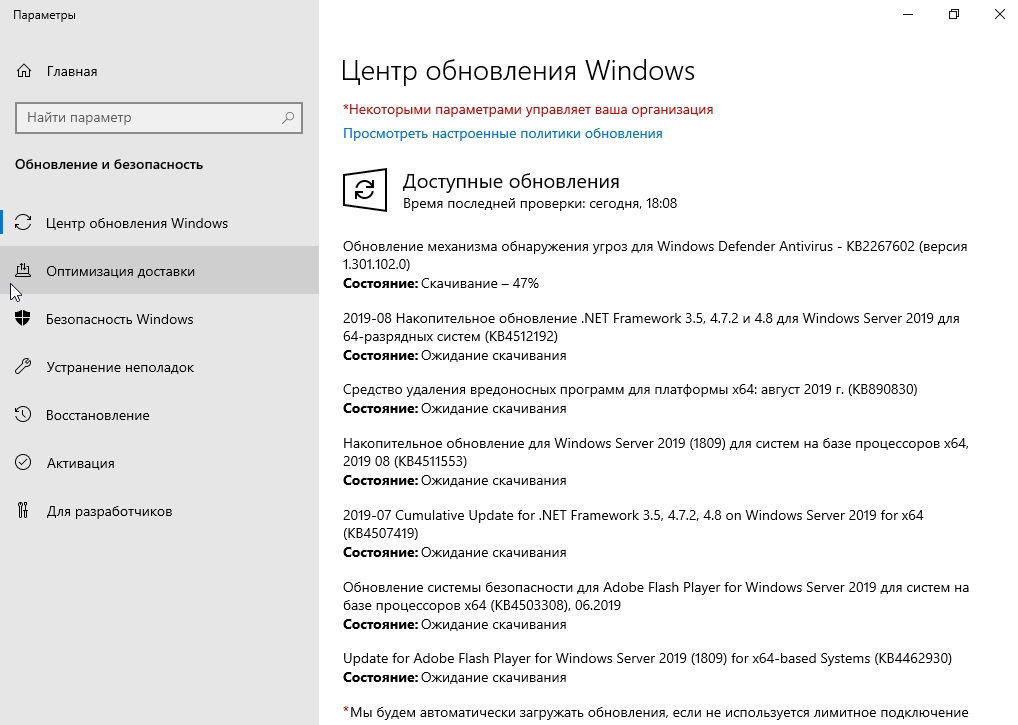
Загружаем обновления, после устанавливаем их. После установки нужно перезагрузить систему.
На этом все. Установка и первичная настройка закончена. Как детально настроить Windows Server 2019 читайте в нашей следующей статье.
Лицензионный ключ активации Windows Server 2019 от
Windows Server 2019: подробные инструкции по установке и настройке
Очистка логов ETL в папке ETLLogs в ProgramData
23.04.2025
На одном из хостов Windows Server 2019 после анализа свободного места, обнаружили что каталог ETLLogs с нескольким десятками Гб файлов расширением ETL (Event Trace Log)….
Перезагрузка (выключение) Windows по расписанию
10.04.2025
Если нужно настроить регулярную (по определенному расписанию) перезагрузку или выключение Windows компьютера (сервера), проще всего создать задание в планировщике задач….
Неактивные TS порты принтеров на RDS сервере
10.04.2025
Одной из распространённых проблем при использовании терминального (RDS/RDP) сервера, на который пробрасываются локальные принтеры с компьютеров пользователей в режиме RD Easy Print, заключается в большом количестве неактивных TS портов печати от перенаправленных принтеров (Inactive TS Port), которые накапливаются со временем. Все…
Не удается установить драйвер сетевого адаптера Intel в Windows Server
27.02.2025
При установке драйверов для сетевых карт Intel в Windows Server, установщик может не обнаружить сетевые адаптеры Intel на компьютере. При этом физически Ethernet адаптер Intel на компьютере подключен и отображается в неизвестных устройствах:…
Защитник Windows (Defender) не обновляется автоматически
19.02.2025
Если встроенный антивирус Microsoft Defender (Защитник Windows) не обновляется автоматически, рекомендуем воспользоваться методикой диагностики и исправления типовых ошибок, предложенная в этой статье….
Windows постоянно просит перезагрузить компьютер (Pending Restart)
28.12.2024
После установки обновлений в редких случаях Windows может начать постоянно требовать перезагрузить компьютер. Причем сколько бы раз вы его не перезагружали, в Windows Update постоянно будет висеть надпись ‘Требуется перезагрузка, ожидание перезагрузки‘ (Restart required, pending restart)….
Удаляем Let’s Encrypt сертификаты в Windows
07.10.2024
Если вы используете на хосте Windows бесплатные сертификатов Let’s Encrypt и решили переключиться на другой CA (собственный или коммерческий), нужно выполнить ряд шагов по отзыву старых сертификатов Let’s Encrypt и очистки их следов в Windows….
Использование Network Monitor для захвата и анализа сетевого трафика в Windows
19.09.2024
Microsoft Network Monitor это классический инструмент сетевой диагностики для Windows, которой позволяет выполнить захват и анализ входящего и исходящего трафика на компьютере. Несмотря на то, что это продукт не развивается и не обновляется уже более 3 лет, его часто используют администраторы,…
Отправка сообщений в WhatsApp из командной строки
10.09.2024
Для отправки сообщений в мессенджер WhatApp из командной строки можно воспользоваться консольным клиентом Mudslide. Чаще всего такая необходимость возникает, когда вам нужно получить оповещение от скрипта или системы мониторинга….
RDP ошибка: The number of connections to this computer is limited and all connections are in use
06.08.2024
При подключении к удаленному рабочему столу компьютера может появиться ошибка на синем фоне о превышении количества доступных подключений. В моем случае проблема возникла у пользователей на Windows Server 2022 с ролью RDS….
Добавить несколько альтернативных DNS/NetBIOS имен для компьютера Windows
17.07.2024
В сценариях миграции часто нужно, чтобы сервера (компьютеры) Windows были одновременно доступны по старому и новому имени. В самом простом случае, чтобы компьютер был доступен по новому имени, достаточно добавить в DNS алиас (CNAME), который указывает на старое FQDN имя (A…
Автоматизация любых действий в браузере с помощью PowerShell и Selenium
28.05.2024
Для автоматизации различных действий в браузере из скриптов PowerShell можно использовать фреймворк Selenium. С помощью Selenium вы можете получить содержимое веб страницы так, как его видит пользователь (отрабатываются все скрипты Java, стили, куки) Чаще всего Selenium используется для тестирования веб-сайтов с…
Эта статья описывает, как заказать и использовать Windows Server 2019.
УСТАРЕЛО Мы не предлагаем Windows Server 2019 для новых заказов.
Мы предлагаем Microsoft Windows Server 2019 как дополнение к вашему выделенному корневому серверу по выгодным тарифам.
Заказ дополнения Windows
Чтобы установить Windows Server 2019 на ваш сервер, пожалуйста, заказывайте соответствующее дополнение через личный кабинет клиента. Здесь вы также найдете условия предоставления услуг.
После завершения вашего заказа установка выполняется на вашем сервере автоматически. Вы получите электронное письмо, как только установка будет завершена.
Доступ через удаленный рабочий стол
После этого вы сможете подключиться к своему серверу с полными правами администратора, используя клиент удаленного рабочего стола. Большинство вариантов Windows поставляются с клиентом удаленного рабочего стола (RDP). Вы можете найти его, перейдя в Пуск -> Программы -> Аксессуары. На Linux установите пакет xfreerdp или один из многих альтернатив. Windows поставляется с программой mstsc, но вы можете использовать альтернативы, такие как Terminals.
Для входа используйте имя пользователя Administrator и пароль, который вы выбрали при заказе дополнения.
Вы можете заказать дополнительные лицензии RDP (на пользователя) написав запрос в службу поддержки.
Изменение пароля при первом доступе
При первом входе в систему Windows попросит вас изменить ваш начальный пароль. Это сделано из соображений безопасности сервера. Пожалуйста, выберите хороший пароль, который не легко угадать.
Важное замечание: Первый вход не поддерживает аутентификацию на уровне сети. Дополнительную информацию можно найти Здесь.
Программный RAID 1 / зеркалирование дисков
Windows 2019 позволяет объединить несколько установленных дисков в программный RAID 1 (зеркалирование), так что при отказе одного диска все ваши данные сохраняются на втором диске.
При заказе Windows-сервера у нас, он автоматически оснащается зеркалированием, если есть два диска одинакового размера.
Настройка программного RAID в Windows 2019 аналогична настройке в Windows 2016. Инструкции по настройке программного RAID в Windows Server можно найти здесь.
Среда восстановления Windows / Консоль восстановления
Консоль восстановления Windows (среда восстановления / RE) полезна, например, если вам нужно восстановить загрузчик или загрузочный сектор, или если вам нужно загрузить полное резервное копирование ранее созданного резервного копирования из Хранилища.
Устаревшее
Сначала вам следует заказать KVM-консоль. В вашем запросе попросите команду поддержки предварительно загрузить Среду восстановления Windows. Это даст вам прямой доступ к монитору и клавиатуре вашего сервера. Техники перезапустят сервер, и он загрузит Windows RE через сеть. Как только Windows загрузится, появится графический интерфейс с инструкциями, которые вам нужно выполнить.
UEFI
При установке UEFI Среду восстановления Windows нельзя загрузить через PXE. В этой ситуации техники предоставят вам KVM-консоль с USB-накопителем с Windows RE.
Часто задаваемые вопросы / FAQ
Забытый пароль
Если вы забыли пароль администратора, напишите запрос в службу поддержки и попросите команду поддержки сбросить ваш пароль.
Сброс службы
С Windows CTRL+ALT+DEL вызывает только диалоговое окно аутентификации. Следовательно, функция “Отправить CTRL+ALT+DEL” наш
ей службы сброса в настоящее время не может перезапустить сервер. Вместо этого сделайте аппаратный сброс. Это должно по-прежнему работать, как предполагается.
Служба обновления Windows
По техническим причинам служба обновления Windows для наших установок Windows настроена так, что обновления можно только загружать, но не устанавливать.
Для внесения изменений вам необходимо настроить Реестр. Для начала выполните команду “regedit” в диалоговом окне Запуск.
Перейдите по пути HKEY_LOCAL_MACHINE\SOFTWARE\Policies\Microsoft\Windows\WindowsUpdate\AU и установите значение ключа “AUOptions” равным 5.
Теперь вы можете настроить функцию обновления в Панели управления.
Служба резервного копирования Windows
Если вам нужно использовать Службу резервного копирования Windows (функцию) совместно с Хранилищем, создайте пользователя в локальной системе с тем же именем, что и учетная запись резервного копирования. Затем добавьте этого пользователя в группу “Операторы резервного копирования”.
Использование собственных лицензий
Мы участвуем в программе Microsoft SPLA. Лицензия Windows, предоставленная нам, является SPLA-лицензией. Сочетание собственных клиентских лицензий Microsoft с SPLA-лицензией должно быть оформлено письменно (в виде договора), поскольку клиент должен поручить хостинг продукта. Кроме того, развертывание собственной лицензии Microsoft не всегда возможно (например, для лицензий терминального сервера). Поэтому, с учетом увеличения административных затрат, мы решили не разрешать совмещение лицензий. Таким образом, невозможно использовать собственные лицензии Microsoft на арендованной у нас операционной системе Windows.
Однако вы можете установить свою собственную версию Windows, используя свою лицензию. Возможно установить Windows с использованием KVM-консоли.
Включенная лицензия для Hyper-V в стандартной версии
В рамках нашей SPLA-лицензии у вас есть дополнительная лицензия для использования экземпляра Hyper-V при использовании стандартной версии. Вы можете использовать ее следующим образом:
- Закажите дополнительный отдельный IP через личный кабинет клиента.
- Запишите виртуальный MAC-адрес.
- Создайте новый экземпляр.
- Добавьте сетевой адаптер Legacy и назначьте MAC-адрес.
- Запустите экземпляр и дайте ему загрузиться через PXE.
- В случае успешной загрузки появится меню PXE Boot (синий логотип).
- Активируйте установку Windows через Robot для дополнительного IP.
- Загрузите экземпляр через PXE еще раз, и вместо меню начнется установка Windows. Как только появится стандартный экран входа в систему, вы сможете использовать экземпляр.
Was this article helpful?
Like
1
Why start this series in the 2020, when everything is about cloud, and Microsoft is pulling the plug on its “on-premise” certificates including MCSA, MCSE on Windows Server on 31.01.2021. Why even bother?
For a start… This series is obviously aimed at those of you who are just starting in IT, and want to pursue a career in IT infrastructure/services.
Although everything today is about cloud, Windows Server is still everywhere and will be for some time, since not every workload is suited for cloud, be it practical, security or regulatory reasons. That may change in future, but for now it is like that…
Also, I think that mastering Windows Server 2019 will help you understand basic concepts of services and IT infrastructure.
And in the end, Microsoft Azure is built on Windows Server 2019 at the moment, so if you have a chance to work on ASDK (Azure Stack) you will benefit from this knowledge, because you will understand how it is all connected and working.
This “Server Basics” series will not go into details too deep, the goal is to make you act and try technology by doing something practical and simple that works. That way you will quickly get the result which will make you excited about technology and push you to explore more.
Before you start…
Where to get the Windows Server 2019 installation?
No need for piracy, Microsoft offers trial version of software that will work for 180 days (and more) and is fully functioning.
You can get the software here – https://www.microsoft.com/en-us/evalcenter/evaluate-windows-server-2019
Select ISO image and click on Continue
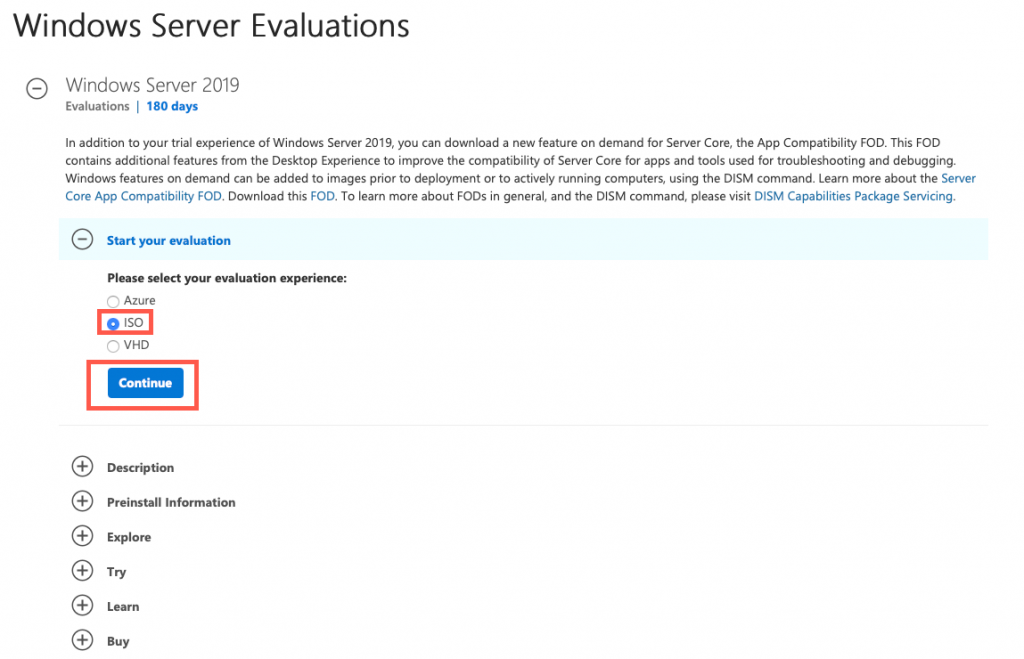
You will be asked for your details, and after you enter everything select Continue
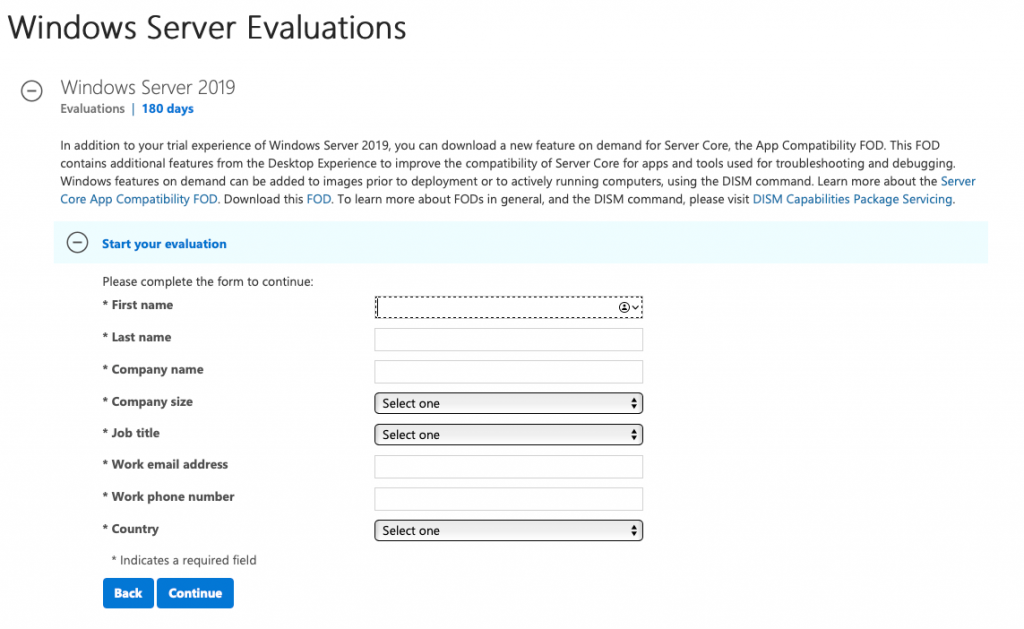
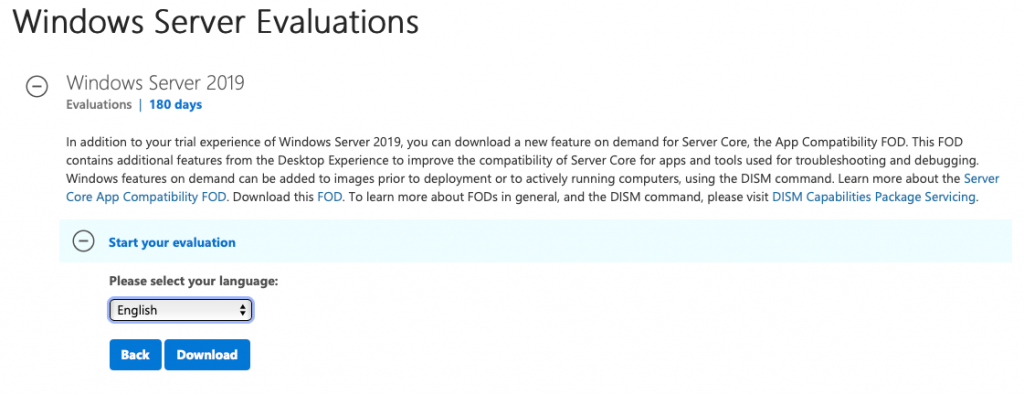
You will then select the language and click on Download…
If you are planing to do Windows Server 2019 installation on physical machine you will have to “burn” ISO image you downloaded to CD or USB stick (USB preferably) – you can do that with a tool called Rufus, you can find it here – https://rufus.ie/
Installation on Hardware or Virtual Machine?
Hardware
If you are installing on a physical machine (bare metal) there are a couple of thing to be aware of:
Minimal requirements are (same goes for virtual machines (VMs)) – 1.4Ghz 64bit CPU (it is very important you have 64bit capable CPU, otherwise this won’t work), 512MB of RAM – 2GB of RAM is minimal for graphic environment (which we will do) and 4GB is optimal in my experience. 32GB of disk space, 1Gbit ethernet, 1024×768 screen resolution, keyboard/mouse.
My advice would be to have CPU with multiple cores (2 or more if you can afford), at least 16GB of RAM (the more the better) 1TB disk drive at minimum for testing, if you plan to do LAB and test Windows Server 2019 and its services.
If you are installing on a server, be sure that you first upgraded all the firmwares on your machine. Also, create RAID field on the server on which you will place your Windows Server 2019 installation.
Make sure you set boot device in BIOS to USB stick (or whatever you burned your Windows Server 2019 installation to)
In the end have storage drivers (raid controller) or motherboard storage drivers at hand – Windows Server recognises a huge variety of storage controllers but you never know… Better to be prepared then to waste time. If you are practicing on Dell, HP, Lenovo server equipment, you are covered out of the box.
If you don’t have a server at hand and you are practicing in home lab on “desktop” grade hardware, no worries, installation should work, just make sure you have minimal requirements covered in your PC or laptop. There may be an odd driver issue to resolve if you have “exotic” configuration, so be aware of that.
Virtualization:
With virtual machines you just need to mount Windows Server 2019 ISO image we downloaded earlier after you created empty VM for your Windows Server 2019 ISO install. Procedure depends on the virtualisation software you are using, I can show you VMware vSphere, but more or less all the virtualisation softwares are same with these options, it just depends how you navigate to the option you need.
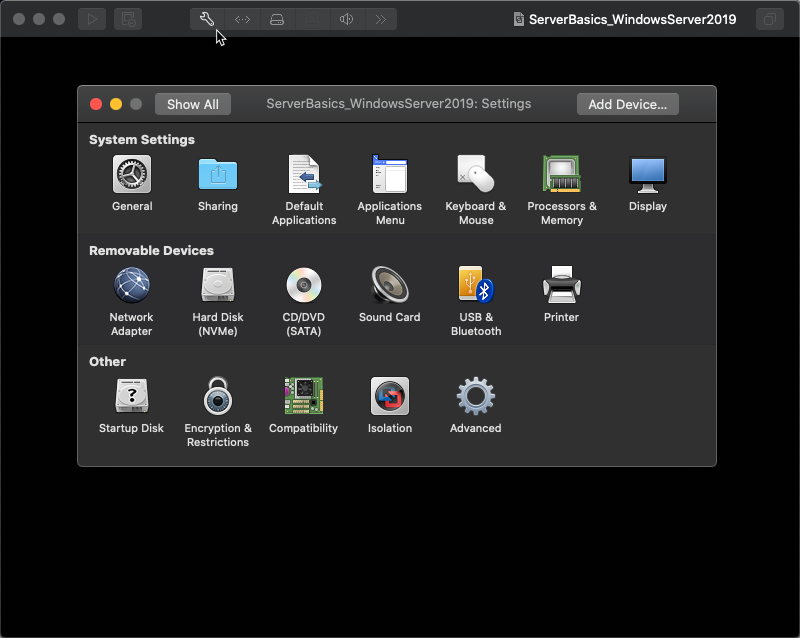
In vSphere you click on settings on virtual machine you created, it is a little wrench on the top of the screen. Under Removable Devices section you will select CD/DVD (SATA)
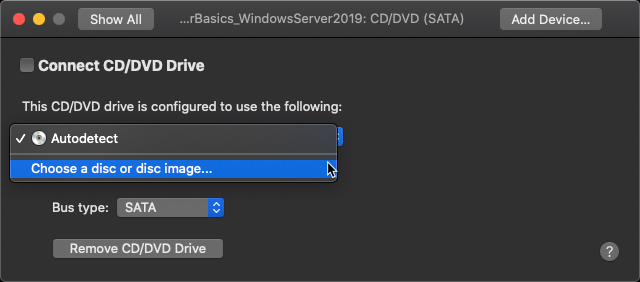
Click on the selection box and select “Choose a disc or disc image…”
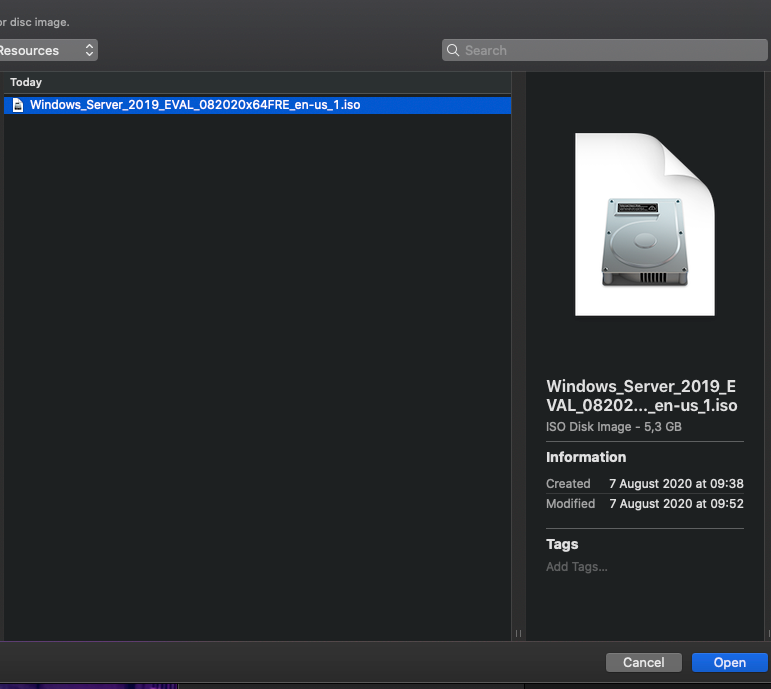
Navigate to the location you downloaded your Windows Server 2019 ISO image and select it.
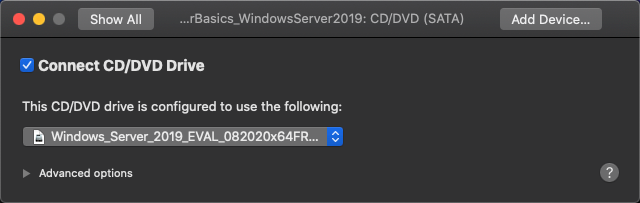
Now that we selected our ISO image, make sure you selected “Connect CD/DVD Drive” checkbox and then back to the main settings screen.
We need to set one more thing so we are sure that we will boot from our ISO image
Under Other Section select “Startup Disk”
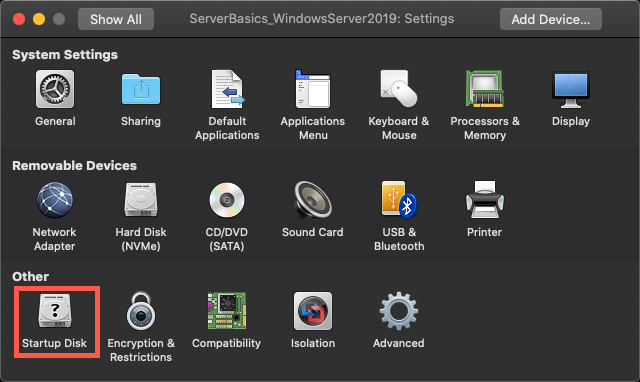
Select CD/DVD as your startup device.
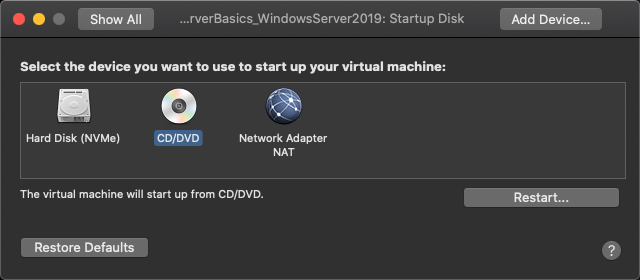
Again, settings in your virtualisation software may differ from this, so explore or Google for the steps you need.
Goal is clear whatever method – hardware or software you are using – mount Windows Server 2019 image we downloaded earlier and select it as bootable device. Also change hardware settings (CPU, RAM, disk) to the settings I mentioned above.
Installation
Now, to the final step, installation of our first Windows Server 2019 machine.
If you are doing it on physical machine be sure you set the USB stick (or CD/DVD if you burned downloaded ISO image to it) as main bootable device in BIOS (probably under boot menu) and in your virtualisation software follow steps I mentioned earlier.
If you did everything correctly, you will be greeted with this screen…
“Press any key to boot from CD or DVD” – press a key on your keyboard to boot from it…

Wait…

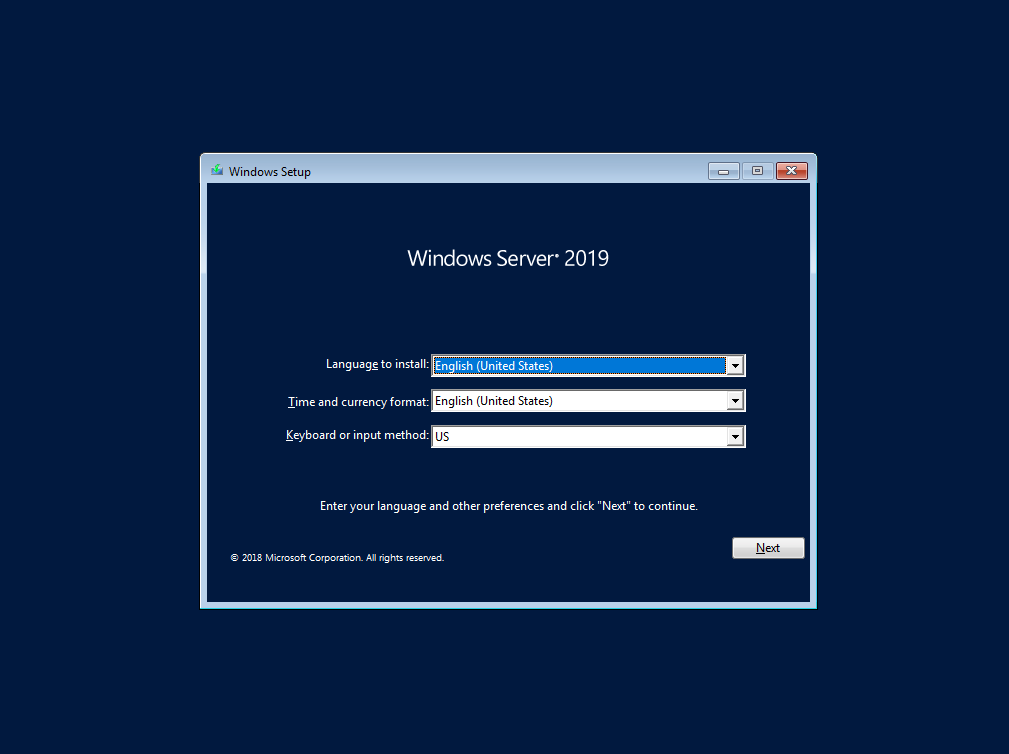
Language to install: Select language you wish your Windows Server installation to be – I will select English
Time and currency format – again, select your local settings
Keyboard or input method – select a keyboard layout, I will select English keyboard layout.
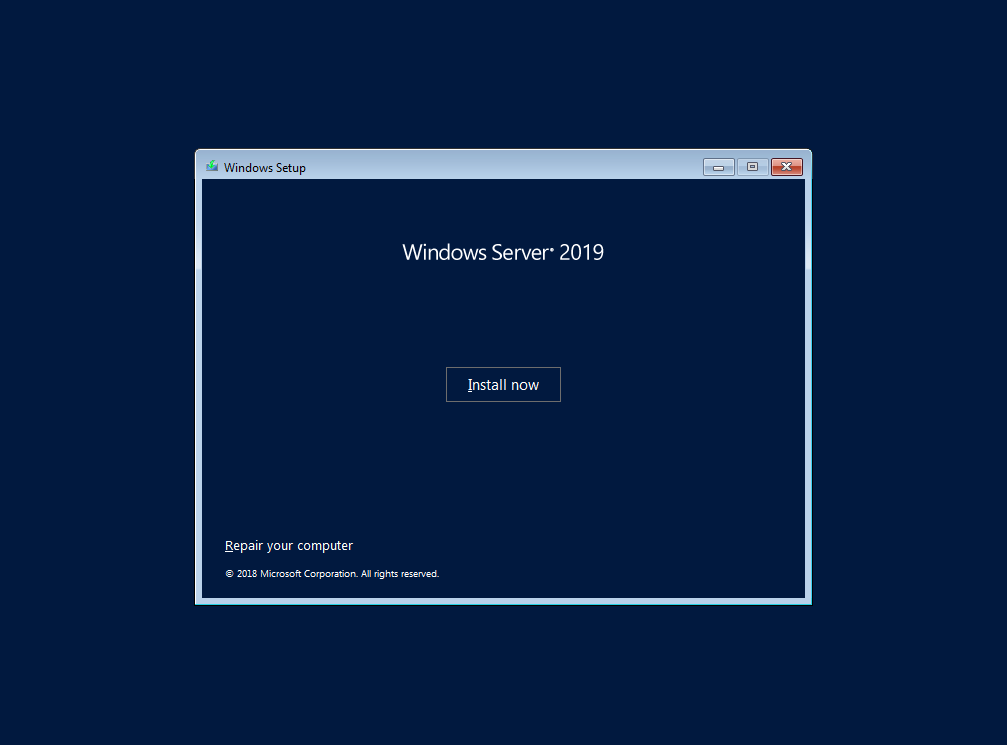
Install now…
…
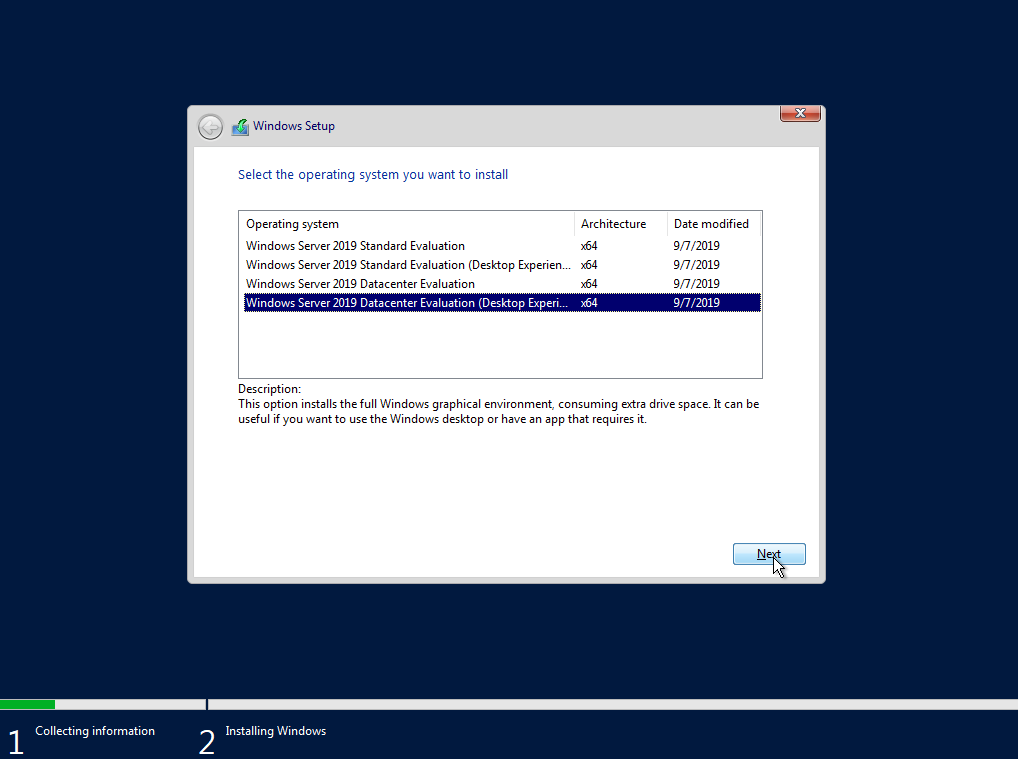
We will select Windows Server 2019 Datacenter Evaluation (Desktop Experience)
Read agreement, select “I accept…” and click on Next

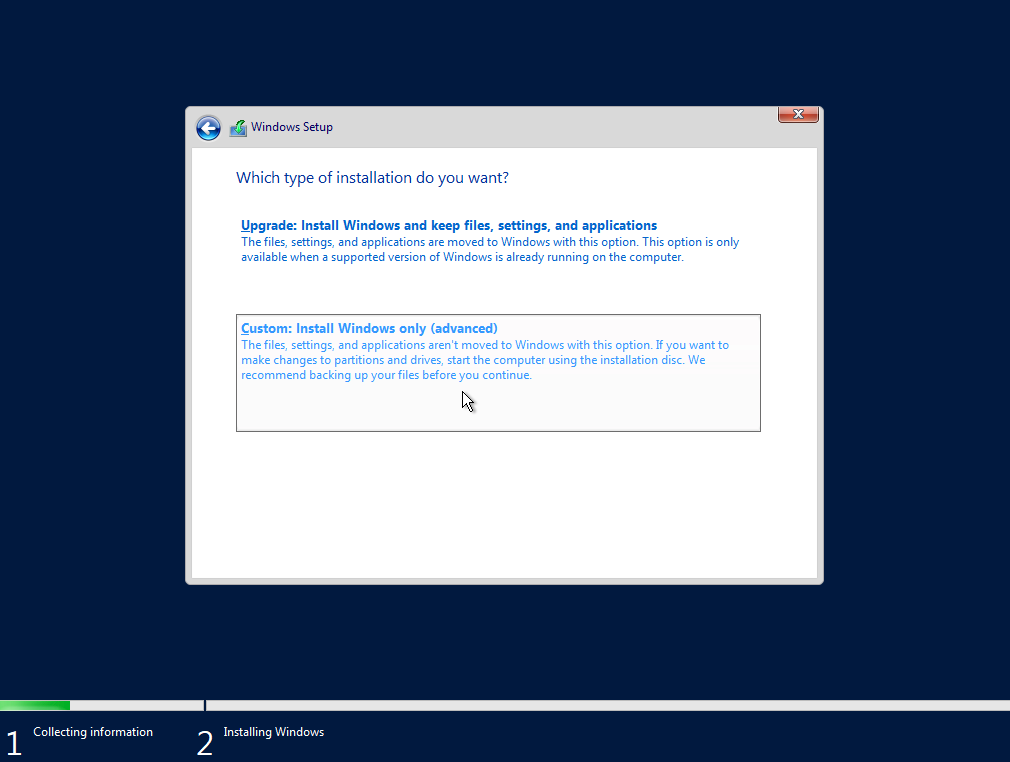
Select “Custom: Install Windows only (advanced) option
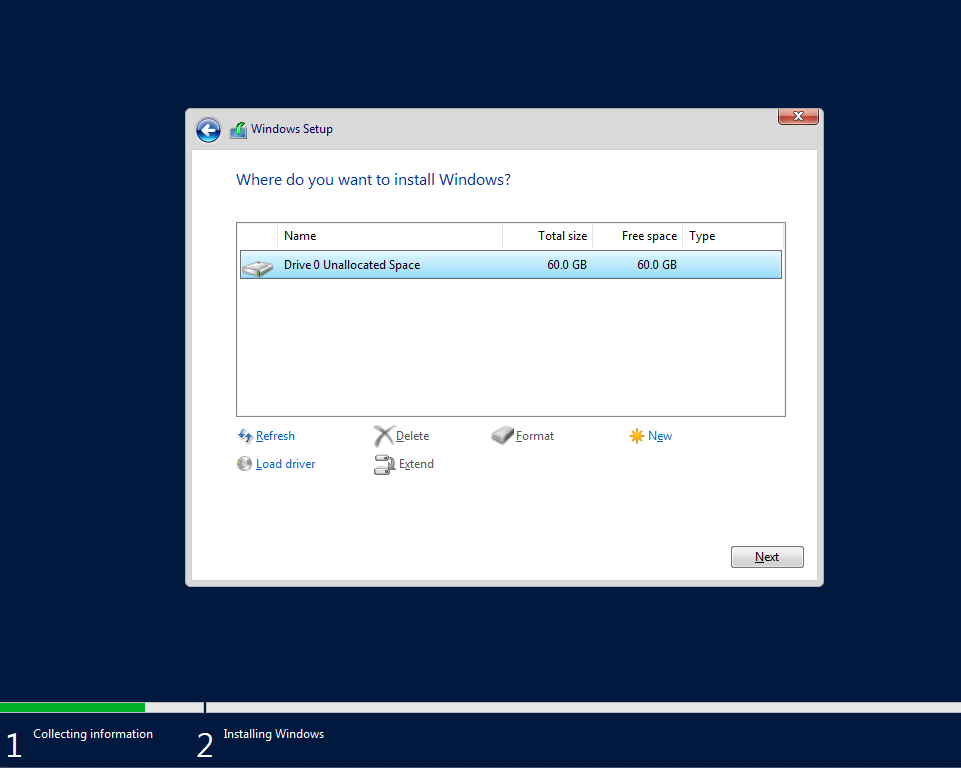
Now, select the disk you prepared for this installation. If this is a blank screen for you, you will need to prepare and load drivers for your storage controller (or RAID controller) I mentioned before. Copy drivers (drivers need to be for the Windows Server 2016/19 or some Windows 10 will even work) to USB, plug it in your machine and click on the Load driver on bottom of the screen. Then browse to your driver, select it and hope for the best.
Also, make sure disk you are installing on is empty with no important data on it, this operation will delete everything on it.
If you can see your disk on the screen below, then select Next and the installation will start…
We will now wait a bit… Waiting depends primarily on the speed of your PC, it may take longer on be very quick to install…
After you reached last step you will get restart screen…
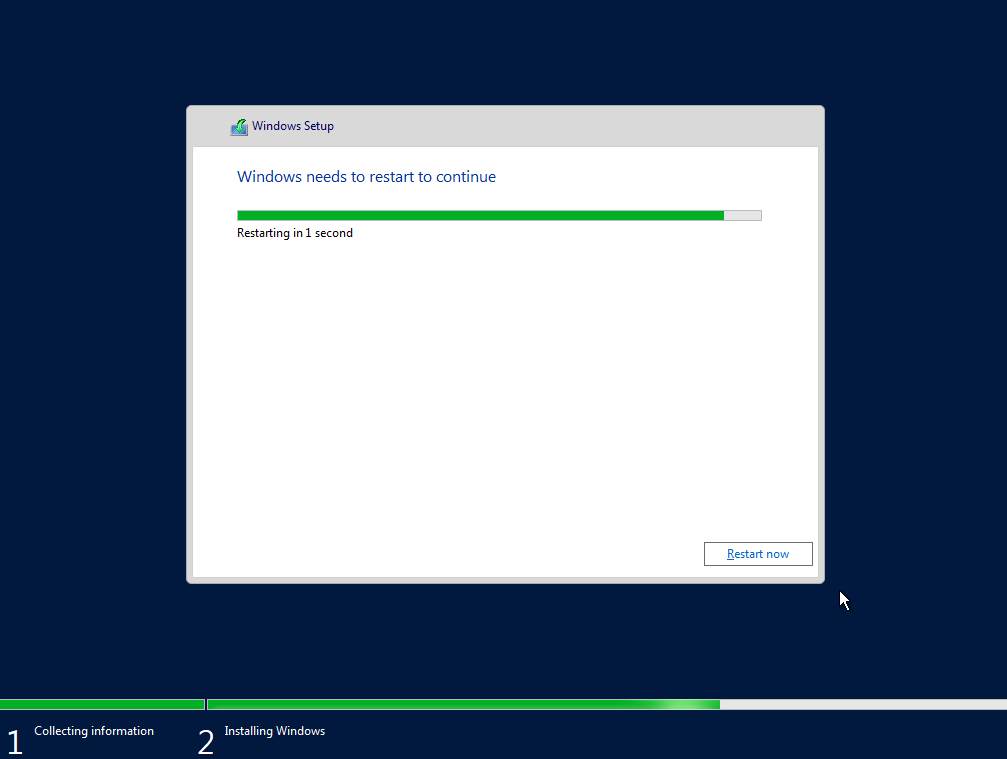
Let the computer/VM restart and this time let it pass “Press any key to boot from CD or DVD” – do not press any key on that screen.
You will be greeted with this screen… Enter password of your selection for your installation. Always make sure you use strong passwords (Minimum 12 signs – combination of letters, numbers, special chars…)
Click on Finish
That is it, you are greeted with lock screen
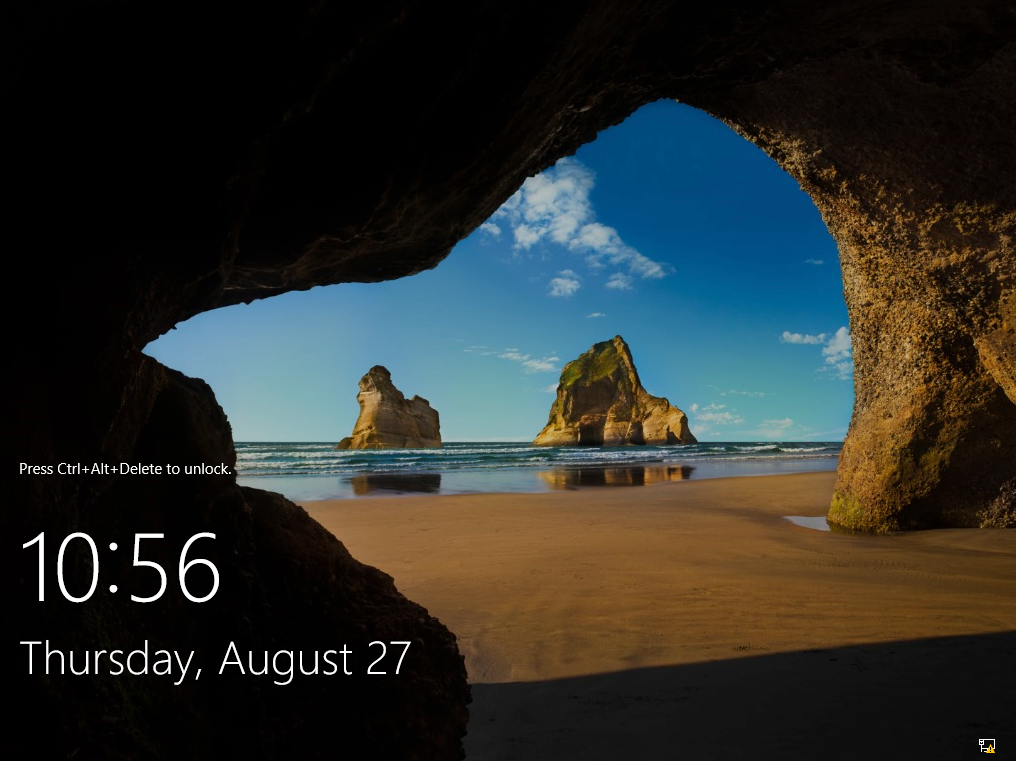
Press CTRL+ALT+DEL if you did install on physical machine, if you done install on a VM, look for a CTRL+ALT+DEL shortcut in a menu.
Enter your password and press enter on a keyboard.
Congratulations, you did your first Windows Server 2019 installation.
In the future I will try to expand this “Server Basics” series with more tutorials on how to configure your Windows Server 2019 installation and set various services on it (DHCP, DNS, file share, failover…)
I have a very busy schedule, so I can’t promise much, but I will try to write as much as time allows.
If you are interested in a video version of this tutorial – here is the video:
Disclaimer
Other tutorials in this series:
Server basics 02: First steps adter Windows Server 2019 install
Server Basics 03: How to install Hyper-V
Server Basics 04: How to create VM on Hyper-V
Server Basics 05: How to create virtual machine template
Server Basics 06: How to create windows domain
Server Basics 07: How to create user in domain, join computer to domain
Server Basics 08: How to create DHCP server
Server Basics 09: How to configure Groupe Policy Part1
Server Basics 10: How to configure Groupe Policy Part2
Server Basics 11: How to create iSCSI Target in Windows Server
Server Basics 12: How to create file server (DFS) in Windows Server
Server Basics 13: How to create Print Server
Are you ready to install Windows Server 2019 and take advantage of its powerful features? This comprehensive guide will walk you through the entire installation process, from obtaining the Windows Server 2019 ISO to configuring your system. Whether you’re setting up a standalone system or integrating it into a larger network, we’ll cover the essentials to ensure a smooth installation.
Don’t miss important details like the Windows Server 2019 end of life considerations and the different editions available, including Windows Server 2019 Standard. Let’s get started and make your Windows Server setup a success!
A Quick Guide:
The article provides a step-by-step guide for installing Windows Server 2019, starting with ensuring your system meets the minimum hardware requirements, including a 64-bit processor, 2 GB RAM, and 32 GB storage. It then instructs you to access the Voxfor website, select a subscription plan, and complete the signup process. Once subscribed, you prepare for installation by accessing the Voxfor management interface, locating, and loading the Windows Server 2019 ISO image, and rebooting the virtual machine.
The installation involves selecting the preferred Windows Server 2019 edition, accepting the license terms, choosing the custom installation type, and loading necessary drivers from the “virtio-win” ISO image. You also need to partition the disk by deleting existing partitions and creating new ones for the installation. Post-installation steps include setting up the initial user account and password, accessing the server via Remote Desktop Connection, and performing system updates and configurations, such as enabling Ethernet drivers and remote desktop access. This comprehensive guide ensures a smooth and complete installation of Windows Server 2019 on your system.
Windows Server 2019 Requirements
Minimum Requirements
- Processor: 1.4 GHz 64-bit, supports NX, DEP, CMPXCHG16b, LAHF/SAHF, PrefetchW, SLAT
- Memory: 512 MB (2 GB for Desktop Experience)
- Storage: 32 GB
- Network: Gigabit Ethernet adapter, PCI Express, PXE boot support
- Other: UEFI 2.3.1c, TPM 2.0, Super VGA (1024 x 768), DVD drive, Internet access
Recommended Requirements
- Processor: 3.1 GHz or faster multi-core
- Memory: 16 GB or more
- Storage: 64 GB or more
These requirements ensure that Windows Server 2019 runs effectively and efficiently.
Voxfor Lifetime Server Offer
First you need to navigate to voxfor website and then move to the windows vps price.
To subscribe to a plan, follow these steps:
- First Scroll down and select Windows Server 2019.
- You can select the 7 days trial only for $1 or just choose the plan you need.
- Choose the “Purchase Plan” option.
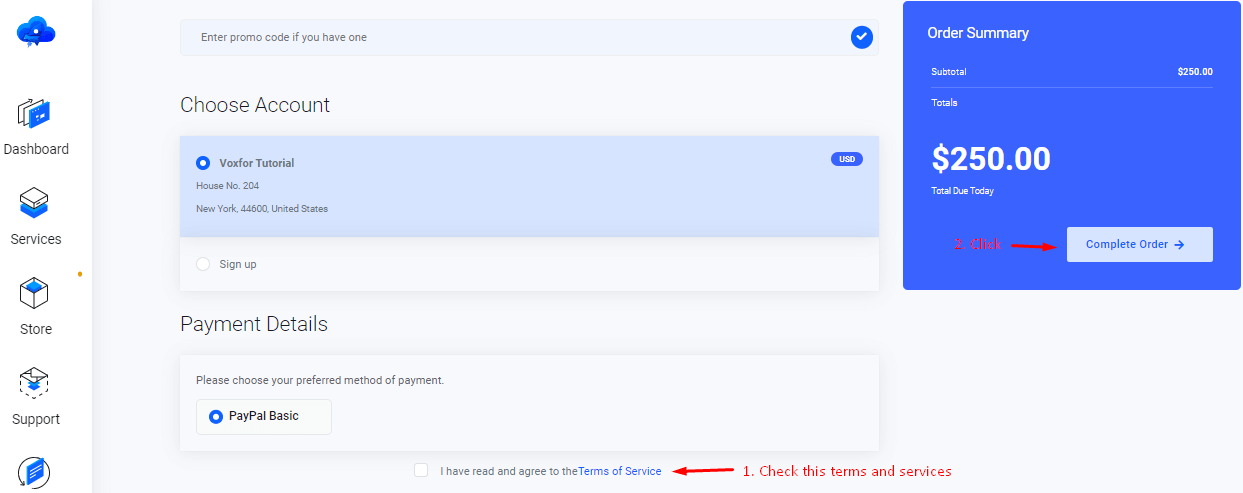
On the new page, sign up by entering your details.
Complete all steps and you’ll receive an email from Voxfor confirming your subscription.
Your Server is ready
After following all the above steps you’ll receive a confirmation email from voxfor confirming your subscription and the server information.

After getting the confirmation email from voxfor, you just need to click on the services as shown in the below image:

Windows 2019 Server Installation Steps
Follow these simple steps to install Windows 2019 Server iso:
1. Prepare Your Server:
Access the Voxfor management interface and select and click on your server from the list Under Services.

2. Service Management
Locate the “Service Management” section on your dashboard.
Click on the “ISO Images” option, which is represented by an icon with a disc and the text “ISO Images”.

3. ISO images:
Windows Server 2019 download or ISO for installation: In the search box, type the “Windows” and press Enter.
From the list of available ISO images, locate “Windows Server 2019 English.”
To load the ISO image, click on the refresh icon button next to “Windows Server 2019 iso English”.

After this you will get a confirmation dialogue box and you just need to click on the confirm button as you can see in the below image.

4. Reboot To Load ISO Image:
Return to the main service management page.
In the “Service Actions” section, click on the “Reboot” option to load the ISO image.

5. Reboot This Virtual Machine:
A confirmation box will appear asking, “Are you sure that you want to reboot this virtual machine?” Click “Yes” to proceed.

6. Navigate To Console:
In the “Service Management” section, click on the “Console” option to navigate to the console.

7. Windows Server 2019 Boot Menu:
On the console screen, you will see the Windows Server 2019 boot menu. Select the Language to install, set time and currency format and keyboard and input method and then press Next.

To proceed with configuring the Server Core installation, click Install Now

8. Windows Server 2019 Standard:
The setup wizard lists the install options below. In this list, editions without Desktop Experience are the Server Core install options:
- Windows Server Standard
- Windows Server Standard with Desktop Experience
- Windows Server Datacenter
- Windows Server Datacenter with Desktop Experience
Choose the operating system you would like to install, which in this case is Windows Server 2019 Standard (Desktop Experience). Depending on the license that you have, you may select Windows Server 2019 Datacenter as well. The options with the suffix Desktop Experience should not be selected because they will not install the Server Core edition.

Accept the License Terms for Windows Server Core 2019. Click Next.

Select the Server Core Installation Type: Upgrade or Custom. Selecting Upgrade will upgrade the existing server to the core edition. Since we are installing Windows Server 2019 Core on a VM, select Custom.

9. Virtio ISO Images:
Go to the services again and in the search box, type “virtio” and press Enter. From the list of available ISO images, locate “virtio-win-0.1.248.iso”. To load the ISO image, click on the refresh icon button next to “virtio-win-0.1.248.iso.” We are doing this because we need to install the driver during the installation.

After this you will get a confirmation dialogue box and you just need to click on the confirm button as you can see in the below image.

10. Load Driver:
Click on the load drive as you can see in the below image.

You have to select Browse from the options as you can see the image below:

You can select the CD Drive option under This PC as you can also see in the image.

Search NetKVM in CD drive.

In the dropdown menu of NetKVM you have to find 2k19 and click on that.

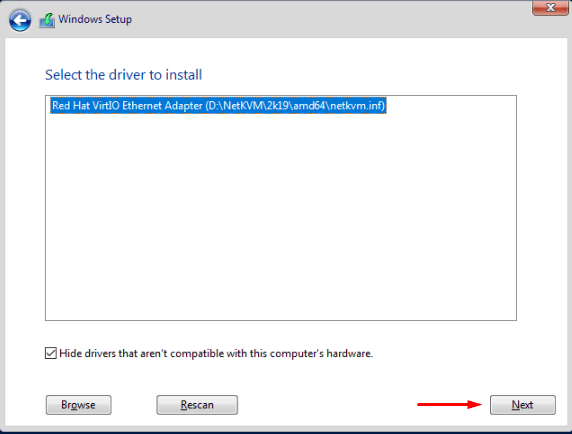
Select amd64 and click on Next as shown in the below image.

After this you will get the below image and you have to click on next.
11. Available ISO Images:
After this you need to go once again in Services and in the search box, type the “Windows” and press Enter.
From the list of available ISO images, locate “Windows Server 2019 English”
To load the ISO image, click on the refresh icon button next to “Windows Server 2019 English.”
After this you will get a confirmation dialogue box and you just need to click on the confirm button as you can see in the below image.

12. Release Storage:
Select the Disk for installing Windows Server 2019 Core. First you have to release some space by selecting and clicking on Delete as shown in the image. Click Next.

After this you can get a confirmation box and you have to click OK.

Select Drive 0 Partition 1, click on delete and press Next.

It will show you a warning message and hit OK on it.

Same step you will do for this option also.

After this you can get a confirmation box and you have to click OK.

Next, click on “New” to create a new partition for the installation of Windows Server 2019. Select the desired size, click on “Apply,” and then press “Next.”

After this, a confirmation box will appear. You will need to click “OK.”

Now, select the partition you created for the installation of the operating system and click “Next.”

13. Windows Server 2019 Core Installation:
Windows Server 2019 Core Installation begins now. All you need to do is wait a few minutes to complete the installation. While the installation is in progress, if you’re feeling too sleepy, why not grab a cup of coffee?
The Server 2019 installation should be quick, with the entire process taking no more than 5-10 minutes. This completes the steps to install Windows Server 2019 Core.

You may click “Restart Now,” but if you do not, the system will automatically reboot after 10 seconds.

After reboot you will see this window.
14. Administrator Creation:
Next, you will need to enter your login password and retype it for confirmation. After this, click on “Finish.”

Press “Alt+Ctrl+Del” to log in to your operating system.

Enter the password you set during the installation.

15. Windows Server 2019 Interface:
After a successful login, you will access the Windows Server 2019.

As you can see that your Ethernet drivers have been installed automatically. Click on “No,” and proceed on.

Windows has successfully updated your drivers. Simply click on “Close”.

16. Local Storage:
The Control Panel is available in the same way as it is on conventional Windows operating systems, so you can start customizing your server from here or explore more possibilities there. After this you have to select a local server.

17. Enhanced Security Manager:
In the server manager find If Enhanced Security Manager and click at ON as you can see in the below image.

After selecting on you have a new menu and click on OFF at Admin

18. Enable Remote Desktop:
In the server manager screen you need to find the remote desktop and click on disabled written in front of Remote desktop as you can see in the below image.

After this you will see the system properties menu in which you have to select Allow remote connections to the computer, then you will see the new window click OK as shown in image.

First click ok and then hit apply as you can see in the image.

19. Command Prompt:
Left-click on the Command Prompt and select “Run as administrator”.

20. Ethernet Drivers Ping Test:
To verify your Ethernet drivers, you can perform a ping test from the Command Prompt. Type ping 8.8.8.8. If your drivers are working correctly, you will see successful ping responses.

21. Voxfor Control Panel
Once again, navigate to the services section of Voxfor.

Copy the IP Address. In this case, the IP Address is 5.161.235.159, as shown in the image below.

22. Remote Desktop Connection:
Now, go to the search box and type “remote.” Click on “Remote Desktop Connection,” as shown in the image.
Paste the IP Address that you copied from the Voxfor dashboard into the provided field, and then click on “Connect,” as shown in the image.

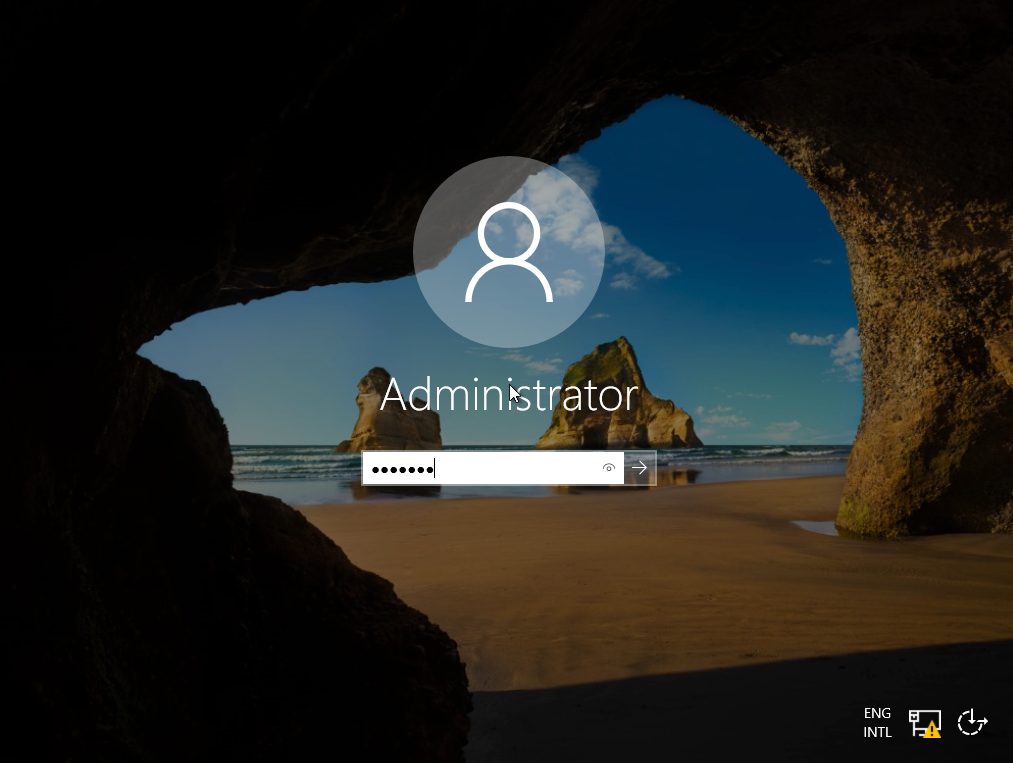
You will now see a pop-up where you need to enter your credentials. In the username field, type “Administrator.” Then, enter the password you set during the installation.
After this, you will receive a pop-up message from Remote Desktop Connection. Check the box that says “Don’t ask me again for connections to this computer,” and then click on “Yes.”
Now, you will see that your Remote Desktop Connection is connecting to the server.

After the connection is established, you will have successfully entered your operating system.

23. Check For updates:
Now, search for “updates” in the search box and click on “Check for updates.”

If you find any updates, click on “Install now,” as shown in this case.

Conclusion
Congratulations! You now have an installation of Windows 2019 Server up and running. Windows Server 2019 is a powerful and stable distribution, perfect for servers and workstations alike. Ready for more? Choose Voxfor for your server needs and enjoy the simplicity of a ready-to-use server with Windows Server 2019 installed, available in just two minutes. Visit Voxfor to get started today! Thank you for following this guide. For more tips and tutorials, stay tuned to our website. If you have any questions or need further assistance, feel free to reach out to our support team.For further installation guides, visit the Voxfor website where you can find information on Almalinux, CentOS 7.9, and windows 2022 server.