
Not along after posting about using PCem 11, version 12 was available for downloading literally a few days later. Due to this, I’ll briefly go over the changes before delving into setting up a virtual 386 PC with Windows 95.
Why a 386? Windows 95 required as a minimum a 386DX to run. Back in the day when a 386 was rather common, I’d only see them with 4 or 8 MB of RAM running Windows 3.1. However, in more recent times I did see someone who had a highly-spec’d multimedia 386 build with 64 MB of RAM on YouTube, and the performance of Windows 95 wasn’t that bad considering the hardware involved. This is an attempt to mimic that virtually.
Before proceeding, here’s a run-down of some of the changes between PCem 11 and 12:
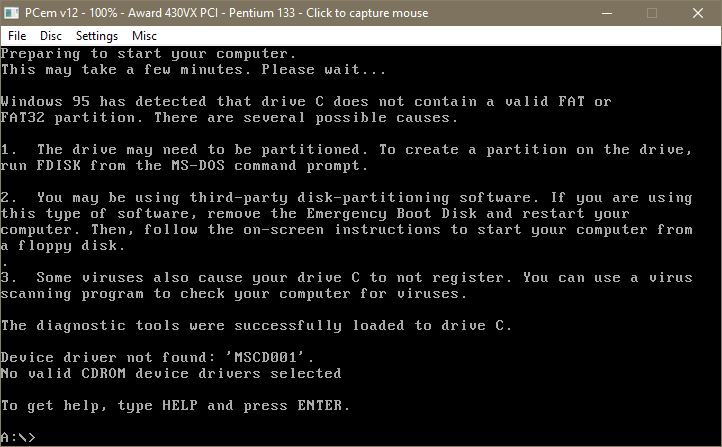
BIOS – Version 12 added BIOS support for AMI 386DX and MR 386DX. Previously when using the AMI 386 BIOS ROM file (AMI386.BIN), it was named as a generic 386 clone with the ability to select either 386 SX or DX processors. Using the same ROM file in version 12 now designates it as a 386 SX only. In order to use a 386DX, another ROM file needs to be used instead named OPT495SX.AMI.
Mice – The ability to now select between serial, PS/2, and IntelliMouse, with the Microsoft 2-button serial mouse as the default option.
Joysticks – The ability to now select a joystick, including the Microsoft SideWinder Pad.
Wait states – Wait states replaces the cache setting from previous versions. This adjusts the speed when the processor has no instructions to process.
Voodoo graphics – The Voodoo graphics feature isn’t new, though the ability to select the type of Voodoo is. A new drop-down list has been added to select between the original Voodoo, Voodoo 2, and the Obsidian SB50 with Amethyst adapters.
Lastly PCem 12 can now synchronise the time with the host PC.
For this guide you’ll need to have:
- PCem available on your PC
- ROM files for motherboard BIOS and video
- OPT495SX.AMI – 386DX-based BIOS; use with PCem 12 or later Download
- AMI386.BIN – 386 BIOS; use with PCem 11 or earlier, otherwise it’s treated as a 386 SX (for the purpose of running Windows 95, I won’t be using this one) Download
- ET4000.BIN – Tseng Labs ET4000AX with 1 MB video memory Download
- CD or ISO image of Windows 95 (you also could use the floppy disk version)
- Windows 95 boot disk Download
Setting Up PCem Itself
Firstly, I’d suggest having a read of my previous post, click here, as it covers the process of setting up PCem for the first time.
With the ROM files, place the OPT495SX.AMI file into the ami386dx sub-folder under the roms folder. If the AMI386.BIN file is to be used, this file is placed into the ami386 sub-folder instead at the same location. The ET4000.BIN file for the video is simply placed into the roms folder itself. Now that the ROMs are in their correct location, execute PCEM.EXE to start.
Upon starting PCem, an error message will appear due to the lack of having a configuration file. When closing the message, a PCEM.CFG file is created, and the error will no longer appear provided that the file is kept as is. It will then appear to be starting up the virtual PC, using 4 MB RAM and CGA graphics by default.

PCem starting up with default RAM and graphic settings.
Before commencing anything else, we’ll start configuring the virtual PC in order to meet the minimum requirements for running Windows 95. Select Settings followed by Configure from the menu bar. The Configure PCem dialog box appears.
I used the following configuration, though feel free to experiment:
- Machine > AMI 386DX clone
- Video > Tseng ET4000AX
- CPU type > AMD
- CPU > Am386DX/40
- Video speed > Fast 16-bit (just for being more historically correct, as the faster VLB and PCI interfaces were introduced in the 486 era)
- Sound card > Sound Blaster 16
- Memory > 64 MB (the maximum amount the 386 BIOS can address)
- Drive A > 3.5″ 1.44M
- Drive B > 5.25″ 1.2M
Select OK to confirm the changes. PCem will mention this will restart itself; select OK again. You should notice the change in display and the additional memory detected.

PCem now starting up as a 386DX 40 Mhz with SVGA graphics card.
From here, it’s a good time to set up the hard disk and CD-ROM drive. Being a 386, the maximum size for hard disks supported were around 504 MB, and the only way to get around that was to either use a SCSI controller card or DDO (dynamic drive overlay) software.
Select Configure hard discs from the Disc menu. Choose hard drive and CD-ROM for C: and D: drives respectively. Under C: select New for the New Hard Disc dialog box to appear.

Setting up mass storage drives.
Update the cylinders values with 1024 to increase the capacity to 504 MB. Select the … button to provide a file name and specify the location where it’s to be saved, then select OK. PCem will remind you to partition and format the drive. Select OK again to close and save the changes in the Configure Hard Discs dialog box. Continue with restarting PCem when prompted to do so.
Upon restart, you’ll see once again (as shown above) a prompt to run the setup utility from the BIOS. Press the F1 key, and the AMI BIOS utility will appear. Highlight the Auto Detect Hard Disk option and press Enter. Shortly afterwards the hard drive should be detected as below. Press Y, then Enter. Repeat again for drive D when it detects no hard disk.

Successfully detecting the 504 MB hard disk.
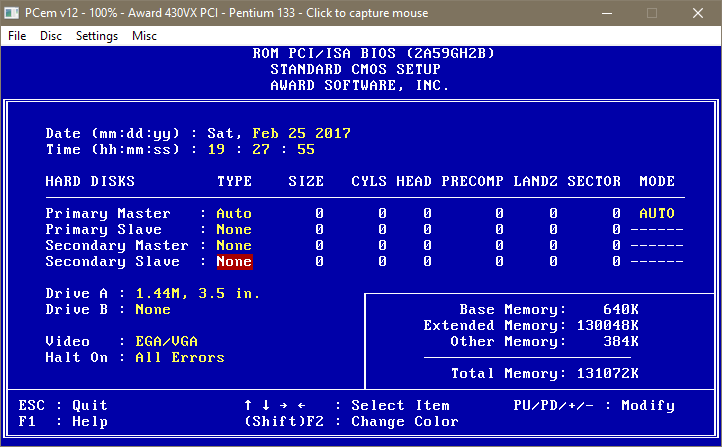
Back at the main menu, highlight the Standard CMOS Setup option and press Enter. Here is where we align the floppy drives to what was set in PCem itself, in this case with drive B. Use the Page Up and Page Down keys to change the highlighted option.

Updating the floppy drive type.
When done press Esc to return to the main menu, and choose Write to CMOS and Exit to save the changes. Press Y then Enter upon confirmation. PCem will restart. Once it does, instead of seeing a prompt to run the setup utility, it will state there’s an issue with the HDD (hard disk drive) controller. The error will disappear following the next steps.
Preparing the Hard Disk
At this point mount the Windows 95 boot disk image file, by selecting Change Drive A: from the Disc menu. It’s also a good time to enable the virtual CD-ROM drive, as it’s disabled by default. To do so, select Settings from the menu, hover over CD-ROM, and select Empty for the time being. PCem will require a restart. Now CD-ROM drivers will then be able to detect a CD-ROM drive present.
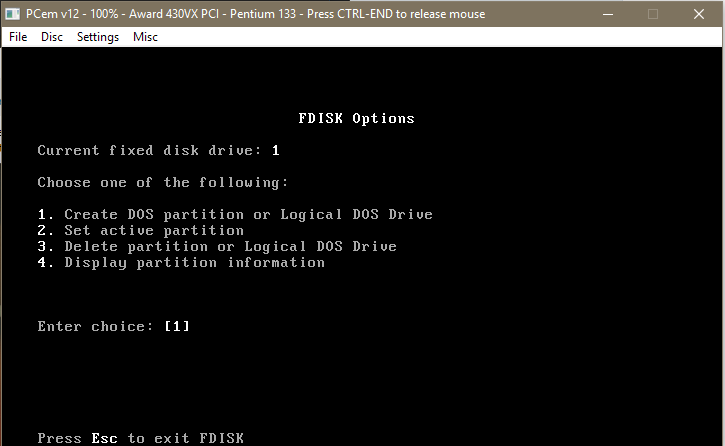
As it restarts, PCem should now be starting from the boot disk in drive A. At the A:\> prompt, type fdisk then press Enter to start the FDISK utility. FDISK will bring up a menu with four options to select from. Press 1 for the Create DOS partition or Logical DOS drive option followed by Enter. Another menu appears with three options to select from. Press 1 for the Create Primary DOS Partition and press Enter. The hard disk is quickly scanned and you will be prompted if you wish to use the maximum available size of the hard disk. The default option is yes, so press Enter. You will be prompted to now restart the computer. From the File menu, select Ctrl+Alt+Del to restart bypassing the memory test.
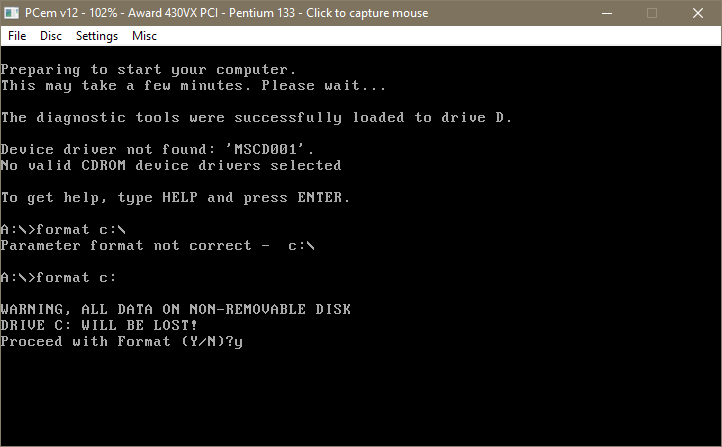
Back at the A:\> prompt, type format c: then Enter. Press Y then Enter to proceed with the format.

Formatting the hard disk.
After formatting, you’ll be prompted to provide disk volume label, otherwise just proceed by pressing Enter. The hard disk is now ready for installing Windows.
At the C:\> prompt, type md win95 and press Enter. This creates a directory (folder) named win95 on the hard disk. Then type copy d:\win95\*.cab c:\win95 to copy the main installation files from the CD to the new directory on your hard disk, were d:\ is the CD-ROM drive. The purpose is to avoid an issue in the later stages of Windows 95 Setup after rebooting, where it’s unable to locate the CAB files from not having CD-ROM drivers loaded. The files can be deleted afterwards to save on the limited disk space of the drive. For now, we’re ready to install Windows 95.
Windows 95 Setup
At the DOS prompt, begin Windows 95 Setup by typing d:\setup (again change d:\ if your CD-ROM drive is designated a different letter).
Follow the prompts as your normally would during Setup. If you need more details on proceeding through with installation, I suggest checking out an earlier post (click here) where I was installing Windows 95 under Oracle VirtualBox. More specifically the section under the same name (Windows 95 Setup) as here. The only part I deviate here is skipping detection of network cards.
Eventually when installation completes, you should be able to see the desktop. Windows 95 came provided with drivers for the Tseng Labs ET4000 and Sound Blaster 16, so these work as is. The mouse under Device Manager was flagged with an issue, despite functioning okay. It was listed as a Standard Serial Mouse, though updating to the Microsoft Serial Mouse driver from the Windows CD sorted that out.

Windows 95 on a 386, usable with a little patience.
Going into MS-DOS mode, I ran SpeedSys to see how the results would turn out. The CPU score of 8.98 was within range of a real 386DX processor. The hard disk tests were automatically skipped, while memory performance flat-lined, though its throughput was higher by around 5 to 10 MB/s compared to using actual SIMM memory of the era from what I could see.

Results under SpeedSys.
Overall with plenty of RAM, Windows 95 was doable on a 386 upon release. The pain-point is with the software to run on it, as often releases would be requiring a 486 as a bare minimum, such as Microsoft Office 97 and Adobe Photoshop 4.0. It’s not really a compelling Windows upgrade, when you’re likely to be stuck with Windows 3.x and DOS applications.
This page provides instructions and tips for installing Windows in PCem to make tool-assisted speedruns. The entirety of the main guide applies here too. To discuss this setup and its usage, please visit this thread.
These guidelines will help you make a TAS that people will be able to sync on other machines. If nobody else can sync your run, then it will probably not get accepted!
We cannot distribute a fully configured OS hard drive image like we did with the DOS configurations, so you will need to install Windows yourself. But we can provide a libTAS movie that you can run and it will automatically install Windows onto a hard drive image for you.
- What you’ll need
- Common files
- OS dependent files
- Installing the OS
- Encodes
- Using Windows with libTAS
- flash.bin and NVR
- libTAS Settings
- Trivia
What you’ll need
The steps for installing Windows 95 or Windows XP in PCem under libTAS are similar. You will need a number of files matched exactly by name and hashsum, and the steps below largely involve identifying the correct files and ensuring they are in the correct locations. Consult the Windows configuration page for additional details including hashsum information as well as full hardware specifications. The following elements should be in place to complete a Windows installation using a libTAS movie file:
Common files
- libTAS and PCem installed (ensure
~/.pcem/pcem.cfghasconfirm_on_stop_emulation = 0set). - ROM files for PCem v17. We can’t distribute them. Place all PCem ROMs in
~/.pcem/roms/. File names are case-sensitive!- The files you’ll need for Windows are:
ga686bx/6BX.F2a,voodoo3_3000/3k12sd.rom, andawe32.raw. Their hashsums are provided in the Windows common configuration section.
- The files you’ll need for Windows are:
- An empty 4GB hard drive image file (download link)
- If you are installing Windows 95, just rename the
windowsxp.imgfile towindows95b.imgor similar.
- If you are installing Windows 95, just rename the
- Make sure
~/.pcem/roms/ga686bx/flash.binand~/.pcem/nvr/windowsxp.ga686bx.nvrfiles do not exist! If you write to disk or use PCem outside of libTAS, delete the files again before installing.
OS dependent files
| File | Windows 95 | Windows XP |
|---|---|---|
| Windows installation CD image | Windows 95b OSR 2 | Windows XP SP3 Home Edition |
| Utilities CD with extra dependencies | Windows 95 utilities ISO | Windows XP utilities ISO |
| Boot floppy (Windows 95 only) | Microsoft Windows 95 OSR2 — Boot Disk | |
Machine config file (update each /full/path/to/) |
windows95b.cfg | windowsxp.cfg |
| OS installation movie file for libTAS | Windows 95 installation .ltm | Windows XP installation .ltm |
Installing the OS
- Set the game executable to the full path to PCem, usually
/usr/bin/pcem. - Set the command line to
--config /full/path/to/config.cfg, substituting the path of your.cfgfile. Use the full path, do not shorten it with~. - Uncheck Runtime -> Prevent writing to disk for the installation movie only (remember to check this back after the OS installation is complete).
- Play back the matching installation movie above (fast-forward should work).
- If something is missing and the process fails, delete
~/.pcem/roms/ga686bx/flash.binand~/.pcem/nvr/windowsxp.ga686bx.nvrand recreate an empty 4GB hard drive image before trying again.
When the Windows installation completes successfully, you will have flash.bin, .nvr, and .img files that represent your setup. See descriptions/annotations of respective OS installation movies for their paths, names, and hashsums.
- If some hashsum does not match, you’ll have to redo the installation process again, because that’s the only way to ensure your actual TAS will sync for other people!
Encodes
- Windows 95B OSR 2
- Windows XP SP 3
- Setting up Windows XP in libTAS
(Link to video)
(Link to video)
(Link to video)
Using Windows with libTAS
flash.bin and NVR
flash.bin is file a created by the system, it contains the flash memory of the system. Because the ROM gets written into it, we can’t distribute it. This file may also contain custom system parameters from previous configs using the chipset.
Similarly, a non-volatile memory file is created in ~/.pcem/nvr/ named after your machine config and motherboard (for example windowsxp.ga686bx.nvr). It is also required for movie sync. It can be distributed, but it’s pointless to distribute it, since the installation movie has to be run anyway, and it recreates the NVR file.
- You must always start with the
~/.pcem/roms/ga686bx/flash.binand~/.pcem/nvr/windowsxp.ga686bx.nvrfiles that were generated from the Windows XP installation movie.- If you use a verification movie to install your game, you should start with
flash.binand.nvrthat were generated from that.
- If you use a verification movie to install your game, you should start with
libTAS Settings
- All settings from the main PCem guide apply
- Games that attempt to fetch the current time and date may not work correctly using the default system time in libTAS (which results in 2070-01-01). To fix this, set the system time to a date between 2000-01-01 (946684800 System time in libTAS) and 2037-12-31 (2145830400).
- 1980-01-01 (2145830400 System time in libTAS) to 1999-12-31 (946684800) should also work. However, Windows XP is known to take substantially longer to boot up using system times in this range (see Trivia below) and hence this is not recommended.
Trivia
- Hide
- Driver VSync setting
- System time and startup timecodes
- Double-click on the 3dfx icon in the Notification area (alternatively, right-click it and select 3dfx Voodoo 3 Board — 3dfx Hub)
- Go to 3dfx Advanced Features tab
- Go to Direct3D (or OpenGL/Glide, depending on the game) -> Speed Settings
- Change Fastest (V-Sync Disabled) to Normal (V-Sync Enabled) by double-clicking on the current option and selecting the other one in the dropdown that appears
This may reduce screen tearing in your game, but it’s not guaranteed to help.
| Starting time | 3dfx card BIOS | Pentium II BIOS | System Config | Windows XP | Res increase | Mouse appears | Welcome | Desktop |
|---|---|---|---|---|---|---|---|---|
| 1 | 2.27 | 3.63 | 9.57 | 13.82 | 44.39 | 44.55 | 48.75 | 51.56 |
| 100000000 | Trial expiry | |||||||
| 300000000 | Trial expiry | |||||||
| 400000000 | Invalid time/date | |||||||
| 500000000 | Too long (300+) | |||||||
| 800000000 | Invalid time/date | |||||||
| 1000000000 | 2.27 | 3.63 | 9.57 | 13.82 | 53.42 | 55.88 | 60.63 | 68.75 |
| 1100000000 | 2.27 | 3.63 | 9.57 | 13.82 | 44.4 | 44.56 | 48.94 | 51.39 |
| 1200000000 | 2.27 | 3.63 | 9.57 | 13.82 | 44.42 | 44.58 | 48.84 | 51.49 |
| 1300000000 | 2.27 | 3.63 | 9.57 | 13.82 | 44.4 | 44.56 | 48.55 | 53.62 |
| 1400000000 | 2.27 | 3.63 | 9.57 | 13.82 | 53.42 | 55.89 | 58.36 | 68.84 |
| 1500000000 | 2.27 | 3.63 | 9.57 | 13.82 | 53.42 | 55.88 | 58.31 | 68.78 |
| 1600000000 | 2.27 | 3.63 | 9.57 | 13.82 | 53.42 | 55.88 | 59.92 | 68.72 |
| 1700000000 | 2.27 | 3.63 | 9.57 | 13.82 | 44.4 | 44.56 | 48.74 | 51.1 |
| 1800000000 | 2.27 | 3.63 | 9.57 | 13.82 | 44.4 | 44.56 | 48.91 | 51.36 |
| 1900000000 | 2.27 | 3.63 | 9.57 | 13.82 | 44.4 | 44.57 | 49.01 | 51.36 |
| 2000000000 | 2.27 | 3.63 | 9.57 | 13.82 | 53.42 | 55.88 | 59.88 | 68.75 |
| 2100000000 | 2.27 | 3.63 | 9.57 | 13.82 | 53.42 | 55.89 | 58.27 | 68.76 |
Legend:
- 3dfx card BIOS = first frame that the text is visible onscreen
- Pentium II BIOS = first frame that the text is visible onscreen
- System Config = frame that the window settles on its new resolution
- Windows XP = frame that the window settles on its new resolution of 640×480
- Res increase = frame that the window settles on its new resolution of 800×600
- Mouse appears = first frame that the mouse appears onscreen
- Welcome = first frame that the welcome screen (or «Windows is starting up») is fully visible
- Desktop = first frame that the desktop is fully visible
This guide is out of date. I’ve written an updated guide on setting up PCem’s successor, 86 box here:
Setting Up 86box and Windows 98
If you have an older computer or just prefer PCem, then carry on with this guide:
————————————————————————
PCem is an impressively versatile emulator, capable of emulating a wide range of IBM compatible PCs. From XT 8088 based machines up to Late Pentium I MMX era machines, making it a viable alternative to DOSbox and virtualization.
The latest version at the time of writing is PCem V12. Heading up the list of improvements are speed optimizations and Vodoo 2 support.
Games from the late 90s era of Windows computing are notoriously difficult to get working on a modern install of Windows. These latest improvements make PCem an attractive option to play around with.
This tutorial will focus on setting up PCem to run Windows games from this era. You should also be able to run older Windows software and even many DOS games well as a bonus. If you need to see any of the images in more detail, right click on them and click view image. The files needed should be easily searchable by the names I give.

Things you will need:
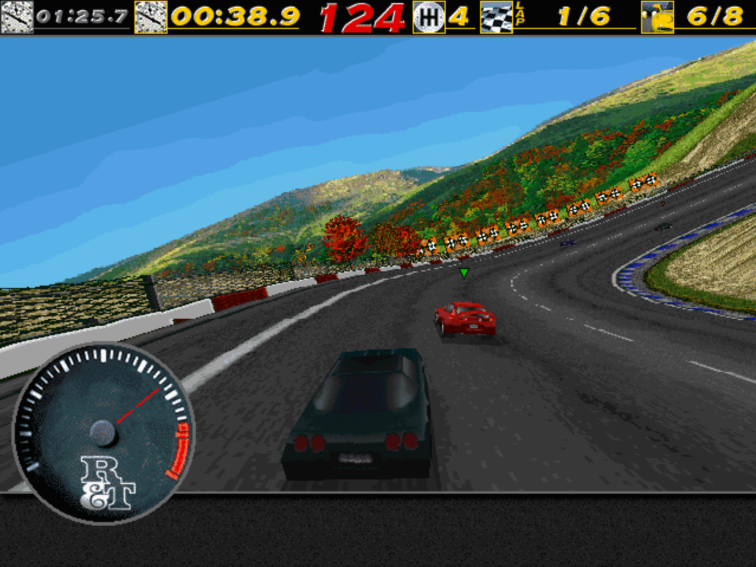
- A fast CPU. At least if you want to run the more demanding 3DFX titles. Something around the 4Ghz mark. Emulation of a single thread CPU is impossible to run on multiple threads. As a result, a slower clocked octo core CPU will be no help to you here. I’m using an i7 3820 running at 4.2Ghz and I’m able to get performance similar to a Pentium 1 200Mhz. This gets me a good frame rate in games like Quake 2, Need for Speed III and even pretty playable frame rates in Quake 3. A host CPU of around half the speed will likely be able to keep up with games made for a Pentium 1 90Mhz.
- PCem. Get it here:
http://pcem-emulator.co.uk/downloads.html - Compatible BIOS files:
https://mega.nz/#!p99klbTb!A5-E97bh290pALB7vayX7t8ibVLgWKfmFf2GoU8oj04 - Windows 95 OSR2.5 CD image:
You can use an actual CD or a .iso disc image.
https://winworldpc.com/product/windows-95/osr-3
From what I understand this version of Win 95 is the one to get. Better compatibility with things apparently. It does cause a slight complication during the setup but it’s not a big deal. - Windows 95 boot floppy disk image:
You’ll need floppy disk image windows95b.img or this boot.img here:
https://mega.nz/#!888XlQ4A!pRdORIFx3W4zw8KAemkOUZVTm3Gu4X0gPzgzn-1mLDY
We’ll need this to setup our virtual hard drive. Make sure it’s a .img file. - Win9x Voodoo 2 drivers:
http://www.falconfly.de/voodoo2.htm
Get the latest reference driver from 2000. Just note that you will need to install DirectX 7 for many games to work properly, even if the games themselves don’t require Dx7.
You’re also going to need to install some additional software:
- A tool to extract compressed archives. I recommend 7zip:
http://www.7-zip.org/download.html - Daemon Tools lite or similar CD image mounting software:
https://www.daemon-tools.cc/products/dtlite
Windows comes built in with it’s own image mounting software but it’s limited in compatibility. - ImgBurn:
http://download.imgburn.com/SetupImgBurn_2.5.8.0.exe
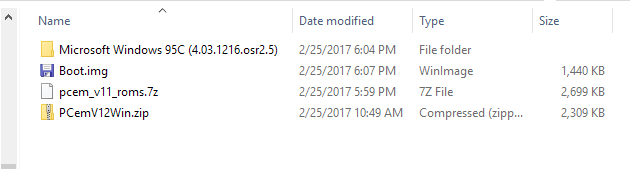
Once you’ve got all that you should have a collection of files that looks something like this:

Initial Emulator Setup
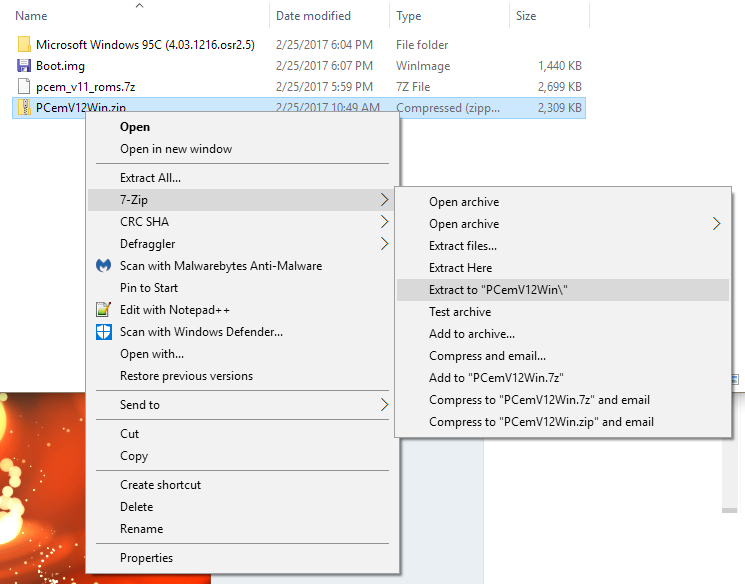
To get things started we’ll need to extract the PCem archive. Plonk it where ever is convenient to you. I’m going to keep everything in the one folder.
Extract the pcem_v11_roms.7z archive somewhere else convenient too.
Open up your PCem folder and in a new window, open up the folder you extracted the pcem_v11_roms archive to.
In the PCem folder there is a folder called roms. We’ll need to copy the contents of the pcem_v11_roms folder into this folder.
Select all files inside pcem_v11_roms and drag them into your PCem\Roms folder. Overwrite files if it asks.
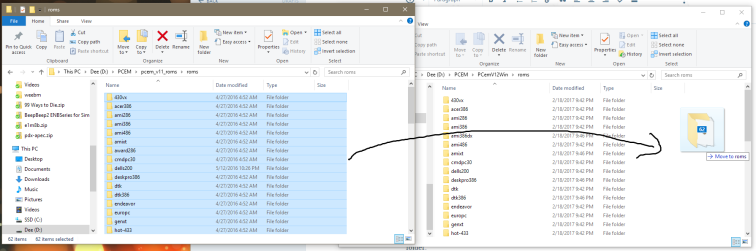
Now all those funny named folders have ROMs inside them. Most importantly you should have a file named 55xwuq0e.bin contained within the 430vx folder. This is the mother board BIOS ROM that we will be using.
Back out to the root of your PCem folder. Fire up PCem.exe
It might start up as some sort of Sinclair computer. Just ignore that. If your mouse cursor has become trapped within the emulator press Ctrl + End to get it back. Open up the settings menu and click configure. Change the options in the window that pops up to look like this:
(Update 27/12/17:
PCem is now on version 15. The configuration menus are a little different now, but all the settings I show are still relevant. The menus just look a bit different so you might need to click around a bit to find the settings I talk about.)
The Award 430VX PCI motherboard is now listed as “[Socket 7] Shuttle HOT-557”
I’m not sure why but this is what you will now have to set as your machine in the current version of PCem instead.
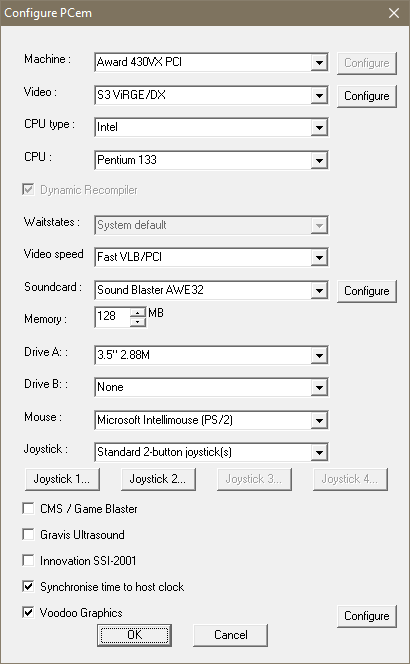
Don’t be concerned about the CPU speed too much, we can bump that up at any time and using a slower Pentium runs better during the initial setup of Windows.
Click the configure button next to Voodoo Graphics and change the settings to these:
It will complain about having to reset, just hit okay in both instances. The emulator will restart and you should be presented with a nostalgic POST screen – at least to some of you:


Setting Up the Virtual Hard Drive
Open up the Disc menu and find Configure hard disks…
Make sure under C: that Hard drive is selected and then click the New button.
In the window that pops up, click the unhelpfully labelled “…” button.
This will let you select a location for your virtual hard drive. The file is going to take up roughly 8GB of disk space. I recommend making a folder labelled “hdd” in your PCem folder and placing it in there. It will ask you to choose a name. Call it something like “Win95”
Next you’re going to want to change the value in the Cylinders field. The maximum is 16383 so lets go with that. Leave Sectors and Heads at their default values of 63 and 16 respectively.
Once you hit OK, PCem is going to lock up. Don’t panic, it’s creating the virtual hard drive file. It’ll take a minute or two before popping up a window reminding you to partition and format your drive. We will get to that soon. Hit OK and PCem will complain about needing to reset again. Hit OK.
You should now be back at the POST display we saw earlier. Click on the display and hit the DEL key to enter the BIOS setup screen. Select STANDARD CMOS SETUP.
Use the down arrow key on your keyboard and select Primary Slave. Primary Master should be set to Auto. To speed up boot times a little we can set the three other drives to None. Press PgDn twice to change this and repeat for Secondary Master and Secondary Slave.
Hit ESC to back out to the main menu and then press F10 then Y and then Enter on your keyboard to save the settings. The emulated system will now reboot, go through the POST screen again and then complain about NOT HAVING ANY BOOT DISK. Time to fix that I suppose.
Press Ctrl + End to release your mouse from the emulator and open up the Disc drop down menu. Select “Change Drive A:” Navigate to the boot.img I had you download, select it and press open.
Now open up the File drop down menu and select Hard Reset.
The emulator will now restart and boot from the floppy disk image we just virtually inserted into it’s virtual floppy disk drive virtually.
You’ll be presented with this screen:
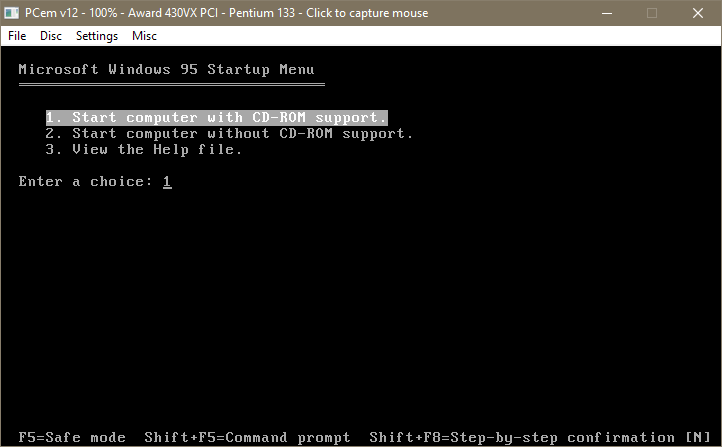
Hit 1 and enter to continue with CD-ROM support. Give it a few moments and you should have something like this on your screen:
Type in “fdisk” at the prompt and press Y to say yes to large disk support.
Now press 1 and enter to Create DOS partition or Logical DOS drive. Then 1 again at the next screen to Create Primary DOS Partition
After a brief moment it will ask you if you want to make the maximum space available plus make the partition the active partition. Press Y for yes and then enter.
Fdisk will then inform us that we MUST restart the system. Let’s not upset it. Press Ctrl + End and select the File menu and Hard Reset once again. Say yes to CD-ROM support once again when you’re asked.
Once the system is back to the A:\> prompt type in “format c:” and press enter. It will warn you about erasing all data on c: but since we haven’t put anything on there yet I don’t think we need to worry about that. Press y and then enter.
Formatting will take a few minutes. Once it’s finished it will ask you to give it a label. You can hit Enter for no label or call it whatever you like.
That’s the Virtual Hard drive setup and ready to have Windows installed on it.

Installing Windows
First we are going to need to mount the disc image of the Windows 95 installation CD. There are a couple of ways to go about this.
You can either use Daemon Tools to mount the image, once mounted in Daemon Tools you can then open the settings menu in PCem, navigate to CD-ROM and then select the virtual drive you have the Windows CD mounted to. You may need to close and re-open PCem in order for it to see the newly mounted image.
If you don’t want to use Daemon tools, you can mount it directly within PCem by going to Settings–>CD-ROM–>ISO… Navigate to the Windows 95 OSR 2.5 I had you download at the beginning, select it and click Open.
Whichever method you decide to use you will need to restart PCem. It will again boot from our boot disk floopy image. Again select CD-ROM support.
Once you’re at the A:\> prompt, check that the CD is mounted correctly by typing e: and press Enter. You should now be at an E:\> prompt. Type dir and hit enter. You should see these files and folders listed:
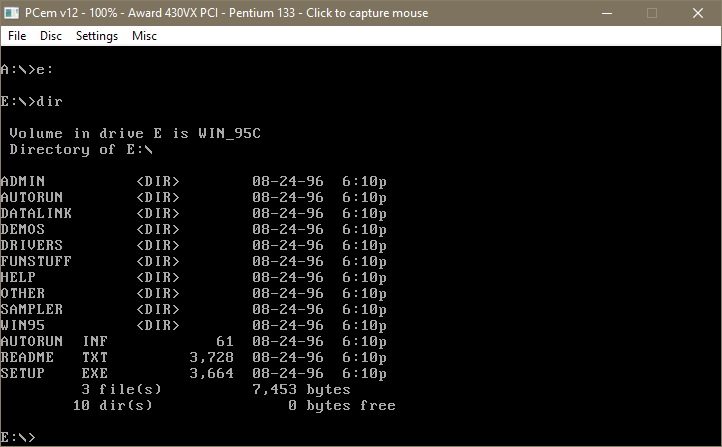
There is a bug with the version of Windows that we are installing that won’t let it read from the WIN95 folder on the CD during the install, so we’ll need to copy it over onto the c:\ drive manually.
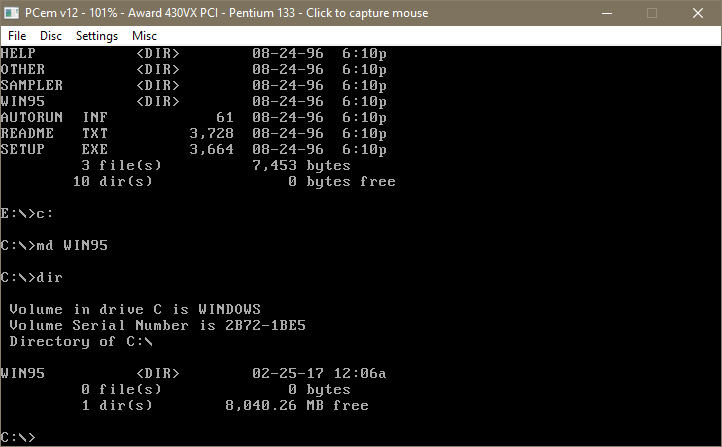
First let’s make a directory on the c: drive to copy the folder into.
Type c: and press Enter.
Type md WIN95 and press Enter. (md is the make directory command. you can check that it’s made the folder by typing dir and pressing Enter. It should look like this:
Now we can copy the files from the CD onto c:\ . Type:
copy e:\WIN95 c:\WIN95
Press enter and you should see it copying the files. You can navigate into the folder and check that all the files are there by typing:
cd win95
Then:
dir/p
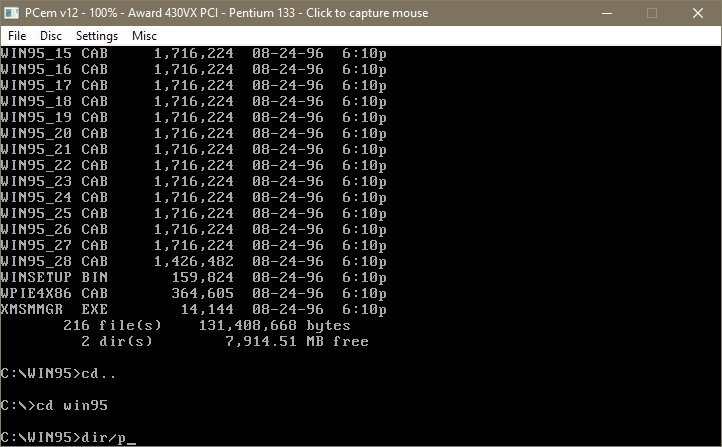
Once you hit enter it will display the list of files contained in the directory. Keep pressing any key until you are returned to the prompt. Once you’ve confirmed the WIN95 folder from the CD is on your c: drive we can go back to the e: and start the Windows setup. Type e: and press Enter.
At the E:\> prompt type setup and press enter. Press enter again and the installer will run through it’s checks to make sure everything is ready to go. Once it’s done, press x on your keyboard to Exit and jump into the Windows setup proper.

Windows Setup GUI
Alright, you can start using your mouse again. Press Continue to get things started. Press Yes to accept the license agreement and Next two times to get to the type of install you want. Select Typical and hit next. (You can select custom and choose to install additional components like games and mouse pointers but these can also be installed later once Windows setup has completed.)
Once you hit next it will ask you for a COA key. You can search around for one or search around for one.
At the next screen, enter your name and make up a dumb company name if you want and hit next.
It will then ask what type of devices it searches for just check both boxes and hit next.
I forgot to take pictures during this part so here’s a screenshot of a progress bar:
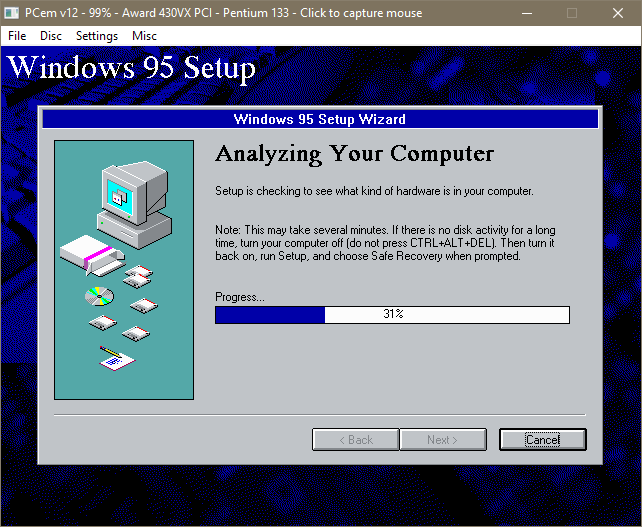
This will take a minute or so. Once that’s done if you selected typical install it will ask you if you want to install the most common components or if you want to choose. Just select common and move on. You’ll then be asked if you want to make a start up disk. Say no and click next and then next again to start it copying files.
It will take a few more minutes to do it’s thing. Once that’s done it will ask you to restart the system. Before doing that make sure to eject the floppy disk image by pressing Ctrl + End and then going to the Disc menu and selecting Eject drive A:
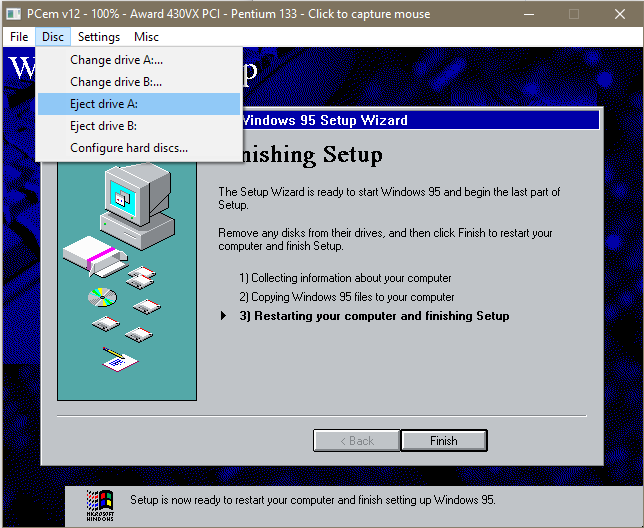
Hit finish and the system will reboot and continue into Windows.
Here’s why we had to faff about, moving files in DOS:
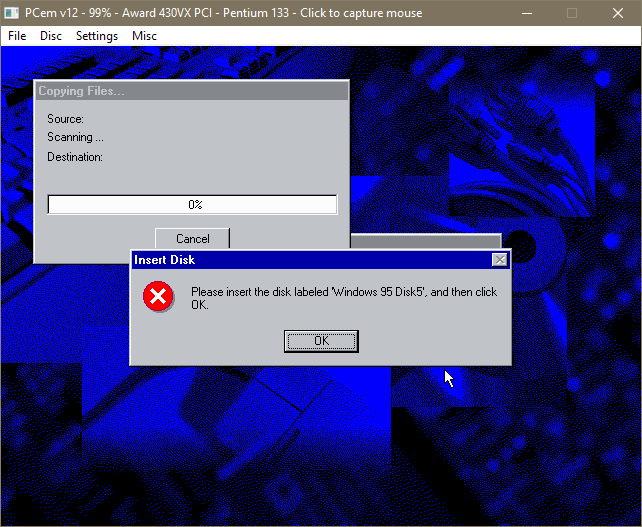
Hit OK. In the next window that pops up click on Browse…
The Win95 folder on c: we created should be right there.
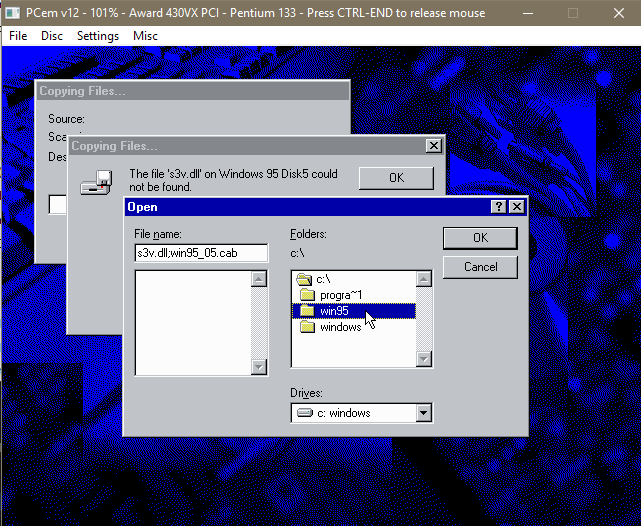
Double click on it.
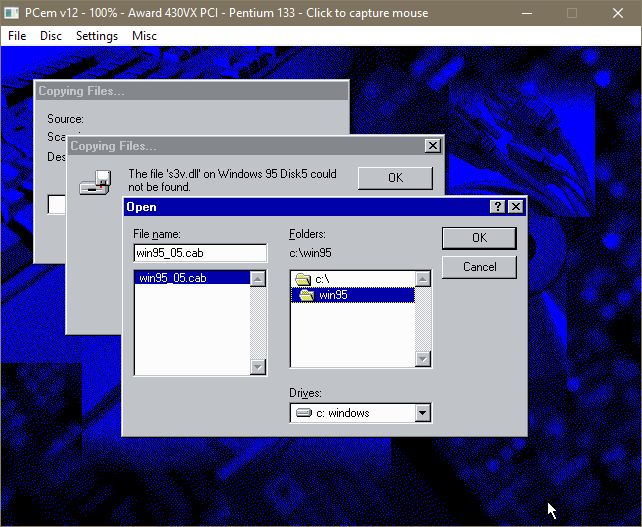
Windows should see the .cab file it’s looking for and display it in the left panel there. Click OK, then OK again.
Windows will now go through it’s unpacking process. Tell it what time zone you are in when it asks. If it asks you to setup a printer or something else you don’t care about just click on cancel. Once all that is done Windows will reboot again.
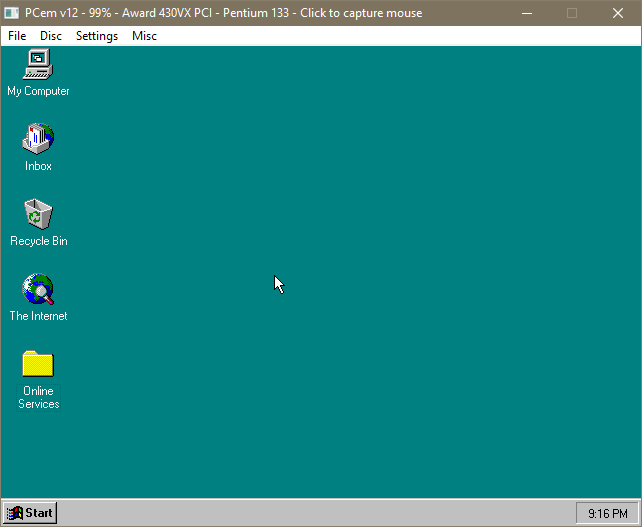
The emulator should now boot into the default Windows 95 256 colour desktop, in all it’s turquoise glory. You should find that the base graphics card has installed itself so feel free to up the resolution and colour depth in screen properties. (If you find that you are stuck on a low resolution and low colour mode it means Windows hasn’t automatically installed the S3 drivers, I talk about fixing that at the end of next section.)
You should have also noticed a startup sound indicating sound drivers are also installed.
If for some reason you don’t get any sound, you can try running the add new hardware wizard in the control panel. If it asks for your Windows 95 CD just point it to the WIN95 folder on the c: drive that we created.
Grab this Soundblaster software suite CD image if you want more advanced features and other related stuff:
http://www.vogonsdrivers.com/getfile.php?fileid=13
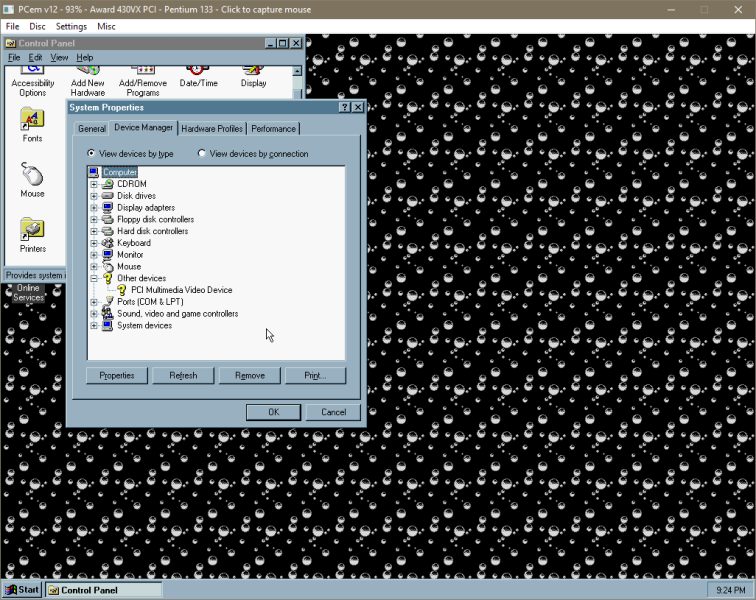
Okay, moving on. Head on over to the device manager, you will find PCI multimedia Video Device without drivers. That’s our emulated Voodoo 2. To install it we’re going to need a way to get files from the host system into the emulator. This is where Imgburn comes in.

Importing Files Into PCem and Installing 3DFX Drivers
Extract the Voodoo 2 drivers you downloaded and open up imgburn.
Select Create Image File from Files/Folders.
Hit the Show Disc Layout Editor, find your voodoo 2 driver folder and drag it into the lower panel.
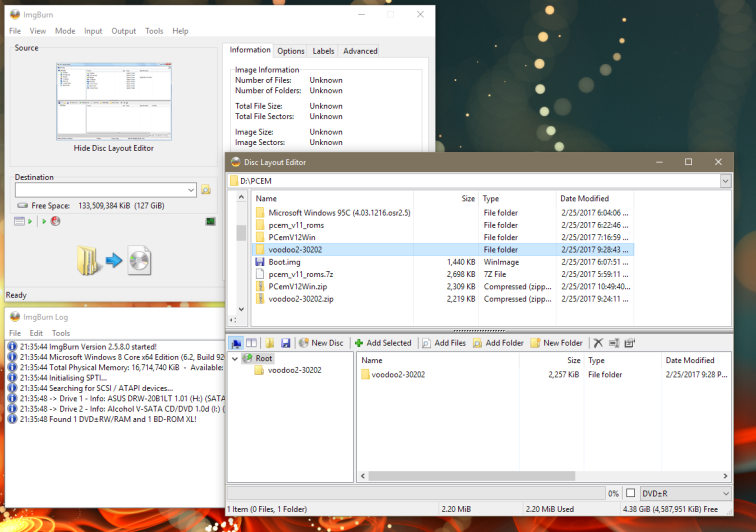
Close that window. And find the sneaky little toggle button I’ve highlighted below that tells Imgburn to write the image to a disc image and not your optical disc drive (if you have one).
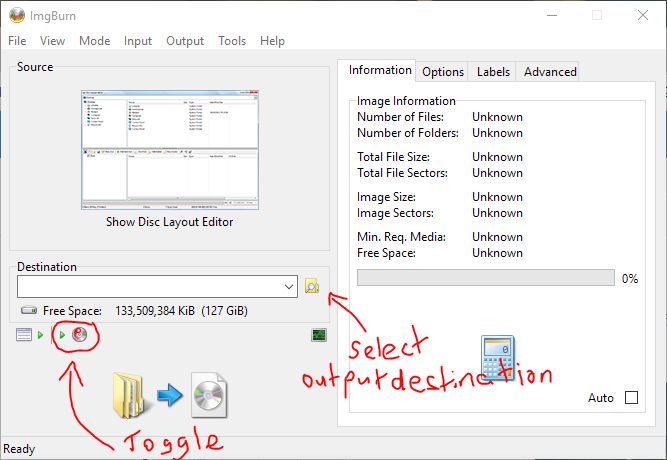
Click the little folder to tell Imgburn where to save the image we’re creating to. Then click the big button in the bottom left to create the image. Hit Yes to select the default image name and we’re done with Imgburn.
Mount the image you just created with Daemon tools or with PCem as described earlier and a CD containing our files will appear within Windows 95.

Run the Voodoo 2 executable and extract the driver files somewhere handy. c:\voodoo2 is good.
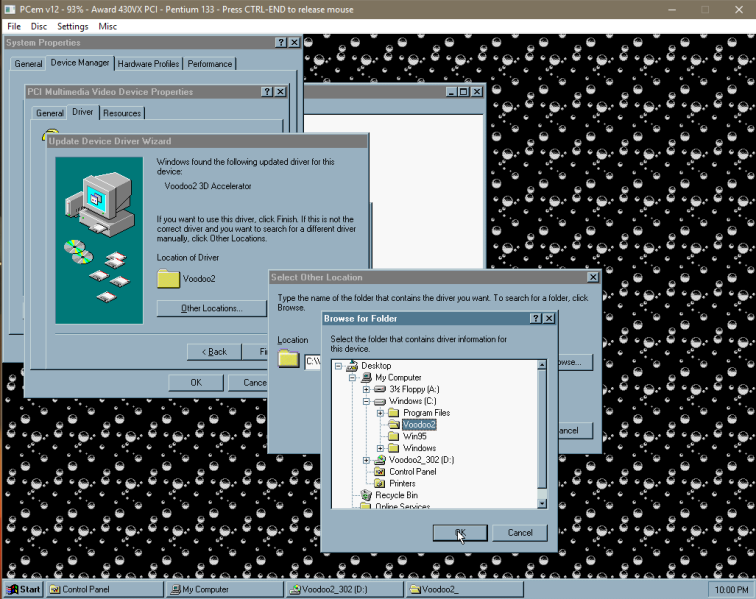
Open up the control panel, navigate to System, open up the device manager tab and find PCI Multimedia Video Device. Double click on it, click on the driver tab and click on Update Driver…
Choose Yes to search for the driver and click next. Give it a moment and it will say it was unable to locate a driver but there will now be a button labelled Other Locations that you can click on. Click Browse, find your voodoo2 folder on c: and click OK and then OK again.
Click Finish and Windows will throw up an error message telling you to insert the disk labelled Voodoo 2.
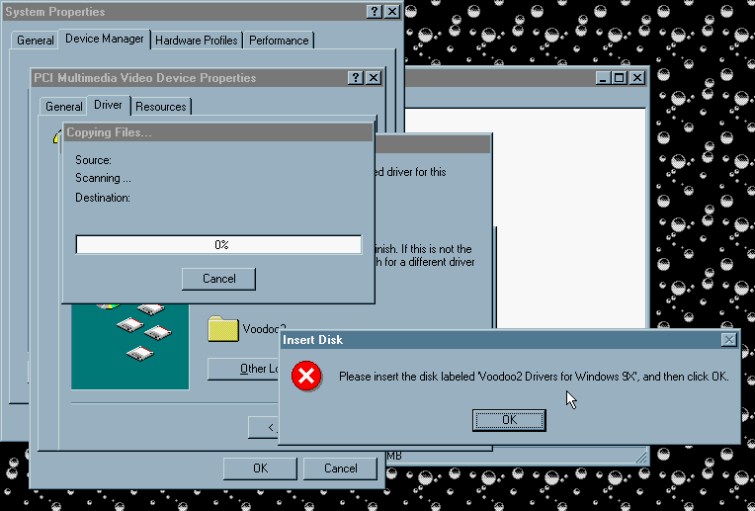
Windows 95! \o/
Hit OK. Again, click browse on the window that pops up and yet again navigate to your voodoo 2 folder on c:\ until a .dll file appears in the left panel.
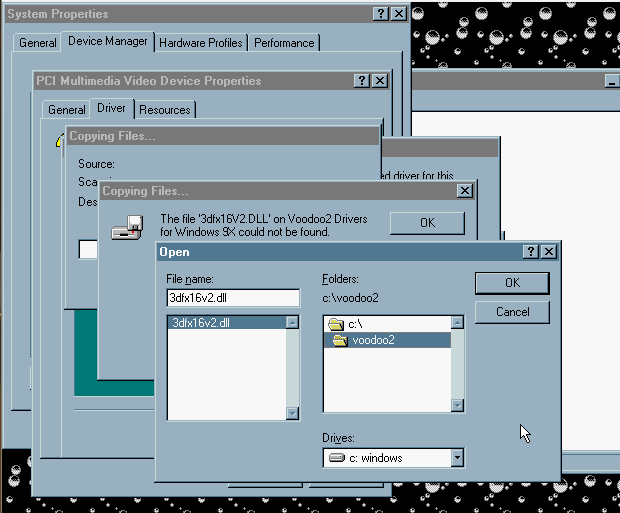
Click OK. Then OK once again. This bullshit is fairly standard procedure when installing drivers in Win9x. Their are many things I remember fondly about Windows 95 but installing new hardware is not one of them.
It will install the driver, prompt you to restart the system. Once rebooted, you should now have the Voodoo 2 drivers installed.
—
If the S3 graphics drivers haven’t installed themselves it should be simple enough to fix.
I’ve uploaded a CD image file which contains the S3 drivers (and vodoo 2 drivers as a bonus) that you will need here:
https://mega.nz/#!d4MhCYCD!kOkZFQaV8Jzpkp9CG2s5RGI1VXRXUEwTvjyh1qlC_Bc
Mount it with Daemon tools just like we did above and right click on the Windows 95 desktop and select properties then click on the settings tab. Click on the Advanced Settings button.
Click on the monitor tab and make sure it says Plug and Play monitor. If it doesn’t, click the change button and change it to that.
Once that is done you can click back onto the adapter tab and click the Change… button there. Click the have disk button and point it towards the S3 folder in the CD drive. With a little luck, after a reboot Windows should now be using the S3 Virge as it’s default display adapter and you will be able to use higher resolutions with more colours.
—
And that’s pretty much it. You’re ready to install some games.
If you think I’ve said something dumb and need to correct something, be sure to let me know in the comments. Please let me know if any of the links are dead too. I hope you have a good time using PCem and that this has been of some use.

Things to Note
A quirk of PCem to be aware of is that if a program isn’t using much CPU the emulator can slow right down. Sim City 2000 for example will run very slowly when you aren’t moving around the map and in game menus, you might notice sound stuttering. The best fix for this is to lower the CPU down to a slower chip. Like a Pentium 90Mhz. The general rule of thumb is to use the lowest speed CPU that will allow you to run the game smoothly. For 2d games use something like a Pentium 90 and for 3d use a Pentium 200Mhz MMX. You will probably need to experiment with it a bit. You can change the CPU while the emulator is running. It’s best to do it while on the Windows desktop because some games can freeze up if you swap around CPUs while they are running.
If your CPU has hyper-threading (or an AMD equivalent) it’s worth turning it off in your bios if you need some extra performance. Overclocking your CPU will also make a big difference. Raw clock speed is what counts most with emulation like this.
Full screen can be found in the settings menu under video. Direct 3d tends to look best and be sure to set Full screen stretch mode to 4:3 if you don’t want it to look ugly and stretched. Press Alt + Ctrl + PgDn to exit full screen.

Testing Out Some Games
I’ll throw up a few screenshots of games here and describe the sort of performance I get with each.
The Need for Speed: Special Edition
With the CPU set to 166Mhz audio is quite choppy in the game menus. In game it runs perfectly with high settings and no audio issues.
Need for Speed III: Hot Pursuit
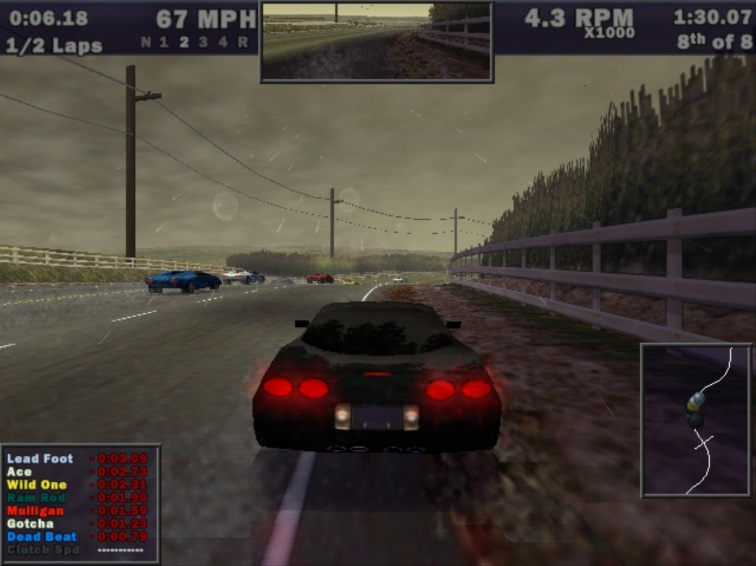
You may need to install the DirectX 5 redistributable that comes on the game’s CD before this game will work properly. Be sure to set the video device to Voodoo 2 using the games video setup program. Running with a 200Mhz CPU the game runs smoothly. The menus are a little bit choppy but in game performance is good with all the graphical bells and whistles turned up.
Quake II
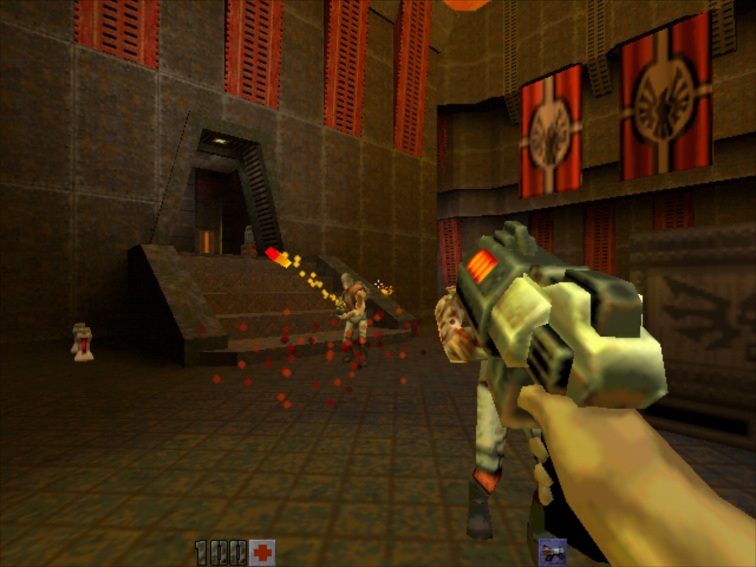
I was running this from a physical CD and was experiencing poor performance and choppy sound. Ripping the disc with ImgBurn to my hard drive and mounting the image solved it. I believe this was due to CD audio played during the game. The game runs great in Glide mode. Very smooth.
Interstate 76
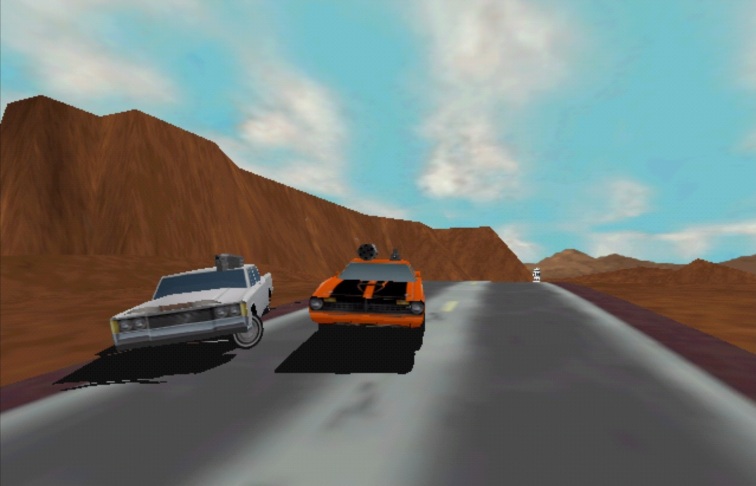
Here we have -at least for me- the best reason to setup PCem. Interstate 76 will not run correctly on a modern computer. Today’s CPUs completely break the physics and AI rendering the game unplayable. Even the gog.com version suffers from this problem. You can make the game playable by limiting the game to below 30FPS to fix the physics issues but flamethrowers will still be broken.
A shame as you aren’t going to find a better game in the car combat sub-genre. I love this game.
At first performance in PCem was disappointing. Running the game at anything higher than 320×240 resolution resulted in a very choppy frame rate. However installing the official “gold patch” allows the game to run in Direct3d or Glide mode instead of the original release’s software renderer. Running in either of these new modes results in a very smooth frame rate and the game becomes perfectly playable. The 3dFX glide mode looks the best. Great stuff.
If you start seeing texture corruption, quickly hit escape to enter the menu and then jump back in and you should be good for the rest of the mission. If you experience a crash soon afterwards, create a .bat file with these two lines:
SET SST_TMUMEM_SIZE=2
i76.exe -glide
And use the newly created .bat file to run the game. You can also limit 3DFX games to 2MB of memory in the 3DFX control panel (the one that is found by right clicking on the desktop and selecting properties.)
As a result of cobbling together a vehicle combat game using the Mech Warrior 2 engine, I76 was never a particularly bug free game. Be sure to check out the games Pcgamingwiki page for more info:
https://pcgamingwiki.com/wiki/Interstate_%2776
i76 gold patch download:
https://mega.nz/#!BwsXxKZb!ySGRNZnCR8AcIkhMO0iaH8tFIilsb2loWgdDrEXxpOc
Sub Culture
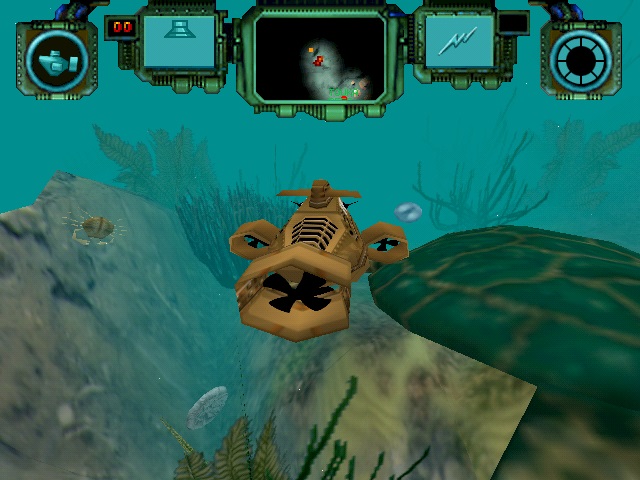
With the CPU set to a Pentium 166Mhz and running the 3DFX version, in game frame rates are 30+. Runs great, very playable. FMVs play perfectly. Menus have choppy music. Running a slower clocked Pentium fixes this but will result in poorer frame rates in game. The Direct3D version of the game seems to run pretty much the same.
I haven’t played much of this game but it seems to have a bit of a cult following. It’s like Elite but miniature and in the ocean. There isn’t much support for this game and as it uses a 16-bit installer program, installing it on a 64-bit install of Windows isn’t much of an option. Another good use for PCem.
Эмулятор персонального компьютера на уровне регистров аппаратного обеспечения. Помогает в запуске старых Windows-игр.
|
PCem v14 + ROMs Сайт-источник |
PCem v14, укомплектованный необходимыми прошивками. Архив не содержит образов жёсткого диска. Образы с предустановленной Win98SE можно найти ниже на данной странице. | |
| Скачать (8.21 MB) |
| Win98SE (eng) с PCem v15 | Самодостаточная сборка эмулятора на основе PCem v15 с комплектом rom’ов и настроенной конфигурацией P133-SB16-Voodoo1 + англоязычная Windows 98SE. Данная версия имеет как плюсы, так и минусы. |
|
| Скачать (204.59 MB) |
| Win98SE (rus) для PCem | Настроенная конфигурация и образ жесткого диска с установленной ОС Windows 98 SE (rus) для PCem. | |
| Скачать (70.55 MB) |
| Win98SE для PCem | Настроенная конфигурация и образ жесткого диска с установленной ОС Windows 98 SE (eng) для PCem. | |
| Скачать (78.65 MB) |
| Windows 95 (ar) с PCem v17 | Арабоязычная версия операционной системы Windows 95, установленная в среде эмулятора PCem (v17). Конфигурация: арабская Windows 95 RTM; Pentium 200 MMX, 128 МБ ОЗУ, видеокарта S3 Virge/DX, звуковая карта Sound Blaster 16 (установлены лишь базовые драйверы), жёсткий диск в формате динамического VHD на 504 МБ (из которых свободно 461 МБ). Автор сборки — Uka. |
|
| Скачать (26.33 MB) |
| Windows 95 (he) с PCem v17 | Ивритоязычная версия операционной системы Windows 95, установленная в среде эмулятора PCem (v17). Конфигурация: ивритская Windows 95 RTM; Pentium 166 MMX, 128 МБ ОЗУ, видеокарта S3 Virge/DX, звуковая карта Sound Blaster 16 (установлены лишь базовые драйверы), жёсткий диск в формате динамического VHD на 504 МБ (из которых свободно 463 МБ). Автор сборки — Uka. |
|
| Скачать (26.7 MB) |
| Windows 95 OSR 2.5 (fr) с PCem v17 | Франкоязычная версия операционной системы Windows 95, установленная в среде эмулятора PCem (v17). Конфигурация: французская Windows 95 OSR2.5; Pentium 166 MMX, 256 МБ ОЗУ, видеокарта S3 Virge/DX + Voodoo Graphics, звуковая карта Sound Blaster 16 (установлены лишь базовые драйверы), жёсткий диск в формате IMG на 250 МБ (из которых свободно 151 МБ). Автор сборки — Uka. |
|
| Скачать (56.4 MB) |
| Windows 98SE (de) с PCem v17 | Немецкоязычная версия операционной системы Windows 98 «второго издания», установленная в среде эмулятора PCem (v17). Конфигурация: немецкая Windows 98 SE; Pentium 166 MMX, 256 МБ ОЗУ, видеокарта S3 Virge/DX + Voodoo Graphics, звуковая карта Sound Blaster 16 (установлены лишь базовые драйверы), жёсткий диск в формате IMG на 499 МБ (из которых свободно 267 МБ). Автор сборки — Uka. |
|
| Скачать (122.28 MB) |
| Windows 98SE (el) с PCem v17 | Грекоязычная версия операционной системы Windows 98 «второго издания», установленная в среде эмулятора PCem (v17). Конфигурация: греческая Windows 98 SE; Pentium 233 MMX, 256 МБ ОЗУ, видеокарта S3 Virge/DX, звуковая карта Sound Blaster 16 (установлены лишь базовые драйверы), жёсткий диск в формате IMG на 511 МБ (из которых свободно 289 МБ). Автор сборки — Uka. |
|
| Скачать (93.61 MB) |
| Windows 98SE (ja) с PCem v17 | Японоязычная версия операционной системы Windows 98 «второго издания», установленная в среде эмулятора PCem (v17). Конфигурация: Pentium 166 MMX, 256 МБ ОЗУ, видеокарта S3 Virge/DX + Voodoo Graphics, звуковая карта Sound Blaster 16 (для ускорителя 3dfx установлена последняя версия драйверов), жёсткий диск в формате IMG на 499 МБ (из которых свободно 206 МБ). Автор сборки — TheMadLynx. |
|
| Скачать (108.58 MB) |
| Windows 98SE (ko) с PCem v17 | Корееязычная версия операционной системы Windows 98 «второго издания», установленная в среде эмулятора PCem (v17). Конфигурация: корейская Windows 98 SE; Pentium 166 MMX, 256 МБ ОЗУ, видеокарта S3 Virge/DX + Voodoo Graphics, звуковая карта Sound Blaster 16 (установлены лишь базовые драйверы), два жёстких диска (системный в формате IMG на 499 МБ, из которых свободно 234 МБ, и полностью свободный на 0,98 ГБ). Автор сборки — Uka. |
|
| Скачать (92.34 MB) |
| Windows 98SE (sv) с PCem v17 | Шведскоязычная версия операционной системы Windows 98 «второго издания», установленная в среде эмулятора PCem (v17). Конфигурация: шведская Windows 98 SE; Pentium 200 MMX, 256 МБ ОЗУ, видеокарта S3 Virge/DX + Voodoo 2, звуковая карта Sound Blaster 16 (установлены лишь базовые драйверы), два жёстких диска в формате динамических VHD (системный на 504 МБ, из которых свободно 271 МБ, + полностью свободный на 0,98 ГБ). Автор сборки — Uka. |
|
| Скачать (82.13 MB) |
| Windows 98SE (th) с PCem v17 | Тайская версия операционной системы Windows 98 «второго издания», установленная в среде эмулятора PCem (v17). Конфигурация: англоязычная Windows 98 SE «тайского издания»; Pentium 200 MMX, 256 МБ ОЗУ, видеокарта S3 Virge/DX + Voodoo 2, звуковая карта Sound Blaster 16 (установлены лишь базовые драйверы), жёсткий диск в формате динамического VHD на 504 МБ, из которых свободно 260 МБ. Автор сборки — Uka. |
|
| Скачать (86.95 MB) |
27 лет назад, в 1997 г., я установила на свой первый компьютер, появившийся у меня дома 6 февраля 1996 г. (процессор Intel 80486DX2, частота 66 МГц, ОЗУ SIMM 4 МБ, HDD 640 МБ,ОС MSDOS 6.22, NC 5.0 Rus,архиватор Arj) ОС Windows 95 OSR2 (русская версия, датированная 12.11.1996). Установка мне в конце концов удалась, но только в результате многомесячных колоссальных трудов
32-томный Arj-архив с дистрибутивом Windows я в двадцатых числах мая 1997 г. скачала на дискеты с компьютера в школе, в которой я в то время работала учителем математики и информатики. Файлы дистрибутива были упорядочены по расширению, а затем по имени. Любопытно, что при такой сортировке первый файл Windows назывался autoexec.bat (какая банальность, не правда ли?) Вторым был файл setupnm.bat (также весьма банальный — с единственной командой Set setup=setup). Далее следовали четыре bin’a — dossetup.bin, oemsetup.bin, suhelper.bin и winsetup.bin. И после них 28 cab’ов — многотомный архив, содержащий файлы Windows — mini.cab, precopy1.cab и precopy2.cab, и 25 основных томов — с win95_02.cab по win95_26.cab. После cab’ов шел command.com и другие com’ы, далее — cpi’шки, dmf’ки, drv’шки, exe’шники (важнейшим из которых является setup.exe), hlp’ы, inf’ы, pif’ы, rtl’ки (одну из них — pcmcia.rtl — я называла почему ЦРУ?.rtl — ведь Пэ-Це-Эм ассоциируется с вопросом почему?, а CIA — это ЦРУ)), sys’ы, и заканчивалось всё это хозяйство файлом msbatch.xpr.
Для установки Windows надо было запустить файл setup.exe, что я и сделала, набрав в командной строке пятого Нортона команду setup и нажав Enter. Инсталляция началась…
Она включает в себя следующие этапы:
1) собственно программа setup.exe запускает встроенный русификатор (переключение алфавита — по двум шифтам) и вызывает программу setupcor.exe;
2) setupcor вызывает scandisk, который проверяет логическую структуру диска C: (проверку можно пропустить, запустив setup с ключом /is). Если всё прошло благополучно, вызывается dossetup.bin;
3) dossetup.bin вызывает extract.exe, которая распаковывает первый том архива — mini.cab. Из этого тома вызывается dosx.exe;
4) dosx переводит компьютер из режима dos в режим mini-windows. Оболочкой системы является winsetup.bin;
5) winsetup.bin вызывает библиотеку lzexpand.dll (извлеченную из mini.cab’а), которая распаковывает следующие два тома — precopy1.cab и precopy2.cab (сопровождается полоской с процентами и текстом Распаковка файлов, необходимых для установки Windows 95);
6) вызывается программа suwin.exe (извлеченная из precopy2.cab’а), которая и будет устанавливать Windows;
7) в первую очередь, suwin обновляет загрузочные файды ОС (io.sys, msdos.sys и command.com), а также — загрузочный сектор диска C: (именно так — сначала файлы, а потом — сектор), т. е., попросту, выполняет команду sys. И теперь внимание — Первый глюк: параметр Virus Warning в Bios’e должен быть выключен. Если он включен, то появляется табличка с текстом: Boot sector has been modified. Type Y to accept this change and any other key to discard. Вы нажимаете клавишу Y (имея в виду одобрительное английское Yes). Но увы, табличка не исчезает — компьютер трактует ваше нажатие, как Н, т. е. категорическое русское Нет! Не помогают ни два шифта, ни другая комбинация — в данный момент латиница намертво заблокирована. Инсталляция безнадежно виснет, и ничего не остается, как перезагрузиться (не забыв при этом заглянуть в Bios и отключить Virus Warning) и начать всё с начала;
 далее suwin проверяет конфигурацию вашего компьютера. Второй глюк: во время проверки во флоппи-дисководе обязательно должна быть дискета (желательно — защищенная от записи). Дискеты нет — всё, повисли (перезагрузка, и начинаем всё с начала). Дискета есть, но она не защищена от записи — ее загрузочный сектор будет испорчен. Придется ее или переформатировать (естественно, с потерей всех данных), или попытаться исправить нортоновской программой NDD (которая поможет вам в беде));
9) у вас спросят, куда устанавливать Windows — в C:\Windows или в другой каталог (пока еще каталог — папки и мамки у вас появятся только на завершающих стадиях установки), а также ваше имя и название организации, в которой вы работаете;
10) выбор типа установки (стандартная, минимальная, портативная или выборочная). Лучше выбрать последний вариант и отметить галочкой только те компоненты, которые вам действительно нужны);
11) проверка конфигурации периферийных устройств (монитора, принтера, модема и др.) и выбор соответствующих драйверов;
12) создание аварийной загрузочной дискеты DOS 7.10 (шаг можно пропустить);
13) подготовка к копированию файлов (внизу появляется синяя полоса с барабанчиком). Если у вас не слишком много ОЗУ, и вы устанавливаете Windows из-под DOS, то данный этап будет весьма долгим — минут этак 45, не меньше. Причем может повезти, и в один прекрасный миг появятся песочные часы. Это означает, что подготовка подошла — нет, не к концу, а только к середине. А может и не подвезти — в один не менее прекрасный миг появится окошко с текстом: Ошибка SU-0099. Ошибка распределения памяти (0х66). Это Третий глюк. Ничего не остается, как нажать волшебную кнопочку ОК. После этого в компьютере что-то пощелкает, что-то потрескает — программа Suwin удалит все установочные файлы, и компьютер вернется в DOS. А точнее — в ваш любимый NC. А вам ничего не остается, как распрощаться с мечтой о Windows до лучших времен (можно поплакаться мамке в жилетку, что у вас не будет ни одной папки, а будут только эти набившие оскомину каталоги);
14) если Третий глюк миновал вас, и в один прекрасный миг вы увидели песочные часы — значит, осталось подождать еще 45 минут, и начнется копирование файлов. В центре экрана появится картинка, анонсирующая первую возможность Windows, а внизу — полоска с надписью: Идет копирование, и индикатором, показывающим ноль процентов. Можно смело идти пить чай (ну или там пиво). Если, вернувшись к компьютеру после возлияния, вы с ужасом обнаружите, что так и остался ноль процентов, значит произошел Четвертый глюк. Действия — те же, что и при других глюках. А если ноль постепенно сменяется всё возрастающими значащими цифрами, значит всё в порядке — suwin вызвал lzexpand, который распаковывает win95_xx.cab’ы и автоматически рассортировывает файлы по каталогам. Причем он ставит те и только те файлы, которые требуются для заказанной вами конфигурации;
15) как только индикатор дойдет до 100%, начнется подготовка к перезагрузке компьютера. В это время формируются файлы win.ini, system.ini, wininit.ini, а также файлы системного реестра — system.dat и user.dat;
16) выполняется перезагрузка компьютера (можно заглянуть в Bios и вернуть Virus Warning). Вместо обычного сообщения Starting MS-DOS появляется Starting Windows 95. И затем — красивая синяя заставка с оранжевой надписью Идет подготовка Windows 95 к первому запуску (картинка хранится в файле logo.sys, помещенном в корневой каталог диска C:; данный файл был переименован из sulogo.sys, извлеченного из одного из томов cab-архива). Загружаются драйверы config.sys’а (в обязательном порядке — himem.sys, ifshlp.sys и setver.exe). Выполняется autoexec.bat. Загружается… нет, не Windows, а старый-добрый Norton Commander. Причем, если у вас русскоязычная версия NC, то все русские надписи будут в абракадабре. Это произошло потому, что suwinья переместила команды русификации (пару команд mode и одну keyb) в конец autoexec.bat’а, после NC);
17) запускаем волшебную команду win. Появляется надпись: Программа установки обновляет файлы конфигурации. Это может занять несколько минут. В компьютере начинается страшный скрежет. Это работает «программа-убийца» wininit.exe. Она берет в руки «оружие» — файл wininit.ini и совершает следующие «преступления»:
1) сначала быстро выполняется секция [rename] файла wininit.ini:
1.1) некоторые файлы в каталоге windows\system переименовываются: kommctrl.dll в commctrl.dll, user.001 в user.exe, netware.tmp в netware.drv и др.;
1.2) файлы windows\ttfcache и C:\logo.sys удаляются;
2) затем весьма долго выполняется секция [combineVxDs] файла wininit.ini:
2.1) файл windows\system\vmm32.vxd копируется в vmm32.tmp;
2.2) в vmm32.tmp вставляются программные части всех файлов, указанных в левой части уравнений секции (причем именно в той последовательности, в которой они указаны в секции);
2.3) файл vmm32.tmp сжимается. Сжатый файл получает имя vmm32.cmp;
2.4) файлы vmm32.vxd и vmm32.tmp удаляются, а vmm32.cmp переименовывается в vmm32.vxd. Удаляются все файлы, указанные в левой части уравнений секции;
2.5) файл wininit.ini переименовывается в wininit.bak. Появляется сообщение: Обновление файлов конфигурации завершено. Загрузка Windows продолжается;
18) управление передается обновленному файлу vmm32.vxd — основному загрузчику windows. Он загружает драйверы, вставленные wininit’ом внутрь vmm32 (а также два файла, «помилованных убийцей» и оставшихся в каталоге windows\system\vmm32 — ifsmgr.vxd и ios.vxd; здесь же остался и qemmfix.vxd, но фактически он не используется). На этапе инициализации драйверов возможны три глюка:
1) если вы вернули Virus Warning в Bios’е, то при инициализации некоторого драйвера (какого именно — мне не удалось установить) появляется та же табличка, что и при Первом глюке. Но на сей раз латиница не заблокирована, и нажатие игрека решает проблему;
2) экран очищается, и в верхней части появляется сообщение: При инициализации устройства ios: файл в каталоге \iosubsys поврежден или системе не хватает памяти. Компьютер виснет, спасает только перезагрузка. Ничего не поделаешь — придется ограничиться DOS’ом 7.10, а для Windows 95 OSR2 у вас недостаточно ОЗУ;
3) появляется Синий «Экран Смерти» с надписью: Сбой инициализации устройства VFAT. Устройство или ресурс, необходимые для загрузки VFAT, отсутствуют или недоступны. Продолжение загрузки VFAT невозможно. Система остановлена (и опять — зависание).
В отличие от предшествующей, данная проблема легко решается, причем всего за две перезагрузки. Перезагружаемся, редактируем из-под Нортона файл config.sys, вставляем в него строку device=c:\windows\ifshlp.sys, и еще раз перезагружаемся. Теперь всё идет как по маслу!
19) если инициализация всех vxd-устройств благополучно, то загружаются драйверы comm.drv, keyboard.drv, mouse.drv и другие, затем программа msgsrv32.exe и некоторые другие файлы. Создаются резервные копии файлов системного реестра — system.da0 и user.da0 (которые безжалостно затирают почти все файлы, «убитые» wininit’ом, разве только perf.vxd, расположенный ближе к концу диска, еще можно будет восстановить unerase’ом). Выполняется настройка самонастраивающихся устройств Plug and Play (а точнее, Plug and Pray). Создаются группы для Диспетчера программ, которые сразу же копируются в разделы Главного меню. Выбирается часовой пояс. Выполняется еще одна перезагрузка. На этот раз появляется белая заставка: Windows 95. Microsoft Internet Explorer (на место C:\logo.sys поставлен другой файл — переименованный logo2_0.sys). Загружается NC с абракадаброй. В этот момент целесообразно удалить строку NC из autoexec.bat’a и еще раз перезагрузиться. И тогда, наконец, загрузится Windows 95 во всей своей красе — с бледно-зеленым рабочим столом, ярлыками и кнопкой Пуск. И вы смело можете сказать мамке, что каталогов у вас больше нет — теперь в компьютере только папки.
Включив домашний компьютер и распаковав Arj-архив в один из майских вечеров 1997 г., я запустила из-под NC команду setup. Первая попытка у меня закончилась полным фиаско — в Bios’e был включен Virus Warning, и установка дошла только до Первого глюка. Перезагружаюсь, захожу в Bios, отключаю Virus Warning. Компьютер безнадежно повис — белый курсор на черном фоне, нет даже сообщения Non-system disk or disk error (как я выяснила впоследствии, инсталлятор обновил загрузочные файлы MS-DOS до версии 7.10, но не смог из-за Virus Warning’а обновить загрузочный сектор. Несовместимость старого сектора с новыми файлами и привела к описанной картине).
Перезагружаюсь с дискеты, прогоняю команду sys, перезагружаюсь с винчестера, вторично запускаю Setup. На этот раз не было ни Первого, ни Второго глюка (благо, дискета осталась в дисководе и была защищена от записи). И, о чудо! — после двух часов мытарств я дошла до нуля процентов. Но ноль так и оставался нулем. Четвертый глюк…
Чудо, при котором я дошла до Четвертого глюка, больше не повторилось. Несколько попыток инсталляции, которые я предприняла в последующие дни, закончились Третьим глюком.
В июне 1997 г., расшифровав файл copy.inf из precopy2.cab’а, я выполнила «искусственную инсталляцию» — распаковала программой extract все cab’ы (на это потребовалось около двух часов) и рассортировала их по каталогам. Опять неудача — Синий Экран Смерти, сбой инициализации устройства VFAT. Если б я тогда знала, что до действующей Windows мне остался только один шажок — включить в config.sys запуск драйвера ifshlp.sys… С оболочкой — Диспетчером программ такая искусственно установленная система вполне могла бы худо-бедно работать…
И наконец уже в сентябре моя знакомая, которой я рассказала о своих проблемах, предложила мне установить Windows 95 с ее компакт-диска. Правда, CD-ROM’а в моем компьютере в то время не было, но она принесла свой привод, который, отвинтив крышку корпуса, мы присоединили к моей машине. Из-под Нортона мы запустили «сидишную» версию Setup’а.
Сначала всё пошло по знакомому пути, но, кроме имени и организации инсталлятор почему-то потребовал ввести серийный номер, который раньше не требовался. Номер был указан на коробке от диска, и мы его ввели.
Вскоре началась подготовка к копированию. Я приготовилась к долгой барабанной дроби, которая должна закончиться Третьим глюком. Но уже через шесть секунд появились песочные часы, а через тринадцать началось копирование. И ноль процентов очень быстро стал сменяться всё возрастающими значащими цифрами.
Данная инсталляция закончилась полным успехом, и у меня на компьютере появилась действующая Windows 95. Мы отсоединили CD-привод, и знакомая забрала его с собой.
Вскоре я поняла, почему нам удалось установить Windows 95 — это была другая версия, не OSR2, а 95.0, датированная 02.10.1995 и основанная на DOS 7.00. А через пять дней я решила попробовать установить «свою» версию из-под Windows. На этот раз всё быстро и благополучно установилось и заработало. По-видимому, памяти не хватало не на саму OSR2, а только на ее инсталляцию из-под DOS. Я заменила на дискетах дистрибутив действующей копией OSR2. Как показал дальнейший опыт, при авариях с такой копии вполне можно было восстановиться.
Последний раз редактировалось Мария Константиновна 30 янв 2025, 17:34, всего редактировалось 10 раз(а).
Cito liquescunt anni, nivis particulae,
Et cogitare terribile est, et cogitare de aeternitate.
Humano modo iam volo vivere,
Non saepe, sed interdum, saltem semel per hebdomadam.