
Linux wget: ваш загрузчик командной строки
Wget — это открыто распостраняемая утилита для загрузки файлов из интернет.
Он поддерживает HTTP, FTP, HTTPS и другие протоколы, а также средство аутентификации и множество других опций.
Если вы пользователь Linux или Mac, WGET либо уже включен в пакет, который вы используете, либо это простой случай установки из любого репозитория, который вы предпочитаете, с помощью одной команды.
Как установить команду wget в Linux
Используйте команду apt / apt-get, если вы работаете в Ubuntu / Debian / Mint Linux:
$ sudo apt install wget
Пользователь Fedora Linux должен ввести команду dnf
$ sudo dnf install wget
Пользователь RHEL / CentOS / Oracle Linux должен ввести команду yum :
$ sudo yum install wget
Пользователь SUSE / OpenSUSE Linux должен ввести команду zypper:
$ zypper install wget
Пользователь Arch Linux должен ввести команду pacman:
$ sudo pacman -S wget
К сожалению, в Windows все не так просто (хотя не так сложно!).
Для запуска WGET вам необходимо скачать, распаковать и установить утилиту вручную.
Установите WGET в Windows 10
Загрузите классическую 32-разрядную версию 1.14 здесь или перейдите в эту коллекцию двоичных файлов Windows на сайте Eternal Bored здесь, чтобы получить более поздние версии и более быстрые 64-разрядные сборки.
Вот загружаемый zip-файл для 64-разрядной версии 1.2.
Если вы хотите иметь возможность запускать WGET из любого каталога в терминале, вам нужно будет узнать о переменных пути в Windows, чтобы решить, куда копировать новый исполняемый файл. Если вы это сделаете, то сможете сделать WGET командой, которую можно запускать из любого каталога в командной строке, это отдельная тема по настройке Windows.
Запуск WGET из любого места
Во-первых, нам нужно определить, куда копировать WGET.exe.
Мы собираемся переместить wget.exe в каталог Windows, который позволит запускать WGET из любого места.
После того, как вы загрузили wget.exe (или распаковали связанные с ним zip-файлы дистрибутива), откройте командный терминал, набрав «cmd» в меню поиска и запустите командную строку.
Во-первых, нам нужно выяснить, в каком каталоге это должно быть. В командную строку введите:
path
Вы должны увидеть что-то вроде этого:

Благодаря переменной окружения “Path” мы знаем, что нам нужно скопировать wget.exe в папку c:\Windows\System32.
Скопируйте WGET.exe в каталог System32 и перезапустите командную строку.
Если вы хотите проверить правильность работы WGET, перезапустите терминал и введите:
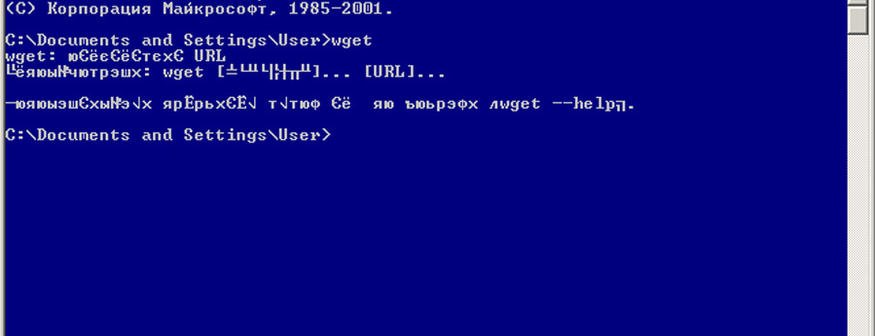
wget -h
Если вы скопировали файл в нужное место, вы увидите файл справки со всеми доступными командами.
Итак, вы должны увидеть что-то вроде этого:

Начнем работать с WGET
Мы будем работать в командной строке, поэтому давайте создадим каталог загрузок только для загрузок WGET.
Чтобы создать каталог, воспользуемся командой md («создать каталог»).
Перейдите в корневой каталог c: / и введите команду:
md wgetdown
Затем перейдите в новый каталог и введите «dir», и вы увидите (пустое) содержимое.

После того, как вы установили WGET и создали новый каталог, все, что вам нужно сделать, это изучить некоторые тонкости аргументов WGET, чтобы убедиться, что вы получаете то, что вам нужно.
Руководство Gnu.org WGET — особенно полезный ресурс для тех, кто действительно хочет узнать подробности.
Вот несколько советов, как извлечь из этого максимум пользы:
Linux wget примеры команд
Синтаксис:
wget url
wget [options] url
Давайте посмотрим на некоторые распространенные примеры команд Linux wget, синтаксис и использование.
WGET можно использовать для:
Скачать один файл с помощью wget
$ wget https://cyberciti.biz/here/lsst.tar.gz
Загрузить несколько файлов с помощью wget
$ wget https://cyberciti.biz/download/lsst.tar.gz ftp://ftp.freebsd.org/pub/sys.tar.gz ftp://ftp.redhat.com/pub/xyz-1rc-i386.rpm
Можно прочитать URL из файла
Вы можете поместить все URL в текстовый файл и использовать опцию -i, чтобы wget загрузил все файлы. Сначала создайте текстовый файл:
$ xed /temp/download.txt
Добавить список URL:
https://cyberciti.biz/download/lsst.tar.gz
ftp://ftp.freebsd.org/pub/sys.tar.gz
ftp://ftp.redhat.com/pub/xyz-1rc-i386.rpm
Введите команду wget следующим образом:
$ wget -i /temp/download.txt
Можно ограничить скорость загрузки
$ wget -c -o /temp/susedvd.log —limit-rate=50k ftp://ftp.novell.com/pub/suse/dvd1.iso
Используйте wget с сайтами, защищенными паролем
Вы можете указать http имя пользователя / пароль на сервере следующим образом:
$ wget —http-user=vivek —http-password=Secrete http://cyberciti.biz/vivek/csits.tar.gz
Другой способ указать имя пользователя и пароль — в самом URL.
$ wget ‘http://username:password@cyberciti.biz/file.tar.gz
Скачать все mp3 или pdf файлы с удаленного FTP сервера
$ wget ftp://somedom-url/pub/downloads/*.mp3
$ wget ftp://somedom-url/pub/downloads/*.pdf
Скачать сайт целиком
$ wget -r -k -l 7 -p -E -nc https://site.com/
Рассмотрим используемые параметры:
-r — указывает на то, что нужно рекурсивно переходить по ссылкам на сайте, чтобы скачивать страницы.
-k — используется для того, чтобы wget преобразовал все ссылки в скаченных файлах таким образом, чтобы по ним можно было переходить на локальном компьютере (в автономном режиме).
-p — указывает на то, что нужно загрузить все файлы, которые требуются для отображения страниц (изображения, css и т.д.).
-l — определяет максимальную глубину вложенности страниц, которые wget должен скачать (по умолчанию значение равно 5, в примере мы установили 7). В большинстве случаев сайты имеют страницы с большой степенью вложенности и wget может просто «закопаться», скачивая новые страницы. Чтобы этого не произошло можно использовать параметр -l.
-E — добавлять к загруженным файлам расширение .html.
-nc — при использовании данного параметра существующие файлы не будут перезаписаны. Это удобно, когда нужно продолжить загрузку сайта, прерванную в предыдущий раз.
По умолчанию wget загружает файл и сохраняет его с оригинальным именем в URL — в текущем каталоге.
Здесь я перечислил набор инструкций для WGET для рекурсивного зеркалирования вашего сайта, загрузки всех изображений, CSS и JavaScript, локализации всех URL-адресов (чтобы сайт работал на вашем локальном компьютере) и сохранения всех страниц как .html файл.
Чтобы скачать ваш сайт, выполните эту команду:
wget -r https://www.yoursite.com
Чтобы скачать сайт и локализовать все URL:
wget —convert-links -r https://www.yoursite.com
Чтобы создать полноценное оффлайн зеркало сайта:
wget —mirror —convert-links —adjust-extension —page-requisites —no-parent https://www.yoursite.com
Чтобы скачать сайт и сохранить файлы как .html:
wget —html-extension -r https://www.yoursite.com
Чтобы скачать все изображения в формате jpg с сайта:
wget -A «*.jpg» -r https://www.yoursite.com
Дополнительные сведения об операциях, связанных с конкретным типом файлов, можно найти в этой полезной ветке на Stack .
Установите другой пользовательский агент:
Некоторые веб-серверы настроены так, чтобы запрещать пользовательский агент WGET по умолчанию — по очевидным причинам экономии полосы пропускания. Вы можете попробовать изменить свой пользовательский агент, чтобы обойти это. Например, притворившись роботом Google:
wget —user-agent=»Googlebot/2.1 (+https://www.googlebot.com/bot.html)» -r https://www.yoursite.com
Wget режим «паук»:
Wget может получать страницы без их сохранения, что может быть полезной функцией, если вы ищете неработающие ссылки на веб-сайте. Не забудьте включить рекурсивный режим, который позволяет wget сканировать документ и искать ссылки для перехода.
wget —spider -r https://www.yoursite.com
Вы также можете сохранить это в файл журнала, добавив эту опцию:
wget —spider -r https://www.yoursite.com -o wget.log
wget -m -l 10 -e robots=off -p -k -E —reject-regex «wp» —no-check-certificate -U=«Mozilla/5.0 (Windows NT 10.0; Win64; x64) AppleWebKit/537.36 (KHTML, like Gecko) Chrome/68.0.3440.106 Safari/537.36» site-addr.com
Как найти неработающие ссылки на вашем сайте
wget —spider -r -nd -nv -H -l 2 -w 2 -o run1.log https://site.by
Наслаждайтесь использованием этого мощного инструмента, и я надеюсь, что вам понравился мой урок.
Начнем с того а что же такое wget???
Wget — это Свободная неинтерактивная консольная программа для загрузки файлов по сети. Поддерживает протоколы HTTP, FTP и HTTPS, а также поддерживает работу через HTTP прокси-сервер. Программа включена почти во все дистрибутивы GNU/Linux.
Как установить wget на windows
Сразу оговоримся что большого различия между windows 7,10 и xp нету, так что инструкцию можно считать универсальной.
1 шаг — Скачиваем программу wget-1.21.1-1-win32 wget-1.21.1-1-win64
2 шаг — Распаковываем содержимое архива на диск C: в папку wget.
3 шаг — Настройка программы
Наводим курсор мыши на кнопку ПУСК — открываем проводник — слева находим Мой компьютер(нажимаем правой клавишей мыши — свойства). Переходим во вкладку «Дополнительно» и нажимаем кнопку «Переменные среды»
В окне системные переменные находим переменную Path нажимаем кнопку изменить и в значение переменной в самом конце добавляем «;c:\wget» (не забывайте про «;» )
Подробное видео установки на Windows 10 смотрите ниже:
The Command Prompt in Windows 10 doesn’t compare to the terminal on Linux. To make up for its shortcomings, tools like wget and Cygwin can be installed on Windows to get more out of the Command Prompt. Here’s how you can install and use wget in Windows 10.
Wget is a free tool but downloading the correct file is oddly tricky. It’s hard to tell just which one you should download and one of the more popular mirrors for the EXE is notorious for crashing on Windows 10. In order to install wget, (https://sourceforge.net/projects/gnuwin32/files/wget/1.11.4-1/wget-1.11.4-1-setup.exe/download?use_mirror=excellmedia) download this file from Sourceforge.
Extract the file, and run the EXE inside it. The installation is pretty straightforward. Except the EULA, and don’t change anything else.
Using Wget
There are two ways to use Wget on Windows 10. This is a command line tool so it doesn’t have a GUI. You access it via the Command Prompt. To use it from the Command Prompt, you can either add it as an environment variable, or you can manually go to the directory the Wget app is in, and use it from there. The second method isn’t convenient if you intend to use this tool often but we’re going to detail both methods and you can chose whichever suits you best.
CD To Wget
This is the less convenient method. Open File Explorer and go to the following location. There will be a Wget.exe file here. You really only need the path to this file. Copy it to your clipboard.
C:\Program Files (x86)\GnuWin32\bin
Next, open Command Prompt and enter the following command to move to the above location.
cd C:\Program Files (x86)\GnuWin32\bin
Once you’re in this folder, you can type wget and use any of its functions and switches.
Add Environment Variable
To have to move to the bin folder the Wget.exe is in every single time you want to use the tool is time consuming. If you add it as an environment variable though, you can simply type wget from any directory and use it. You will need admin rights to do this.
To add wget as an environment variable, open File Explorer and paste the following in the location bar.
Control Panel\System and Security\System
On the left column, click Advanced System Settings. In the window that opens, click Environment Variables. In the Environment Variables window, select ‘Path’ in the section at the top, and click Edit.
In the window that opens, click New, then click the browse button. Enter this location;
C:\Program Files (x86)\GnuWin32\bin
Click Ok on each window to exit.
Now, when you open Command Prompt, you can type wget regardless of which directory/folder you’re in and you will be able to access this app and use its commands.

Fatima Wahab
Fatima has been writing for AddictiveTips for six years. She began as a junior writer and has been working as the Editor in Chief since 2014.
Fatima gets an adrenaline rush from figuring out how technology works, and how to manipulate it. A well-designed app, something that solves a common everyday problem and looks
Have you ever lost an essential asset at a crucial moment on your website? It is frightening to even think about it, isn’t it? Perhaps if you have used Linux, then you might have heard of WGET. Yay! WGET is also available for Windows. Thank GNU for coming up with a compatible version of WGET for Windows 10. From the starting of this article, you will understand how to download and install WGET for Windows 10. Also, you will learn how to use WGET command with examples provided for improving your understanding. Keep on reading to gain comprehensive knowledge about WGET.

Table of Contents
WGET has been available for Linux users for a long time. Learners can even refer to the different articles and guides available on the web to better their comprehension. But when it comes to the Windows version, even the scarce amount of articles cannot give you the information you need. However, do not lose hope. From this point on, you will know things about WGET on Windows that you’ve never heard or read. So why not start with answering the most asked question: What is WGET?
What is WGET?
WGET is a free tool to download files and crawl websites using the command line. Before learning to download WGET and how to use WGET command with examples, check out the points given below to know more about its features:
- WGET can retrieve contents from web pages.
- It even allows you to download from any web pages (FTP, HTTP) in any format (PDF, XML).
- It’s known to provide operational anonymity to keep users’ location or activities a secret.
- WGET works perfectly in bad network conditions too.
- Apart from these features, WGET can overwrite correct domain name in links.
- Moreover, it can perform recursive downloads, where the link present in the downloading document gets automatically downloaded further.
Also Read: What is a Command Line Interpreter?
How to Install WGET for Windows 10
Using WGET for Windows 10 will seamlessly download and extract information from any webpage by using commands. Implement the steps below to download GnuWin first to create a Windows environment and use WGET.
1. Download GnuWin WGET from here. The download process will start and finish automatically in a few seconds.
2. Click the downloaded WGET setup.exe folder to open it, as shown below.

3. Click Yes when prompted.
Note: Make sure to close already running applications before starting WGET installation.
4. To install WGET for Windows, click on Next, as depicted below.

5. Select the I accept the agreement radio button and click the Next option as highlighted below to continue the installation process.

6. Click on Browse to select the Destination Location. Choose a folder where you want to set up WGET and click on Next as shown.
Note: It is recommended to use default path: C:\Program Files (x86)\GnuWin32\bin

7. Select the components you want to install among Binaries and Documentation. Click Next to proceed further.

8. Here, click on Browse and select a Destination Folder to create the program shortcut in the start menu. Then, click on Next.
Note: If you don’t want to create a shortcut, select the checkbox Don’t create a Start Menu folder.

9. Select the Additional icons you need and click Next as illustrated below:
- Create document shortcuts in Start Menu folder
- Download Sources
10. Scroll down the review tab and check if all the desired options are present. Click Install to begin installing WGET on your system.
Note: You can select Back to change any setting you need to modify.

11. Wait for the WGET installation process to complete in your Windows 10 desktop/laptop and click Finish to exit the setup.

Also Read: Fix error 1500 Another Installation is in Progress
How to Use WGET for Windows 10
There are two ways to use WGET on your system.
- First, it is accessed directly via Command Prompt using a single path.
- Second, you need to manually go to the directory page where the app is present, and then proceed to the command prompt procedure.
You can implement any of these methods to use WGET on your system at your convenience. So, now you will see both methods in action below:
Method 1: Add CD to WGET Path
Once you install WGET for Windows 10, ensure that the wget.exe folder exists in the path given in this method.
Note: If not, copy and paste the respective folder in the location shown in the below File Explorer navigation, as you are about to use only this path.
1. Press Windows + E keys simultaneously to open File Explorer.
2. Navigate to C:\Program Files (x86)\GnuWin32\bin and copy the location.

3. Type Command Prompt in the Windows search bar and click Open to launch it, as shown below.

4. Type cd C:\Program Files (x86)\GnuWin32\bin and press Enter.
5. Then type wget and hit Enter. If the command is executed, it shows that WGET is running properly.

6A. Type the required WGET for Windows 10 command to download any file in the given format:
wget [OPTION] … [URL]…
6B. Or, view help from WGET by typing ‘wget –help’
Also Read: Fix File Explorer Not Responding in Windows 10
Method 2: Add Environment Variable
Once you download WGET for Windows 10, you must change the environmental variable set in the system settings. This is a long process. Follow the steps below carefully to set up WGET for Windows 10:
1. Press the Windows key from the keyboard and type Control Panel. Click the Open option to launch it.

2. Choose View by: Large icons from the top right corner. Click on the System option.
3. Scroll down and click on the Advanced system settings as illustrated below.

4. In the Advanced tab, click the Environment Variables button as shown.

5. Environmental Variables pop-up window will appear. Select the Path under the User variables for GREEN category and click on Edit as depicted below.

6. In the Edit environmental variable window, select the Browse option.

7. Select C:\Program Files (x86)\GnuWin32\bin path and click OK as shown.

8. Then, click OK as shown.

9. Again, click OK in the System Properties window.

10. Now, open Command Prompt as explained in Method 1.
11. Type wget and press Enter on the keyboard. Once the Environment Variable is set, you will be able to run WGET regardless of any folder you are currently in.

Also Read: How to Fix Git Merge Error
How to Check the Functioning of WGET App and Commands
To check if you can access WGET for Windows 10 regardless of any folder or directory that is present, follow the steps given below:
1. Type Command Prompt on the start menu search bar and click Open to launch it.

2. Type wget and press Enter to check whether the application runs.
Note: If you receive unrecognized command error, you have downloaded the WGET Setup from the wrong source. So, ensure to use only the link given above for the download process and try again.

3A. If the test worked, then it’s great. You have done a good job!
3B. If it is not working, do not worry. Check if you have followed the steps in an orderly manner, from downloading GnuWin, installing WGET Setup, then adding WGET environment variable. Try once again and restart the command line.
Also Read: Fix ERR_EMPTY_RESPONSE in Google Chrome
How to Use WGET Command with Examples
There are thousands of WGET commands to perform specific tasks. Run WGET for Windows 10 using any of the methods given above and type any of the commands listed below in Command Prompt.
Note: You need to enter the command correctly to obtain desired results.
1. To get list of commands, use the command wget -h.

2. To download a single file, use the command wget [URL]. For instance, enter the command wget https://wordpress.org/latest.zip. Here, WordPress is chosen as an example.
3. To download to a specific folder, use the command wget ‐P [wanted directory] [URL]. For instance, wget -P /temp https://github.com/git/git/archive/master.zip.
4. To resume an interrupted download, use the command wget ‐c [URL]. For instance, wget -c https://wordpress.org/latest.zip.
5. To set the download speed, use the command wget ‐‐limit-rate [wanted speed] [URL]. For instance, wget –limit-rate 1m https://wordpress.org/latest.zip.
6. To mirror a single webpage, use the command wget -m [URL]. For instance, wget -m https://cereal.guru/.
7. To know the version of installed WGET, then use the command wget -V.

8. To download and save under a specific name, use the command wget -o [file name] [URL]. For instance, wget -o file.docx https://cereal.guru/.
9. To download a web page in the background, use the command wget -b [URL]. For instance, wget -b https://cereal.guru/.
10. To download multiple URLs, use the command wget -i [File name]. For instance, wget -i URL.txt. Before executing this command, place all the URLs in one file and include that file name in the command.
11. To download via FTP, use the command wget –ftp-user=[ftp_username] –ftp-password=[ftp_password] ftp://… For instance, wget –ftp-user=sofiftp –ftp-password=TopSecretPassword ftp://123.456.7890.
12. To change the number of retry attempts, use the command wget –tries=[number_of_tries] [URL]. For instance, wget –tries=inf https://cereal.guru/. In this example, inf denotes infinity. The default number of retries is 20.
This is how to use WGET command with examples. Click here to know about more commands and their uses.
Recommended:
- Fix Windows 10 Update Error 0x80070103
- How to Enable Telnet in Windows 10
- Complete List of Windows 11 Run Commands
- Discord Commands List
We hope that this guide was helpful and you could learn how to download, install & use WGET for Windows 10. If you have any queries or suggestions, feel free to drop them in the comments section below.
Hello, how are you? This time we’re going to talk about Wget. It is a tool created by the GNU Project. Its main purpose is to get content and files from different web servers. Besides, it supports downloads via FTP, SFTP, HTTP, and HTTPS. Its features include recursive download, conversion of links for offline viewing of local HTML, and support for proxies. It is a widely known program in Linux environments, since its appearance in 1996. However, it can also be ported to Windows, where its use is not well known. For that reason, we will see how to install and use Wget in Windows 10.
Installing Wget in Windows 10
Wget is a free tool and relatively simple to install in a Linux environment. Just type the appropriate commands to each distribution, and you’re done. However, when it comes to Windows, the situation changes. There are many installers and options that end up with installation errors. However, we’ve got this version that works properly. Go to this link and download version 1.11.4-1

Next, we proceed to run the installer. Just double click and the wizard will start, press next to continue:

Then accept the license terms, and click Next to continue the installation.

Select the folder where the program will be installed. Click next to continue the installation.

Next, select the components to install. To ensure proper operation, check both boxes and press Next to continue the installation.

Next, you can create direct access to the application and its respective location

You can install additional icons. Click Next to continue

Verify the installation options and press Install to finish the process.

Once the installation is finished, we will see the following screen.

Using Wget in Windows 10
Please note that Wget does not have a graphical interface, so you will have to use it through command in the CMD. To check that the program is actually installed, please go to the installation directory. Depending on the installation options selected, it should be as follows:
C:\Program Files (x86)\GnuWin32\bin
What we need to do is open a command prompt. With this intention, press the Win+R combination and type CMD

Once there, use the CD command to navigate to the file location mentioned above. Then type Wget to use the program.

Add environment variable
We have correctly installed Wget. However, to be able to use it we always have to navigate to the installation folder of the program. This is cumbersome, so if we want to use Wget from any directory, we need to add an environment variable. With this in mind, please follow this path: Control Panel>System and Security>System>Advanced system settings

On the next screen, choose Environment Variables

Next, we are going to create a new environment variable. With that intention, please select Path and press Edit.

On the next screen first select New, then Browse. You must select the address where the program is installed.

Press ok in each of the open windows, and we can run Wget every time we open a Command Prompt. It doesn’t matter which directory we’re in. Let’s test the Wget command, downloading its executable for windows 10. With this intention, we enter this command in the CMD
wget https://sourceforge.net/projects/gnuwin32/files/wget/1.11.4-1/wget-1.11.4-1-setup.exe/download

Using Wget in Windows Subsystem for Linux
We have already seen how to use bash in windows 10. Through WSL we can also use Wget natively. To do this, we’ll open ubuntu and run the following command:
sudo apt-get install wget
Enter your password, and wait while the program is installed. Now we are ready to use wget in Windows 10.

Finally, we have seen how to install Wget in Windows 10. We can do it natively or using the Windows Subsystem for Linux. Both methods are valid for using this powerful download tool. Not only will we have access to files, but also to complete pages so that they can run offline. All right, that’s it for now, if you have any questions, don’t hesitate to ask. We are here to serve! until next time!
— Advertisement —
Everything Linux, A.I, IT News, DataOps, Open Source and more delivered right to you.
Subscribe
«The best Linux newsletter on the web»