
The tmux terminal multiplexer is often used in remote development, but it has interesting applications for local dev work as well. In this article, I’ll explain what a terminal multiplexer does, show you how to install tmux, run through the basic commands such as starting a tmux session, and show you how to navigate between windows and panes. Finally, I’ll show you why (and how) I use tmux for local development.
I’ll admit that local development isn’t the most obvious use case for tmux, but I started using it that way in 2016 and fell in love with this super awesome little tool. For me, the best part of using tmux for local dev work is the ability to almost instantly get my preferred command line “workspace” set up as soon as I fire up my terminal emulator.
Table of Contents
- What Is tmux?
- How to Install tmux
- Installing tmux on Linux
- Installing tmux on macOS
- Installing tmux on Windows
- How to Use tmux
- Command Structure
- Sessions
- Attaching and Detaching
- Windows and Panes
- Why Use tmux Locally?
- Wrapping Up
What is tmux?
The name “tmux” is a contraction of “terminal multiplexer.” This means you can open multiple split-views (panes) in a single terminal window, and each will function as its own independent terminal. They run visually, right next to each other, eliminating the need to open a new window.
It’s often thought of as a tool you use when working on a remote server, as it saves opening up multiple terminal (SSH) sessions to the machine when you’re trying to do a few things at once.
Maybe you’ve got a script you need to run that takes a while and at the same time you want to monitor its output to a log file with a command like tail -f. Perhaps all the while editing some other configuration files or scripts you’re getting ready to run next.
Normally you’d fire up three or more separate instances of your terminal application and SSH into the server with each one. With tmux you only need one SSH connection to the server.
The great thing about tmux is it allows you to have multiple panes open at the same time, each with their own shell running, but using the same, single SSH connection.

Not only that, you can also have multiple windows open at the same time, a bit like tabs with more panes in them.

A huge benefit of using tmux on a remote server is that if your internet connection should die for any reason, that tmux session just keeps on truckin’. Your long-running job that you just kicked off and forgot to nohup and background with stream redirection keeps on going too. Just tmux attach once your internet is back and you’ve SSH’d into the server again, with all the same panes and windows there waiting for you. You can even detach from your current session, log back in at another computer, and find it’s still running.
How to Install tmux
Installation varies by operating system, but Linux and Mac systems typically only require a single command. Installing it on Windows is slightly trickier, as you have to use the Windows Subsystem for Linux (WSL) feature that premiered in Windows 10.
Installing tmux on Linux
Installing tmux on Linux uses sudo, but the following commands differ by distribution:
Ubuntu/Debian
sudo apt-get update
sudo apt-get install tmux
Fedora
sudo dnf -y install tmux
CentOS
sudo yum -y install tmux
Nixpkgs or NixOS
If you have Nixpkgs installed on Linux, macOS, or Windows WSL2, you can use the following command:
nix-env -iA nixpkgs.tmux
For NixOS, you can instead add programs.tmux to your configuration.nix file, optionally with some changes to the defaults:
  # tmux
  programs.tmux = {
    enable = true;
    shortcut = "a";
    baseIndex = 1;
    keyMode = "vi";
    secureSocket = false;
    clock24 = true;
  };
You can then just sudo nixos-rebuild switch to install and configure tmux.
Installing tmux on macOS
The easiest way to do this on a Mac is to use Homebrew. I highly recommend installing this package manager if you haven’t already. It makes life so much easier.
brew install tmux
Installing tmux on Windows
To get Windows to run tmux, you’ll need to install WSL and a Linux distro first.
The first step is to install WSL or WSL2, the upgraded version. To install WSL2, you’ll need to be running on Windows 10 version 2004 and higher (Build 19041 and higher) or Windows 11. Older builds of Windows can’t use WSL2, but may be able to manually install WSL.
A single command in Windows PowerShell or command prompt will take care of just about everything: enabling required components, downloading the latest Linux kernel, and installing Ubuntu for you:
wsl --install
You can change the Linux distro that will be installed by using the -d flag, followed by the name of the distro. You can see a list of the currently available distributions with this command:
wsl --list --online
You’ll have to import the distro manually if you want to use one that isn’t listed.
The next step is to create a username and password that you’ll use in Linux. Click your Start menu and open your Linux distribution. You may have to search for it.

Once it’s finished unpacking the files, Linux will prompt you to enter a username and password. Now that you’ve got a Linux distro up and running, the next step is to update your packages:
sudo apt update
sudo apt upgrade
Running the following Linux command will install tmux:
sudo apt install tmux
Congratulations! You have successfully installed tmux on Windows. 😅
To start tmux, open your terminal and let fly with this:
tmux
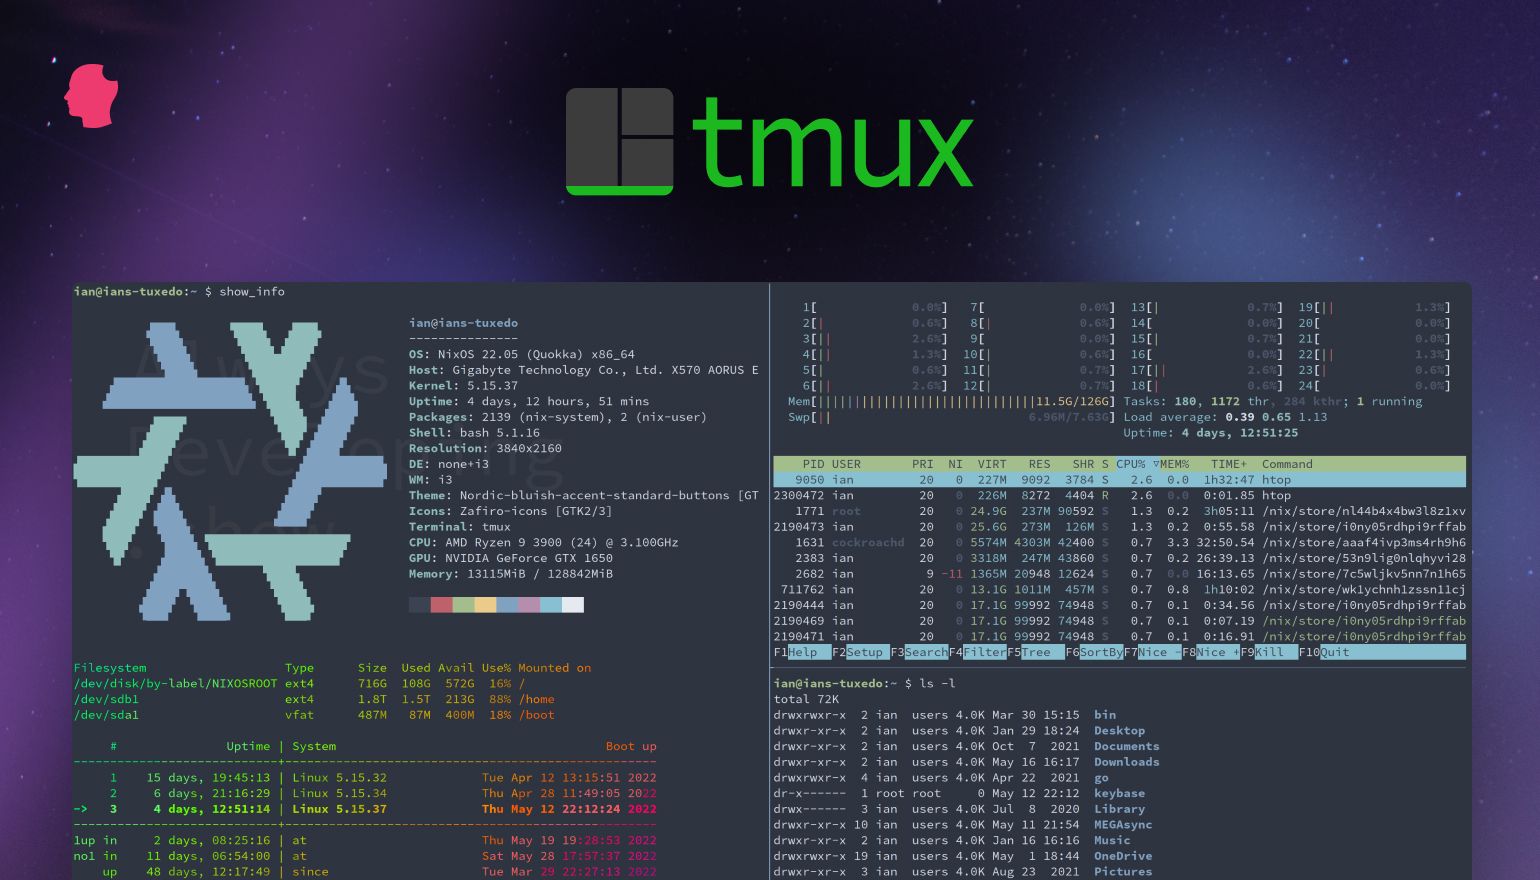
You’ll now see a single tmux window with just one pane and a status bar along the bottom. The status bar displays information about the current tmux session, including the name of the current session, the window numbers and the running process in their active pane, which window is active (*), the name of the host, and the time and date.

As you’ll see later, a lot of the default tmux configuration can be changed.
Command Structure
Before diving into exactly how to use tmux, let’s take a moment to look at how it structures commands. All tmux commands consist of a prefix followed by a command. The most common prefix you’ll use with tmux is Ctrl+b. In all cases, you can press Ctrl+b instead of typing tmux within a tmux pane.
The default prefix is an awkward combination of keys. A lot of people (including me) configure tmux to use Ctrl+a instead. You can do this by adding these lines to your ~/.tmux.conf file:
unbind C-b
set -g prefix C-a
From this point forward, we’ll use Ctrl+a when referring to the prefix. If you decide not to remap the prefix, make sure to use Ctrl+b instead,
Sessions
Sessions are basic to tmux. Sessions can consist of multiple windows, any of which may have multiple panes. The active window is called a notion.
By starting tmux with the tmux command, you are starting a new session. The sessions are numbered by default, starting with 0. As shown in the cheat sheet below, you can create a named session instead by using the -s flag and following it with the session name.
tmux new -s [name]
You’re not required to give your sessions a name, but the default numbering does make it hard to keep track as your list of tmux sessions grows. You can rename existing tmux sessions using the rename-session command and the -t flag. That flag tells tmux to target-session.
tmux rename-session -t [old name or number] [new name]
For example, we can use this to rename our first session from 0 to something more descriptive.

As you can see in the bottom-left, the session has been renamed to learning.
Instead of typing out the entire command, like with most commands in tmux you can use a shortcut. In this case Ctrl+a and $ will get you a prompt to rename the session.
You can have multiple sessions running in the same terminal at the same time. The easiest way to create a new session is with the command tmux new-session. However, this will create a new session with default numbering. It’s better to use the -s flag and give our new session a descriptive name:
tmux new -s practice
Those sessions will continue to run until you close them with the kill-session command. You can see all the running sessions with tmux ls.

To switch sessions without having to first detach, use Ctrl+a and s, and then select another session with arrow keys and Enter. You can also select the required session directly by entering its displayed number.

Attaching and Detaching
You will automatically attach to a new session when you start it. To reattach to an existing session, use the attach-session command, followed by the -t flag to target a named or numbered session:
tmux attach-session -t [session name or number]
As a shortcut, you can quickly attach to the last session you were using by not providing the -t … flag. In fact, tmux is very good at guessing what command you’d like to do and often the first letter or two of the command will be enough.
tmux a
To detach from all sessions, use tmux detach or press Ctrl+a followed by d. To detach from just the current session, you’ll have to target that session specifically with the -s flag:
tmux detach -s [session name or number]
Remember, detaching from the session does not stop any running process. Everything will continue to run until you stop the process or kill the session. You can end any active session by pressing Ctrl+a and x, and then y.
To kill all sessions, use the kill-server command.
tmux kill-server
Windows and Panes
Windows and panes are how you use tmux to its full potential. Panes are the part of a window where we run processes, commands, and scripts. So far in this tutorial, we’ve only used one window with a single pane. One of the great things about tmux is that you can run multiple processes at the same time, while keeping an eye on both because they’re in different panes in the same window.
You can split windows into panes either horizontally or vertically. To create two vertical panes, press Ctrl+a followed by %.

You’ll now have a new pane to the right of the first one. You can continue to split panes, either vertically with the command above, or by pressing Ctrl+a and ” to create horizontal panes.

I created a vertical split followed by a horizontal split, but you can set it up any way you like. By default, tmux activates the cursor in the most recently created pane. Navigate between them with a combination of Ctrl+a and your arrow keys. For example, if you want to move to a pane to the right, you would press Ctrl+a followed by →. To go to the next pane, you can use Ctrl+a followed by o. Using Ctrl+a and ; instead toggles between the current and previous panes.
You can also navigate by using the pane numbers. Pressing Ctrl+a and q will very briefly show the pane numbers. Enter the number while it’s still being displayed, and you’ll automatically switch to that pane. This is a good test of your reflexes, but it’s actually one more keystroke than just using your arrow keys.

Personally, I want even faster pane navigation, so I’ve configured tmux to enable Alt+arrow-key for switching panes by adding the following to my ~/.tmux.conf file.
# Use Alt-arrow keys without prefix key to switch panes
bind -n M-Left select-pane -L
bind -n M-Right select-pane -R
bind -n M-Up select-pane -U
bind -n M-Down select-pane -D
To close a pane, use the exit command or press Ctrl+d. Doing this in the last open pane will exit tmux completely.
Resizing Panes
You can change the relative size of each pane. Naturally, increasing the size of one pane may cause others to shrink in proportion.
To change pane size, navigate to the correct pane and press Ctrl+a followed by :. Your status bar will change from green to yellow. You can then use the following commands to change the boundary lines of that pane. Note that you’re limited by the bounds of your terminal. For example, resizing a right-hand pane by moving the boundary line to the right will not work, as there is no space for the pane to expand into.
- resize-pane -R: Expands the pane to the right.
- resize-pane -L: Expands the pane to the left.
- resize-pane -U: Expands the pane upward.
- resize-pane -D: Expands the pane downward.
However, as that’s rather slow and laborious, tmux has a few key bindings configured by default for resizing quickly.
- Ctrl+a Ctrl+arrow-key: Grows or shrinks the pane by 1 column or row.
- Ctrl+a Alt+arrow-key: Grows or shrinks the pane by 5 columns or rows.
If you hold down that Alt key and mash the arrow key a few times, it’ll keep on resizing the pane without having to hit the Ctrl+a prefix again.
Navigating Between Windows
Use Ctrl+a and c to create a new window (think tab) in the current session. You will automatically switch to the new window when you create it.
You can navigate to another window by pressing Ctrl+a followed by the window’s number as displayed in the status bar, or switch to the next window with Ctrl+a and n. Entering Ctrl+a and p will take you back to the previous window.
To quickly toggle back and forwards between two windows, use Ctrl+a and l (that’s lowercase L, for “last”). You can tell which window is the last one by “-” following its name in the status bar, just like how the current window has “*” after its name.

You may find while using tmux that you need to switch between windows across sessions. You can do this by pressing Ctrl+a followed by w to display a list of the current windows. It will not display windows for detached sessions. You can select the window you want by scrolling through the list with your arrow keys.

It can get a little confusing seeing a whole bunch of windows with just a number and : bash in the status bar. So you can rename the current window with Ctrl+a and ,.

In the following screenshot you can see the result of naming both windows to reflect the projects they’ll be used for.

Basic Commands Cheat Sheet
Below you’ll find a cheat sheet with the basic commands you’ll use most often with tmux. To see a complete list of all the keyboard shortcuts in tmux, press Ctrl+a followed by ?.
| Command | Description |
|---|---|
| tmux | Starts tmux from the Mac Terminal or Linux. |
| tmux new -s [name] | Starts a new named tmux session. Replace [name] with the name of your session. |
| tmux a # | Attaches to a numbered session. Replace # with the number of your session. |
| tmux a -t [name] | Same as above, but used with named sessions. |
| tmux ls | Shows the complete list of all tmux sessions. |
| tmux kill-session -t [name] | Closes the named session. Note that this is different from detaching from a session. Detaching from a session will leave processes running. |
| exit | Exits tmux without detaching from any sessions. |
Why Use tmux Locally?
Using tmux on a remote server means internet connection problems may interrupt your work, but they won’t interrupt the processes you’re running. Given that connection issues can’t stop me using the command line on a machine I’m sitting right in front of, why do I use tmux locally? The biggest advantage is that as soon as I start my terminal emulator, my preferred command line workspace is waiting and ready to go.
In the video above, you can see me firing up Alacritty (my terminal emulator), having shown that there was no other terminal emulator open beforehand. I was able to attach to my already running “dev” tmux session, switch to another window, switch to my “dbi” session, and then check on the still running WP Offload Media acceptance tests I kicked off earlier. If you look closely you’ll notice windows still there for WP Offload SES development, WP Migrate testing, and working with various storage providers. Everything was just as I left it, even though there was no previously open terminal emulator window.
I have a tmux window for each of the projects I’m currently working on. Each of those windows generally has at least a couple of panes where the current working directory is within the project’s source tree or related folders. I hop between the projects with a quick Ctrl+a N, where “N” is the number of the window. So to get to my WP Offload Media stuff I just hit Ctrl+a 2.
On my “admin” window I usually have htop open in one pane as it’s handy for quickly seeing what’s hogging my machine’s resources if things start getting slow. Otherwise, the other two panes are generally used for updating my .dotfiles, reading man pages, or general support stuff like curl -I https://cdn.example.com/some/customers/bucket/object.png.
Before using tmux, when I still used a Mac, I used Magnet for rearranging terminal windows after MercuryMover went away. It wasn’t ideal for getting things set up nicely. Trying to get to a specific window quickly without having to resort to my trackpad was nearly impossible, and I’ve always struggled to get tiling terminal emulators to work how I like.
The great thing is tmux acts more like a tiling window manager, giving you lots of ways to get to your panes in a window, and rearrange them to suit your workflow. If you’re trying to reduce how much you use a mouse or trackpad, you’ll be very happy.
In fact, after using tmux for just a little while, I started looking at tiling window managers on my Linux machines. I used the excellent Qtile window manager for quite a while, but these days I tend to use i3-gaps. This led to using a tiling window manager on macOS too! Eventually though, I couldn’t resist switching to Linux full time, and now I use NixOS with the aforementioned i3wm fork for my desktop. So be warned, using tmux day in, day out, could lead you to massively improving your entire desktop experience! 😂
What Happens When You Reboot?
“Okay smarty pants, what happens when you reboot your machine and that tmux session dies? Where’s your nice comfortable multi-window workspace now?”
Let me introduce you to my very favorite tmux plugins, tmux-resurrect and tmux-continuum.
In the video, I willfully kill my beloved “dev” and other tmux sessions, create a new session with tmux new -s dev, and by pressing Ctrl+a and Ctrl+r, I resurrect my previous sessions to how they were before I killed the tmux server.
It’s incredibly useful to have all my shell sessions restored with the current working directories as I left them. And as seen in the video, if there was a program running that tmux-resurrect deems safe to restart like htop or vim, then they come back to life too!
Resizing and Zooming Panes
Another thing I love about using tmux as my primary means of accessing the command line is its excellent support for resizing. I discussed this briefly while outlining the commands, but it’s worth mentioning again.

In the above screenshot my main local terminal window now only takes up half of the screen, there’s two other terminals open in the other half, one logged into a server created with SpinupWP, and the other my ancient iMac.
Even with the bumped up font size I’ve used for your viewing pleasure 😉, tmux has smoothly resized its panes and kept all the ratios intact, and by switching to “horizontal” layout with Ctrl+a and Alt+2, my super long command prompts aren’t disturbed. 😄
If I want to see more of a pane while still keeping the window a little more cramped than normal, I can zoom the current pane with Ctrl+a and z.

I love that feature. It’s great for quickly reviewing log files, etc., with long lines that would normally wrap in a smaller terminal pane.
Vim Key Navigation
I’ve been using Vi and Vim for over 25 years now, so it’s how my hands do text editing. Apart from using Vim for general text editing, I generally use “vim mode” in everything I can, including in my IDE and the bash command line.
As such, it’s great that if I want to scroll back up or move around in the output of my current tmux pane, I can simply hit Ctrl+a and then use the usual Vim keys for navigation without leaving the keyboard.
Wrapping Up
Hopefully that’s enough of an overview of why I think tmux is the bee’s knees for not just remote command line work, but also on your local development machine.
If you haven’t tried tmux yet, what are you waiting for?! If you give tmux a go for the first time let us know how you get on in the comments, and if you’re already a daily tmux user why not share your tips in the comments too?
I do a lot of work on the command line in Linux and Windows.
One of my favorite apps that makes working on the command line more efficient is Tmux.
There hasn’t been anything quite like it in Windows, until now.
The Windows Subsystem for Linux (WSL) changes all of this.
Here are the steps for installing the WSL on Windows, and installing Tmux.
Step 1: Install WSL
If you haven’t already done so, install the Windows Subsystem for Linux (WSL).
Enable-WindowsOptionalFeature -Online -FeatureName Microsoft-Windows-Subsystem-Linux
# Will likely require and prompt for a reboot
# If you want to upgrade to WSL2, do not reboot yet, otherwise reboot now
NOTE: If you are on Windows 2004 or later,
you should install WSL 2 for better performance / supportability.
Second NOTE: If you are running this on a VM like VirtualBox,
you will need to use WSL 1
Step 2 (Optional): Upgrade to WSL2
Enable the ‘Virtual Machine Platform’ Windows feature.
Enable-WindowsOptionalFeature -Online -FeatureName VirtualMachinePlatform
# Will likely require and prompt for a reboot
# Go ahead and reboot
Set WSL2 as the default WSL version
wsl --set-default-version 2
# Will likely require updating the kernel, Visit https://aka.ms/wsl2kernel
# Install the new kernel and reboot if needed
Step 3: Install a Linux distro from the Windows store
In the Windows store, you can search for your preferred Linux distribution.
Not all are available,
but I have successfully used Ubuntu, Debian, and Kali Linux.
Step 4 (Optional): Install Windows Terminal from the Windows store.
Since you are in the Windows Store,
I would recommend installing the Windows Terminal.
Step 5: Launch the Linux distro application to complete the installation
Run the application you installed from the Windows store;
it should be available on the start menu once it is installed.
Complete the initial user setup:

Step 6 (Optional): Run the Linux Shell in the Windows Terminal
If you launch the Windows Terminal now,
in the drop-down menu you should now have an option to select your Linux distro
If you want to set this as your default shell in the Windows Terminal,
you can update the settings Ctrl + , to do so.
Replace the GUID in defaultProfile with the one for your Linux app.
You can find the GUID in the list section under profiles.
You should see something like this:
    [
        "guid": "{2c4de342-38b7-51cf-b940-2309a097f518}",
        "hidden": false,
        "name": "Ubuntu",
        "source": "Windows.Terminal.Wsl"
    ]
Set this GUID as the defaultProfile,
and this will be the shell that opens by default.
Step 6: Install tmux
Open up the Linux distro app
(or launch it from the Windows Terminal if you have it installed).
Update / upgrade the applications using the package manager
For Ubuntu / Debian / Kali Linux
sudo apt update
sudo apt upgrade -y

# If using Ubuntu, Tmux should be installed already
sudo apt install tmux
Step 7: Launch
If you are just getting started with Tmux, search for Tmux Cheatsheet for useful examples
Now you can multiplex your terminals til the cows come home.
I will go into detail on configuring Tmux in VIM style in a future post.
Post: Customizing Tmux with VIM keys
Thanks for reading
PS> exit
Добрый день, хабр!
Я давно плотно работаю с Linux системами, но в качестве десктопа предпочитаю Windows. Но для комфортной работы иногда нужно постараться.
Сегодня я хочу поделится опытом и впечатлениями о том как я пытался найти замену Tmux под cygwin и как я в конце концов победил Tmux и скомпилировал его под Cygwin + Windows. Кому интересно — прошу под кат.

Требования к системе
Я собирал tmux на windows 7 x64 с установленным Cygwin.x86. На Cygwin.x86_64 Собрать библиотеку libevent не удалось.
Начать стоит с установки Cygwin.x86. При установке помимо необходимого вам софта нужно установить:
gcc*, make, autoconf, automake, cmake.
Также необходимо будет поставить библиотеку которую требует tmux: libncurses10, libncurses-devel, ncurses.
Сборка libevent
Я черпал информацию и опыт с этой переписки. Но все равно пришлось немного изменить и поковыряться в souce code. Я не хочу вас загружать .patch файлами и лишними деталями, кому нужно — сам сможет сравнить исходники. Я же выложу свои готовые наработки, вам необходимо будет только собрать.
Еще одна из необходимых зависимостей Tmux — это библиотека libevent которой, к сожалению, нет в репозитории cygwin. Ее необходимо собрать с исходников. Я использовал libevent-2.0.21-stable. Открываем Cygwin и собираем:
tar xf libevent-2.0.21-stable.tgz
cd libevent-2.0.21-stable
./configure --libdir=/usr/lib/
make && make install
Прошу обратить внимание что при configure параметр libdir указан не зря, и Cygwin плохо дружит с /usr/local/lib.
Сборка tmux
Я выложил свои наработки Tmux
tar xf tmux-tmux-code.tgz
cd tmux-tmux-code
./configure
make && make install
tmux
echo 'Enjoy!'
Впечетления
Работает очень быстро и не сбоит! В сравнении с альтернативами такими как Byobu и Screen небо и земля.
Спасибо за внимание, желаю всем хорошей недели и комфортных условий труда!
Источники
Я лично сделал пару мелких фиксов, основную работу сделали за меня, я хочу выразить большую благодарность этому проекту.
UPD. Также собрал бинарники которые я собрал.
Git for Windows is a special version of the MSYS2 with some customizations for better integration with Windows. In particular, in my experience, MSYS2 with Git does not work properly with Visual Studio Code, while Git for Windows works perfectly without any tweaking. However, Git for Windows version of MSYS2 does not include many of the other tools that are available in the standard MSYS2 installation, including Tmux. Nevertheless, we can install Tmux from the MSYS2 repositories with a little bit of effort.
Before making these changes, you should back up the Git for Windows installation directory, typically C:\Program Files\Git. You can simply copy this directory to another folder so that you have a backup in case something goes wrong in the update process.
Newer packages from the MSYS2 repositories <http://repo.msys2.org/msys/x86_64/> use Facebook’s new Zstandard compression. These files have .zst file extension. To decompress them, you will need to download the zstd for Windows native Windows tool. Place the tool in a directory in your path, such as C:\Windows, since you will be running this tool from the Windows Command Prompt.
In addition, you will also need a tool capable of extracting tar archives. Fortunately, the Git for Windows installation includes the tar utility as one of the standard tools. Or your can use a GUI tool such as 7-Zip, which supports this archive type.
In addition to the Tmux executable itself, a few other files from the standard MSYS2 installation, particularly from the libevent library, are needed. So we will download several packages from the MSYS2 repositories. Since packages are updated frequently, the version numbers of the packages may change. Accordingly, in the list below, the version numbers are represented by x.y.z-p. You will need to replace these with the current/latest version number.
libevent-x.y.z-p-x86_64.pkg.tar.xz
tmux-x.y.z-p-x86_64.pkg.tar.zst
Enter fullscreen mode
Exit fullscreen mode
To decompress the Zstandard compressed files, run the native Windows zstd tool (see above) at a Windows Command Prompt with the -d («decompress») option:
zstd -d tmux-x.y.z-p-x86_64.pkg.tar.zst
Enter fullscreen mode
Exit fullscreen mode
This will give you two tar archives that can then be extracted using the tar tool at the Git Bash prompt:
tar -xvf tmux-x.y.z-p-x86_64.pkg.tar
tar -Jxvf libevent-x.y.z-p-x86_64.pkg.tar.xz
Enter fullscreen mode
Exit fullscreen mode
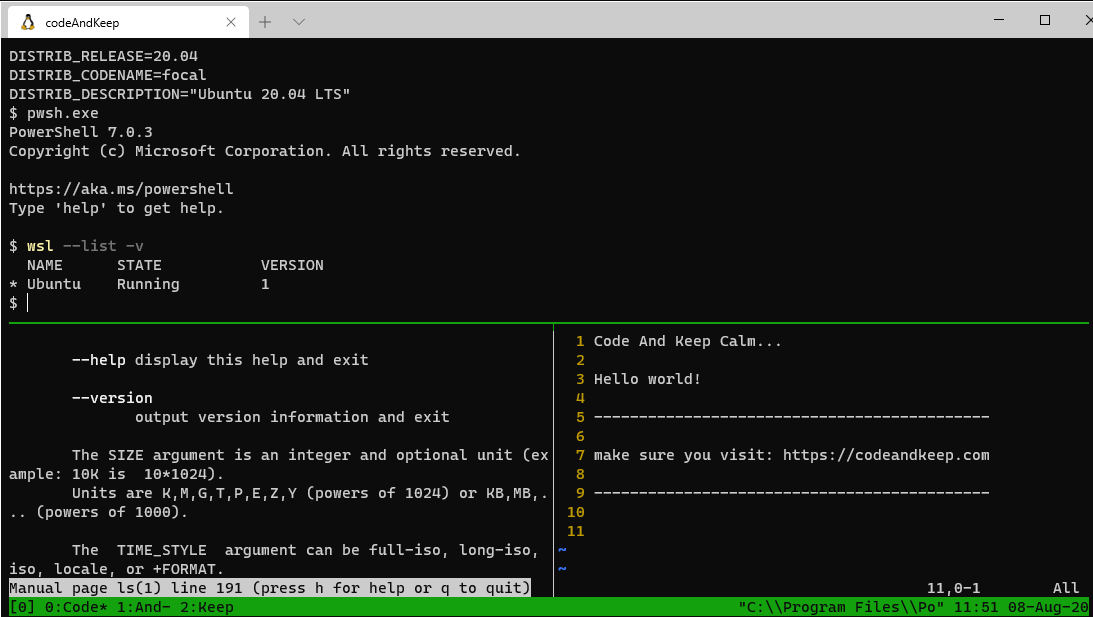
Since you have updated the files in the running Git Bash session, you will need to close the Git Bash prompt and open a new session. (Note: Tmux only works with the MinTTY version of Git Bash (git-bash.exe). If you usually use the native bash.exe or git-cmd.exe Git prompts, you’ll get the error open terminal failed: not a terminal when trying to run Tmux.)
In the new Git Bash instance, launch a new Tmux session normally by running tmux. You should see the usual Tmux status bar and you’ll be able to use the normal Tmux functions and keyboard shortcuts. Likewise, if you run Git Bash (again, the MinTTY version) in ConEmu, Tmux works just fine in it, as well.
Installing tmux
Binary packages
Many platforms provide prebuilt packages of tmux, although these are often out
of date. Details of the commands to discover and install these can be found in
the documentation for the platform package management tools, for example:
| Platform | Install Command |
|---|---|
| Arch Linux | pacman -S tmux |
| Debian or Ubuntu | apt install tmux |
| Fedora | dnf install tmux |
| RHEL or CentOS | yum install tmux |
| macOS (using Homebrew | brew install tmux |
| macOS (using MacPorts) | port install tmux |
| openSUSE | zypper install tmux |
Some thirdparty binary packages are available: AppImage and
RPMs.
From source tarball
tmux requires two libraries to be available:
-
libevent
-
ncurses
In addition, tmux requires a C compiler, make, yacc (or bison) and pkg-config.
On most platforms, these are available as packages. This table lists the
packages needed to run or to buld tmux:
| Platform | Command | Run Packages | Build Packages |
|---|---|---|---|
| Debian | apt-get install |
libevent ncurses |
libevent-dev ncurses-dev build-essential bison pkg-config |
| RHEL or CentOS | yum install |
libevent ncurses |
libevent-devel ncurses-devel gcc make bison pkg-config |
If libevent and ncurses are not available as packages, they can be built from
source, see this section.
tmux uses autoconf so it provides a configure script. To build and install
into /usr/local using sudo, run:
tar -zxf tmux-*.tar.gz
cd tmux-*/
./configure
make && sudo make install
To install elsewhere add --prefix to configure, for example for /usr add
--prefix=/usr.
Building dependencies
If the dependencies are not available, they can be built from source and
installed locally. This is not recommended if the dependencies can be installed
from system packages.
Building requires a C compiler, make, automake, autoconf and pkg-config to be
installed. It is more common to need to build libevent than ncurses.
Full instructions can be found on the project sites but this is a summary of
how to install libevent and ncurses into ~/local for a single user. To
install system-wide into directories under /opt or into /usr/local,
substitute the required path for for $HOME/local in each case and run make install as root (for example with sudo: make && sudo make install).
For libevent:
tar -zxf libevent-*.tar.gz
cd libevent-*/
./configure --prefix=$HOME/local --enable-shared
make && make install
For ncurses:
tar -zxf ncurses-*.tar.gz
cd ncurses-*/
./configure --prefix=$HOME/local --with-shared --with-termlib --enable-pc-files --with-pkg-config-libdir=$HOME/local/lib/pkgconfig
make && make install
Then the tmux configure script needs to be pointed to the local libraries
using PKG_CONFIG_PATH:
tar -zxf tmux-*.tar.gz
cd tmux-*/
PKG_CONFIG_PATH=$HOME/local/lib/pkgconfig ./configure --prefix=$HOME/local
make && make install
If ncurses and libevent were installed in different directories rather than all
together in ~/local, both their lib/pkgconfig directories will need to be
in PKG_CONFIG_PATH, for example:
PKG_CONFIG_PATH=/opt/libevent/lib/pkgconfig:/opt/ncurses/lib/pkgconfig ./configure --prefix=$HOME/local
The newly built tmux can be found in ~/local/bin/tmux.
When tmux is installed locally on Linux, the runtime linker may need to be told
where to find the libraries using the LD_LIBRARY_PATH environment variable,
for example:
LD_LIBRARY_PATH=$HOME/local/lib $HOME/local/bin/tmux -V
And to view the manual page, MANPATH must be set:
MANPATH=$HOME/local/share/man man tmux
Most users will want to configure these in a shell profile, for example in
.profile for ksh or .bash_profile for bash:
export PATH=$HOME/local/bin:$PATH
export LD_LIBRARY_PATH=$HOME/local/lib:$LD_LIBRARY_PATH
export MANPATH=$HOME/local/share/man:$MANPATH
From version control
Building tmux from Git has the same dependencies as building from tarball plus
also autoconf and automake. Building is the same as from a tarball except first
the configure script must be generated. To install into /usr/local:
git clone https://github.com/tmux/tmux.git
cd tmux
sh autogen.sh
./configure
make && sudo make install
Configure options
tmux provides a few configure options:
| Option | Description |
|---|---|
--enable-debug |
Build with debug symbols |
--enable-static |
Create a static build |
--enable-utempter |
Use the utempter library if it is installed |
--enable-utf8proc |
Use the utf8proc library if it is installed |
Common problems
configure says: libevent not found or ncurses not found
The libevent library or its headers are not installed. Make sure the
appropriate packages are installed (some platforms split libraries from headers
into a -dev or -devel package).
configure says: must give --enable-utf8proc or --disable-utf8proc
macOS’s builtin UTF-8 support is very poor, so it is best to use the
utf8proc library if possible. Once
it is installed, pass --enable-utf8proc to configure.
To force tmux to build without utf8proc, use --disable-utf8proc.
tmux won’t run from ~/local
On Linux, make sure LD_LIBRARY_PATH is set, or try a static build instead
(give --enable-static to configure).
autogen.sh complains about AM_BLAH
Make sure pkg-config is installed.
configure says: C compiler cannot create executables
Either no C compiler (gcc, clang) is installed, or it doesn’t work — check
there is nothing stupid in CFLAGS or CPPFLAGS.
AppImage package
Instructions and scripts on building an AppImage package for tmux are available
from Nelson Enzo here. Prebuilt
AppImage packages are also available
here.
Red Hat Enterprise Linux / CentOS RPMs
The tmux packages available from the main repositories are often quite out of
date, especially for long-term support distributions. RPMs for newer tmux
versions can be obtained from here.
For example to set up a repository and install on RHEL8:
sudo yum install http://galaxy4.net/repo/galaxy4-release-8-current.noarch.rpm
sudo yum install tmux
Or to install an RPM directly on RHEL6:
sudo rpm -ivh http://galaxy4.net/repo/RHEL/6/x86_64/tmux-3.1b-2.el6.x86_64.rpm
The repository method is recommended to automatically receive future package
updates. See this page for more
details.