
Играйте на ПК с BlueStacks или через наше облако
Запустите Termux на PC или Mac
Termux — приложение категории «Инструменты», разработанное Fredrik Fornwall. BlueStacks — лучшая платформа и эмулятор для запуска этого Android приложения на ПК или Mac. Получите незабываемый опыт вместе с нами.
Это комплексный эмулятор терминала для Android, разработанный Fredrik Fornwall, который позволяет запускать полноценную Linux-среду на вашем устройстве. С помощью Termux вы можете использовать широкий спектр команд Linux, устанавливать дополнительные пакеты и настраивать систему под свои нужды.
Запускайте оболочки bash и zsh, работайте с командной строкой так же, как на настольном Linux. Устанавливайте более 1000 пакетов, включая текстовые редакторы (vim, nano), компиляторы (gcc, clang), интерпретаторы (Python, Ruby) и многие другие.
Используйте Termux для разработки на различных языках программирования, компиляции кода и управления проектами с помощью систем контроля версий, таких как Git.
С помощью дополнения Termux:Styling вы можете изменять цветовые схемы и шрифты терминала под свои предпочтения.
Расширяйте функциональность Termux с помощью дополнительных плагинов, таких как Termux:API для доступа к функциям устройства, Termux:Boot для запуска скриптов при загрузке и Termux:Widget для быстрого доступа к скриптам с главного экрана.
Особенности приложения:
- Эмуляция терминала
- Установка пакетов
- Разработка и программирование
- Настраиваемый интерфейс
Termux предоставляет уникальную возможность использовать мощь Linux на вашем Android-устройстве, превращая его в полноценный инструмент для разработки и администрирования.
Скачайте Termux на ПК с помощью BlueStacks и откройте для себя новые горизонты работы с Linux!
Как скачать и запустить Termux на ПК
-
Скачайте и установите BlueStacks на ваш ПК или Mac
-
Войдите в аккаунт Google, чтобы получить доступ к Google Play, или сделайте это позже.
-
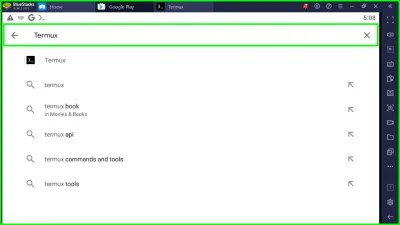
В поле поиска, которое находится в правой части экрана, введите название игры – Termux.
-
Среди результатов поиска найдите игру Termux и нажмите на кнопку «Установить».
-
Завершите авторизацию в Google (если вы пропустили этот шаг в начале) и установите игру Termux.
-
Нажмите на ярлык игры Termux на главном экране, чтобы начать играть.
Watch Video
Операционная система
Microsoft Windows 7 и выше, macOS 11 (Big Sur) и выше
Процессор
Intel, AMD или Apple Silicon Processor
ОЗУ
не менее 4 ГБ
Жесткий диск
10 ГБ свободного дискового пространства
Note:
* У вас должны быть права администратора на ПК. Актуальные драйверы видеокарты от производителя чипсета или Microsoft.
Termux — FAQ
-
Как запустить Termux на ПК с Windows и Mac?
Запустите Termux на своем ПК или Mac, выполнив следующие простые действия.
- Нажмите «Скачать Termux на ПК», чтобы загрузить BlueStacks.
- Установите его и авторизируйтесь в Google Play Store.
- Запустите приложение.
-
Почему BlueStacks — самая быстрая и безопасная платформа для игр на ПК?
BlueStacks уважает вашу конфиденциальность и всегда безопасен в использовании. Он не содержит вредоносных и шпионских программ или любого другого дополнительного программного обеспечения, которое может нанести вред вашему компьютеру.
Он разработан и оптимизирован чтобы обеспечивать ваш игровой процесс наилучшей производительностью.
-
Какие системные требования у Termux к ПК?
Минимальные требования для запуска Termux на вашем ПК
- ОС: Microsoft Windows 7 и выше
- Процессор: процессор Intel или AMD.
- Оперативная память: на вашем компьютере должно быть не менее 2 ГБ оперативной памяти. (Обратите внимание, что наличие 2 ГБ или более дискового пространства не заменяет ОЗУ)
- Жесткий диск: 5 ГБ свободного места на диске.
- Вы должны быть администратором на своем ПК.
LAST Updated : August 2023
Unmaintained : Due to Termux not working properly on new Android versions and also Termux not getting maintained properly.
Alright, Lets just get this straight, these are just some dotfiles & scripts, which will help you to setup a graphical environment in termux. I’ve tried to make it as easy as possible to setup a beautiful linux desktop on your android device with termux, So follow the steps and you’ll end up making it look like this —
| Openbox WM | Another Style |
|---|---|

|

|
Lets start from the beginning…
What is termux?
Termux is an Android terminal emulator and Linux environment app that works directly with no rooting or setup required. A minimal base system is installed automatically — additional packages are available using the PKG/APT package manager. More Here…
How To install termux?
You can install termux form google play store or from f-droid.
- Get it on Github
- Download from F-Droid
More information about installation is here
Preparation
Install Termux & Termux:API on your phone. It’s recommended to install Termux API application as many desktop elements are dependent on it.
This setup is created and tested on :
Device — Redmi Note 9 Pro
Android — Android 10 (Q)
CPU Type — aarch64
Installation
After installing both applications above, open Termux and follow the steps below —
- Update termux packages and install
git
pkg upgrade && pkg install git
- Clone this repository
git clone --depth=1 https://github.com/adi1090x/termux-desktop.git
Warning : I’m assuming that you’re doing this on a fresh termux install. If not, I’ll suggest you to do so. However the
setup.shscript backup every file it replace, It’s still recommended that you manually backup your files in order to avoid conflicts.
- Change to cloned directory and run
setup.shwith —install option
cd termux-desktop
chmod +x setup.sh
./setup.sh --install
If script
setup.shfails during package installation (due to network issues), you can re-execute it again.
- During installation, you’ll be asked to set up password for VNC —
[*] Setting up VNC Server...

You will require a password to access your desktops.

Password:
Verify:
Would you like to enter a view-only password (y/n)? n
Note that passwords are not visible when you are typing them and minimum password length is 6 characters.
Remember the password you typed as it’ll be required to connect via vnc client.
- If everything is okay, you will see this message —
New 'localhost:1 ()' desktop is localhost:1

Creating default startup script /data/data/com.termux/files/home/.vnc/xstartup
Creating default config /data/data/com.termux/files/home/.vnc/config
Starting applications specified in /data/data/com.termux/files/home/.vnc/xstartup
Log file is /data/data/com.termux/files/home/.vnc/localhost:1.log

[*] Server Is Running...

TigerVNC server sessions:

X DISPLAY #     PROCESS ID
:1              XXXXX
It means that X (vnc) server is available on display ‘localhost:1’.
That’s it. Termux Desktop is installed successfully. Restart Termux and enter startdesktop command to start vncserver and connect via VNC Client.
startdesktop

[*] Starting VNC Server...

New 'localhost:1 ()' desktop is localhost:1

Starting applications specified in /data/data/com.termux/files/home/.vnc/xstartup
Log file is /data/data/com.termux/files/home/.vnc/localhost:1.log
Uninstallation
If you ever want to uninstall Termux Desktop, just run setup.sh with —uninstall option. Just keep the setup.sh script and delete the cloned repository to save space. I’ll create a separate uninstaller script later. The command below will remove all the packages and delete all the config files it installed, including the changes you’ve made. So, Be careful there…
VNC Client
Now you need a VNC client app to connect to server. I’m using this Android VNC client: VNC Viewer. You can use TigerVNC if you’re trying to connect to server by a computer (Windows or Linux).
Determine port number on which VNC server listens. It can be calculated like this: 5900 + {display number}. So for display ‘localhost:1’ the port will be 5901.
Now open the VNC Viewer application and create a new connection with the following information (assuming that port is 5901) —
Address:
127.0.0.1:5901

Name:
Termux
Now launch it. You will be prompted for password that you entered during installation. After entering password, you’ll be headed directly to this desktop —

First Impression
Let’s take a look at following installed programs you’ll get here —
| File Manager | Text Editor/IDE |
|---|---|

|

|
| Terminal Emulator | Web Browser |
|---|---|

|

|
| Openbox Menu | Many CLI based Programs |
|---|---|

|

|
| vim & htop | ranger & calcurse | mutt & elinks | mpd & ncmpcpp |
|---|---|---|---|

|

|

|

|
Rofi Application launcher and Applets —
| App Launcher | Music Player |
|---|---|

|

|
| Battery Status | Exit Menu | Network Info |
|---|---|---|

|

|

|
Styles
There are total Eight different styles/themes available in this setup. To change style, Right click on desktop > Preferences > Change Style and select the one you want to apply.
| Default | Beach | Forest | Grid |
|---|---|---|---|

|

|

|

|
| Manhattan | Slime | Spark | Wave |
|---|---|---|---|

|

|

|

|
Applications of Termux Desktop
Well, These are some ideas or things you can do with termux desktop. From Learning coding to Penetration testing, Chatting over IRC to Browsing web and Downloading file, Playing classic retro games to run Windows from 90s.
- Learn and practice you coding skill without having a laptop
| Python | Bash |
|---|---|

|

|
- Chatting, Web Browsing and Downloading files
| Hexchat & Pidgin | Netsurf & Uget | Browsing Wiki |
|---|---|---|

|

|

|
- Penetration testing and Learn cyber security stuff
I’m not doing anything illegal or sponsoring any kind of Hacking and Cracking. Termux is a powerful tool, use it with responsibilities.
| Metasploit — Sherlock — Socialfish — Zphisher — Sqlmap |
|---|

|
- Play classic retro games or Run Microsoft Windows from 90s with
Dosbox
| Turbo C++, Windows 1 and Windows 3 | Duke and Blue Brothers |
|---|---|

|

|
| Mario and Pacman | Prince of Persia (both) |
|---|---|

|

|
| Wolfenstein and Turrican2 | SuperKarts and Spiderman |
|---|---|

|

|
You’ll probably get the idea of possible things you can do with Termux and how Termux Desktop makes it more easy.
Keybindings
Here’s some shortcut keys you want to use to speed up your work. For more, Right click on desktop > Keybinds
| Keys | Action | —— | Keys | Action |
|---|---|---|---|---|
W-1 |
Go To Desktop 1 | S-W-1 |
Send To Desktop 1 | |
W-2 |
Go To Desktop 2 | S-W-2 |
Send To Desktop 2 | |
W-3 |
Go To Desktop 3 | S-W-3 |
Send To Desktop 3 | |
W-4 |
Go To Desktop 4 | S-W-4 |
Send To Desktop 4 | |
W-5 |
Go To Desktop 5 | S-W-5 |
Send To Desktop 5 | |
W-S-Left |
Send To Prev Desktop | W-S-Right |
Send To Next Desktop | |
A-Tab |
Next Window (Current Workspace) | W-Tab |
Next Window (All Workspaces) | |
W-h |
Move to TopLeft | W-j |
Move to BottomLeft | |
W-k |
Move to TopRight | W-l |
Move to BottomRight | |
W-Left |
Move To Left Edge | W-Right |
Move To Right Edge | |
W-Up |
Maximized | W-Down |
Unmaximized | |
W-q/c |
Close Windows | A-r/m |
Toggle Resize/Move | |
W-Space |
Openbox Menu | W-p/A-F1 |
App Launcher | |
W-d |
Toggle Desktop | W-v |
Set Tasks | |
W-f |
File Manager | W-e |
Text Editor | |
W-t/return |
Terminal | W-w |
Web Browser | |
W-x |
Exit Menu | W-m |
Music Menu | |
W-b |
Battery Menu | W-n |
Network Menu | |
C-A-v |
Vim | C-A-r |
Ranger | |
C-A-h |
Htop | C-A-n |
Nano |
Additional Tools
You can install additional tools for termux, to make it visually look good.
- Oh my zsh, Setup zsh with oh-my-zsh framework. (Already Added in this setup)
- Termux style, Change color and fonts in termux.
FYI
- If you face any problem or get any error, you can create an issue & i’ll try to help.
- Edit
~/.local/bin/emailand put your Email ID and Password (Use an App password) to show unread mails on polybar. - You may need to edit some config files accoring to your need (
~/.mutt/muttrc,~/.gitconfig) - Don’t Email or DM me to ask how to hack, I ain’t a Hacker.
- Have Fun, Share this repository with your friends.
In this post, I am gonna show you How you can install the termux app on your Windows🔥. So if you want to use termux in your pc or in your laptop this will work fine. I am gonna show you 2 methods, in the first one, I am gonna show you how you can install termux on you PC using Emulator. And in the second method, I will show you how you can install Termux on Your Laptop/PC without Emulator.
How to Install Termux for PC :
If you are a termux user you should know that the termux is a Terminal Emulator for Linux. Basically, it’s a Lighter version on the Linux command-line interface. Since it is a Lighter version they made is a little bit simpler than the Linux terminal. And If you Run Termux Commands on Linux shell, some of them won’t work.
There are two ways you can install Termux in your PC, In the first method we will use Bluestack Android Emulator and we will install the termux apk on it. Every time we want to use the termux we will open BlueStack and use it like we do on android.

In the second method, we will install we will use Linux Subsystem for windows to install the Linux shell in Windows. Since we are using the Linux subsystem we will be installing the full version Linux shell and not the light version termux. This will run much faster than the 1st method and it will not lag at all and Bluestack will lag a lot if you have 4gb ram PC.
But the only difficulty in using the 2nd method is that only a few commands will differ from the termux commands. Like you must have to use apt and not the pkg and some time you will need to type sudo before commands because the terminal will be rooted😍.
Method 1: Install Termux in Windows Using Emulator:
In this method, we will install the Bluestack and then we will install Termux on it. This method will work on any Windows PC But you must have a good configuration else it will lag.
Step 1:
First of all, you have to Install BlueStack in your PC, Just Click on the below Download link and a setup file of less than 2 MB will be installed on your PC.
Step 2:
Click on the Downloaded File in the bottom left corner of your chrome.

and the Installer will Open Just click on Install and it will start Downloading the Tool in your Windows.

The Blue stack will take around 500MB to download.
Step 3:
Now after the installation is done, It will ask you to sign in the google play store. Click on the sign in Button and then Enter your email and password and you will be logged in.

Step 4:
Now you can see the PlayStore in your BlueStack, Just Click on the Search bar and Type Termux and Press Enter.

Step 5:
Install the Termux Like you normally do in your android Phone. After it’s installed Press Click Open.

Step 6:
Now you can see I can use termux in Windows10 without any Interruption. I am also running the cool header script, If you also want to add this header then you read this [Termux-Cool-Header]

Tip :
To Run the termux again you need to open the blue stack and there you can see the Termux Icon also it will Create a Termux icon on your Home Screen you can also click that icon to run the Termux in your Windows. You can use Termux commands like you do in your Phone. If you don’t like termux bluestack method, you can always try the next method.
Method 2: Install Termux on PC Without Emulator :
In this method, we will Not install an Emulator to run termux, We will install the Linux terminal in Windows so that we can use Linux tools in Windows which is the same as Linux.
Step 1:
Press the Windows key on your keyboard and type «turn windows features on or off» and select the top Option and it will open the below window in your computers.

Step 2:
Now Scroll to the Bottom and then Turn on the Windows Subsystem for Linux. and then press Ok.
Step 3:
Now it will check for the components to turn on the subsystem features and then it will apply the changes and it will ask you to restart the System, Click on the Restart Button.

Step 4:
Now You have to install the Kali Linux Terminal in your Windows from the Microsoft Store click on the below link. And Click on the get app or install Button and install the tool.
After Downloading, You can Directly Launch the Kali Linux application and the For the First time it will ask you for your username and password, Just Type any simple Username and password, Because you will have to type this password a lot while installing anything.

Step 6:
Now everything is Set and you just have to use this Terminal like you use termux but Keep in mind that this is Actual Linux, so you need to use Linux commands. The Linux commands are the same as termux you just have to use apt here and not pkg. You will also have to type sudo before commands if they are not working normally. Here is a Linux Cheat Sheet That you can follow for a better experience. Below, you can see that I have installed Neofetch in Kali Linux shell.

Method 3: Use Termux in Windows Using SSH Server:
This is a Bonus tip, using this method you will be able to access your termux in your Windows10 without any lag and without installing any things. This is the latest and tested method and it is far better than the above two methods if you have a phone with you. i have written a dedicated post on this topic so you can read it here : [ Termux SSH : Use Termux in Windows Using SSH Server ]
Conclusion :
These are the most common methods to use termux in PC. To be honest the Bluestack is accurate because you are actually using Termux BUT it takes all your resources and It lags a lot. To test all the scripts that I make, I use the windows subsystem for Linux, It is a much faster, Cleaner, and it is same as the termux. If you can use Linux Shell than that means you are a good Linux user. If you are facing any error while installing and using these tools just drop a comment I will surely give you a reply. Thanks For reading Guys, and as always Stay Ethical👾.
Termux для ПК | Как установить Termux в Windows.
True HackTrue Hack — не забудь подписаться на канал, чтоб не пропустить новые статьи!
И так, приступим!
В этом посте я покажу вам, как вы можете установить приложение termux на вашем Windows🔥. Я собираюсь показать вам 2 метода, в первом из них, я собираюсь показать вам, как вы можете установить termux на вашем компьютере с помощью эмулятора. И во втором способе, я покажу вам, как вы можете установить Termux на вашем компьютере без эмулятора.
Мы не призываем вас к каким-либо действиям, статья написана исключительно в ознакомительных целях, чтобы уберечь читателя от противоправных действий.
Как установить Termux для ПК
Если вы являетесь пользователем termux, вы должны знать, что termux-это эмулятор терминала для Linux. По сути, это более легкая версия интерфейса командной строки Linux. Поскольку это более легкая версия, которую они сделали, она немного проще, чем терминал Linux. И если вы запускаете команды Termux в оболочке Linux, некоторые из них не будут работать.
Существует два способа установки Termux на вашем ПК, в первом способе мы будем использовать Bluestack Android Emulator, и мы установим приложение termux на нем. Каждый раз, когда мы хотим использовать termux, мы открываем BlueStack и используем его так же, как и на android.
Во втором способе мы установим мы будем использовать подсистему Linux для windows, чтобы установить оболочку Linux в Windows. Поскольку мы используем подсистему Linux, мы будем устанавливать полную версию Linux shell, а не светлую версию termux. Это будет работать гораздо быстрее, чем 1-й метод, и он не будет отставать вообще, и Bluestack будет отставать много, если у вас есть 4 ГБ оперативной памяти ПК.
Но единственная трудность в использовании 2-го метода заключается в том, что только несколько команд будут отличаться от команд termux. Например, вы должны использовать apt, а не pkg, и некоторое время вам нужно будет вводить sudo перед командами, потому что терминал будет так сказать рутирован.
Способ 1: Установите Termux в Windows с помощью эмулятора:
В этом методе мы установим Bluestack, а затем установим Termux на него. Этот метод будет работать на любом ПК с Windows, но у вас должна быть хорошая конфигурация, иначе он будет отставать.
Шаг 1:
Прежде всего , вам необходимо установить BlueStack на свой компьютер, просто нажмите на ссылку ниже, и на вашем ПК будет установлен установочный файл размером менее 2 МБ.
Шаг 2:
Нажмите на загруженный файл в нижнем левом углу вашего chrome.
и установщик откроется, просто нажмите на кнопку Установить, и он начнет загружать инструмент в вашу Windows.
Синий стек займет около 500 МБ для загрузки.
Шаг 3:
Теперь, после завершения установки, он попросит вас войти в google play store. Нажмите на кнопку Войти, а затем введите свой адрес электронной почты и пароль, и вы войдете в систему.
Шаг 4:
Теперь вы можете увидеть PlayStore в своем BlueStack, просто нажмите Click в строке поиска, введите Termux и нажмите Enter.
Шаг 5:
Установите Termux, как вы обычно делаете в вашем телефоне android. После его установки нажмите кнопку Открыть.
Шаг 6:
Теперь вы можете видеть, что я могу использовать termux в Windows10 без каких-либо перерывов.
Совет :
Чтобы снова запустить termux, вам нужно открыть синий стек, и там вы увидите значок Termux, а также он создаст значок Termux на вашем домашнем экране. Вы можете использовать команды Termux так же, как и в вашем телефоне.
Способ 2: Установите Termux на ПК без эмулятора:
В этом методе мы не будем устанавливать эмулятор для запуска termux, мы установим терминал Linux в Windows, чтобы мы могли использовать инструменты Linux в Windows, которые являются такими же, как Linux.
Шаг 1:
Нажмите клавишу Windows на клавиатуре и введите «включить или выключить функции windows», а затем выберите верхнюю опцию, и она откроет нижеприведенное окно на ваших компьютерах.
Шаг 2:
Теперь прокрутите страницу вниз и включите подсистему Windows для Linux. а затем нажмите Ok.
Шаг 3:
Теперь он будет проверять компоненты, чтобы включить функции подсистемы, а затем он применит изменения, и он попросит вас перезагрузить систему, нажмите на кнопку перезагрузки.
Шаг 4:
Теперь вам нужно установить терминал Kali Linux в вашу Windows из магазина Microsoft Store, нажав на ссылку ниже. А затем нажмите на кнопку Получить приложение или установить и установите инструмент.
Шаг 5:
После загрузки вы можете непосредственно запустить приложение Kali Linux, и в первый раз оно попросит вас ввести ваше имя пользователя и пароль, просто введите любое простое имя пользователя и пароль, потому что вам придется много вводить этот пароль при установке чего-либо.
Шаг 6:
Теперь все настроено, и вы просто должны использовать этот терминал, как вы используете termux, но имейте в виду, что это фактический Linux, поэтому вам нужно использовать команды Linux. Команды Linux такие же, как и termux, вы просто должны использовать apt здесь, а не pkg. Вам также придется ввести sudo перед командами, если они не работают нормально. Ниже вы можете видеть, что я установил Neofetch в оболочке Kali Linux.
Метод 3: Используйте Termux в Windows с помощью сервера SSH:
Это бонусный совет, с помощью этого метода вы сможете получить доступ к своему termux в вашем Windows10 без каких-либо задержек и без установки каких-либо вещей. Это самый последний и проверенный метод, и он намного лучше, чем два вышеупомянутых метода, если у вас есть телефон с вами.
Вывод :
Это наиболее распространенные методы для использования termux в ПК. Честно говоря, Bluestack точен, потому что вы на самом деле используете Termux, но он занимает все ваши ресурсы и сильно отстает. Чтобы протестировать все сценарии, которые я делаю, я использую Подсистема Windows для Linux, это гораздо быстрее, чище, и это же, как termux. Если вы можете использовать Linux Shell, нежели это означает, что вы хороший пользователь Linux. Если вы столкнулись с какой-либо ошибки при установке и использовании этих средств просто напишите комментарий и я обязательно дам вам ответ. Спасибо, что читаете ребят, и как всегда оставайтесь этичными👾.
● Buratinopol — хакинг, кибербезопасность, приватность, анонимность
● SOFTWARE — хранилище приватных софтов и прочей годноты. Подпишись!
● CODING — программирование доступным языком.
● Termux — one — гайды и статьи по Termux.
Details
NOTE: If you’re having issues with installing or updating packages see https://github.com/termux/termuxpackages/wiki/PackageManagement
NOTE: Updates over Google Play is currently halted due to technical reasons. In the meantime, see https://github.com/termux/termuxapp#installation for alternative installation sources.
Termux combines powerful terminal emulation with an extensive Linux package collection.
• Enjoy the bash and zsh shells.
• Manage files with nnn and edit them with nano, vim or emacs.
• Access servers over ssh.
• Develop in C with clang, make and gdb.
• Use the python console as a pocket calculator.
• Check out projects with git.
• Run textbased games with frotz.
At first start a small base system is downloaded desired packages can then be installed using the apt package manager. Access the builtin help by longpressing anywhere on the terminal and selecting the Help menu option to learn more.
Want to read the wiki?
https://wiki.termux.com
Want to ask questions, report bugs or give feedback?
https://termux.com/community
Want to join the Termux IRC chat?
#termux on freenode
NoxPlayer Delivers The Best Gaming Experience For You
How to play Termux on PC using NoxPlayer
-
1Download NoxPlayer on your PC.
-
2Run the installation package and complete the installation.
-
3Search for Termux on NoxPlayer.
-
4Install the game in Google Play.
-
5Click the game icon to start it.
-
6Play Termux with NoxPlayer on PC easier!
Simple Method
Method 1. Click «Download on PC» to download NoxPlayer and apk file at the same time. Once installation completes, play the game on PC.
Method 2. If you already have NoxPlayer on PC, click «Download APK», then drag and drop the file to the emulator to install.
The Wonderful Video of Termux
Do you wanna run Termux with a better gaming experience? With the benefit of the bigger screen, smarter keyboard and the higher hardware performance, NoxPlayer brings you an extreme gaming experience on PC. By downloading and playing Termux on PC via NoxPlayer, users don’t need to worry about the battery or the interruption of calling.
NoxPlayer is compatible with Android 7 and supports running over 90% of the mobile games on PC, which will boost your gaming experience perfectly. In addition, by opening multiple instances, Noxplayer supports to running multiple games or apps at the same time, or chatting with your friend while playing game.
NoxPlayer is perfectly compatible with AMD and Intel with the exclusive core virtualization technology, making your computer run more stable and smoothly. Download NoxPlayer and experience it now!