
Enable Telnet on Windows Server 2012 R2 follow steps below:
- On the Server Manager‘s of Windows Server, click Manage and then click Add Roles and Features:

2. On the Installation Type page select Role-based or feature-base installation and click Next.

3.Select the Server which you want to install telnet and click next and On the Server Role page, do nothing and just click Next:

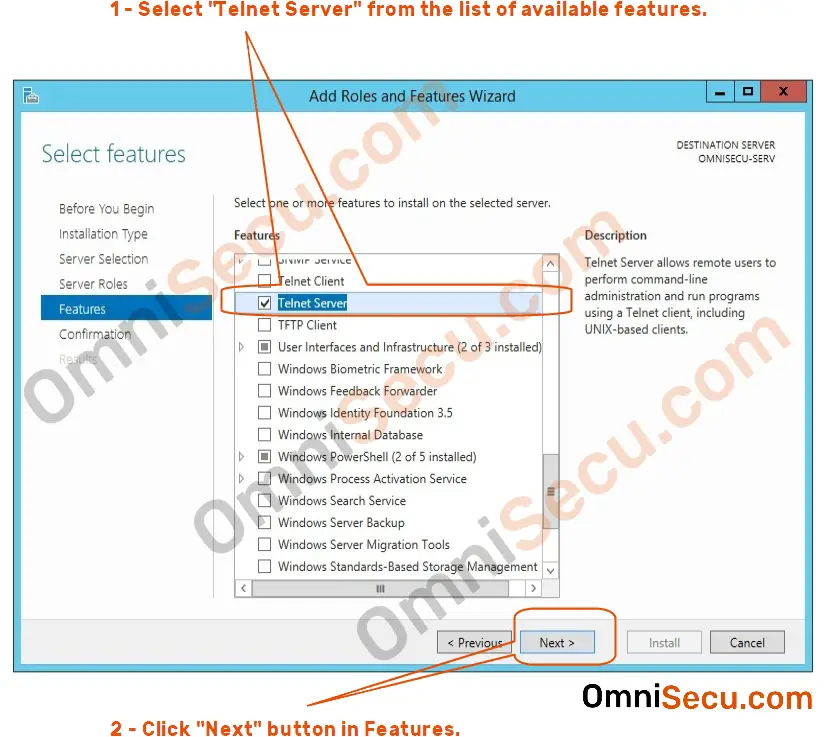
4. Select Feature page select both Telnet Server and Telnet Client then click Next to install it


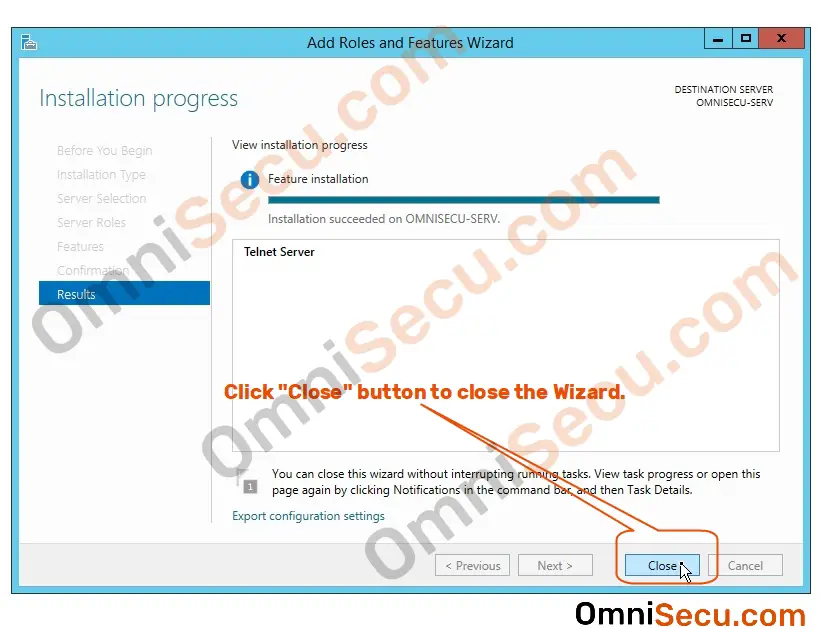
5. Finally, when the installation completed successfully, click Close:

6.Once all done we need to start Telnet service from the Services:

So we can use telnet server.
Introduction
In this article, I will be showing you how you can start using Telnet in Windows Server 2012.
By default, Windows Server 2012 does not recognize the telnet command.

If you want to start using telnet on your Windows Server 2012, then you need to install the Telnet Client Feature.
1. Open Server Manager
2. From the Server Manager Dashboard page, Click on Add roles and features
3. The Add roles and features wizard will open, click Next to begin
4. On the installation type page, select Role-based or feature-based installation and click Next
5. On the destination server, select a server from the server pool and make sure that the server you want to install Telnet on is currently highlighted ( You can manager a server pool if you had any but this is out of the scope of this article )
6. The Telnet Client is a Feature, so skip the Roles and click Next
7. From the list of available Features, select Telnet Client and then click Next
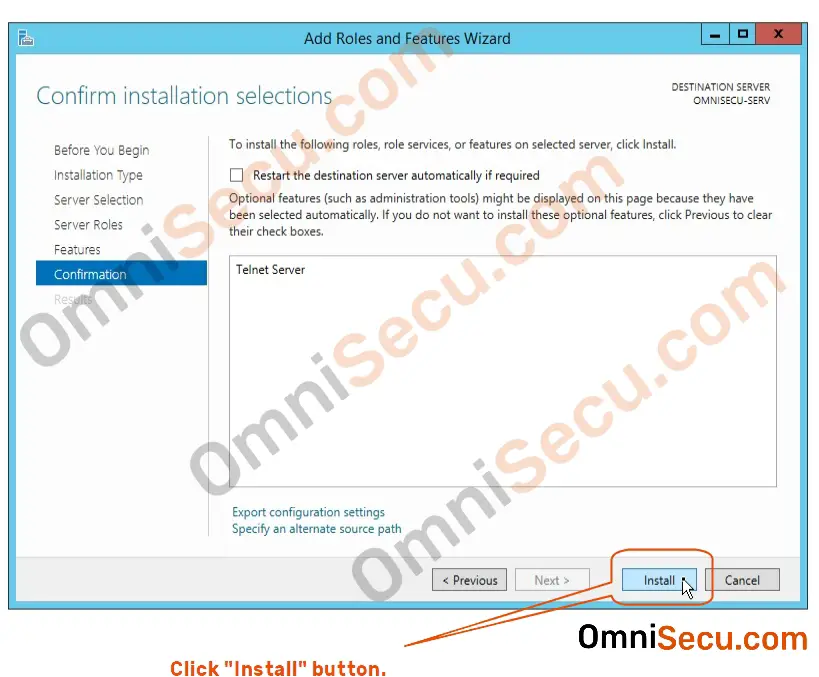
8. On the Confirmation page, If you need to reboot the machine automatically if required after installation is completed, then select the option Restart the destination server automatically if required. The Telnet Client Feature does not require any restart, so don’t select this option.
Click Install
9. Installation will be completed successfully and no reboot is required. Click Close
Now, when you try to use telnet inside command prompt, telnet will be recognized and if you typed ? and hit Enter, you will get a list of the supported commands that can be used along with telnet
Tarek Majdalani is an accomplished Windows Expert-IT Pro MVP, honored by Microsoft for eight consecutive years from 2007-2015. Holding a B.E. in Computer Engineering from the Lebanese American University, he pursued further education while working, earning various certificates showcased in his MVP profile. Tarek is currently serving as the Director of Engineering & Technology at Alrai Media Group in Kuwait. Since 2006, he has been actively contributing to the community by writing tutorials featuring tips and tricks, amassing over 300 tutorials on diverse systems.
This tutorial lesson explains how to install TELNET server in Windows server. Before connecting to any TCP/IP device using TELNET protocol, the very basic requirement is to install and run the TELNET server on that device. TELNET server was shipped inbuilt in previous Windows server Operating System products, but not available in Windows Server 2019 because of the security vulnerability of TELNET protocol. So, to show you how to install TELNET server in Windows server, I had selected Windows server 2012.
I suggest you to learn below lessons, before continuing.
- What is TELNET
- TELNET modes of operation
- TELNET NVT (Network Virtual Terminal)
- IAC (Interpret as Command) in TELNET
- TELNET Commands and Options
- TELNET Negotiation
- How to start TELNET service in Windows Server
- How to install TELNET Client in Windows 10
- Why TELNET is not secure
Follow these steps to install TELNET server in Windows Server 2012 using Server Manager. You should login as an Administrator to perform this task successfully.
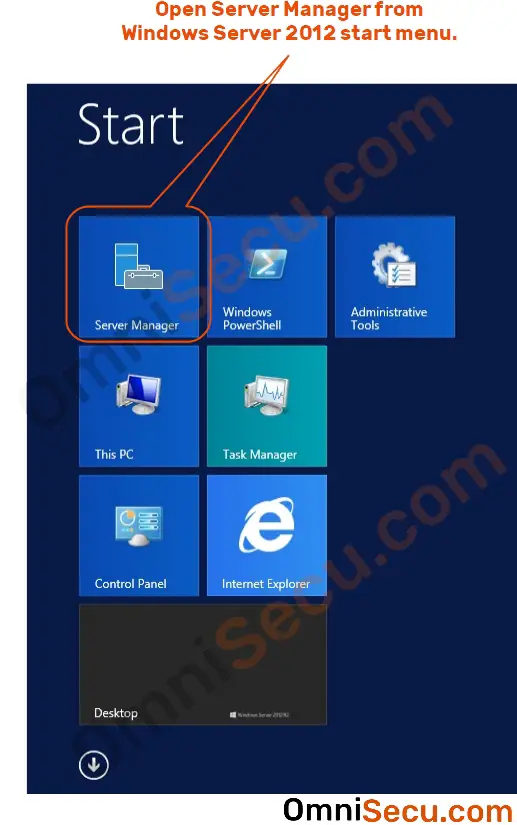
Step 1 — To install TELNET server service in Windows Server 2012, open Server Manager from Windows Server 2012 start menu, by clicking it.
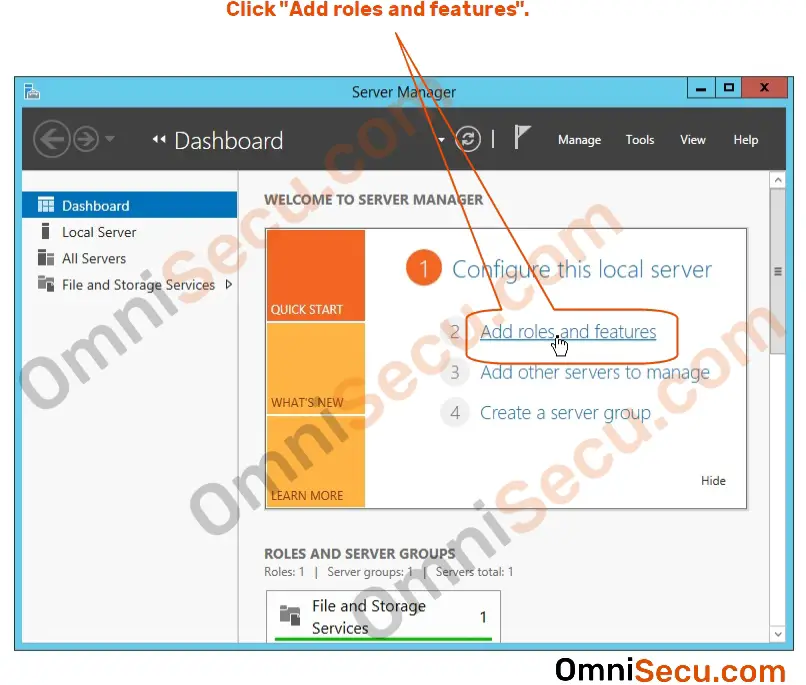
Step 2 — Once the Server Manager is open, click «Add roles and features», as shown below.
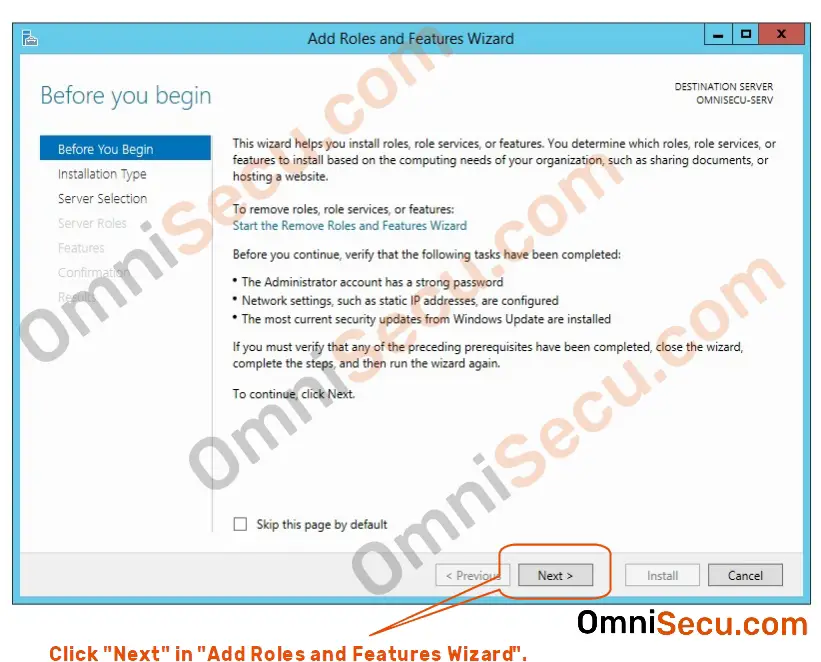
Step 3 — Click «Next» in the first page of the «Add roles and features Wizard».
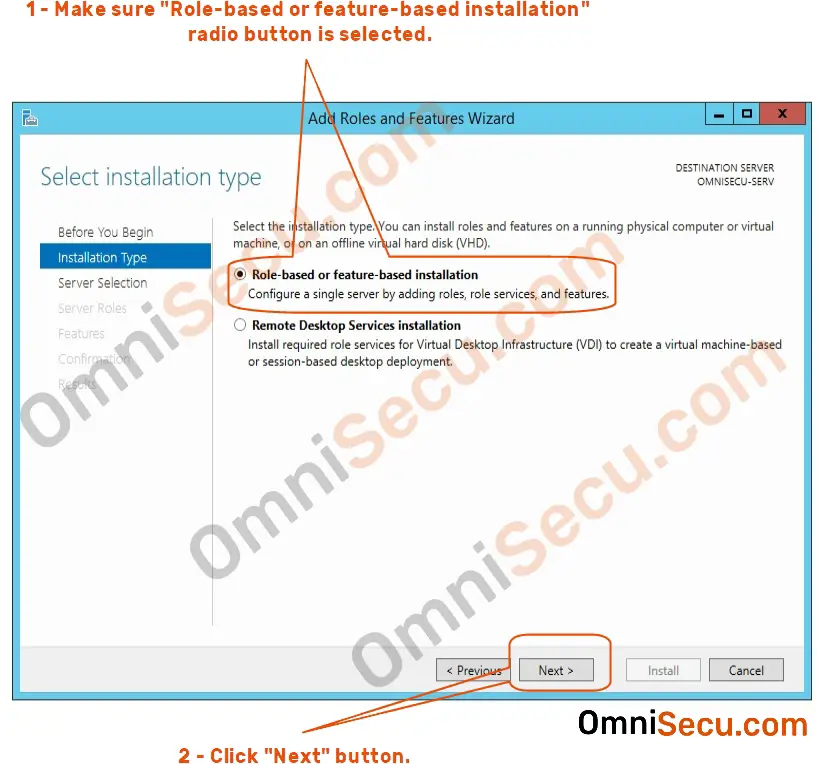
Step 4 — Make sure «Role-based or feature-based installation» radio button is selected. Then «Next» button to continue.
Step 5 — Select the server where you want to install the TELNET server service from the list of available servers. In this case, we have only one server, OMNISECU-SERV. Click «Next».
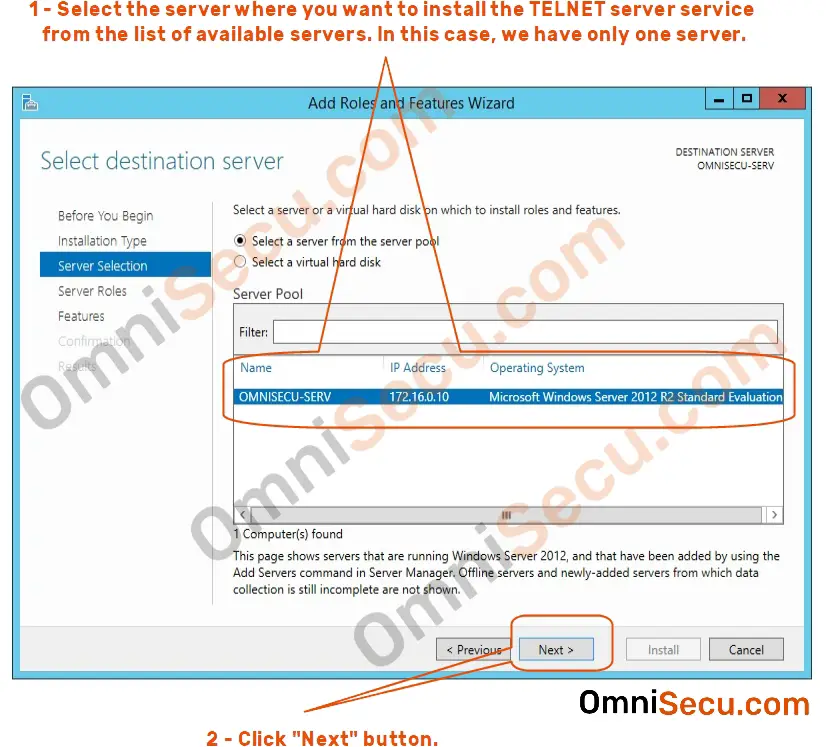
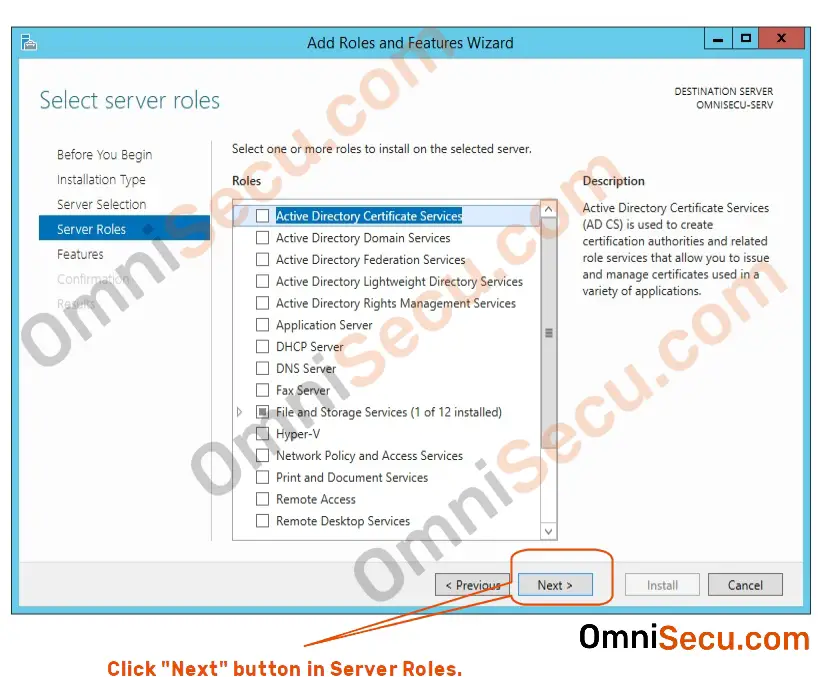
Step 6 — In «Server Roles» page, click «Next».
Step 7 — Select «Telnet Server» from the list of available features, in «Features» page. Click «Next».
Step 8 — Click «Install» button, in «Confirmation» page, to install TELNET server.
Step 9 — Click «Close» button in «Results» page to finish TELNET server installation and to close the Wizard.
Once the TELNET server installation is completed, you need to start the TELNET service in Windows Server. Click the following link to learn how to start TELNET service in Windows Server, using Services MMC snap-in.
Do you have any suggestions?
Controlling Windows Servers remotely is a daily activity of a network and system administrators, whether with command line or remote desktop. Here I’m using Telnet command Line tool. Telnet is a protocol that enables you to connect remotely to computers. By default the telnet services is not enabled on Windows Server and Clients. I’m going to show you how to enable telnet in Windows 10 and Windows Server 2012 R2 or vNext Server. So you need to know the telnet port also. The default port of telnet is 23 and when you enable telnet on Windows, you make sure that the port 23 is not blocked by Windows Firewall or Anti Virus.
Telnet is not a good chose to control a system over the internet. Because it is not secure and the communication is occurred on a non encrypted mode. If you want to secure Telnet communications, you must do it with Internet security protocol (IPSec). Securing telnet is out of scope of this topic, we simply enable telnet in Windows 10 client and Windows Servers. It work the same on Windows Server 2008, Windows 7, 8 and Windows 8.1.
Enable Telnet In Windows 10 Client Side
Firstly, we must enable telnet in Windows 10 and next on Windows Server. To work perfectly, telnet client must installed on client side and telnet Server must be installed on Server side. In order to enable telnet, go to control panel -> Programs and Features -> and click Turn Windows Features on or off.
For an expert it is a very long way, so just type “optionalfeatures” on the Run and press enter to open Windows Features page.
On the Windows Features page, tick the Telnet Client and click on to install it. It take a minute and when the installation complete successfully, close the page. That is it, Telnet installed successfully on Windows 10.
Enable Telnet on Windows Server 2012 R2
OK the next step is enabling telnet on Windows Server. No matter which server you are using. In Server side it is not enabled like Windows client, you must enabled trough Server Manager. Becuase it is Feature base and all are controlling with Server Manager console.
On the Server Manager‘s of Windows Server, click Manage and then click Add Roles and Features.
On the Installation Type page select Role-based or feature-base installation and click Next.
Select the Server you want to install telnet on the destination Server page. In this test environment, we have only one server and by default it has been selected. Don? So click Next.
On the Server Role page, do nothing and just click Next. So we want to install features not Roles. And I don’t take Screenshot, it is going to make heavy my article.
So on the Windows Feature tick both Telnet Server and Telnet Client then click Next to install it and go to Confirmation page. On the Confirmation page click Next and it takes a few minutes, so be patient.
Finally, when the installation finished successfully, click Close and go to enable Telnet service from Services. To open Services on Windows Server, search for Services to find it.
On the Services page find Telnet and click twice to open telnet properties. Now select Automatic and click Start button then click OK and close the services console.
Test Telnet Services on Windows
Try to test the telnet whether it work or not. In order to test telnet, go to Windows 10 and open command prompt or PowerShell. and type the following command.
Telnet 192.168.100.2
It is the IP Address of Server that I want to control it with Telnet.
So when you press enter, the system ask you about sending password to a remote computer trough internet.
This is about sending your user name and password trough a non secure internet line which I told you about securing telnet with IPsec. So type “Y” and press enter.
Type user name and password correctly and press enter.
Welcome to the telnet session from Windows 10 to Windows Server 2012 R2 that work perfectly. Now the Server 2012 R2 is completely under your control. Test and run some command for test.
What Is Telnet
Telnet is a user command and an underlying TCP/IP protocol for accessing remote computers. Through Telnet, an administrator or another user can access someone else’s computer remotely. On the Web, HTTP and FTP protocols allow you to request specific files from remote computers, but not t;o actually be logged on as a user of that computer. With Telnet, you log on as a regular user with whatever privileges you may have been granted to the specific application and data on that computer.
INSTALLING TELNET SERVER ON WINDOWS SERVER.
To install telnet server follow thes steps.
1:Click the server manger button on task bar to open server manager.
2:at the top server manager, select manage and click Add role and features. the add role and features wiazrd.
3:on befor you begin page, click next
4:on select Installation type page, select Role-based or feature-based installation and then click next.
5:On Select destination server page. click next.
6:On select server role page, click next.
7:On Select features, select the Telnet server,and select TFTP Cleint, and then click next .

Figure 1
8:On Confirm Installation Selection page, select the Restart the destination server automatically if reuired and then click next. Now the Telnet server is install ….
INSTALL TELNET CLIENT AND TFTP CLIENT ON WINDOWS 10.
To Install telenet client on your client windows follow thes staeps.
1:Press Windows+R key on the keyboard
2:write on the Run Powershell and press Enter .
3:write on the powershel OptionalFeatures, Press Enter .
4:Now show Optional Featueres in optional features, Select the Telnet client, and TFTP client and then click OK button . now this is searchin required file
5:When windows completed the requested change, and then click the clocse button.

Figure 2
6:To open the Service (local) search and write service on the start bar .and click Enter the Services (Local) .
7:On the services (Local) Page Find the Telenet when you find telnet, duble click the telnet
8:On Telnet Properies (Local Computer) ,click the General tap and click the Staraup type, click the Automatic. in service status click the start button and then apply and Ok .

Figur 3
9:open the Powershell and write Telnet and write the IP address of server and Press Enter for Example like theat 200.100.10.1

Figure 4
10:when you write Telnet 200.100.10.1 Press Enter and then write Y and press Enter
11:Now you are connect the server, you can do any thing and any where go . for example write Hostname show you the computer name, and write ipconfig show you the IP Addresses

Figur 5