
Microsoft SQL Server 2016 is a powerful and widely-used RDBMS ideal for enterprise-scale data applications. In this guide, we’ll walk through the complete installation of SQL Server 2016 on a Windows Server 2016 machine.
📋 Prerequisites
Before starting the installation:
- ✅ Windows Server 2016 (fully patched)
- ✅ Administrator privileges
- ✅ SQL Server 2016 setup files (ISO or extracted installer)
steps to download ms sql server 2016

use the first link to download evaluation version

download the exe file

Installing sql server 2016:


select basic

select installation


accept the license and click next


as a best practice create a service accounts for each service and update the password here.


for better performance store the data and log and temp files in different disks.


Download the Management studio Tools:


without .Net framework installed we will get above error so lets download and install .Net framework 4.8.


install .net framework 4.8


now proceed with ssms installation


create a new database :


Best Practices
- Always patch SQL Server after installation.
- Use SQL Server Configuration Manager to manage ports and protocols.
- Enable TCP/IP and restart SQL Server services if remote connection is needed.
🧾 Conclusion
SQL Server 2016 installation on Windows Server 2016 is straightforward with the Setup Wizard. Make sure to follow the steps carefully, especially when configuring authentication and security settings.
Whether you’re setting up a dev environment or preparing a staging server, this guide should help you hit the ground running.
⚠️ Disclaimer
The information provided in this blog post is for educational and informational purposes only. While every effort has been made to ensure accuracy and completeness, the author assumes no responsibility for errors or omissions, or for damages resulting from the use of the information provided herein.
Software installation and configuration should be performed by qualified IT professionals in accordance with your organization’s policies and licensing agreements.
🔐 Always test in a non-production environment before deploying changes to live systems.
📜 Licensing Note: Ensure you comply with Microsoft’s licensing terms for SQL Server and Windows Server. Use Developer or Evaluation editions only for development or testing purposes unless appropriately licensed.
SQL Server 2016 is the newest Version of the Microsoft SQL Relational Database Management System. In this article I will explain how to install MS SQL Server on Windows Server 2016.
You can also use Following guide to Install Microsoft SQL Server on Windows 10.
Download SQL Server 2016
First, download the SQL Server download setup from the following URL www.microsoft.com/en-us/evalcenter/evaluate-sql-server-2016
Once you run the download setup, you have options to perform a basic Installation, Custom Installation or you can download the SQL Server ISO Image to Your Computer.
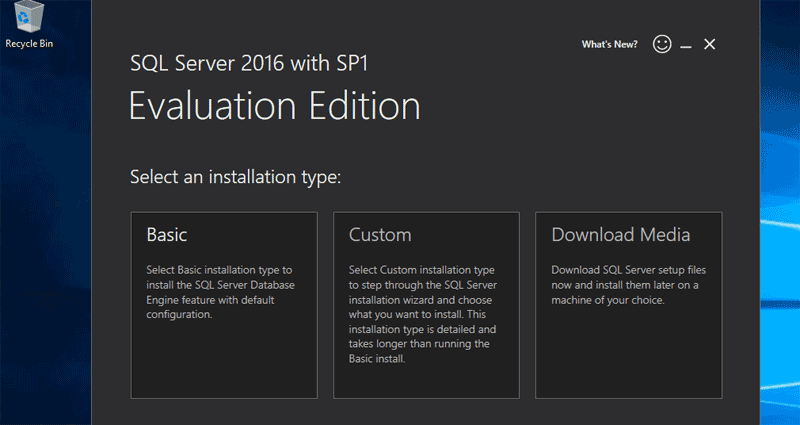
It is better to Download ISO image so we can use it to Install SQL Server whenever we want. You can burn ISO Image to a DVD or mount the ISO image to the Windows Server if you are running a Virtual Machine.
Install SQL Server 2016 on Windows Server 2016
Once you run the SQL Server Installer, It will launch the SQL Server Installation Center.
From the Installation Center, Select installation and click on “New SQL Server stand-alone installation or add features to an existing installation” Link to start install SQL Server 2016.

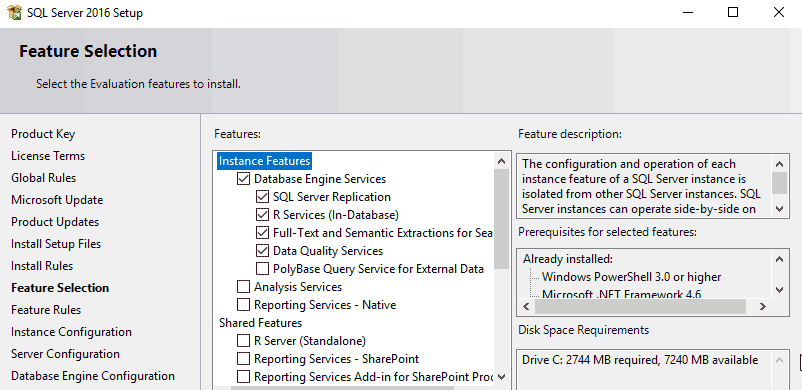
Feature Selection
In the Feature Section, you need to select what features you need to install. Make sure to select Database Engine Services as below screenshot shows. Also select “Client Tool Connectivity” From the Shared features Section.
Authentication Mode
Select Mixed Mode as the Authentication Mode and Set Password for the “sa” user. Also click on “Add Current User” button to add yourself as a SQL Server Administrator.

At the end of the SQL Server 2016 Setup, Click on the Install Button to Install Microsoft SQL Server on Windows Server 2016.
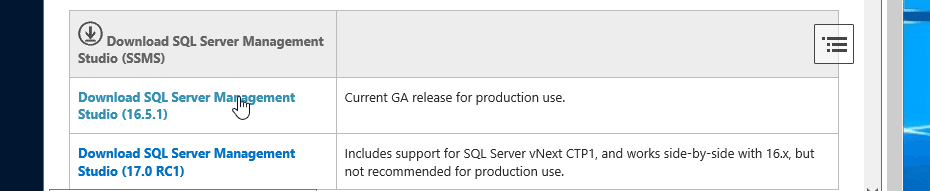
Install SQL Server Management Studio
SQL Server Management Studio provides the Graphical User Interface (GUI) to manage MS SQL Server 2016.
You can download Server Management Studio Installation setup From the Following URL https://msdn.microsoft.com/en-us/library/mt238290.aspx (Also Available in the SQL Server Installation Center).
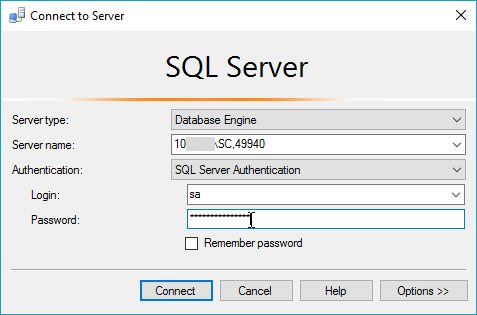
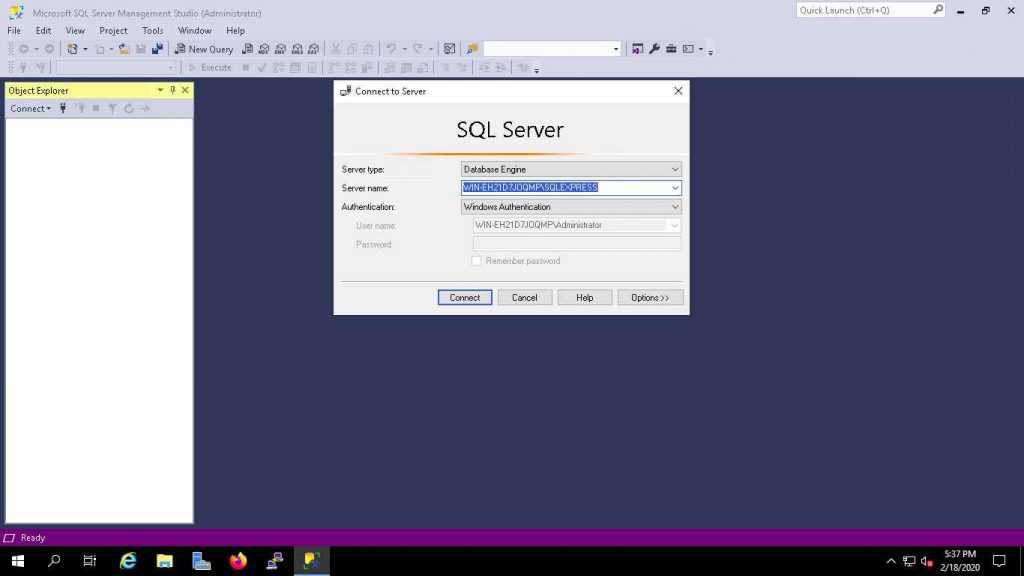
Connect to the MS SQL Database Server
Now we can use Server Management Studio to connect to the our MS SQL Database server.
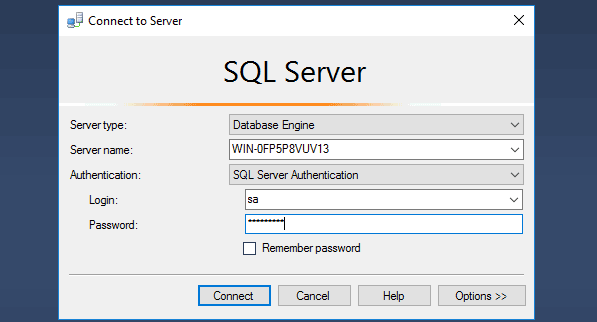
We can use either sa user account or windows user account to authenticate to the Microsoft SQL Server 2016.
Cloud and Virtualization Architect. Florent is specializing in public, hybrid, and private cloud technologies. He is a Microsoft MVP in Cloud and Datacenter Management and an MCSE in Private Cloud.
Cloud and Virtualization Architect. Florent is specializing in public, hybrid, and private cloud technologies. He is a Microsoft MVP in Cloud and Datacenter Management and an MCSE in Private Cloud.
Because I have a small server at home, I try to win a maximum of space, for the storage and for the memory, by installing VM in Server Core. To note, it is very good for security/patches management.
It’s why, after installing my Hyper-V host and my first domain controller, on Windows Server 2016, I tried to install the SQL on a Server Core.
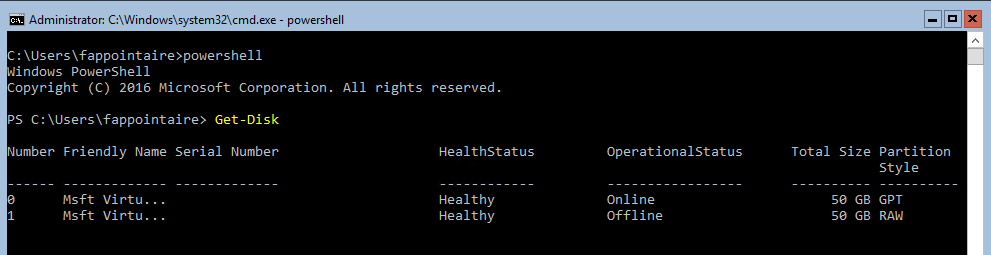
To start, I installed the VM and I added a second volume to store databases, logs and TempDb.
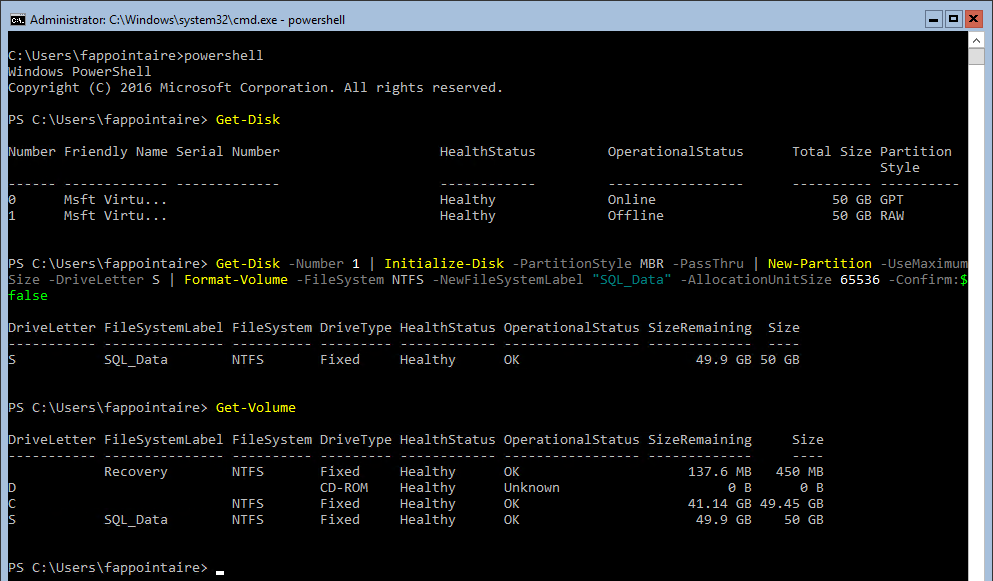
Use the Get-Disk command to see your second disks with his number, that will help you to format the volume:
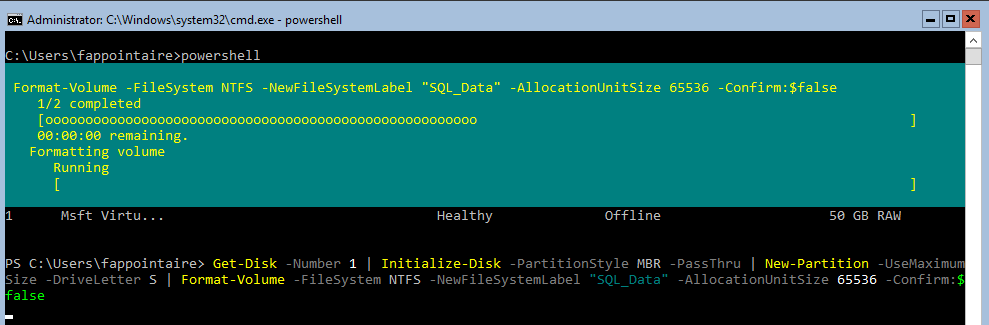
To format and mount the volume, used the following command:
Get-Disk -Number 1 | Initialize-Disk -PartitionStyle MBR -PassThru | New-Partition -UseMaximumSize -DriveLetter S | Format-Volume -FileSystem NTFS -NewFileSystemLabel "SQL_Data" -AllocationUnitSize 65536 -Confirm:$false
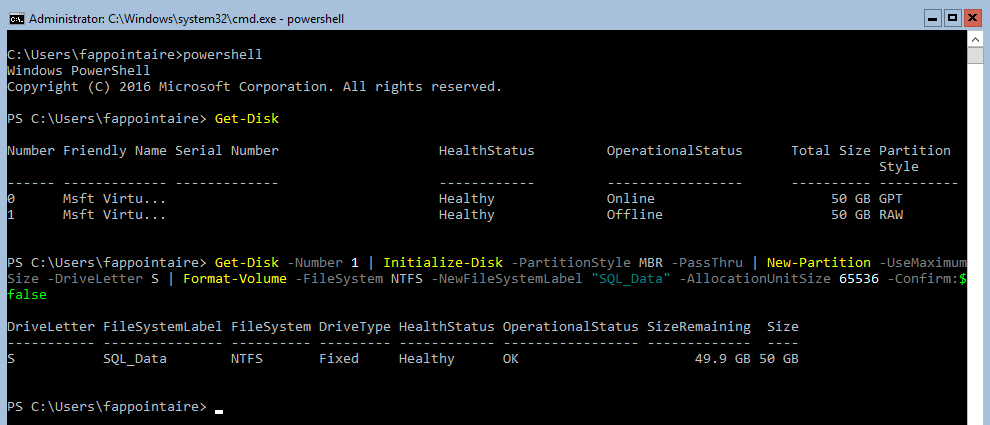
I can now see my volume SQL_Data :
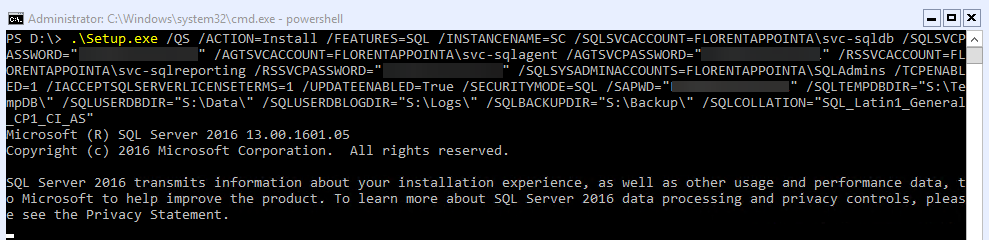
We can start the installation for SQL Server, in command line. You need to adapt this command with your values. To note that I’ll use this SQL for my System Center environment, it’s why, by installing my products in English, I used the SQL_Latin1_General_CP1_CI_AS collation:
.\Setup.exe /QS /ACTION=Install /FEATURES=SQL /INSTANCENAME=SC /SQLSVCACCOUNT=FLORENTAPPOINTA\svc-sqldb /SQLSVCPASSWORD="P@ssword!123" /AGTSVCACCOUNT=FLORENTAPPOINTA\svc-sqlagent /AGTSVCPASSWORD="P@ssword!123" /RSSVCACCOUNT=FLORENTAPPOINTA\svc-sqlreporting /RSSVCPASSWORD="P@ssword!123" /SQLSYSADMINACCOUNTS=FLORENTAPPOINTA\SQLAdmins /TCPENABLED=1 /IACCEPTSQLSERVERLICENSETERMS=1 /UPDATEENABLED=True /SECURITYMODE=SQL /SAPWD="P@ssword!123" /SQLTEMPDBDIR="S:\TempDB\" /SQLUSERDBDIR="S:\Data\" /SQLUSERDBLOGDIR="S:\Logs\" /SQLBACKUPDIR="S:\Backup\" /SQLCOLLATION="SQL_Latin1_General_CP1_CI_AS"
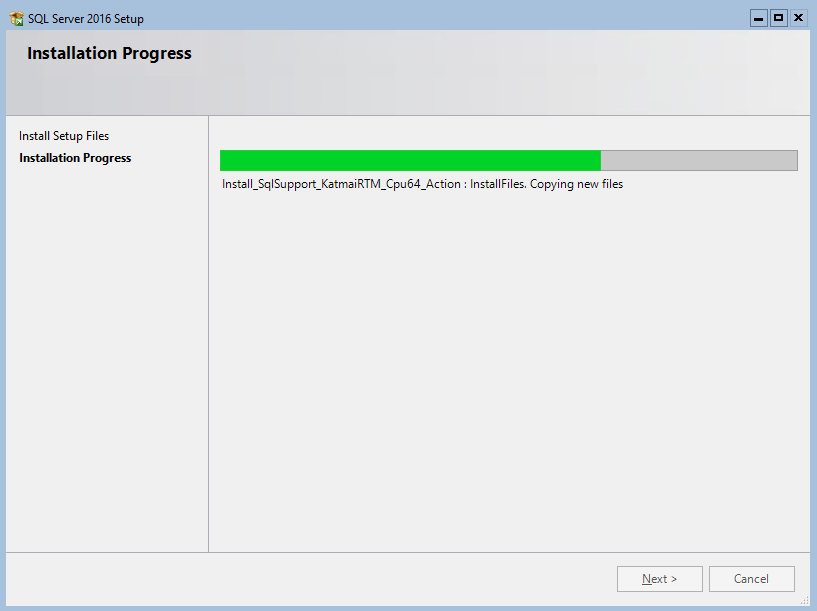
I noted that the reporting services can’t be installed on a Server Core. The installation was faster than in GUI 🙂
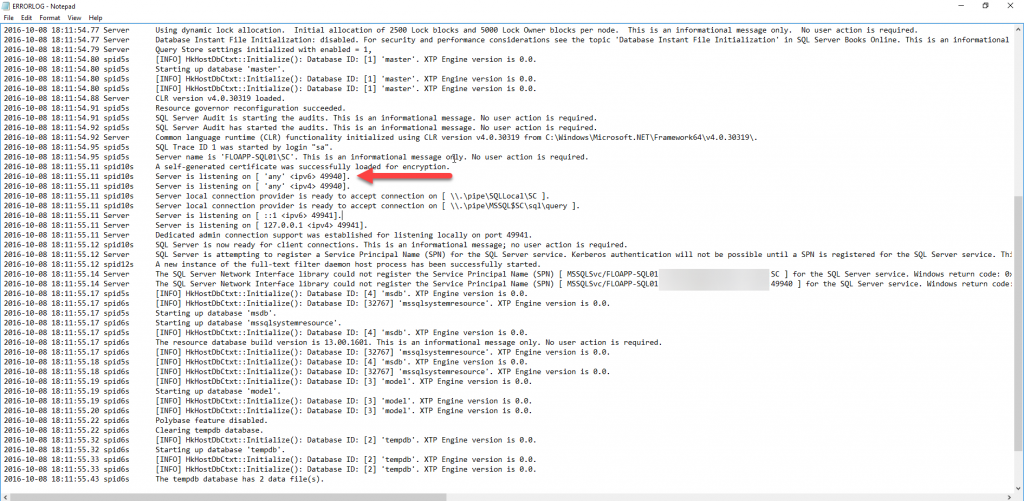
From my laptop, I opened the ERRORLOG file on the SQL Server, to see the port used by SQL Server, to open it in the firewall :
\\FLOAPP-SQL01.domain.local\C$\Program Files\Microsoft SQL Server\MSSQL13.SC\MSSQL\Log
For me, I opened the port, with a GPO and I’ve done a gpupdate /force. I tested the connection from my laptop, where I installed SQL Server Management Studio :
Enjoy 🙂
- The High Availability Features in SQL Server 2016 Standard Edition
- Microsoft SQL Server deployment price reduced by 3 times with VSAN from StarWind
В данной статье мы наглядно покажем как происходит установка SQL Server 2016, а так же начальные настройки приложения, которые можно задать при установке.
Для полноценной установки вам потребуется:
— Скачать оригинальный дистрибутив SQL Server 2016 с нашего сайта, либо с официального сайта Microsoft.
Если вы решите скачать дистрибутив у нас на сайте, то можете сразу переходить к инструкции по установке!
— Лицензионный ключ продукта SQL Server 2016, который вы можете приобрести в нашем магазине всего за 2190 ₽ с моментальной доставкой на Вашу электронную почту!
Инструкция, как скачать дистрибутив SQL Server 2016 с официального сайта Microsoft.
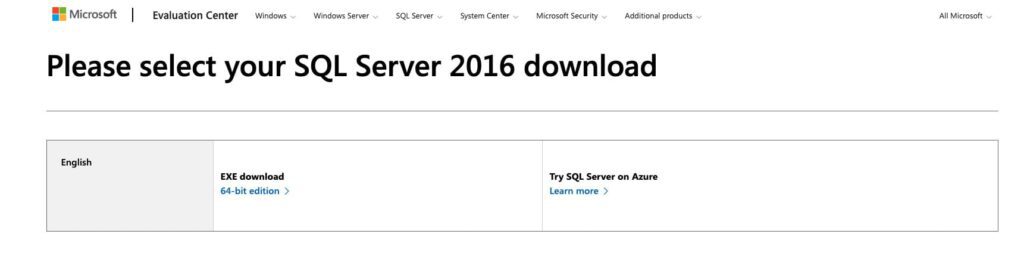
1) Переходим на официальный сайт Microsoft и скачиваем дистрибутив SQL Server 2016, нажимая на «64-bit edition».
2) Далее открываем скаченный «exe» файл.
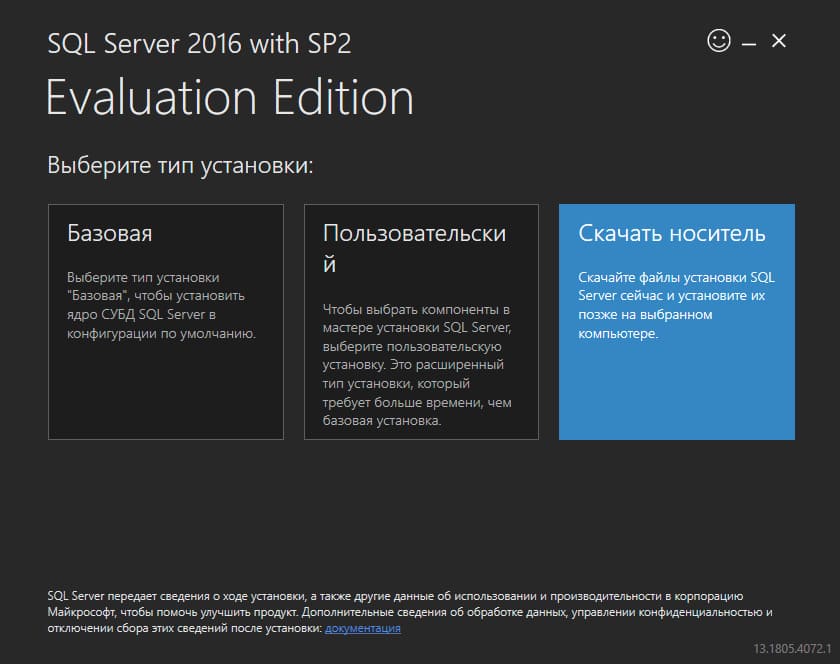
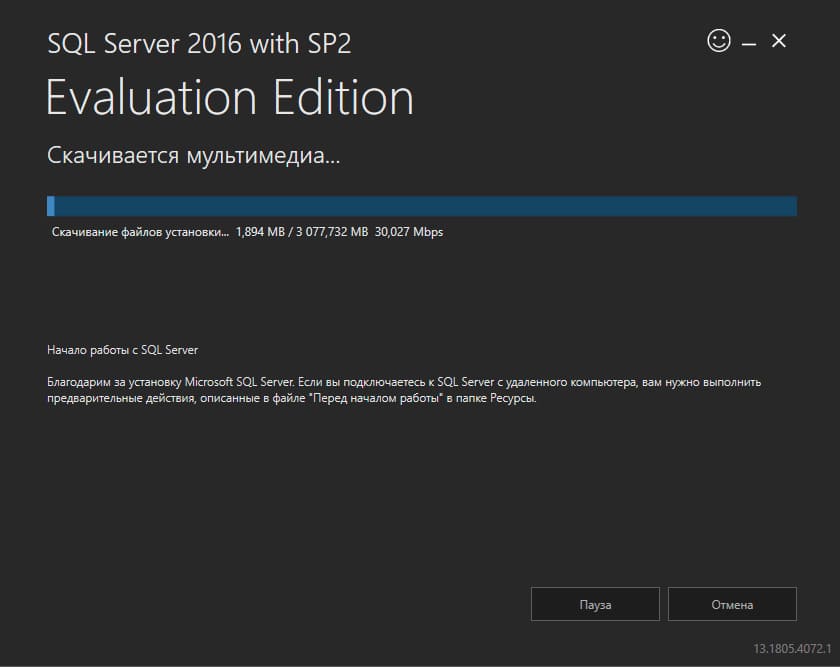
3) Нажимаем «Скачать носитель».
4) Выбираем язык установщика, в нашем случае «Русский» и жмем «Скачать»
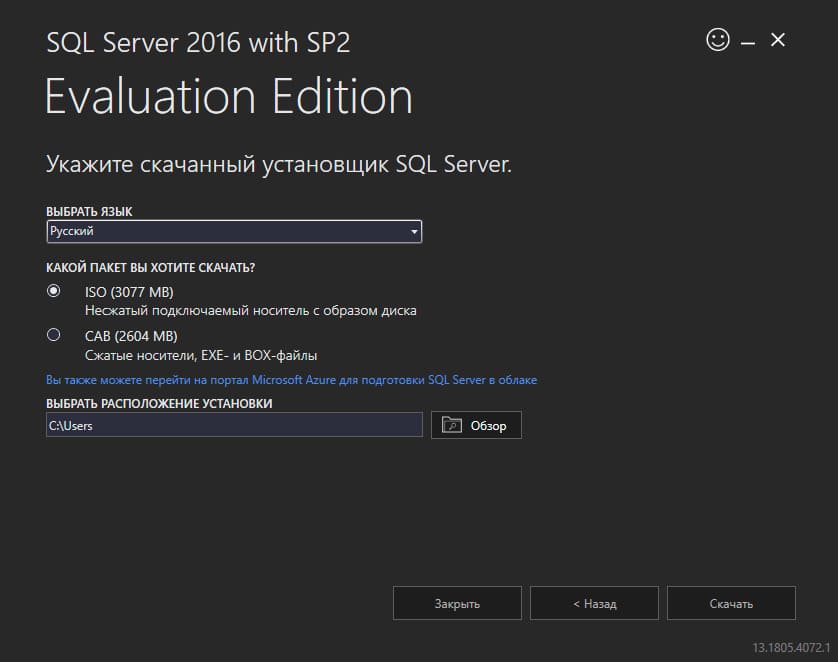
5) После чего начнется загрузка ISO дистрибутива SQL Server 2016 на ваш компьютер.
Установка SQL Server 2016.
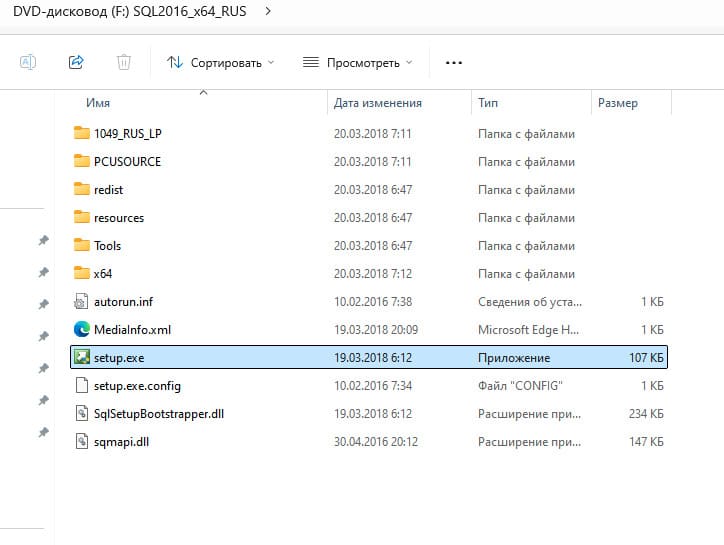
1) Открываем ISO файл который до этого мы скачали с официального сайта Microsoft, либо с нашего сайта.
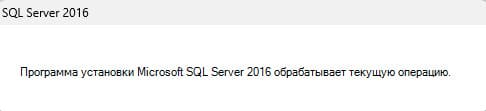
2) Запускаем файл «setup.exe» от имени администратора и дожидаемся открытия установщика.
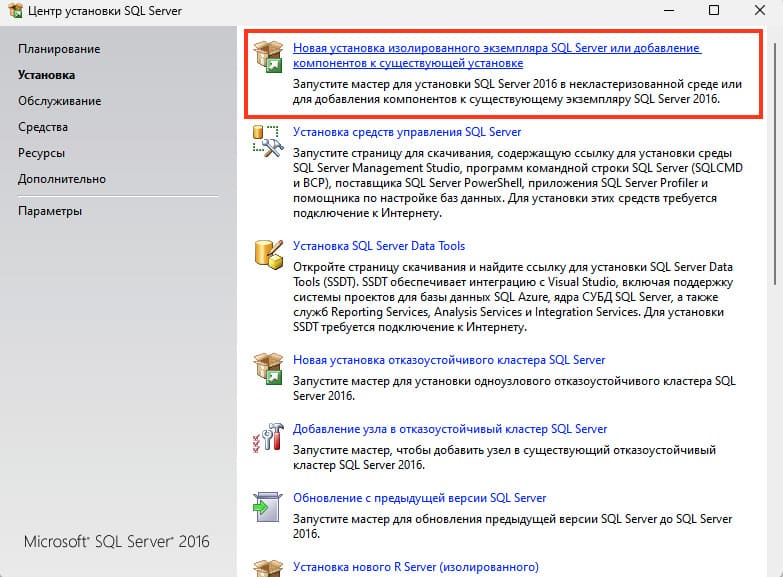
3) В открывшейся программе, переходим в раздел «Установка».
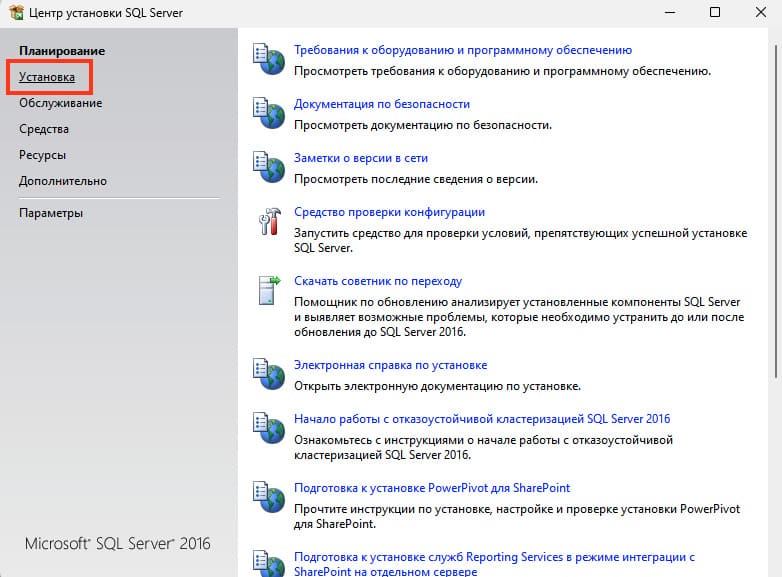
4) Далее переходим в «Новая установка изолированного экземпляра SQL Server или добавление…»
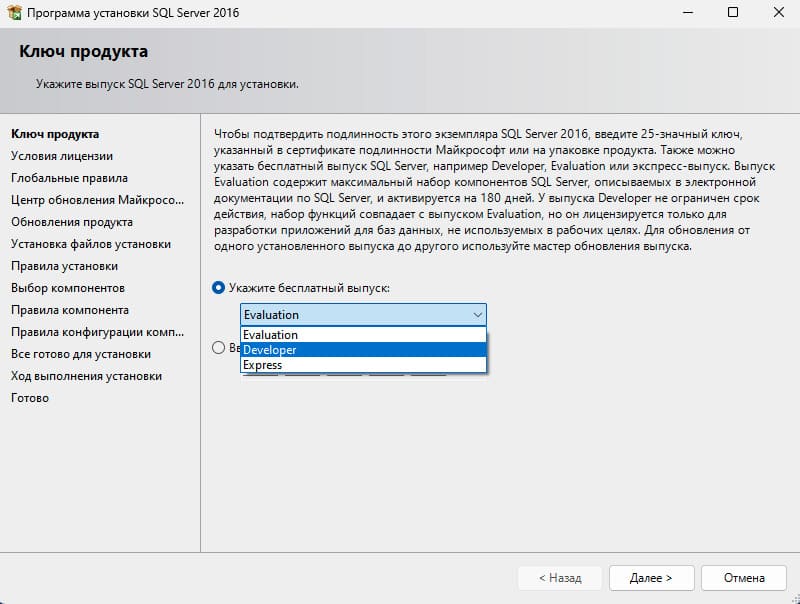
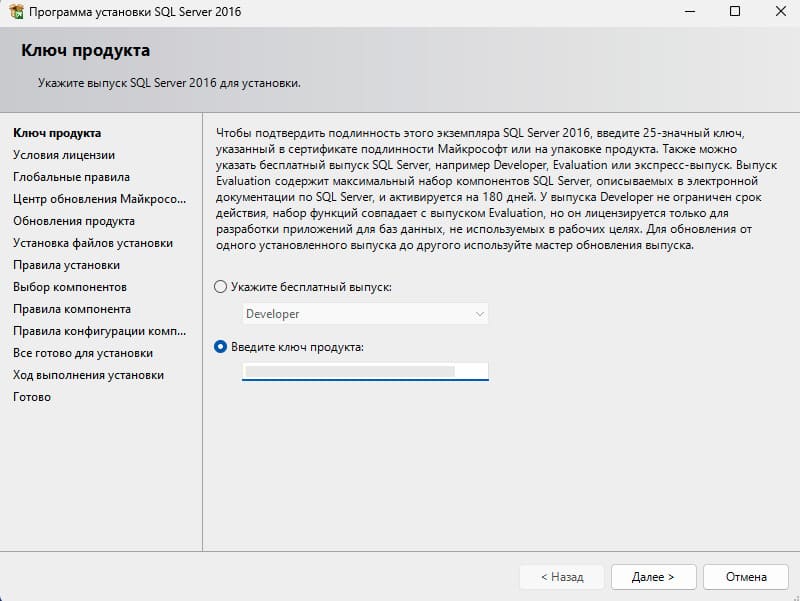
5) После чего выбираем бесплатный выпуск «Developer» и жмем «Далее». Либо если вы заранее приобрели лицензионный ключ в нашем магазине, то вводите его в пункте «Введите ключ продукта».
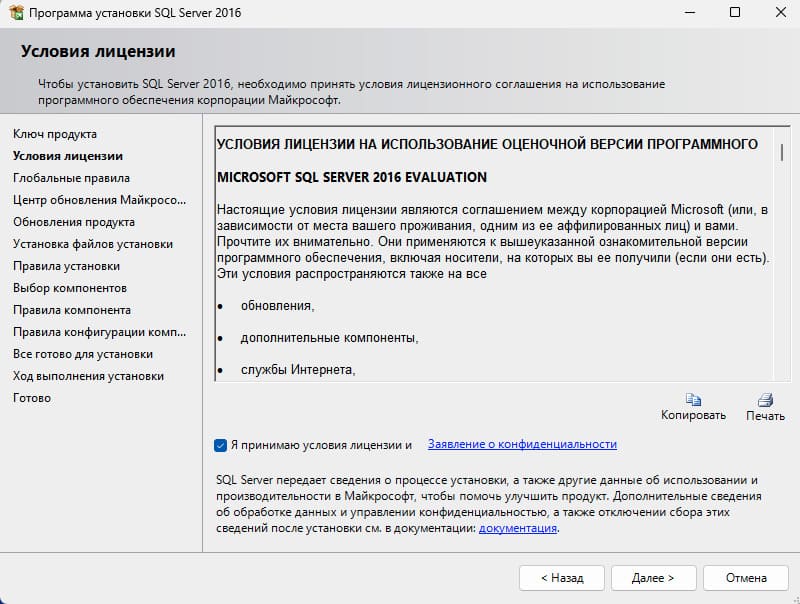
6) Принимаем условия лицензии и жмем «Далее».
7) Здесь просто жмем «Далее», не выбирая галочку.
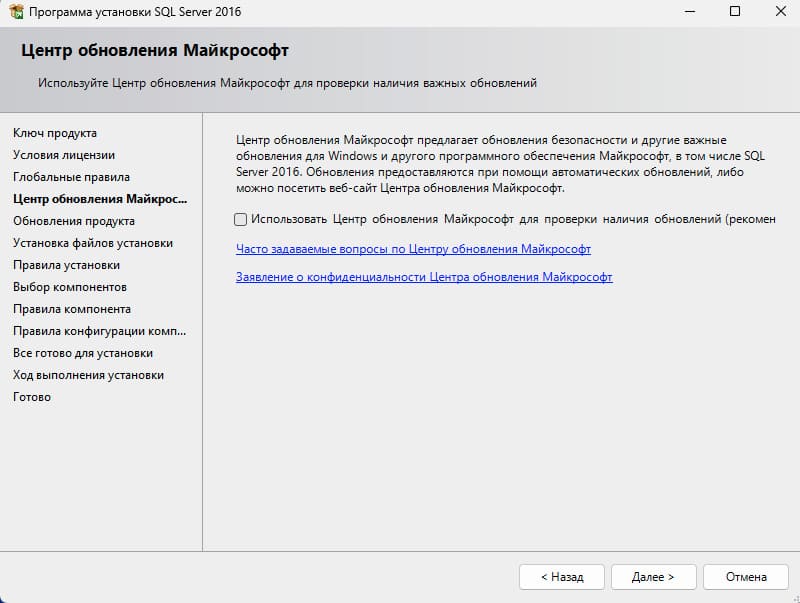
 При проверке обновлений, жмем далее либо убираем галочку и жмем далее.
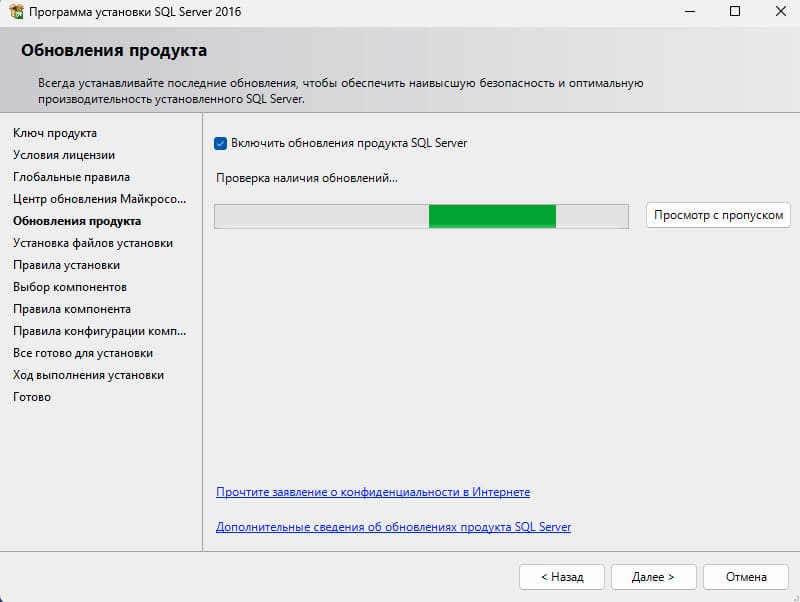
9) Далее начнется установка файлов инсталяции.
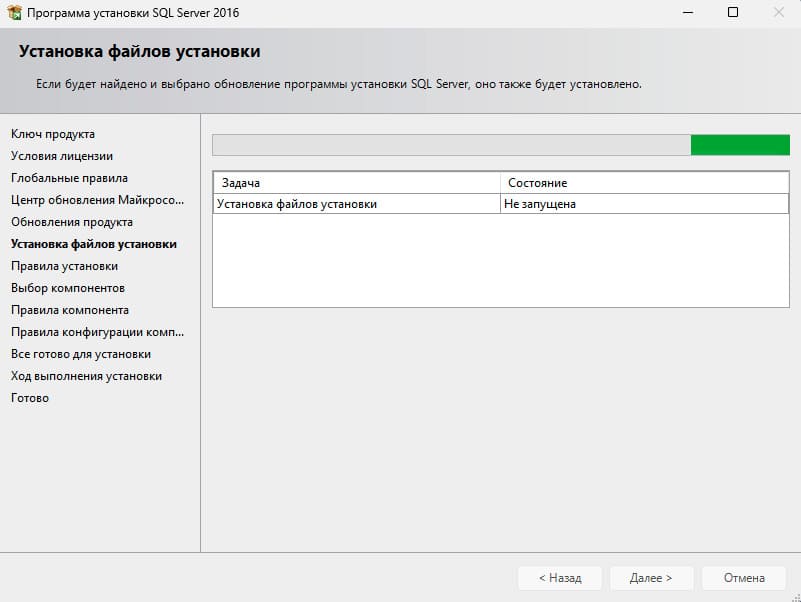
По завершению установки, просто жмем «Далее».
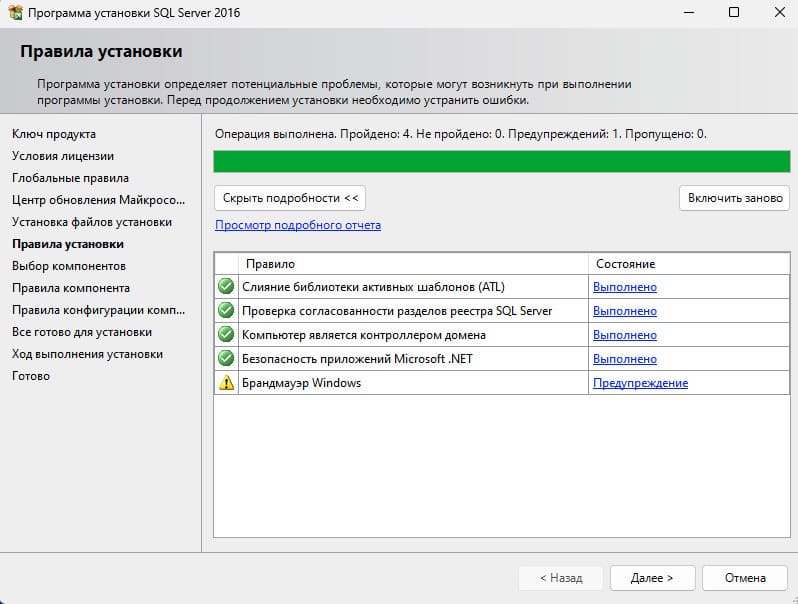
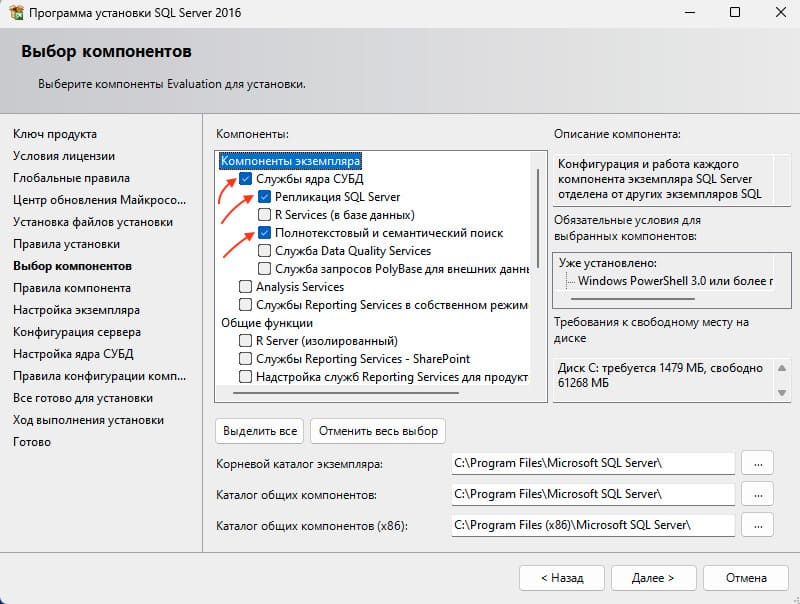
10) Устанавливаем три галочки напротив — «Службы ядра СУБД», «Репликация SQL Server» и «Полнотекстовый и семантический поиск». После чего жмем «Далее».
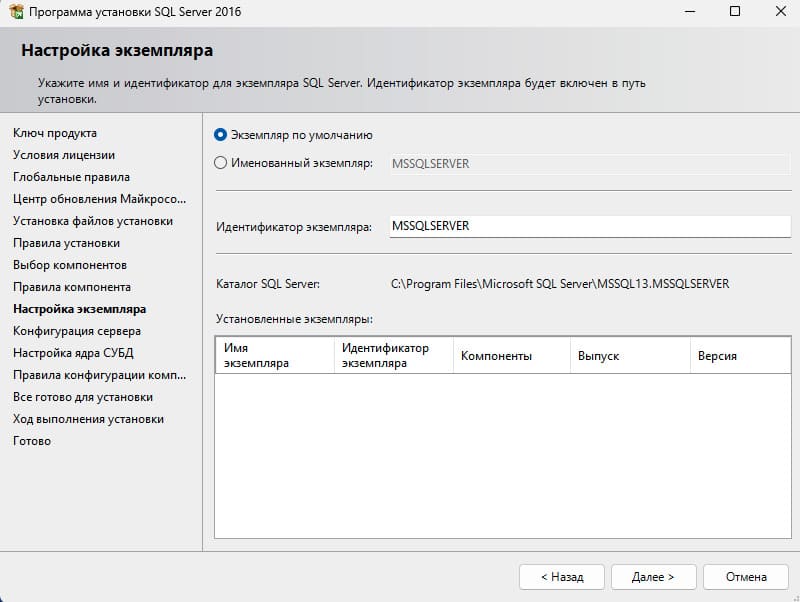
11) Здесь все оставляем по умолчанию, жмем «Далее».
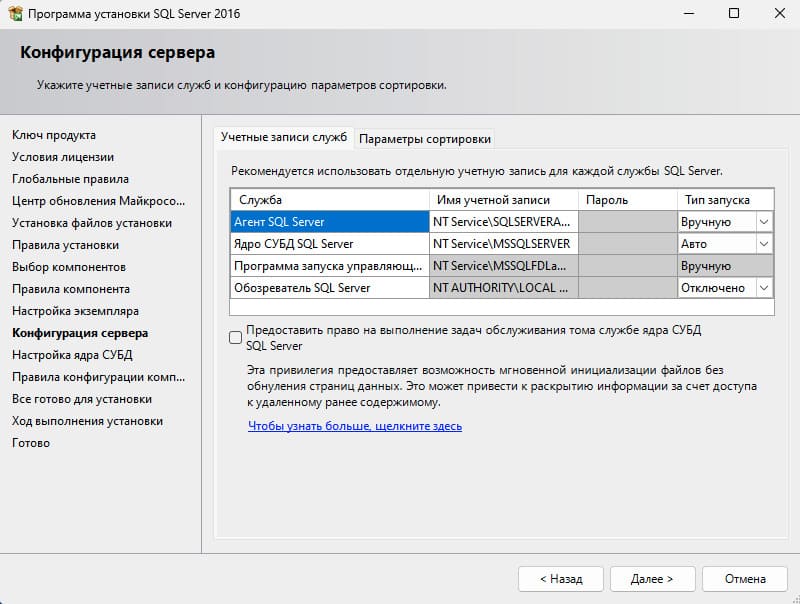
12) В данном окне вы можете задать тип запуска какой-либо службы. Поставить ее на автозапуск, в ручную, или вообще отключить, если Вам данная служба не нужна под Ваши задачи. В нашем примере мы все оставляем по умолчанию и жмем «Далее».
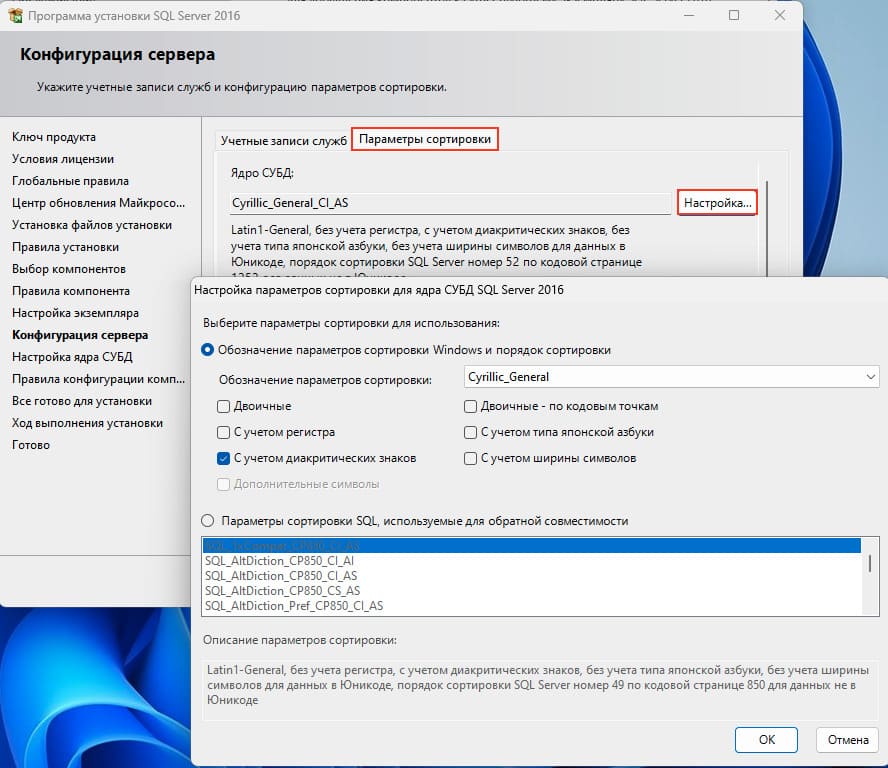
Так же можем зайти в меню «Параметры сортировки» — Это настройки таблицы кодировок. А так же, выполнять сортировку, как учитывать верхний и нижний регистр, как реагировать на символы, и т.п.
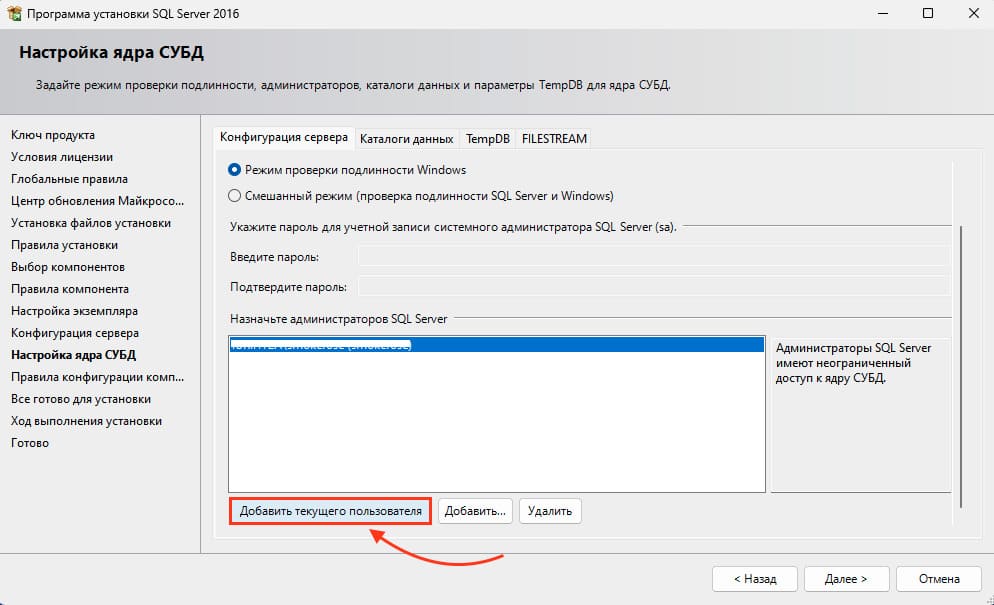
13) Переходим к настройкам учетных записей для подключения к SQL Server 2016. Нам предлагают выбор режим входа под учетными записями Windows, либо смешанный режим, т.е возможность входа под учетной записью Windows и под учетной записью SQL Server, если выбрать смешанную, то Вам предложится создать учетную запись SQL Server.
На примере мы выберем «Режим аутентификации Windows => нажимаем на кнопку «Добавить текущего пользователя» и добавляем его.
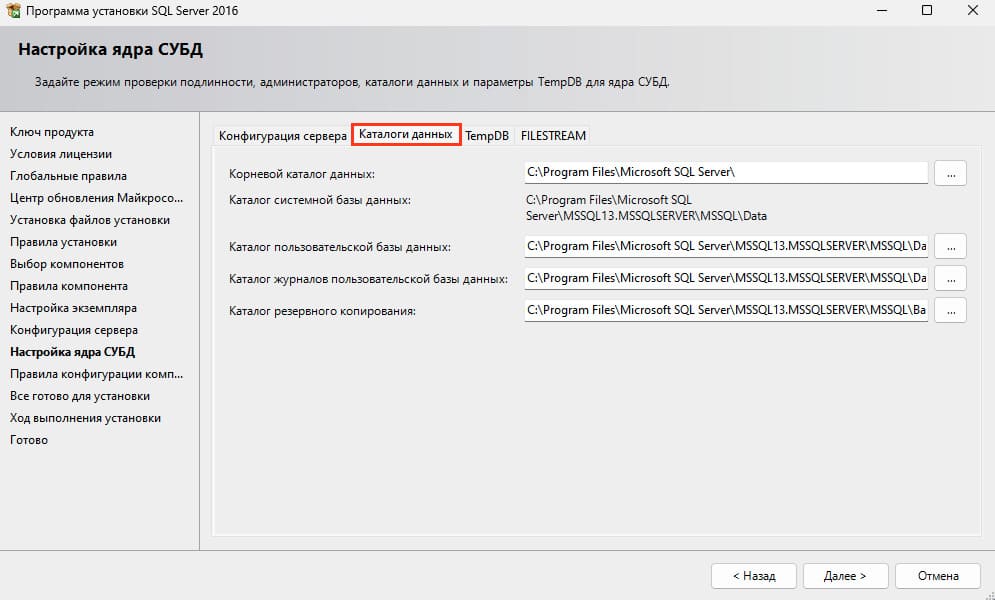
Так же можем перейти в вкладку «Каталоги данных». В этом пункте вы можете выбрать места расположения для корневого каталога, каталога системной базы данных, пользовательской БД, каталог журналов пользовательской БД и каталог для бекапа. Рекомендуется все месторасположения указывать на разных жестких дисках / разделах. Каталог данных в идеале должен быть на отдельном жестком диске.
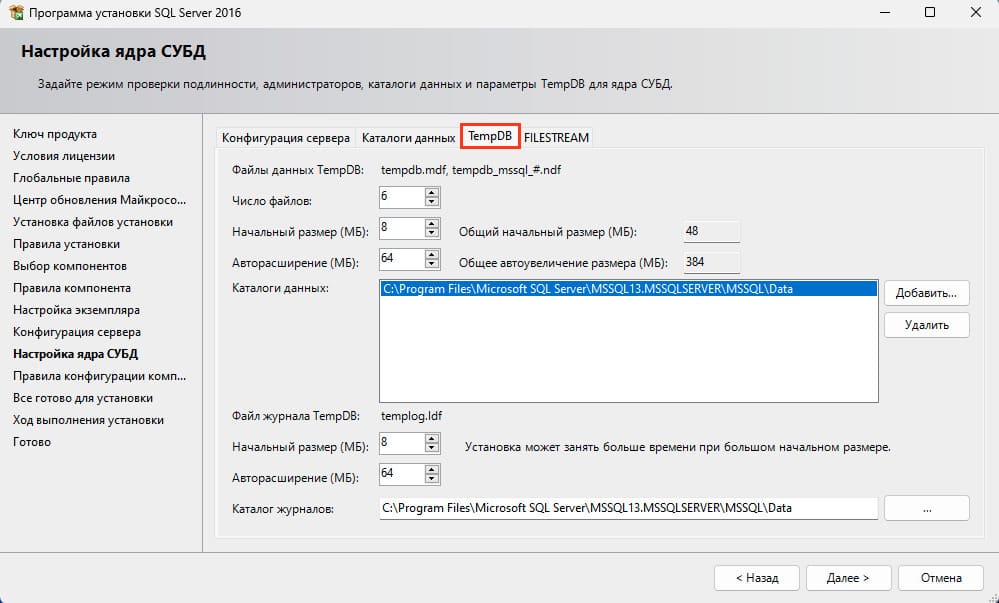
В следующей вкладке «TempDB».
Число файлов — прописано по умолчанию в зависимости от количества ядер.
Начальный размер — рекомендуется прибавить размер хотя бы до 16, или 32 МБ.
Авторасширение — Это количество МБ, которое будет приращиваться, если файл будет заполнен на 100%. Количество указывают обычно в зависимости от задач и использования SQL Server, по умолчанию 64 МБ, но рекомендуется добавлять от 1гб, чтобы не было нагрузки на производительность SQL Server
Следующая вкладка это настройки Filestream — это настройка, которая позволяет хранить файлы в файловой системе NTFS, она может быть как активирована, так и нет, опционально.
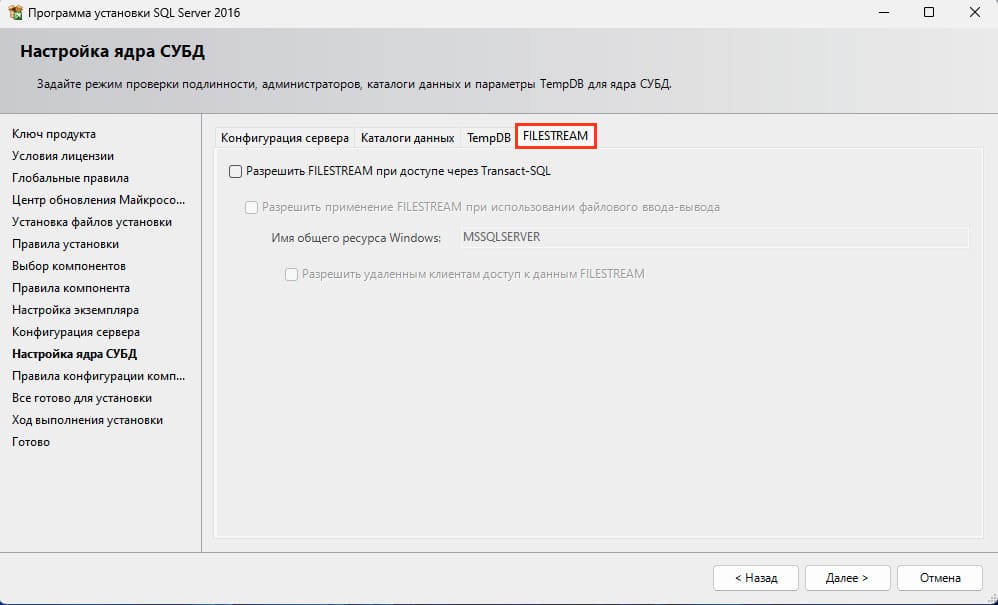
После всех настроек, жмем «Далее».
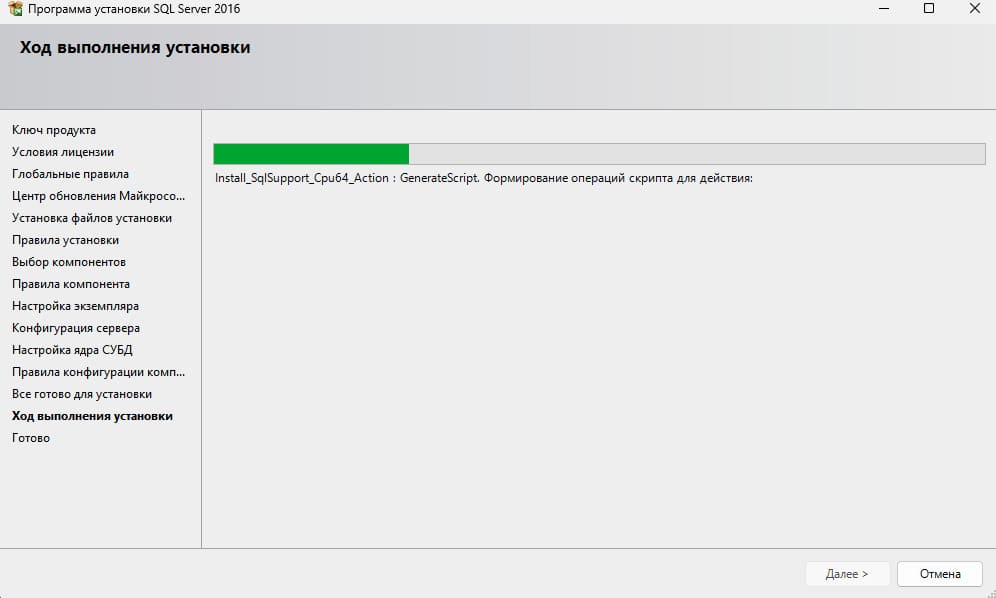
14) Теперь осталось только нажать «Установить» и начнется непосредственно установка SQL Server 2016.
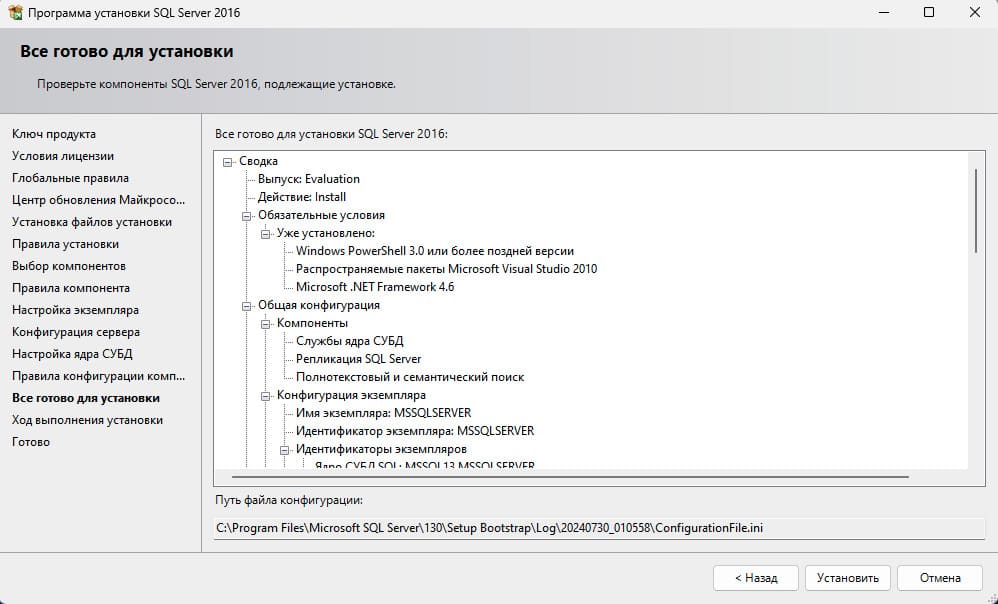
Здесь нужно будет подождать какое-то время, в зависимости от мощности вашего ПК.
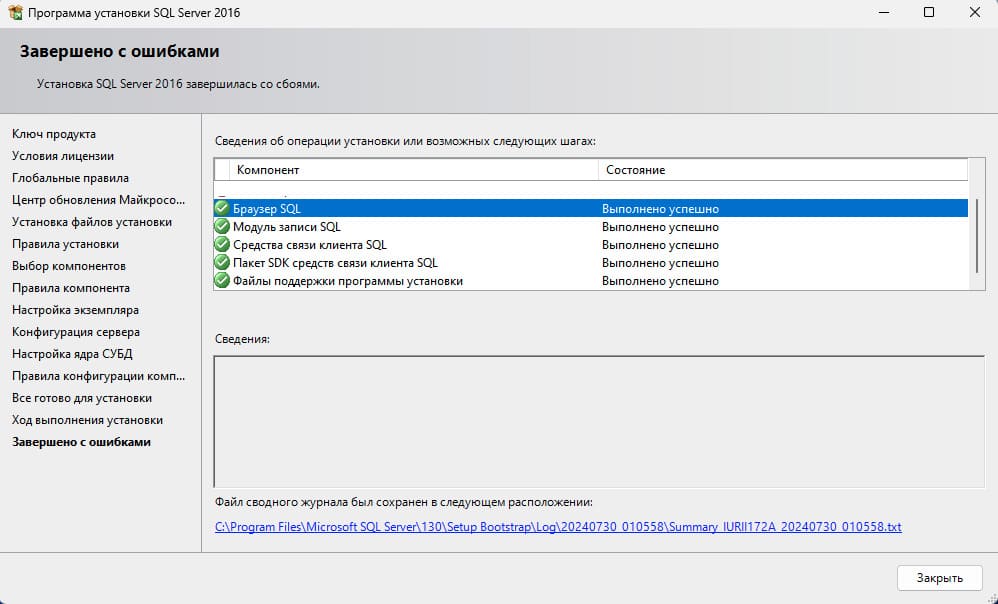
15) Если все прошло успешно, закрываем окно.
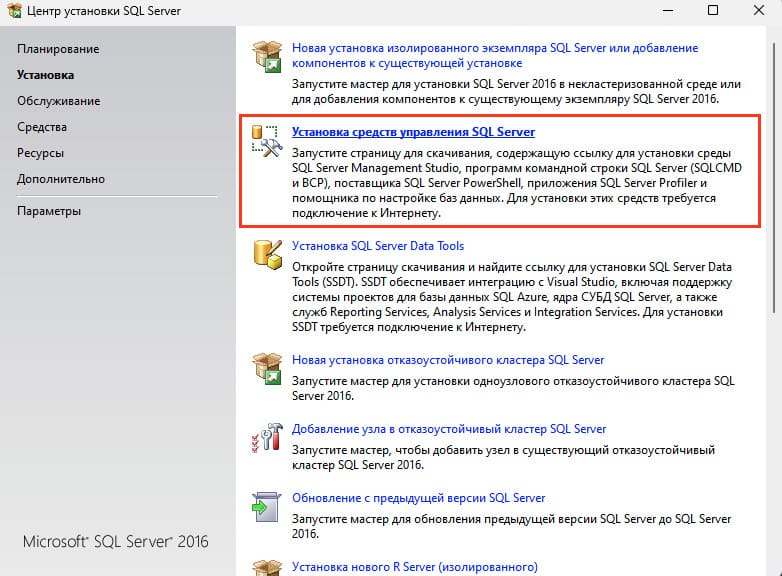
16) После того, как установка SQL Server 2016 завершена, нам нужно установить приложение, с помощью которого мы будем подключаться к серверу баз данных. Это приложение SQL Server Management Studio (SSMS).
Заходим снова в центр установки SQL Server и наживаем «Установить средства управления SQL Server».
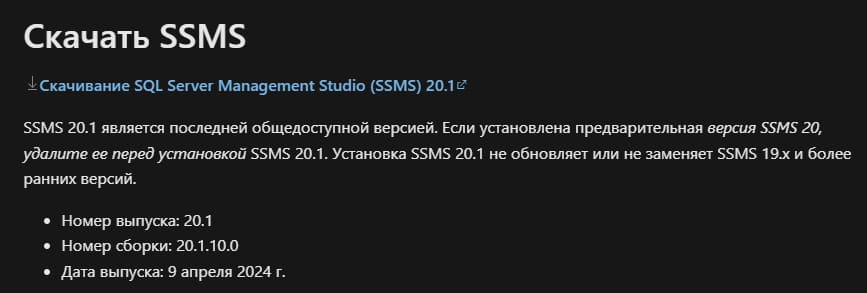
17) При нажатии у нас откроется сайт Microsoft, нам нужно будет проскроллить чуть ниже и скачать SSMS.
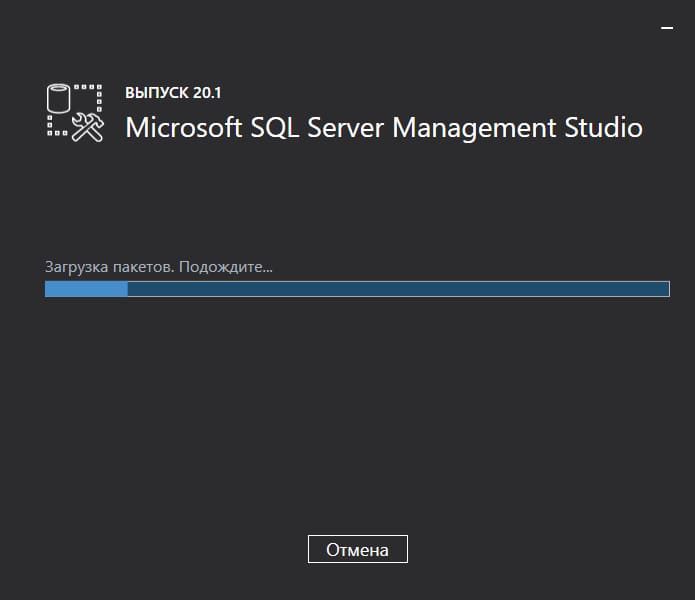
18) Открываем SSMS установщик и нажимаем «Установить».

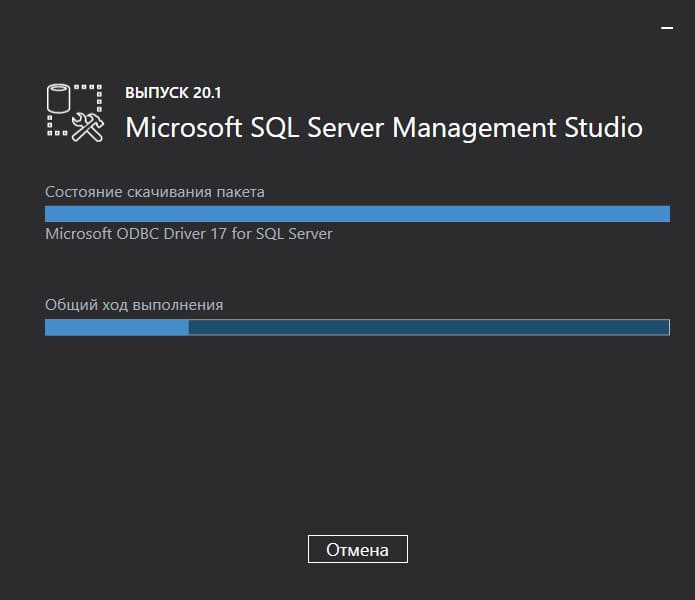
19) Дожидаемся окончания установки.
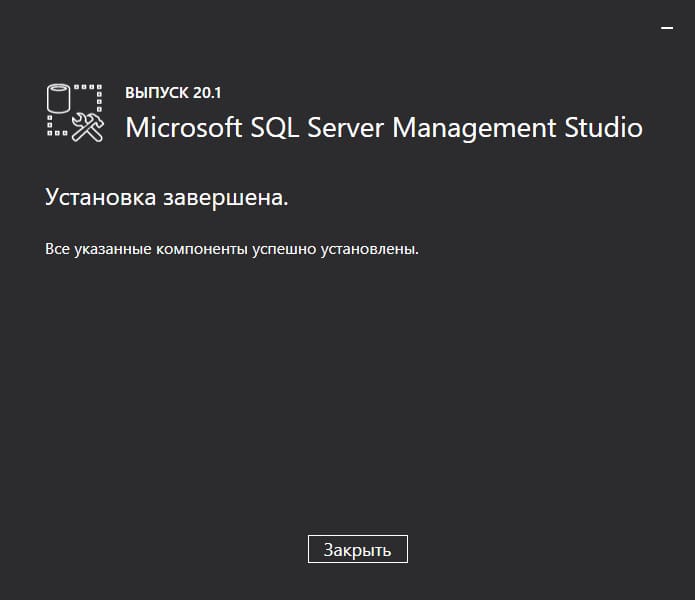
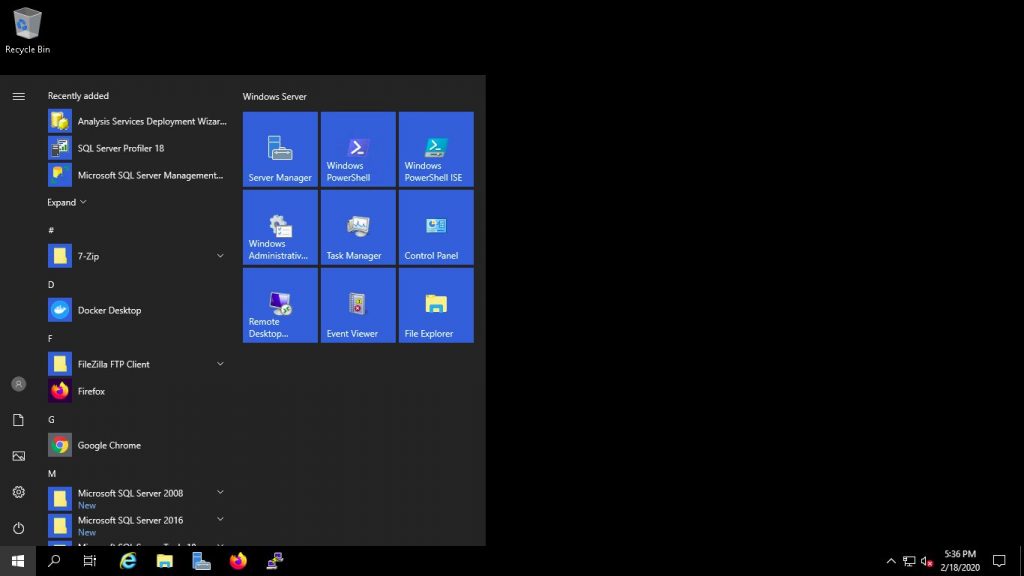
20) Через поиск Windows ищем приложение «Microsoft SQL Server Management Studio» и открываем его.

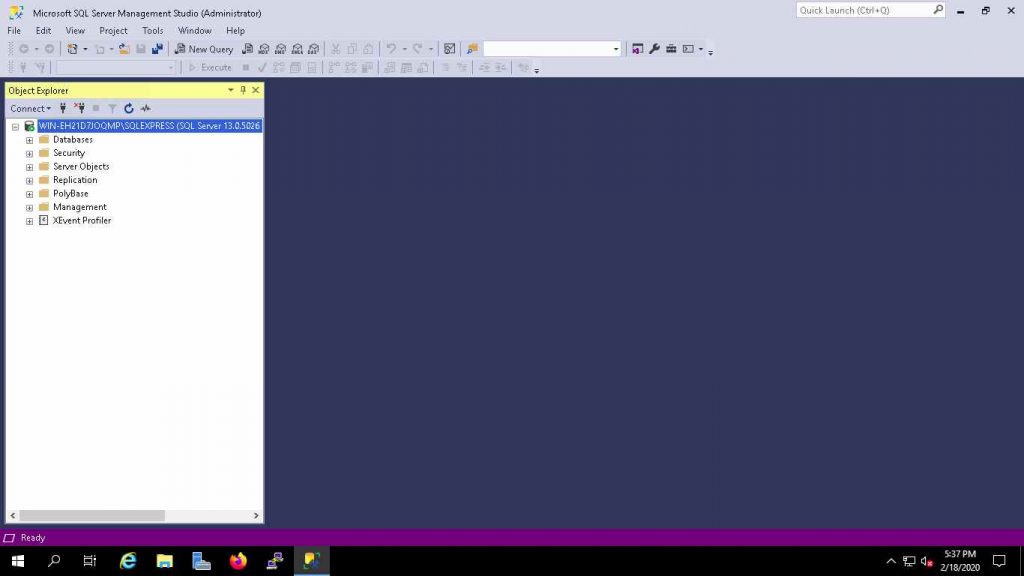
21) Теперь Вы можете авторизоваться под Вашей учетной записью в SQL Server.

MS SQL Server 2016 Express Edition Software Requirements
- Windows Server 2012/R2/2014/16/19 with the latest patch levels should be installed prior to Installation.
- 64-bit edition of Microsoft SQL Server 2012 R2 or SQL Server 2014/16 Standard (Enterprise required for Always On).
- SQL Server Management Studio (SSMS) is recommended.
- Installing SQL Server 2016 express requires .NET Framework 4.6 to be installed. You can check before the install, but it will check and install it automatically if needed. If you are using Windows Server 2012 R2, an update of KB2919355 is required before installing the framework.
- Download the executable file (.exe file) from the Microsoft site:-https://www.microsoft.com/en-us/download/confirmation.aspx?id=56840
Choose your installation type:-
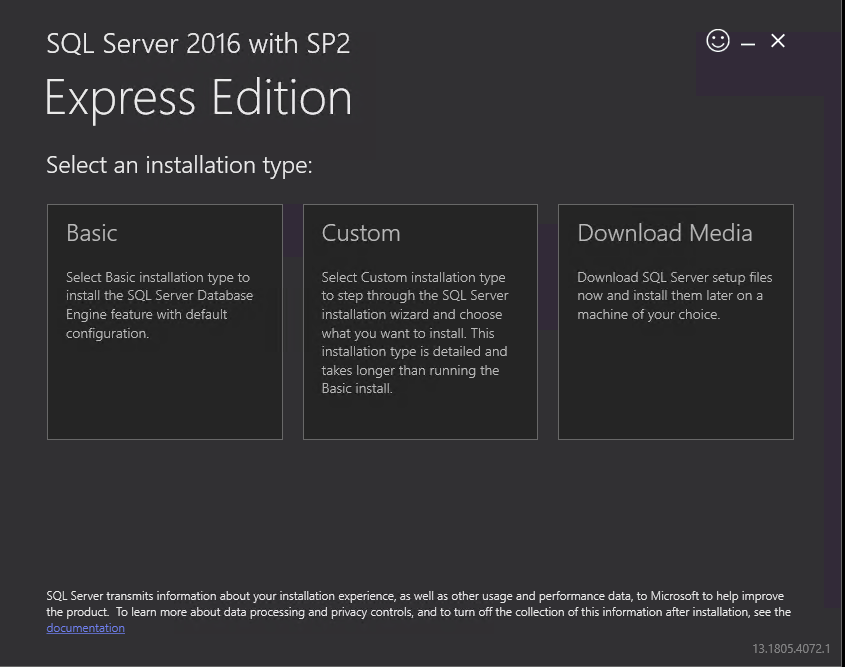
Note: You can stick with Basic unless you have custom options and locations you’d like to set.
SQL Server 2016 Express Edition Installation Type:-
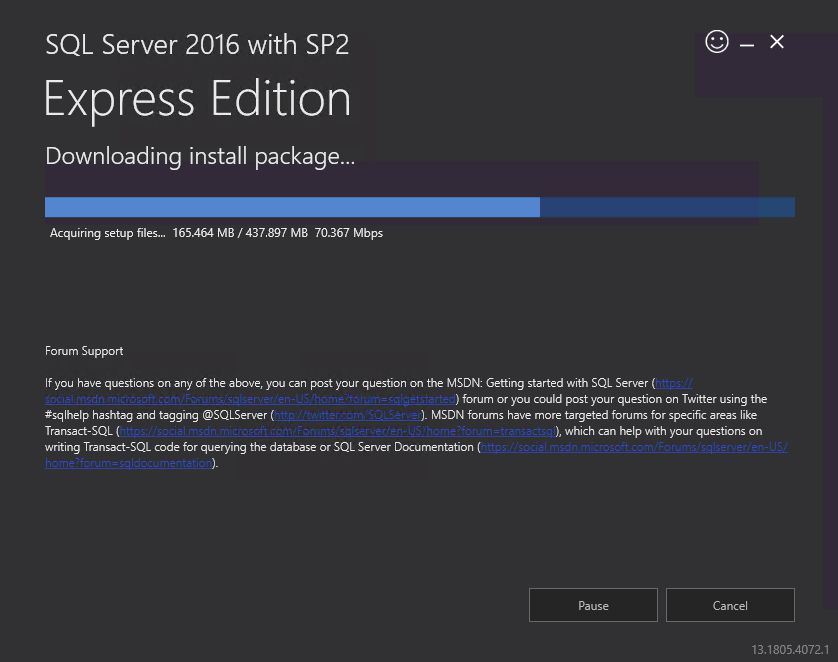
- Basic Type will install default packages by downloading from the internet. In this blog, we will use this installation type.
- Custom Type provides customization features of MS SQL 2016 Express, where we can install extra features of MS SQL or remote some default features.
- Download Media Type will only download setup files from the internet and do not start Installation. This can be useful if we do not have an internet connection and install MS SQL on your machine later.
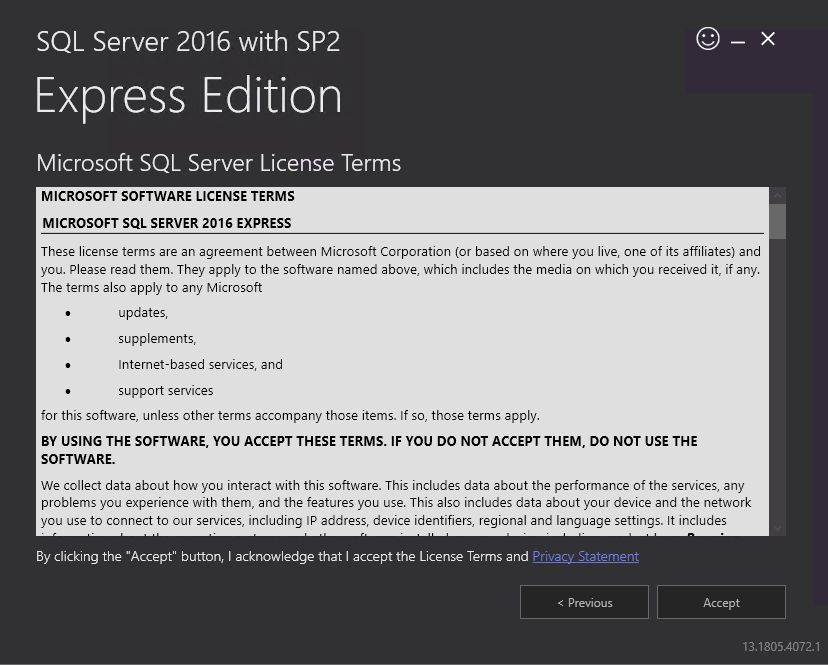
- Accept the license agreement
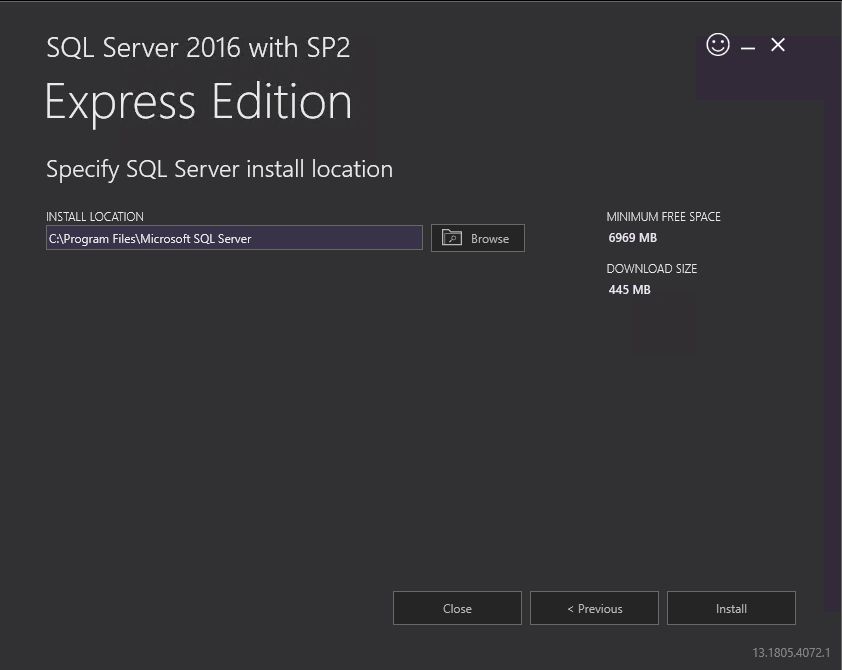
5. Choose a default Install Location or other Install Location then you can select Install
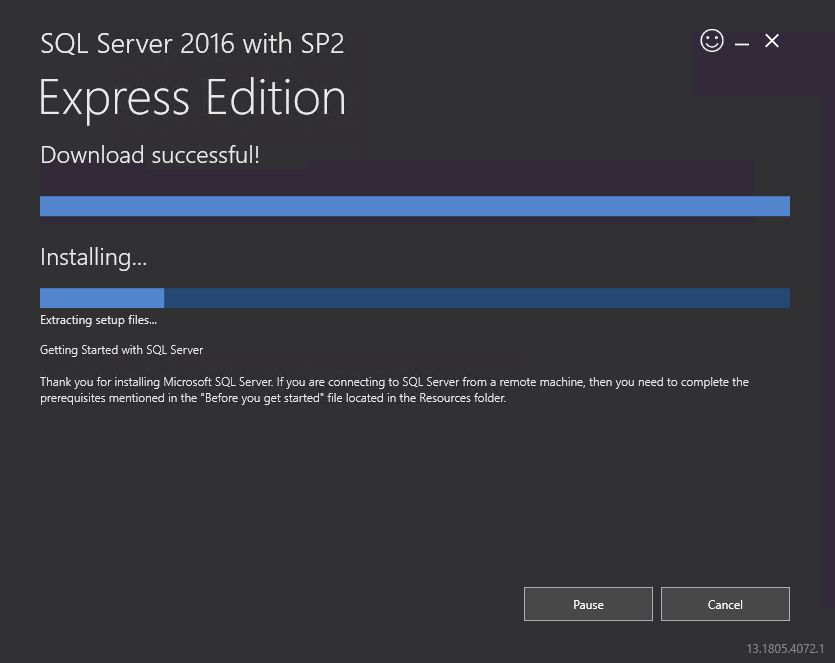
6. Completed Successfully! From here, you can connect to the server immediately, or Customize the Installation, and Install SQL Server Management Studio(SSMS).
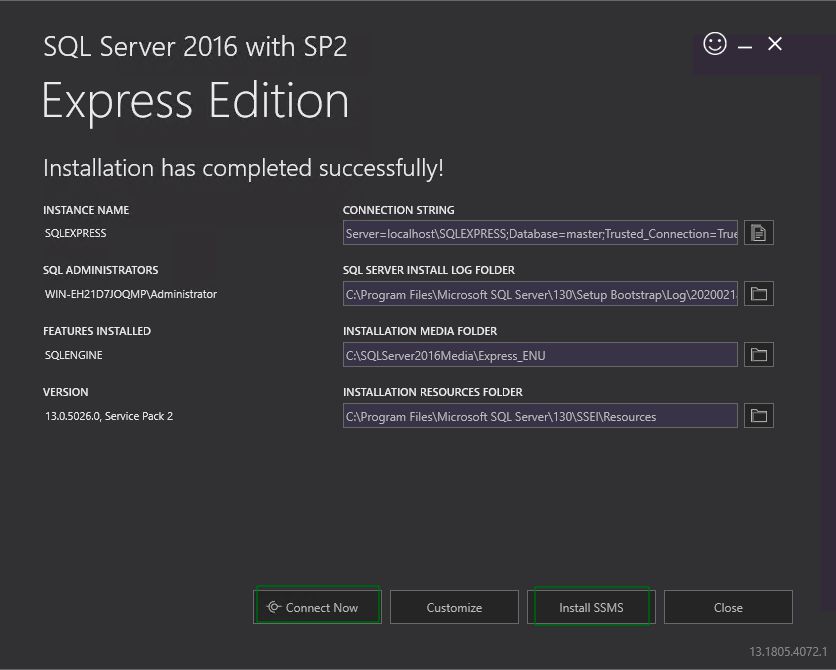
SQL Server Management Studio (SSMS) installation
You can click on Install SSMS or download SSMS via below-mentioned weblink
SSMS Download Link — https://docs.microsoft.com/en-us/sql/ssms/download-sql-server-management-studio-ssms?view=sql-server-ver15
Click on Download SSMS and save it.
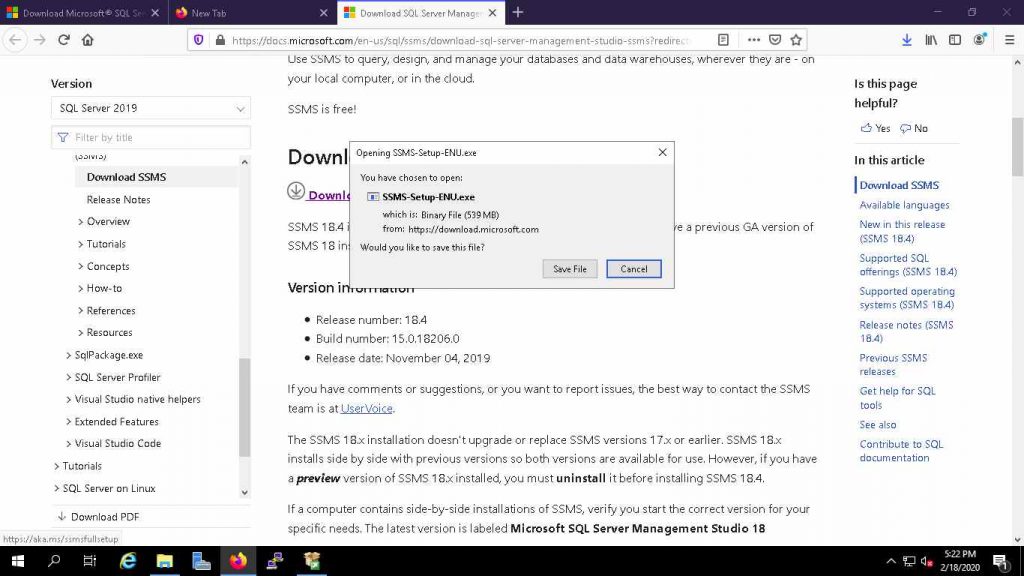
After Download SSMS .exe file, click on it and Install it.

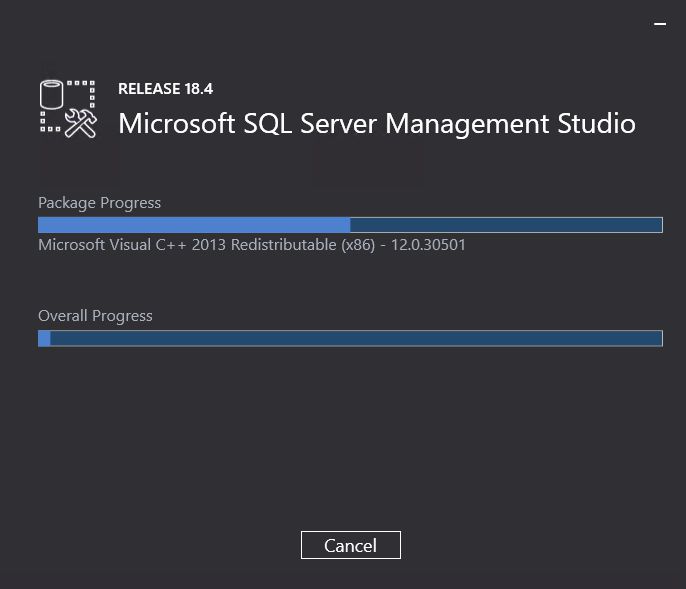
After the finish installation, Restart server.
Finally, SQL Server Management Studio (SSMS) is installed on your server.
How to connect MS SQL 2016 Express to SQL Server Management Studio (SSMS)
Click on Windows Home and search «SQL Server Management Studio» and click to start SSMS
Click on connect to connect your MS SQL 2016 Express Database via Windows Authentication
Here You can Manage your database:
To know more about our Windows servers, please check here