
Samba — это бесплатное программное обеспечение, которое обеспечивает взаимодействие между системами Linux/Unix и Windows, позволяя создавать файловые и печатные серверы. Установка сервера Samba на Windows Server 2019 полезна, когда необходимо предоставить доступ к файлам и папкам на сервере с другого сервера на Windows Server 2019. В этой статье мы предоставим шаги по установке сервера Samba на Windows Server 2019 через Server Manager и подключению к нему с другого сервера на Windows Server 2019.
Шаг 1: Установка сервера Samba на Windows Server 2019
Чтобы установить сервер Samba на Windows Server 2019, выполните следующие действия:
Запустите Server Manager и нажмите «Добавить роли и компоненты».
Нажмите «Далее» до страницы «Роли сервера».
Выберите «Сервисы файлов и хранилищ» и нажмите «Далее».
Выберите «Сервисы файлов и iSCSI» и нажмите «Далее».
Если они не выбраны, выберите «Сервер для NFS» и «Поддержка SMB 1.0/CIFS для обмена файлами» и нажмите «Далее».
Нажмите «Установить», чтобы установить выбранные роли и компоненты.
После завершения установки перезагрузите сервер.
Шаг 2: Настройка сервера Samba на Windows Server 2019
После установки сервера Samba выполните следующие действия для его настройки:
Откройте Server Manager и выберите «File and Storage Services».
Выберите «SMB Server» и в окне настройки выберите «Create a fale share, start the new SMB share» и введите имя разделяемой папки.
Выберите SMB hare — Quick
Укажите папку, которую вы хотите разделить.
Нажмите «Далее» и выберите имя папки.
Проверьте настройки и нажмите «Создать».
Перезагрузите сервер.
Шаг 3: Подключение к серверу Samba с другого сервера на Windows Server 2019
После установки и настройки сервера Samba на Windows Server 2019 выполните следующие действия, чтобы подключиться к нему с другого сервера на Windows Server 2019:
-
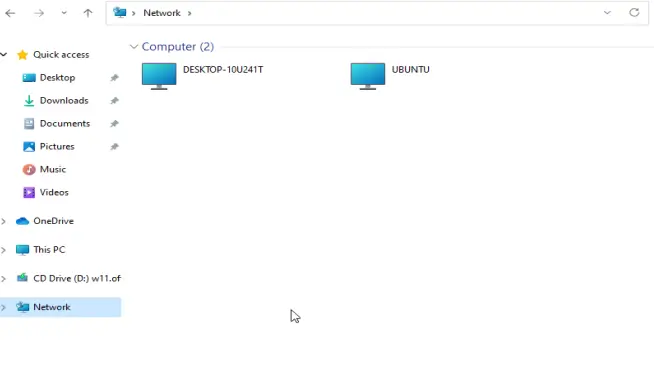
На сервере, с которого вы хотите подключиться к серверу Samba, откройте проводник Windows и выберите «Этот компьютер».
-
Нажмите «Сеть» в левой панели, чтобы открыть доступные сетевые ресурсы.
-
Найдите сервер Samba в списке и дважды щелкните на нем, чтобы открыть доступные разделяемые папки.
-
Выберите нужную папку и нажмите «Подключиться», чтобы подключиться к серверу Samba.
-
Введите имя пользователя и пароль для доступа к папке, если это необходимо.
-
После успешного подключения вы сможете просматривать и работать с файлами в разделяемой папке на сервере Samba.
В заключение, установка сервера Samba на Windows Server 2019 через Server Manager и подключение к нему с другого сервера на Windows Server 2019 может показаться сложной задачей для новичков, но выполнение приведенных выше шагов поможет вам успешно установить и настроить сервер Samba, чтобы подключиться к нему с другого сервера и использовать его в качестве файлового и печатного сервера в вашей сети.
Также предлагаем рассмотреть другие полезные статьи:
- Как попасть в phpMyAdmin из популярных панелей управления сервером
- Как поднять OpenSSH на Windows 2012
- Как поднять Samba сервер на Linux и подключиться к нему из Windows Server 2019
By default, when you open a windows/Linux system’s file manager, you will see network shares that are automatically advertised across your local network. Remote users are only allowed to connect to the network and access the shared files when they are directly connected to the machine.
Samba is an extremely powerful tool that allows one to create file and printer sharing to SMB/CIFS clients in both Windows and Unix systems. When it comes to file sharing, Windows 11 and Ubuntu work seamlessly since they both use the SMB protocol. Samba share was developed by Andrew Tridgell and runs on many Unix-Operating systems such as Linux, Solaris, BSD variants and AIX.
Samba share, is so significant in that:
- It allows Windows systems to share files and printers on the Unix host and allows Unix users to access the resources shared by Windows systems.
- It is so reliable it runs on a Unix host resulting in few problems and low maintenance costs. It also offers good performance under heavy loads.
- It offers secured data transfer
- Message signing-with didgital signing users who receive the data packets are assured of the origin point authenticity.
- SMB encryption.
- Allows concurrent operations.(simultaneous access to the files)
- Multichanel technology.
This guide demonstrates how to install and Configure Samba Share on Windows 11. For Samba share set up, you will need the following:
- Windows 11 installation.
- A Linux machine
Step 1: Enable Network Discovery in Windows 11
The network needs to be advertised for other devices to view and access it. This is made possible In Windows 11 by Enabling Network discovery.
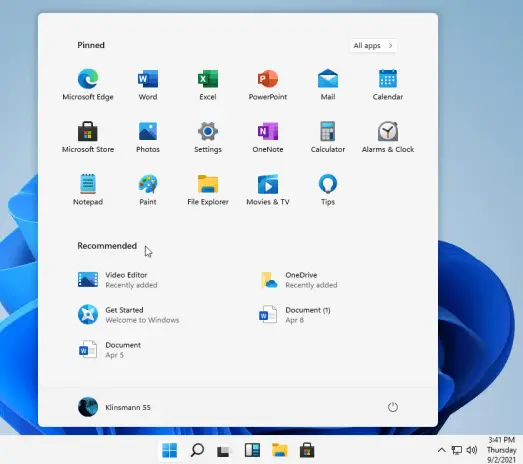
On your Windows 11 start menu, launch settings as below:
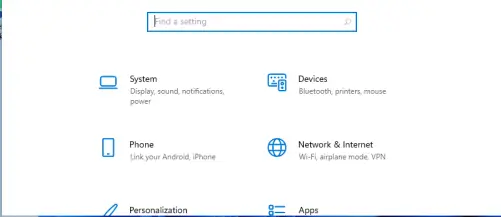
On the settings tab, click on Network & internet then select Ethernet:
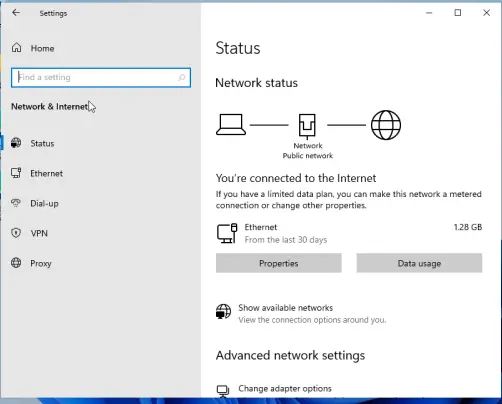
In the Ethernet settings tab, select Ethernet properties:
Here, select private under the network profile as shown:
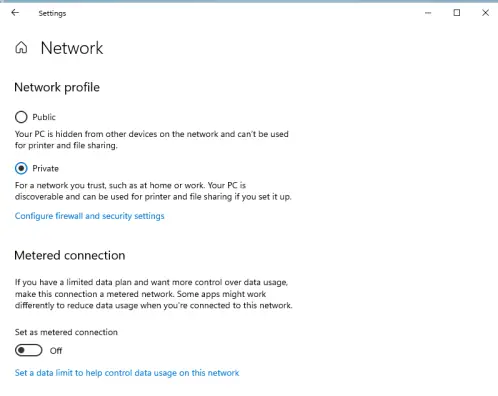
If you are connected with Wi-Fi, you will need to enable Private in the Profile settings. This profile should be selected if you need file-sharing or you are using apps that communicate over the network. With this done, exit and the network should now be discoverable.
Step 2: Turn on Public Folder Sharing in Windows 11
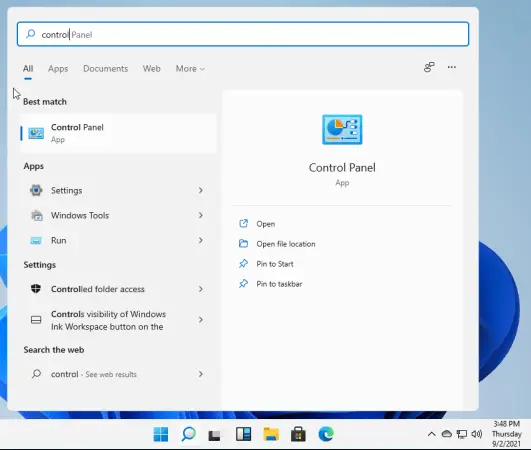
On the Windows 11 start menu, launch the Control Panel:
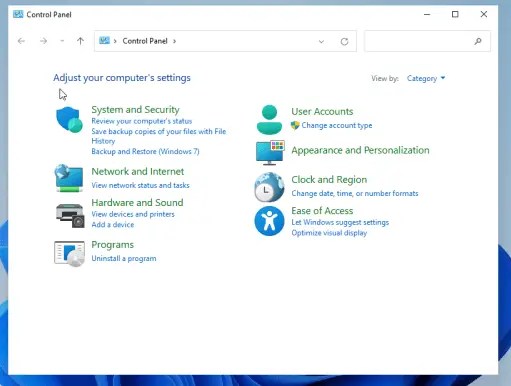
While in the Control Panel, select Network and Internet as shown:
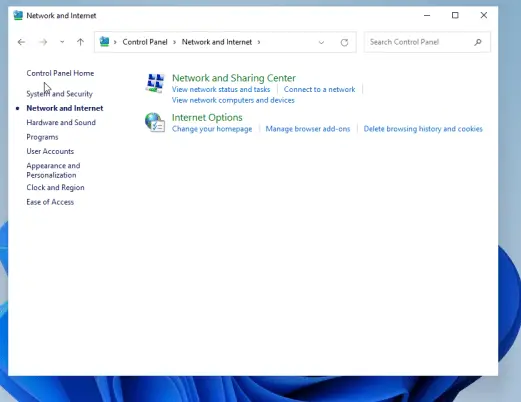
On the next page select Network and Sharing Center:
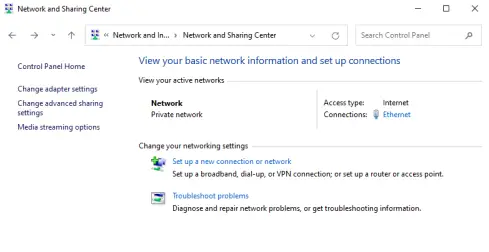
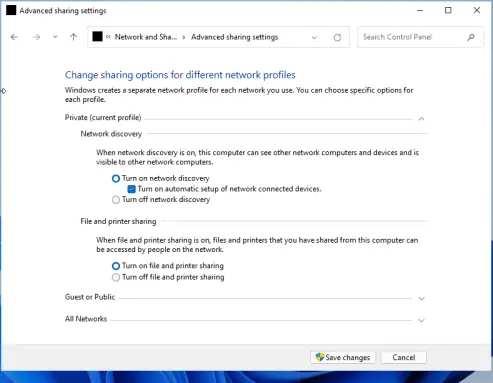
Go to the Change advanced sharing settings option on the right-hand side panel:
While here, select the Private(current profile) and make the below settings:
Turn on file and printer sharing:
Save the changes made and exit.
While in the Advanced settings tab, Click the all networks option, and scroll down. Here there are several options such as Public folder sharing, Media streaming, File sharing connections, and Password protected sharing. By default, Windows turns on file and printer sharing, but in some cases, it is not enabled.
With password-protected sharing turned on, anyone connecting to your shared network will have to authenticate with the set password to be allowed to access your network.
While here, you can also allow Public folder sharing as shown.

With your desired changes made, save and exit.
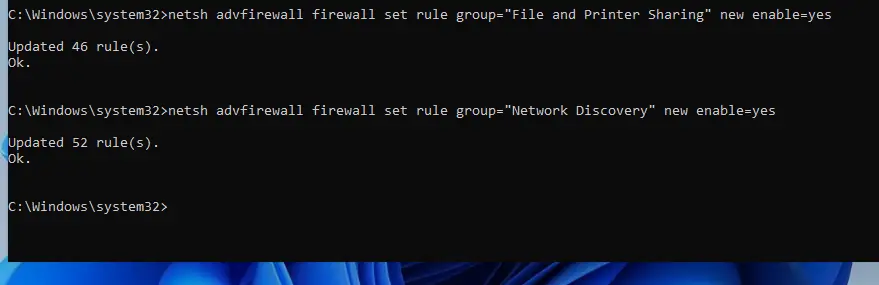
Alternatively, all the above settings can easily be done using the below commands. Run Command prompt as Administrator and issue the below commands.
netsh advfirewall firewall set rule group="File and Printer Sharing" new enable=Yes
netsh advfirewall firewall set rule group="Network Discovery" new enable=Yes
Sample Output:
Step 3: Access Windows 11 shares from Linux
In this guide, I will be using Ubuntu to access the Windows 11 shared files. Now I will have to make a few configurations on my Ubuntu system to be able to connect to the Windows network.
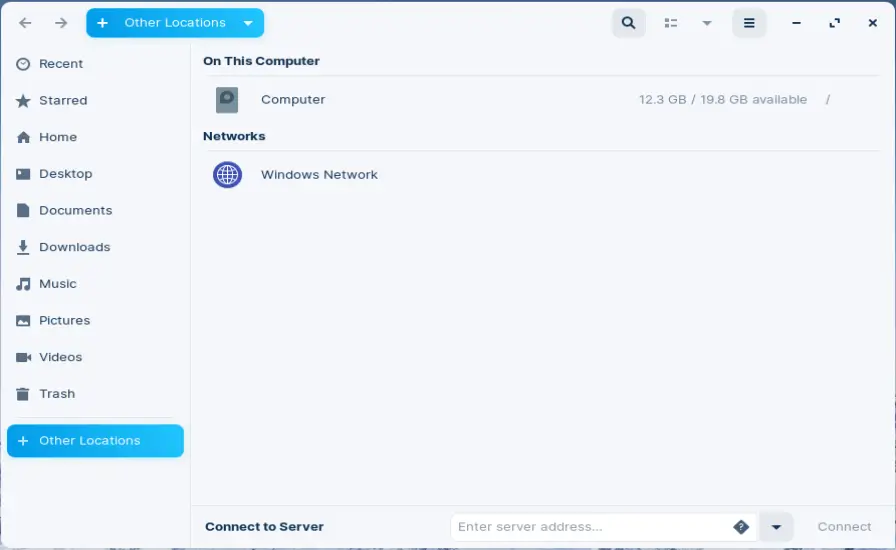
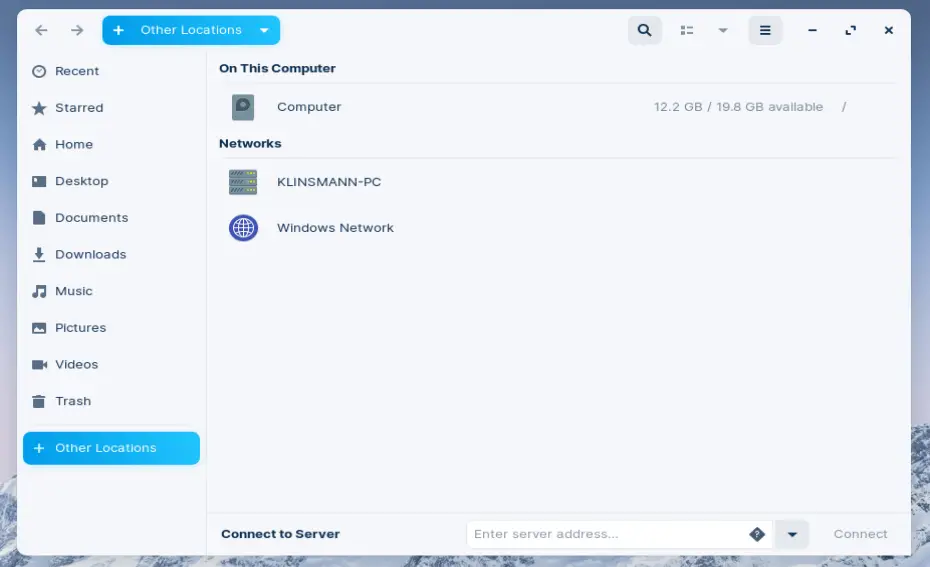
Before we install Samba your Ubuntu File Manager appears as below after clicking on Other Locations:
Install Samba file-sharing system on Ubuntu using the below command:
sudo apt update && sudo apt install sambaAdd users to Samba and create a password:
sudo pdbedit -a -u $(whoami)Sample Output:
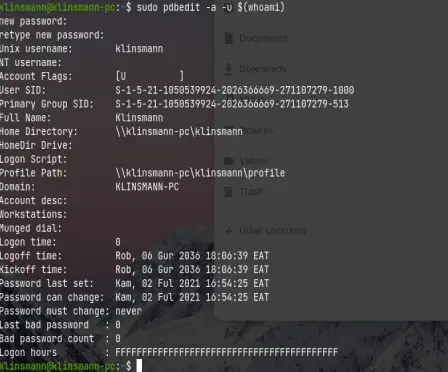
You have successfully set a Samba password which you will use to log in to samba share.
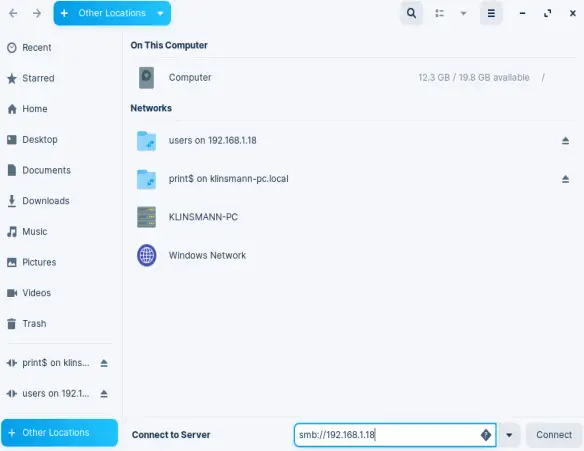
Now launch the Ubuntu File Manager, click on other locations as shown.
Now the Windows system is visible. Launch file sharing by adding the connection as shown. Enter the address of the server with the below syntax.
smb://servername/Share_nameFor example, I will use this syntax to access my Windows System.
smb://192.168.1.18See below screenshot:
In case you are prompted to enter a password for login, use the Samba login password:
You will successfully be connected to the Network and you can access files from the windows system.
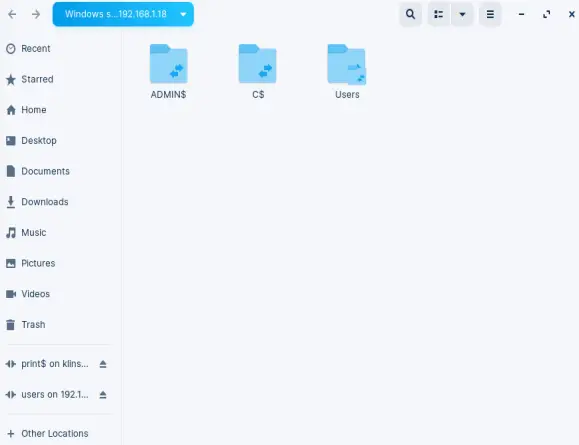
Now you are set to access the files on your Windows system. Click on Users> Default, you should be able to see these files.

Access Ubuntu Files from Windows 11
Now we want to access the Ubuntu files from Windows 11. This is done in the following steps.
First, we need to find the workgroup name in Windows 11. Launch the command prompt and issue the command below.
net config workstationSample Output:
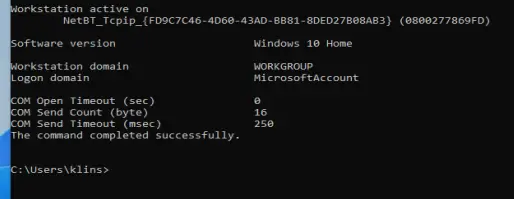
On my system, the workgroup name is WORKGROUP. This is the default workgroup name for Windows systems.
The next step is to configure Samba on Ubuntu. Since we already have samba installed we will make configuration settings as below.
Edit the Samba default configuration:
sudo cp /etc/samba/smb.conf /etc/samba/smb.conf.bak
sudo vi /etc/samba/smb.conf
Edit your file as below replacing appropriately.
[global]
........
# Configure correct UTP
 unix charset = UTF-8
# Change this to the workgroup/NT-domain name your Samba server will be part of
  workgroup = WORKGROUP
  server min protocol = NT1
  ntlm auth = yes
  netbios name = UbuntuVM
  security = user
  #interfaces = 127.0.0.0/8 eth0
  bind interfaces only = yes

# add at the end
[Public]
   comment = Ubuntu File Share
   path = /srv/samba/share
   browsable = yes
   writable = yes
   guest ok = yes
   read only = no
   create mode = 0777
   directory mode = 0777
   force user = nobody
In the configuration file, we have set to share /srv/samba/share directory. So we need to create it. This is used for experiment purposes, but you can share an existing directory.
sudo mkdir -p /srv/samba/share
sudo chown nobody:nogroup /srv/samba/share
sudo chmod -R 0777 /srv/samba/share
sudo chgrp sambashare /srv/samba/share
Now restart the Samba service.
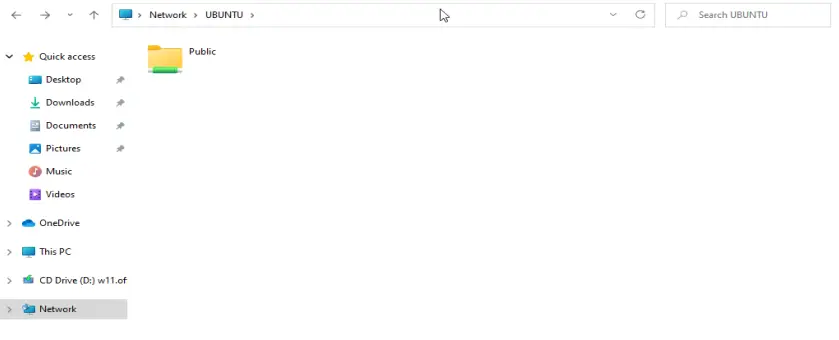
sudo systemctl restart smbd.service nmbd.serviceOn the Windows system, open the file manager and click on Network. You will see the Ubuntu system added as below. Open it and view the contents of your shared folder:
This Public folder contains contents of your shared path. For this guide, our shared path is /srv/samba/share :
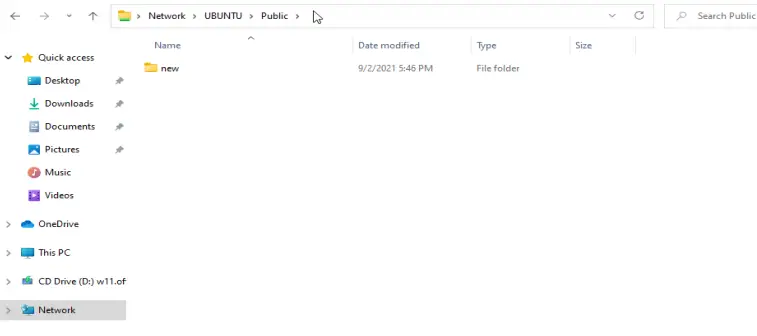
Suppose I add a new directory in the path /srv/samba/share using the command:
sudo mkdir /srv/samba/share/newOn Windows, the shared file will appear inside the Public folder as below:
Alternatively, you can create a file on this Windows tab that will appear on our Ubuntu system.
That is it! We have successfully gone through how to install and configure Samba Share on Windows 11. I hope you found this guide helpful.
See more on this page:
- How To Install MySQL 8.2 on Windows 11 / Windows 10
- Fix Windows Error “running scripts is disabled on this system”
- Fix Windows BSOD Issue caused by CrowdStrike Update
- Running Windows Server 2022 on OpenStack (Complete Steps)
Все способы:
- Шаг 1: Активация компонента
- Шаг 2: Проверка и настройка
- Вариант 1: Клиент
- Вариант 2: Сервер
- Шаг 3: Подключение
- Вопросы и ответы: 2
Шаг 1: Активация компонента
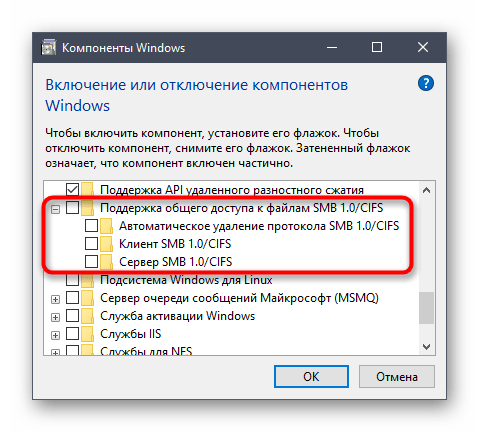
По умолчанию компонент, отвечающий за работу службы Samba (SMB), отключен в Windows 10, поэтому перед настройкой его следует активировать. Делается это в специальном меню «Панели управления». Достаточно будет открыть окно «Компоненты Windows» и установить отметку напротив пункта «Поддержка общего доступа к файлам SMB 1.0/CIFS». В завершение следует перезапустить компьютер, чтобы внесенные изменения зарегистрировались в системе. При надобности обратитесь за помощью к тематической статье на нашем сайте — в ней автор описал эту процедуру более подробно. Там же вы сможете найти альтернативные методы выполнения поставленной задачи. Для ознакомления с темой перейдите по ссылке ниже.
Подробнее: Как включить SMBv1 в Windows 10
Шаг 2: Проверка и настройка
После того как компонент «Поддержка общего доступа к файлам SMB 1.0/CIFS» будет включен, необходимо проверить его работу и выполнить запуск. Для клиентской и серверной части эти действия выполняются по-разному. Подробнее о них будет рассказано дальше по тексту.
Вариант 1: Клиент
Если вы собираетесь настроить клиентскую часть SMB, запустите оболочку «Windows PowerShell» от имени администратора и выполните несколько команд. Делается это следующим образом:
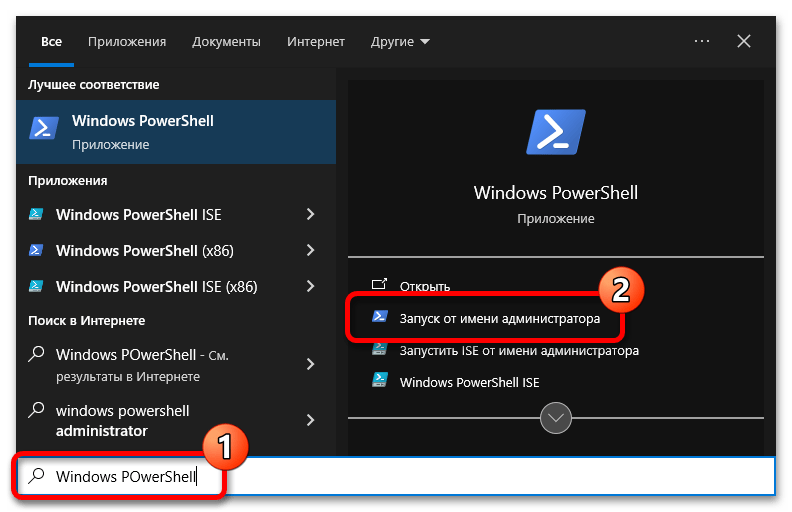
- Запустите оболочку любым доступным способом. Например, сделать это можно посредством поиска по системе. Установите курсор в соответствующее поле на панели задач, введите запрос «Windows PowerShell» и в результате щелкните по пункту «Запуск от имени администратора».

Читайте также: Как открыть Windows PowerShell в Windows 10
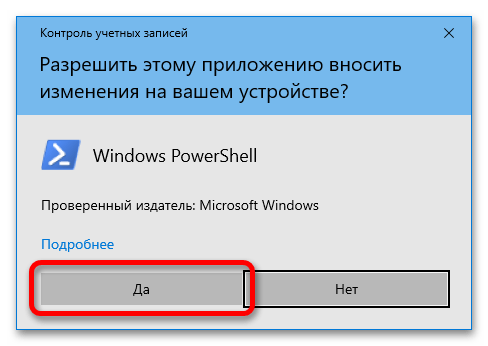
- При появлении диалогового окна контроля учетных записей щелкните по кнопке «Да», чтобы разрешить запуск оболочки.
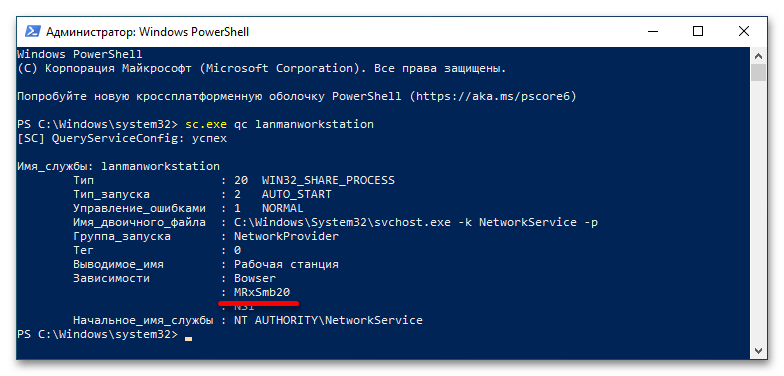
- В появившееся окно «Windows PowerShell» вставьте команду
sc.exe qc lanmanworkstationи нажмите Enter для ее выполнения.В результате появится информация, касающаяся клиентской части службы SMB. Здесь вам необходимо обратить внимание на строку «Зависимости». Важно, чтобы в списке была указана службы под названием «MRxSmb20». Если она есть, значит, все нормально и клиент Samba настроен правильно.
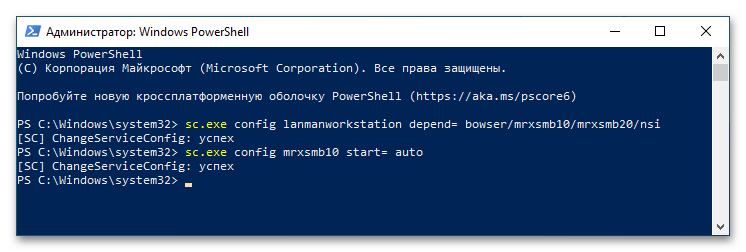
- Если в списке «MRxSmb20» отсутствует, следует вручную включить эту службу. Сделать это можно посредством редактирования системного реестра или путем ввода специальных команд в «Windows PowerShell». Во втором случае воспользуйтесь приведенными ниже командами. Поочередно вставьте их в консоль и нажмите по клавише Enter для выполнения.
sc.exe config lanmanworkstation depend= bowser/mrxsmb10/mrxsmb20/nsi
sc.exe config mrxsmb10 start= auto
Если после ввода команд на экране появлялось сообщение «[SC] ChangeServiceConfig: успех», значит, вы все выполнили верно и клиентская часть Samba полностью настроена.
Вариант 2: Сервер
Серверная часть SMB настраивается похожим образом, но прежде следует проверить ее статус посредством специальной команды, приведенной ниже. Откройте «Windows PowerShell» от имени администратора, как это было показано ранее, а затем выполните команду.
PowerShell Get-SmbServerConfiguration | Select EnableSMB1Protocol
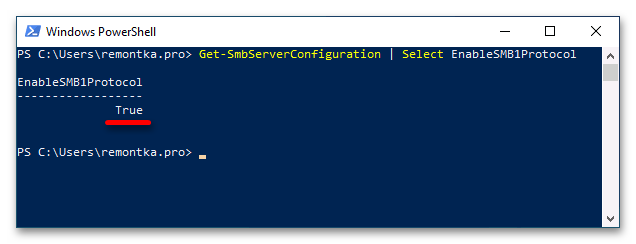
Наличие в столбце «EnableSMB1Protocol» значения «True» означает, что сервер настроен корректно и готов к работе. В противном случае вам необходимо выполнить настройку вручную. Для этого сделайте следующие действия:
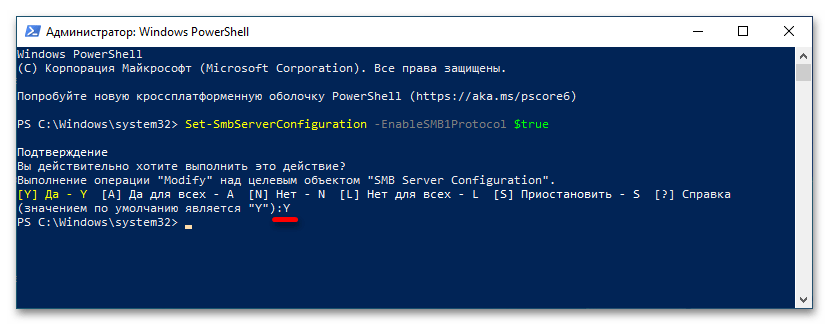
- Впишите в «Windows PowerShell» команду
Set-SmbServerConfiguration -EnableSMB1Protocol $trueи нажмите Enter, чтобы ее выполнить.
При появлении запроса подтверждения впишите символ «Y» (без кавычек) и нажмите по клавише Enter. Это нужно для завершения выполнения команды.
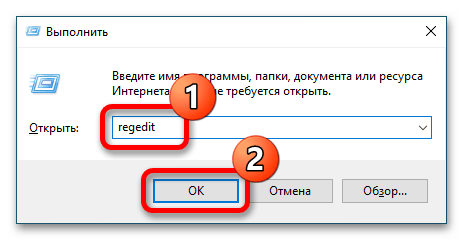
- После этого окно консоли вы можете закрыть, оставшиеся действия выполняются в «Редакторе реестра». Откройте его через системный поиск или утилиту «Выполнить», вызываемую сочетанием клавиш Win + R. Вставьте в поле «Открыть» команду
regeditи кликните по кнопке «ОК».
При появлении диалогового окна контроля учетных записей кликните по кнопке «Да», чтобы разрешить запуск «Редактора реестра».
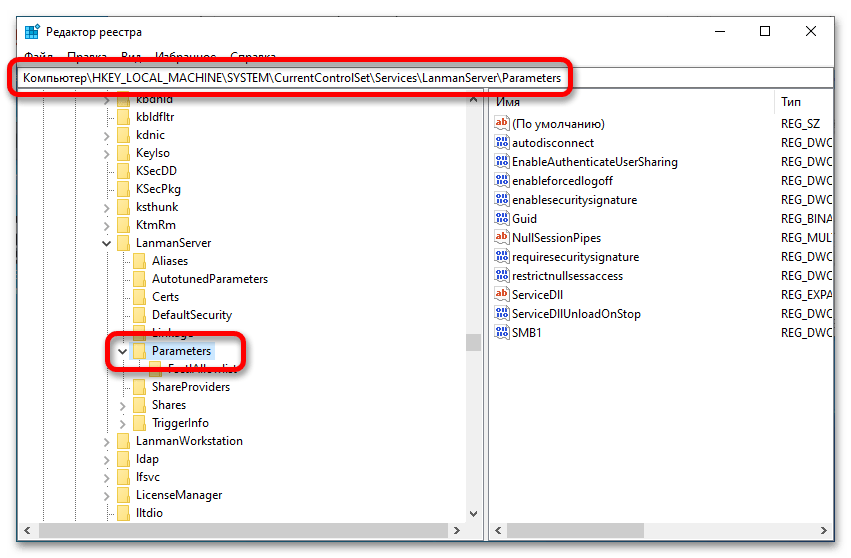
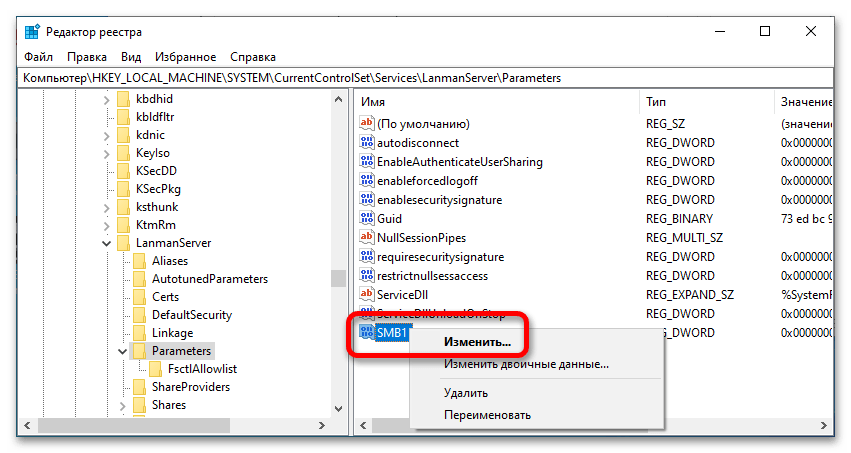
- В появившемся окне приложения воспользуйтесь древовидной структурой каталогов в левой части интерфейса, чтобы перейти по указанному далее пути. Вы также можете сделать это намного быстрее — вставив адрес в адресную строку, находящуюся сверху. Просто скопируйте путь и вставьте его туда, а для перехода нажмите по клавише Enter.
HKEY_LOCAL_MACHINE\SYSTEM\CurrentControlSet\Services\LanmanServer\Parameters - Находясь в целевой директории, найдите в ней параметр под названием «SMB1» и откройте его свойства. Для этого щелкните по нему правой кнопкой мыши и из появившегося контекстного меню выберите пункт «Изменить».
- В поле «Значение» введите цифру «1» (без кавычек) и нажмите по кнопке «ОК», чтобы сохранить внесенные изменения.
Как только все описанные действия будут выполнены, настройку серверной части службы Samba можно считать оконченной.
Шаг 3: Подключение
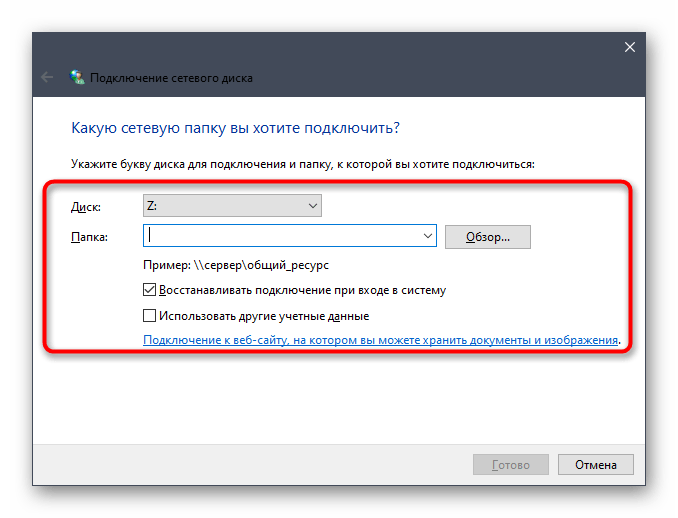
Теперь, когда служба SMB настроена, можно непосредственно пробовать подключаться к серверу. Делается это стандартным способом через меню сетевого диска. Открыть его вы можете через файловый менеджер «Проводник». По итогу вам нужно будет присвоить букву новому диску, ввести адрес сервера Samba и нажать на «Готово». Подробнее об этом рассказывается в другой статье на нашем сайте. Ознакомиться с ее содержанием вы можете посредством следующей ссылки.
Подробнее: Как подключить сетевой диск в Windows 10
Читайте также: Что делать, если не удается подключить сетевой диск в Windows 10
Наша группа в TelegramПолезные советы и помощь
Tutorial: How to Install Samba on Windows 10
Samba is a free, open-source software suite that enables file and print sharing between Unix, Linux, and Windows systems. In this tutorial, we will show you how to install Samba on Windows 10.
Prerequisites
Before you start, make sure you have administrative access on your Windows 10 system.
Step 1: Download Samba
To download Samba, go to https://www.samba.org/ and click the Download link. Then, select the version of Samba that is compatible with your Windows 10 architecture (32-bit or 64-bit).
Step 2: Install Samba
- Double-click the Samba executable file that you downloaded in Step 1.
- In the Samba installation wizard, click Next to proceed.
- Accept the license agreement and click Next.
- Choose the destination folder where you want to install Samba and click Next.
- Choose the components that you want to install (we recommend selecting all components) and click Next.
- Configure the Samba Server settings (e.g., global workgroup, security mode, etc.) as per your requirements and click Next.
- Choose a password for the administrative account that you will use to manage the Samba server and click Next.
- Review the installation summary and click Next to start the installation process.
- After the installation is complete, click Finish to close the installer.
Step 3: Configure Samba
- Open the Samba configuration file (smb.conf) located in the installation directory.
- Edit the smb.conf file to configure the necessary settings (e.g., share directories, users and groups, etc.). You can refer to the Samba documentation for more information on configuring smb.conf.
- Save the changes to the smb.conf file.
Step 4: Start Samba
- Press the Windows key + R to open the Run dialog box.
- Type services.msc and click OK to open the Services Manager window.
- Find the Samba service (named «SMB» or «Samba») in the list of services.
- Right-click the Samba service and choose Start.
- Wait for a few seconds until the Samba service starts.
Step 5: Access Samba Shares
- Open the File Explorer on your Windows 10 system.
- In the address bar, type \localhost or \[your-computer-name] and press Enter.
- You will be prompted to enter your Samba username and password. Enter the credentials that you specified in Step 2.
- You should now see a list of shared directories on your Samba server. Double-click the directories to access their contents.
Congratulations! You have successfully installed and configured Samba on Windows 10.
If you want to self-host in an easy, hands free way, need an external IP address, or simply want your data in your own hands, give IPv6.rs a try!
Alternatively, for the best virtual desktop, try Shells!
How to Install Samba on Linux/Windows. Samba is free and open-source software that allows files to be shared across Windows and Linux systems simply and easily. To be exact, it is an open-source implementation of the SMB/CIFS protocol.
The (CIFS) Common Internet File System Protocol is a dialect of the SMB protocol. A collection of message bundles that describes a distinct variant of a protocol is called a dialect.
The (SMB) Server Message Block Protocol is a client-server communication protocol that is used for sharing access to files, printers, serial ports, and other resources on a network.
When using Samba, you can share files and printing services, user authentication and authorization, name resolution, and service announcements between Linux/Unix servers and Windows clients.
Cheap VPS Hosting Server with Instant Activation
Table of Contents
The Main Tasks of Samba
1. Sharing a Linux drive with Windows machines.
2. Accessing an SMB share with Linux machines.
3. Sharing a Linux printer with Windows machines.
4. Sharing a Windows printer with Linux machines.
5. Setting up a domain controller on a Unix/Linux server and integrating Windows clients to the Domain controller.
Samba can also function as both a domain controller or as a regular domain member. This option makes Samba almost a must-have if you have a blended networking environment containing both Windows and Linux computers.
Introduction before installation
In order to install Samba, you will need to log into your Linux server as a user with Sudo privileges, or as the root user.
Note: To simplify the steps in this tutorial, we will use the root user.
In case you decide to move forward and install the software as your user (with sudo privileges), do not forget to type the Sudo command at the beginning of each command.
You will also need a Windows computer that we will connect from/to.
Installation of Samba on CentOS 7
As installations on CentOS and other RedHat based distributions are mostly managed best using the yum tool, we’ll be using it to install Samba on our CentOS 7 and to get our system up to date.
Firstly let’s remove all packages that might still be cached in our system.
To clean all the cached files from any enabled repository at once, we’ll use the following command:
[root@host ~]# yum clean allNext, let’s ensure all our system packages are updated.
We are using the -y flag to auto-confirm on any prompts:
[root@host ~]# yum -y updateNow, you can move on to the Samba installation.
Notice how we are using the -y flag once again to auto-confirm the installation prompts.
Samba can be easily installed with the following command:
[root@host ~]# yum -y install samba samba-client samba-commonYum, being such a great tool, will automatically install any dependencies needed for Samba.
At the end of the installation output, you should see something similar to this output:
Installed: samba.x86_64 0:4.9.1-10.el7_7 samba-client.x86_64 0:4.9.1-10.el7_7 samba-common.noarch 0:4.9.1-10.el7_7 Dependency Installed: libsmbclient.x86_64 0:4.9.1-10.el7_7 libwbclient.x86_64 0:4.9.1-10.el7_7 samba-client-libs.x86_64 0:4.9.1-10.el7_7 samba-common-libs.x86_64 0:4.9.1-10.el7_7 samba-common-tools.x86_64 0:4.9.1-10.el7_7 samba-libs.x86_64 0:4.9.1-10.el7_7 Complete!After completing the installation, you can check Samba version:
[root@host ~]# smbd --version Version 4.9.1How to Configure Samba
After installing Samba, you will need to configure it to conform to your set up and standards.
Note: Before you start with Samba configuration on our Linux machine, you’ll need to verify the workgroup on your Windows computer.
To confirm the workgroup on your Windows computer, do the following:
1. Right-click on This PC or My Computer.
2. Click on Properties.
3. Select Advanced System Settings.
4.Computer Name which will show you the following window with the data you need.
You can also run cmd (from the Windows start box) and run the following command:
net config workstationThe above command will display the information you need about the workstation domain.
You will see something like the image below:
Now that you have information about your Windows computer’s workgroup, you can move on to the Samba configuration on your Linux system.
The Samba configuration file can be found at /etc/samba/smb.conf.
Note: Before we make any changes, make sure to create a backup copy of the original configuration file.
To create a backup of your original configuration file smb.conf, you’ll use the following command to create a backup copy called smb.conf_orig:
[root@host ~]# cp /etc/samba/smb.conf /etc/samba/smb.conf_origWe’ll start by configuring Samba for anonymous file-sharing services.
In this share, any user will be able to read or write. We’ll start by creating a directory called “anonymous_shared_directory” where our files will be stored:
[root@host ~]# mkdir -p /samba/anonymous_shared_directoryNow, you need to apply for the appropriate permissions on your directory:
[root@host ~]# chmod -R 0775 /samba/anonymous_shared_directory [root@host ~]# chown -R nobody:nobody /samba/anonymous_shared_directoryLinux Virtual Private Server
In case you are using SELinux, you will need to change the SELinux security context for the samba shared directory:
[root@host ~]# chcon -t samba_share_t /samba/anonymous_shared_directoryTo make the changes needed in your configuration file, you will need to open the /etc/samba/smb.conf file with preferred CLI text editor (Nano or Vim).
[root@host ~]# vim /etc/samba/smb.confNow we’ll configure our anonymous share by adding and editing the following directive:
[global] workgroup = WORKGROUP security = user netbios name = centos7 printcap name = cups idmap config * : backend = tdb cups options = raw map to guest = bad user [Anonymous] comment = anonymous file share path = /samba/anonymous_shared_directory browseable = yes writable = yes guest ok = yes guest only = yes read only = no force user = nobodyYour Samba configuration file should now look like below:
[root@host samba]# cat /etc/samba/smb.conf # See smb.conf.example for a more detailed config file or # read the smb.conf manpage. # Run 'testparm' to verify the config is correct after # you modified it. [global] workgroup = WORKGROUP security = user netbios name = centos7 printcap name = cups idmap config * : backend = tdb cups options = raw map to guest = bad user [Anonymous] comment = anonymous file share path = /samba/anonymous_shared_directory browseable = yes writable = yes guest ok = yes guest only = yes read only = no force user = nobody [homes] comment = Home Directories valid users = %S, %D%w%S browseable = No read only = No inherit acls = Yes [printers] comment = All Printers path = /var/tmp printable = Yes create mask = 0600 browseable = No [print$] comment = Printer Drivers path = /var/lib/samba/drivers write list = @printadmin root force group = @printadmin create mask = 0664 directory mask = 0775Note: Don’t forget to save the changes made and close the text editor.
Dedicated Server
To verify your current samba settings, run the following command:
[root@host samba]# testparm rlimit_max: increasing rlimit_max (1024) to minimum Windows limit (16384) Registered MSG_REQ_POOL_USAGE Registered MSG_REQ_DMALLOC_MARK and LOG_CHANGED Load smb config files from /etc/samba/smb.conf rlimit_max: increasing rlimit_max (1024) to minimum Windows limit (16384) Processing section "[Anonymous]" Processing section "[homes]" Processing section "[printers]" Processing section "[print$]" Loaded services file OK. Server role: ROLE_STANDALONEPress enter to see a dump of your service definitions.
Before you continue starting the Samba service, you’ll need to configure your firewall to work with it.
How to Install Samba on Linux/Windows.
Samba will need the following ports open to operate correctly:
Port 137 (TCP) - netbios-ns - NETBIOS Name Service Port 138 (TCP) - netbios-dgm - NETBIOS Datagram Service Port 139 (TCP) - netbios-ssn - NETBIOS session service Port 445 (TCP) - microsoft-ds - if you are using Active Directoryand:
Port 389 (TCP) - for LDAP (Active Directory Mode) Port 445 (TCP) - NetBIOS was moved to 445 after 2000 and beyond, (CIFS) Port 901 (TCP) - for SWAT service (not related to client communication)We’ll start by configuring the csf.conf file.
Let’s open our csf configuration file with your chosen text editor:
[root@host ~]# vim /etc/csf/csf.confNow, make sure to add the ports to the appropriate section:
# Allow incoming TCP ports TCP_IN = "20,21,25,53,80,110,139,143,443,445,465,587,993,995,53835" # Allow outgoing TCP ports TCP_OUT = "20,21,25,53,80,110,139,143,113,443,445,587,993,995,53835"Save the changes and reload the firewall rules:
[root@host ~]# csf -rIn case you are running the firewall service, simply add the service using the following command:
[root@host ~]# firewall-cmd --permanent --zone=public --add-service=sambaReload the firewall service:
[root@host ~]# firewall-cmd --reloadStart the Samba services and ensure that it is started automatically on system boot.
Samba uses two system services to operate:
1. The smb.service: Implements a file sharing and printing service which listens on ports 139 and 445.
2. The nmb.service: Implements the NetBIOS over IP naming services to clients and listens on port 137.
[root@host ~]# systemctl start smb.service [root@host ~]# systemctl start nmb.serviceNote: To make sure those services are started automatically on system boot, you need to enable them:
[root@host ~]# [root@host ~]# systemctl enable smb.service Created symlink from /etc/systemd/system/multi-user.target.wants/smb.service to /usr/lib/systemd/system/smb.service. [root@host ~]# systemctl enable nmb.service Created symlink from /etc/systemd/system/multi-user.target.wants/nmb.service to /usr/lib/systemd/system/nmb.service.To test your newly implemented anonymous share do the following:
1. Go to Windows computer
2. Click Start -> Run, and we are going to input are server IP address like so.
3. Press OK. Your Anonymous directory will be shown in file explorer.
4. Double-click to access the directory, and then right-click to create a new text document.
5. Choose a file name and then save it. (We will name our file testfile for this purpose.)
Make sure the new file is available on your Linux machine as well:
[root@host ~]# [root@host ~]# ls -l /samba/anonymous_shared_directory total 0 -rwxr--r--. 1 nobody nobody 0 Mar 30 22:03 testfile.txtHow to Install Samba on Linux/Windows.
How to Configure Samba for Private Shares
This type of share requires a username and a password for access. We’re going to need to create a user/group of users that are allowed to access our share.
Once we have a group for our Samba users we can easily assign any needed privileges to all of them at once.
To create a new group use the following command:
[root@host ~]# groupadd sambausergroupWe have now successfully created a group for our users called sambausergroup. Let’s move on and create our user as well.
We’ll name it newtestuser and we’ll assign it to our group in a single command along with denying him shell access.
Samba user accounts are separate from system accounts, so our user, to which we intended to grant privileges only for Samba, will not require shell access/password.
If you decide to combine, you can install “samba-winbind” package which is used to sync system users and passwords with the samba user database among other features.
How to Install Samba on Linux/Windows.
To add your user use the following command:
[root@host ~]# useradd -s /sbin/nologin -g sambausergroup newtestuserThere is one more thing our user will need to access our share and that’s a password so let create a Samba access password for him:
[root@host ~]# smbpasswd -a newtestuser New SMB password: Retype new SMB password: Added user newtestuser.Samba users for this password-protected share will now need a place to store their files so we need to create a directory for them.
This one will be called “password_protected_directory”:
[root@host samba]# mkdir -p /samba/password_protected_directoryUsers from group we created sambausergroup,will need permissions to read,write and execute files in this directory so we’ll grant them those with the following command:
root@host samba]# setfacl -R -m "g:sambausergroup:rwx" /samba/password_protected_directoryYou’ll need to apply SELinux security context on this one as well:
[root@host samba]# chcon -t samba_share_t /samba/password_protected_directory/Open the Samba configuration file and add the setting for our private share:
[root@host ~]# vim /etc/samba/smb.conf[Password Protected] comment = needs username and password to access path = /samba/password_protected_directory valid users = @sambausergroup guest ok = no writable = yes browsable = yesThe full configuration file will now look like the following:
# See smb.conf.example for a more detailed config file or # read the smb.conf manpage. # Run 'testparm' to verify the config is correct after # you modified it. [global] workgroup = WORKGROUP security = user netbios name = centos7 printcap name = cups idmap config * : backend = tdb cups options = raw map to guest = bad user [Password Protected] comment = needs username and password to access path = /samba/password_protected_directory valid users = @sambausergroup guest ok = no writable = yes browsable = yes [Anonymous] comment = anonymous file share path = /samba/anonymous_shared_directory browseable = yes writable = yes guest ok = yes guest only = yes read only = no force user = nobody [homes] comment = Home Directories valid users = %S, %D%w%S browseable = No read only = No inherit acls = Yes [printers] comment = All Printers path = /var/tmp printable = Yes create mask = 0600 browseable = No [print$] comment = Printer Drivers path = /var/lib/samba/drivers write list = @printadmin root force group = @printadmin create mask = 0664 directory mask = 0775Now you can test your configuration with testparm command:
[root@host samba]# testparm rlimit_max: increasing rlimit_max (1024) to minimum Windows limit (16384) Registered MSG_REQ_POOL_USAGE Registered MSG_REQ_DMALLOC_MARK and LOG_CHANGED Load smb config files from /etc/samba/smb.conf rlimit_max: increasing rlimit_max (1024) to minimum Windows limit (16384) Processing section "[Password Protected]" Processing section "[Anonymous]" Processing section "[homes]" Processing section "[printers]" Processing section "[print$]" Loaded services file OK. Server role: ROLE_STANDALONEPress enter to see a dump of your service definitions.
For testing, connect from your Windows computer and click on Start –> Run and input your server IP \\serverIP –>Ok.
Now, you’ll have Anonymous directory and Password protected directory:
Double-click on Password Protected directory will open up the following prompt where we’ll need to input our newtestuser credentials:
To make sure everything is working as it’s supposed to create a new directory in your Password Protected one:
This one will be named test_directory for this purpose.
Finally, confirm the existence of your directory from your Linux machine.
[root@host /]# ls -l /samba/password_protected_directory/ total 0 drwxr-xr-x. 2 newtestuser sambausergroup 6 Apr 3 21:12 test_directoryDear user, we hope you would enjoy this tutorial, you can ask questions about this training in the comments section, or to solve other problems in the field of Eldernode training, refer to the Ask page section and raise your problem in it as soon as possible. Make time for other users and experts to answer your questions.
How to Install Samba on Linux/Windows.
Goodluck.