
Все способы:
- Способ 1: Скачивание через Microsoft Store
- Способ 2: Установка в «Терминале Windows»
- Способ 3: Ручная загрузка исполняемого файла
- Вопросы и ответы: 0
Способ 1: Скачивание через Microsoft Store
Метод установки обновления для PowerShell в Windows 11 через Microsoft Store — самый простой, поскольку не требует от пользователя выполнения многих действий и довольно понятен. Вам будет либо предложено установить новую сборку терминала, либо обновить ее, если приложение уже используется в вашей операционной системе (разные сборки PowerShell могут загружаться как отдельные приложения, что зависит от их версий).
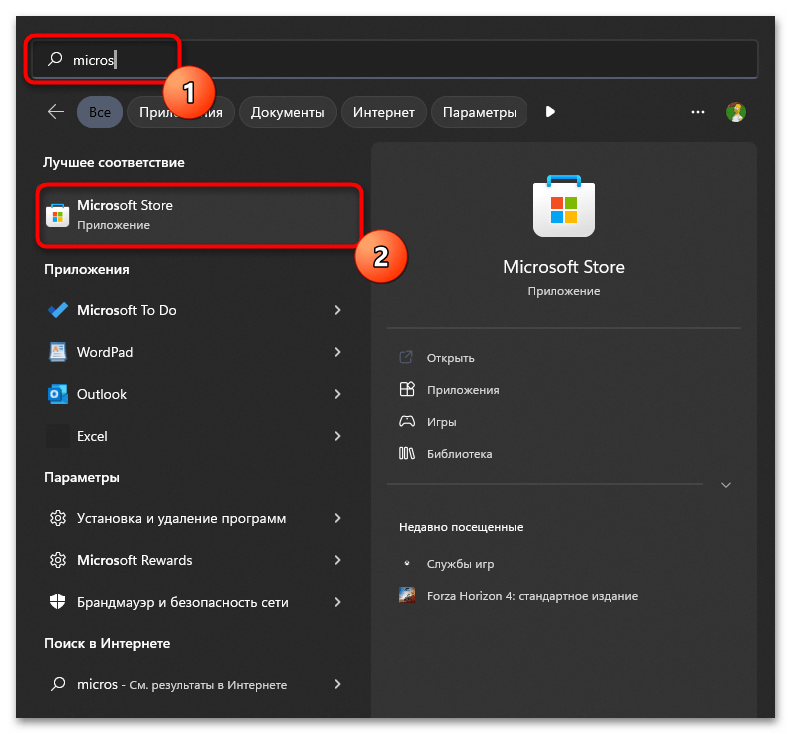
- Откройте меню «Пуск», начните в поиске вводить «Microsoft Store», дожидаясь отображения лучшего соответствия. Затем запустите найденное приложение магазина.
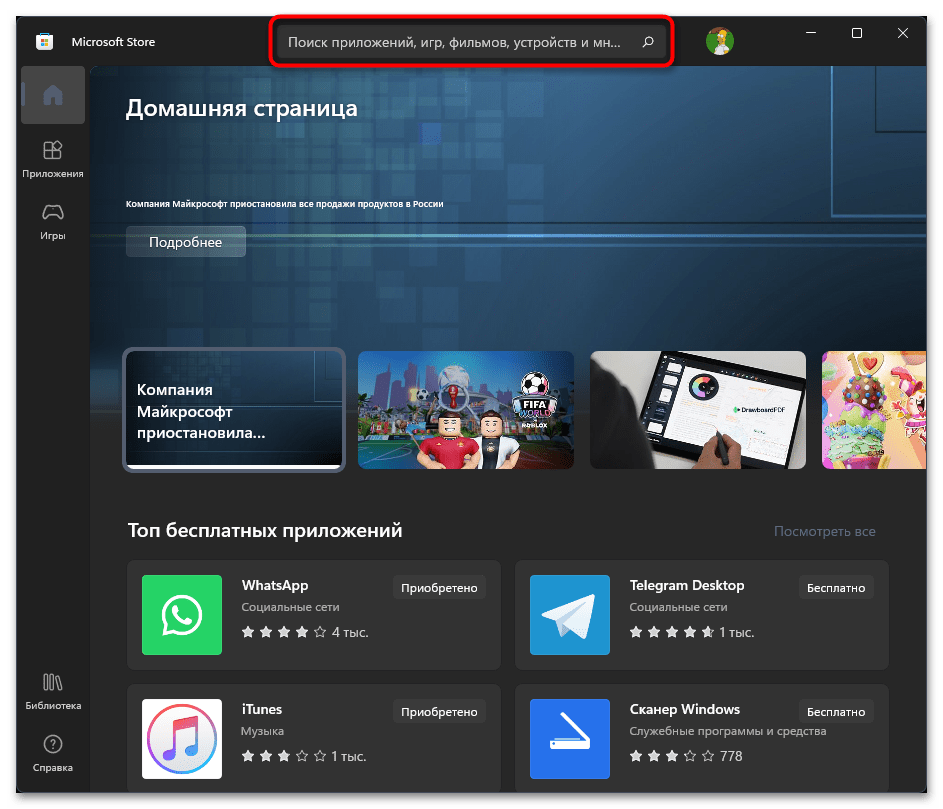
- Активируйте строку поиска и введите в ней «PowerShell», чтобы отыскать интересующий вас вариант консоли.
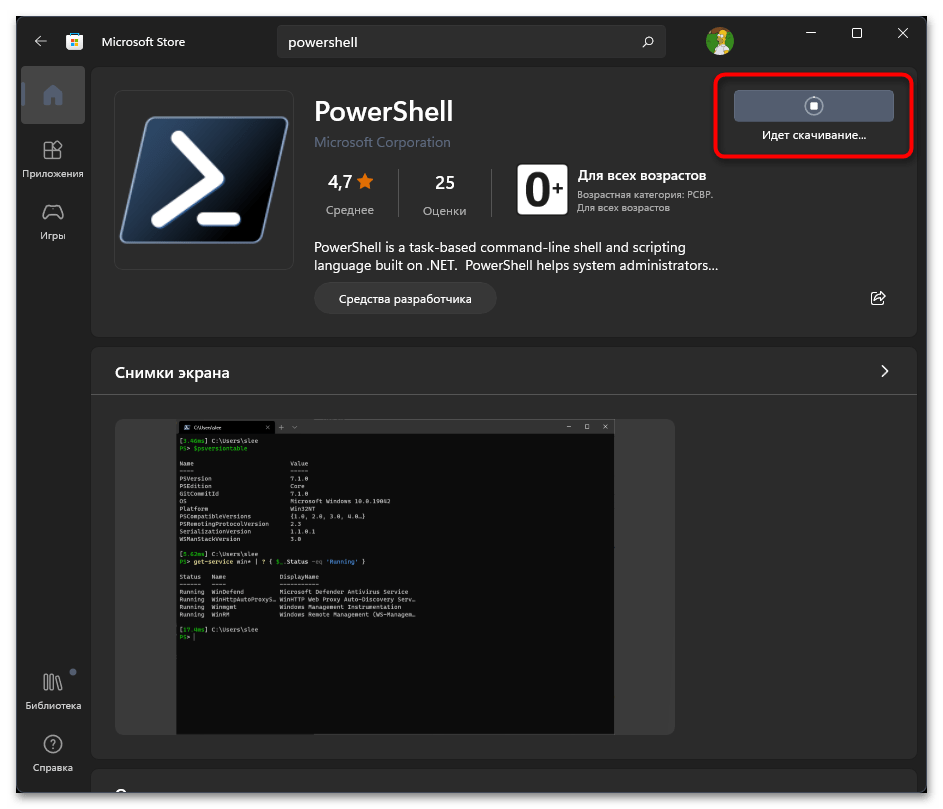
- Появится несколько разных решений, но первым результатом всегда будет официальное приложение, являющееся средством для разработчиков. Нажмите кнопку «Получить» или «Обновить», чтобы начать инсталляцию новых файлов.
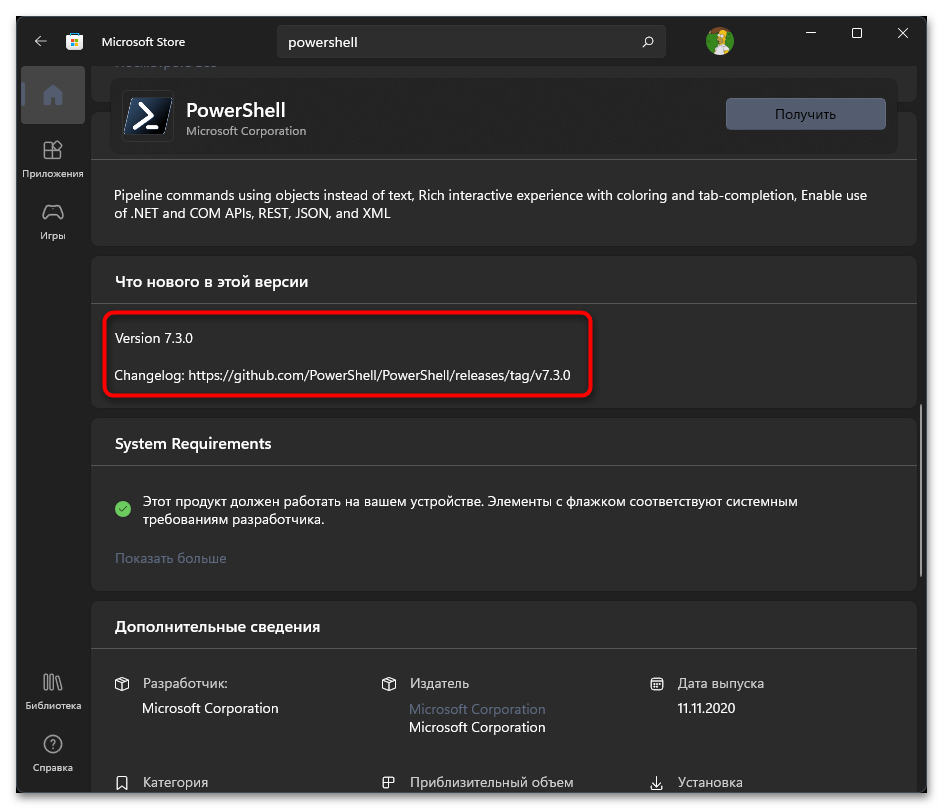
- Если вы перейдете на страницу данного приложения, внизу увидите информацию о текущей версии и ссылку на страницу GitHub, где обычно пишут об изменениях в последней сборке.
- Ожидайте окончания загрузки и установки, следя за прогрессом на той же странице приложения.
- Как только появилась кнопка «Открыть», можете использовать ее для запуска консоли.
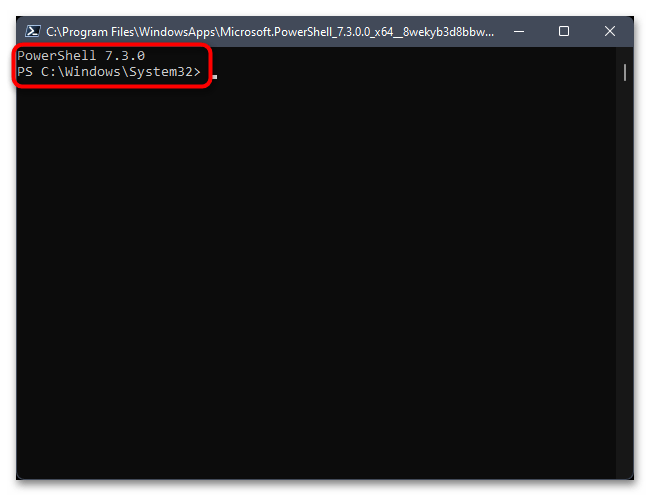
- При открытии вы всегда будете уведомлены о том, какую версию PowerShell используете, а затем сможете активировать необходимые команды.
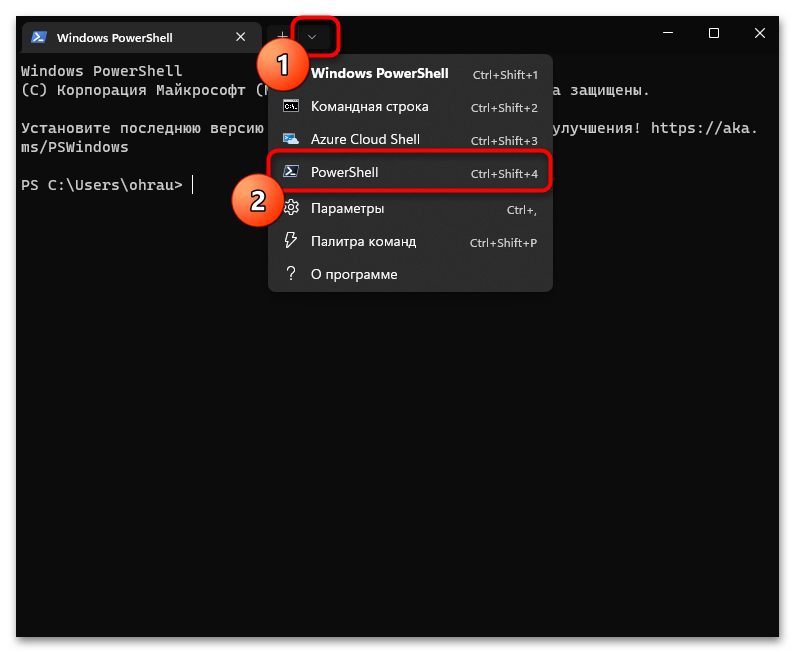
- Отдельно отметим быстрый метод переключения к обновленному приложению через «Терминал Windows». Сначала запустите это приложение, выбрав его из контекстного меню «Пуска».
- В нем разверните список с выбором консолей и выберите вариант «PowerShell».
- Как видите, то же самое представление консоли открывается в новой вкладке, и в нем будут доступны все те функции и команды, о которых как раз и заявляют разработчики в описании обновлений.


Способ 2: Установка в «Терминале Windows»
Следующий метод подразумевает использование команд для обращения к репозиторию, где и хранятся новые версии PowerShell. Необходимые действия выполняются через стандартный «Терминал Windows», а вам понадобится только доступ к интернету, чтобы загрузка и установка новых пакетов прошла успешно. Обратите внимание на следующую инструкцию, в которой детально рассказывается о выполнении данного способа обновления консоли.
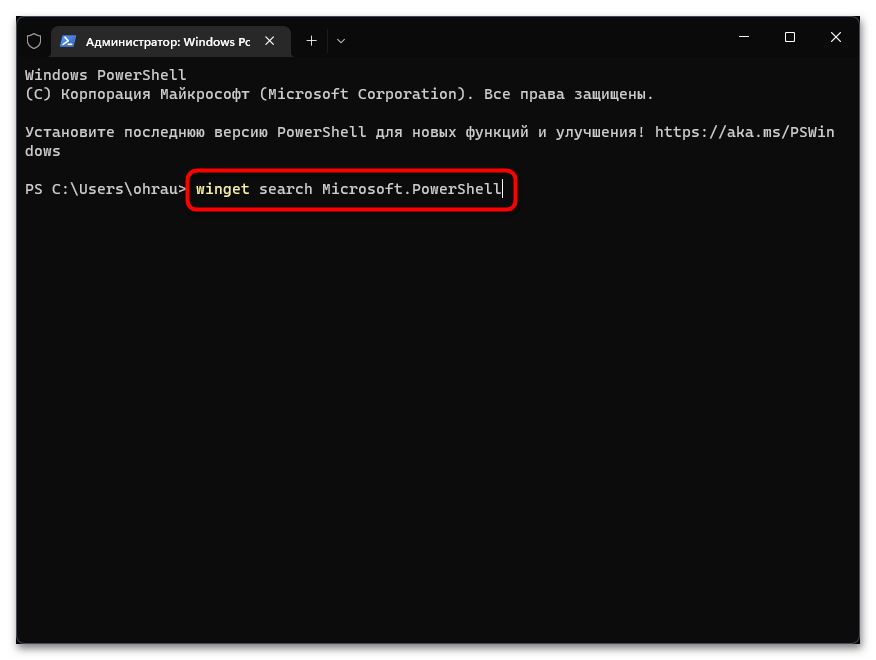
- Щелкните правой кнопкой мыши по кнопке «Пуск» и лучше запустите «Терминал Windows» от имени администратора, чтобы не возникло ошибок доступа при распаковке новых файлов.
- Введите и активируйте команду
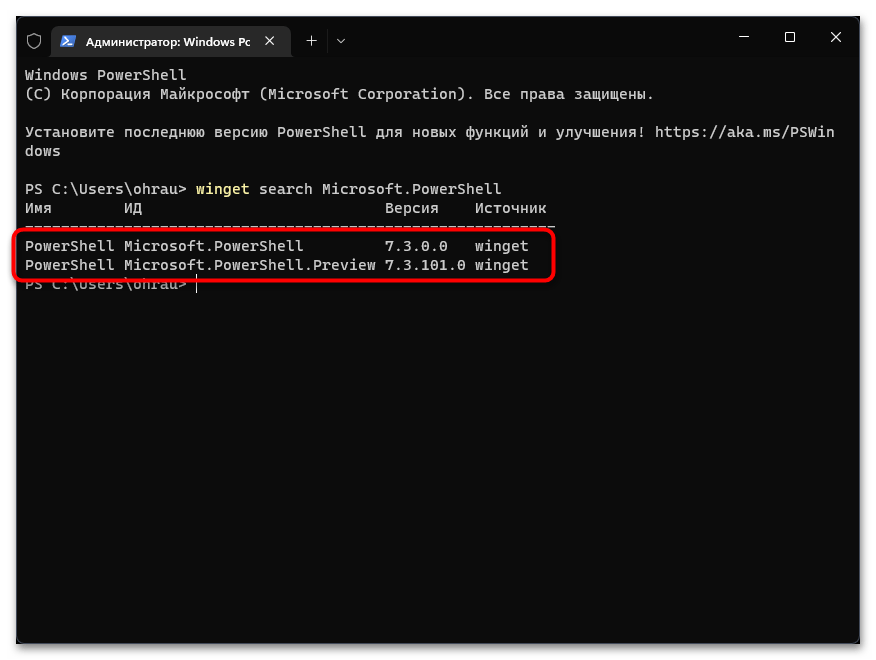
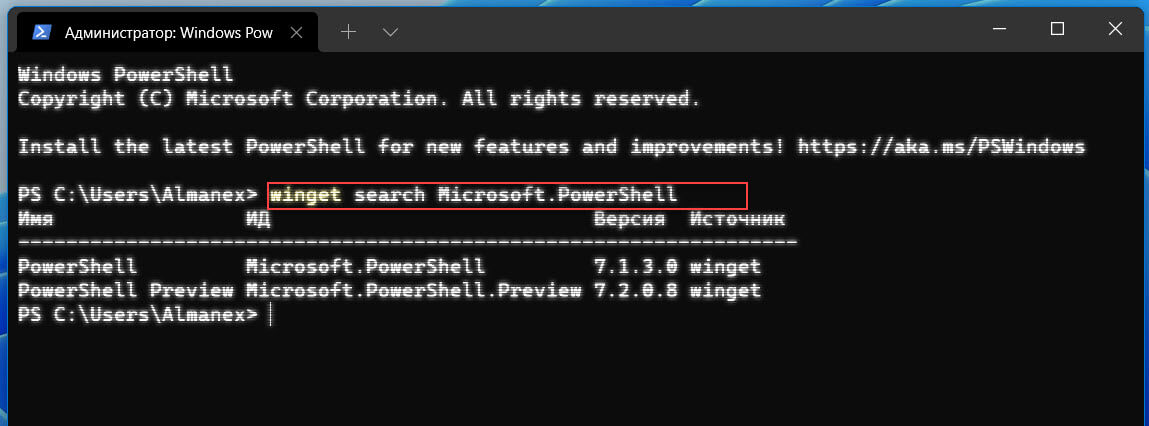
winget search Microsoft.PowerShell, чтобы просмотреть доступные последние версии PowerShell. - Вы увидите информацию о последней стабильной версии и тестовой. Скорее всего, вам нужна именно та, которая уже находится в релизе, чтобы все функции работали корректно.
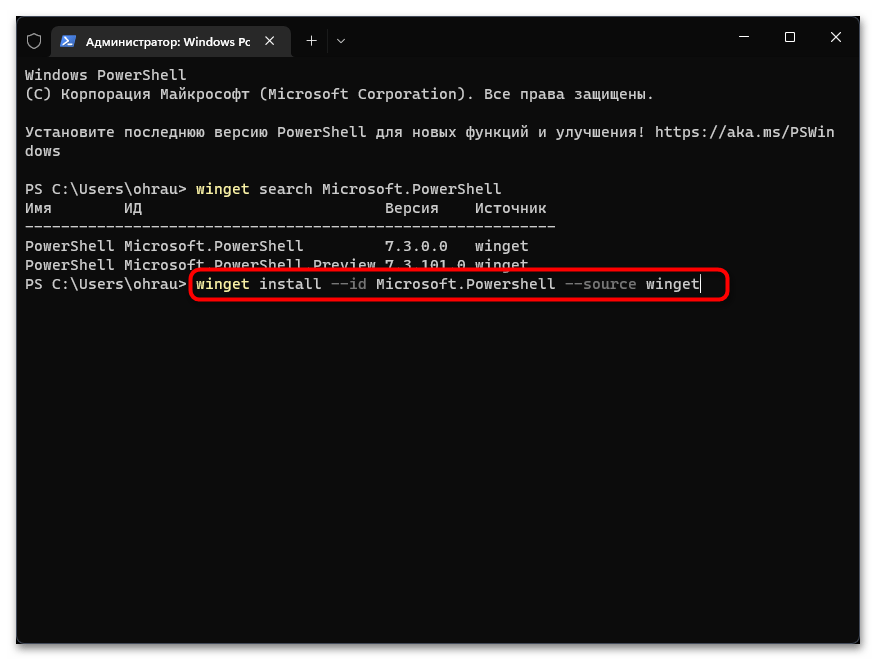
- Для установки такой версии введите
winget install --id Microsoft.Powershell --source wingetи нажмите Enter, чтобы применить команду. Если вас интересует тестовая сборка, вместо указанной используйте командуwinget install --id Microsoft.Powershell.Preview --source winget. - Начнется процесс скачивания и установки пакетов из GitHub, поэтому просто следите за прогрессом и ожидайте появления следующих уведомлений.
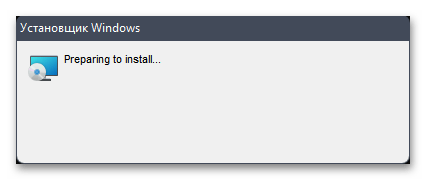
- Вместе с этим на экране появится и стандартное окно установщика, в котором тоже ничего не нужно жать, оно закроется автоматически после инсталляции.
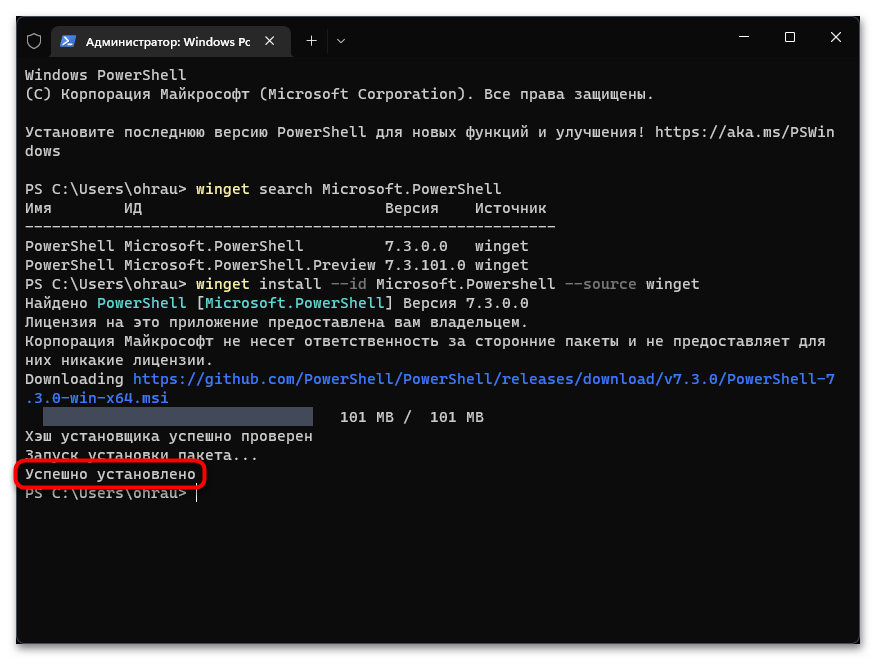
- Вы будете уведомлены о том, что пакеты успешно установлены, — переходите к проверке консоли.
- Запустите ее так, как это было показано ранее, или отыщите исполняемый файл через меню «Пуск».


Способ 3: Ручная загрузка исполняемого файла
Последний вариант обновления PowerShell подойдет тем пользователям, кто желает сначала скачать установочный файл с приложением, а затем передать его на другой компьютер, на котором нет интернета, чтобы выполнить предыдущие методы, подразумевающие скачивание файлов из сети. В этом случае понадобится открыть официальный источник от Microsoft, чтобы загрузить последнюю версию консоли, а затем использовать установщик в своих целях.
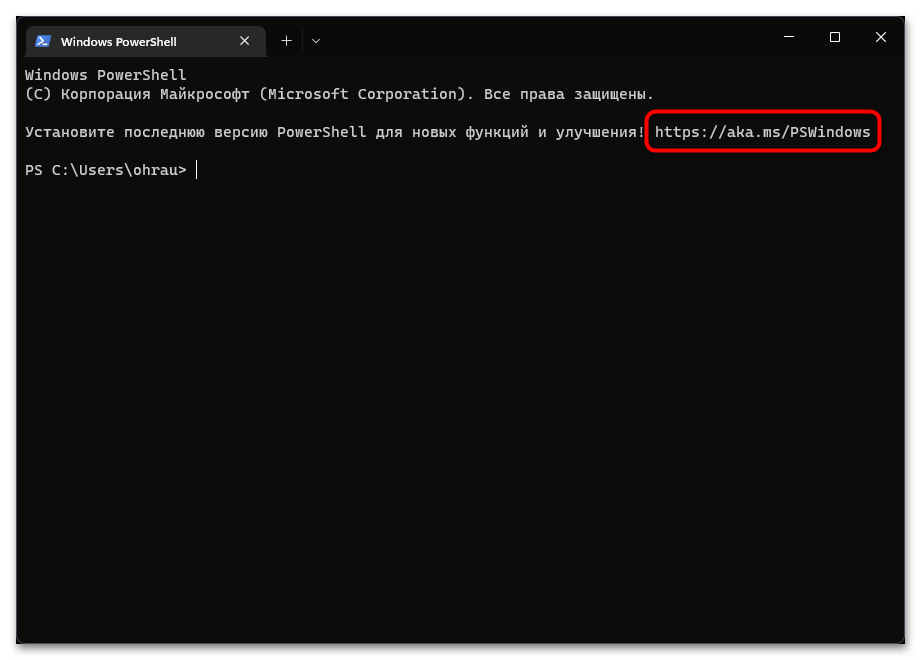
- Проще всего перейти на сайт через «Терминал Windows», о запуске которого уже говорилось ранее. Вы найдете ссылку, которую можно скопировать и вставить в адресную строку любого браузера.
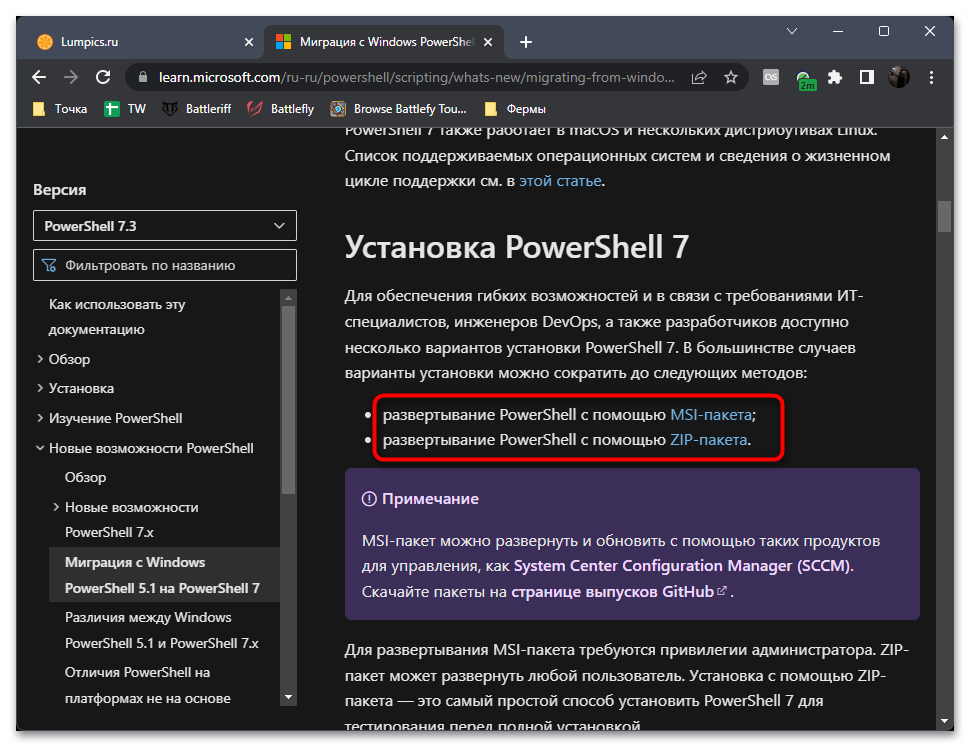
- После открытия страницы перейдите к разделу статьи «Установка PowerShell 7» и выберите оптимальный для себя метод развертывания.
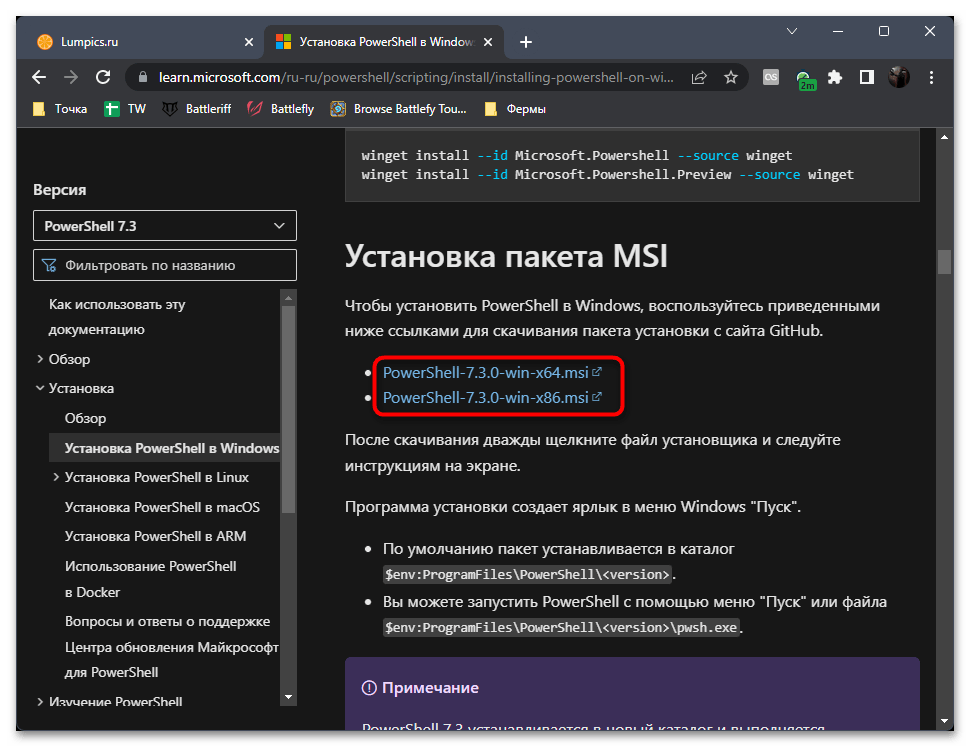
- Мы остановились на исполняемом файле, а не архиве, поскольку этот вариант более распространенный. Вам будет предложено загрузить MSI-объект x86 или x64. Если у вас нет никаких специфических требований, вам подойдет обычная версия x64.
- Вы можете запустить исполняемый файл на этом компьютере или передать его на другой для установки.
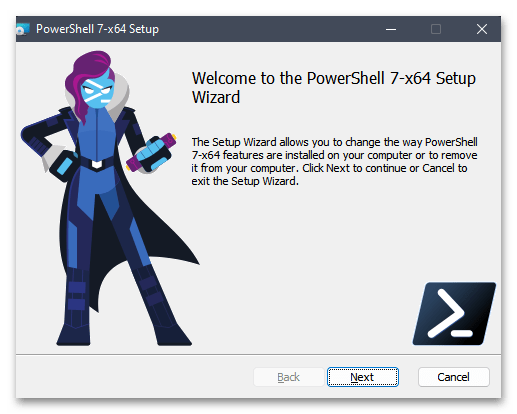
- В инсталляторе просто следуйте инструкциям от разработчиков и на свое усмотрение измените путь для расположения файлов.
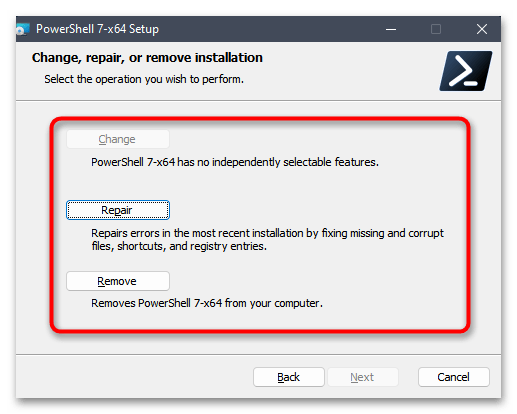
- Если на экране появились кнопки только для восстановления или удаления PowerShell, значит, данная версия уже используется на вашем компьютере. Можете попробовать нажать «Repair», чтобы восстановить ее, если некоторые функции ранее не работали.

Наша группа в TelegramПолезные советы и помощь
In this tutorial, I will explain how to update PowerShell on Windows 11. You need to update PowerShell to get the latest features, security updates, and performance improvements.
There are several methods for updating PowerShell on Windows. Let me show you.
Before you start the update, ensure you have administrative privileges, as you will need to run the commands as an administrator. Additionally, you will need an internet connection.
Update PowerShell on Windows 11 using Winget
You can update PowerShell in Windows 11 using the Windows package manager (Winget).
Follow the steps below:
Step 1: Check Your Current PowerShell Version
First, let’s check which version of PowerShell is currently installed on your system. Open PowerShell and run the following command:
$PSVersionTable.PSVersionThis command will display the version number. If it’s outdated, proceed with the update.
You can see the current PowerShell version as shown in the screenshot below:

Step 2: Install Windows Package Manager (Winget)
Windows 11 comes with the Windows Package Manager (Winget) pre-installed. If you don’t have it, you can download Winget from the Microsoft Store.
Step 3: Update PowerShell Using Winget
One of the easiest ways to update PowerShell is by using Winget. Open a PowerShell window with administrative privileges and run the following command:
winget install --id Microsoft.Powershell --source wingetThis command will download and install the latest version of PowerShell. Once the installation is complete, restart your computer to apply the changes.
Step 4: Verify the Installation
After restarting, open PowerShell and verify the installation by running the version check command again:
$PSVersionTable.PSVersionYou should see the updated version number.
Now, let me show you some other methods to update PowerShell on Windows.
Check out Get Default Browser Using PowerShell
Update PowerShell in Windows Using the MSI Package
You can also update PowerShell in Windows 11 using an MSI package. Follow the steps below:
- Download the MSI Package: Visit the PowerShell GitHub releases page and download the latest MSI package for Windows.
- Run the Installer: Double-click the downloaded MSI file and follow the on-screen instructions to complete the installation.
- Verify the Installation: Open PowerShell and run the version check command.
Check out List Windows Features Using PowerShell
Update PowerShell in Windows 11 Using the ZIP Package
This is another method to update PowerShell in Windows 11. Follow the below steps to update PowerShell using the Zip package.
- Download the ZIP Package: Go to the PowerShell GitHub releases page and download the ZIP package for Windows.
- Extract the ZIP File: Extract the contents of the ZIP file to a directory of your choice.
- Run PowerShell: Navigate to the extracted directory and run
pwsh.exe.
Update PowerShell Using the Command Line
If you prefer using the command line, you can update PowerShell by running a script. Open PowerShell with administrative privileges and run the following command:
iex "& { $(irm https://aka.ms/install-powershell.ps1) } -UseMSI"This command downloads and installs the latest version of PowerShell using the MSI package.
Check out Check for Windows Updates Using PowerShell
Common Issues and Troubleshooting
From my experience, let me show you some common issues you might face while updating PowerShell and how to fix it.
Here are some common problems and solutions:
Issue 1: Permission Denied
If you receive a “permission denied” error, ensure you’re running PowerShell as an administrator. Right-click the PowerShell icon and select “Run as administrator.”
Issue 2: Installation Fails
If the installation fails, check your internet connection and try again. You can also download the installer manually from the PowerShell GitHub releases page.
Issue 3: Version Not Updating
If the version number doesn’t update after installation, restart your computer and check again. Sometimes, a reboot is necessary to apply the changes.
Conclusion
For most users, the recommended method for updating PowerShell on Windows 11 is to use the winget command-line tool, which I also recommend. But you can also use the other methods I have explained above to update PowerShell in Windows. The updated version of PowerShell ensures access to the latest features, performance enhancements, and critical security updates.
You may also find the following tutorials useful:
- Install Windows Updates Using PowerShell
- Install .NET Framework 3.5 Using PowerShell
- Restart a Windows Service Using PowerShell
Bijay Kumar is an esteemed author and the mind behind PowerShellFAQs.com, where he shares his extensive knowledge and expertise in PowerShell, with a particular focus on SharePoint projects. Recognized for his contributions to the tech community, Bijay has been honored with the prestigious Microsoft MVP award. With over 15 years of experience in the software industry, he has a rich professional background, having worked with industry giants such as HP and TCS. His insights and guidance have made him a respected figure in the world of software development and administration. Read more.
To install the latest version of PowerShell on Windows 11, you can follow these steps:
Step 1: Open a web browser and navigate to the official PowerShell GitHub page.
Step 2: On the GitHub page, find the “Releases” section, which provides access to the latest version of PowerShell.
Step 3: Look for the latest stable release and click on it to access the release page.
Step 4: On the release page, you will find the downloadable package for your appropriate operating system. Make sure to select the package compatible with Windows 11.
Step 5: Once the download is complete, locate the downloaded file and double-click to initiate the installation process.
Step 6: Follow the on-screen instructions provided by the installer to complete the installation.
Step 7: After installation, you should be able to access the latest version of PowerShell either through the Start menu or by running “powershell” in the Run dialog.
It’s worth noting that Windows 11 may come pre-installed with an older version of PowerShell. However, updating to the latest version is recommended to take advantage of new features and improvements. Keeping PowerShell up to date ensures compatibility with the latest scripts and tools.
Remember to periodically check for updates to ensure that you’re always running the latest version of PowerShell.
Video Tutorial:What version of PowerShell is on Windows 11?
Does PowerShell work on Windows 11?
Yes, PowerShell works on Windows 11. PowerShell is a powerful command-line shell and scripting language developed by Microsoft. It is designed to manage and automate the administration of Windows operating systems. Windows 11 maintains backward compatibility with previous versions of PowerShell, including the latest version, PowerShell 7. PowerShell 7, and potentially newer versions, can be installed on Windows 11 to perform various tasks, such as system administration, scripting, and automation. It provides extensive capabilities and a rich set of commands and modules to manage Windows environments effectively.
Why can’t i run PowerShell on Windows 11?
Windows 11 is the latest operating system released by Microsoft, and it brings several changes and new features compared to its predecessors. One notable change is the introduction of Windows 11’s new default shell, called “Windows Terminal,” which is designed to provide a more modern and streamlined command-line experience.
As a result, PowerShell is not enabled by default in Windows 11 in favor of Windows Terminal. This decision reflects Microsoft’s focus on expanding and improving the usage of Windows Terminal as the preferred command-line interface. It offers a more unified and configurable experience, supporting various shells like PowerShell, Command Prompt, and WSL (Windows Subsystem for Linux).
However, while PowerShell might not be the default option, it can still be used on Windows 11. You can easily install and enable PowerShell through the Microsoft Store or the official PowerShell website. Once installed, PowerShell can be accessed via the Start menu or by running the ‘powershell’ command from the Windows Terminal.
Overall, though PowerShell is not the primary command-line interface in Windows 11, it is still available for those who prefer its comprehensive scripting capabilities and advanced features.
How do I fix PowerShell in Windows 11?
To fix PowerShell issues in Windows 11, you can try the following troubleshooting steps:
1. Update Windows: Ensure that you have the latest updates installed on your Windows 11 system. Microsoft often releases patches and fixes that can resolve known issues, including those related to PowerShell.
2. Run Windows Troubleshooter: Use the built-in Windows Troubleshooter to identify and resolve any problems with PowerShell. To access it, go to Settings > System > Troubleshoot > Additional Troubleshooters and run the “Windows PowerShell” troubleshooter.
3. Reset PowerShell: If PowerShell is misbehaving or giving errors, you can try resetting it to its default settings. Open PowerShell as an administrator and run the command: `Set-ExecutionPolicy Restricted -Scope CurrentUser`. Then close PowerShell and reopen it to see if the issue persists.
4. Reinstall PowerShell: If the above steps don’t work, you can reinstall PowerShell on your Windows 11 system. Open PowerShell as an administrator and run the command: `Get-AppxPackage -name Microsoft.PowerShell -AllUsers | Remove-AppxPackage`. After the removal is complete, restart your computer and reinstall PowerShell from the Microsoft Store or by running the command: `Get-AppxPackage -AllUsers -PackageName Microsoft.PowerShell | Foreach {Add-AppxPackage -DisableDevelopmentMode -Register “$($_.InstallLocation)AppXManifest.xml”}`.
5. Check for incompatible modules: If you have custom modules or scripts installed, ensure that they are compatible with the version of PowerShell you’re using. Incompatible modules can cause issues. Consider updating or removing any problematic modules to see if it resolves the problem.
6. Seek community support: If you’ve exhausted the above troubleshooting options, it can be helpful to seek assistance from the broader community. Online forums and communities dedicated to PowerShell can provide guidance based on specific error messages or symptoms you are experiencing.
Remember to exercise caution while troubleshooting PowerShell to avoid any unintended consequences. It’s also recommended to back up your important data prior to making any changes to your system.
What is the difference between PowerShell and command prompt in Windows 11?
PowerShell and Command Prompt are both command-line tools available in Windows 11, but they differ in functionality and capabilities.
Command Prompt, also known as CMD or cmd.exe, is a command-line interpreter that allows users to execute commands and perform tasks on their Windows system. It is primarily based on the MS-DOS operating system and supports a limited set of commands and scripting capabilities. Command Prompt is well-suited for basic command execution and system management tasks.
On the other hand, PowerShell is a more advanced command-line shell and scripting language developed by Microsoft. It is built on the .NET framework and provides a powerful and extensible environment for automation, configuration management, and task scripting. PowerShell offers a wide range of commands, known as cmdlets, which can be used to perform complex operations, interact with system components, and manage various aspects of the operating system.
The key difference between PowerShell and Command Prompt lies in their underlying technology and capabilities. While Command Prompt is based on the older MS-DOS, PowerShell is built on top of the modern .NET framework. This affords PowerShell access to a vast range of libraries and APIs, allowing it to interact with various system components and perform advanced tasks.
PowerShell also supports scripting functionality, allowing users to create and execute scripts to automate repetitive tasks or perform complex operations. The scripting capabilities of PowerShell make it a favorite tool for system administrators and power users.
In summary, Command Prompt is a simple command-line interpreter with limited functionality, while PowerShell is a more powerful and versatile command-line shell and scripting language. The choice between the two depends on the complexity of the tasks at hand and the level of automation and scripting required.
How do I force a PowerShell update?
To force a PowerShell update, you can follow these steps:
1. Check your current version: Open PowerShell and type the following command:
“`powershell
$PSVersionTable.PSVersion
“`
2. Visit Microsoft’s website: Go to the Microsoft Download Center and search for the latest version of PowerShell available for your operating system.
3. Download the latest version: Download the appropriate package for your system architecture (x86 or x64) and operating system version. Make sure you choose the version that matches your system requirements.
4. Install the update: Once the download is complete, run the installer and follow the on-screen instructions to install the latest version of PowerShell. You may need administrative privileges to perform this installation.
5. Verify the installation: After the installation, open PowerShell again and run the same command as in step 1 to confirm that your PowerShell version has been updated.
By following these steps, you will be able to force an update of PowerShell to the latest available version on your system.
Does Windows Update update PowerShell?
Yes, Windows Update does update PowerShell. PowerShell is a scripting language and command-line shell developed by Microsoft, primarily used for automating administrative tasks and managing system configurations in Windows. As part of the Windows operating system, PowerShell receives updates through Windows Update, just like other system components and software packages. These updates can include bug fixes, security patches, performance improvements, and sometimes even feature enhancements for PowerShell. It is recommended to keep Windows and its components up to date to ensure a secure and reliable computing experience.
{“@context”:”https://schema.org”,”@type”:”FAQPage”,”mainEntity”:[{“@type”:”Question”,”name”:”Does PowerShell work on Windows 11?”,”acceptedAnswer”:{“@type”:”Answer”,”text”:”Yes, PowerShell works on Windows 11. PowerShell is a powerful command-line shell and scripting language developed by Microsoft. It is designed to manage and automate the administration of Windows operating systems. Windows 11 maintains backward compatibility with previous versions of PowerShell, including the latest version, PowerShell 7. PowerShell 7, and potentially newer versions, can be installed on Windows 11 to perform various tasks, such as system administration, scripting, and automation. It provides extensive capabilities and a rich set of commands and modules to manage Windows environments effectively.”}},{“@type”:”Question”,”name”:”Why can’t i run PowerShell on Windows 11?”,”acceptedAnswer”:{“@type”:”Answer”,”text”:”Windows 11 is the latest operating system released by Microsoft, and it brings several changes and new features compared to its predecessors. One notable change is the introduction of Windows 11’s new default shell, called “Windows Terminal,” which is designed to provide a more modern and streamlined command-line experience.nnAs a result, PowerShell is not enabled by default in Windows 11 in favor of Windows Terminal. This decision reflects Microsoft’s focus on expanding and improving the usage of Windows Terminal as the preferred command-line interface. It offers a more unified and configurable experience, supporting various shells like PowerShell, Command Prompt, and WSL (Windows Subsystem for Linux).nnHowever, while PowerShell might not be the default option, it can still be used on Windows 11. You can easily install and enable PowerShell through the Microsoft Store or the official PowerShell website. Once installed, PowerShell can be accessed via the Start menu or by running the ‘powershell’ command from the Windows Terminal.nnOverall, though PowerShell is not the primary command-line interface in Windows 11, it is still available for those who prefer its comprehensive scripting capabilities and advanced features.”}},{“@type”:”Question”,”name”:”How do I fix PowerShell in Windows 11?”,”acceptedAnswer”:{“@type”:”Answer”,”text”:”To fix PowerShell issues in Windows 11, you can try the following troubleshooting steps:nn1. Update Windows: Ensure that you have the latest updates installed on your Windows 11 system. Microsoft often releases patches and fixes that can resolve known issues, including those related to PowerShell.nn2. Run Windows Troubleshooter: Use the built-in Windows Troubleshooter to identify and resolve any problems with PowerShell. To access it, go to Settings > System > Troubleshoot > Additional Troubleshooters and run the “Windows PowerShell” troubleshooter.nn3. Reset PowerShell: If PowerShell is misbehaving or giving errors, you can try resetting it to its default settings. Open PowerShell as an administrator and run the command: `Set-ExecutionPolicy Restricted -Scope CurrentUser`. Then close PowerShell and reopen it to see if the issue persists.nn4. Reinstall PowerShell: If the above steps don’t work, you can reinstall PowerShell on your Windows 11 system. Open PowerShell as an administrator and run the command: `Get-AppxPackage -name Microsoft.PowerShell -AllUsers | Remove-AppxPackage`. After the removal is complete, restart your computer and reinstall PowerShell from the Microsoft Store or by running the command: `Get-AppxPackage -AllUsers -PackageName Microsoft.PowerShell | Foreach {Add-AppxPackage -DisableDevelopmentMode -Register “$($_.InstallLocation)AppXManifest.xml”}`.nn5. Check for incompatible modules: If you have custom modules or scripts installed, ensure that they are compatible with the version of PowerShell you’re using. Incompatible modules can cause issues. Consider updating or removing any problematic modules to see if it resolves the problem.nn6. Seek community support: If you’ve exhausted the above troubleshooting options, it can be helpful to seek assistance from the broader community. Online forums and communities dedicated to PowerShell can provide guidance based on specific error messages or symptoms you are experiencing.nnRemember to exercise caution while troubleshooting PowerShell to avoid any unintended consequences. It’s also recommended to back up your important data prior to making any changes to your system.”}},{“@type”:”Question”,”name”:”What is the difference between PowerShell and command prompt in Windows 11?”,”acceptedAnswer”:{“@type”:”Answer”,”text”:”PowerShell and Command Prompt are both command-line tools available in Windows 11, but they differ in functionality and capabilities.nnCommand Prompt, also known as CMD or cmd.exe, is a command-line interpreter that allows users to execute commands and perform tasks on their Windows system. It is primarily based on the MS-DOS operating system and supports a limited set of commands and scripting capabilities. Command Prompt is well-suited for basic command execution and system management tasks.nnOn the other hand, PowerShell is a more advanced command-line shell and scripting language developed by Microsoft. It is built on the .NET framework and provides a powerful and extensible environment for automation, configuration management, and task scripting. PowerShell offers a wide range of commands, known as cmdlets, which can be used to perform complex operations, interact with system components, and manage various aspects of the operating system.nnThe key difference between PowerShell and Command Prompt lies in their underlying technology and capabilities. While Command Prompt is based on the older MS-DOS, PowerShell is built on top of the modern .NET framework. This affords PowerShell access to a vast range of libraries and APIs, allowing it to interact with various system components and perform advanced tasks.nnPowerShell also supports scripting functionality, allowing users to create and execute scripts to automate repetitive tasks or perform complex operations. The scripting capabilities of PowerShell make it a favorite tool for system administrators and power users.nnIn summary, Command Prompt is a simple command-line interpreter with limited functionality, while PowerShell is a more powerful and versatile command-line shell and scripting language. The choice between the two depends on the complexity of the tasks at hand and the level of automation and scripting required.”}},{“@type”:”Question”,”name”:”How do I force a PowerShell update?”,”acceptedAnswer”:{“@type”:”Answer”,”text”:”To force a PowerShell update, you can follow these steps:nn1. Check your current version: Open PowerShell and type the following command:n “`powershelln $PSVersionTable.PSVersionn “`nn2. Visit Microsoft’s website: Go to the Microsoft Download Center and search for the latest version of PowerShell available for your operating system.nn3. Download the latest version: Download the appropriate package for your system architecture (x86 or x64) and operating system version. Make sure you choose the version that matches your system requirements.nn4. Install the update: Once the download is complete, run the installer and follow the on-screen instructions to install the latest version of PowerShell. You may need administrative privileges to perform this installation.nn5. Verify the installation: After the installation, open PowerShell again and run the same command as in step 1 to confirm that your PowerShell version has been updated.nnBy following these steps, you will be able to force an update of PowerShell to the latest available version on your system.”}},{“@type”:”Question”,”name”:”Does Windows Update update PowerShell?”,”acceptedAnswer”:{“@type”:”Answer”,”text”:”Yes, Windows Update does update PowerShell. PowerShell is a scripting language and command-line shell developed by Microsoft, primarily used for automating administrative tasks and managing system configurations in Windows. As part of the Windows operating system, PowerShell receives updates through Windows Update, just like other system components and software packages. These updates can include bug fixes, security patches, performance improvements, and sometimes even feature enhancements for PowerShell. It is recommended to keep Windows and its components up to date to ensure a secure and reliable computing experience.”}}]}
Looking to Get Latest PowerShell on Windows PC. Here is the Simple Guide to Update PowerShell in Windows 11.
If you have been a regular Windows user, I’m sure you know of the popular command line tool PowerShell. Interestingly, you can also use PowerShell on macOS and Linux apart from Windows OS. Along with automating the system, you can use PowerShell to develop, test, and deploy solutions on the system.
It is also widely used with Azure, AWS, and SQL technologies. Like any other Windows app, you can update PowerShell on your PC. Let us look at the various methods to upgrade the Windows PowerShell command line tool.
Various ways to update PowerShell include using the Windows Packages Manager, installing from GitHub, or downloading the application from the Microsoft Store.
1. Update Windows PowerShell from Microsoft Store
The command-line tool from Windows is available on the official application repository of Microsoft. Follow the steps below to update it from the Microsoft Store.
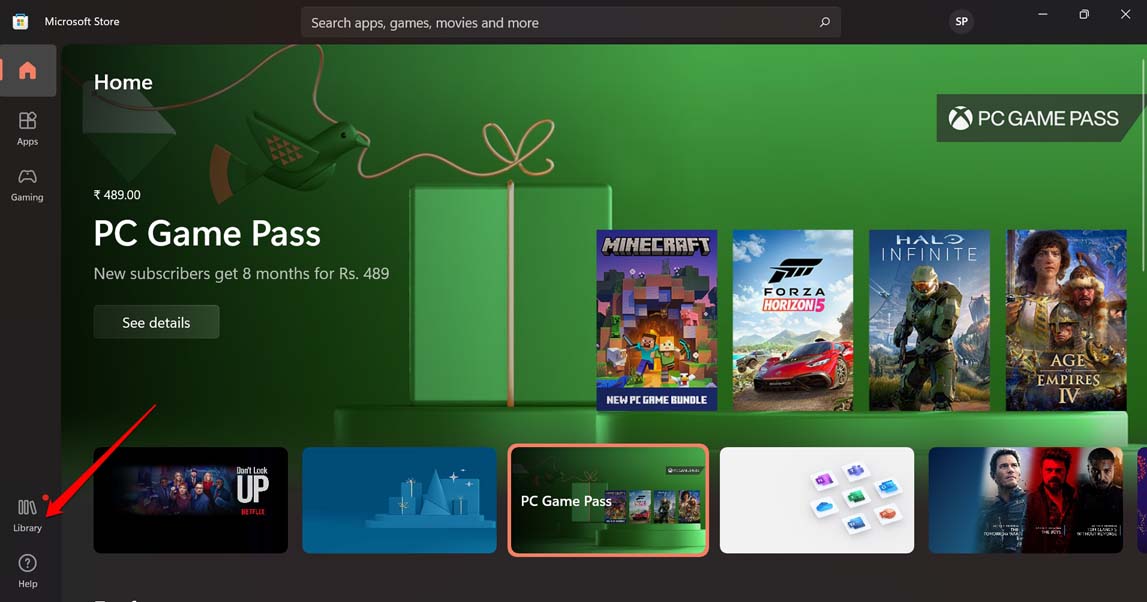
- Launch the Microsoft Store app on your computer.
- On the left sidebar, click on Library.

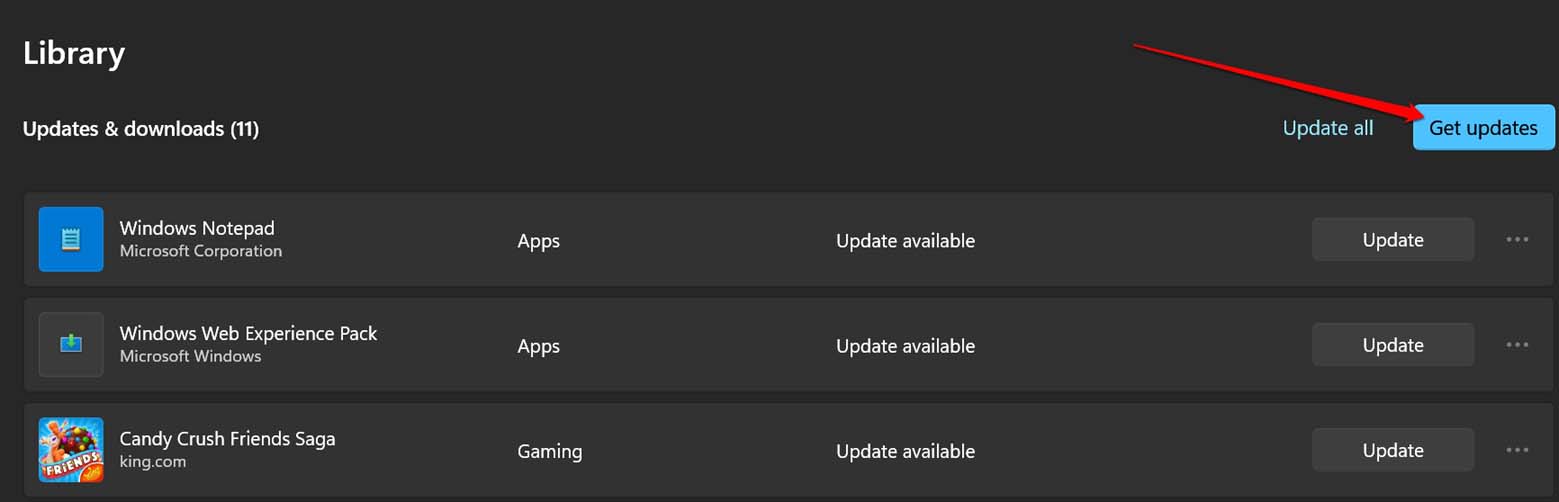
- Click the button Get Updates on the right-hand side of the screen.

- If PowerShell has a new update available, it will start installing provided your computer is connected to the WiFi.
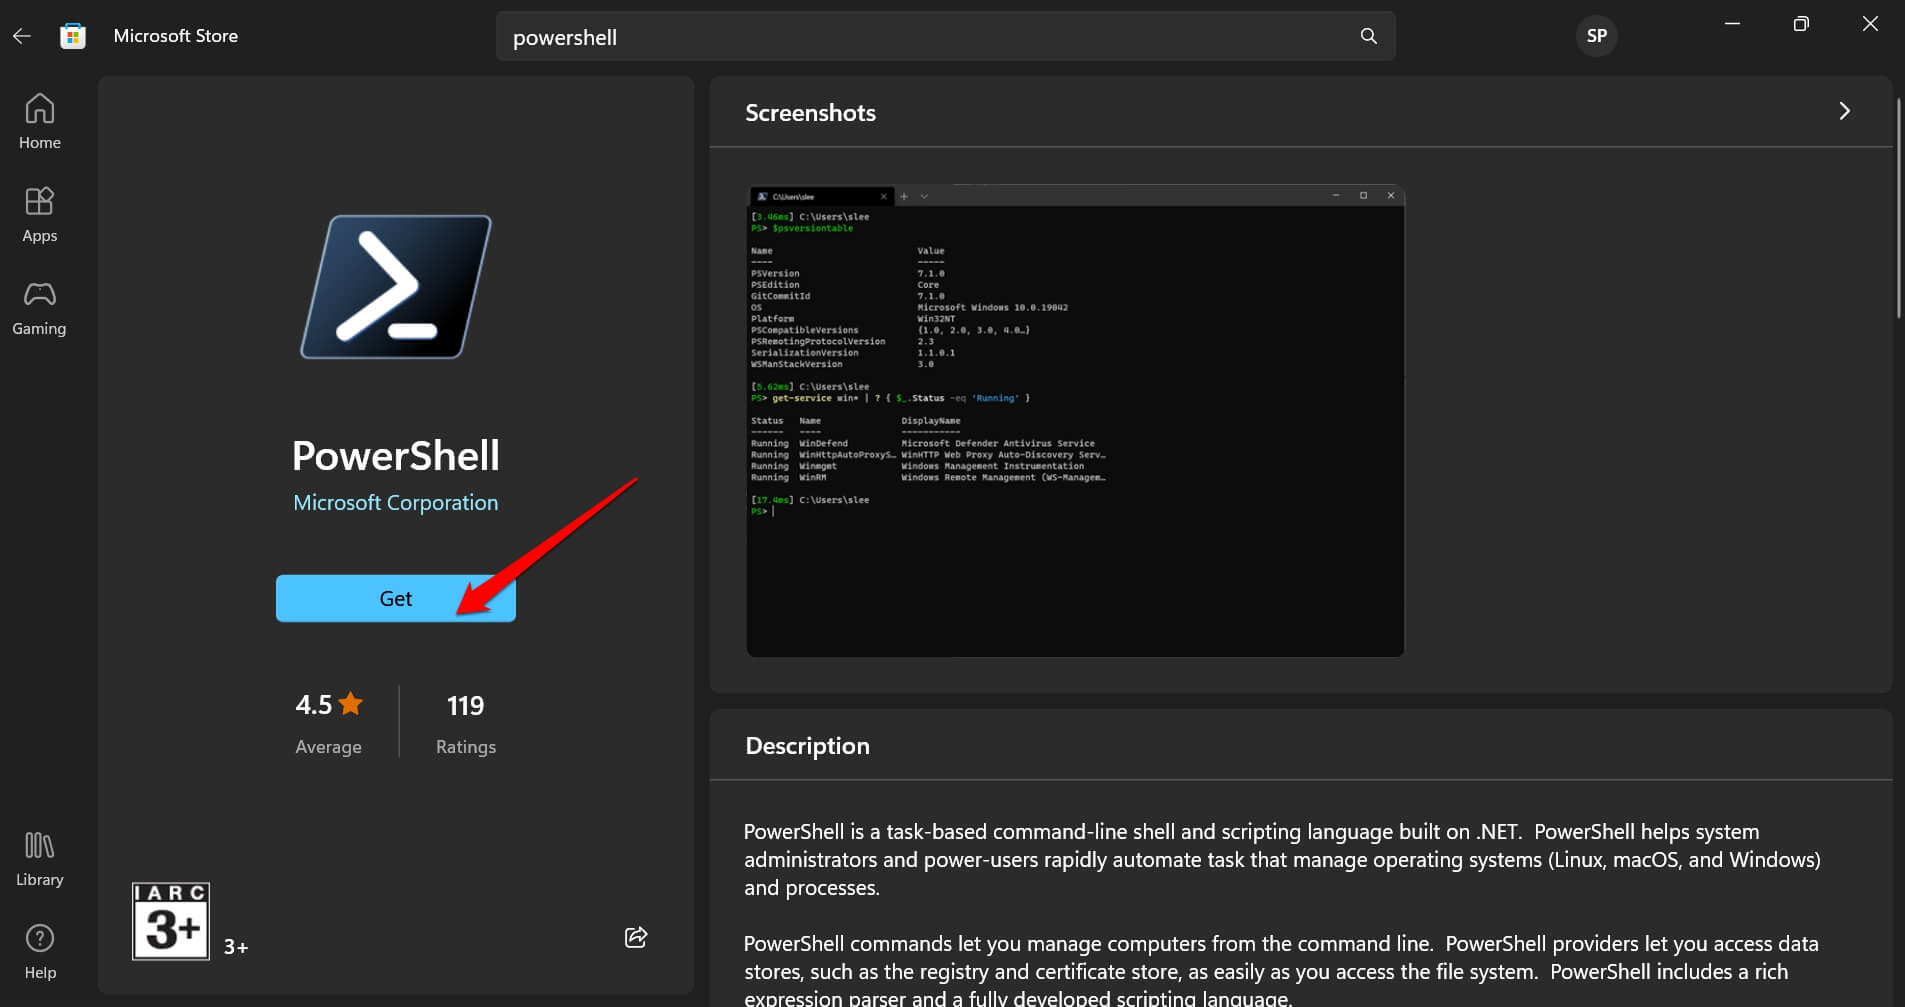
- If you have not installed PowerShell on your Windows PC yet, click the search bar at the top and type PowerShell.
- From the search results, click on the official PowerShell app offered by Microsoft Corporation.
- To install the app, click the button Get.

2. Using GitHub to Update PowerShell on Windows
GitHub is a great platform for software redistribution for various operating systems. You can grab the installer package for PowerShell from GitHub.
- Launch your PC browser.
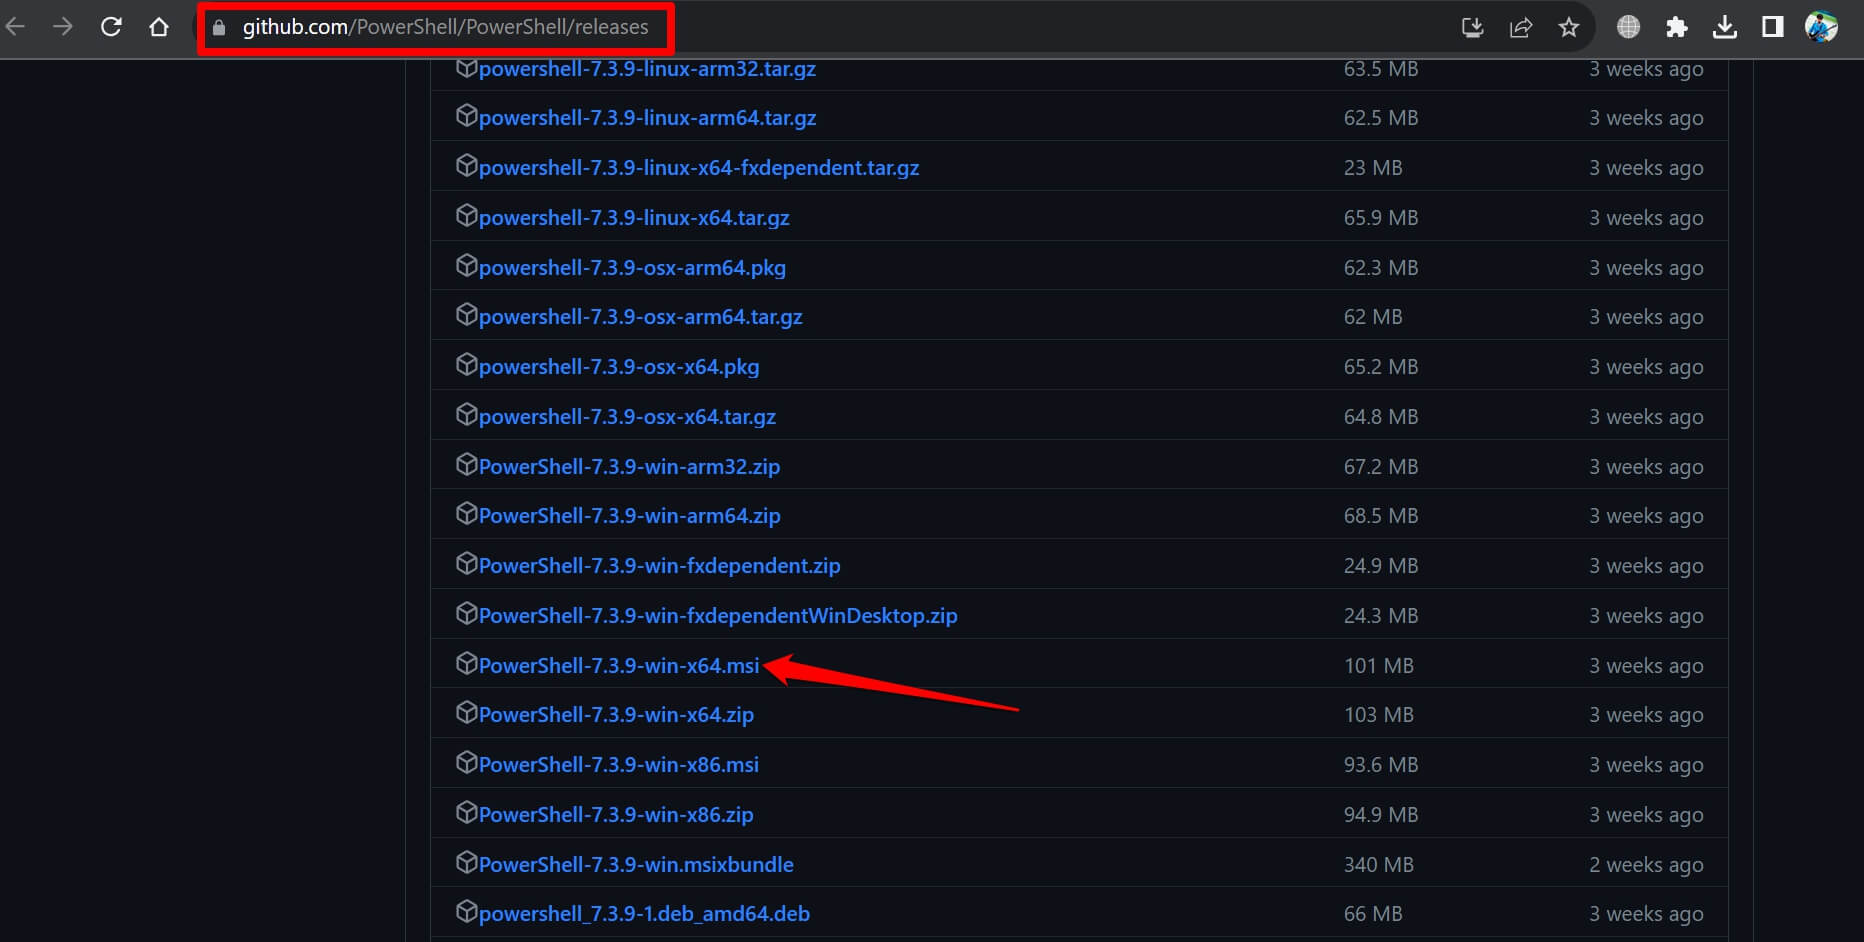
- Visit the page that maintains the version releases of PowerShell.
- Scroll through the latest version of the application.
- Under the Assets tab, locate the MSI file.
- Depending on whether you are using a 32-bit or 64-bit architecture, download the correct MSI file.
- If it is a 32-bit architecture, then download the msi file for x86.
- If it is a 64-bit architecture, then download the msi file for x64.

- On your Windows PC Downloads folder, open the installer package.
- Follow the instructions on the screen, specify an installation folder, and begin the installation.
3. Update PowerShell Using the Windows Package Manager
If you are comfortable with using a command line tool to update PowerShell by issuing commands, this method is for you. You have to use the Windows Package Manager for issuing commands which is also referred to as Winget.
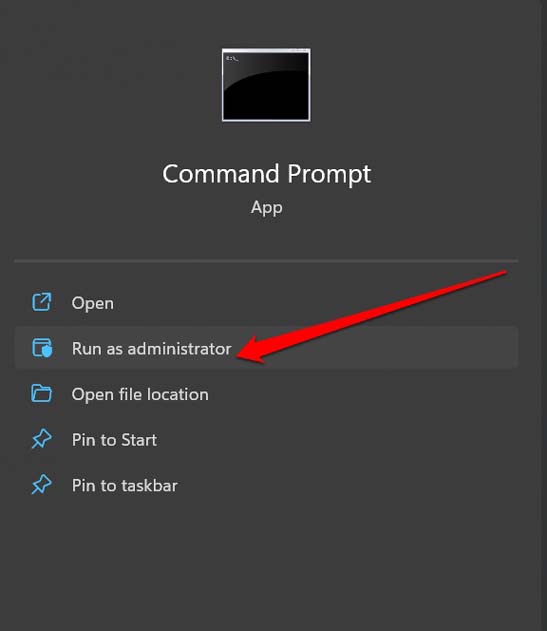
- Press the Windows + S hotkeys to invoke the search panel.
- Type Command Prompt and click Run as Administrator.

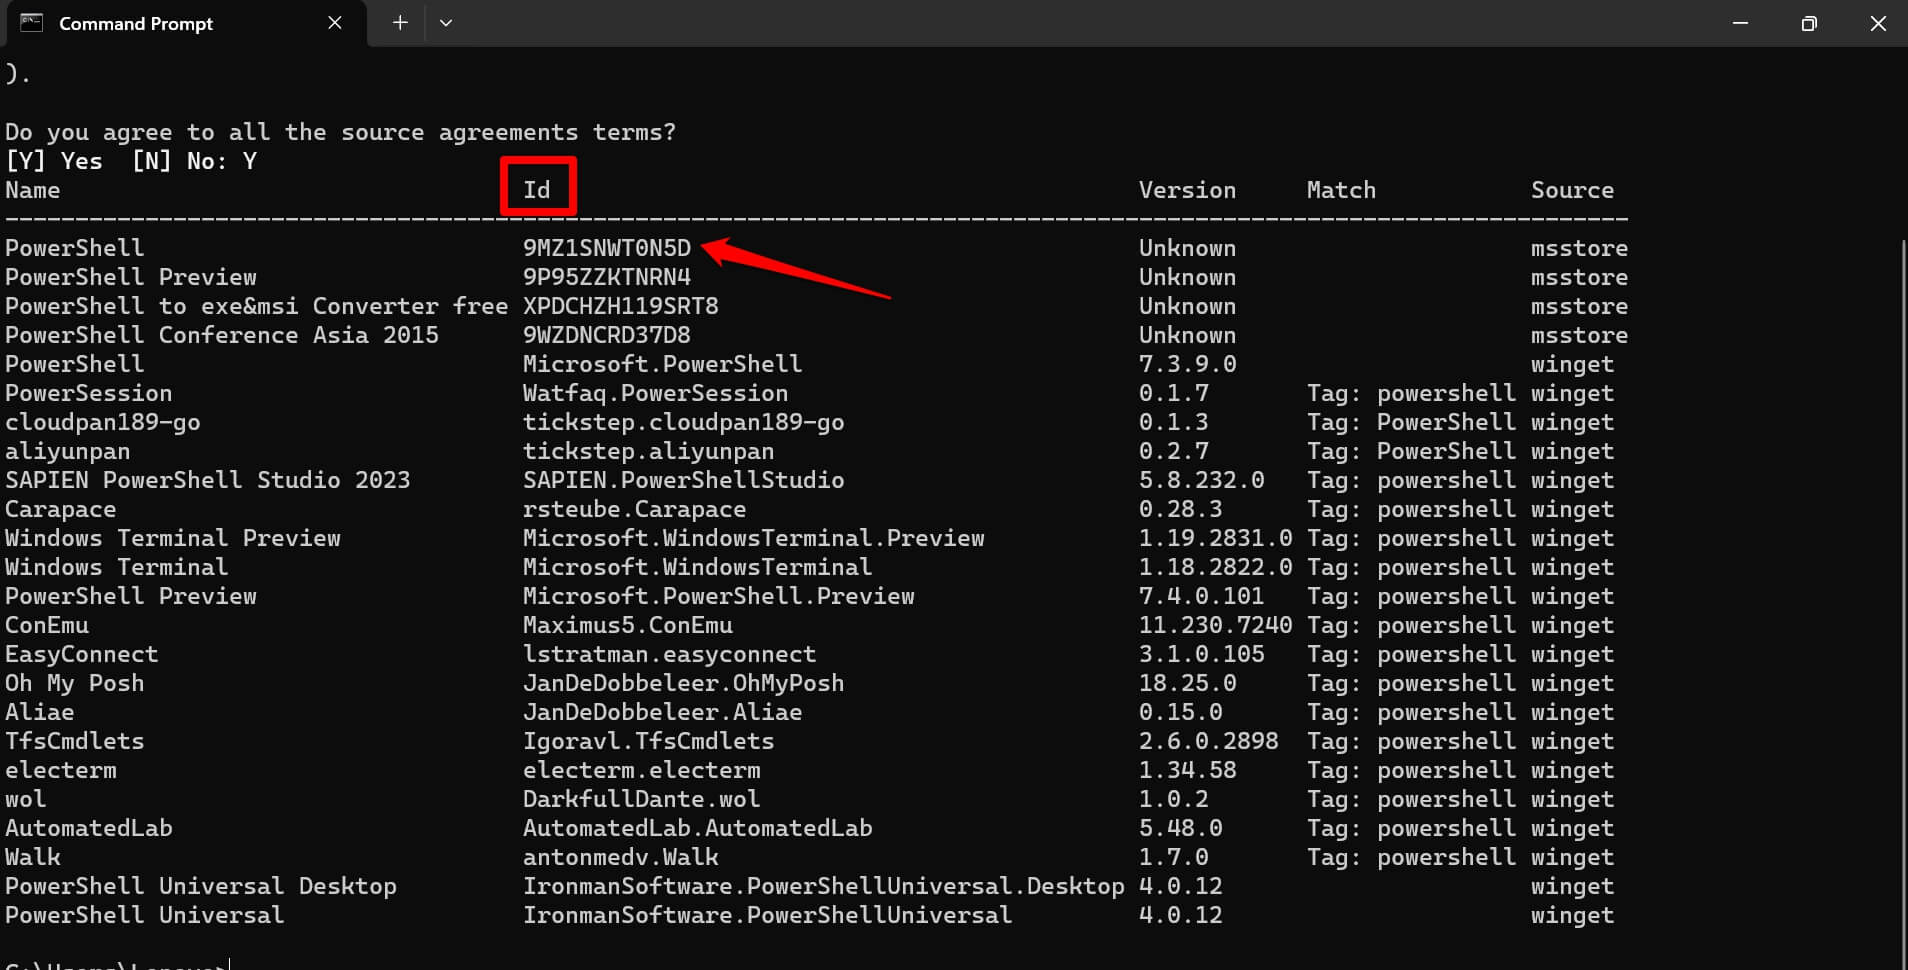
- Enter the following command.
winget search PowerShell
- Select the ID of the PowerShell package that you want to install.

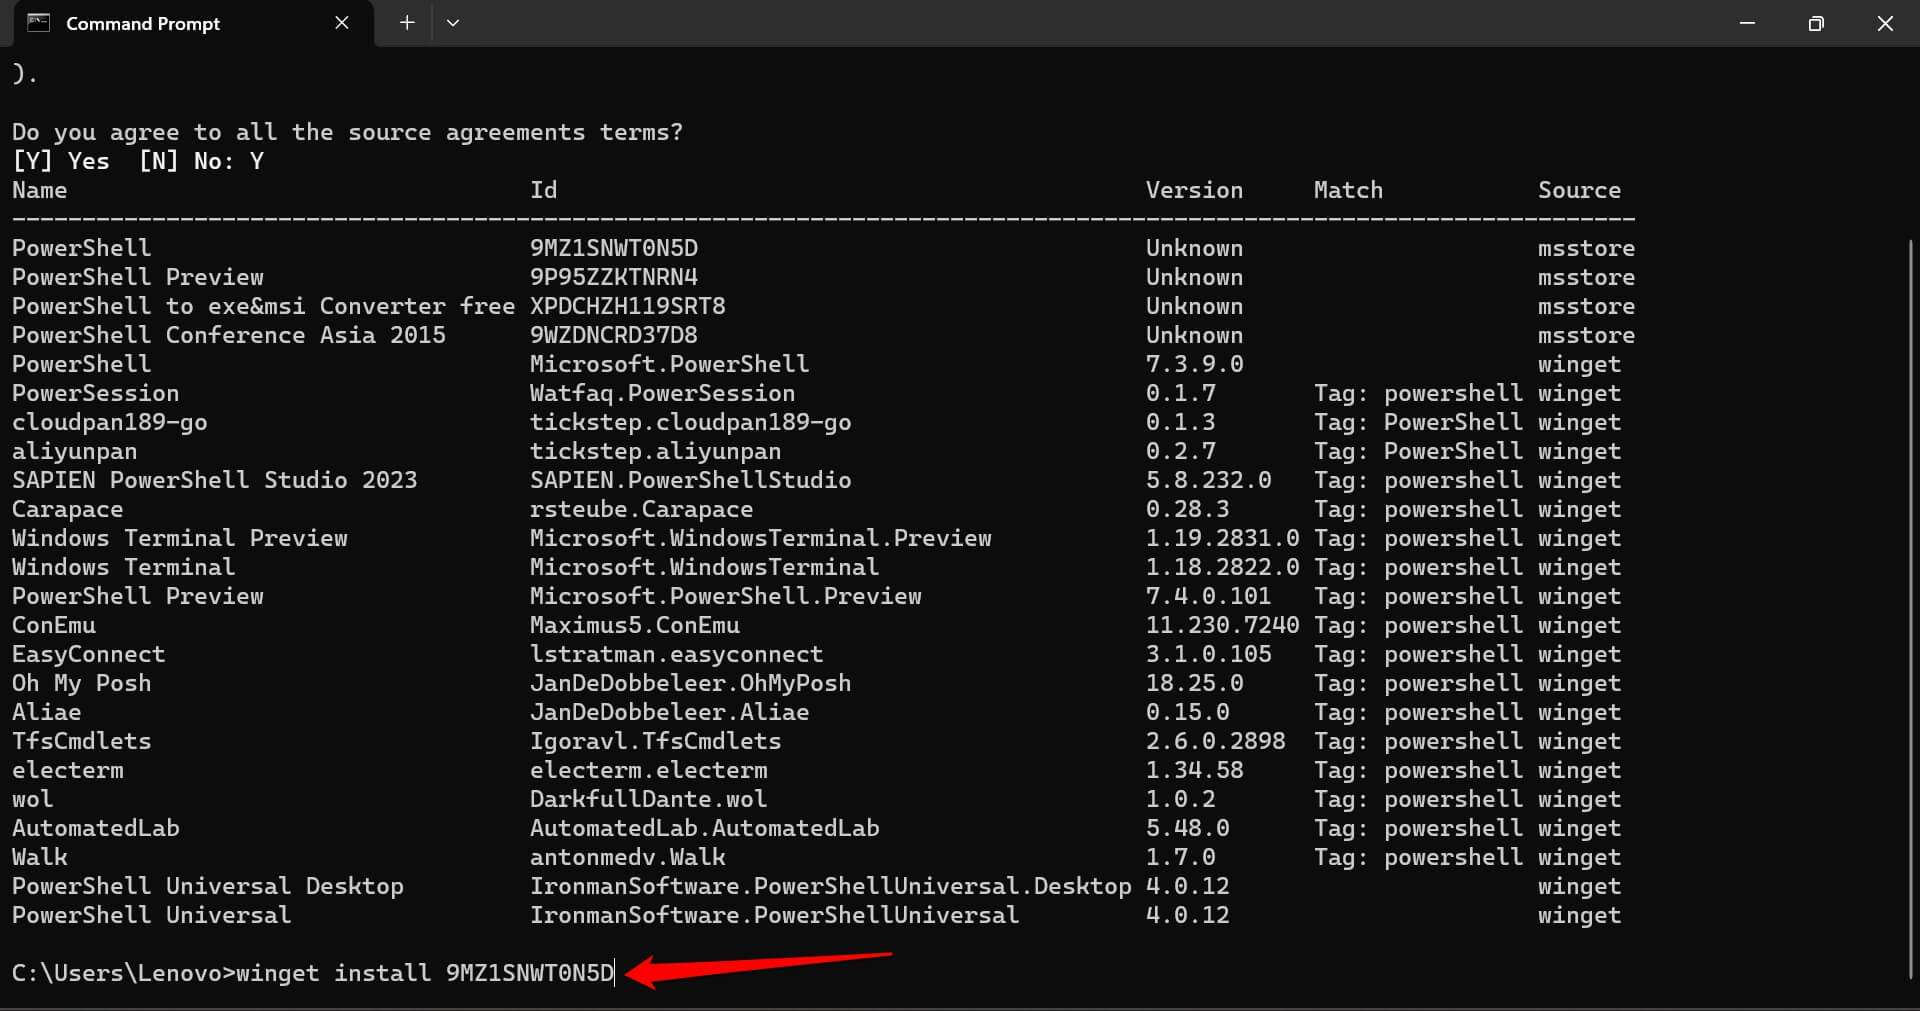
- To install PowerShell, issue the following command.
winget install AppID
- In the above command, replace the AppID with the ID you have noted in Step 4.

- Press enter to begin the installation. The package will download and install. It will take a few seconds to complete.
- Once the installation is completed, quit the Command Prompt terminal.
Update PowerShell and Automate the System
Updating to the newer version of PowerShell will ensure a bug-free experience while using the command line tool to issue commands or automate any task. You can use all the new features offered on the app. Also, if you have not installed PowerShell on your Windows PC, now you know all the installation methods. So, try it out and jump into the world of automation.
If you’ve any thoughts on How to Update PowerShell in Windows 11, then feel free to drop in below comment box. Also, please subscribe to our DigitBin YouTube channel for videos tutorials. Cheers!
В данном руководстве рассмотрим как установить новую версию PowerShell 7 в Windows 11 и в Windows 10.
Седьмая версия командной оболочки разработана для облачных, локальных и гибридных сред, содержит множество улучшений и новых функций. Устанавливается и работает параллельно с предыдущей версией Windows PowerShell 5.1.
- Улучшена совместимость с существующими модулями Windows PowerShell.
- Новые языковые функции
- Улучшенная производительность
- Удаленное взаимодействие на основе SSH
- Кроссплатформенная совместимость
- Поддержка контейнеров Docker
PowerShell 7 может работать параллельно с PowerShell 5.1. Переход выполняется просто, быстро и безопасно.
Как проверить версию PowerShell?
Перед загрузкой и установкой новой версии PowerShell вы можете узнать текущую версию PowerShell установленную с Windows 10. Для этого:
- Откройте PowerShell с помощью меню «Пуск», поиска или терминала.
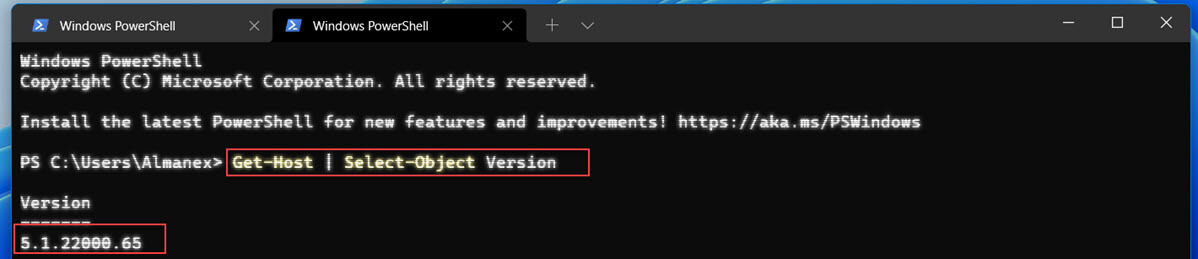
- В окно PowerShell скопируйте и вставьте одну из двух команд ниже, а затем нажмите клавишу Enter, чтобы узнать текущую версию PowerShell.
Get-Host | Select-Object Version
$PSVersionTable
Установка PowerShell 7 c помощью пакета MSI или ZIP-архива
В Windows 11 существует несколько вариантов установки PowerShell 7. Вы можете использовать один из способов, представленных ниже:
Перейдите на страницу и выберите необходимый релиз PowerShell 7 для загрузки.
- Стабильный выпуск: https://aka.ms/powershell-release?tag=stable
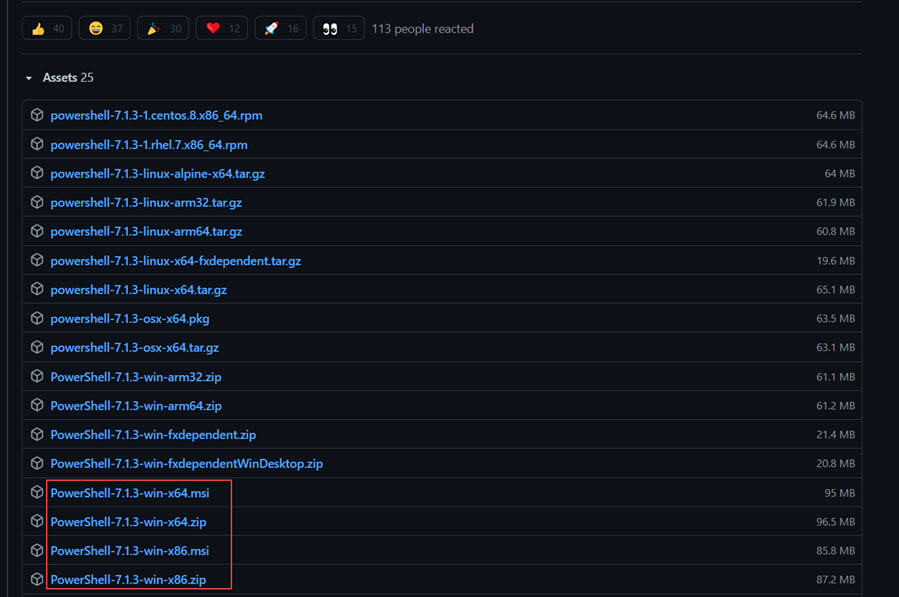
Обратите внимание, что отдельные файлы доступны как для 32-разрядных, так и для 64-разрядных систем. При загрузке MSI-файла обязательно загрузите стабильную версию.
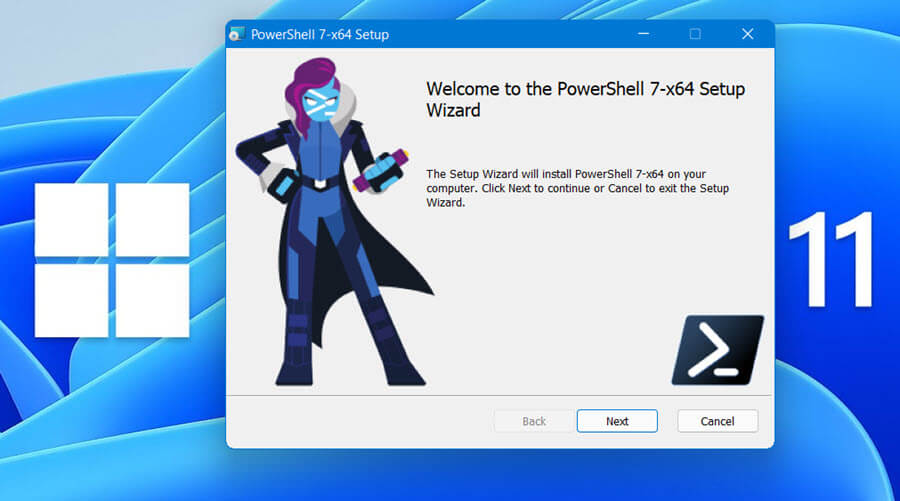
После загрузки нужного пакета дважды кликните установщик и следуйте инструкциям помощника по установке. После чего, программа создаст ярлык в меню Windows «Пуск».
Примечание: для установки с помощью пакета MSI требуется разрешение администратора. Пакет ZIP может развернуть любой пользователь, это самый простой способ использовать PowerShell 7. Если вы ранее установили PowerShell 6.x, PowerShell 7.x будет обновлением.
Если выбрали архив, установка не требуется это переносная версия. Распакуйте архив в любое место на ваше усмотрение, и запустите файл «pwsh.exe». В открывшемся окне, вы можете увидеть сообщение: «Вы хотите запускать программное обеспечение этого ненадежного издателя?»
Чтобы разблокировать запуск, напечатайте букву А и нажмите Enter:
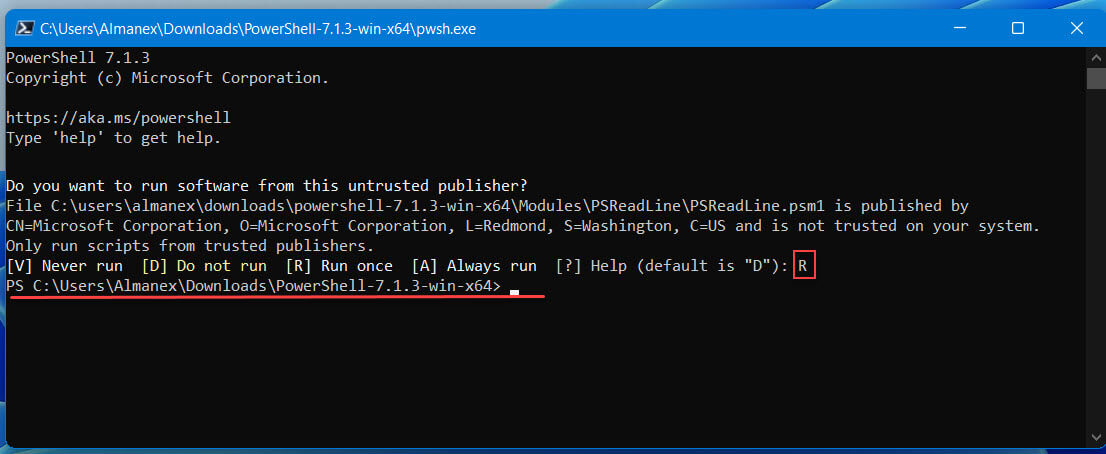
[A] Always run (Всегда разрешать запуск)
или,
[R] Run once (Разрешить запуск один раз)
После чего PowerShell 7 будет готов к работе.
Установка PowerShell с помощью winget диспетчера пакетов Windows
Приложение командной строки winget умеет, устанавливать, обновлять, удалять и настраивать приложения в новой ОС Windows 11.
Для установки PowerShell с помощью пакетов winget вы можете использовать следующие команды.
Запустите терминал и выполните следующую команду, чтобы найти доступные версии:
winget search Microsoft.PowerShell
Установите 7 версию PowerShell
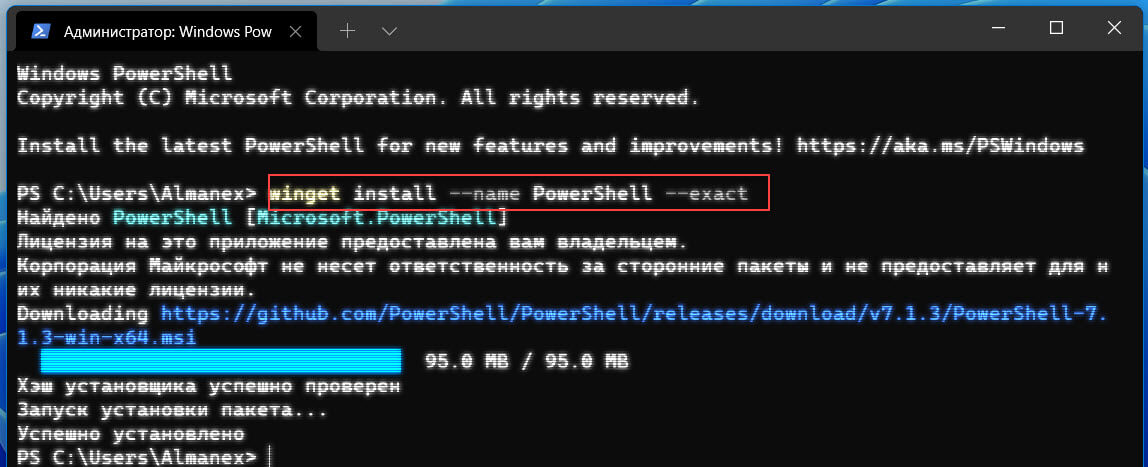
Для установки выполните команду:
winget install --name PowerShell --exact
Примечание: если необходимо установить превью версию, выполните:
winget install --name PowerShell-Preview --exact
Установка из магазина Microsoft Store
Версия PowerShell 7.1 опубликована в Microsoft Store. Установка из магазина Microsoft имеет преимущество поскольку обновление приложения будет выполняться автоматически.
Этот выпуск PowerShell можно найти на веб-сайте Microsoft Store
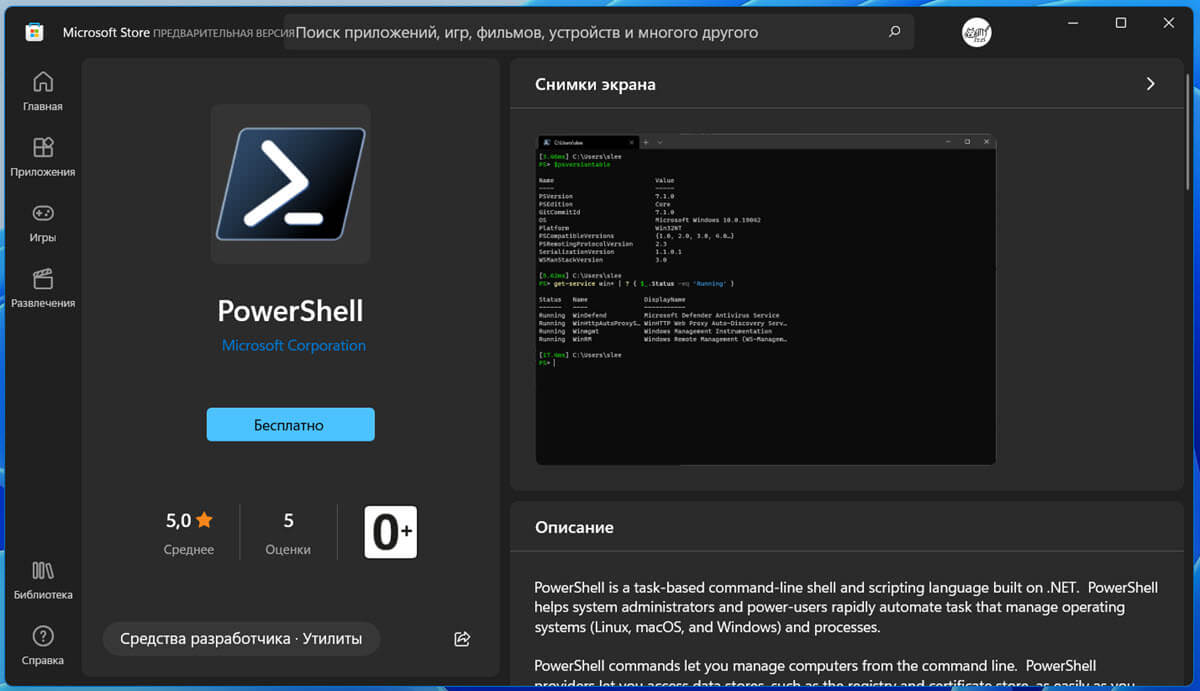
После загрузки и установки приложение появится в меню «Пуск» в разделе «Все приложения».
Как установить PowerShell 7 из PowerShell 5
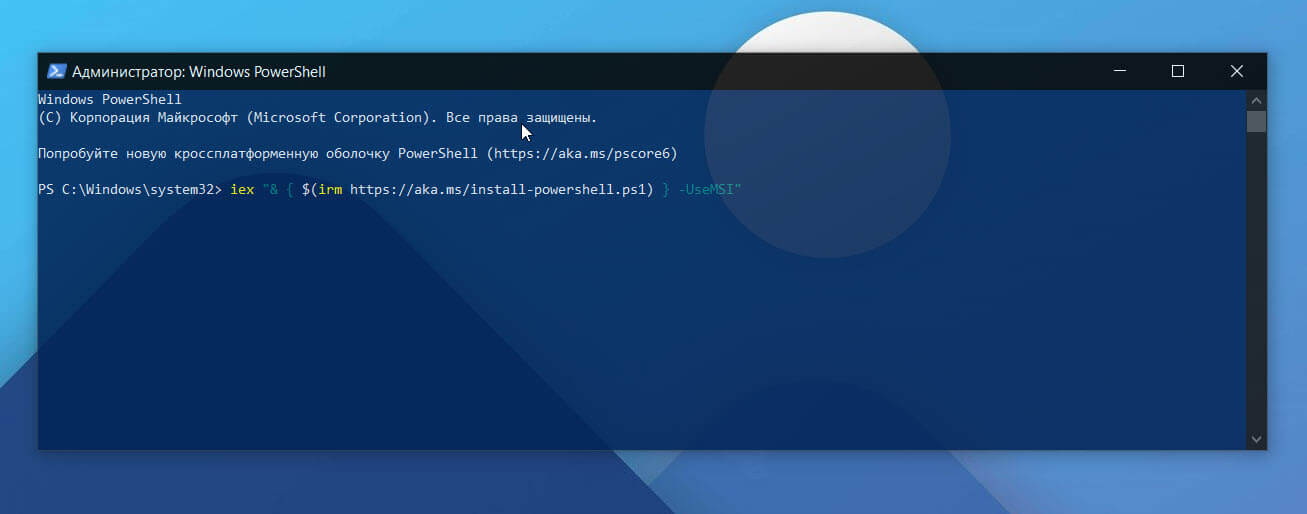
- Откройте Windows PowerShell от имени администратора.
- Выполните следующую команду, чтобы загрузить последнюю версию PowerShell и запустить программу установки:
iex "& { $(irm https://aka.ms/install-powershell.ps1) } -UseMSI"
- Когда появится следующий экран установщика, нажмите кнопку «Далее».
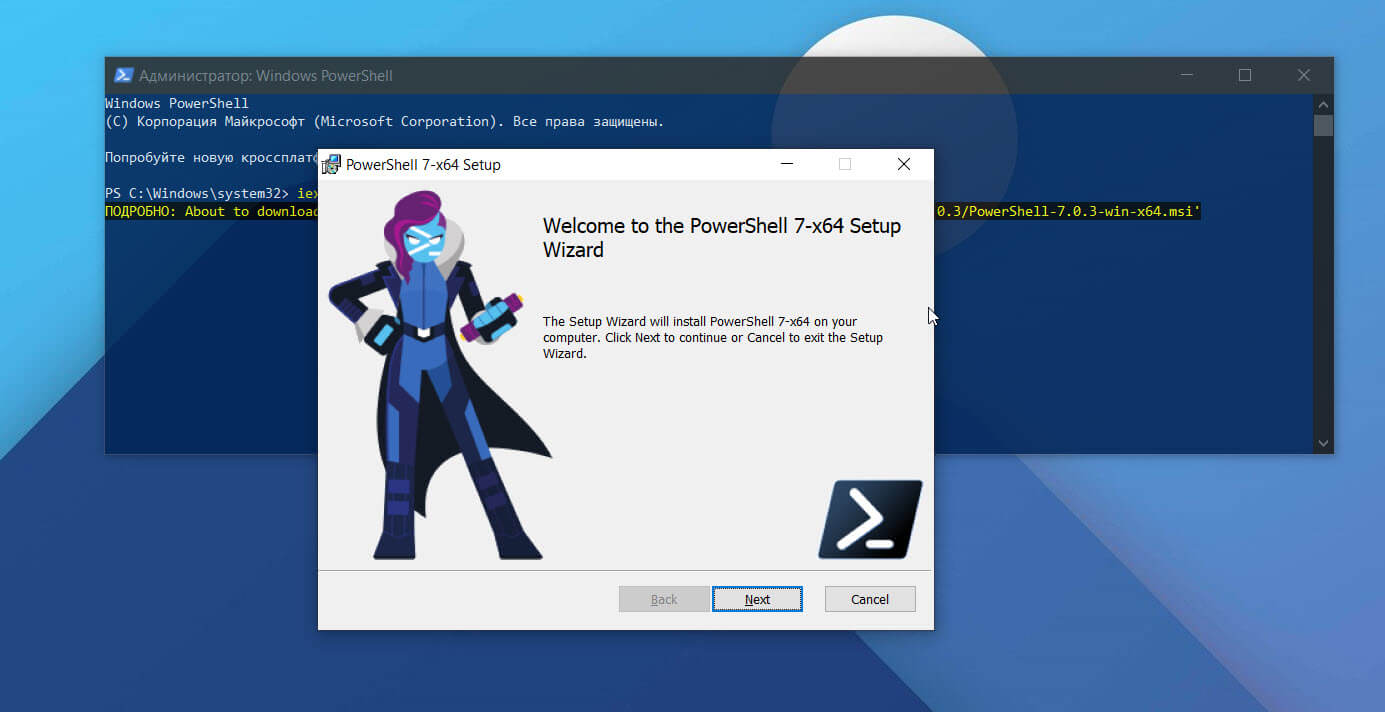
- Выберите функции, которые вы хотите добавить / установить, прежде чем нажимать кнопку «Далее». Нажмите кнопку «Установить» еще раз, чтобы завершить установку. Когда закончите, нажмите кнопку «Готово».
Обновляет ли установка новой версии встроенный PowerShell?
Нет. Если вы устанавливаете PowerShell 7 версии, следуя инструкциям, указанным выше, он будет установлен рядом со встроенным PowerShell. То есть PowerShell 7 будет установлен в новый каталог, и не будет касаться встроенного PowerShell. Это означает, что вы сможете использовать как встроенный, так и только что установленный PowerShell.
Как добавить новый профиль PowerShell 7 в Терминал Windows
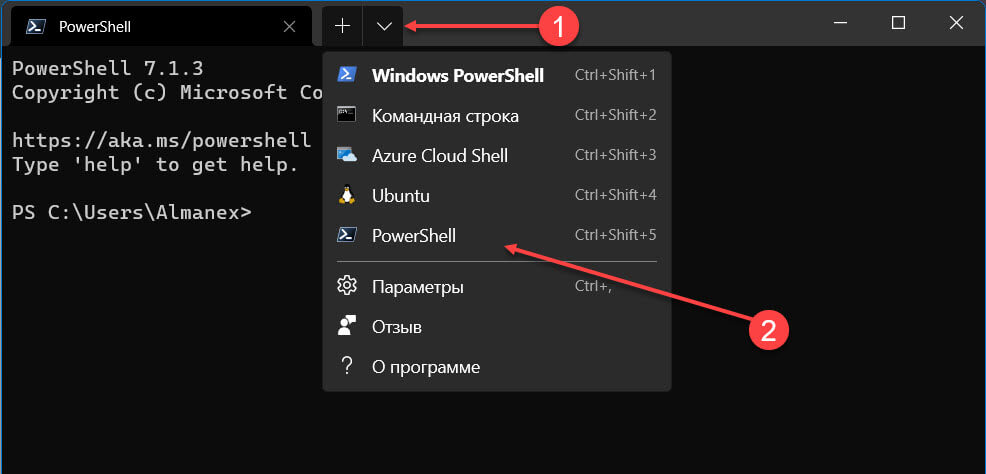
После того как вы установили PowerShell 7, в приложении Windows Терминал, будет автоматически добавлен новый профиль, вы сможете переключаться на него нажав кнопку со стрелкой вниз и выбрав в меню «PowerShell»
Если используете архив, профиль для него необходимо создать в ручную, подробнее в нашем руководстве: Как настроить и изменить параметры терминала Windows в Windows 11
Как удалить PowerShell 7 в Windows 11 \ 10
Обратите внимание, что удаление PowerShell 7 не приведет к удалению встроенного средства Windows PowerShell. В зависимости от того каким из способов вы установили приложение выберите один из вариантов:
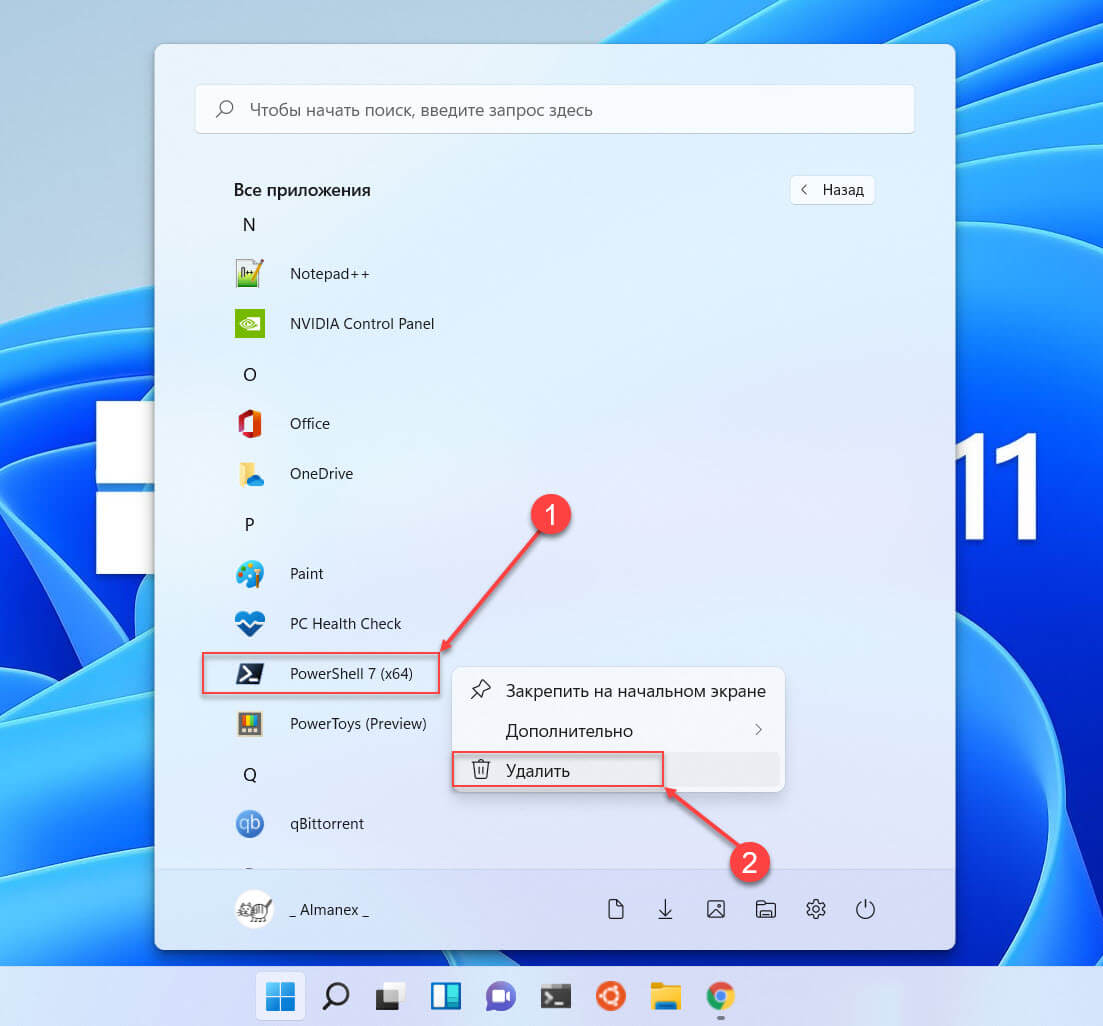
Если для установки использовали MSI или winget для удаления PowerShell 7, перейдите в меню «Пуск» → «Все приложения» найдите его запись, кликните на ней правой кнопкой мыши и выберите в контекстном меню «Удалить».
Или,
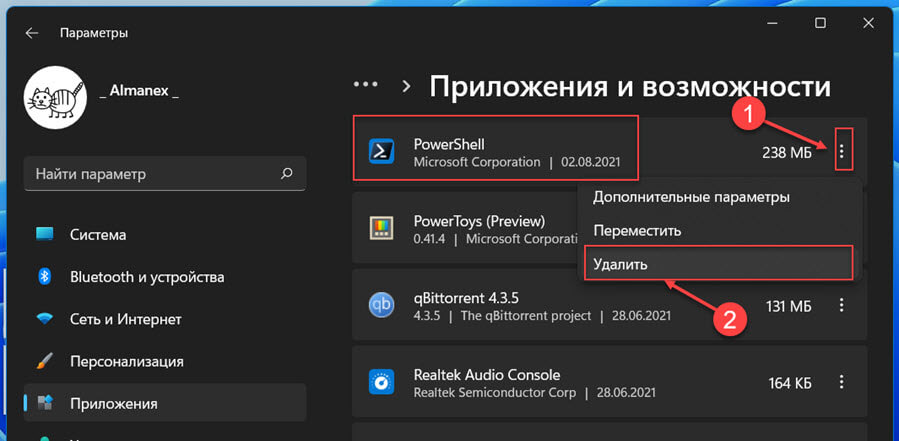
Откройте приложение «Параметры», перейдите в раздел «Приложения» → «Приложения и возможности» на вкладке «PowerShell» кликните три вертикальные точки и выберите «Удалить».
Или,
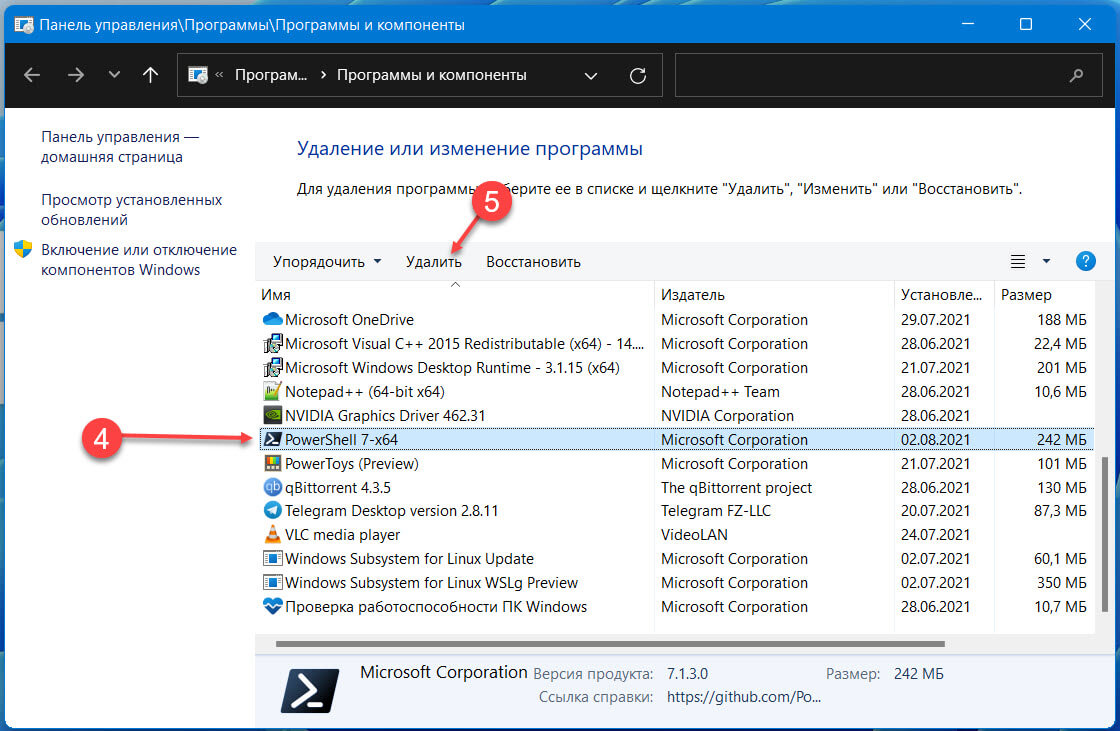
Введите appwiz.cpl в поле поиска или меню «Пуск» и нажмите клавишу Enter, чтобы открыть окно «Программы и компоненты».
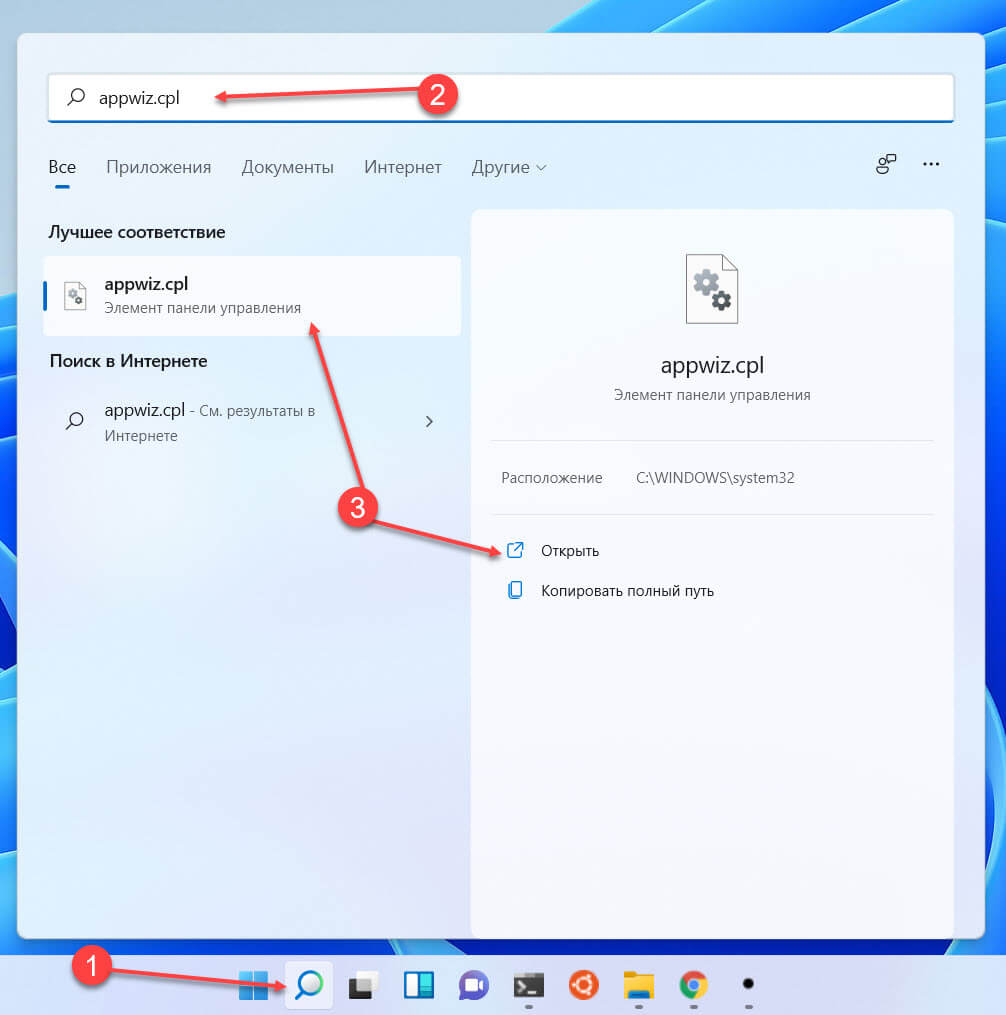
Найдите запись PowerShell 7, кликните ее правой кнопкой мыши и выберите параметр «Удалить».
Если вы использовали ZIP-архив, просто удалите папку с жесткого диска.
Все! Это мгновенно удалит приложение с вашего устройства.