
Photoshop is one of the most popular graphic software that is used to edit, reconstruct, and make changes to images within spaces and different color models such as RGB, CMYK, black and white, and so on. This software can run on Windows, Mac, and Linux operating systems through interface software. Activating and installing Photoshop is done in several ways for each of these operating systems. Photoshop software is a graphic software product of Adobe. The features, speed and AI of Photoshop have been greatly improved in the new versions. We will examine this perfect app and teach you how to install Photoshop on Admin RDP.
Requirements
To install Photoshop on an Admin RDP, the following requirements are recommended:
– Processor: Intel Core i5 or higher
– RAM: 8GB or more
– Storage: At least 10GB of free disk space for installation and additional space for files.
– Graphics card: NVIDIA GeForce GTX 1050 or higher with at least 2GB of VRAM.
If you want to buy Admin RDP Server, we suggest you to test and use different plans with different locations that are presented on our website.
How to Install Photoshop on Admin RDP
At first, You must log in to your Creative Cloud account, but if you do not have one, sign up.
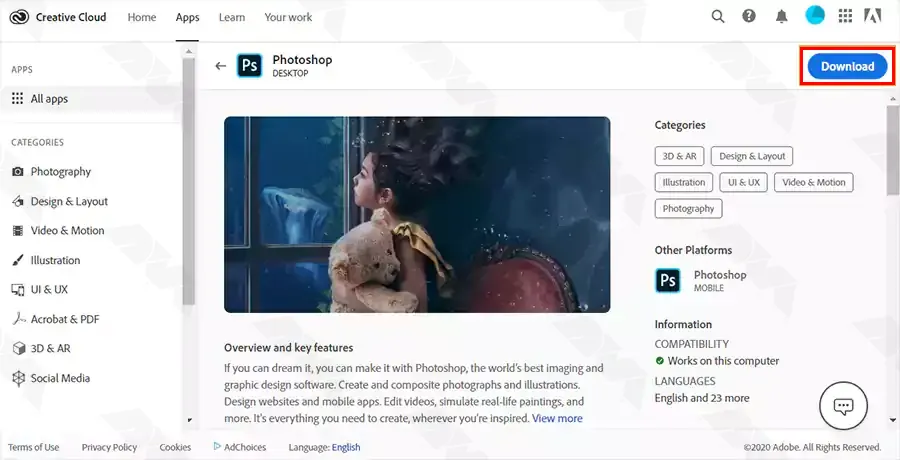
After logging in to your account, now you can download the Photoshop program from the Creative Cloud website. Just click Download.
Tip: First you have to buy Photoshop, then download it.
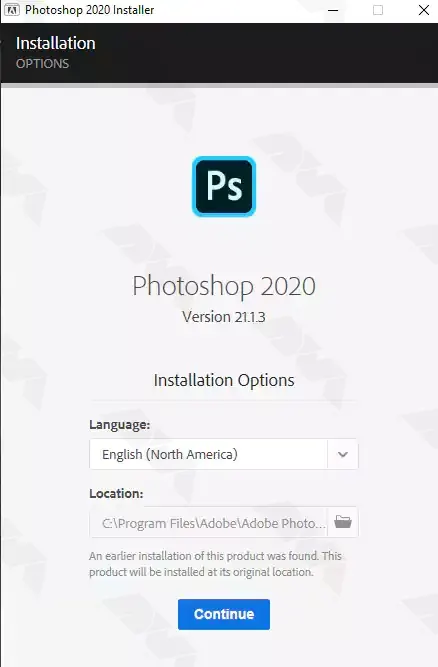
Now you have to double-click on the downloaded file to start the installation progress.
At this point, just follow the onscreen instructions to complete the installation of Photoshop. So in the window that opens, select the language you want and click Continue:
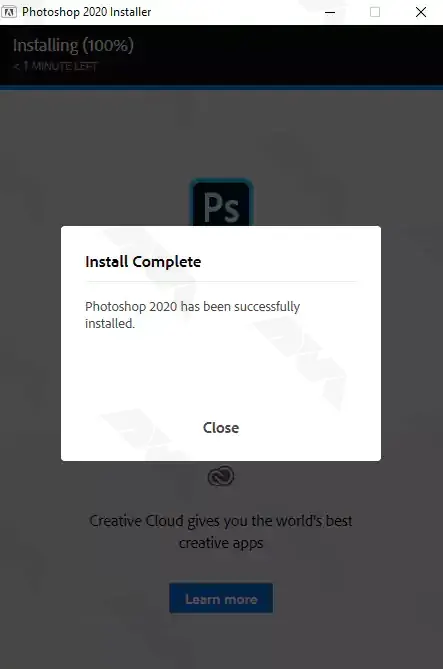
Wait a few moments for Photoshop to finish. Finally, click Close:
How to Run Photoshop on an Admin RDP Server
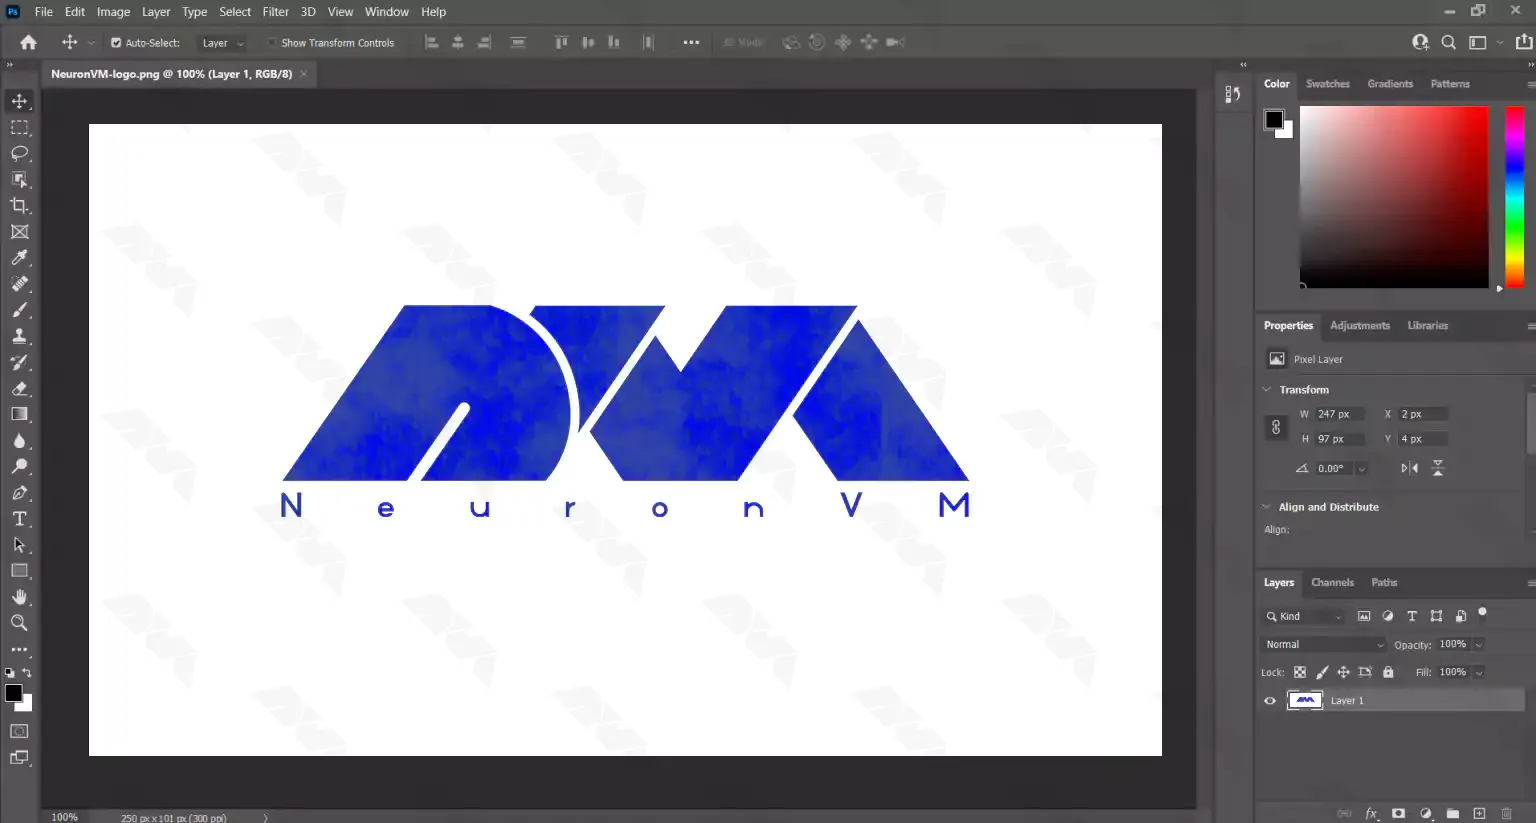
After installing Photoshop, you can run it by clicking on its icon on the desktop or the Start menu. In the image below, you can see the Photoshop environment:
Troubleshooting
If you are encountering issues while trying to install Photoshop on admin RDP session, there are a few troubleshooting steps you can try:
1) Administrative privileges: Make sure you have administrative privileges on the RDP session. To do this, right-click on the installer file and select “Run as administrator.”
2) Antivirus software: Temporarily disable any antivirus or security software running on the RDP session. Some security applications may interfere with the installation process. Remember to re-enable the antivirus software after installation.
3) Compatibility mode: Right-click on the installer file and select “Properties.” Under the “Compatibility” tab, enable the option to run the program in compatibility mode. Choose a previous version of Windows that you know is compatible with Photoshop.
Conclusion
If you Install Photoshop on Admin RDP, it provides the convenience of accessing and using the software remotely. By following this comprehensive guide, you can successfully install Photoshop on an Admin RDP by setting up the remote desktop connection, downloading and installing the Adobe Creative Cloud application, and then installing and activating Photoshop itself. With Photoshop readily available on your Admin RDP, you can now enjoy all its features and functionalities from anywhere with an internet connection.
Photoshop is one of the most widely used and popular graphic software that many people work with on a daily basis. In fact, many of the images and graphic designs that we deal with every day are created by Photoshop software. The features of this software have caused Photoshop to be used for a variety of tasks such as retouching and photo editing, creating banners, business cards, and so on. In this article, we are going to teach you How to Setup Photoshop on Windows VPS.
Table of Contents
Adobe Photoshop software is the most popular program for creating and modifying images and is also one of the valuable products of Adobe. That is why in this article we decide to introduce you to this software. In the continuation of this article, we will teach you to step by step how to install Photoshop on Windows VPS. Please join us.
Introduction Photoshop and its capabilities
To introduce Photoshop software, it is better to first provide a definition of what Photoshop does. Photoshop is a very powerful graphics processor that can make changes to images such as editing, retouching, and reconstruction. In addition, Photoshop can create new images or combine different images. This makes Photoshop training a must-have for many businesses.
Adobe is the owner and developer of this software. This software was created by the Knoll brothers in the late ’80s, but Photoshop was officially introduced in 1990 by Adobe. Over time, the software has been added to its applications and capabilities and has been able to greatly affect the art of photography and graphics during this period.
Important features of Photoshop include:
1. Select the subject with one click and improve this possibility
2. Delete photo background with one click
3. Quick layer editing
4. New Content-Aware Fill
5. New properties panel
6. New and important feature for smart objects
7. Tilda key “~” and interesting features with it
8. Quickly close documents that are not needed
9. Improve Shift performance
10. New and excellent warp
How to Install Photoshop on Windows VPS
In this section, you will learn how to install Photoshop on a Windows server. To do this, just follow the steps below. First, you need to buy Photoshop from the Creative Cloud website section. Then click on Download as shown below. Note that you must be logged in to your Creative Cloud account to do this.
If you want to use the free version, you can refer to the Creative Cloud apps catalog page. Then click on Start Free Trial.
Now you need to go to the place where you downloaded the file. Double-click it to start the Photoshop installation process. In the window that opens, select the language you want and then click Continue.
Note: Installing this software will take a few minutes, please wait.
Click Close after the installation of the program is complete.
Setup Photoshop on Windows VPS
As you saw in the previous step, installing Photoshop is very easy. After you have successfully installed Photoshop, you can now type Photoshop in the Start menu to launch it. Then in the results displayed as shown below, click on it to run.
After successfully completing all the steps mentioned in this tutorial, Photoshop will be launched. You can see the Photoshop environment in the image below:
Conclusion
Photoshop, which according to graphic artists is a magic software, is one of the most popular image editing software that is used in a very wide range of graphic activities. Due to the great popularity of this software, we tried to teach you how to install and Setup Photoshop on Windows VPS.
-
-
#1
Способ установки CS3 на Windows Server 2003 от самой Адобы
(перевод на русский Awsxedc и Ginfonic с ру-борда)
Скачиваем программу Application Verifier:
http://www.microsoft.com/downloads/…9c-1250-433c-8c1b-2619bd93b3a2&DisplayLang=en
Запускаем ее. File>Add Application>’setup.exe’ program in the CS3 install folder on the DVD
В правом окне убираем все галочки, кроме ‘Compatibility’ — HighVersionLie
Дальше правой кнопкой на HighVersionLie открываем properties
Откроется таблица. Ставим значения:
major version 5,
minor version 1,
build number 2600.
Advanced:
service pack major 2,
service pack minor 1
Остальные оставляем пустыми, сохраняем.
Теперь запускайте инсталлятор CS3
Оригинальный текст:
Run the tool, pick ‘Add Application’ from the file menu and browse to the ‘setup.exe’ program in the CS3 install folder on the DVD. Once you’ve added the app you can pick tests from the right pane. Open the ‘Compatibility’ node and check HighVersionLie. Right click it after checking it and pick properties. Fill in the above info to mimick win xp sp2 (option: major version 5, minor version 1, build number 2600. Advanced: service pack major 2, service pack minor 1) — you dont need to specify the product type field. Save everything (button on bottom right of app) and then run the installer for CS3 (setup.exe in the photoshop cs3 folder) with the Application Verifier running.
-
-
#2
Ответ: Установка CS3 на Windows 2003 от Adobe
Лучше бы Адоба сделала правку в одном-единственном файле Media.cab и не парила мозги. Или 6 мб., качать или 10 — разницы ноль. Зато все бы _просто ставилось_.
Чем адобовский каб перепаковать? Я сам пропатчу.
PS. И никто не предупредил, что при установке указанным выше методом выскочит окно «Application breakpoint», которое нужно просто проигнорировать и нажать «Ok».
PPS. А ограничение 512 Мб. RAM на всю Сюиту эта штука не убирает. А я убрал =)
-
-
#3
Ответ: Установка CS3 на Windows 2003 от Adobe
А как запустить усатновку CS3 если у меня форточка 2002, SP1? При следовании вішесказанному, при запуске setup.exe выскакивает сообщение ‘Ошибка при инициализации приложения 0xc00000005’
Help!!!
-
-
#4
Ответ: Установка CS3 на Windows 2003 от Adobe
nikolay-litvin сказал(а):
у меня форточка 2002, SP1?
А что это за зверь такой?
-
-
#5
Ответ: Установка CS3 на Windows 2003 от Adobe
Microsoft Windows XP Professional 2002 Service Pack 1.
Как возможно поставить на этого зверя? Из-за железа SP2 не ставится!
Насколько знаю, build 2600.
-
-
#6
Ответ: Установка CS3 на Windows 2003 от Adobe
правильно ли я понимаю, что если есть локальная сеть с одним win server 2003 и несколькими машинами win XP, то можно адобовские продукты поставить на одной и запускать их на ХР как на терминалах?
тогда нужна будет всего одна лицензия?
подскажите, пожалуйста. помогите педагогам
-
-
#7
Ответ: Установка CS3 на Windows 2003 от Adobe
Винодовс ХР. Пытаюсь ставить CS3. Проходит «инициализация», окошко закрывается — и тишина… И так много раз.
Переустановил систему, попробовал поменять видеокарточку с соседом — ноль толку.
А вот у соседа встала программа…
Абыдна.
-
-
#8
Ответ: Установка CS3 на Windows 2003 от Adobe
Вопрос-то не о сервере. Есть куча рабочих станций с лицензионной windows 2000 sp4, на них то и надо установить cs3 (((
-
-
#9
Ответ: Установка CS3 на Windows 2003 от Adobe
Удалось подружить 2000 sp4 и CS3?
-
-
#10
Ответ: Установка CS3 на Windows 2003 от Adobe
head сказал(а):
Чем адобовский каб перепаковать? Я сам пропатчу.
Собственными средствами Виндовс, сейчас точно не помню, но нашел описание процедуры в яндексе. Все чудесно заработало
Не по теме:
Кстати, как вариант, существует некое средство, которое каким-то путем меняет тип системы, с 2003 на , например, ХР
-
-
#11
Ответ: Установка CS3 на Windows 2003 от Adobe
А кто знает как обойти ограничение на 512 оперативки при установке?
Ну нет у меня 1 Гб памяти
-
-
#12
Ответ: Установка CS3 на Windows 2003 от Adobe
vlad_28 сказал(а):
А кто знает как обойти ограничение на 512 оперативки при установке?
Ну нет у меня 1 Гб памяти
Это не ограничение, а скорее рекомендация установщика
У меня без проблем установился и работает на 512. Хотя Иллу немного тяжеловато, но Фотошоп все равно шустрей чем девятый
-
-
#13
Ответ: Установка CS3 на Windows 2003 от Adobe
Не хочет ставиться на Windows 2003 Server.
Всё сделал как в первом посте.
Поставил всё что Адоба хочет, и яву и QuckTime, и вычистил всё старое. И аккаунт админский…
Не хочет…
Прокручивает окошко инициализации и отваливается.
Пишет лог какой-то, фиг разберёшь…
Как победить? Может ставил кто, а?
SINL
Registered User
-
-
#14
Ответ: Установка CS3 на Windows 2003 от Adobe
Решение проблемы установки Photoshop CS3 на Windows 2003. «Последовательность действий:
Находим файл AdobePhotoshop10en_US_volume.proxy.xml
«C:/…/Adobe CS3/Photoshop CS3 Extended/payloads/
AdobePhotoshop10en_US_volume/
AdobePhotoshop10en_US_volume.proxy.xml»
Затем в конце файла ищем похожую строку и меняем на это:
——————————————————————————————————
{«OS»:{«Macintosh»:{«Require»:[{«Version»:»10.4.8″}],»Exclude»:
[{«Version»:»10.4.8″}]},»Windows»:{«XP»:{«Exclude»:true,»Require»:
{«MinServicePack»:»2″,»@servicePack64Bit»:1 ,»Need64Bit»:»0″}},»Server2003″:{«Require»:true},»Vista»:{«Require»:true}}}
}
——————————————————————————————————
— не забудем редактируемому файлу вернуть дату и время на тоже что и у остальных файлов инсталяции, все.» — BaksoGen1998
Аналогично и с сюитой, но лично не проверял. Пробуйте.
-
-
#15
Ответ: Установка CS3 на Windows 2003 от Adobe
Mangust сказал(а):
Не хочет ставиться на Windows 2003 Server.
Сервис пак 1 нужно ещё. (но не 2-ой)
-
-
#16
Ответ: Установка CS3 на Windows 2003 от Adobe
SINL сказал(а):
Решение проблемы установки Photoshop CS3 на Windows 2003. Пробуйте.
Это только Фотошоп, но не весь CS3
Mangust
а случайно путей нелатиницей нету?
Кстати, в ХР брандмауэр и DEP установку блокируют, может и там такая причина?
SINL
Registered User
-
-
#17
Ответ: Установка CS3 на Windows 2003 от Adobe
pahafo сказал(а):
Это только Фотошоп, но не весь CS3
В сюите премиум таких файлов пять:
\Adobe CS3\payloads\AdobeDesignSuitePremiumen_US\AdobeDesignSuitePremiumen_US.proxy.xml
\Adobe CS3\payloads\AdobeIllustrator13en_US\AdobeIllustrator13en_US.proxy.xml
\Adobe CS3\payloads\AdobeInDesign5en_US\AdobeInDesign5en_US.proxy.xml
\Adobe CS3\payloads\AdobePhotoshop10en_US\AdobePhotoshop10en_US.proxy.xml
\Adobe CS3\payloads\AdobeVersionCue3All\AdobeVersionCue3All.proxy.xml
Запрет на 2003 стоит в моём дистрибутиве стоит только у иля и фотошопа, а в головном AdobeDesignSuitePremiumen_US.proxy.xml запрета нет, возможно, уже исправлено.
Проверить в ближайшем времени не могу, нет свободной машины, а в виртуалке оно капризничает, но про рецепт писали, что он рабочий.
Кстати, в ХР брандмауэр и DEP установку блокируют, может и там такая причина?
Встроенный брандмауэр не блокирует, а в х64 деп не отключается, и тоже не мешает.
-
-
#18
Ответ: Установка CS3 на Windows 2003 от Adobe
MAO_the_Doom сказал(а):
Сервис пак 1 нужно ещё. (но не 2-ой)
Это Адоба так сделала?
И шот теперь? откат сервиспаку делать.
Бред какой-то.
-
-
#19
Ответ: Установка CS3 на Windows 2003 от Adobe
SINL сказал(а):
В сюите премиум таких файлов пять:
\Adobe CS3\payloads\AdobeDesignSuitePremiumen_US\AdobeDesignSuitePremiumen_US.proxy.xml
\Adobe CS3\payloads\AdobeIllustrator13en_US\AdobeIllustrator13en_US.proxy.xml
\Adobe CS3\payloads\AdobeInDesign5en_US\AdobeInDesign5en_US.proxy.xml
\Adobe CS3\payloads\AdobePhotoshop10en_US\AdobePhotoshop10en_US.proxy.xml
\Adobe CS3\payloads\AdobeVersionCue3All\AdobeVersionCue3All.proxy.xmlЗапрет на 2003 стоит в моём дистрибутиве стоит только у иля и фотошопа, а в головном AdobeDesignSuitePremiumen_US.proxy.xml запрета нет, возможно, уже исправлено.
Проверить в ближайшем времени не могу, нет свободной машины, а в виртуалке оно капризничает, но про рецепт писали, что он рабочий.
Встроенный брандмауэр не блокирует, а в х64 деп не отключается, и тоже не мешает.
Даже если прописать разрешения, он всё равно ставить их не хочет.
Запустил-таки, после того как реестр ручками вычистил от следов Адобы, но кроме акробата и VersionCue ничего ставить не стал. «Ошибка» говорит. И всё.
Windows 2003 Server SP2 и последние апдейты с сайта.
-
-
#20
Ответ: Установка CS3 на Windows 2003 от Adobe
SINL сказал(а):
В сюите премиум таких файлов пять:
\Adobe CS3\payloads\AdobeDesignSuitePremiumen_US\AdobeDesignSuitePremiumen_US.proxy.xml
\Adobe
При установки всей сюиты установщик достает эти XMLы из главного media.cab?…
Цитата:
Встроенный брандмауэр не блокирует, а в х64 деп не отключается, и тоже не мешает.
Что интересно, никаких предупреждений система не выдает, а установщик приступить к своим обязанностям не может… После отключения бранмаурера — все нормально ставится
Adobe Employee
,
Nov 02, 2018
Nov 02, 2018
Lhummel, many of our most recent releases do not support Server versions of Windows operating system. You can find a complete list of system requirements, for the applications included with a Creative Cloud membership, at Adobe Creative Cloud system requirements . Unless you see Windows Server 2019 specifically listed then it is likely you will be blocked from installing the application. I would encourage you to use the membership on a computer that does meet the system requirements for the a
…
Are you looking for a solution on how to deploy Adobe Photoshop Creative Cloud with Intune or SCCM? This article will serve as an informative guide and give you a clear understanding of how to perform silent or interactive installs and uninstalls of Adobe Photoshop Creative Cloud using the Powershell App Deployment Toolkit. The PowerShell App Deployment Toolkit can be used to replace your WiseScript, VBScript and Batch wrapper scripts with one versatile, re-usable and extensible tool. This tool is an absolute must for Microsoft Endpoint Manager Configuration Manager (MEMCM) / (SCCM) Administrators or anyone who is responsible for packaging and deploying software.
How to Install Adobe Photoshop Creative Cloud Using the PowerShell App Deployment Toolkit
- Download the Powershell App Deployment Toolkit 3.8.4:
- https://github.com/PSAppDeployToolkit/PSAppDeployToolkit/releases/download/3.8.4/PSAppDeployToolkit_v3.8.4.zip
- Download the zip file to a folder created at (C:\Downloads)
- Open Windows PowerShell by Right-Clicking on Windows PowerShell and selecting Run as Administrator
- Enter the following command to remove the Zone.Identifier:
Unblock-File -Path C:\Downloads\PSAppDeployToolkit_v3.8.4.zip
- Enter the following command to extract the contents of the zip file:
Expand-Archive -Path C:\Downloads\PSAppDeployToolkit_v3.8.4.zip -DestinationPath C:\Downloads\PADT
- Enter the following commands to copy the AppDeployToolkit, Files & SupportFiles folders to “C:\Downloads\AdobePhotoshopCC”:
Copy-Item -Path "C:\Downloads\PADT\Toolkit\AppDeployToolkit" -Destination "C:\Downloads\AdobePhotoshopCC\AppDeployToolkit" -RecurseCopy-Item -Path "C:\Downloads\PADT\Toolkit\Files" -Destination "C:\Downloads\AdobePhotoshopCC\Files"Copy-Item -Path "C:\Downloads\PADT\Toolkit\SupportFiles" -Destination "C:\Downloads\AdobePhotoshopCC
You should now see the AppDeploymentToolkit folder with files & the empty Files & SupportFiles folders at “C:\Downloads\AdobePhotoshopCC”
Next we’ll want to download & extract the EXE installers for Adobe Photoshop Creative Cloud and the Adobe Uninstall Tool.
- Login to the Adobe Admin Console: https://adminconsole.adobe.com
- Navigate to Packages->Adobe templates
- Search for PACKAGE NAME: Photoshop | PLATFORM: Windows
- Click the magnifying glass to view the details for Photoshop
- Click Customize to configure options based on your preferences
- After completing the customizations click Create Package
- Once the package build has completed it should automatically start to download
- Extract the contents of the Photoshop_en_US_WIN_64.zip to “C:\Downloads\AdobePhotoshopCC\Files\”
- You should now see a similar structure inside the Files directory
- Build
- Exceptions
- Photoshop.ccp
- PackageInfo.txt
- You should now see a similar structure inside the Files directory
- Login to the Adobe Admin Console: https://adminconsole.adobe.com
- Navigate to Packages->Tools
- Download the Adobe Uninstall Tool
- Copy the AdobeUninstaller.exe to “C:\Downloads\AdobePhotoshopCC\SupportFiles\”
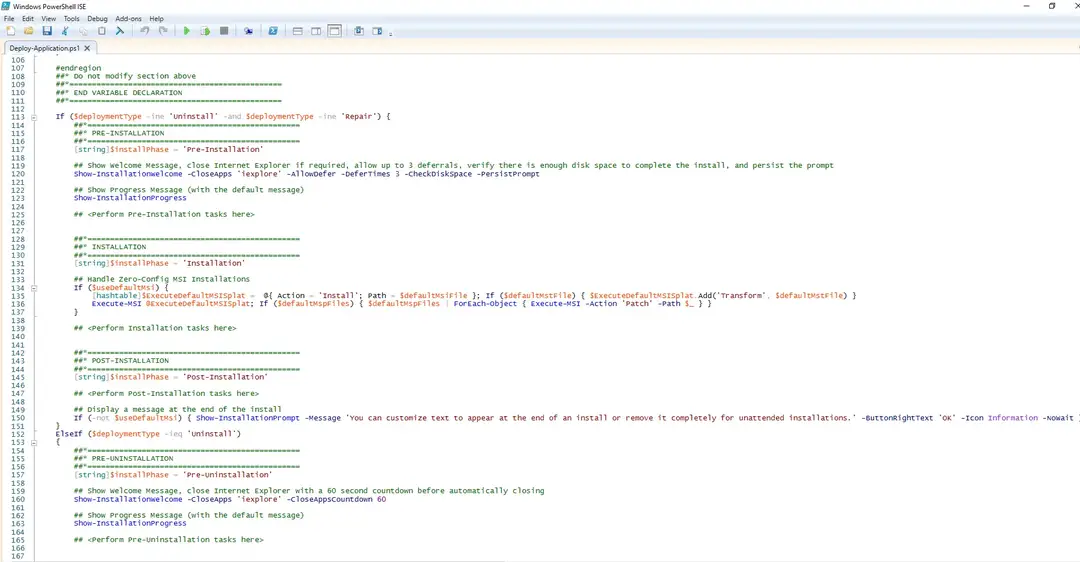
- Copy the PowerShell script below to “C:\Downloads\AdobePhotoshopCC“ & name it Deploy-AdobePhotoshopCC.ps1
<#
.SYNOPSIS
	This script performs the installation or uninstallation of Adobe Photoshop Creative Cloud.
	# LICENSE #
	PowerShell App Deployment Toolkit - Provides a set of functions to perform common application deployment tasks on Windows.
	Copyright (C) 2017 - Sean Lillis, Dan Cunningham, Muhammad Mashwani, Aman Motazedian.
	This program is free software: you can redistribute it and/or modify it under the terms of the GNU Lesser General Public License as published by the Free Software Foundation, either version 3 of the License, or any later version. This program is distributed in the hope that it will be useful, but WITHOUT ANY WARRANTY; without even the implied warranty of MERCHANTABILITY or FITNESS FOR A PARTICULAR PURPOSE. See the GNU General Public License for more details.
	You should have received a copy of the GNU Lesser General Public License along with this program. If not, see <http://www.gnu.org/licenses/>.
.DESCRIPTION
	The script is provided as a template to perform an install or uninstall of an application(s).
	The script either performs an "Install" deployment type or an "Uninstall" deployment type.
	The install deployment type is broken down into 3 main sections/phases: Pre-Install, Install, and Post-Install.
	The script dot-sources the AppDeployToolkitMain.ps1 script which contains the logic and functions required to install or uninstall an application.
.PARAMETER DeploymentType
	The type of deployment to perform. Default is: Install.
.PARAMETER DeployMode
	Specifies whether the installation should be run in Interactive, Silent, or NonInteractive mode. Default is: Interactive. Options: Interactive = Shows dialogs, Silent = No dialogs, NonInteractive = Very silent, i.e. no blocking apps. NonInteractive mode is automatically set if it is detected that the process is not user interactive.
.PARAMETER AllowRebootPassThru
	Allows the 3010 return code (requires restart) to be passed back to the parent process (e.g. SCCM) if detected from an installation. If 3010 is passed back to SCCM, a reboot prompt will be triggered.
.PARAMETER TerminalServerMode
	Changes to "user install mode" and back to "user execute mode" for installing/uninstalling applications for Remote Destkop Session Hosts/Citrix servers.
.PARAMETER DisableLogging
	Disables logging to file for the script. Default is: $false.
.EXAMPLE
    PowerShell.exe .\Deploy-AdobePhotoshopCC.ps1 -DeploymentType "Install" -DeployMode "NonInteractive"
.EXAMPLE
    PowerShell.exe .\Deploy-AdobePhotoshopCC.ps1 -DeploymentType "Install" -DeployMode "Silent"
.EXAMPLE
    PowerShell.exe .\Deploy-AdobePhotoshopCC.ps1 -DeploymentType "Install" -DeployMode "Interactive"
.EXAMPLE
    PowerShell.exe .\Deploy-AdobePhotoshopCC.ps1 -DeploymentType "Uninstall" -DeployMode "NonInteractive"
.EXAMPLE
    PowerShell.exe .\Deploy-AdobePhotoshopCC.ps1 -DeploymentType "Uninstall" -DeployMode "Silent"
.EXAMPLE
    PowerShell.exe .\Deploy-AdobePhotoshopCC.ps1 -DeploymentType "Uninstall" -DeployMode "Interactive"
.NOTES
	Toolkit Exit Code Ranges:
	60000 - 68999: Reserved for built-in exit codes in Deploy-Application.ps1, Deploy-Application.exe, and AppDeployToolkitMain.ps1
	69000 - 69999: Recommended for user customized exit codes in Deploy-Application.ps1
	70000 - 79999: Recommended for user customized exit codes in AppDeployToolkitExtensions.ps1
.LINK
	http://psappdeploytoolkit.com
#>
[CmdletBinding()]
Param (
	[Parameter(Mandatory=$false)]
	[ValidateSet('Install','Uninstall','Repair')]
	[string]$DeploymentType = 'Install',
	[Parameter(Mandatory=$false)]
	[ValidateSet('Interactive','Silent','NonInteractive')]
	[string]$DeployMode = 'Interactive',
	[Parameter(Mandatory=$false)]
	[switch]$AllowRebootPassThru = $false,
	[Parameter(Mandatory=$false)]
	[switch]$TerminalServerMode = $false,
	[Parameter(Mandatory=$false)]
	[switch]$DisableLogging = $false
)

Try {
	## Set the script execution policy for this process
	Try { Set-ExecutionPolicy -ExecutionPolicy 'ByPass' -Scope 'Process' -Force -ErrorAction 'Stop' } Catch {}

	##*===============================================
	##* VARIABLE DECLARATION
	##*===============================================
	## Variables: Application
	[string]$appVendor = ''
	[string]$appName = 'Adobe Photoshop Creative Cloud'
	[string]$appVersion = ''
	[string]$appArch = ''
	[string]$appLang = ''
	[string]$appRevision = ''
	[string]$appScriptVersion = '1.0.0'
	[string]$appScriptDate = 'XX/XX/20XX'
	[string]$appScriptAuthor = 'Jason Bergner'
	##*===============================================
	## Variables: Install Titles (Only set here to override defaults set by the toolkit)
	[string]$installName = ''
	[string]$installTitle = 'Adobe Photoshop Creative Cloud'

	##* Do not modify section below
	#region DoNotModify

	## Variables: Exit Code
	[int32]$mainExitCode = 0

	## Variables: Script
	[string]$deployAppScriptFriendlyName = 'Deploy Application'
	[version]$deployAppScriptVersion = [version]'3.8.4'
	[string]$deployAppScriptDate = '26/01/2021'
	[hashtable]$deployAppScriptParameters = $psBoundParameters

	## Variables: Environment
	If (Test-Path -LiteralPath 'variable:HostInvocation') { $InvocationInfo = $HostInvocation } Else { $InvocationInfo = $MyInvocation }
	[string]$scriptDirectory = Split-Path -Path $InvocationInfo.MyCommand.Definition -Parent

	## Dot source the required App Deploy Toolkit Functions
	Try {
		[string]$moduleAppDeployToolkitMain = "$scriptDirectory\AppDeployToolkit\AppDeployToolkitMain.ps1"
		If (-not (Test-Path -LiteralPath $moduleAppDeployToolkitMain -PathType 'Leaf')) { Throw "Module does not exist at the specified location [$moduleAppDeployToolkitMain]." }
		If ($DisableLogging) { . $moduleAppDeployToolkitMain -DisableLogging } Else { . $moduleAppDeployToolkitMain }
	}
	Catch {
		If ($mainExitCode -eq 0){ [int32]$mainExitCode = 60008 }
		Write-Error -Message "Module [$moduleAppDeployToolkitMain] failed to load: `n$($_.Exception.Message)`n `n$($_.InvocationInfo.PositionMessage)" -ErrorAction 'Continue'
		## Exit the script, returning the exit code to SCCM
		If (Test-Path -LiteralPath 'variable:HostInvocation') { $script:ExitCode = $mainExitCode; Exit } Else { Exit $mainExitCode }
	}

	#endregion
	##* Do not modify section above
	##*===============================================
	##* END VARIABLE DECLARATION
	##*===============================================

	If ($deploymentType -ine 'Uninstall' -and $deploymentType -ine 'Repair') {
		##*===============================================
		##* PRE-INSTALLATION
		##*===============================================
		[string]$installPhase = 'Pre-Installation'

		## Show Welcome Message, Close Adobe Photoshop Creative Cloud With a 60 Second Countdown Before Automatically Closing
		Show-InstallationWelcome -CloseApps 'Photoshop,Adobe CEF Helper,Adobe Desktop Service,AdobeIPCBroker,AdobeUpdateService,armsvc,CCLibrary,CCXProcess,CoreSync,Creative Cloud Helper,Creative Cloud,node' -CloseAppsCountdown 60

        ## Show Progress Message (With a Message to Indicate the Application is Being Uninstalled)
        Show-InstallationProgress -StatusMessage "Removing Any Existing Version of Adobe Photoshop Creative Cloud. Please Wait..."

        ## Remove Any Existing Version of Adobe Photoshop CC
        $AppList = Get-InstalledApplication -Name 'Adobe Photoshop'
        ForEach ($App in $AppList)
        {
        If($App.UninstallString)
        {
        $AdobeUninstaller = Get-ChildItem -Path "$dirSupportFiles" -Include AdobeUninstaller.exe -File -Recurse -ErrorAction SilentlyContinue
        If($AdobeUninstaller.Exists)
        {
        Write-Log -Message "Found $($AdobeUninstaller.FullName), now attempting to uninstall Adobe Creative Cloud."
        Execute-Process -Path "$AdobeUninstaller" -Parameters "--products=PHSP --skipNotInstalled" -WindowStyle Hidden
        Start-Sleep -Seconds 5
        }
        }
        }

        ## Remove Any Existing Version of Adobe Bridge CC
        $AppList = Get-InstalledApplication -Name 'Adobe Bridge'
        ForEach ($App in $AppList)
        {
        If($App.UninstallString)
        {
        $AdobeUninstaller = Get-ChildItem -Path "$dirSupportFiles" -Include AdobeUninstaller.exe -File -Recurse -ErrorAction SilentlyContinue
        If($AdobeUninstaller.Exists)
        {
        Write-Log -Message "Found $($AdobeUninstaller.FullName), now attempting to uninstall Adobe Creative Cloud."
        Execute-Process -Path "$AdobeUninstaller" -Parameters "--products=KBRG --skipNotInstalled" -WindowStyle Hidden
        Start-Sleep -Seconds 5
        }
        }
        }

		##*===============================================
		##* INSTALLATION
		##*===============================================
		[string]$installPhase = 'Installation'

        ## Install Adobe Photoshop Creative Cloud
        Show-InstallationProgress "Installing Adobe Photoshop Creative Cloud. This may take some time. Please wait..."
        Execute-Process -Path "$dirFiles\Build\setup.exe" -Parameters "--silent" -WindowStyle Hidden
        Start-Sleep -Seconds 5

        ## Remove Adobe Creative Cloud Desktop Shortcut (If Present)
        If (Test-Path -Path "$envPublic\Desktop\Adobe Creative Cloud.lnk") {
        Write-Log -Message "Removing Adobe Creative Cloud Desktop Shortcut."
        Remove-Item -Path "$envPublic\Desktop\Adobe Creative Cloud.lnk" -Force -Recurse -ErrorAction SilentlyContinue
        }

        ## Remove Adobe Photoshop Desktop Shortcut (If Present)
        If (Test-Path -Path "$envPublic\Desktop\Adobe Photoshop*.lnk") {
        Write-Log -Message "Removing Adobe Photoshop Desktop Shortcut."
        Remove-Item -Path "$envPublic\Desktop\Adobe Photoshop*.lnk" -Force -Recurse -ErrorAction SilentlyContinue
        }

		##*===============================================
		##* POST-INSTALLATION
		##*===============================================
		[string]$installPhase = 'Post-Installation'

	}
	ElseIf ($deploymentType -ieq 'Uninstall')
	{
		##*===============================================
		##* PRE-UNINSTALLATION
		##*===============================================
		[string]$installPhase = 'Pre-Uninstallation'

		## Show Welcome Message, Close Adobe Photoshop Creative Cloud With a 60 Second Countdown Before Automatically Closing
		Show-InstallationWelcome -CloseApps 'Photoshop,Adobe CEF Helper,Adobe Desktop Service,AdobeIPCBroker,AdobeUpdateService,armsvc,CCLibrary,CCXProcess,CoreSync,Creative Cloud Helper,Creative Cloud,node' -CloseAppsCountdown 60

        ## Show Progress Message (With a Message to Indicate the Application is Being Uninstalled)
        Show-InstallationProgress -StatusMessage "Uninstalling the $installTitle Application. Please Wait..."

		##*===============================================
		##* UNINSTALLATION
		##*===============================================
		[string]$installPhase = 'Uninstallation'

        ## Uninstall Any Existing Version of Adobe Photoshop CC
        $AppList = Get-InstalledApplication -Name 'Adobe Photoshop'
        ForEach ($App in $AppList)
        {
        If($App.UninstallString)
        {
        $AdobeUninstaller = Get-ChildItem -Path "$dirSupportFiles" -Include AdobeUninstaller.exe -File -Recurse -ErrorAction SilentlyContinue
        If($AdobeUninstaller.Exists)
        {
        Write-Log -Message "Found $($AdobeUninstaller.FullName), now attempting to uninstall Adobe Creative Cloud."
        Execute-Process -Path "$AdobeUninstaller" -Parameters "--products=PHSP --skipNotInstalled" -WindowStyle Hidden
        Start-Sleep -Seconds 5
        }
        }
        }

        ## Uninstall Any Existing Version of Adobe Bridge CC
        $AppList = Get-InstalledApplication -Name 'Adobe Bridge'
        ForEach ($App in $AppList)
        {
        If($App.UninstallString)
        {
        $AdobeUninstaller = Get-ChildItem -Path "$dirSupportFiles" -Include AdobeUninstaller.exe -File -Recurse -ErrorAction SilentlyContinue
        If($AdobeUninstaller.Exists)
        {
        Write-Log -Message "Found $($AdobeUninstaller.FullName), now attempting to uninstall Adobe Creative Cloud."
        Execute-Process -Path "$AdobeUninstaller" -Parameters "--products=KBRG --skipNotInstalled" -WindowStyle Hidden
        Start-Sleep -Seconds 5
        }
        }
        }

		##*===============================================
		##* POST-UNINSTALLATION
		##*===============================================
		[string]$installPhase = 'Post-Uninstallation'


	}
	ElseIf ($deploymentType -ieq 'Repair')
	{
		##*===============================================
		##* PRE-REPAIR
		##*===============================================
		[string]$installPhase = 'Pre-Repair'


		##*===============================================
		##* REPAIR
		##*===============================================
		[string]$installPhase = 'Repair'


		##*===============================================
		##* POST-REPAIR
		##*===============================================
		[string]$installPhase = 'Post-Repair'


    }
	##*===============================================
	##* END SCRIPT BODY
	##*===============================================

	## Call the Exit-Script function to perform final cleanup operations
	Exit-Script -ExitCode $mainExitCode
}
Catch {
	[int32]$mainExitCode = 60001
	[string]$mainErrorMessage = "$(Resolve-Error)"
	Write-Log -Message $mainErrorMessage -Severity 3 -Source $deployAppScriptFriendlyName
	Show-DialogBox -Text $mainErrorMessage -Icon 'Stop'
	Exit-Script -ExitCode $mainExitCode
}
Ok, all the hard work is done and now you can install or uninstall Adobe Photoshop Creative Cloud using one single PowerShell script. Simply change the DeploymentType parameter to install or uninstall. Logging functionality is built-in automatically and you can view the log files under “C:\Windows\Logs\Software”.
Adobe Photoshop Creative Cloud NonInteractive Install (PowerShell)
NonInteractive means Very Silent, i.e. no blocking apps. This is automatically set if it is detected that the process is not running in the user session and it is not possible for anyone to provide input using a mouse or keyboard.
- Open Windows PowerShell by Right-Clicking on Windows PowerShell and selecting Run as Administrator
- Change the directory to “C:\Downloads\AdobePhotoshopCC”
- PS C:\Downloads\AdobePhotoshopCC>
- Enter the following command:
Powershell.exe -ExecutionPolicy Bypass .\Deploy-AdobePhotoshopCC.ps1 -DeploymentType "Install" -DeployMode "NonInteractive"
Adobe Photoshop Creative Cloud Silent Install (PowerShell)
Silent means no dialogs (progress and balloon tip notifications are suppressed).
- Open Windows PowerShell by Right-Clicking on Windows PowerShell and selecting Run as Administrator
- Change the directory to “C:\Downloads\AdobePhotoshopCC“
- PS C:\Downloads\AdobePhotoshopCC>
- Enter the following command:
Powershell.exe -ExecutionPolicy Bypass .\Deploy-AdobePhotoshopCC.ps1 -DeploymentType "Install" -DeployMode "Silent"
Adobe Photoshop Creative Cloud Interactive Install (PowerShell)
Interactive means the install will show dialogs including progress and balloon tip notifications.
- Open Windows PowerShell by Right-Clicking on Windows PowerShell and selecting Run as Administrator
- Change the directory to “C:\Downloads\AdobePhotoshopCC”
- PS C:\Downloads\AdobePhotoshopCC>
- Enter the following command:
Powershell.exe -ExecutionPolicy Bypass .\Deploy-AdobePhotoshopCC.ps1 -DeploymentType "Install" -DeployMode "Interactive"
How to Uninstall Adobe Photoshop Creative Cloud Using the PowerShell App Deployment Toolkit
Adobe Photoshop Creative Cloud NonInteractive Uninstall (PowerShell)
NonInteractive means Very Silent, i.e. no blocking apps. This is automatically set if it is detected that the process is not running in the user session and it is not possible for anyone to provide input using a mouse or keyboard.
- Open Windows PowerShell by Right-Clicking on Windows PowerShell and selecting Run as Administrator
- Change the directory to “C:\Downloads\AdobePhotoshopCC“
- PS C:\Downloads\AdobePhotoshopCC>
- Enter the following command:
Powershell.exe -ExecutionPolicy Bypass .\Deploy-AdobePhotoshopCC.ps1 -DeploymentType "Uninstall" -DeployMode "NonInteractive"
Adobe Photoshop Creative Cloud Silent Uninstall (PowerShell)
Silent means no dialogs (progress and balloon tip notifications are suppressed).
- Open Windows PowerShell by Right-Clicking on Windows PowerShell and selecting Run as Administrator
- Change the directory to “C:\Downloads\AdobePhotoshopCC“
- PS C:\Downloads\AdobePhotoshopCC>
- Enter the following command:
Powershell.exe -ExecutionPolicy Bypass .\Deploy-AdobePhotoshopCC.ps1 -DeploymentType "Uninstall" -DeployMode "Silent"
Adobe Photoshop Creative Cloud Interactive Uninstall (PowerShell)
Interactive means the install will show dialogs including progress and balloon tip notifications.
- Open Windows PowerShell by Right-Clicking on Windows PowerShell and selecting Run as Administrator
- Change the directory to “C:\Downloads\AdobePhotoshopCC“
- PS C:\Downloads\AdobePhotoshopCC>
- Enter the following command:
Powershell.exe -ExecutionPolicy Bypass .\Deploy-AdobePhotoshopCC.ps1 -DeploymentType "Uninstall" -DeployMode "Interactive"
Always make sure to test everything in a development environment prior to implementing anything into production. The information in this article is provided “As Is” without warranty of any kind.