
- Nmap Network Scanning
- Chapter 2. Obtaining, Compiling, Installing, and Removing Nmap
- Windows
While Nmap was once a Unix-only tool, a Windows version was
released in 2000 and has since become the second most popular Nmap
platform (behind Linux). Because of this popularity and the fact that
many Windows users do not have a compiler, binary executables are
distributed for each major Nmap release. We support Nmap on Windows 7
and newer, as well as Windows Server 2008 and newer. We also maintain
a guide for users
who must run Nmap on earlier Windows releases.
Nmap runs equally well on Windows as on Unix in nearly every way, though there are a couple of known limitations:
-
Nmap only supports ethernet interfaces (including most
802.11 wireless cards and many VPN clients) for raw packet scans.
Unless you use the-sT -Pnoptions, RAS connections
(such as PPP dialups) and certain VPN clients are not supported. This
support was dropped when Microsoft removed raw TCP/IP socket support
in Windows XP SP2. Now Nmap must send lower-level ethernet frames
instead. -
When using Nmap without Npcap, you cannot
generally scan your own machine from itself (using a
loopback IP such as 127.0.0.1 or any of its
registered IP addresses). This is a Windows limitation that we
have worked around in Npcap, which is included in the Windows self-installer.
Users stuck without a Npcap installation can use a TCP
connect scan without pinging (-sT -Pn) as that uses
the high level socket API rather than sending raw
packets.
Scan speeds on Windows are generally comparable to those on
Unix, though the latter often has a slight performance edge. One
example of this is connect scan (-sT), which may be
slower on Windows because of different limits in the Windows
networking API. Since this is the one TCP scan that
works over all networking types (not just ethernet, like the raw packet scans),
Nmap includes a collection of Registry changes that substantially improve connect scan performance.
By default these changes are applied for you by the Nmap executable installer, and are also available in the
nmap_performance.reg file
in the nmap-<version>
directory of the Windows binary zip file (for Nmap OEM customers), and
nmap-<version>/mswin32
in the source tarball (where <version> is the
version number of the specific release). These changes increase
the number of ephemeral ports reserved for user applications (such as
Nmap) and reduce the time delay before a closed connection can
be reused. Most people simply check the box to apply these changes in the executable Nmap installer, but you can also apply them by double-clicking on
nmap_performance.reg, or by running the command
regedt32 nmap_performance.reg. To make the changes by hand, add these three Registry DWORD values to
HKEY_LOCAL_MACHINE\SYSTEM\CurrentControlSet\Services\Tcpip\Parameters:
- MaxUserPort
-
Set a large value such as 65534 (0x0000fffe). See MS KB 196271.
- TCPTimedWaitDelay
-
Set the minimum value (0x0000001e). See MS KB 149532.
- StrictTimeWaitSeqCheck
-
Set to 1 so TCPTimedWaitDelay is checked.
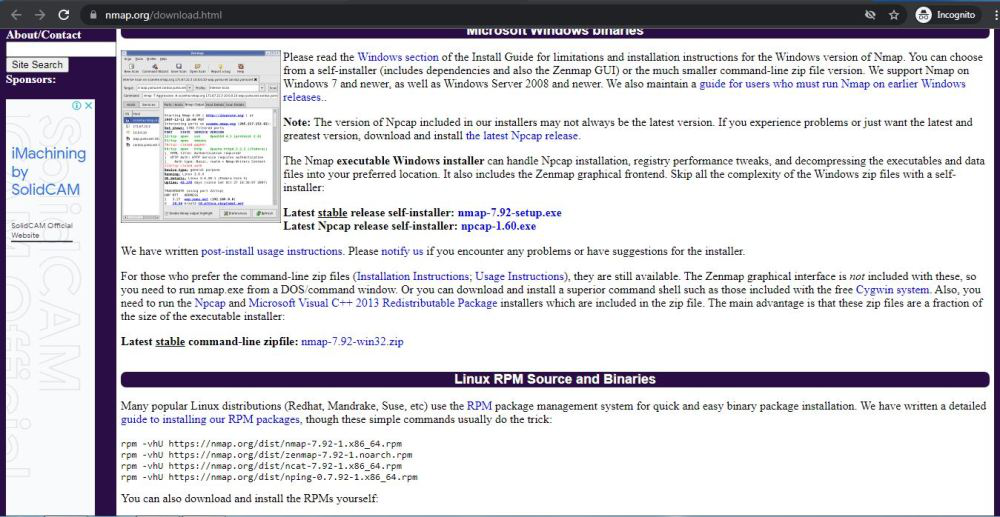
Windows users have three choices for installing
Nmap, all of which are available from the
download page at https://nmap.org/download.html.
Windows Self-installer
Every Nmap release includes a Windows
self-installer named
nmap-<version>-setup.exe
(where <version> is the version number of the
specific release). Most Nmap users choose this option since it is so
easy. Another advantage of the self-installer is that it provides the option to install the Zenmap GUI and other tools. Simply run the installer file and let it walk you through
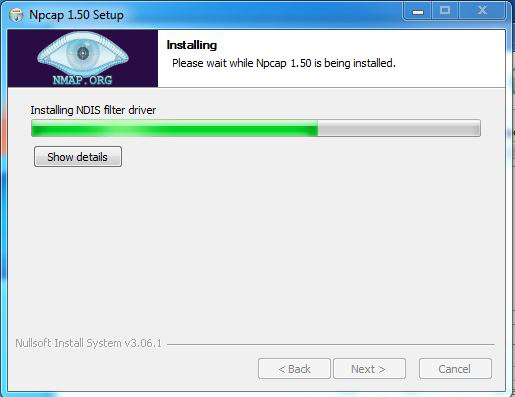
panels for choosing an install path and installing Npcap. The
installer was created with the open-source Nullsoft Scriptable
Install System. After it completes, read the section called “Executing Nmap on Windows” for instructions on executing Nmap on the
command-line or through Zenmap.
Command-line Zip Binaries
| Note | |
|---|---|
|
The Zip archive is available to Nmap OEM customers only. Most users prefer installing Nmap with the self-installer discussed previously. |
Every stable Nmap OEM release is also available as Windows
command-line binaries and associated files in a Zip archive. No
graphical interface is included, so you need to run
nmap.exe from a DOS/command window.
Here are the step-by-step instructions for installing and executing the Nmap .zip binaries.
Installing the Nmap zip binaries
-
Download the .zip binaries from the link provided in your Nmap OEM order.
-
Extract the zip file into the directory you want
Nmap to reside in. An example would beC:\Program. A directory called
Files
nmap-should be created, which includes<version>
the Nmap executable and data files. -
For improved performance, apply the Nmap Registry
changes discussed previously. -
Nmap requires the free Npcap packet capture library.
We include a recent Npcap installer which is available in the zip file
asnpcap-,<version>-oem.exe
where<version>is the Npcap version rather
than the Nmap version. Alternatively, you can obtain and install
the latest version fromhttps://npcap.com. -
Due to the way Nmap is compiled, it requires the
Microsoft Visual C++ Redistributable Package of runtime
components. Many systems already have this installed from other
packages, but you should runvc_redist.x86.exe
from the zip file just in case you need it.
Pass the/qoption to run these installers in quiet (non interactive) mode. -
Instructions for executing your compiled Nmap are
given in the section called “Executing Nmap on Windows”.
Compile from Source Code
Most Windows users prefer to use the Nmap binary self-installer,
but compilation from source code is an option, particularly if you plan to help with Nmap development. Compilation requires
Microsoft Visual C++ 2019, which is part of their commercial Visual Studio
suite. Any of the Visual Studio 2019 editions should work, including the free
Visual Studio 2019 Community.
Some of Nmap’s dependencies on Windows are inconvenient to build. For
this reason, precompiled binaries of the dependencies are stored in
Subversion, in the directory /nmap-mswin32-aux.
When building from source, whether from a source code release or from
Subversion, check out /nmap-mswin32-aux as
described below.
Compiling Nmap on Windows from Source
-
Download the Windows dependencies from Subversion with the command
svn checkout https://svn.nmap.org/nmap-mswin32-aux.
The build files are configured to look for dependencies in this
checked-out directory. If you want to build the dependencies yourself
instead, you will have to reconfigure the Visual Studio project files to
point to the alternate directory. -
Decide whether to obtain the Nmap source code by downloading the latest release from nmap.org, or using a Subversion client to retrieve even newer (but less tested) code from our repository. These instructions are for the web download approach, but using Subversion instead is straightforward (see the section called “Obtaining Nmap from the Subversion (SVN) Repository”).
-
Download the latest Nmap source distribution from
https://nmap.org/download.html. It has the name
nmap-or<version>.tar.bz2
nmap-. Those are the same tar file compressed using bzip2 or gzip, respectively. The bzip2-compressed version is smaller.<version>.tgz -
Uncompress the source code file you just downloaded. The
source code directory and thenmap-mswin32-auxmust
be in the same parent directory.
Recent releases of the free Cygwin distribution can handle both the.tar.bz2and.tgzformats. Use the command tar xvjf nmap-version.tar.bz2 or tar xvzf nmap-version.tgz, respectively. Alternatively, the common WinZip application can decompress these files. -
Open Visual Studio and the Nmap solution file (
nmap-).<version>/mswin32/nmap.sln -
Right click on
Solution 'nmap'in the Solution Explorer sidebar and choose “Configuration Manager”. Ensure that the active solution configuration isReleaseand then close the Configuration Manager. -
Build Nmap by pressing F7 or choosing “Build
Solution” from the GUI. Nmap should begin compiling, and
end with the line “-- Done --” saying
that all projects built successfully and there were zero
failures. -
The executable and data files can be found in
nmap-. You can copy them to a preferred directory as long as they are all kept together.<version>/mswin32/Release/ -
Ensure that you have Npcap installed.
The official installer for the latest version is available athttps://npcap.com/#download. Users who install via
our binary self-installer will have Npcap installed automatically.
Nmap OEM customers can also run
npcap-from<version>.exe
our zip package. -
Instructions for executing your compiled Nmap are
given in the next section.
If you wish to build an Nmap executable Windows
installer or Zenmap executable,
see docs/win32-installer-zenmap-buildguide.txt in the Nmap SVN repository.
Many people have asked whether Nmap can be compiled with the
gcc/g++ included
with Cygwin or other compilers. Some users have reported success with
this, but we don’t maintain instructions for building Nmap under
Cygwin.
Executing Nmap on Windows
Nmap releases now include the
Zenmap graphical user interface for Nmap.
If you used the Nmap installer and left the Zenmap field checked,
there should be a new Zenmap entry on your desktop and Start Menu.
Click this to get started. Zenmap is fully documented in
Chapter 12, Zenmap GUI Users’ Guide. While many users love Zenmap, others prefer
the traditional command-line approach to executing Nmap. Here are
detailed instructions for users who are unfamiliar with command-line
interfaces:
-
Open Terminal, PowerShell, or Command Prompt. If you are using MSYS2, Cygwin, or WSL,
the necessary commands differ slightly from those shown here. -
Change to the directory you installed Nmap into. You can skip this step if Nmap is already in your command path (the installer adds it there by default). Otherwise, type the following commands.
c:cd "\Program Files (x86)\Nmap" -
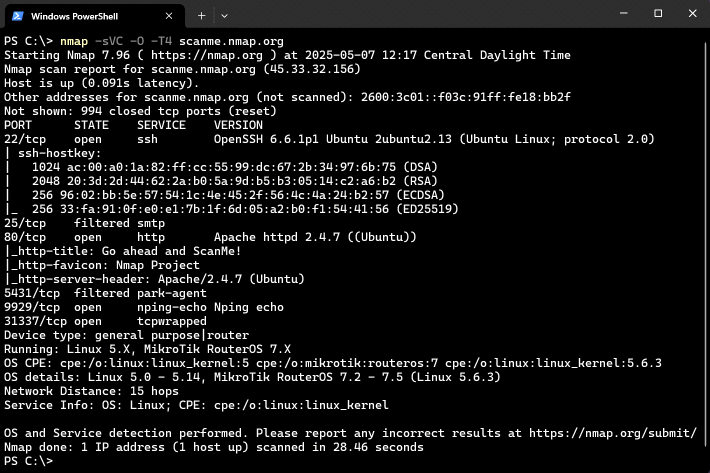
Execute nmap.exe. Figure 2.1 is a screen shot showing a simple example.
Figure 2.1. Executing Nmap from a Windows command shell
If you execute Nmap frequently, you can add the Nmap directory
(c:\Program Files (x86)\Nmap by default) to your command execution path:
-
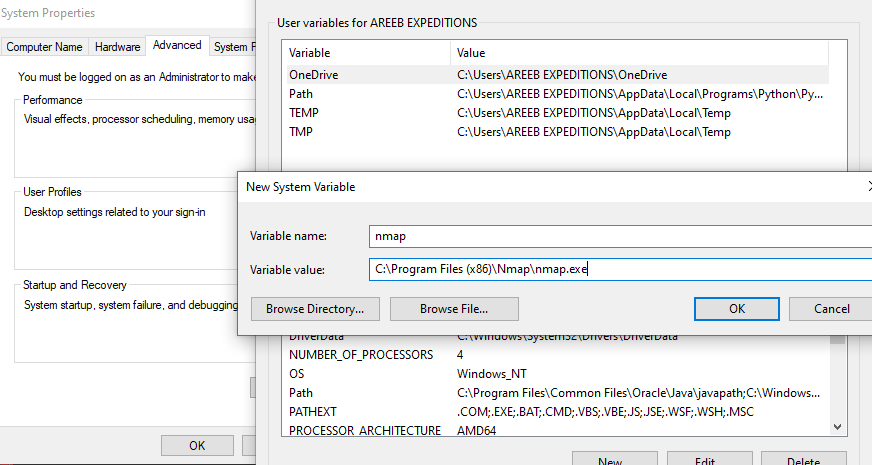
Open the System Properties window to the Advanced tab by running
SystemPropertiesAdvanced.exe. -
Click the “Environment
Variables” button. -
Choose
Pathfrom the
System variablessection, then hit
edit. -
Add a semi-colon and then your Nmap directory (e.g.
c:\Program Files (x86)\Nmap) to the end of the value. -
Open a new command prompt and you should be able to execute a
command such as nmap scanme.nmap.org from any directory.
Last Updated :
05 Jan, 2022
Nmap is computer software that is used to scan networks. It was developed by Gordon Lyon. It is written in C, C++, Python, and Lua. Its initial release was in 1997, and its stable release was in 2021. Its latest version is 7.92. It is free software used for security purposes of networks. It can be run on different operating systems like Windows, Mac, Linux, etc. It is used to protect computers by discovering hosts and services on a computer network by sending data packets and analyzing the responses. Some of the basic features of Nmap are:
- It discovers hosts on a network.
- It also scans open ports on the target hosts.
- It also finds the application name and the version number by interacting with network services on remote devices.
- It also finds the OS and hardware characteristics of the network devices.
- It also does scriptable interaction with the target with the help of NSE(Nmap Scripting Engine) and Lua programming languages.
- It is open-source software and is available for most operating systems.
Installing Nmap on Windows
Follow the below steps to install Nmap on Windows:
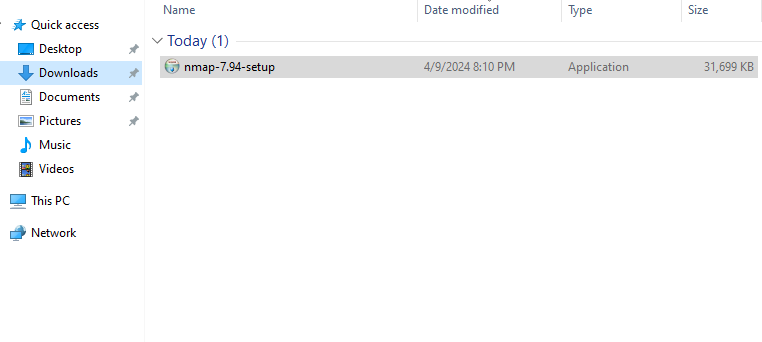
Step 1: Visit the official website using the URL https://nmap.org/download.html on any web browser the click on nmap-7.92-setup.exe. Downloading of this executable file will start soon. It is a 21.8 MB file so it will take some minutes.
Step 2: Now check for the executable file in downloads in your system and run it.
Step 3: It will prompt confirmation to make changes to your system. Click on Yes.
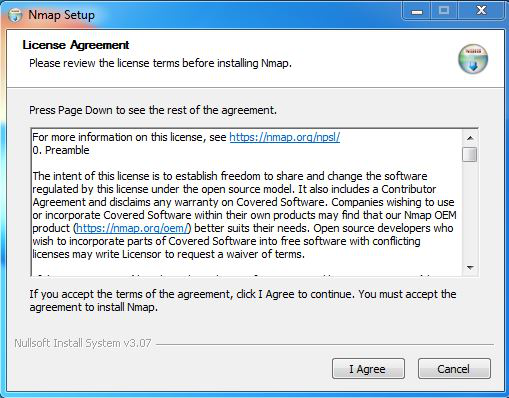
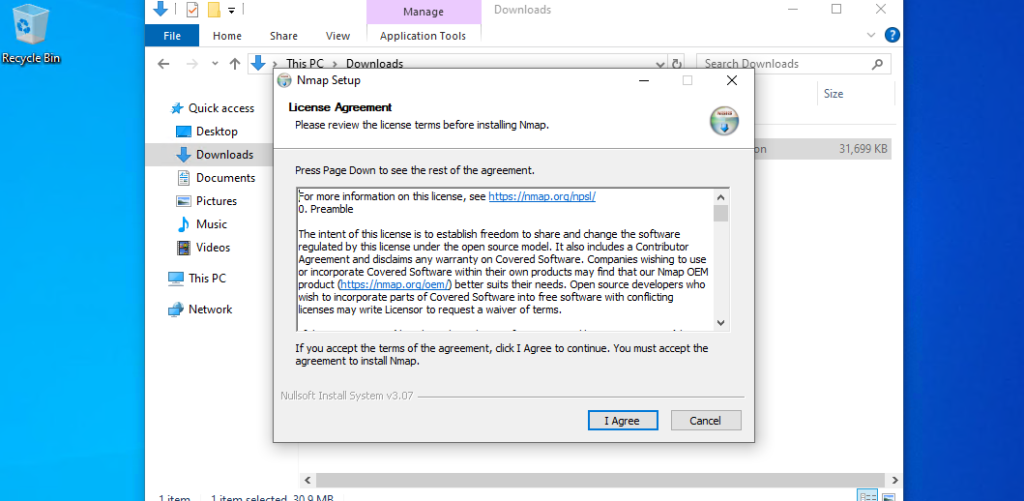
Step 4: The next screen will be of License Agreement, click on I Agree.
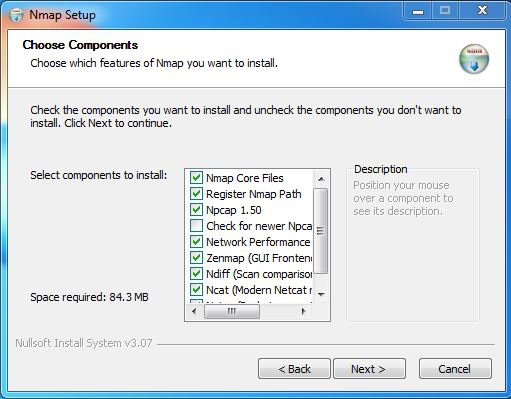
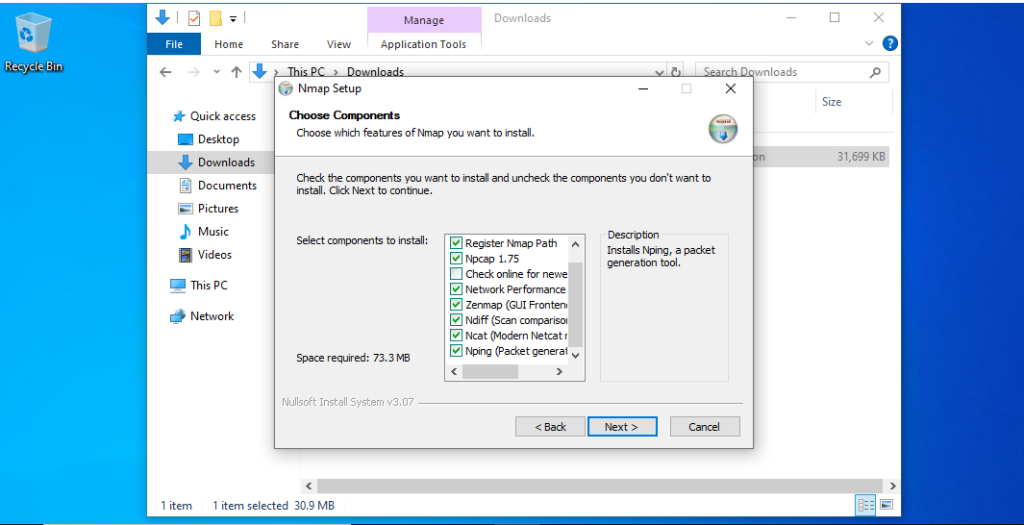
Step 5: Next screen is of choosing components, all components are already marked so don’t change anything just click on the Next button.
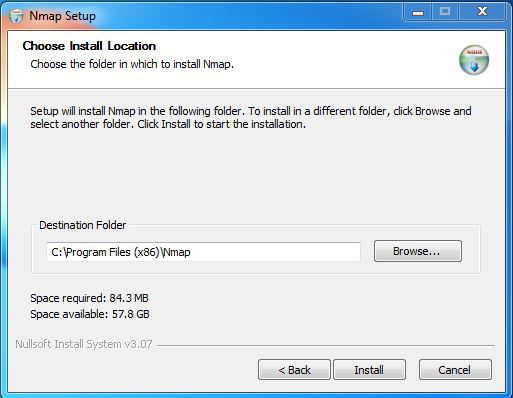
Step 6: In this step, we choose the installation location of Nmap. By default, it uses the C drive but you can change it into another drive that will have sufficient memory space for installation. It requires 84.3 MB of memory space.
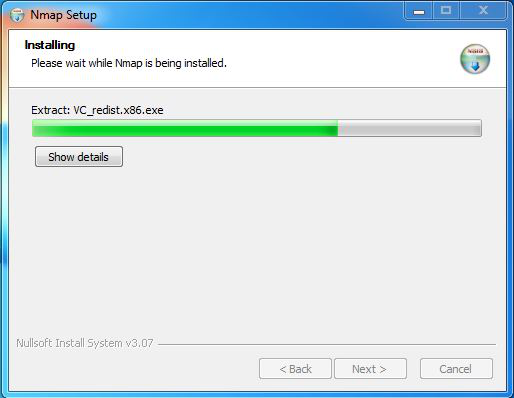
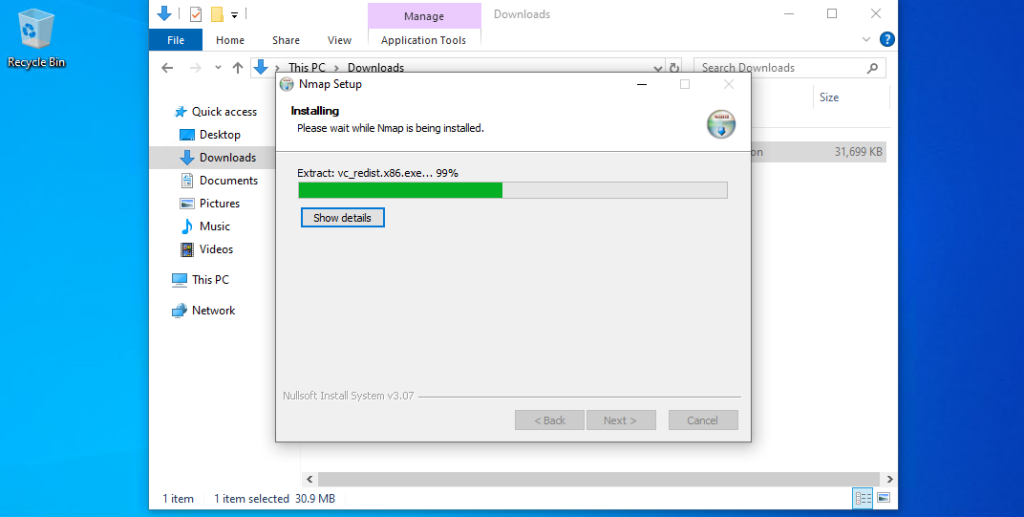
Step 7: After this installation process it will take a few minutes to complete the installation.
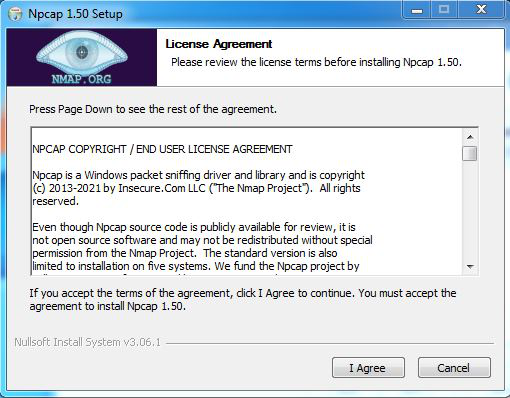
Step 8: Npcap installation will also occur with it, the screen of License Agreement will appear, click on I Agree.
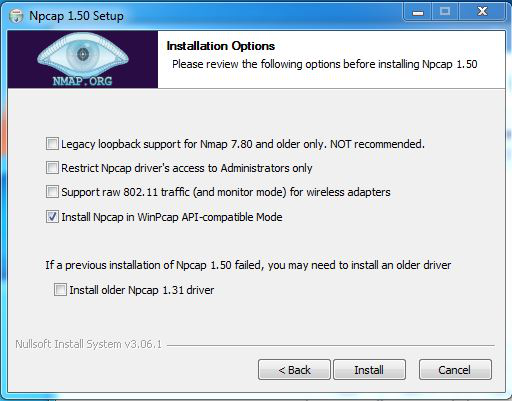
Step 9: Next screen is of installation options don’t change anything and click on the Install button.
Step 10: After this installation process it will take a few minutes to complete the installation.
Step 11: After completion of installation click on the Next button.
Step 12: Click on the Finish button to finish the installation of Npcap.
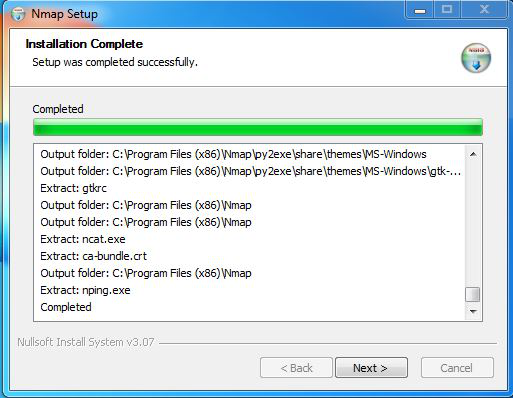
Step 13: After completion of the installation of Nmap click on Next button.
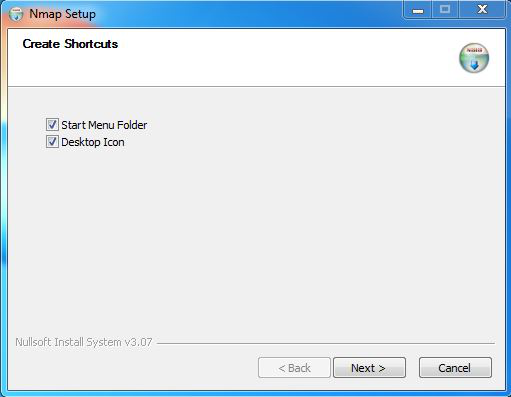
Step 14: Screen for creating shortcut will appear, click on Next button.
Step 15: Click on the Finish button to finish the installation of Nmap.
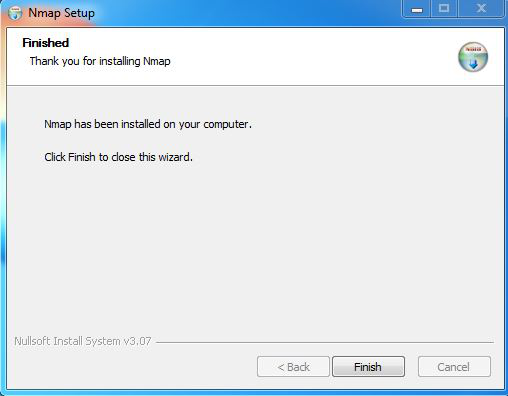
Step 16: Nmap is successfully installed on the system and an icon is created on the desktop.
Step 17: Run the software and see the interface.
So this is how you have successfully installed Nmap on your windows system.
Nmap, the Network Mapper, is a free and open-source security auditing and network exploration tool widely used by system administrators, network security professionals, and ethical hackers. Nmap can also perform more advanced tasks such as vulnerability scanning. Nmap can be downloaded in different operating systems such as Windows, macOS, and Linux.
This guide will go through the prerequisites of installing Nmap Windows and moving forward how to install the Nmap Windows operating system with different methods exploring in depth.
Prerequisites
Before installing Nmap make sure you meet the following requirements:
- Windows 7 or Later: Nmap officially supports Windows 7 and newer operating systems including Windows Server versions. If you’re using an older version there are alternative methods but these are not officially supported and may have security risks.
- Administrator Privileges: The installation process requires administrator access to modify system files and configurations.
Setting Nmap on Windows
Nmap comes pre-installed in the Kali operating system. If you have installed Kali Linux then Nmap is installed by default. If you are using Ubuntu you can refer to our guide on how to install Nmap on Ubuntu. This article will help you with Nmap download for the Windows system which will handle essential tasks:
- Network discovery: Identifying devices, hosts, and services on a network.
- Port scanning: Determining open ports and the running applications or services on those ports.
- Operating system detection: Guessing the operating system running on a host based on its responses.
- Vulnerability scanning: Identifying potential security vulnerabilities in detected services.
Let’s discuss the steps on how to install Nmap for Windows.
Step 1: Downloading Nmap for Windows
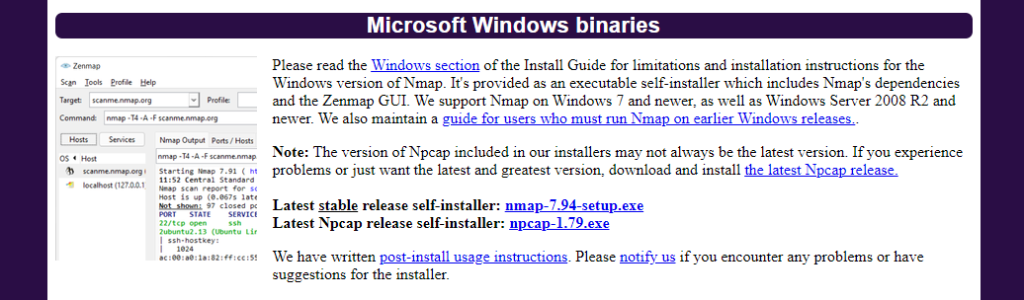
The first step is to download the official version. To do so, navigate to the Nmap download page for Windows by opening your web browser. Scroll down to the section titled ‘Microsoft Windows binaries’. Click on the latest stable release link to download the self-installer.
Step 2: Running the Installer
Once the download is complete, follow these steps for Nmap download Windows:
1. Locate the downloaded file typically in your Downloads folder. Double-click on the Nmap installer for example nmap-x-x-setup.exe.
2. If prompted by User Account Control (UAC), click ‘Yes’ to allow the installation. A Window will open by the Setup Wizard. Click ‘Next’ to proceed. Agree the End-User License Agreement after reading it.
Step 3: Choosing Components
The installer will then ask which components of Nmap should be installed. It includes:
- Nmap core files (mandatory)
- Npcap (required for packet capturing functionality)
- Zenmap GUI (optional but recommended for easy use)
- Netcat, Netdiff and Nping
Select all the components as per your requirement and click ‘Next’.
Install Nmap on Our Cheap Windows VPS!
Experience the unparalleled ease and speed of hosting Windows VPS with Ultahost. Enjoy blazing-fast SSD NVME speeds without any interruptions at a low cost.
Step 4: Selecting Installation Location
You can stick with the default directory or click ‘Browse’ to select a custom location. After selecting your preferred directory, click ‘Next’.

Step 5: Configuring Additional Tasks (Optional)
Install Nmap as a Windows system path which is recommended so it can be run from any command line. Search for System Properties in the Start menu. In the System Properties window, click on Environment Variables. Under System Variables, find and select the Path variable, then click on Edit.
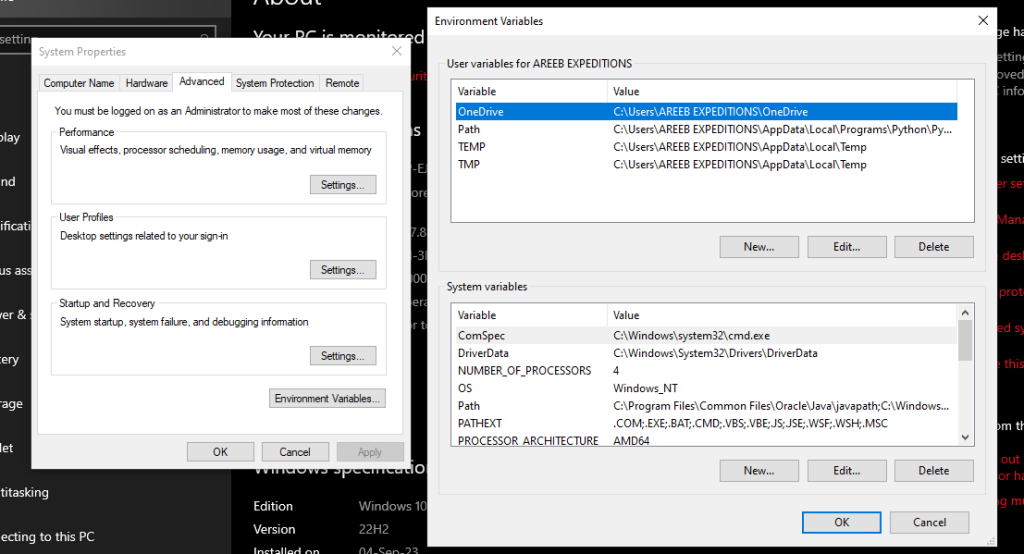
Click on New and add the path to your Nmap installation.
Step 6: Finalize Installation and Verifying Installation
Review your choices and click ‘Install’ to begin copying files onto your computer. A completion screen will appear indicating a successful installation. Click ‘Finish’.
Open Command Prompt by typing cmd in your search bar and hitting Enter. Type the following command to run Nmap on Windows:
nmap --version
If installation was successful it should display version information.

Ethical considerations
Always adhere to network privacy and security boundaries. Only scan networks where you have explicit permission. Nmap potential extends far beyond this guide. Refer to this guide Nmap cheat sheet essential commands and options for in-depth exploration of:
- Advanced scan types: Delve into SYN scans, UDP scans, and more, for specific testing needs.
- Flags and filters: Explore these modifiers to fine-tune your scans and gather precise information.
- Scripting: Suggestion of custom scripts to automate tasks and extend Nmap’s capabilities.
Conclusion
By following these steps and considering the ethical implications, you’ve empowered yourself with Nmap, a valuable tool for understanding and securing your network landscape. Use Nmap for ethical purposes, promoting a secure and responsible digital environment.
Nmap is commonly used in scanning networks, you can install Nmap on our server. Ultahost VPS hosting offers you an easy-to-manage, reliable, and economical hosting plan for businesses of all sizes. Get started today and enjoy the freedom and flexibility of a VPS!
FAQ
What is Nmap and why should I install it on Windows?
Nmap is a powerful network scanning tool used for security auditing and network exploration. Installing it on Windows enables you to assess your network’s security and discover connected devices.
How do I install Nmap on Windows?
You can install Nmap on Windows by downloading the installer from the official Nmap website and following the installation instructions.
Are there any prerequisites for installing Nmap on Windows?
No, there are no specific prerequisites for installing Nmap on Windows. You just need to ensure that your Windows system meets the minimum requirements specified by the Nmap installer.
Can I use Nmap on Windows Command Prompt or PowerShell?
Yes, once installed, you can use Nmap commands directly from the Command Prompt or PowerShell.
Introduction
Network security and analysis are critical components of modern IT infrastructure. One of the most powerful tools in this domain is Nmap (Network Mapper), a free and open-source utility designed for network discovery and security auditing. Nmap allows users to see what hosts are available on the network, what services those hosts are offering, and what operating systems are running on them. In this guide, we will take you through the steps to install Nmap on Windows 11, in a straightforward manner.
Prerequisites
Before we proceed with the installation, it’s essential to have a few prerequisites in place:
-
Windows 11 Environment: This guide is specifically tailored for Windows 11. Make sure your system is updated and functioning properly.
-
Administrator Privileges: You will need administrative rights on your computer to install Nmap. Ensure that you are using an account that has these privileges.
-
Internet Connection: A stable internet connection is required for downloading the installation files.
Downloading Nmap
The first step in installing Nmap is to download the installer from the official Nmap website. Here’s how you can do that:
-
Open a Web Browser: Launch your preferred web browser—this could be Microsoft Edge, Google Chrome, or any other browser of your choice.
-
Visit the Nmap Official Website: In the address bar, type in
https://nmap.organd hit Enter. This will take you to the official Nmap homepage. -
Navigate to the Download Section: On the homepage, find and click on the «Download» option. This section provides a list of precompiled binaries and source code.
-
Select the Windows Installer: Scroll down to find the «Microsoft Windows» section. You will see a link for the Nmap Windows installer package, usually titled something like «Nmap–setup.exe.» Click on this link to start the download.
-
Wait for the Download to Complete: Depending on your internet speed, wait for a few moments while the installer is downloaded. Once completed, navigate to your Downloads folder to locate the installer file.
Running the Installer
Now that you have downloaded the Nmap installer, it’s time to run it and proceed with the installation process.
-
Locate the Installer: Go to the Downloads folder, or wherever you saved the Nmap setup file, and find the file named something similar to
Nmap--setup.exe. -
Run the Installer: Double-click the installer file to run it. A User Account Control (UAC) dialog may appear, asking for permission to run the installer. Click Yes to proceed.
-
Follow Installation Wizard Steps:
- Once the setup wizard opens, you will be greeted with an introduction screen. Click Next to continue.
- You will see the license agreement. Review the terms, and if you agree, select the option to accept the agreement, then click Next.
- Next, you will choose the installation type. You can either select the default options or customize your installation to include additional features such as Npcap, which is necessary for certain functionalities. It’s recommended to check the box for Npcap to proceed with installation functionalities involving packet capturing.
- Choose the installation directory. The default location is usually fine, but you can change it if you prefer. Click Next.
-
Select Components: On the next screen, check the components you want to install. Nmap comes with different features, such as:
- Nmap itself
- Ncat (a networking utility that reads and writes data across networks)
- Ndiff (a utility for comparing the results of two Nmap scans)
- Nping (a ping tool that sends packets to network hosts)
- Zenmap (a graphical user interface for Nmap)
Make your selections and click Next.
-
Install Nmap: After selecting the desired components, the installer will present a summary of your choices. Review the selection, and if it looks good, click Install. The installation process will begin, and it will take a few moments to complete.
-
Complete the Installation: Once the installation is finished, you will see a confirmation window. You can choose to start Nmap and/or Zenmap immediately by checking the respective boxes. Click Finish to close the installer.
Setting Environment Variables
While the installation process is pretty straightforward, you may also want to add Nmap to your system’s PATH environment variable to easily run it from any command line interface. Here’s how you can do that:
-
Open Settings: Press
Win + Ion your keyboard to open the Windows Settings menu. -
Go to System: In settings, click on System from the left sidebar.
-
Select About: Scroll down and click on the About option at the bottom.
-
Advanced System Settings: On the About page, look for the Advanced system settings link on the right panel and click it. This opens the System Properties window.
-
Environment Variables: Within the System Properties window, click on the Environment Variables button located at the bottom.
-
Edit Path Variable: Under the «System variables» section, find and select the variable named
Path, then click on Edit. -
Add Nmap Path: In the Edit Environment Variable window, click New and enter the path to the Nmap installation folder (default is usually
C:Program Files (x86)Nmap). Click OK to confirm your changes. -
Close All Dialogs: Click OK on all open dialog windows to finalize the changes.
Verifying the Installation
To ensure that Nmap was installed correctly and is working properly, you can validate the installation using the Command Prompt.
-
Open Command Prompt: Press
Win + Rto open the Run dialog, typecmd, and press Enter. This opens the Command Prompt. -
Run Nmap Command: At the command prompt, type
nmap -vand press Enter. This command checks the version of Nmap installed and confirms that it’s set up correctly. -
Check for Output: If everything is set up correctly, you should see output displaying the version of Nmap installed, along with some licensing information.
Using Nmap on Windows 11
With Nmap successfully installed, you can begin using it to scan your networks and discover hosts. Here are a few basic Nmap commands to get you started:
1. Basic Host Discovery
To find live hosts on your local network, use the command:
nmap -sn 192.168.1.0/24Replace 192.168.1.0/24 with your own subnet.
2. Service Version Detection
To find out what services and versions are running on a specific target, use:
nmap -sV [target-IP]Replace [target-IP] with the IP address you want to scan.
3. Operating System Detection
To try to determine the operating system of a target, use the command:
nmap -O [target-IP]4. Full Scan of a Target
For a more comprehensive scan, including open ports and services, you can use:
nmap -A [target-IP]5. Scan a Range of IPs
To scan a range of IPs, you can specify them like this:
nmap 192.168.1.1-206. Scan a Specific Port
To scan a specific port on a target, you can use:
nmap -p 80 [target-IP]Additional Resources
While this guide provides a solid foundation for installing and basic usage of Nmap on Windows 11, the capabilities of Nmap are extensive. The official documentation is an invaluable resource for learning more advanced techniques and commands. Here are a few additional resources you may find useful:
-
Official Nmap Documentation: Visit the Nmap documentation page for comprehensive usage instructions, reference guides, and FAQs.
-
Online Tutorials and Courses: Various online platforms offer tutorials and courses that cover not just Nmap, but ethical hacking, penetration testing, and network security.
-
Books on Network Security: Consider reading books focused on network security and tools like Nmap for in-depth knowledge.
Conclusion
Installing Nmap on Windows 11 is a relatively straightforward process, but it opens up a world of possibilities for network security analysis and discovery. With its rich set of features and robust capabilities, Nmap can help network administrators and security professionals effectively assess the integrity of their networks.
By following this guide, you’ve not only installed Nmap but have also laid the groundwork for exploring its functionalities. Remember to use Nmap responsibly and ethically, always obtaining permission before scanning networks that do not belong to you. Happy scanning!
Nmap is a powerful and flexible tool used for port scanning and vulnerability assessments. It is an essential tool you need to be familiar with as a server administrator.
While the most popular way of using Nmap is through the command line, it also has a GUI called Zenmap.
Download Nmap for Windows 10/11/Server
Nmap supports both Windows and Linux-based operating systems. If you are on Windows, click on This Link to download Nmap.
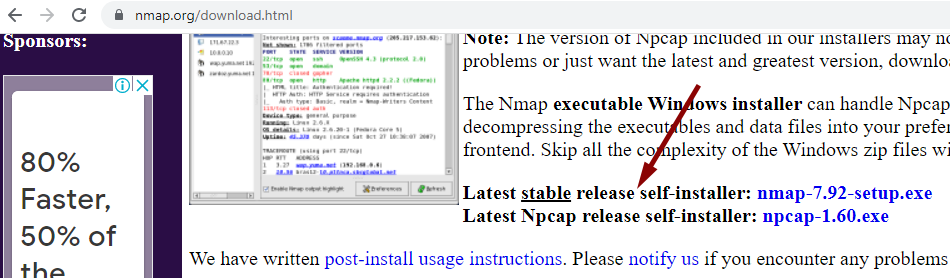
Download the latest stable release of the self-installer, which provides both command-line and GUI versions of the Nmap for Windows.
After the download is complete, double-click the downloaded file to launch the installer.
In the Choose Components window, you can select which features of Nmap to install. Go with default selection, as shown in the following screenshot).
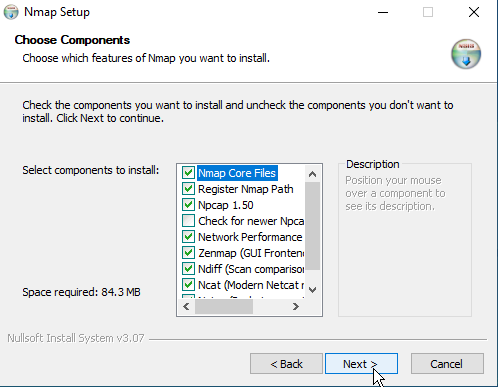
Make sure that the Register Nmap Path is selected to run the Nmap command from the CMD. The Zenmap package provides the graphical user interface (GUI) for the Nmap command.
Using Nmap and Zenmap
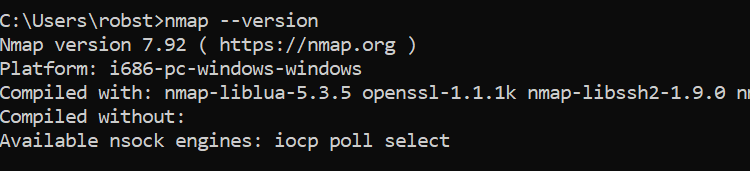
After the installation is complete, open a command prompt (CMD) or PowerShell, and execute the following command:
nmap --versionThe above command will show the Nmap version installed on your Windows PC.
The syntax of nmap is as follows:
nmap <options> <Target>You can perform a simple scan just by using the IP Address (or hostname) of the remote computer:
nmap 192.168.1.10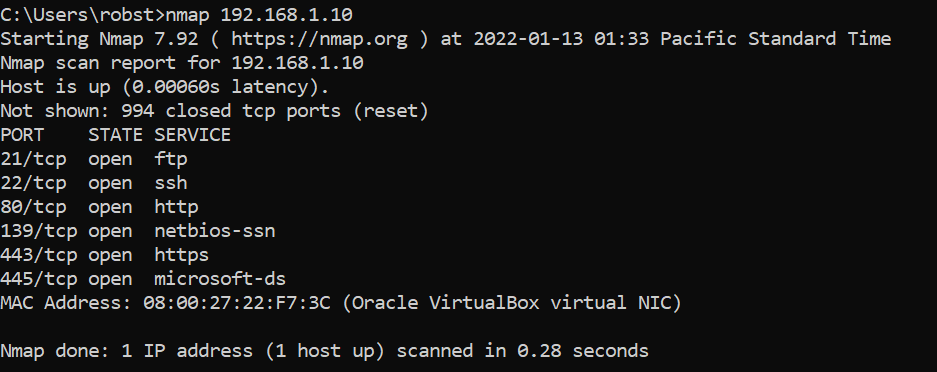
Here is another example that checks if port 80 is open:
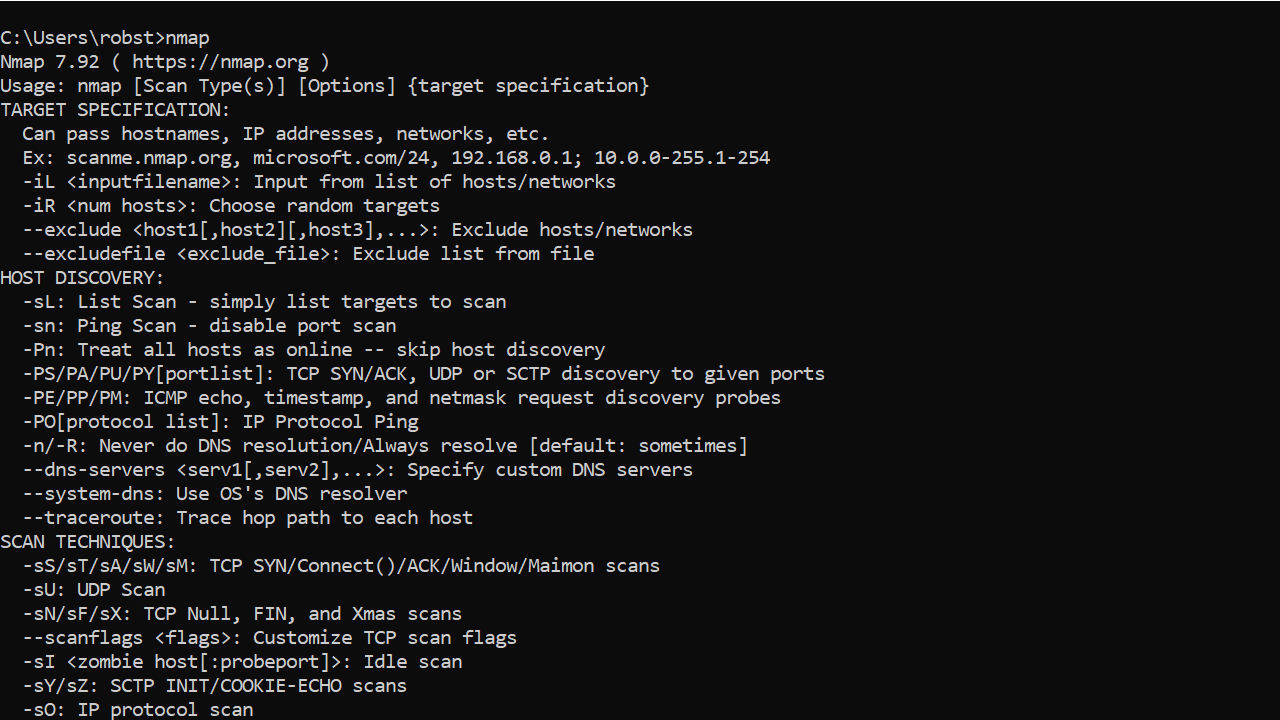
nmap -p 80 192.168.1.10Run the nmap command without any parameters and switches to show the help page:
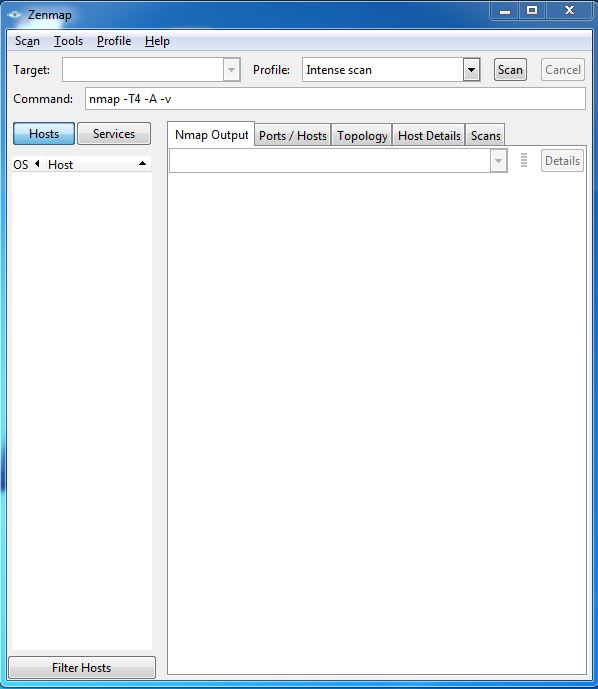
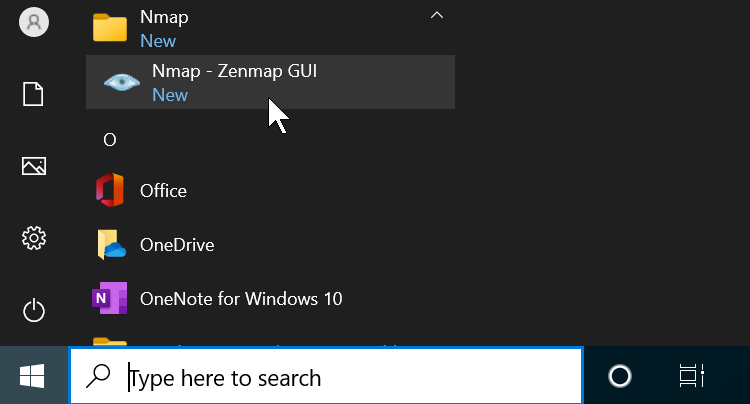
Shortcut to the Nmap GUI (Zenmap) will be available in the Windows Start Menu.
The following screenshot shows the Zenmap interface:
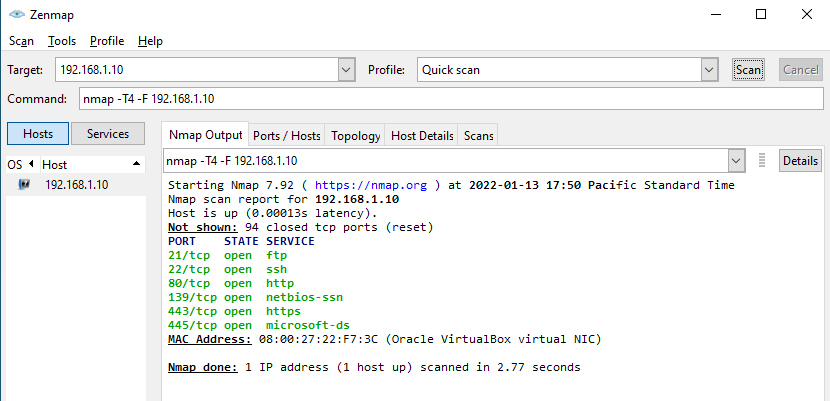
To perform a quick scan: put the IP address in the Target field and then select Quick scan from the Profile drop-down list before clicking the Scan button.
In the Zenmap interface, click Help (Ctrl+H) to open the documentation to learn more about the nmap command.