
Apache NiFi is a software project from the Apache Software Foundation designed to automate the flow of data between software systems.
Apache NiFi supports powerful and scalable directed graphs of data routing, transformation, and system mediation logic.
Prerequisites
- JDK 8
Add JAVA_HOME in Environment Variables
Once you have installed the JDK 8, we need to setup the System Variable in Environment variables. Open Environment variables from the Start Menu.
In System Variables, click on New. If JAVA_HOME is already present pointing to JRE 1.8 path, then you do not have to perform these steps.

Give a new System variable name JAVA_HOME and choose the directory of jre 1.8.

When you have added the system variable, click on OK.

Download Apache NiFi
Go to the official website and click on the zip file under binaries. At the time of writing this blog, the latest version is 1.14.0.

Download from the first link. The download size is approx. over 1.3 GB.

Unzip the file and this is how the folder structure will be.

Check the Configuration
Open the conf folder and open the nifi.properties file. Scroll to the web properties. Make a note of host and the port where the NiFi will be running.

Run NiFi
Go to the bin folder and open command line from there.

To start the NiFi, you can directly double click on run-nifi.bat file. Or you can just type the file name in command prompt.

If the command line produces a process ID, that means your NiFi is running. You can also check the status of NiFi if it is running or not by executing the status-nifi.bat file.

Go to the following URL – https://127.0.0.1:8443/nifi/ to check if the NiFi has started. Your port might be different. Don’t worry if this URL is not loading instantly. NiFi takes time after starting. It creates the repository folders at the root location.

Once the folders are created, you can check the URL. If you see the below warning, click on Advanced and Proceed.

Following is the login screen you will see.

To get the Username and Password, refer to my blog here. To shutdown the NiFi, just type Cntrl+C on the command line where NiFi is running.
Thank you All!!! Hope you find this useful.
Provide feedback
Saved searches
Use saved searches to filter your results more quickly
Sign up
Apache NiFi is a very popular data movement tool, widely used by many companies around the world to move data across different systems. Born as an Apache Open Source project, it was packaged by Hortonworks in its Data Flow platform, and then by Cloudera in their own version of Data Flow when the two companies merged.
Today, it is available in the Cloudera stack both for on-premise and public clusters, but the open-source version still remains a valid option for those who want to experiment, play, or simply run it in non-production environments.
While typically run on Linux machines, it is perfectly feasible to run it on Windows, and in certain cases this might be an easier and more immediate option. If you just want to run it for simple flows, or if you want to build and test your pipelines without worrying about incurring additional costs from your cloud provider before the flow is deployed to production, then you can do so perfectly well from your personal or work Windows laptop, without needing to install Linux virtual machines and so on.
We have written plenty of blog posts about NiFi usage in certain enterprise scenarios (have a look at our blog here or simply google “clearpeaks nifi”), but today we want to get back to the roots and guide you through the straightforward process of installing it on your local Windows machine. There are two main steps that we need to perform, installing a valid JDK (Java Development Kit), and downloading then starting NiFi.
Let’s take a look at both of them in more detail.
Installing a valid JDK
In this section we’ll assume that you do not have a running version of the JDK. On a Windows machine, it’s easy to check: go to Start > Control Panel > Programs, and see if Java is installed. Alternatively, you can open a command line and type “javac”. If the command is not recognised, chances are that you do not have a JDK (although it might depend on how your system variables are set up, as we will see in a bit).
If you already have a JDK, no problem; NiFi will most probably work with it and you can move on to the next step.
To download a JDK, go to the Oracle website. In our case, we decided to install JDK 8, as it is one of the most used versions and usually works well with common software.
Follow this link, and scroll down until you find the Windows x64 installer; click on the link on the right and download the exe file.
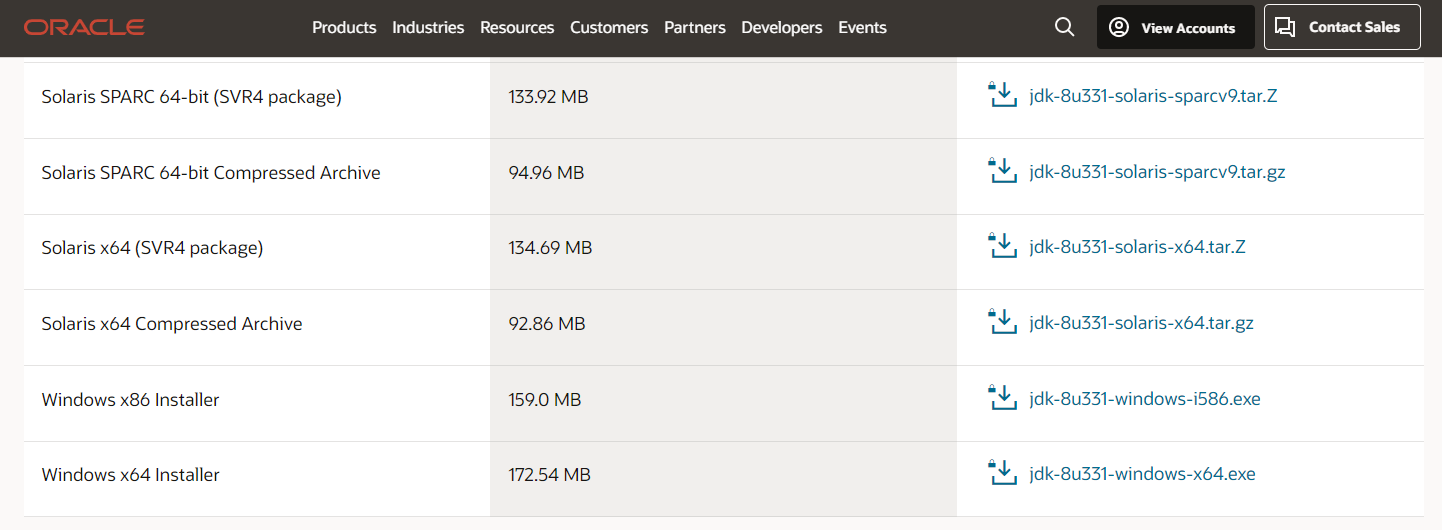
Figure 1: The JDK download page on the Oracle website
After downloading the file, double-click on it and follow the wizard. There’s no need to change anything, so just confirm and click Next whenever requested, and wait for the installation to complete. Remember the name of the folder where the JDK will be installed (probably something like “C:\Program Files\Java”).
Once the installation has finished, you need to edit your system variables so your laptop will be able to find the JDK location when required. Go to the Start Menu, look for Edit the system environment variables, and open the System Properties tab. There, at the bottom, click on Environment Variables.
Click on New at the bottom of the tab that opens to add a new system variable. We called ours JAVA_HOME, with the value where the JDK was installed (in our case, C:\Program Files\Java\jdk1.8.0_331).
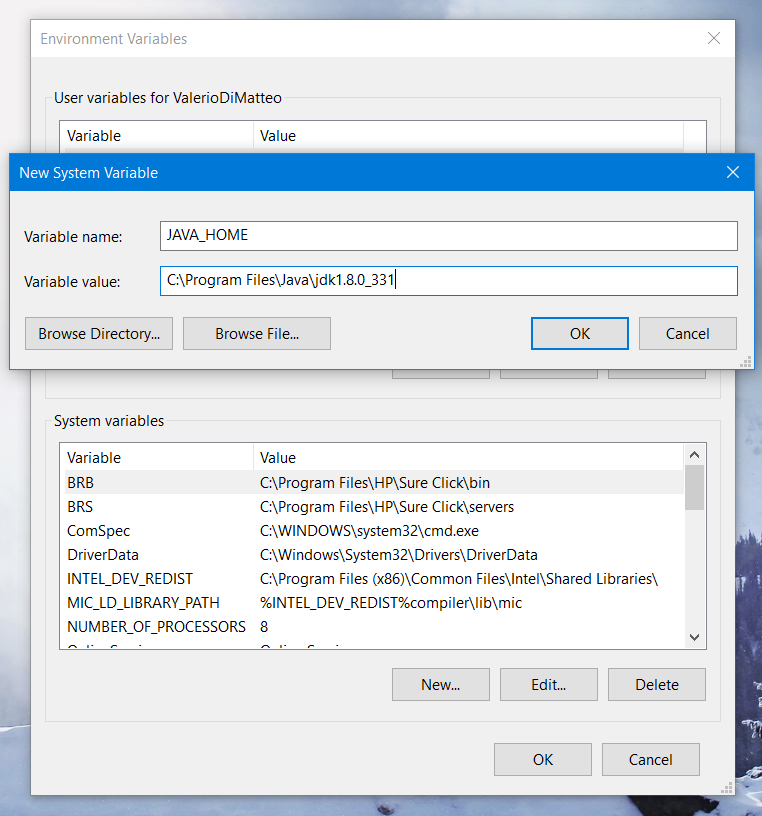
Figure 2: Creating the JAVA_HOME system variable
Then scroll down the list of existing variables until you find Path; open it, and at the bottom add a new line, using the same path as before, but this time with the “\bin” suffix (so in our case, “C:\Program Files\Java\jdk1.8.0_331\bin”).
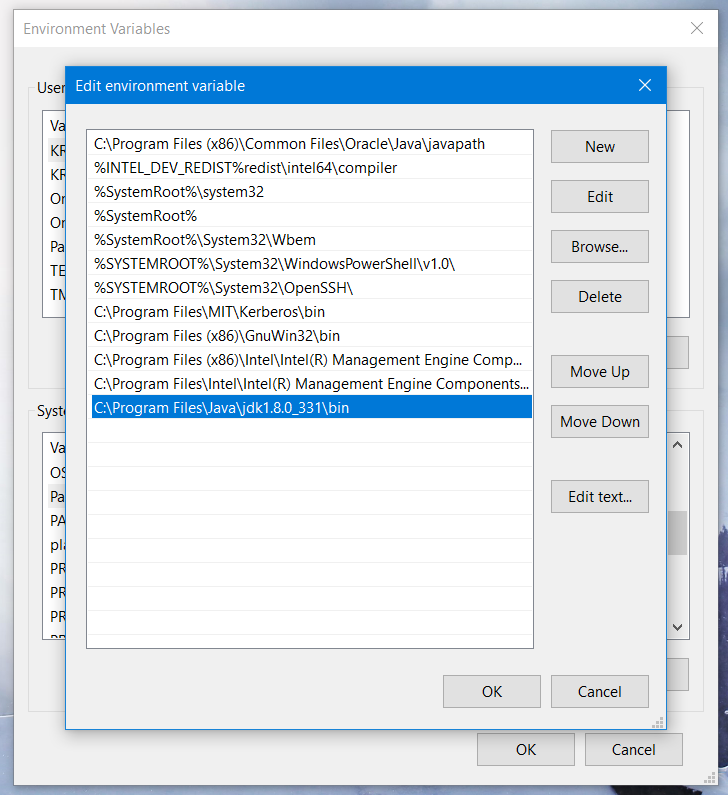
Figure 3: Editing the Path system variable
Now confirm the changes and close the tab.
At this point, the JDK should have been installed and detected by your machine; to confirm this, open a command line and type “javac”. If the output looks like the one in the picture below, then you are all set!
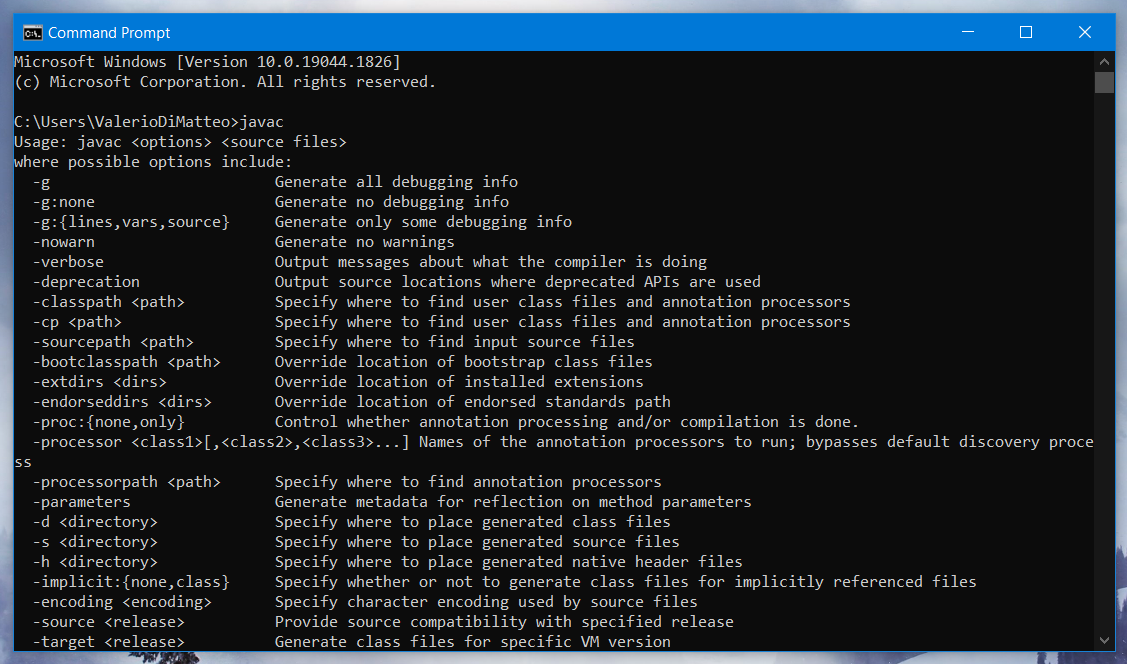
Figure 4: Checking the JDK on your console
Downloading and Starting NiFi
Now that we have a working JDK, we can move on to downloading and installing NiFi.
To download NiFi, go to this link (or simply google “download nifi”).
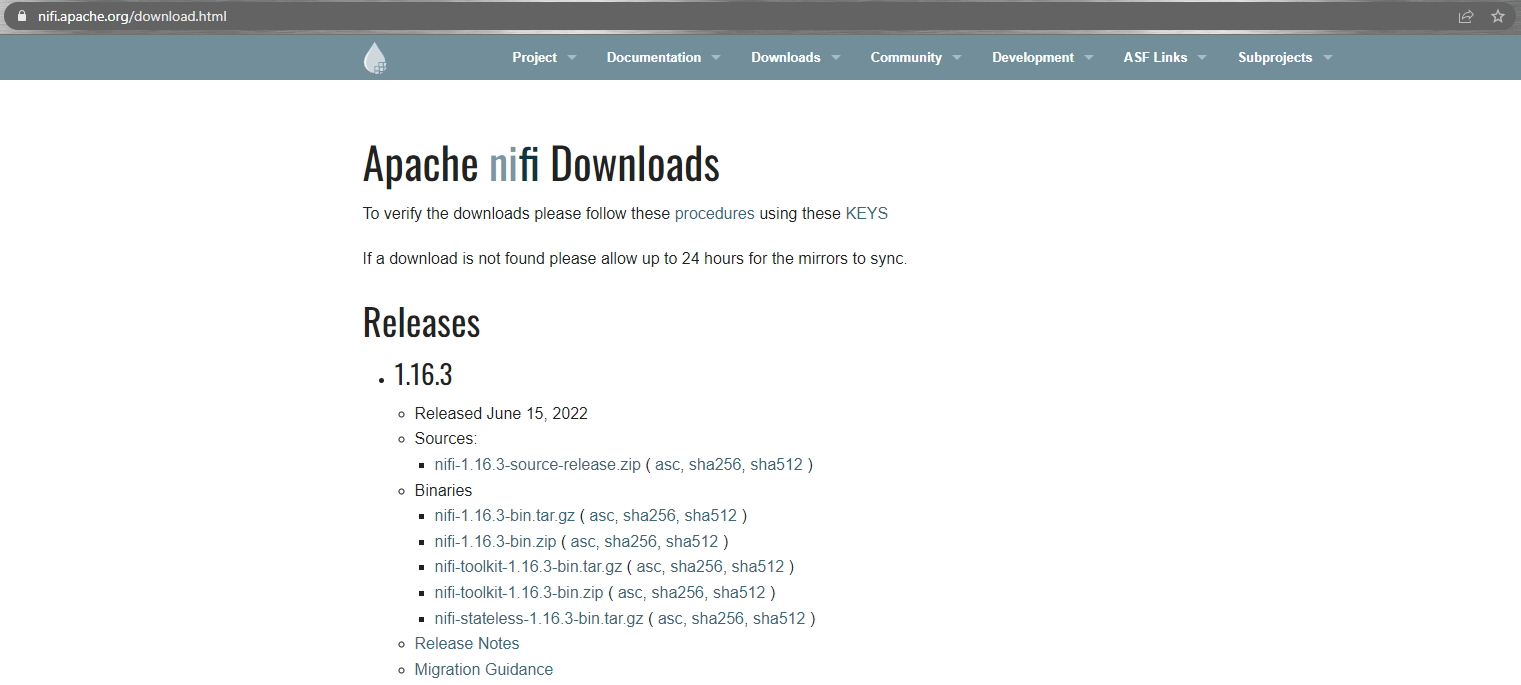
Figure 5: NiFi download page
The version we want ends with “bin.zip” (the binary file zip folder). Click on it, and you are taken to another page where you can actually download the file (using the first link).
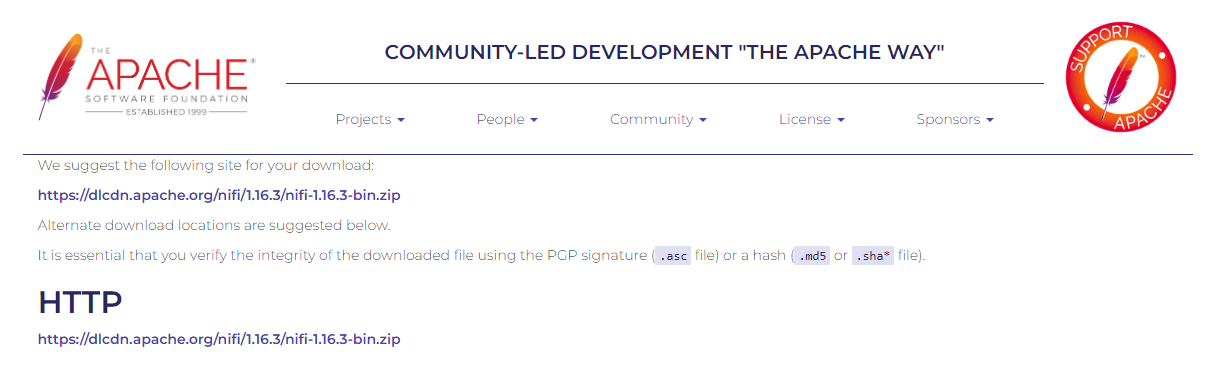
Figure 6: Binary zip file download link
Once the zip file has been downloaded, just extract it. A simple and effective choice is to unzip the folder in C:\, and you should end up with a path like C:\nifi-1.16.3, in which you should already see a bin directory.
At this point, we should check out the NiFi documentation to better understand the next steps.
At this link you’ll see that you are now required to navigate to that bin folder and double-click on the run-nifi.bat file. This will start the NiFi process in your machine. Keep this tab open as long as you want to use NiFi!
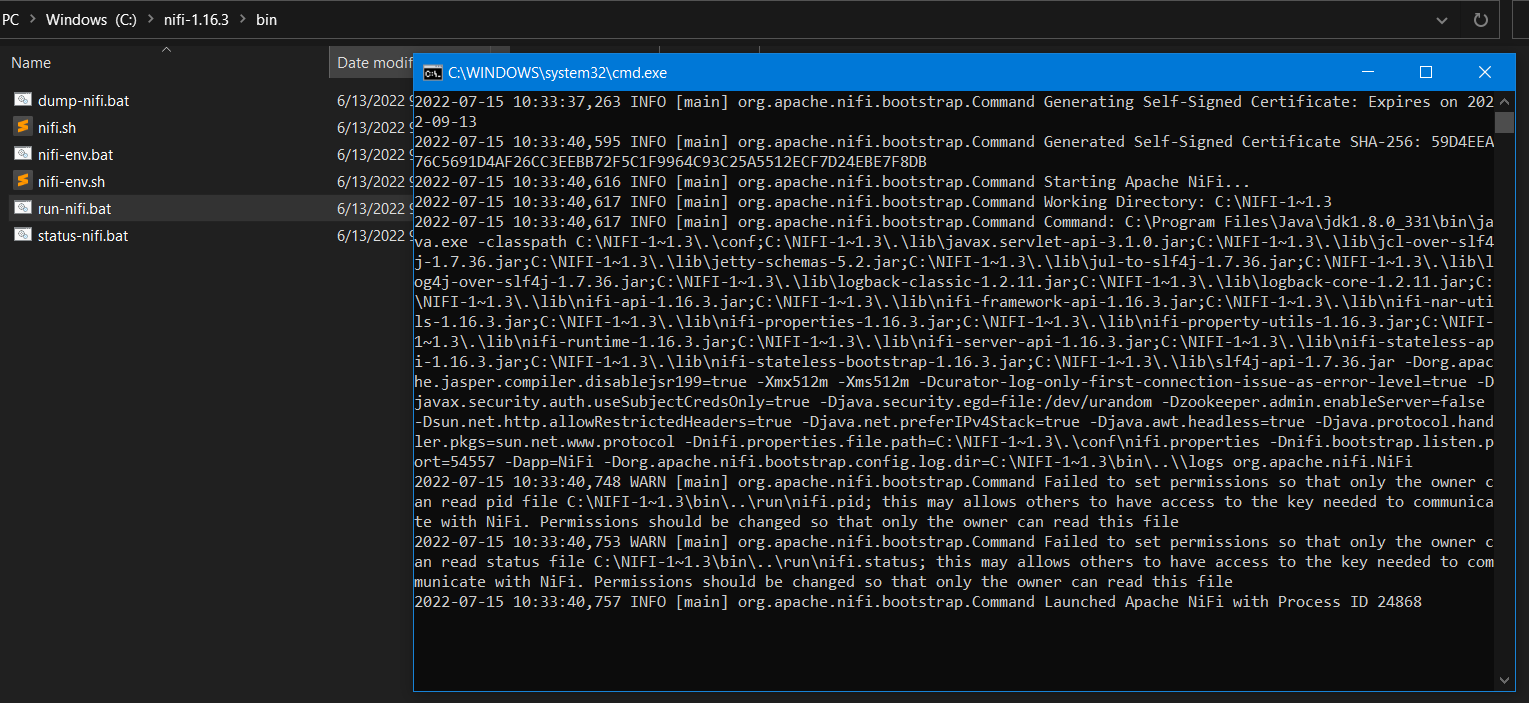
Figure 7: Starting the NiFi process
If you scroll down the documentation page a bit, you’ll also see how NiFi has already created a user for us: simply open the logs/nifi-app.log, look for “Generated”, and you should see both the username and password. The documentation also explains how to change those credentials, should you wish to.
Finally, you can open your NiFi UI. As the documentation shows, it is actually secured and running on HTTPS, on port 8443. Depending on your DNS/hosts file setting, you might need to use one of these URLs to open it:
- https://localhost:8443/nifi
- https://127.0.0.1:8443/nifi
If everything has gone according to plan, you should be prompted with the login page, as in the picture below:
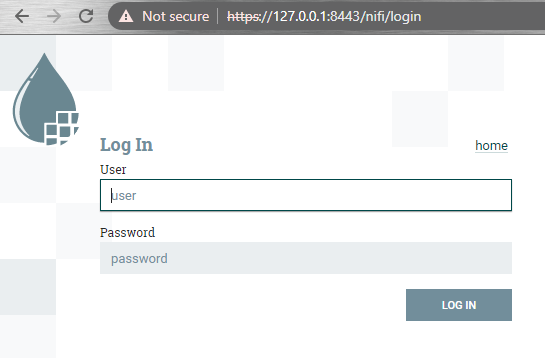
Figure 8: NiFi login
Enter your credentials (the default ones or the new ones, if you changed them) and the NiFi UI will appear!

Figure 9: NiFi UI
Conclusion
Now you have a running NiFi instance to experiment with and test your flows – and it’s free! You can save some money before moving the flows to your production environment (for example, if you are running Data Flow in CDP Public Cloud).
As we said before, we have already written a lot about NiFi (check out our blog posts), but we thought that it would make your life easier if you had a quick and concise guide just to run NiFi locally, without having to worry about clusters, cloud resources, or Linux VMs.
At ClearPeaks, we are experts in NiFi and so much more. If you have any questions about what you’ve just read, or simply need some help with your Big Data, BI or ML architecture, don’t hesitate to contact us and we’ll be happy to help.

1. Overview
This document talks about how to install Apache Nifi for windows.
[Note: Steps included in this document will only works windows server]
2. Technologies and Tools Used
The following technologies have been used for installing Apache Nifi on windows server.
- Apache Nifi 1.23.2
- Java 8 or above
3. Use Case
Assuming there is a requirement to utilize Apache Nifi on a Windows server for performing analytics tasks for various projects.
4. Architecture
Following steps explains in detail,
Installation for Apache Nifi 1.23.2 version
Step 1: Go to Apache Nifi webpage and click download section in binary section please click first binary zip file for windows.
Below is the link to go to the Apache Nifi website.
https://nifi.apache.org/docs/nifi-docs/html/getting-started.html#downloading-and-installing-nifi
Or just search like installing Apache Nifi on windows you will get the Apache Nifi website link.
https://nifi.apache.org/download.html
Step 2: Extract the zip file and placed whatever directory you like and inside the Apache Nifi download folder go to bin sub folder.
For Windows Users
Step 3: For Windows users, navigate to the folder where Nifi was installed. Within this folder is a subfolder named bin. Navigate to this subfolder and double-click the run-nifi.bat file.
Step 4: Go to google chrome and type below link.
https://localhost:8443/nifi/login First you will get screen like below.
Just wait for few minutes you will get actual Apache Nifi login screen like below.
Step 5: For username and password go to Nifi folder and inside that folder click logs subfolder.
Step 6: And find the nifi-app log file you can get the username and password.
Step 7: After Entering correct Username and Password You will redirect to the Apache Nifi home page.
You have successfully installed Apache Nifi on your windows system.
Note: if you want to stop the Apache Nifi just go to close that Nifi command prompt file the server will shut down after closing that command prompt file.
5. Conclusion
Installing Apache Nifi on Windows is relatively straightforward once you have Java set up. Open http://localhost:8443 (default port) in your web browser to visualize and manage your data flows.
Recommended Posts
Recently have been working with Apache Nifi for one my IoT Project. I would like to write a post on how to Install Apache Nifi in Windows 7.
Pre-requisites:
- Java Installation
- Environment variable JAVA_HOME
Step 1: Download Apache Nifi 1.0 from here.

Step 2: Download the zip file the mirror site as recommended. It would be around 740 MB patiently download it.

Step 3: Extract the folder and I moved nifi-1.0.0 to a root drive for each of access through windows command console.
Step 4: Now go to the command prompt and navigate to the nifi-1.0.0 directory
Step 5: Navigate to the bin directory
Step 6: You will find run run-nifi.bat, execute run-nifi
Step 7: You will see something like the below:

Step 8: Now open your favourite browser and type localhost:9090, I have changed the port from 8080 to 9090 in nifi.properties file. If you want, you can change that as well.

Step 9: Now you can access to the menu to get to know the version of you are running on

Step 10: Happy data flows with Apache Nifi!!!