
Если у вас не запускается игра и появляется ошибка d3dx11_43.dll (что, думаю, так и есть, раз вы здесь), то по запросам наподобие «скачать d3dx11_43.dll бесплатно» вы, вероятнее всего, попадете на сайты вроде dll-files, загрузите файл, положите его в папку C:\System32 и… у вас все равно ничего не заработает.
Все это потому, что загрузка недостающих библиотек DLL с подобного рода сайтов — это неправильный, а часто и опасный способ исправить ошибку. А теперь переходим к правильному. (в конце статьи будет также рассмотрен способ, как достать оригинальный файл d3dx11_43.dll отдельно)
Три способа бесплатной загрузки d3dx11_43.dll
Файл d3dx11_43.dll — это составная часть Microsoft DirectX 11. То, что сразу после установки Windows 7 или Windows 8 (и даже 8.1) у вас и так есть DirectX, вовсе не означает, что на компьютере есть этот файл: версия DirectX, «встроенная» в Windows не включает в себя полный набор файлов, которые могут понадобиться для запуска игр и программ.
Поэтому, чтобы исправить ошибку d3dx11_43.dll отсутствует, нужно скачать и установить на компьютер DirectX и лучше всего, если вы это сделаете с официального сайта Microsoft, а не, например, с торрента.

Правильный способ скачать d3dx11_43.dll бесплатно
Два основных сделать это (третий, хитрый, будет ниже):
- Скачать веб-установщик DirectX с этой страницы: http://www.microsoft.com/ru-ru/download/details.aspx?id=35 — после запуска, программа установки определит параметры вашей системы, скачает из Интернета и установит все необходимые файлы на ваш компьютер.
- Скачать сам DirectX, в виде отдельного установщика, не требующего доступа к Интернету для загрузки остальных компонентов. Сделать это можно здесь: http://www.microsoft.com/en-us/download/details.aspx?id=8109. Установка включает в себя файлы для x86 и x64 версий Windows.
После установки DirectX с официального сайта, ошибка d3dx11_43.dll, с большой вероятностью исчезнет.
Если вам все-таки нужен отдельный файл d3dx11_43.dll
Может так случиться, что вам все-таки требуется сам файл d3dx11_43.dll, а не DirectX. В этом случае, использование сайтов, где выложены такие файлы все так же плохой вариант — в файле, который вы скачаете может оказаться любой программный код, необязательно полезный для вашего компьютера.
Поэтому, если вам нужно скачать d3dx11_43.dll, поступите следующим образом:
- Загрузите файлы DirectX по второй ссылке в этой статье (те, которые представляют собой отдельный установщик).
- Переименуйте его в zip или rar и откройте с помощью архиватора (WinRAR точно открывает).

- Внутри вы обнаружите набор файлов cab, вам нужен Jun2010_d3dx11_43_x64.cab или Jun2010_d3dx11_43_x64.cab, в зависимости от разрядности системы.

- Каждый этот файл также представляет собой архив и в нем находится нужный вам d3dx11_43.dll причем точно оригинальный и надежный.


Как видите, ничего сложного. Кстати, все, что здесь описано, касается любых файлов с именами, начинающимися с d3d.
Все способы:
- Способ 1: Загрузка d3dx11_43.dll
- Способ 2: Установка DirectX 11
- Способ 3: Обновление ОС
- Способ 4: Проверка целостности системных файлов
- Вопросы и ответы: 0
Пользователь компьютера на операционной системе Windows может столкнуться с проблемой запуска игр, релиз которых состоялся после 2011-го года. В сообщении об ошибке говорится об отсутствующем файле динамической библиотеки d3dx11_43.dll. Мы расскажем, почему эта ошибка появляется и как с ней бороться.
Способ 1: Загрузка d3dx11_43.dll
Библиотеку d3dx11_43.dll можно загрузить на ПК самостоятельно, после чего ее потребуется установить. Процесс установки выполняется посредством копирования файла библиотеки в системную директорию:
- Windows 32 bit:
C:\Windows\System32. - Windows 64 bit:
C:\Windows\System32иC:\Windows\SysWOW64.
Для установки DLL-файла выполните следующее:
Скачать d3dx11_43.dll
- Перейдите в папку, куда была загружена библиотека d3dx11_43.dll, и скопируйте ее. Сделать это можно как с помощью контекстного меню, вызываемого нажатием правой кнопкой мыши, так и при помощи горячей клавиши Ctrl+C.
- Перейдите в системную директорию. Вставьте скопированную библиотеку, используя все то же контекстное меню или горячую клавишу Ctrl+V.


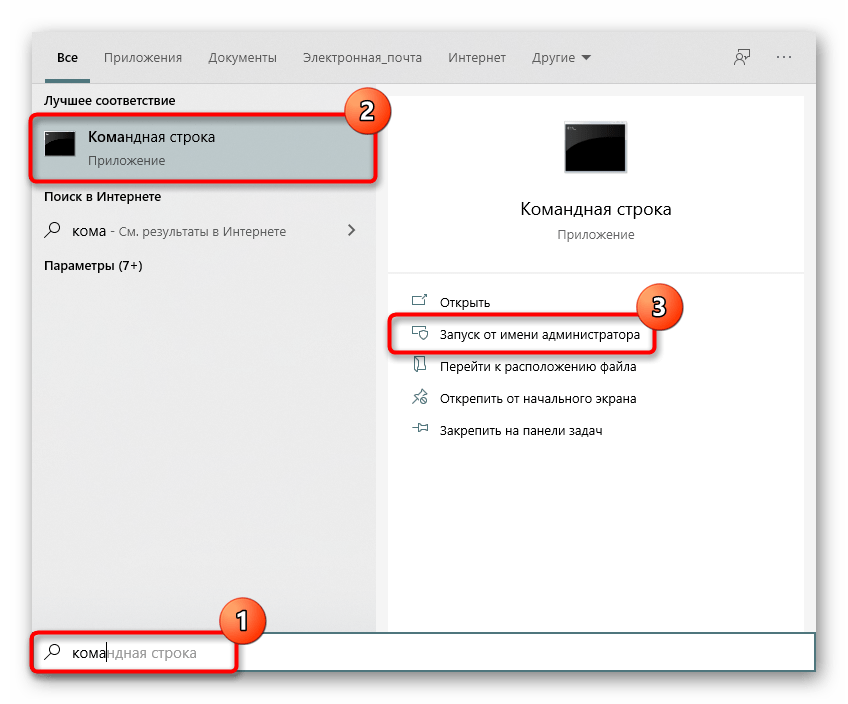
После выполнения этих действий ошибка должна быть исправлена, но в некоторых случаях ОС Windows может не зарегистрировать библиотеку автоматически, и это вам придется выполнять самостоятельно. Для этого откройте «Пуск» > «Командная строка» > «Запуск от имени администратора».
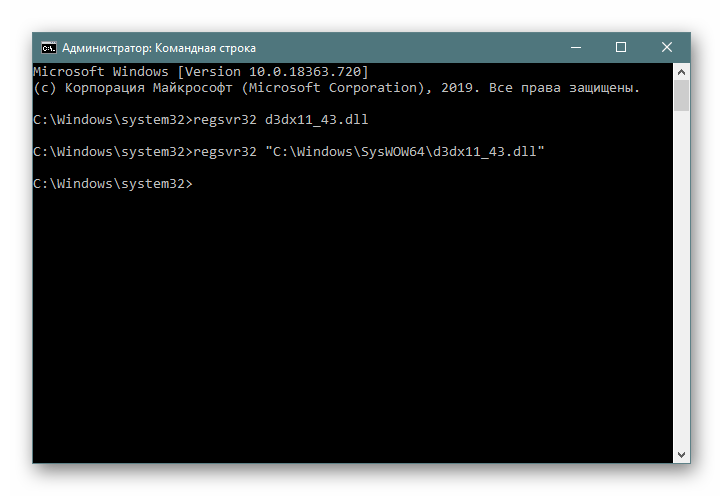
Напишите команду regsvr32 d3dx11_43.dll и подтвердите ее клавишей Enter. Если файл был добавлен в две папки, после этого нужно набрать еще одну команду: regsvr32 "C:\Windows\SysWOW64\d3dx11_43.dll".
В качестве альтернативы можете попробовать регистрацию при помощи сторонней программы. Об этом мы рассказывали в Способе 1 следующего материала.
Подробнее: Регистрируем файл DLL в ОС Windows
После выполнения всех пунктов инструкции в систему будет помещен отсутствующий файл d3dx11_43.dll, следовательно, ошибка будет устранена.
Способ 2: Установка DirectX 11
Изначально файл d3dx11_43.dll попадает в систему при установке DirectX 11. Этот пакет программного обеспечения должен идти с той игрой или программой, которая выдает ошибку, но по какой-то причине он не был инсталлирован или же пользователь ввиду незнания повредил нужный файл. В принципе, причина не важна. Для исправления ситуации понадобится установить DirectX 11, но для начала нужно загрузить инсталлятор этого пакета.
Для пользователей Windows 10 инструкция будет отличаться по той причине, что ДиректИкс и все его версии встроены в операционную систему, а значит, и добавляются/исправляются они вместе с системными обновлениями. Поэтому для вас у нас есть отдельное руководство.
Подробнее: Переустановка и добавление недостающих компонентов DirectX в Windows 10
У кого Windows 7 и ниже, алгоритм действий следующий:
Скачать инсталлятор DirectX
- Перейдите по ссылке, ведущей на официальную страницу загрузки пакета.
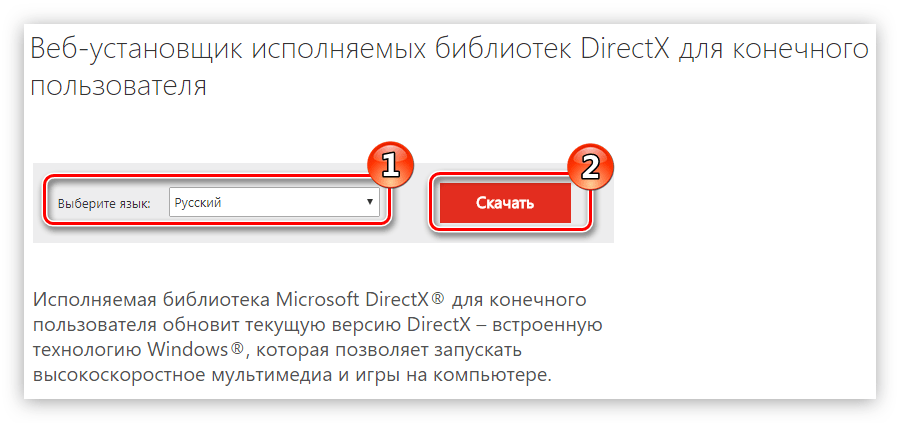
- Выберите язык, на который переведена ваша операционная система. Нажмите «Скачать».
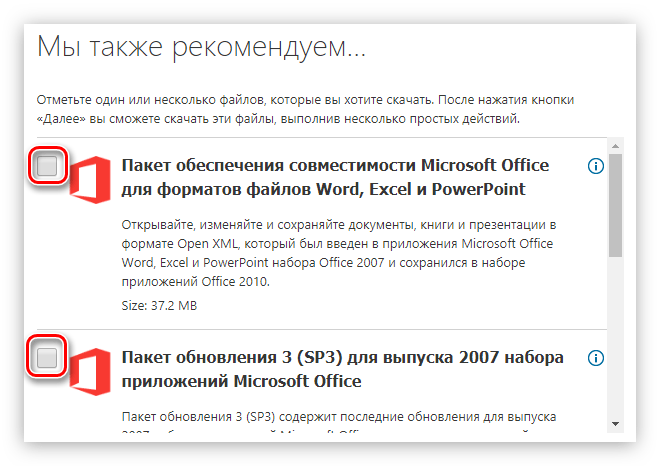
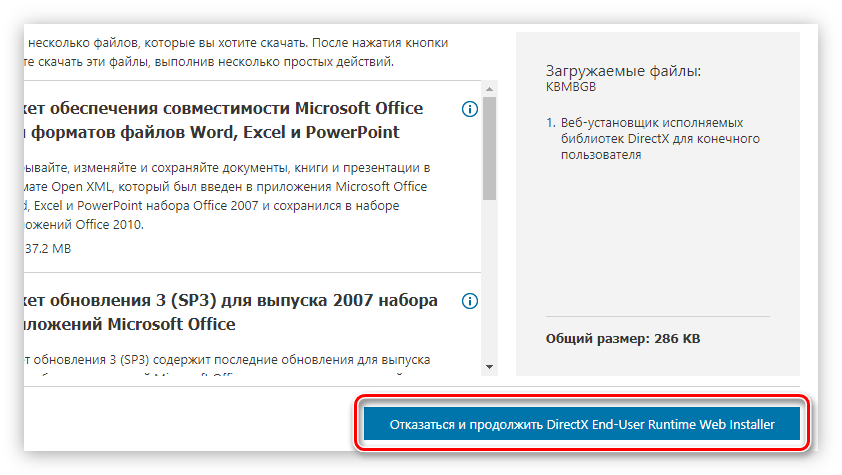
- В появившемся окне снимите галочки с предлагаемых дополнительных пакетов.
- Нажмите кнопку «Отказаться и продолжить».
Загрузив установщик DirectX на компьютер, запустите его и выполните следующее:
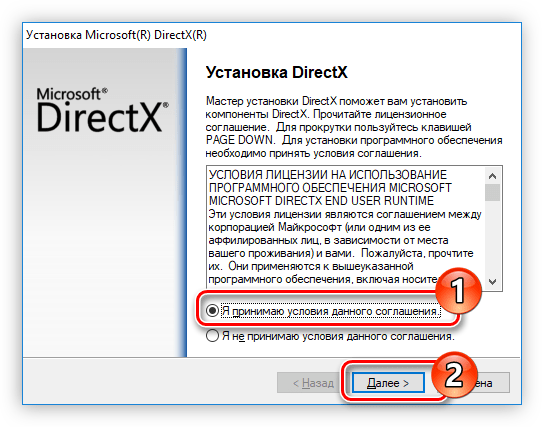
- Примите условия лицензии, отметив соответствующий пункт, после чего нажмите «Далее».
- Выберите, устанавливать ли панель Bing в браузеры или нет, поставив галочку рядом с соответствующей строкой. После этого нажмите «Далее».
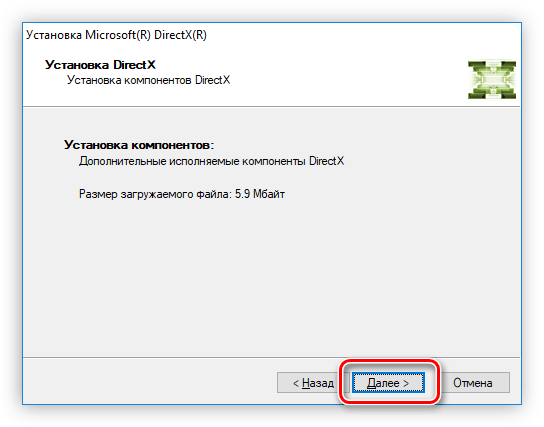
- Подождите завершения инициализации, после чего нажмите «Далее».
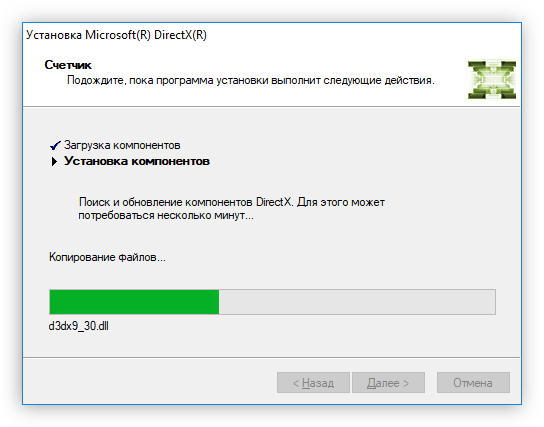
- Подождите завершения установки компонентов DirectX.
- Нажмите «Готово».


Теперь DirectX 11 установлен в системе, следовательно, библиотека d3dx11_43.dll тоже.
Способ 3: Обновление ОС
В первую очередь этот метод подходит тем, у кого установлена новейшая версия Виндовс — 10. Как мы уже сказали ранее, ДиректИкс там обновляется вместе с системными апдейтами, и если какая-то из библиотек будет отсутствовать или окажется поврежденной, вместо нее будет добавлена новая версия. Тем не менее пользователям и более ранних версий не помешает инталлировать апдейты, чтобы исправить возможные проблемы, мешающие работать системным компонентам правильно. Для Windows 10 порядок действий следующий:
- Откройте «Пуск» и перейдите оттуда в «Параметры».
- Зайдите в раздел «Обновление и безопасность».
- Здесь кликните по кнопке «Проверить наличие обновлений». Если они уже найдены, установите их, перезагрузив ПК. Не забудьте установить и необязательные обновления, которые так же видны на скриншоте ниже.


При отсутствии апдейтов используйте другие рекомендации нашей статьи. Если вместо этого вы получили ошибку, воспользуйтесь другим нашим материалом. Для обладателей более старых версий системы инструкция тоже находится по одной из ссылок ниже.
Подробнее:
Установка обновлений на Windows 10 / Windows 7 / Windows XP
Способ 4: Проверка целостности системных файлов
Редко этот совет приносит пользу, но все же его стоит упомянуть хотя бы из-за простоты реализации. Юзеру достаточно лишь запустить командную строку, написать там команду, вызывающую сканирование системных файлов и их восстановление (при необходимости) из резервного хранилища. Более подробно эта процедура расписана в отдельном нашем материале.
Подробнее: Использование и восстановление проверки целостности системных файлов в Windows
В самом конце, если ничего не помогло, стоит проверить компьютер на вирусы: их наличие вполне может влиять на работоспособность системных файлов, в том числе DLL.
Подробнее: Борьба с компьютерными вирусами
Наша группа в TelegramПолезные советы и помощь
Readers help support Windows Report. We may get a commission if you buy through our links.
Read our disclosure page to find out how can you help Windows Report sustain the editorial team. Read more
Most Windows users who don’t understand the intricacies often encounter an error and find themselves in a tricky spot. But most of these are easily fixable, especially when a DLL file is not found. And d3dx11_43.dll is one such file that usually throws an error.
Part of the DirectX library, the DLL is used by particularly graphic-intensive apps, for instance, games. Users generally find d3dx11_43.dll missing on Need for Speed: The Run and GTA 5. Let’s learn about the problem and the solutions that worked for others!
Why is d3dx11_43.dll not found?
Here are a few reasons the DLL file is missing:
- Improper installation of the program: The most common reason the DLL is not found is when the program that requires it was not installed properly, and the file is not located in its directory.
- Issues with the graphics driver: Oftentimes, a corrupt or outdated driver is responsible for the error, and a quick reinstall does the trick.
- DLL files are not readable: In some cases, it is the corrupt state of the file that triggered the d3dx11_43.dll is either not designed to run on Windows or it contains an error message.
What can I do when d3dx11_43.dll is missing?
1. Use a dedicated DLL repair tool
When it comes to missing DLL files, there is no better way to fix things than using a dedicated repair tool. It works seamlessly, even when the DLL files are from third-party apps, and incompatibility is to be blamed for the error.
2. Reinstall the graphics driver
- Press Windows + X to open the Power User menu, and choose Device Manager.
- Expand the Display adapters entry, right-click on the graphics adapter, and select Uninstall device.

- Tick the checkbox for Attempt to remove the driver for this device, and then click Uninstall.

- Once done, restart the computer, and Windows will automatically install a fresh copy of the driver.


Some users reported that when d3dx11_43.dll was missing in Windows 10, the issue was linked to the graphics driver, and reinstalling it worked. Also, you could try updating the graphics driver.
In order to update the graphics drivers correctly, without causing system incompatibility, it’s better to use a dedicated driver tool to automatically get the latest version for all drivers.
⇒ Get Outbyte Driver Updater
3. Download DirectX End-User Runtime Web Installer
- Press Windows + E to open File Explorer, paste the following path in the address bar, and hit Enter:
C:\Windows\System32
- Locate the d3dx11_43.dll file, select it, and hit Delete.
- Similarly, delete the file from the following path:
C:\Windows\SysWOW64 - Once done, go to Microsoft’s official website, pick English from the Select Language menu, and click on Download.

- After you have the setup, run it and follow the on-screen instructions to go through with the installation.


Deleting the d3dx11_43.dll file and then running the DirectX End-User Runtime Web Installer helps when the DLL is corrupt and can’t be read by the application. So, while it appears to be there and things seem in order, you still need to replace it to get things running.
- D3dx11_42.dll Not Found: How to Fix it
- Windows 11 Shutdown After Inactivity: 4 Ways to Stop it
- Windows Shuts Down Instead of Restarting: 4 Ways to Fix it
4. Reinstall the game
- Press Windows + R to open Run, type appwiz.cpl in the text field, and hit Enter.

- Select the app that’s throwing the missing DLL file error, and click Uninstall.

- Follow the instructions and choose the appropriate options to complete the uninstallation process.
- Now, head to its official website or a reliable source, and download the program’s setup, to install it all over again.


5. Perform a System Restore
- Press Windows + R to open Run, type rstrui.exe, and click OK.
- Select the Choose a different restore point option, if available, and click Next.

- Now, pick another restore point from the list, one created before the error first appeared, and click Next.
- Verify the details, and click Finish to start the restore.


In case recent system changes are to blame when d3dx11_43.dll is not found in Windows 10, going for a system restore with the correct restore point should help. The process is simple and shouldn’t take much time.
Before you leave, check the best DLL repair tools and get one today to prevent such errors from reappearing!
For any other queries or to share more solutions with us, drop a comment below.
Kazim Ali Alvi
Windows Hardware Expert
Kazim has always been fond of technology, be it scrolling through the settings on his iPhone, Android device, or Windows PC. He’s specialized in hardware devices, always ready to remove a screw or two to find out the real cause of a problem.
Long-time Windows user, Kazim is ready to provide a solution for your every software & hardware error on Windows 11, Windows 10 and any previous iteration. He’s also one of our experts in Networking & Security.
Have you ever encountered an error message on your Windows computer that mentions a file called “D3dx11_43.dll”? If so, you’re not alone. This article will explain what D3dx11_43.dll is, why it is important, and how to fix any errors related to it.

What is D3dx11_43.dll?
D3dx11_43.dll is a dynamic link library file that is part of the DirectX software development kit (SDK) provided by Microsoft. DirectX is a collection of application programming interfaces (APIs) that allow software developers to create and run multimedia applications, especially games, on Windows operating systems.
The D3dx11_43.dll file specifically belongs to the DirectX 11 version, which is widely used in modern games and graphics-intensive applications. It contains various functions and resources that help render graphics, handle audio, and perform other tasks related to multimedia processing.
Why is D3dx11_43.dll Important?
D3dx11_43.dll is crucial for running DirectX 11-based applications on your computer. Without this file, you may encounter various errors and issues when trying to launch or play games that rely on DirectX 11.
Many popular games, such as “Fortnite,” “League of Legends,” and “Call of Duty,” require DirectX 11 to run smoothly. If the D3dx11_43.dll file is missing or corrupted, these games may fail to start or exhibit graphical glitches and performance problems.
Common D3dx11_43.dll Errors
When there is an issue with the D3dx11_43.dll file, you may encounter one of the following error messages:
- “The program can’t start because D3dx11_43.dll is missing from your computer.”
- “D3dx11_43.dll not found.”
- “File D3dx11_43.dll is corrupt.”
- “D3dx11_43.dll access violation.”
If you come across any of these errors, it is essential to address them promptly to ensure the smooth functioning of your games and multimedia applications.
How to Fix D3dx11_43.dll Errors
Here are several methods you can try to fix D3dx11_43.dll errors:
1. Run the DISM and SFC scans
DISM (Deployment Image Servicing and Management) and SFC (System File Checker) are built-in Windows tools that can repair corrupted or missing system files and restore the health of your computer. Both DISM and SFC scans can be run from an elevated command prompt (with administrative privileges). Here are the steps to do so:
- To open the Command Prompt as an administrator in Windows, type “cmd” in the search bar and then right-click on the Command Prompt result and select “Run as administrator” as shown in the image below.

- To run a DISM scan, type the following command and press Enter:
dism /online /cleanup-image /restorehealth
This will check your Windows component store for corruption and automatically fix any problems it finds. This process may take several minutes or longer depending on your system
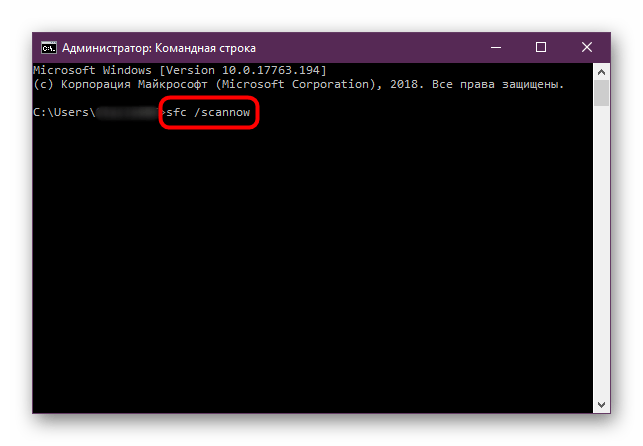
- To run an SFC scan, type in the Command Prompt the following command and press Enter:
sfc /scannow
This will scan all protected system files and replace any corrupted or missing ones with a cached copy. Wait for the scan to complete. It may take some time depending on your system configuration.
- After both scans are completed, you should restart your computer to apply any changes. Check to see if the issue is solved.


2. Check for faulty software.
If there is a specific program that is causing this issue, try uninstalling and then reinstalling it (eg. Microsoft DirectX, Microsoft Visual C++ Redistributable, NET Framework) to check if it will solve the problem.
Windows 11Windows 10Windows 8Windows 7
-
First, open Windows Settings by pressing Windows+I on your keyboard. You can also right-click your Start button and select “Settings” from the list.

-
When Settings opens, click “Apps” in the sidebar, then select “Apps & Features”.

-
In Apps & Features settings, scroll down to the app list and search for the program you want to uninstall. When you find the program, click the three dots button beside it and select “Uninstall” in the menu that appears.

-
In the next message box, confirm the uninstall process by clicking on Uninstall, then follow the prompts to uninstall the program.


- Press the Windows key + I on your keyboard to open the Settings app. You can also ope the Settings app by clicking the Start button on the taskbar, then select “Settings” (gear icon).

-
When the “Windows Settings” window opens, click on “Apps“. By default, it should open “Apps and Features” but if it doesn’t, select it from the list on the left.

-
In Apps & Features settings, scroll down to the app list and search for the program you want to uninstall. When you find the program, click on it and select “Uninstall” in the menu that appears.

-
In the next message box, confirm the uninstall process by clicking on Uninstall, then follow the prompts to uninstall the program.


-
Right-click on the Start button in the taskbar, then select “Programs and Features”. This will take you directly to your list of installed programs.

-
The “Programs and Features” screen will be displayed with a list of all the programs installed on your computer. Scroll through the list until you find the program, then click to highlight it, then click the “Uninstall” button.

- In the next message box, confirm the uninstall process by clicking on Yes, then follow the prompts to uninstall program.


3. Scan for your computer for malware
Malware can damage your system files and registry entries and cause various errors. We will now, download and run a scan with Malwarebytes to check if you’re device is clean.
Malwarebytes is one of the most popular and most used anti-malware software for Windows, and for good reasons. It is able to destroy many types of malware that other software tends to miss, without costing you absolutely nothing. When it comes to cleaning up an infected device, Malwarebytes has always been free and we recommend it as an essential tool in the fight against malware.
-
You can download Malwarebytes by clicking the link below.
-
When Malwarebytes has finished downloading, double-click on the MBSetup file to install Malwarebytes on your computer. In most cases, downloaded files are saved to the Downloads folder.

You may be presented with a User Account Control pop-up asking if you want to allow Malwarebytes to make changes to your device. If this happens, you should click “Yes” to continue with the Malwarebytes installation.

-
When the Malwarebytes installation begins, you will see the Malwarebytes setup wizard which will guide you through the installation process. The Malwarebytes installer will first ask you what type of computer are you installing this program on, click either Personal Computer or Work Computer.

On the next screen, click “Install” to install Malwarebytes on your computer.

When your Malwarebytes installation completes, the program opens the Welcome to Malwarebytes screen.
-
Malwarebytes is now installed on your computer, to start a scan click on the “Scan” button. Malwarebytes will automatically update the antivirus database and start scanning your computer for malicious programs.

-
Malwarebytes will now scan your computer for browser hijackers and other malicious programs. This process can take a few minutes, so we suggest you do something else and periodically check on the status of the scan to see when it is finished.

-
When the Malwarebytes scan is finished scanning it will show a screen that displays any malware, adware, or potentially unwanted programs that it has detected. To remove the malicious programs that Malwarebytes has found, click on the “Quarantine” button.

-
Malwarebytes will now remove all the malicious files and registry keys that it has found. To complete the malware removal process, Malwarebytes may ask you to restart your computer.


4. Check for updates
Make sure your operating system, drivers, and other software are up to date. If the errors started happening after an update, you can uninstall that specific update patch.
To check for Windows updates, follow the below steps:
- Press the Windows key + I to open the Settings menu. Click the “Windows Update” tab on the left side of the screen.
For Windows 10 users, the Windows Update menu can be found in Settings > Update & Security > Windows Update. - Click the “Check for updates” button. This will initiate a scan for updates. If any updates are available, they will be downloaded and installed automatically.

- If you want to check for updates for other software, you can do so by opening the software and looking for a “Check for updates” option in the menu. You can also check the software’s website for updates.

5. Disable any unnecessary startup programs
Startup programs are applications that automatically launch when you start your computer. While some of these programs may be necessary for your system to function properly, others may be unnecessary and can cause errors.
- Open the Task Manager by pressing the Ctrl + Shift + Esc keys on your keyboard simultaneously.

- In the Task Manager, go to the “Startup” tab and disable any programs that you do not need to start automatically when you turn on your computer.
Keep in mind that some startup programs may be essential to the functioning of your system, so be careful not to disable any important programs.


6. Run a memory test
A faulty RAM module can cause random crashes. Run a memory test to check for any issues with your RAM. To run a memory test, follow these steps:
- Press the Windows key + R to open the Run dialog.
- Type “mdsched.exe” into the Run dialog and press Enter. This will launch the Windows Memory Diagnostic tool.

- You will be asked whether you want to restart your PC and run the test immediately or schedule the test to run the next time you start your PC. Choose the option you prefer and click “OK”.

If you choose to run the test immediately, your PC will restart and the test will begin. The test will run automatically and may take several minutes to complete.
- If the test finds any errors, it will display a message indicating the type and location of the error. You may need to replace your RAM if the test finds any errors.
- If the test completes without finding any errors, it will display a message indicating that the test has completed successfully.


7.Check your hardware
Start by inspecting your computer’s hardware components for any signs of damage or failure. Ensure that all connections are secure and that there are no loose cables. If you suspect a faulty component, consider consulting a professional or replacing it if necessary.
Next, check your RAM, hard drive, graphics card, and any other hardware components using the Windows Device Manager.
-
To access the Device Manager, type “devmgmt.msc” into the search bar on the Start menu and select “Device Manager” from the list of results.

-
In the Device Manager, you can view a list of all the hardware devices connected to your computer and check for any errors or issues. If you see a yellow exclamation point next to a device, it may indicate a problem with that device. You can right-click on the device and select “Update driver” or “Troubleshoot” to try and fix any issues.


8. Try a system restore.
If you have a restore point saved, you can try using it to revert your system to a previous state. This may fix the issue if it was caused by a recent change. To do a system restore follow these steps:
- Press the Windows key + S to open the Search menu.
- Type “system restore” into the search bar and click the “Create a restore point” result.

- Click the “System Restore” button.

- In the System Restore window, click “Next.”

- Select a restore point from the list and click “Next.” A restore point is a saved state of your system that you can use to revert your system to a previous state. Make sure to select a restore point that was created before you started experiencing problems.
- Click “Finish” to begin the restore process. Your PC will restart and the restore process will begin. This may take several minutes to complete.

- When the restore is complete, your PC will restart again. You may need to adjust your settings and reinstall any software that was installed after the restore point was created.


9. Reset your PC
One of the most drastic solutions is to reset your PC to its default configuration. This can be considered the nuclear option for fixing errors because it will wipe out all the third-party software you installed on your computer. However, this option can also be effective if none of the other methods work for you.
Before you reset your PC, make sure you back up your important data and files. You can also choose to keep your personal files in the Reset this PC tool, but it is better to have a separate backup just in case something goes wrong.
To reset your PC, follow these steps:
- Open Settings by pressing Windows + I keys.
- Click on System and then on Recovery.

- Under Reset this PC section, click on Reset PC button.
- Choose whether you want to keep your files or remove everything.
- Follow the on-screen instructions to complete the process.


After resetting your PC, you should be able to run your applications without getting any errors. However, keep in mind that this solution will also remove any custom settings and preferences you had on your computer. You will need to reinstall and configure your programs again after resetting.
Summary
D3dx11_43.dll is an essential file for running DirectX 11-based applications on Windows. If you encounter errors related to this file, such as “D3dx11_43.dll is missing” or “D3dx11_43.dll not found,” you can try reinstalling DirectX, updating your graphics drivers, and scanning for viruses and malware. These steps should help resolve the issues and ensure the smooth functioning of your games and multimedia applications.
Here are 10 basic security tips to help you avoid malware and protect your device:
To avoid potential dangers on the internet, it’s important to follow these 10 basic safety rules. By doing so, you can protect yourself from many of the unpleasant surprises that can arise when using the web.
Файл d3dx11_43.dll считается разновидностью DLL-файла. DLL-файлы, такие как d3dx11_43.dll, по сути являются справочником, хранящим информацию и инструкции для исполняемых файлов (EXE-файлов), например AppInstaller.exe. Данные файлы были созданы для того, чтобы различные программы (например, DWG TrueView) имели общий доступ к файлу d3dx11_43.dll для более эффективного распределения памяти, что в свою очередь способствует повышению быстродействия компьютера.
К сожалению, то, что делает файлы DLL настолько удобными и эффективными, также делает их крайне уязвимыми к различного рода проблемам. Если что-то происходит с общим файлом DLL, то он либо пропадает, либо каким-то образом повреждается, вследствие чего может возникать сообщение об ошибке выполнения. Термин «выполнение» говорит сам за себя; имеется в виду, что данные ошибки возникают в момент, когда происходит попытка загрузки файла d3dx11_43.dll — либо при запуске приложения DWG TrueView, либо, в некоторых случаях, во время его работы. К числу наиболее распространенных ошибок d3dx11_43.dll относятся:
- Нарушение прав доступа по адресу — d3dx11_43.dll.
- Не удается найти d3dx11_43.dll.
- Не удается найти C:\Windows\System32\d3dx11_43.dll.
- Не удается зарегистрировать d3dx11_43.dll.
- Не удается запустить DWG TrueView. Отсутствует требуемый компонент: d3dx11_43.dll. Повторите установку DWG TrueView.
- Не удалось загрузить d3dx11_43.dll.
- Не удалось запустить приложение, потому что не найден d3dx11_43.dll.
- Файл d3dx11_43.dll отсутствует или поврежден.
- Не удалось запустить это приложение, потому что не найден d3dx11_43.dll. Попробуйте переустановить программу, чтобы устранить эту проблему.
Файл d3dx11_43.dll может отсутствовать из-за случайного удаления, быть удаленным другой программой как общий файл (общий с DWG TrueView) или быть удаленным в результате заражения вредоносным программным обеспечением. Кроме того, повреждение файла d3dx11_43.dll может быть вызвано отключением питания при загрузке DWG TrueView, сбоем системы при загрузке d3dx11_43.dll, наличием плохих секторов на запоминающем устройстве (обычно это основной жесткий диск) или, как нередко бывает, заражением вредоносным программным обеспечением. Таким образом, крайне важно, чтобы антивирус постоянно поддерживался в актуальном состоянии и регулярно проводил сканирование системы.