
Все способы:
- Шаг 1: Скачивание
- Шаг 2: Установка
- Шаг 3: Настройка переменных среды
- Решение возможных проблем
- Вопросы и ответы: 0
Шаг 1: Скачивание
NetBeans представляет собой интегрированную среду разработки Java с открытым исходным кодом, и установка на компьютер под управлением Windows 10 не составляет труда. Как и большинство подобного ПО, NetBeans доступна для бесплатного скачивания напрямую из браузера:
Скачать NetBeans с официального сайта
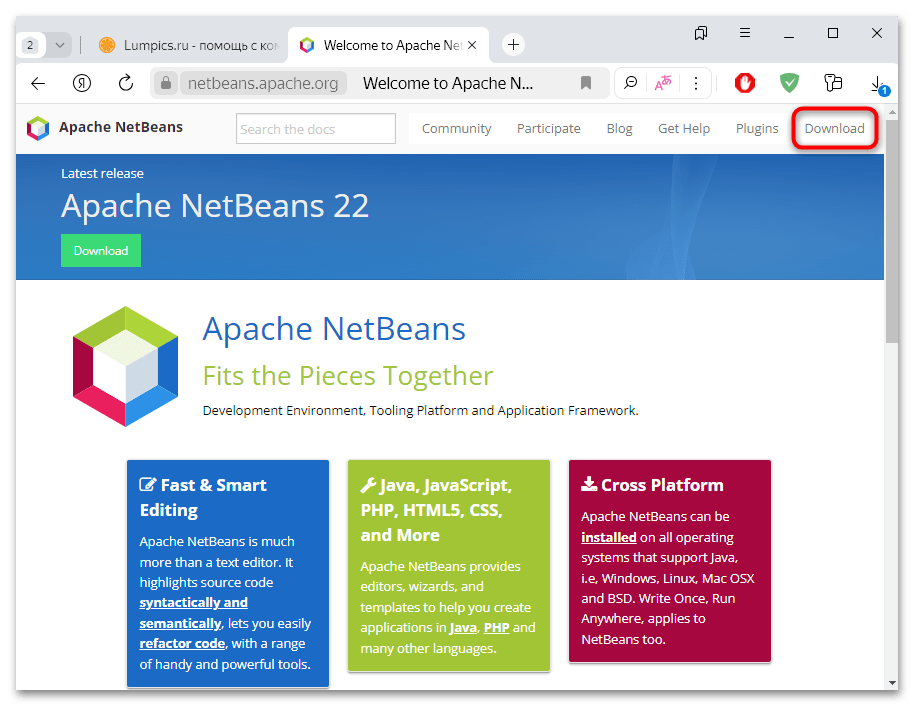
- Перейдите на официальный сайт разработчика среды, кликнув по ссылке выше. На открывшейся странице нужно кликнуть по кнопке «Download», расположенной в верхнем правом углу.
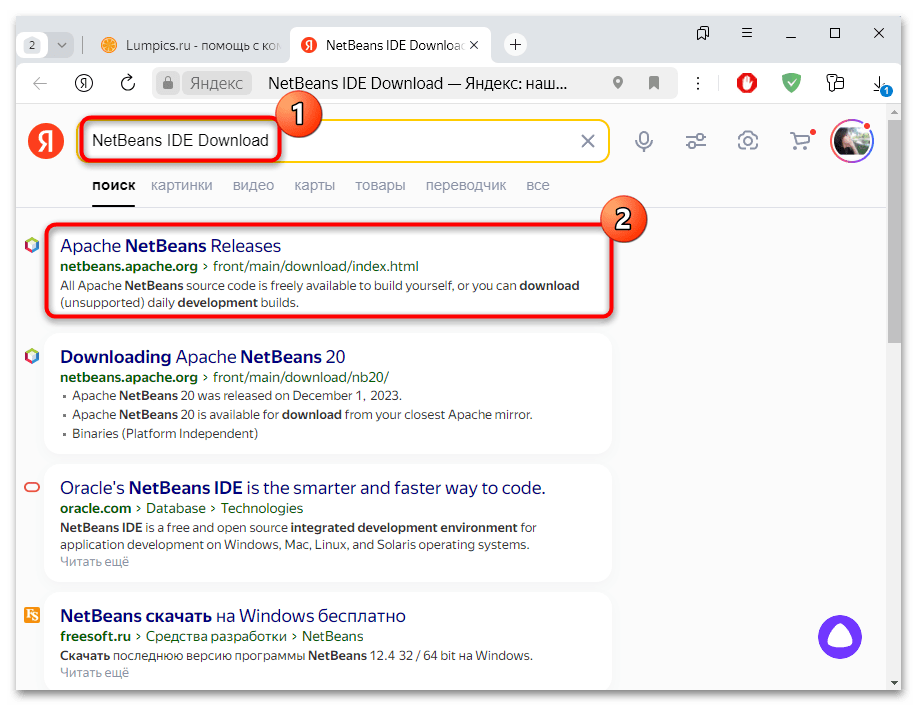
- Также можно отыскать официальный сайт через любую поисковую систему, введя запрос «NetBeans IDE Download». Как правило, нужный нам результат будет отображаться вверху появившегося списка.
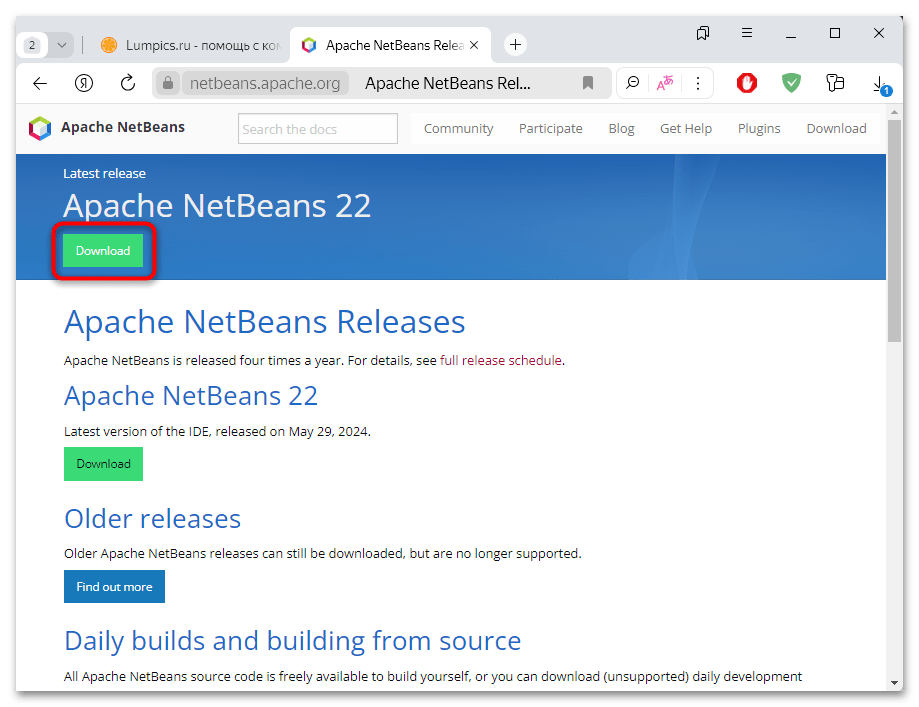
- Откроется страница с выбором релизов IDE. Лучше выбирать наиболее поздний – он отображается вверху перечня. Щелкните по кнопке скачивания.
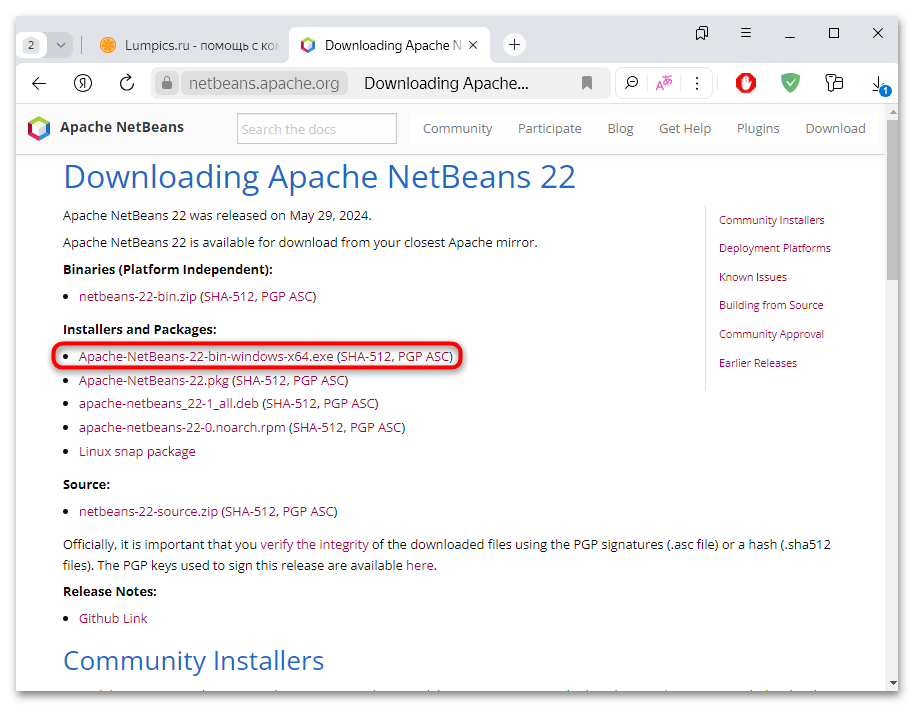
- Далее в блоке «Installers and Packages» выберите версию установщика. В нашем случае это файл «Apache-NetBeans-22-bin-windows-x64.exe (SHA-512, PGP ASC)», который подойдет для 64-разрядной операционной системы Windows.
- На следующей странице кликните по доступной ссылке.
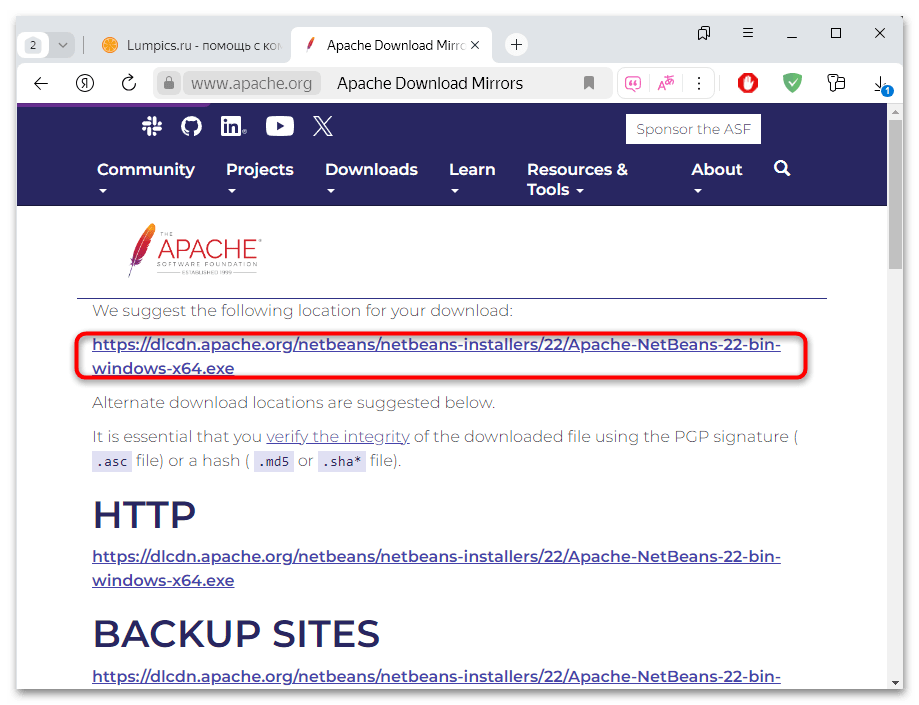
Останется дождаться, пока установочный файл будет скачан на компьютер, после чего можно переходить к непосредственной инсталляции среды NetBeans.
В большинстве случаев также потребуется дополнительно скачать комплект для разработки Java, который необходим для установки и использования среды разработки NetBeans.
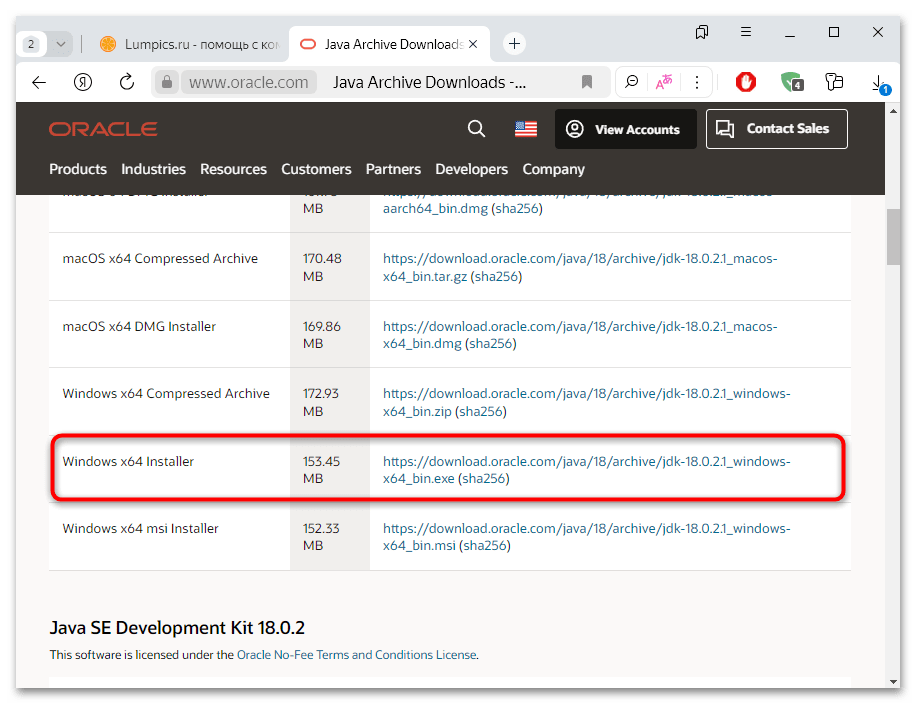
Скачать Java SE Development Kit (JDK) 18
Перейдите по ссылке выше на один из возможных ресурсов и скачайте файл, нажав на ссылку для скачивания именно для вашей версии ОС.
Шаг 2: Установка
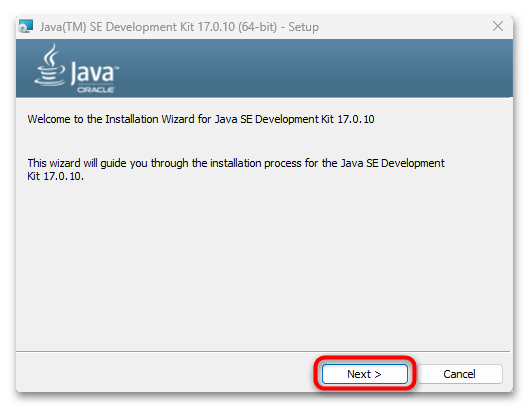
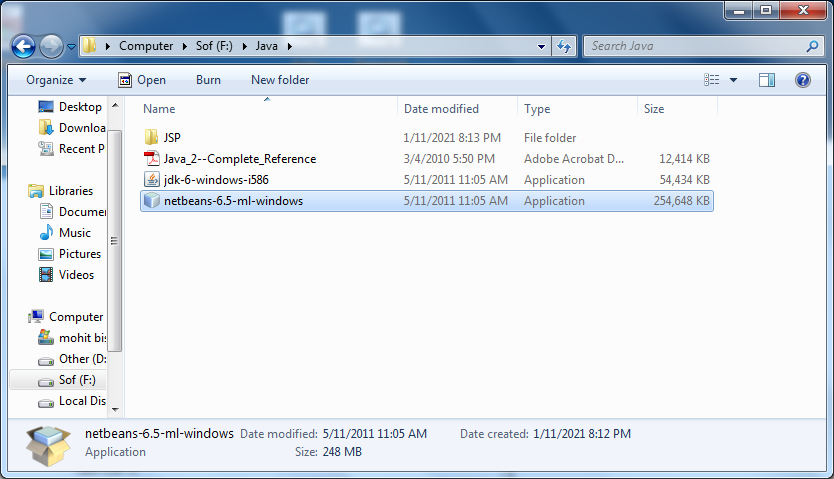
В первую очередь нужно установить JDK, иначе установка среды разработки попросту будет прервана ошибкой с соответствующим уведомлением о том, что в системе не найдены нужные программные компоненты. Найдите файл «JDK» и дважды кликните по нему:
- В приветственном окне нажмите на кнопку «Next» для начала установки.
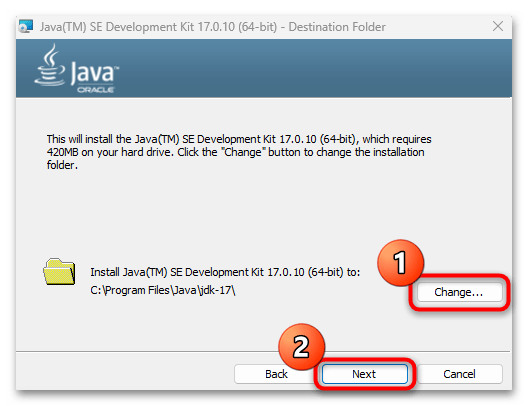
- Вы увидите процесс установки, по завершении которого будет предложено выбрать путь для хранения файлов. Чтобы изменить директорию, нажмите на «Change» и вручную укажите путь в открывшемся файловом менеджере. Кликните по «Next».
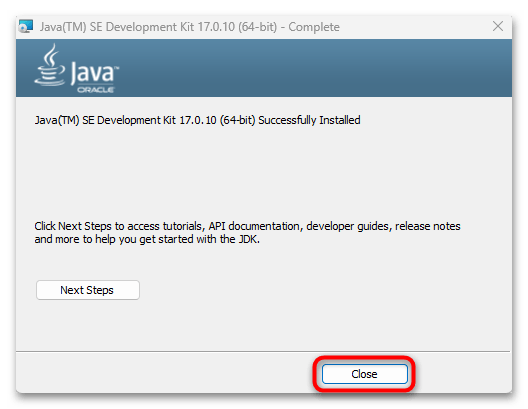
- Начнется непосредственная установка Java в систему. В конце процедуры отобразится уведомление об успешной инсталляции. Чтобы выйти из окна мастера, нажмите на «Close».
Теперь можно переходить к файлу со средой разработки. Отыщите его в папке с загрузками и дважды кликните по нему левой кнопкой мыши для запуска мастера инсталляции. Ничего примечательного в установке нет, но мы разберем все шаги более подробно:
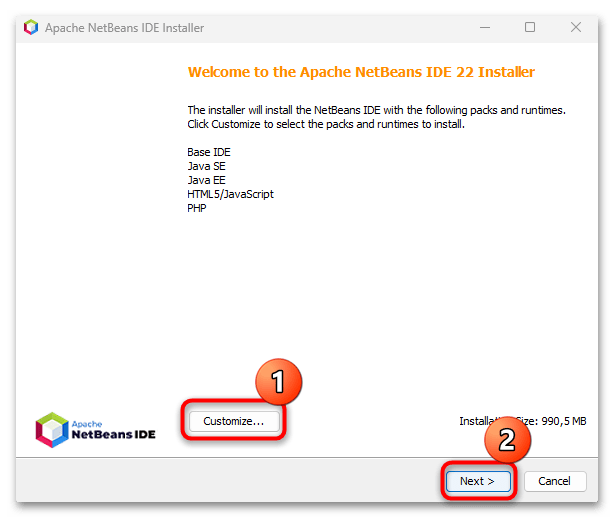
- После установки конфигурации, вы попадете в окно с информацией о том, что будет установлено. При необходимости можете убрать те или иные компоненты – кликните по кнопке «Customize», а в следующем окне уберите отметки у ненужных пунктов при необходимости. Кликните по «Next» для продолжения.
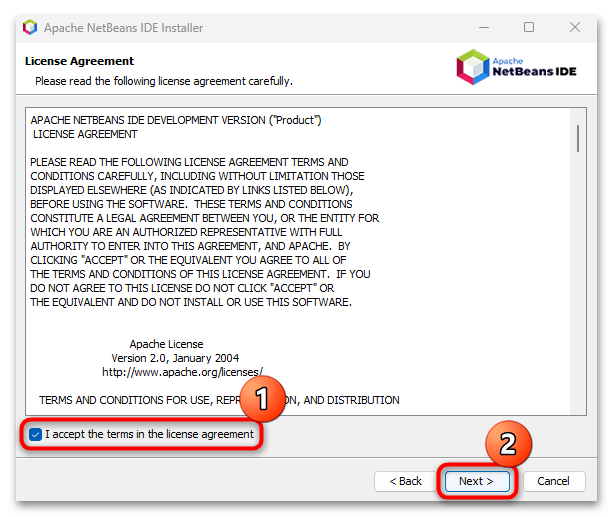
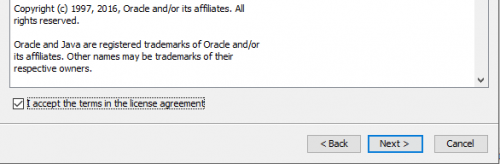
- Далее следует ознакомиться с условиями лицензионного использования, затем отметьте пункт «I accept the terms in the license agreement» и нажмите на «Next».
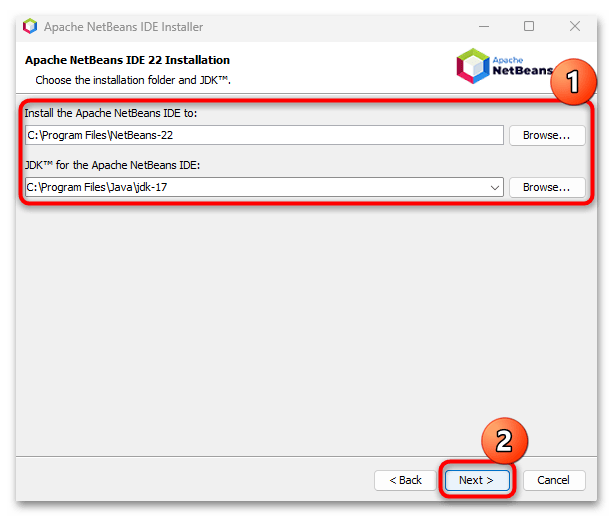
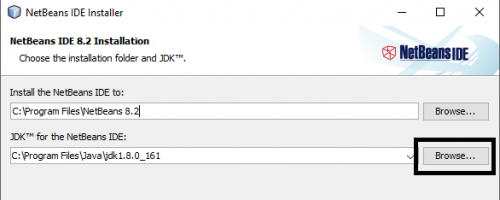
- Укажите путь для установки непосредственно установки среды разработки, а ниже, если потребуется, адрес, куда был инсталлирован компонент JDK. Продолжите процедуру, нажав на соответствующую кнопку.
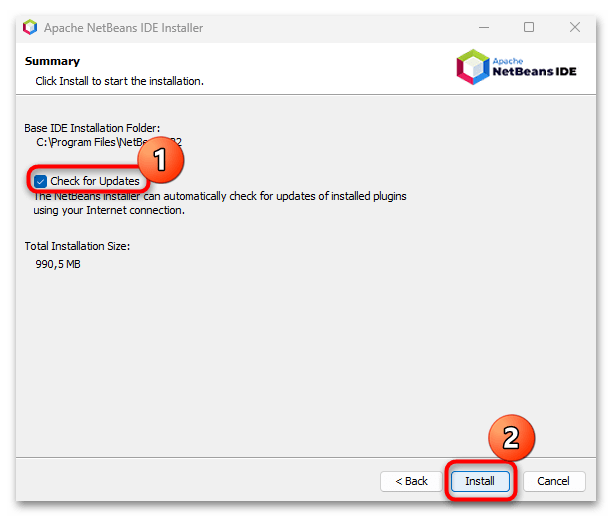
- В следующем окне будет предложено сразу проверить программное обеспечение на наличие обновлений. По умолчанию опция активирована, но вы можете отключить ее. Также ниже отобразится общий объем софта после инсталляции. Нажмите на «Install», чтобы установить NetBeans.
На этом установка среды разработки Java завершена, но для начала работы понадобится настроить переменные среды. Также иногда может потребоваться еще скачать актуальную версию Java. Если при попытке запуска софта появляется окно с предупреждением, тогда скачивайте последнюю версию комплекта разработки JDK (в нашем случае нужна версия не младше 17).
Шаг 3: Настройка переменных среды
Прежде чем переходить к использованию NetBeans, произведите предварительную настройку переменных среды непосредственно в операционной системе:
- С помощью строки системного поиска откройте окно «Свойства системы», введя запрос «Изменение системных переменных среды».
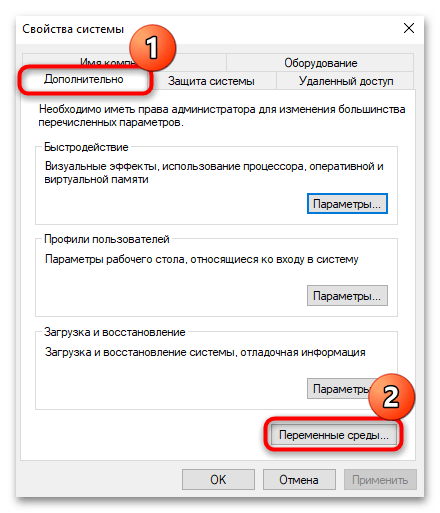
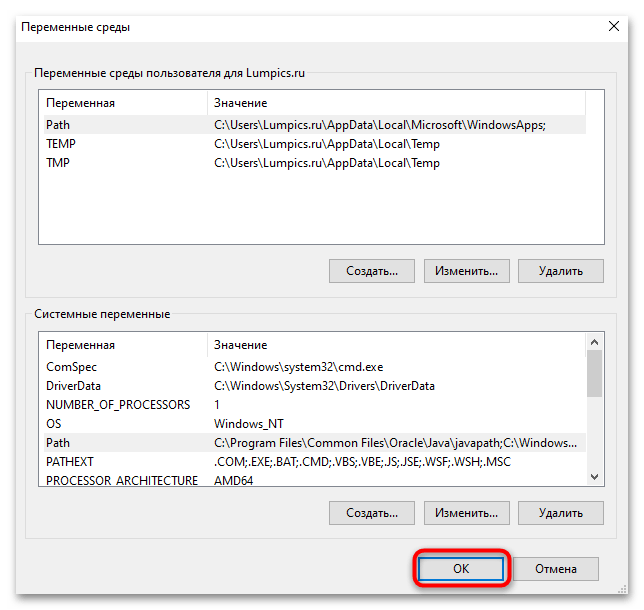
- В открывшемся окне на вкладке «Дополнительно» нажмите на кнопку «Переменные среды» внизу.
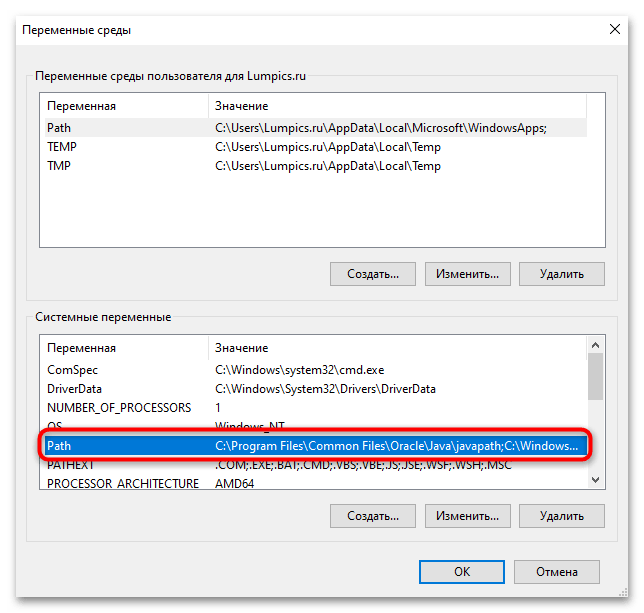
- Далее появится новое окно, где нужно в подразделе «Системные переменные» найти пункт «Path» и дважды кликнуть по нему левой кнопкой мыши.
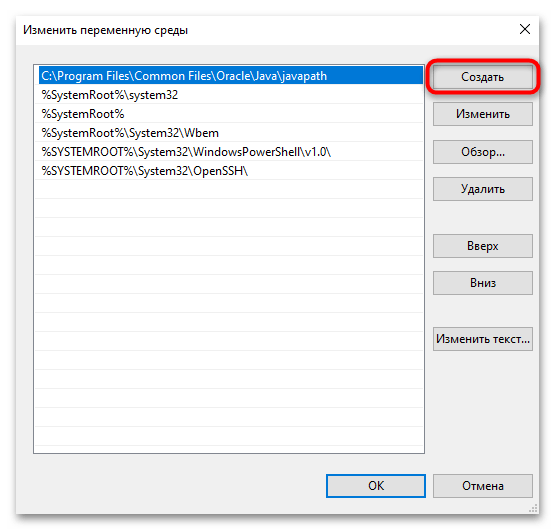
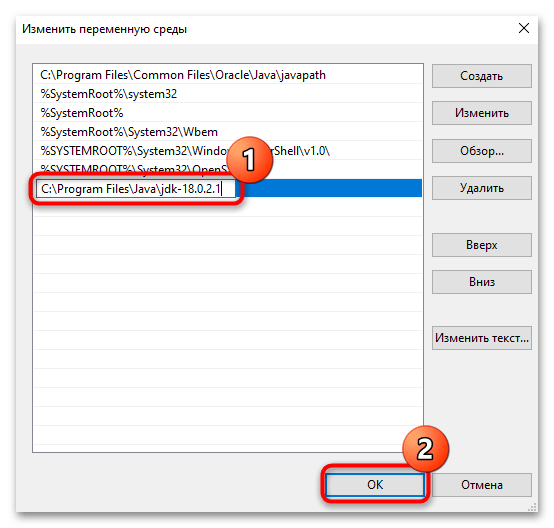
- Нажмите на кнопку «Создать».
- Ниже в свободной строке появится текстовый курсор, куда и введите путь к установленному ранее комплекту для разработки Java. Если во время инсталляции ничего не менялось, то обычно он выглядит так:
C:\Program Files\Java\jdk-18(версия может отличаться от нашего примера, но на момент написания статьи Java SE Development Kit 18 является актуальной версией). Подтвердите действие, нажав на «ОК». - Снова нажмите на «ОК» в предыдущем окне.

После выполненных настроек параметров в системе можете запускать установленную среду разработки NetBeans.
Решение возможных проблем
Есть несколько основных причин, почему возникают неполадки при запуске или работе в среде разработки. Чаще всего это связано с неправильной установкой. В статье мы сделали акцент на том, что для правильной работы софта нужна актуальная версия комплекта Java, иначе при попытке открыть среду появляется соответствующая ошибка. Убедитесь, что все сделано правильно, и проверьте, нет ли более старых версий Java, которые могут препятствовать корректному взаимодействию ПО с системой.
Как уже говорилось, директория с компонентами Java располагается на системном диске по умолчанию в каталоге «Program Files», папке «Java». Если помимо свежей версии, есть и другие, то смело удаляйте их.
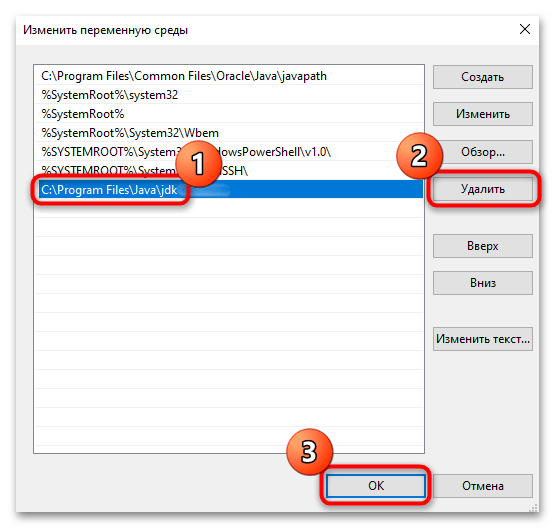
Также не забудьте проверить настройки переменных среды (Шаг 3). Убедитесь, что в списке переменных среды нет старых версий JDK. Если есть, то выделите их и нажмите на кнопку «Удалить», после чего подтвердите действие.
То же самое касается более ранних версий самой среды разработки Apache NetBeans IDE. Удалите старое ПО. Причем воспользоваться можно как файлом-деинсталлятором, который, как правило, находится в корневом каталоге софта, либо встроенными средствами самой системы («Панель управления» или штатные «Параметры» Windows 10).

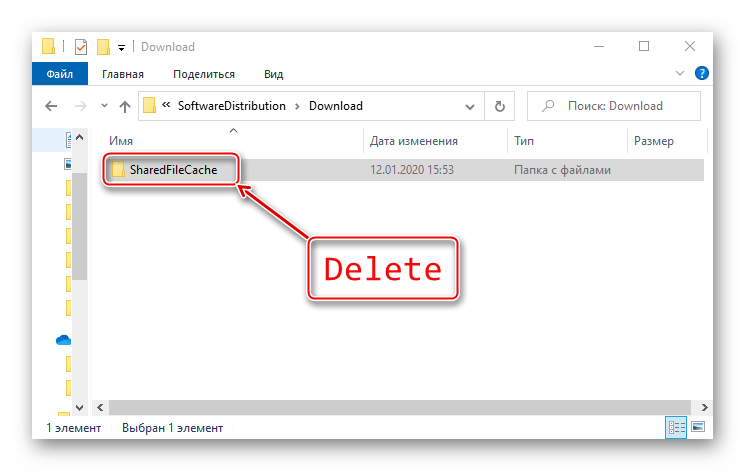
Иногда помогает чистка кеша системы (особенно если ранее вы уже устанавливали среду разработки и даже удалили ее, остаточные данные могут остаться и конфликтовать с новой версией).
Подробнее: Способы очистки кеша на Windows 10
Что касается зависаний и внутренних багов при исполнении кода во время работы в NetBeans, скорее всего, дело в конфигурациях среды. В этом случае можно попробовать изменить соответствующий файл вручную:
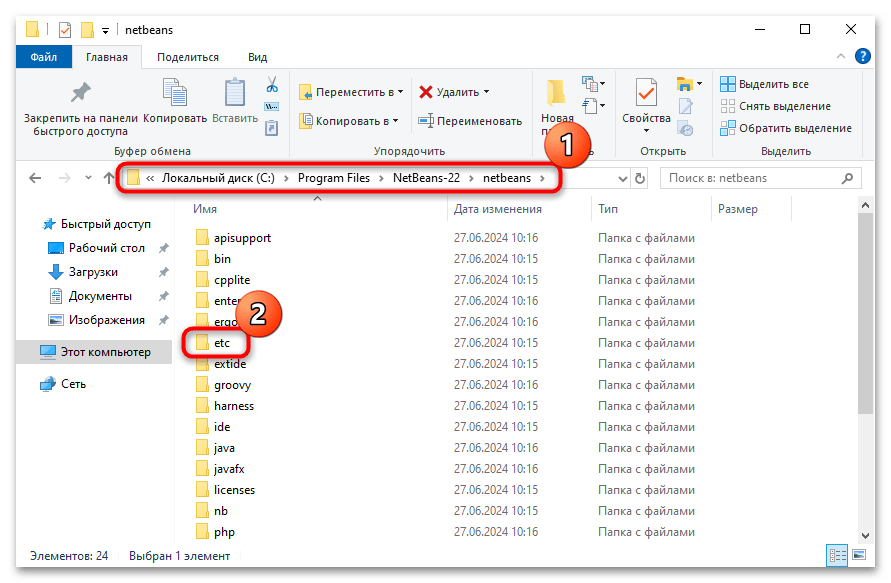
- Перейдите через «Проводник» к файлам программного обеспечения. Если во время установки путь не менялся, адрес будет следующим:
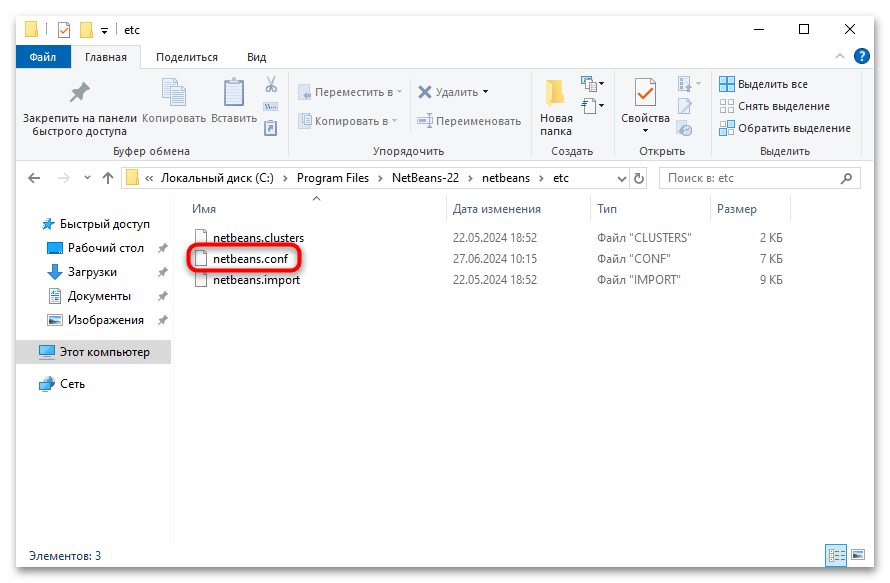
C:\Program Files\NetBeans-22\netbeans. Откройте папку под название «etc». - Найдите файл «netbeans.conf» и кликните по нему левой кнопкой мыши дважды.
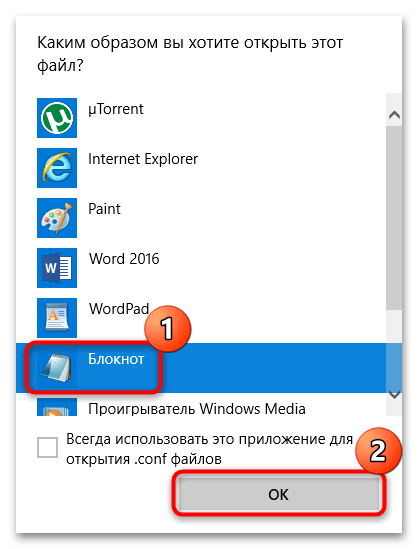
- Если потребуется, в следующем окне выберите способ открытия этого файла. Подойдет простой текстовый редактор типа штатного «Блокнота».
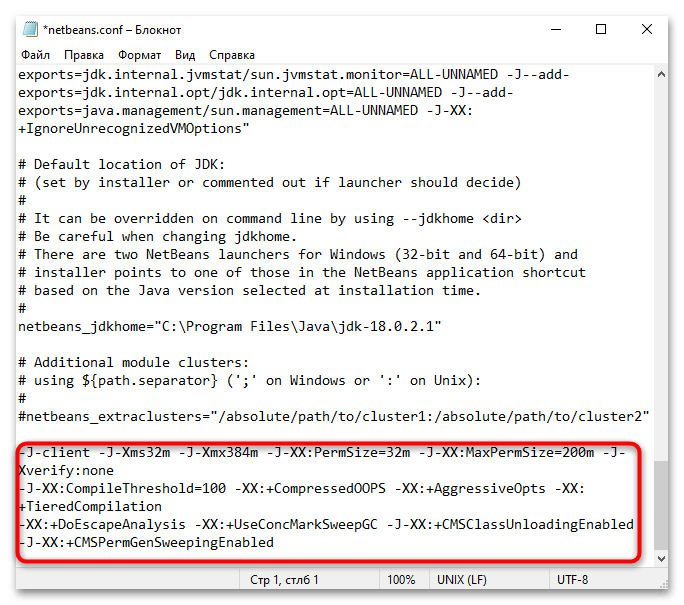
- Добавьте в конец открытого документа следующие строки:
-J-client -J-Xms32m -J-Xmx384m -J-XX:PermSize=32m -J-XX:MaxPermSize=200m -J-Xverify:none
-J-XX:CompileThreshold=100 -XX:+CompressedOOPS -XX:+AggressiveOpts -XX:+TieredCompilation
-XX:+DoEscapeAnalysis -XX:+UseConcMarkSweepGC -J-XX:+CMSClassUnloadingEnabled -J-XX:+CMSPermGenSweepingEnabled - Сохраните изменения.
После правки конфигурации среды перезапустите NetBeans и проверьте работу программы. Такой способ помогает избавиться от большинства багов и зависаний при исполнении кода.
Если ничего не помогло, и среда разработки не устанавливается, велика вероятность, что вся проблема именно в вашей операционной системе. Решить большинство из таких сбоев может только откат/полная переустановка ОС.
Читайте также:
Откат к точке восстановления в Windows 10
Способы переустановки операционной системы Windows 10
Наша группа в TelegramПолезные советы и помощь
Netbeans is an open-source integrated development environment for Java. Java is a programming language that developers use to create applications on your computer. It is intended to let application developers “write once, run anywhere” (WORA), meaning that compiled Java code can run on all platforms that support Java without the need for recompilation.
Netbeans is a famous programming platform. More than 1.5 million people actively employ this software. This Tech-Recipe is a tutorial on How to install Netbeans IDE on windows 10. If you haven’t used Netbeans before, then there are a few things that you need to know. Well, Netbeans is open-source. Although it is an IDE for Java, it does provide extensions for other languages such as Php, C++, HTML, etc.
Why Netbeans is better
You would ask better than what? There are many other IDE’s in the market for Java such as Eclipse, BlueJ, Android studio. What makes Netbeans stand out is the fact that it’s free. Netbeans IDE has a modular architecture. It has a multi-language editor, debugger, profiler, versioning control, and developer collaboration. It integrates all the functionality of Java. NetBeans runs on all major operating systems like Windows, Linux, and Mac OS. Other features in NetBeans include customizability, quick search, plugin manager, Maven support and services.
How to Install NetBeans IDE on Windows 10
Step-by-Step Procedure
1. Search Netbeans or click on the link Netbeans downloads
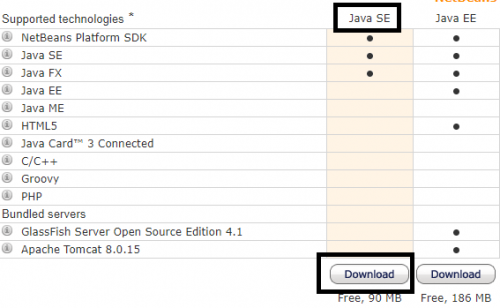
Note If you’re looking forward to code in Java then you are only required to download Java SE. Java EE is a superset of SE, just adds more libraries and functionalities. Java SE is best for a beginner.
2. Click download. But before you try to install it there’s another setup that you require.
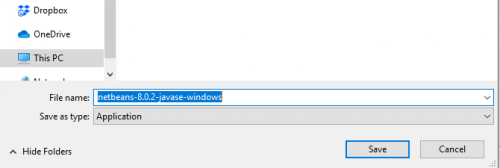
3. Hit ‘save’
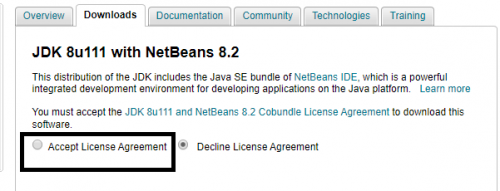
4. Look for Netbeans JDK setup, it is the java development kit. Or click on the link JDK setup

5. Accept the license agreement
6. Click on Windows x64, in case you’re using other windows download the required version
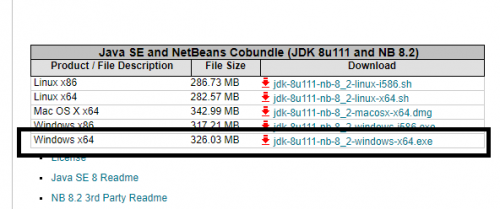
7. Click next, maybe two times

8. Hit next again.
9. Now the Netbeans SE setup that you downloaded earlier, install it. Click ‘next’
10. Accept the license agreement and click ‘Next’ again.
11. Browse the JDK location, and click next.
12. Let it install. It’s going to take some time And then you can use Netbeans.
Happy Programming peeps!!!
Joudet Ahsan
SEO Content Creator, a Computer Scientist in making and someone who
sucks at writing bios.
Last Updated :
06 Oct, 2021
NetBeans IDE is a Free open-Source, Cross-plate form Integrated Development Environment (IDE) with built-in support for the JAVA Programming Language. It can run any machine which consists of the Java Virtual Machine (JVM). It consists of many features for application development as follows:
- Drag & Drop Graphical User Interface (GUI) Creation.
- Excellent editing (advanced source code editor)
- Web-service
- Excellent debugging
- Wizards, code generation and management tools, and many more.
Steps of Installation of NetBeans on Windows
1. You need to have a setup file of the NetBeans JAVA into your setup.
2. If you didn’t have the setup you can download from the following link: https://netbeans.org/images_www/v6/download/community/8.2
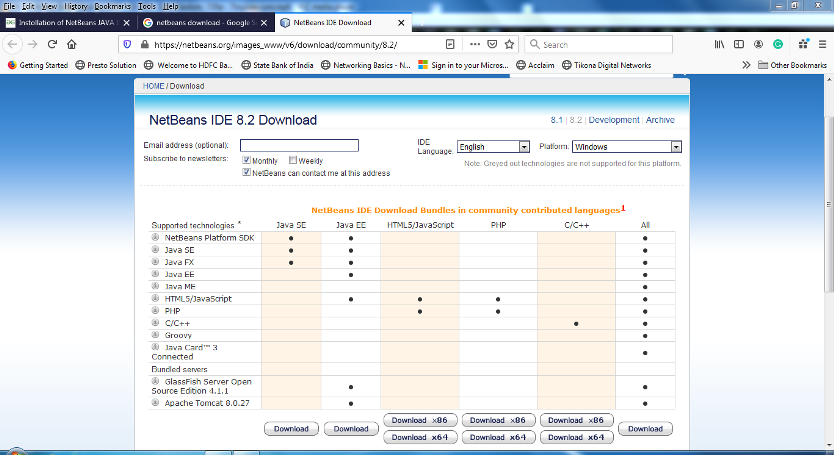
3. You can download any type of setup as per your requirements from the above mention web page.
4. Right-click on the setup or you can Double-Click on the setup by using the mouse.
5. Click on the next option
6. Check on the “Private networks, such as my home and work network».

7. Click on the Allow access button.
8. Check on the “I accept” option and click on the “Next” button.

9. Select the path where you want to install the software and press the “Next” button.
10. Set the Password, User Name & Ports for the Network Connectivity, or we can use this UserName and the Password for the Connecting the Front-End to the Back-End.

11. Click on the “Next” button.
12. Click on the “Install” button.
13. Wait for the while till the time the setup is properly Installed into the Computer
14. After complication of the setup you can click on the “Finish” button or you can also register the Software, for Further Assistance because it is a Free Software.
15. Now you can start the NetBeans for further use
Posted at 21:03h
in NetBeans
2 Comments
NetBeans is a free and open source Integrated Development Environment (IDE) and is governed by the Apache Software Foundation. Develop desktop, mobile, and web applications with Java, JavaScript, HTML5, PHP, C/C++, etc easily with NetBeans. Here, we will be installing NetBeans IDE.
In this tutorial, we will learn how to install NetBeans IDE on Windows 10. Java installation is also necessary since NetBeans is a Java-based IDE, therefore we will also see JAVA JDK installation while installing NetBeans IDE with text as well as a video tutorial below:
Before moving further, we’ve prepared a video tutorial to install NetBeans:
Following steps we will follow to install NetBeans IDE on Windows 10:
- Download and Install Java
- Download NetBeans
- Installing NetBeans IDE
- Set NetBeans and Java path
- Launch NetBeans after installation
- Check the Video Tutorial also
Let’s begin with the installation:
Step 1: Download and Install Java
We will see how to install Java JDK on Windows 10 OS. With that, to avoid any hassles in the future, we will also let you know how to verify the installation.
Let us now Download Java JDK
To download Java, go to Oracle’s official website and type “JAVA JDK ” in the search box as in the below screenshot:
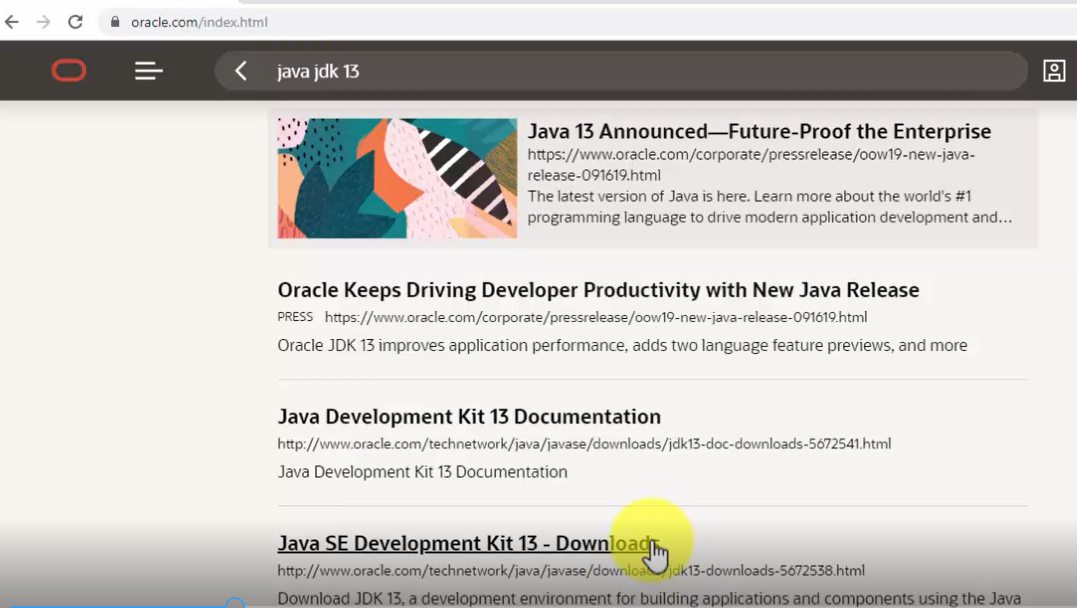
Now, click “Java SE Development Kit 13 – Downloads” and you will reach the Downloads section:

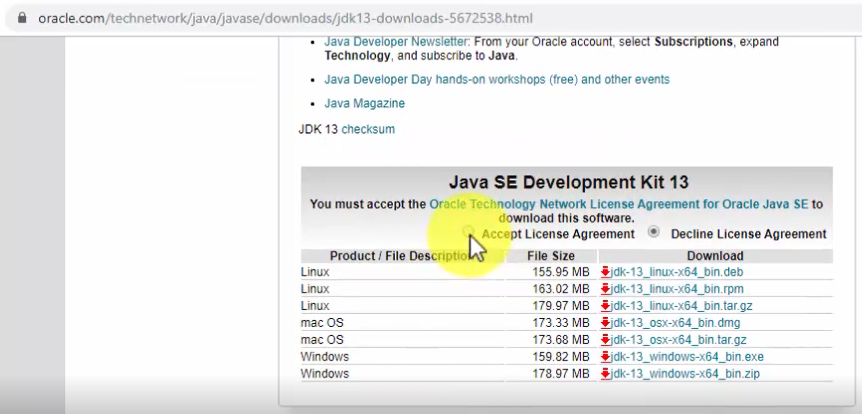
Go to bottom of the same page, click “Accept” there itself:
Since, we are on a Windows 10 system, therefore, we now have two options. From that, we will go with the installer exe 64-bit file i.e. jdk-13_windows-x64_bin.exe:
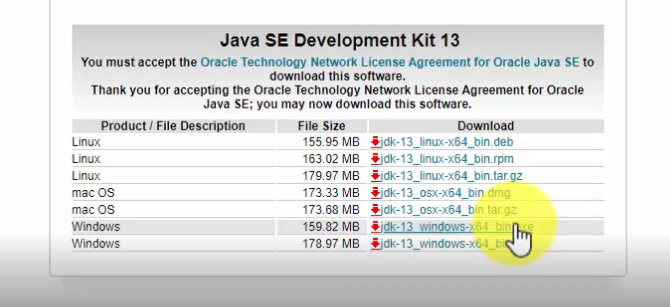
Note: Java JDK 13 will get installed only on a 64-bit Windows 10 system
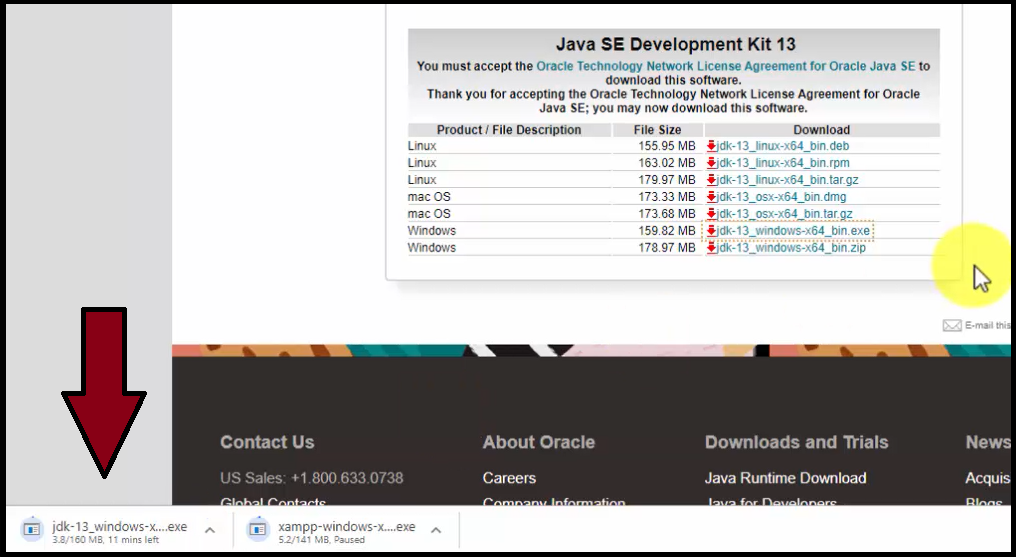
As you can see on the bottom-left of the web browser, the download begins. Just wait for few minutes till the download finishes:
The downloaded jdk exe file will get saved in the “Downloads” folder:
Now, go to “Downloads” folder on your Windows 10 system and double click on the “jdk-13_windows-x64_bin.exe” file:
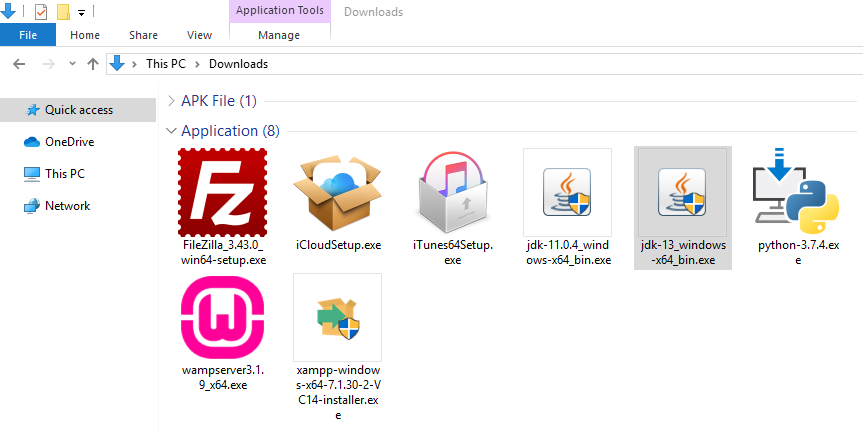
Double click on the exe file and the installation begins:
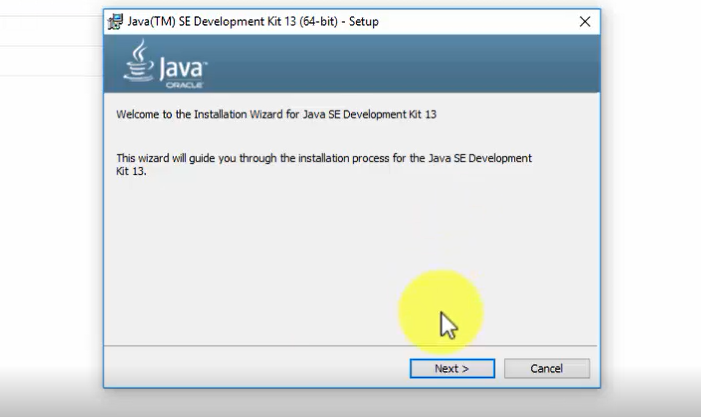
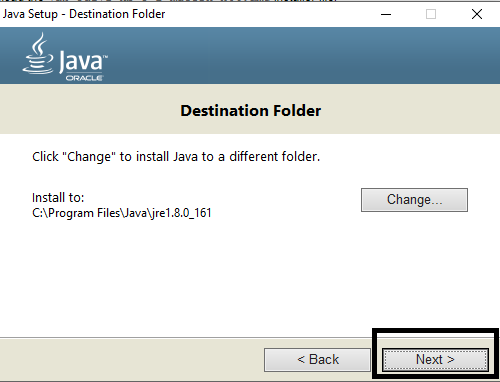
Click on “Next” above and set the path wherein the Java 13 will get installed. You can also keep it the default:
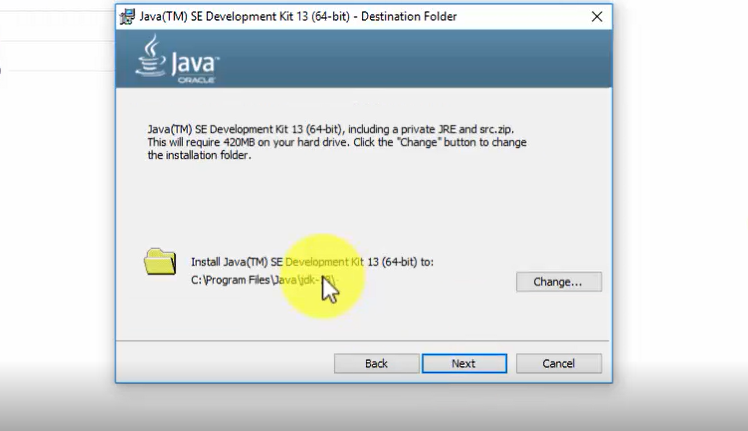
Click on “Next” above and the installation continues for some minutes.
The installation finishes as in the following screenshot. Click on “Close“:
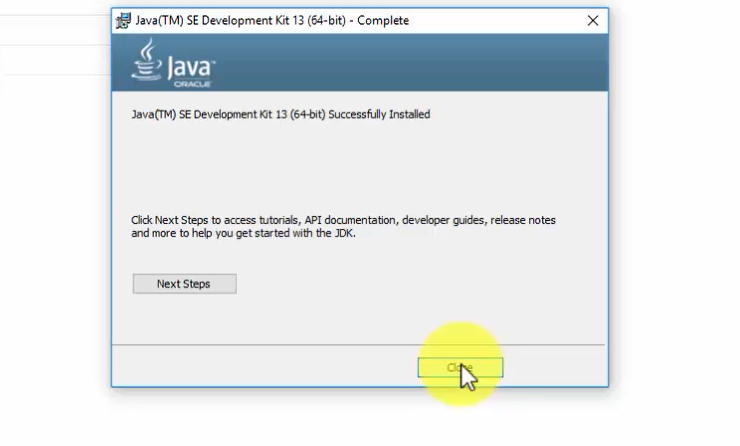
Now, let us set the JDK path.
Now, we will see how to set Java JDK Path (Environment Variable).
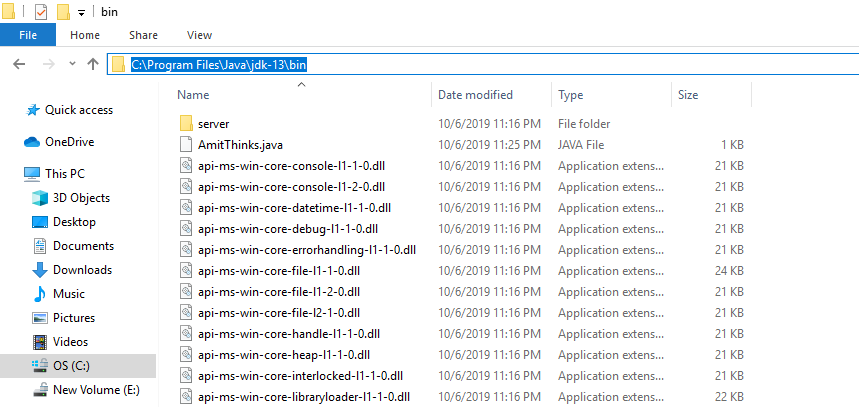
At first, copy the path wherein you installed the Java JDK. Let us copy it first. Remember, we need to copy the bin path i.e. the following on our system:
|
C:\Program Files\Java\jdk—13\bin |
Here’s the screenshot of the “bin” path, wherein we installed Java 13:
To set JDK Path, the easiest way is to type “Environment Variables” on Start. On typing, the following would be visible:
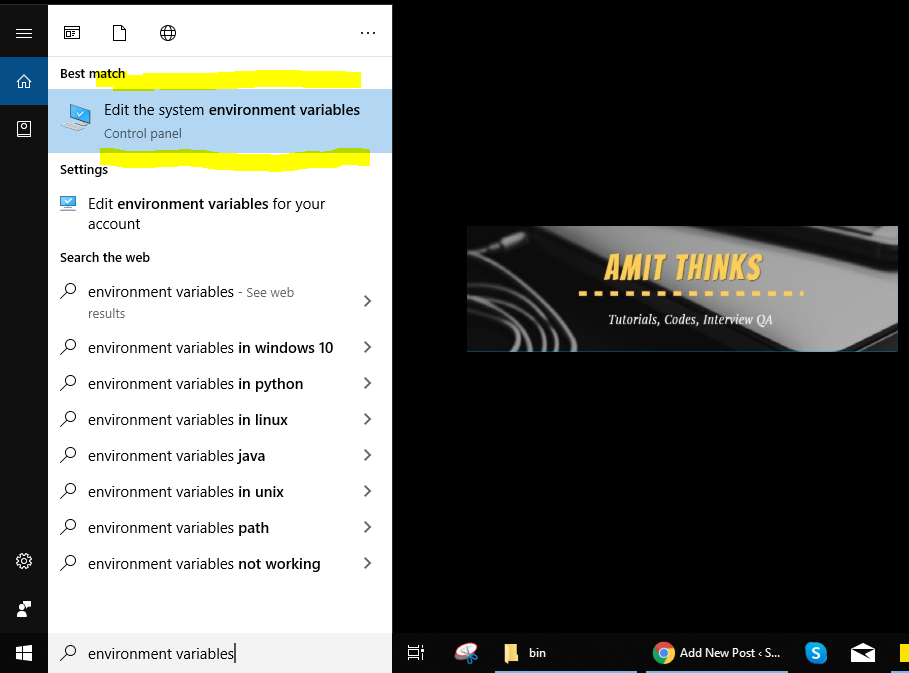
Now, click on “Edit Environment Variables” and a new dialog box would be visible:
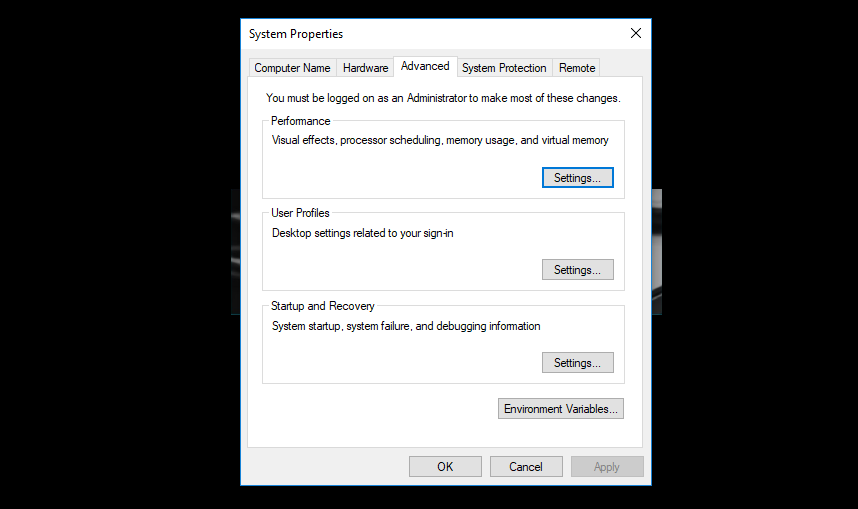
Now, click “Environment Variable” and a new dialog box will open. Go to “System Variables” section and double click “Path” as in the below screenshot:
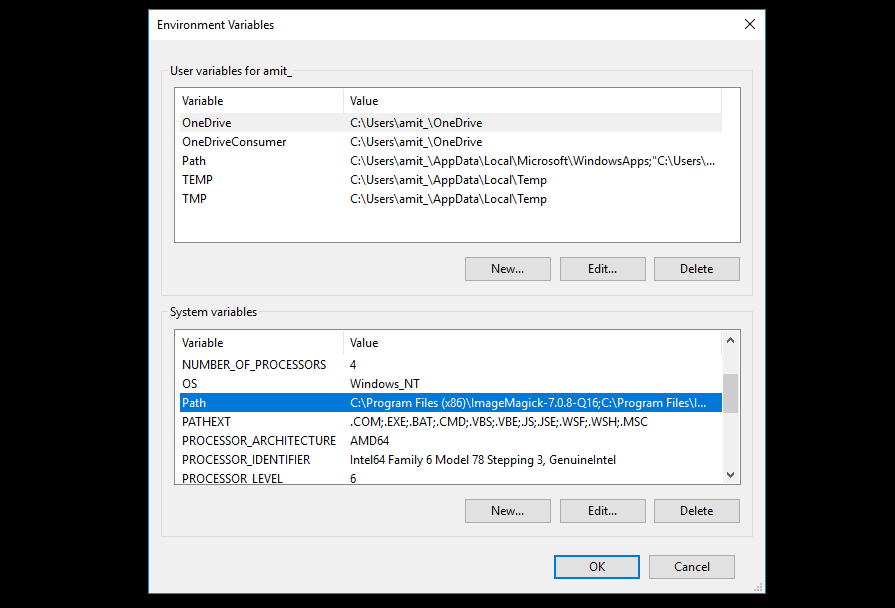
On clicking “Path“, a new dialog box will open. From there, click “New” and add the Java JDK path “C:\Program Files\Java\jdk-13\bin” as displayed in the below screenshot:
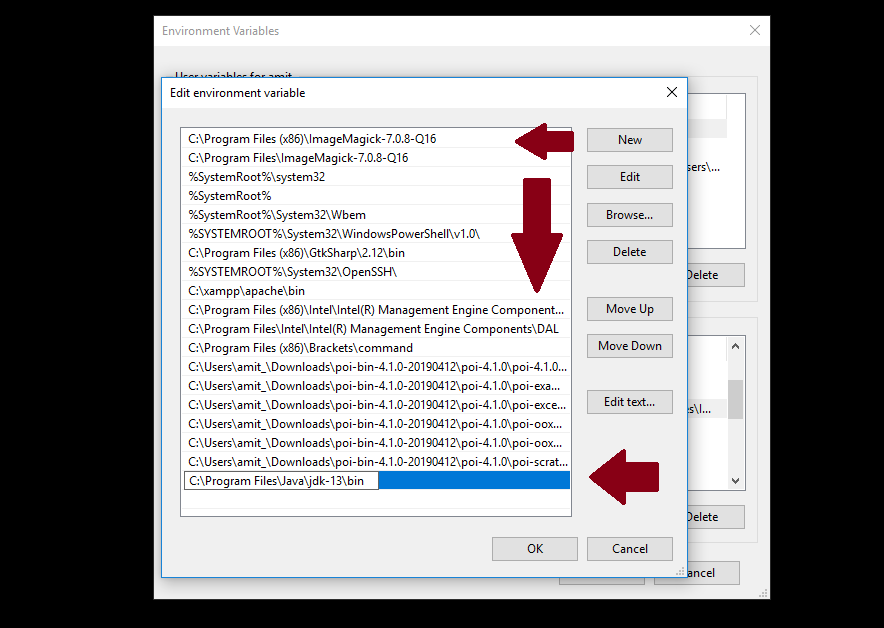
Above, press Ok for all the dialog boxes i.e. 3 times. This ends the installation and the procedure to set path for JDK. Now, we will verify the JDK installation.
Now, we will verify Java JDK 13 Installation.
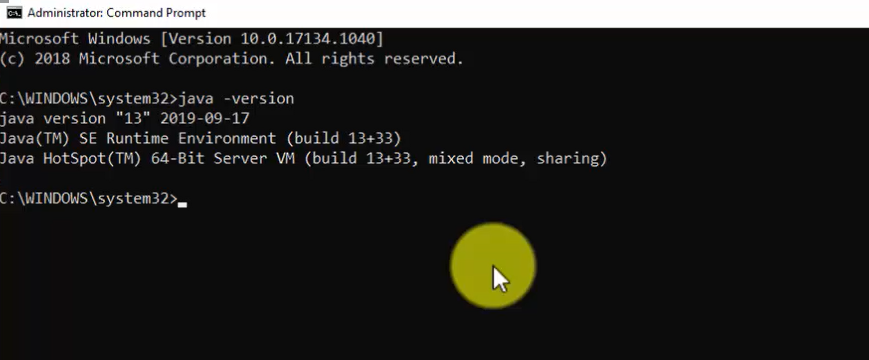
We saw how to install Java JDK 13 above. We installed on Windows 10 OS. Now, we can easily verify whether the installation was successfully or not using the following command:
Let us implement the above command on command prompt (cmd) and verify Java installation:
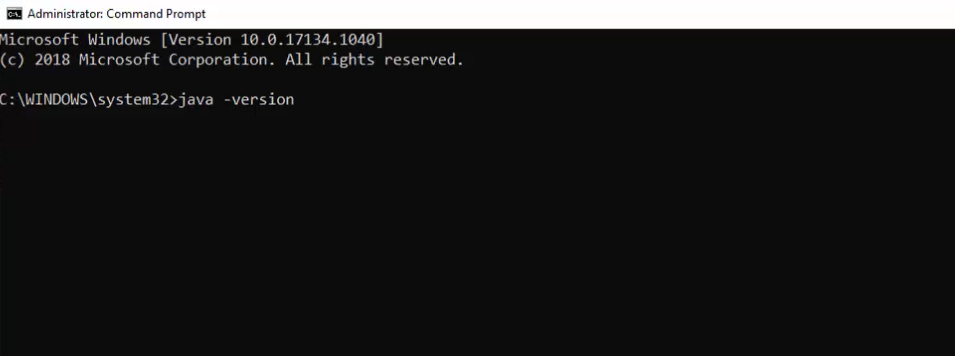
Therefore, the installation verification is now complete and successful since now we can see the version in the command prompt:
Step 2: Download NetBeans IDE
We installed Java above for NetBeans. Now, to install NetBeans IDE on Windows 10, at first we will download NetBeans IDE.
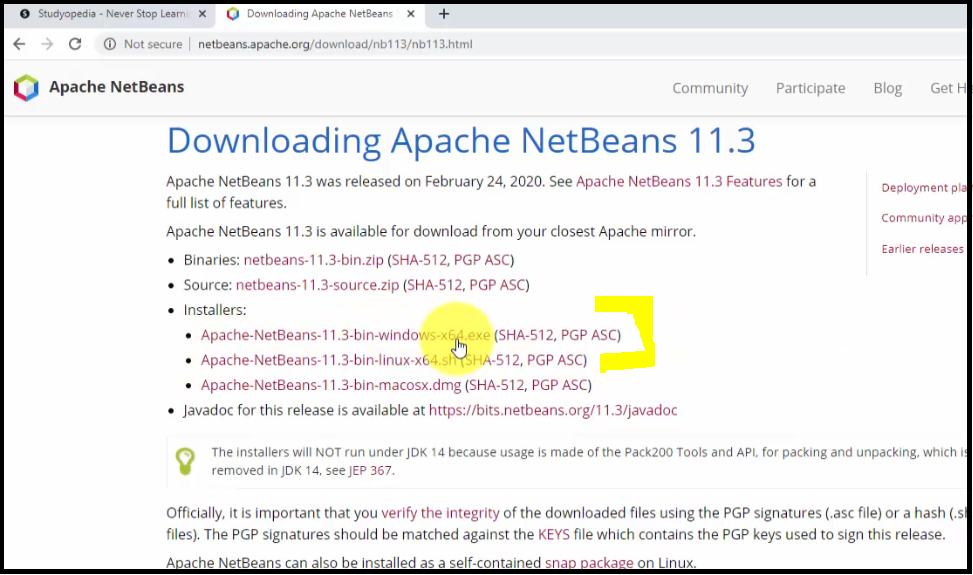
Go to Google and type Download NetBeans IDE 11.3. On typing, the official website of NetBeans i.e. “netbeans.apache.org” would be visible on the top of search results. Click on the website to download NetBeans as in the below screenshot:
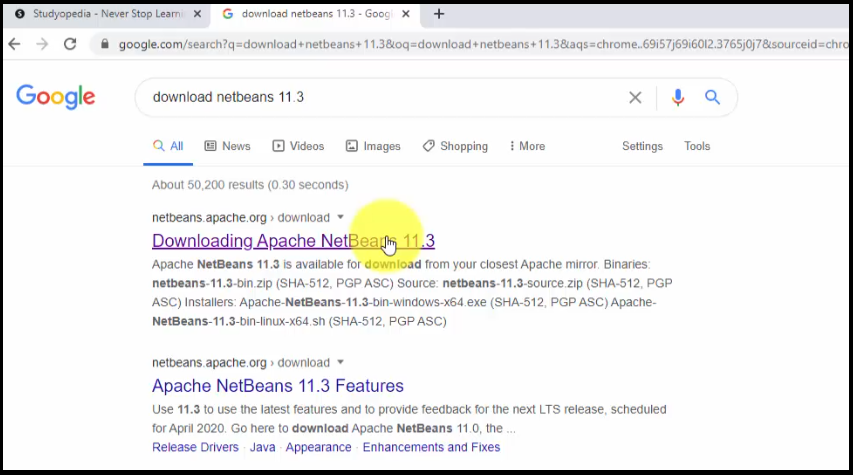
Now, the official website will open. Click on the Windows exe file i.e. “Apache-NetBeans-11.3-bin-windows-x64” file since we have to install NetBeans IDE on Windows 10:
Now, you will be redirected to mirror sites. Click on any of them to download NetBeans IDE. We click the first one and the Download started as in the below screenshot. The Download status would be visible on the bottom left of Chrome web browser. When the download ends, right click to reach the folder where it installed. We have set the default for Google Chrome downloads to the “Downloads” folder:

NetBeans installed successfully under “Downloads” folder through Google Chrome as in the below screenshot. Locate the exe file of NetBeans: “Apache-NetBeans-11.3-bin-windows-x64” file:
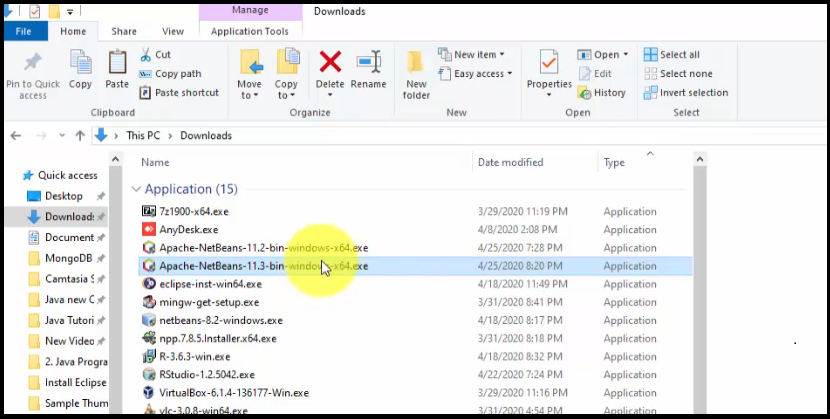
Now, let us move to Step 3 and begin installing NetBeans.
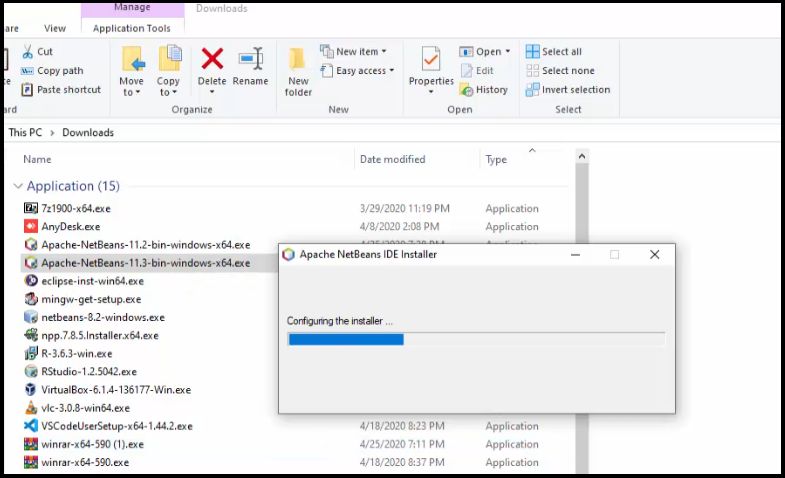
Step 3: Installing NetBeans IDE
Now, we will be installing NetBeans IDE. Double click the exe file we downloaded in Step2 and the installation begins as in the below screenshot:
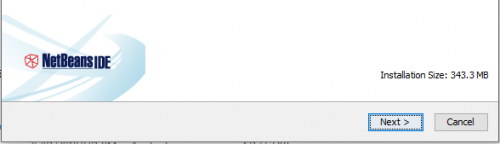
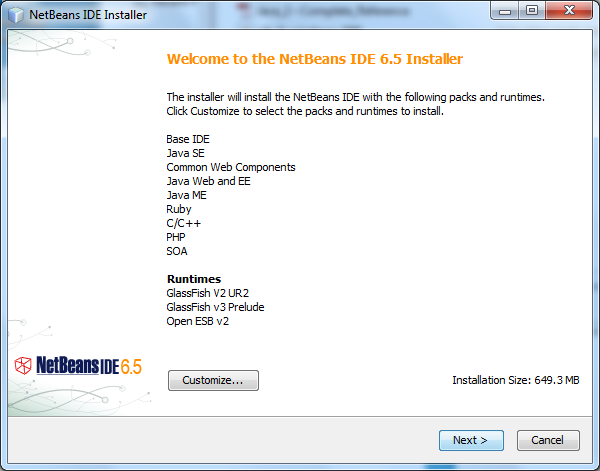
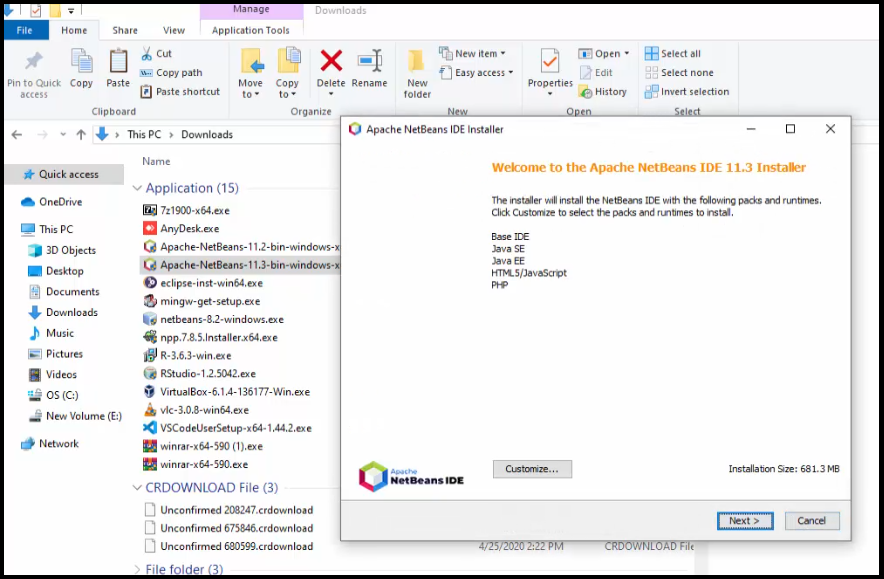
Now, you will reach the following installation dialog box (NetBeans Installer) showing what all will get installed with the installer size.
Note: You may get NetBeans installation error here. Do not worry, check our tutorial to fix NetBeans installation error.
Click “Next” to proceed:
Now, let us move to Step 4 and set the path.
Step 4: Set NetBeans and Java path
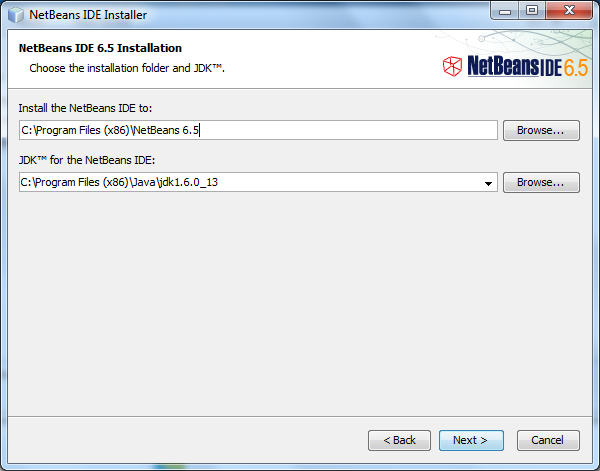
Now, set the path for NetBeans i.e. where you want to install it. We will keep the default i.e. under Program Files we will set the NetBeans path. Following is the path:
|
C:\Program Files\NetBeans—11.3 |
Here, you can also see we need to set the path for JAVA JDK installation. This is the reason why we need to install Java before installing NetBeans IDE. Set the same path we saw under step 1 above while Installing Java i.e. he following Java path:
|
C:\Program Files\Java\jdk—13 |
Screenshot shows the same paths:

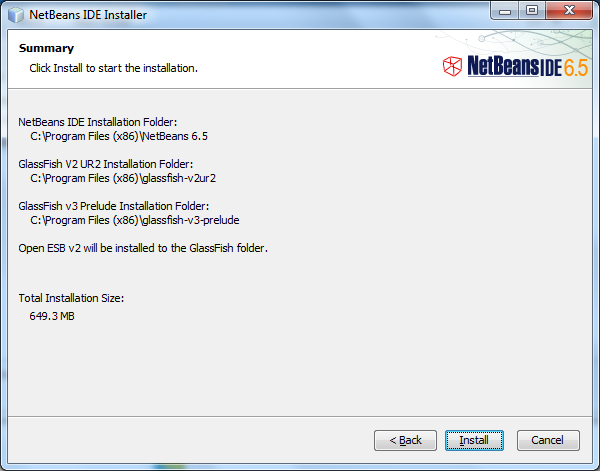
After, that click “Next” and the installation continues. Now, the summary of installer is visible. Click on “Install” as in the below screenshot:

Now, installation continues. This is the final step:
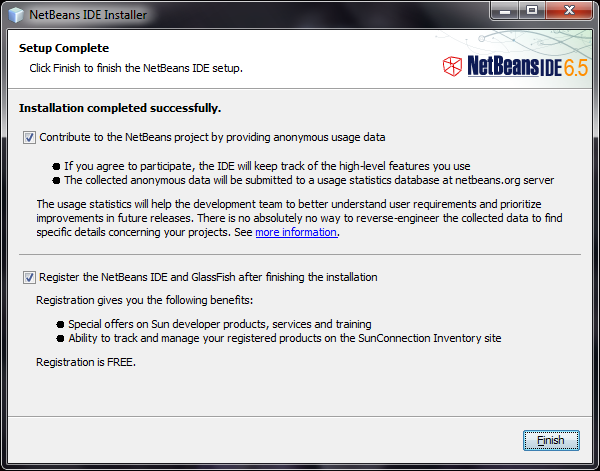
Installation completed successfully and Desktop Shortcut created as in the below screenshot:
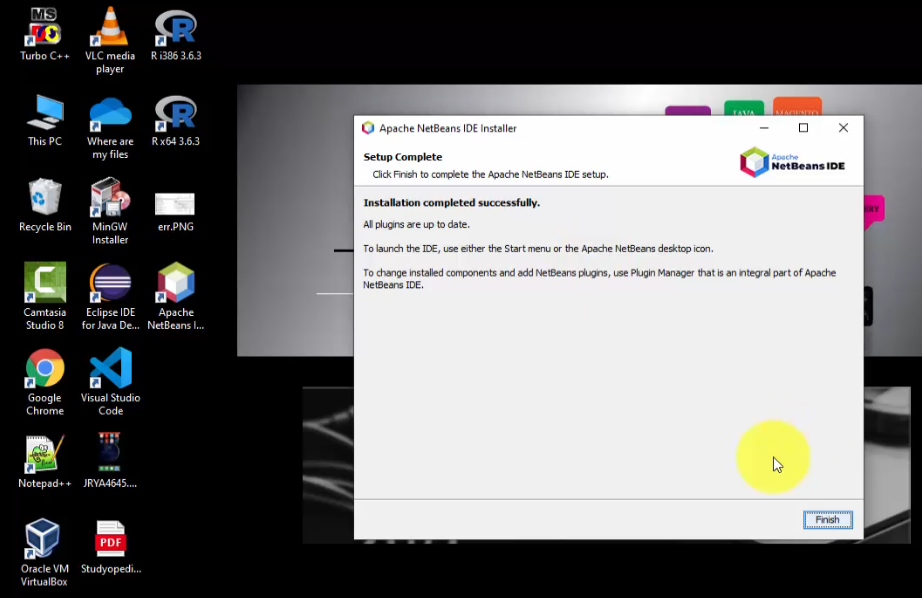
Click “Finish” above to close the dialog box.
Step 5: Launch NetBeans after installation
After that, click the “Desktop Shortcut” to launch NetBeans as in the below screenshot:
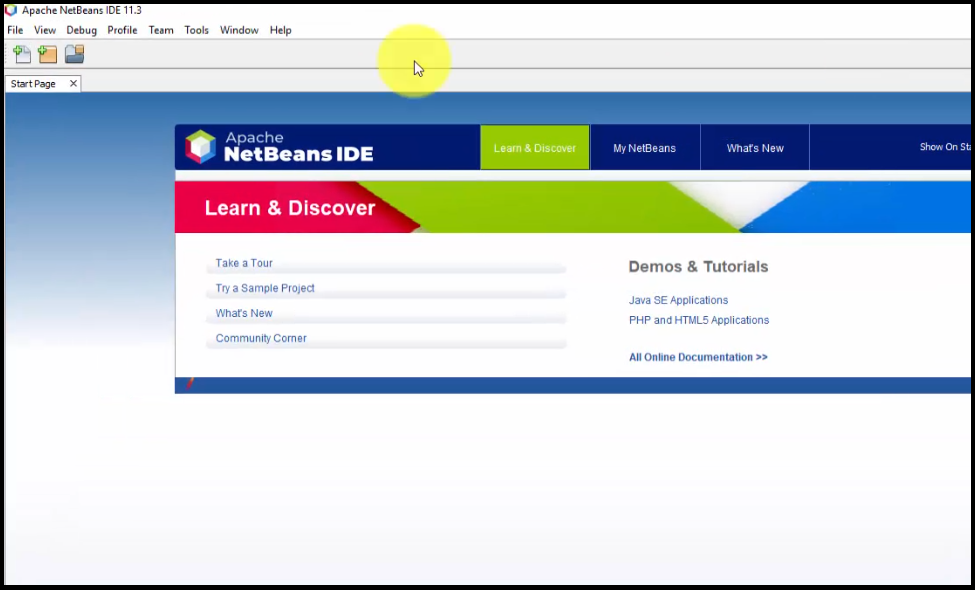
NetBeans opened successfully for the first time after installation as in the below screenshot:
In this article, we saw how to install NetBeans on Windows 10 after installing Java. While installing, we also set the Java path.
If you liked the NetBeans tutorial, spread the word and share the link and our website Studyopedia with others.
Support us: DONATE
Read More:
-
- Install Java on Windows 1o
- Install Python on Windows 10
- Run your first PHP program on XAMPP Server
- Install WordPress on localhost in Windows 10
- Install Drupal on localhost in Windows 10
- Install Joomla on localhost in Windows 10
- Install jQuery on localhost in Windows 10
- Install Eclipse on Windows 10
Hi! Today we’re going to talk a little about Netbeans. This is an integrated development environment that allows programming in various languages. Also, it contains many features, for different types of applications. Consequently, it is oriented to facilitate the programming, testing, and debugging of the applications that are developed. It also incorporates its own editor. It is an open-source project designed mainly for Java. However, it has plugins to extend its operation. Additionally, it is a free product with no usage restrictions. Well, in this post we’ll see how to install NetBeans on Windows 10.
Prerequisites
To be able to run this program you need to have JDK installed on your system. To know how to install and configure it, check our post.
How to download NetBeans for Windows 10
As mentioned, this program is free. So just go to the project download page and select the executable file. At the time of writing, the most recent version is Netbeans 12.0. After downloading the file, just run it as another installable for Windows. At the beginning of the process, it is possible to customize the installation. That is, it is possible to select the elements to be installed. However, this time we will install all the available components.

Next you can set the automatic update of the plugins while they are installed.

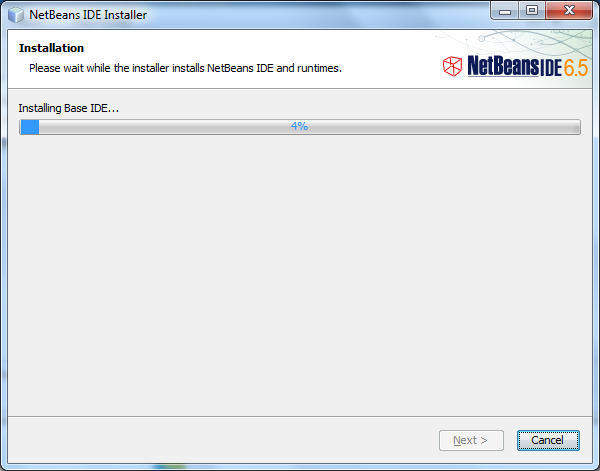
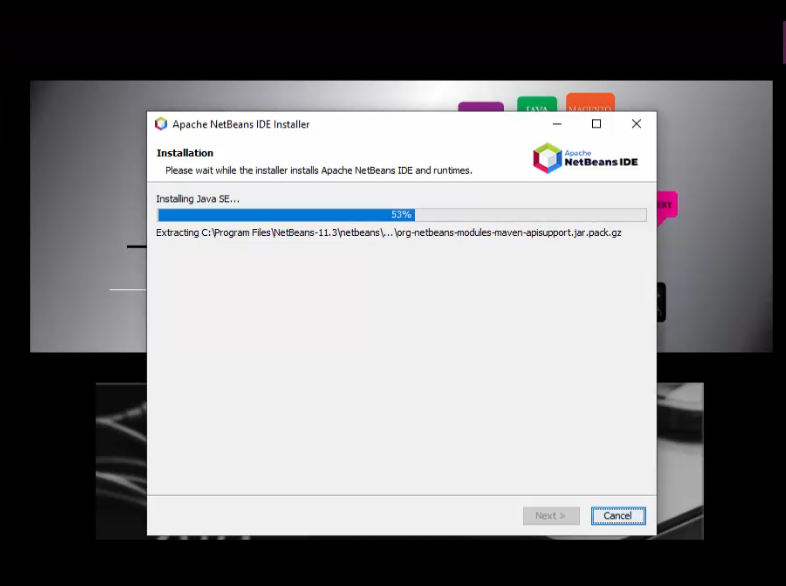
Then, the installation process will begin. Please wait a few moments while the process is completed.


Launching the first project with NetBeans.
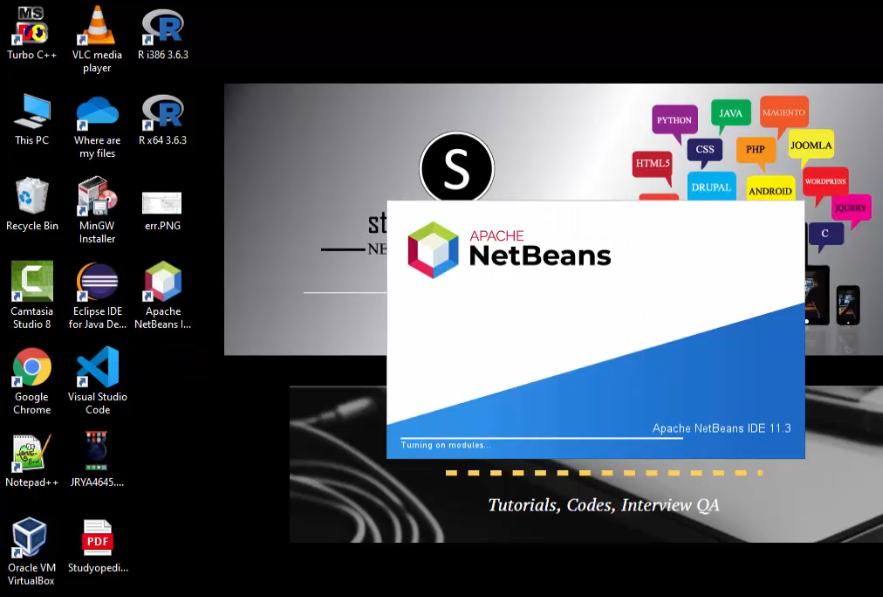
After the installation is completed, we are ready to use the environment for the first time. With this in mind, just look for the program in the start menu.

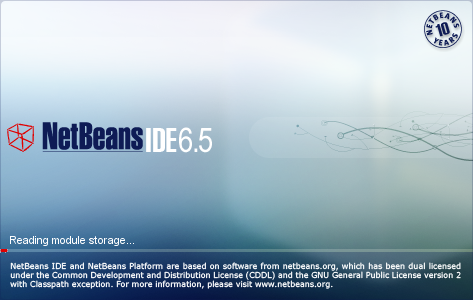
Then, the program will start loading the modules. After a few seconds, you will see the interface of the IDE. Now, it’s time to start the first project. With this in mind, please click on New Project.

A window with the available options for the new project will be displayed immediately. As you can see, they are very varied. For the purposes of this example, we will use Java with Ant. Specifically, we will create a Java Application. Also, the Java logo is colorless because the plugin is not yet available. So in order to enable it, please click Next.

It is then convenient to download some additional modules. This time, please check the JavaFX box. Finally, click on Download and Activate.

After accepting the license terms, please click on Install to begin the installation of the plugin.

Please wait a few moments while the plugin is downloaded and installed


Now it’s time to name the new project. You can choose the one you want. Please remember to check the Create main class option. Additionally, you can customize the location of the project and its folder.

The main page of the IDE will be displayed below. Please add the following test line:
System.out.println("Welcome to osradar")Then click on the Play icon to start compiling the project. If everything goes well, you will see the successful building in the output.

Conclusion
At the end of the day, we have seen how to install NetBeans on Windows 10. These make the work easier and expand the scope of application. All right, I hope you enjoyed the tutorial. I’ll say goodbye for now!
— Advertisement —
Everything Linux, A.I, IT News, DataOps, Open Source and more delivered right to you.
Subscribe
«The best Linux newsletter on the web»