
На этой странице рассказано, как установить Minikube, инструмент для запуска одноузлового кластера Kubernetes на виртуальной машине в персональном компьютере.
Подготовка к работе
- Linux
- macOS
- Windows
Чтобы проверить, поддерживается ли виртуализация в Linux, выполните следующую команду и проверьте, что вывод не пустой:
grep -E --color 'vmx|svm' /proc/cpuinfo
Чтобы проверить, поддерживается ли виртуализация в macOS, выполните следующую команду в терминале:
sysctl -a | grep -E --color 'machdep.cpu.features|VMX'
Если вы видите VMX в выводе (должен быть окрашенным), значит в вашем компьютере поддерживается виртуализация VT-x.
Чтобы проверить, поддерживается ли виртуализация в Windows 8 и выше, выполните следующую команду в Windows Terminal или в командной строке.
systeminfo
Если вы видите следующий вывод, значит виртуализация поддерживается в Windows.
Hyper-V Requirements:     VM Monitor Mode Extensions: Yes
                          Virtualization Enabled In Firmware: Yes
                          Second Level Address Translation: Yes
                          Data Execution Prevention Available: Yes
Если вы видите следующий вывод, значит системе уже установлен гипервизор, значит вы можете пропустить следующий шаг установке гипервизора.
Hyper-V Requirements: A hypervisor has been detected. Features required for Hyper-V will not be displayed.
Установка minikube
- Linux
- macOS
- Windows
Установка kubectl
Убедитесь, что у вас установлен kubectl. Вы можете установить kubectl согласно инструкциям в разделе Установка и настройка kubectl.
Установка Hypervisor
Если у вас ещё не установлен гипервизор, установите один из них:
• KVM, который также использует QEMU
• VirtualBox
Minikube также поддерживает опцию --vm-driver=none, которая запускает компоненты Kubernetes на хосте, а не на виртуальной машине.
Для использования этого драйвера требуется только Docker и Linux, но не гипервизор.
Если вы используете драйвер none в Debian и его производных, используйте пакеты .deb для Docker, а не snap-пакет, который не работает с Minikube.
Вы можете скачать .deb-пакеты с сайта Docker.
Minikube также поддерживает vm-driver=podman, похожий на драйвер Docker. Podman, работающий с правами суперпользователя (пользователь root) — это лучший способ гарантировать вашим контейнерам полный доступ ко всем возможностям в системе.
Установка Minikube через пакет
Доступны экспериментальные пакеты для Minikube; Вы можете загрузить пакеты для Linux (AMD64) со страницы релизов Minikube на GitHub.
Используйте пакетный менеджер в вашем дистрибутиве Linux для установки нужного пакета.
Установка Minikube с помощью прямой ссылки
Вы также можете загрузить двоичный файл и использовать его вместо установки пакета:
curl -Lo minikube https://storage.googleapis.com/minikube/releases/latest/minikube-linux-amd64 \
  && chmod +x minikube
Чтобы исполняемый файл Minikube был доступен из любой директории выполните следующие команды:
sudo mkdir -p /usr/local/bin/
sudo install minikube /usr/local/bin/
Установка Minikube через Homebrew
В качестве ещё одной альтернативы вы можете установить Minikube с помощью Linux Homebrew:
Установка kubectl
Убедитесь, что у вас установлен kubectl. Вы можете установить kubectl согласно инструкциям в разделе Установка и настройка kubectl.
Установка Hypervisor
Если у вас ещё не установлен гипервизор, установите один из них:
• HyperKit
• VirtualBox
• VMware Fusion
Установка Minikube
Простейший способ установить Minikube в macOS — использовать Homebrew:
Вы также можете установить его в macOS, загрузив двоичный файл:
curl -Lo minikube https://storage.googleapis.com/minikube/releases/latest/minikube-darwin-amd64 \
  && chmod +x minikube
Чтобы исполняемый файл Minikube был доступен из любой директории выполните следующие команды:
sudo mv minikube /usr/local/bin
Установка kubectl
Убедитесь, что у вас установлен kubectl. Вы можете установить kubectl согласно инструкциям в разделе Установка и настройка kubectl.
Установка Hypervisor
Если у вас ещё не установлен гипервизор, установите один из них:
• Hyper-V
• VirtualBox
Установка Minikube с помощью Chocolatey
Простейший способ установить Minikube в Windows — использовать Chocolatey (запущенный с правами администратора):
После установки Minikube нужно перезапустить терминал. Minikube должен быть автоматически добавлен в директорию с исполняемыми файлами.
Установка Minikube с помощью исполняемого файла установки
Для ручной установки Minikube в Windows с помощью установщика Windows, загрузите и запустите установщик minikube-installer.exe.
Установка Minikube с помощью прямой ссылки
Для ручной установки Minikube в Windows, загрузите minikube-windows-amd64, переименуйте его в minikube.exe и добавьте его в директорию исполняемых файлов.
Проверка установки
Чтобы убедиться в том, что гипервизор и Minikube были установлены корректно, выполните следующую команду, которая запускает локальный кластер Kubernetes:
minikube start --vm-driver=<driver_name>
После того, как команда minikube start отработала успешно, выполните команду для проверки состояния кластера:
Если ваш кластер запущен, то в выводе команды minikube status должно быть что-то вроде этого:
host: Running
kubelet: Running
apiserver: Running
kubeconfig: Configured
Теперь, когда вы убедились, что Minikube работает с выбранным вами гипервизором, вы можете продолжить использовать Minikube или остановить кластер. Чтобы остановить кластер выполните команду ниже:
Очистка локального состояния
Если вы уже установили Minikube, то выполните следующую команду:
В таком случае команда minikube start вернёт ошибку:
machine does not exist
Чтобы исправить это, нужно очистить локальное состояние:
Что дальше
- Локальный запуск Kubernetes при помощи Minikube
minikube is local Kubernetes, focusing on making it easy to learn and develop for Kubernetes.
All you need is Docker (or similarly compatible) container or a Virtual Machine environment, and Kubernetes is a single command away: minikube start
What you’ll need
- 2 CPUs or more
- 2GB of free memory
- 20GB of free disk space
- Internet connection
- Container or virtual machine manager, such as: Docker, QEMU, Hyperkit, Hyper-V, KVM, Parallels, Podman, VirtualBox, or VMware Fusion/Workstation
1Installation
Click on the buttons that describe your target platform. For other architectures, see the release page for a complete list of minikube binaries.
To install the latest minikube stable release on x86-64 Linux using binary download:
curl -LO https://github.com/kubernetes/minikube/releases/latest/download/minikube-linux-amd64
sudo install minikube-linux-amd64 /usr/local/bin/minikube && rm minikube-linux-amd64
To install the latest minikube beta release on x86-64 Linux using binary download:
r=https://api.github.com/repos/kubernetes/minikube/releases
curl -LO $(curl -s $r | grep -o 'http.*download/v.*beta.*/minikube-linux-amd64' | head -n1)
sudo install minikube-linux-amd64 /usr/local/bin/minikube && rm minikube-linux-amd64
To install the latest minikube stable release on x86-64 Linux using Debian package:
curl -LO https://storage.googleapis.com/minikube/releases/latest/minikube_latest_amd64.deb
sudo dpkg -i minikube_latest_amd64.deb
To install the latest minikube beta release on x86-64 Linux using Debian package:
r=https://api.github.com/repos/kubernetes/minikube/releases
u=$(curl -s $r | grep -o 'http.*download/v.*beta.*/minikube_.*_amd64.deb' | head -n1)
curl -L $u > minikube_beta_amd64.deb && sudo dpkg -i minikube_beta_amd64.deb
To install the latest minikube stable release on x86-64 Linux using RPM package:
curl -LO https://storage.googleapis.com/minikube/releases/latest/minikube-latest.x86_64.rpm
sudo rpm -Uvh minikube-latest.x86_64.rpm
To install the latest minikube beta release on x86-64 Linux using RPM package:
r=https://api.github.com/repos/kubernetes/minikube/releases
u=$(curl -s $r | grep -o 'http.*download/v.*beta.*/minikube-.*.x86_64.rpm' | head -n1)
curl -L $u > minikube-beta.x86_64.rpm && sudo rpm -Uvh minikube-beta.x86_64.rpm
To install the latest minikube stable release on ARM64 Linux using binary download:
curl -LO https://github.com/kubernetes/minikube/releases/latest/download/minikube-linux-arm64
sudo install minikube-linux-arm64 /usr/local/bin/minikube && rm minikube-linux-arm64
To install the latest minikube beta release on ARM64 Linux using binary download:
r=https://api.github.com/repos/kubernetes/minikube/releases
curl -LO $(curl -s $r | grep -o 'http.*download/v.*beta.*/minikube-linux-arm64' | head -n1)
sudo install minikube-linux-arm64 /usr/local/bin/minikube && rm minikube-linux-arm64
To install the latest minikube stable release on ARM64 Linux using Debian package:
curl -LO https://storage.googleapis.com/minikube/releases/latest/minikube_latest_arm64.deb
sudo dpkg -i minikube_latest_arm64.deb
To install the latest minikube beta release on ARM64 Linux using Debian package:
r=https://api.github.com/repos/kubernetes/minikube/releases
u=$(curl -s $r | grep -o 'http.*download/v.*beta.*/minikube_.*_arm64.deb' | head -n1)
curl -L $u > minikube_beta_arm64.deb && sudo dpkg -i minikube_beta_arm64.deb
To install the latest minikube stable release on ARM64 Linux using RPM package:
curl -LO https://storage.googleapis.com/minikube/releases/latest/minikube-latest.aarch64.rpm
sudo rpm -Uvh minikube-latest.aarch64.rpm
To install the latest minikube beta release on ARM64 Linux using RPM package:
r=https://api.github.com/repos/kubernetes/minikube/releases
u=$(curl -s $r | grep -o 'http.*download/v.*beta.*/minikube-.*.aarch64.rpm' | head -n1)
curl -L $u > minikube-beta.aarch64.rpm && sudo rpm -Uvh minikube-beta.aarch64.rpm
To install the latest minikube stable release on ppc64 Linux using binary download:
curl -LO https://github.com/kubernetes/minikube/releases/latest/download/minikube-linux-ppc64le
sudo install minikube-linux-ppc64le /usr/local/bin/minikube && rm minikube-linux-ppc64le
To install the latest minikube beta release on ppc64 Linux using binary download:
r=https://api.github.com/repos/kubernetes/minikube/releases
curl -LO $(curl -s $r | grep -o 'http.*download/v.*beta.*/minikube-linux-ppc64le' | head -n1)
sudo install minikube-linux-ppc64le /usr/local/bin/minikube && rm minikube-linux-ppc64le
To install the latest minikube stable release on ppc64 Linux using Debian package:
curl -LO https://storage.googleapis.com/minikube/releases/latest/minikube_latest_ppc64le.deb
sudo dpkg -i minikube_latest_ppc64le.deb
To install the latest minikube beta release on ppc64 Linux using Debian package:
r=https://api.github.com/repos/kubernetes/minikube/releases
u=$(curl -s $r | grep -o 'http.*download/v.*beta.*/minikube_.*_ppc64le.deb' | head -n1)
curl -L $u > minikube_beta_ppc64le.deb && sudo dpkg -i minikube_beta_ppc64le.deb
To install the latest minikube stable release on ppc64 Linux using RPM package:
curl -LO https://storage.googleapis.com/minikube/releases/latest/minikube-latest.ppc64el.rpm
sudo rpm -Uvh minikube-latest.ppc64el.rpm
To install the latest minikube beta release on ppc64 Linux using RPM package:
r=https://api.github.com/repos/kubernetes/minikube/releases
u=$(curl -s $r | grep -o 'http.*download/v.*beta.*/minikube-.*.ppc64el.rpm' | head -n1)
curl -L $u > minikube-beta.ppc64el.rpm && sudo rpm -Uvh minikube-beta.ppc64el.rpm
To install the latest minikube stable release on S390x Linux using binary download:
curl -LO https://github.com/kubernetes/minikube/releases/latest/download/minikube-linux-s390x
sudo install minikube-linux-s390x /usr/local/bin/minikube && rm minikube-linux-s390x
To install the latest minikube beta release on S390x Linux using binary download:
r=https://api.github.com/repos/kubernetes/minikube/releases
curl -LO $(curl -s $r | grep -o 'http.*download/v.*beta.*/minikube-linux-s390x' | head -n1)
sudo install minikube-linux-s390x /usr/local/bin/minikube && rm minikube-linux-s390x
To install the latest minikube stable release on S390x Linux using Debian package:
curl -LO https://storage.googleapis.com/minikube/releases/latest/minikube_latest_s390x.deb
sudo dpkg -i minikube_latest_s390x.deb
To install the latest minikube beta release on S390x Linux using Debian package:
r=https://api.github.com/repos/kubernetes/minikube/releases
u=$(curl -s $r | grep -o 'http.*download/v.*beta.*/minikube_.*_s390x.deb' | head -n1)
curl -L $u > minikube_beta_s390x.deb && sudo dpkg -i minikube_beta_s390x.deb
To install the latest minikube stable release on S390x Linux using RPM package:
curl -LO https://storage.googleapis.com/minikube/releases/latest/minikube-latest.s390x.rpm
sudo rpm -Uvh minikube-latest.s390x.rpm
To install the latest minikube beta release on S390x Linux using RPM package:
r=https://api.github.com/repos/kubernetes/minikube/releases
u=$(curl -s $r | grep -o 'http.*download/v.*beta.*/minikube-.*.s390x.rpm' | head -n1)
curl -L $u > minikube-beta.s390x.rpm && sudo rpm -Uvh minikube-beta.s390x.rpm
To install the latest minikube stable release on ARMv7 Linux using binary download:
curl -LO https://github.com/kubernetes/minikube/releases/latest/download/minikube-linux-arm
sudo install minikube-linux-arm /usr/local/bin/minikube && rm minikube-linux-arm
To install the latest minikube beta release on ARMv7 Linux using binary download:
r=https://api.github.com/repos/kubernetes/minikube/releases
curl -LO $(curl -s $r | grep -o 'http.*download/v.*beta.*/minikube-linux-arm' | head -n1)
sudo install minikube-linux-arm /usr/local/bin/minikube && rm minikube-linux-arm
To install the latest minikube stable release on ARMv7 Linux using Debian package:
curl -LO https://storage.googleapis.com/minikube/releases/latest/minikube_latest_armhf.deb
sudo dpkg -i minikube_latest_armhf.deb
To install the latest minikube beta release on ARMv7 Linux using Debian package:
r=https://api.github.com/repos/kubernetes/minikube/releases
u=$(curl -s $r | grep -o 'http.*download/v.*beta.*/minikube_.*_armhf.deb' | head -n1)
curl -L $u > minikube_beta_armhf.deb && sudo dpkg -i minikube_beta_armhf.deb
To install the latest minikube stable release on ARMv7 Linux using RPM package:
curl -LO https://storage.googleapis.com/minikube/releases/latest/minikube-latest.armv7hl.rpm
sudo rpm -Uvh minikube-latest.armv7hl.rpm
To install the latest minikube beta release on ARMv7 Linux using RPM package:
r=https://api.github.com/repos/kubernetes/minikube/releases
u=$(curl -s $r | grep -o 'http.*download/v.*beta.*/minikube-.*.armv7hl.rpm' | head -n1)
curl -L $u > minikube-beta.armv7hl.rpm && sudo rpm -Uvh minikube-beta.armv7hl.rpm
To install the latest minikube stable release on x86-64 macOS using Homebrew:
If the Homebrew Package Manager is installed:
If which minikube fails after installation via brew, you may have to remove the old minikube links and link the newly installed binary:
brew unlink minikube
brew link minikube
To install the latest minikube stable release on x86-64 macOS using binary download:
curl -LO https://github.com/kubernetes/minikube/releases/latest/download/minikube-darwin-amd64
sudo install minikube-darwin-amd64 /usr/local/bin/minikube
To install the latest minikube beta release on x86-64 macOS using binary download:
r=https://api.github.com/repos/kubernetes/minikube/releases
curl -LO $(curl -s $r | grep -o 'http.*download/v.*beta.*/minikube-darwin-amd64' | head -n1)
sudo install minikube-darwin-amd64 /usr/local/bin/minikube
To install the latest minikube stable release on ARM64 macOS using binary download:
curl -LO https://github.com/kubernetes/minikube/releases/latest/download/minikube-darwin-arm64
sudo install minikube-darwin-arm64 /usr/local/bin/minikube
To install the latest minikube stable release on ARM64 macOS using Homebrew:
If the Homebrew Package Manager is installed:
If which minikube fails after installation via brew, you may have to remove the old minikube links and link the newly installed binary:
brew unlink minikube
brew link minikube
To install the latest minikube beta release on ARM64 macOS using binary download:
r=https://api.github.com/repos/kubernetes/minikube/releases
curl -LO $(curl -s $r | grep -o 'http.*download/v.*beta.*/minikube-darwin-arm64' | head -n1)
sudo install minikube-darwin-arm64 /usr/local/bin/minikube
To install the latest minikube stable release on x86-64 Windows using Windows Package Manager:
If the Windows Package Manager is installed, use the following command to install minikube:
winget install Kubernetes.minikube
To install the latest minikube stable release on x86-64 Windows using Chocolatey:
If the Chocolatey Package Manager is installed, use the following command:
To install the latest minikube stable release on x86-64 Windows using .exe download:
-
Download and run the installer for the latest release.
Or if usingPowerShell, use this command:New-Item -Path 'c:\' -Name 'minikube' -ItemType Directory -Force Invoke-WebRequest -OutFile 'c:\minikube\minikube.exe' -Uri 'https://github.com/kubernetes/minikube/releases/latest/download/minikube-windows-amd64.exe' -UseBasicParsing -
Add the
minikube.exebinary to yourPATH.
Make sure to run PowerShell as Administrator.$oldPath = [Environment]::GetEnvironmentVariable('Path', [EnvironmentVariableTarget]::Machine) if ($oldPath.Split(';') -inotcontains 'C:\minikube'){ [Environment]::SetEnvironmentVariable('Path', $('{0};C:\minikube' -f $oldPath), [EnvironmentVariableTarget]::Machine) }
If you used a terminal (like powershell) for the installation, please close the terminal and reopen it before running minikube.
To install the latest minikube beta release on x86-64 Windows using .exe download:
-
Download and run the installer for the latest beta release.
Or if usingPowerShell, use this command:New-Item -Path 'c:\' -Name 'minikube' -ItemType Directory -Force $response = Invoke-WebRequest -Uri 'https://api.github.com/repos/kubernetes/minikube/releases' -UseBasicParsing $json = $response.Content | ConvertFrom-Json $item = ($json | ?{ $_.prerelease -eq $true })[0].assets | ?{ $_.name -eq 'minikube-windows-amd64.exe' } Invoke-WebRequest -Uri $item.browser_download_url -OutFile 'c:\minikube\minikube.exe' -UseBasicParsing -
Add the
minikube.exebinary to yourPATH.
Make sure to run PowerShell as Administrator.$oldPath = [Environment]::GetEnvironmentVariable('Path', [EnvironmentVariableTarget]::Machine) if ($oldPath.Split(';') -inotcontains 'C:\minikube'){ [Environment]::SetEnvironmentVariable('Path', $('{0};C:\minikube' -f $oldPath), [EnvironmentVariableTarget]::Machine) }If you used a CLI to perform the installation, you will need to close that CLI and open a new one before proceeding.
2Start your cluster
From a terminal with administrator access (but not logged in as root), run:
If minikube fails to start, see the drivers page for help setting up a compatible container or virtual-machine manager.
3Interact with your cluster
If you already have kubectl installed (see documentation), you can now use it to access your shiny new cluster:
Alternatively, minikube can download the appropriate version of kubectl and you should be able to use it like this:
minikube kubectl -- get po -A
You can also make your life easier by adding the following to your shell config: (for more details see: kubectl)
alias kubectl="minikube kubectl --"
Initially, some services such as the storage-provisioner, may not yet be in a Running state. This is a normal condition during cluster bring-up, and will resolve itself momentarily. For additional insight into your cluster state, minikube bundles the Kubernetes Dashboard, allowing you to get easily acclimated to your new environment:
4Deploy applications
Create a sample deployment and expose it on port 8080:
kubectl create deployment hello-minikube --image=kicbase/echo-server:1.0
kubectl expose deployment hello-minikube --type=NodePort --port=8080
It may take a moment, but your deployment will soon show up when you run:
kubectl get services hello-minikube
The easiest way to access this service is to let minikube launch a web browser for you:
minikube service hello-minikube
Alternatively, use kubectl to forward the port:
kubectl port-forward service/hello-minikube 7080:8080
Tada! Your application is now available at http://localhost:7080/.
You should be able to see the request metadata in the application output. Try changing the path of the request and observe the changes. Similarly, you can do a POST request and observe the body show up in the output.
To access a LoadBalancer deployment, use the “minikube tunnel” command. Here is an example deployment:
kubectl create deployment balanced --image=kicbase/echo-server:1.0
kubectl expose deployment balanced --type=LoadBalancer --port=8080
In another window, start the tunnel to create a routable IP for the ‘balanced’ deployment:
To find the routable IP, run this command and examine the EXTERNAL-IP column:
kubectl get services balanced
Your deployment is now available at <EXTERNAL-IP>:8080
Enable ingress addon:
minikube addons enable ingress
The following example creates simple echo-server services and an Ingress object to route to these services.
kind: Pod
apiVersion: v1
metadata:
  name: foo-app
  labels:
    app: foo
spec:
  containers:
    - name: foo-app
      image: 'kicbase/echo-server:1.0'
---
kind: Service
apiVersion: v1
metadata:
  name: foo-service
spec:
  selector:
    app: foo
  ports:
    - port: 8080
---
kind: Pod
apiVersion: v1
metadata:
  name: bar-app
  labels:
    app: bar
spec:
  containers:
    - name: bar-app
      image: 'kicbase/echo-server:1.0'
---
kind: Service
apiVersion: v1
metadata:
  name: bar-service
spec:
  selector:
    app: bar
  ports:
    - port: 8080
---
apiVersion: networking.k8s.io/v1
kind: Ingress
metadata:
  name: example-ingress
spec:
  rules:
    - http:
        paths:
          - pathType: Prefix
            path: /foo
            backend:
              service:
                name: foo-service
                port:
                  number: 8080
          - pathType: Prefix
            path: /bar
            backend:
              service:
                name: bar-service
                port:
                  number: 8080
---
Apply the contents
kubectl apply -f https://storage.googleapis.com/minikube-site-examples/ingress-example.yaml
Wait for ingress address
kubectl get ingress
NAME              CLASS   HOSTS   ADDRESS          PORTS   AGE
example-ingress   nginx   *       <your_ip_here>   80      5m45s
Note for Docker Desktop Users:
To get ingress to work you’ll need to open a new terminal window and run minikube tunnel and in the following step use 127.0.0.1 in place of <ip_from_above>.
Now verify that the ingress works
$ curl <ip_from_above>/foo
Request served by foo-app
...

$ curl <ip_from_above>/bar
Request served by bar-app
...
5Manage your cluster
Pause Kubernetes without impacting deployed applications:
Unpause a paused instance:
Halt the cluster:
Change the default memory limit (requires a restart):
minikube config set memory 9001
Browse the catalog of easily installed Kubernetes services:
Create a second cluster running an older Kubernetes release:
minikube start -p aged --kubernetes-version=v1.16.1
Delete all of the minikube clusters:
Take the next step
- The minikube handbook
- Community-contributed tutorials
- minikube command reference
- Contributors guide
- Take our fast 5-question survey to share your thoughts 🙏
Введение
В этом руководстве мы расскажем про Minikube. Вы узнаете, что это за инструмент, кому он может пригодиться, чем отличается от Kubernetes, и попробуете его на практике.
Что такое Minikube
Minikube — это упрощенная реализация полноценного Kubernetes-кластера. Обычно установка и настройка Kubernetes — непростое занятие, которым занимаются DevOps-инженеры. Но если вы только начинаете знакомиться с Kubernetes или разрабатываете приложения для развертывания в кластере, вам может пригодиться Minikube.
Minikube позволяет быстро развернуть простой кластер Kubernetes на своей локальной машине. Такой кластер хорошо подойдет для первого знакомства с Kubernetes или для локальной разработки приложений. Minikube позволяет легко включать или выключать возможности «большого» Kubernetes (вроде Ingress-контроллера или дашборда) с помощью аддонов. Но Minikube ни в коем случае нельзя рассматривать как полноценный Kubernetes, даже для простых инсталляций.
Установка Minikube
Установить Minikube намного проще, чем Kubernetes. Тем не менее есть несколько предварительных условий, которые должны соблюдаться. Мы рассмотрим установку Minikube на примере трех ОС: Linux, MacOS и Windows.
Шаг 1: проверка поддержки виртуализации
Для работы Minikube необходимо, чтобы ваш процессор поддерживал аппаратную виртуализацию. Большинство современных процессоров поддерживают ее, но лучше заранее убедиться, что все в порядке.
Linux
Выполните команду в терминале:
grep -E --color 'vmx|svm' /proc/cpuinfoЕсли вывод команды не пустой и вы видите слова vmx или svm — значит все хорошо, можно продолжать.
MacOS
Выполните команду:
sysctl -a | grep -E --color 'machdep.cpu.features|VMX'Если в выводе команды есть слово VMX, значит виртуализация поддерживается.
Windows
Выполните команду в cmd или PowerShell:
systeminfo
Если вы видите следующий вывод, значит, виртуализация поддерживается:
Hyper-V Requirements:     VM Monitor Mode Extensions: Yes
                          Virtualization Enabled In Firmware: Yes
                          Second Level Address Translation: Yes
                          Data Execution Prevention Available: Yes
Шаг 2: установка kubectl
Есть несколько разных утилит, с помощью которых можно управлять Kuberntes-кластером: kubectl, Lens, Kubernetes Dashboard и другие. В этой статье мы будем пользоваться консольной утилитой kubectl, которую разрабатывает сообщество Kubernetes.
Установка утилиты отличается на разных ОС, но мы не будем подробно останавливаться на этом, а приведем ссылки на официальную документацию:
- установка kubectl в Linux,
- установка kubectl в Mac OS,
- установка kubectl в Windows.
Шаг 3: установка гипервизора
Minikube запускается в виртуальной машине, поэтому нам необходимо установить гипервизор. Гипервизор — это программа, которая позволяет на одном компьютере запускать несколько операционных систем и делить между ними системные ресурсы (процессор, память и т.п.). В зависимости от операционной системы можно использовать различные гипервизоры. Мы не будем подробно рассказывать про установку каждого отдельного гипервизора, а перечислим возможные варианты.
Linux
- VirtualBox. Пожалуй, самый простой в установке и настройке. Присутствует в репозиториях большинства дистрибутивов.
- KVM. Гипервизор, встроенный в ядро Linux. Более производительное решение, но и более сложное в установке/настройке.
- Docker / Podman. Это вариант запуска Minikube с помощью Docker или Podman, без установки гипервизора.
MacOS
- VirtualBox.
- HyperKit.
- VMware Fusion.
Windows
Для начала выполните команду в cmd или PowerShell:
systeminfo
Если в результатах есть строка A hypervisor has been detected, значит, у вас уже установлен гипервизор, и дополнительных действий не потребуется. Если же гипервизор не установлен, подойдет один из этих вариантов:
- VirtualBox,
- Hyper-V.
Шаг 4: Установка Minikube
Теперь все готово для того, чтобы установить сам Minikube.
Linux
Если репозиториях вашего дистрибутива есть Minikube — предпочтительней установить его с помощью пакетного менеджера. Например, в Archlinux это делается командой:
pacman -S minikube.Если в репозитории нет этого пакета, тогда скачайте бинарный файл:
curl -Lo minikube https://storage.googleapis.com/minikube/releases/latest/minikube-linux-amd64 && chmod +x minikubeЗатем переместите файл в директорию, которая указана в вашей переменной $PATH, например, в /usr/local/bin.
MacOS
Если вы пользуетесь пакетным менеджером brew, то установить Minikube можно командой:
brew install minikube
Либо можно просто скачать бинарный файл:
curl -Lo minikube https://storage.googleapis.com/minikube/releases/latest/minikube-darwin-amd6 && chmod +x minikubeWindows
Скачайте последнюю версию установщика, запустите его и следуйте инструкциям.
Начало работы с Minikube
Minikube установлен и готов к работе. Давайте теперь посмотрим, как можно его запустить и пользоваться им.
Запуск Minikube
Выполните команду:
minikube startПервый запуск может занять несколько минут, потому что Minikube скачивает образ Kubernetes, создает и настраивает кластер. Результат будет выглядеть примерно так (реальный вывод немного сокращен для удобочитаемости):
minikube v1.27.1 on Arch "rolling"
Automatically selected the docker driver. Other choices: virtualbox, ssh
Using Docker driver with root privileges
Starting control plane node minikube in cluster minikube
Pulling base image ...
Downloading Kubernetes v1.25.2 preload ...
 > preloaded-images-k8s-v18-v1 ...
 > gcr.io/k8s-minikube/kicbase ...
Creating docker container (CPUs=2, Memory=3900MB) ...
Preparing setup Kubernetes v1.25.2 on Docker 20.10.18 ...
 ▪ Generating certificates and keys ...
 ▪ Booting up control plane ...
 ▪ Configuring RBAC rules ...
Verifying Kubernetes components...
 ▪ Using image gcr.io/k8s-minikube/storage-provisioner:v5
Enabled addons: storage-provisioner, default-storageclass
Done! kubectl is now configured to use "minikube" cluster and "default" namespace by default
Обратите внимание на последнюю строчку. Minikube автоматически сгенерировал конфигурационный файл для утилиты kubectl, поэтому мы сможем сразу ее использовать, без дополнительных настроек.
Создание контейнера и просмотр его логов
Давайте создадим собственный под (контейнер) и проверим его логи. Мы не будем описывать деплойменты с помощью yaml-файлов, а воспользуемся командой kubectl. Для примера создадим простой сервис с nginx под капотом:
kubectl create deployment simple-nginx --image=nginx
Проверим список подов и убедимся, что nginx запущен:
kubectl get po
Результат:
    NAME                               READY   STATUS    RESTARTS      AGE
simple-nginx-8566465446-96gpz      1/1     Running   0             50s
Видим, что под запустился 50 секунд назад и находится в статусе Running. Теперь посмотрим его логи, для этого опять воспользуемся kubectl:
kubectl logs simple-nginx-8566465446-96gpz
Результат:
    /docker-entrypoint.sh: Launching /docker-entrypoint.d/20-envsubst-on-templates.sh
/docker-entrypoint.sh: Launching /docker-entrypoint.d/30-tune-worker-processes.sh
/docker-entrypoint.sh: Configuration complete; ready for start up
2022/10/28 13:37:58 [notice] 1#1: using the "epoll" event method
2022/10/28 13:37:58 [notice] 1#1: nginx/1.23.2
2022/10/28 13:37:58 [notice] 1#1: built by gcc 10.2.1 20210110 (Debian 10.2.1-6)
2022/10/28 13:37:58 [notice] 1#1: OS: Linux 5.15.76-1-lts
2022/10/28 13:37:58 [notice] 1#1: getrlimit(RLIMIT_NOFILE): 1048576:1048576
2022/10/28 13:37:58 [notice] 1#1: start worker processes
Использование аддонов
Аддоны — это приложения или сервисы, которые добавляют новые возможности Minikube. Среди них — установка и настройка дашборда или автоматического сбора метрик с контейнеров. Аддоны — это термины только миникуба, и они не имеют отношения к полноценному Kubernetes. В обычном кластере все это тоже можно сделать, но несколько иначе. Minikube специально многое упрощает, чтобы этими возможностями могли пользоваться все.
Для начала посмотрим список всех доступных аддонов:
minikube addons listПо столбцу Status можно определить, какие аддоны уже активированы. При начальной установке Minikube активирует некоторые аддоны, например, storage-provisioner и default-storageclass.
Давайте активируем два аддона: первый будет собирать метрики с контейнеров, а второй — дашборд для управления кластером через браузер:
minikube addons enable metrics-server
minikube addons enable dashboard
Теперь введем команду:
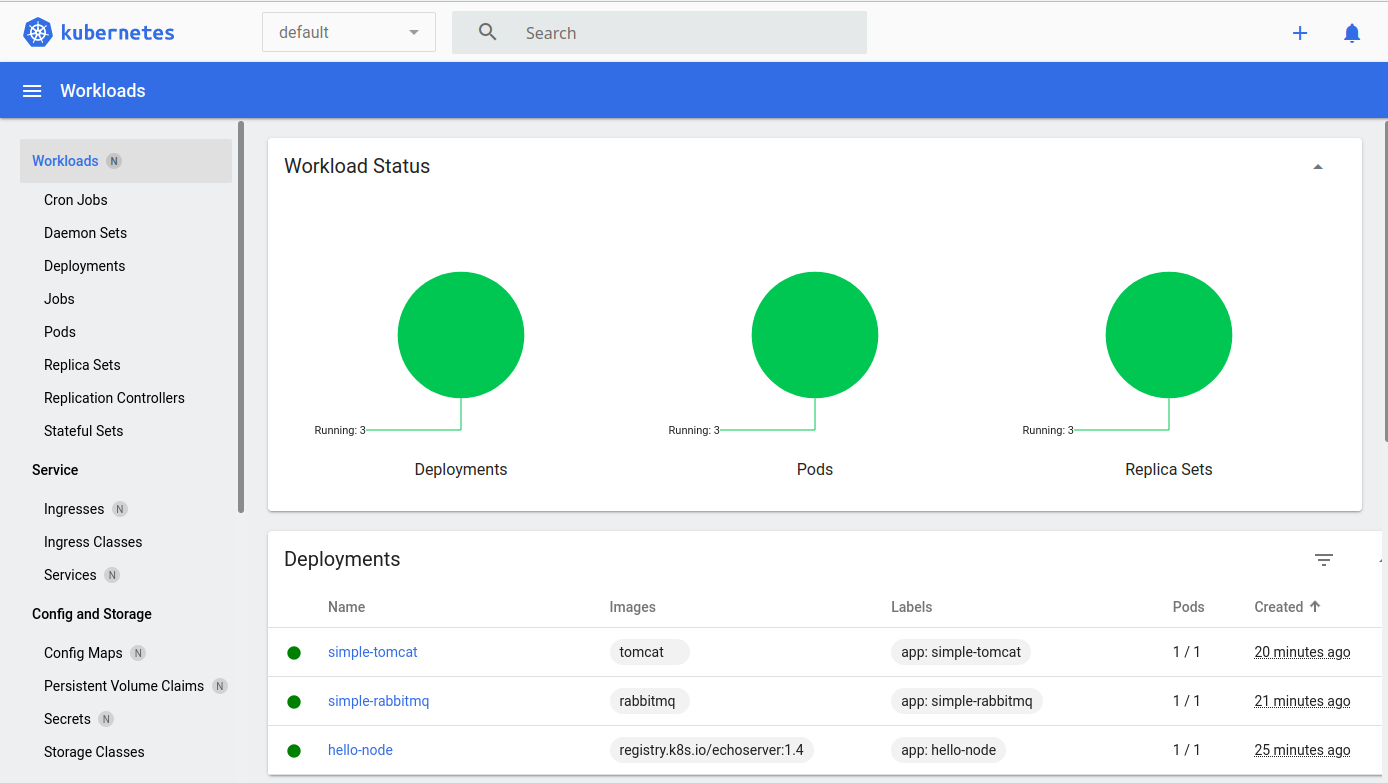
minikube dashboardВ браузере откроется страница с дашбордом. С его помощью вы можете смотреть на состояние кластера, проверять логи, создавать или удалять сущности вроде подов, деплойментов и так далее. Можно сказать, это аналог консольной утилиты kubectl, но с графическим интерфейсом.
Остановка Minikube
Чтобы остановить minikube, скомандуйте:
minikube stopПри этом остановится кластер Kubernetes, но всего развернутые в нем приложения и настройки сохранятся. При следующем запуске minikube полностью восстановит свое состояние.
Заключение
Мы показали установку Minikube, рассмотрели основные возможности инструмента, научились активировать дополнительные функции с помощью аддонов, разворачивать собственные сервисы и проверять их состояние.
Edit This Page
This page shows you how to install Minikube, a tool that runs a single-node Kubernetes cluster in a virtual machine on your personal computer.
Before you begin
- Linux
- macOS
- Windows
To check if virtualization is supported on Linux, run the following command and verify that the output is non-empty:
grep -E --color 'vmx|svm' /proc/cpuinfo
To check if virtualization is supported on macOS, run the following command on your terminal.
sysctl -a | grep -E --color 'machdep.cpu.features|VMX'
If you see VMX in the output (should be colored), the VT-x feature is enabled in your machine.
To check if virtualization is supported on Windows 8 and above, run the following command on your Windows terminal or command prompt.
systeminfo
If you see the following output, virtualization is supported on Windows.
Hyper-V Requirements:     VM Monitor Mode Extensions: Yes
                          Virtualization Enabled In Firmware: Yes
                          Second Level Address Translation: Yes
                          Data Execution Prevention Available: Yes
If you see the following output, your system already has a Hypervisor installed and you can skip the next step.
Hyper-V Requirements: A hypervisor has been detected. Features required for Hyper-V will not be displayed.
Installing minikube
- Linux
- macOS
- Windows
Install kubectl
Make sure you have kubectl installed. You can install kubectl according to the instructions in Install and Set Up kubectl.
Install a Hypervisor
If you do not already have a hypervisor installed, install one of these now:
• KVM, which also uses QEMU
• VirtualBox
Minikube also supports a --driver=none option that runs the Kubernetes components on the host and not in a VM.
Using this driver requires Docker and a Linux environment but not a hypervisor.
If you’re using the none driver in Debian or a derivative, use the .deb packages for
Docker rather than the snap package, which does not work with Minikube.
You can download .deb packages from Docker.
Caution: The
noneVM driver can result in security and data loss issues.
Before using--driver=none, consult this documentation for more information.
Minikube also supports a vm-driver=podman similar to the Docker driver. Podman run as superuser privilege (root user) is the best way to ensure that your containers have full access to any feature available on your system.
Caution: The
podmandriver requires running the containers as root because regular user accounts don’t have full access to all operating system features that their containers might need to run.
Install Minikube using a package
There are experimental packages for Minikube available; you can find Linux (AMD64) packages
from Minikube’s releases page on GitHub.
Use your Linux’s distribution’s package tool to install a suitable package.
Install Minikube via direct download
If you’re not installing via a package, you can download a stand-alone
binary and use that.
curl -Lo minikube https://storage.googleapis.com/minikube/releases/latest/minikube-linux-amd64 \
  && chmod +x minikube
Here’s an easy way to add the Minikube executable to your path:
sudo mkdir -p /usr/local/bin/
sudo install minikube /usr/local/bin/
Install Minikube using Homebrew
As yet another alternative, you can install Minikube using Linux Homebrew:
Install kubectl
Make sure you have kubectl installed. You can install kubectl according to the instructions in Install and Set Up kubectl.
Install a Hypervisor
If you do not already have a hypervisor installed, install one of these now:
• HyperKit
• VirtualBox
• VMware Fusion
Install Minikube
The easiest way to install Minikube on macOS is using Homebrew:
You can also install it on macOS by downloading a stand-alone binary:
curl -Lo minikube https://storage.googleapis.com/minikube/releases/latest/minikube-darwin-amd64 \
  && chmod +x minikube
Here’s an easy way to add the Minikube executable to your path:
sudo mv minikube /usr/local/bin
Install kubectl
Make sure you have kubectl installed. You can install kubectl according to the instructions in Install and Set Up kubectl.
Install a Hypervisor
If you do not already have a hypervisor installed, install one of these now:
• Hyper-V
• VirtualBox
Note: Hyper-V can run on three versions of Windows 10: Windows 10 Enterprise, Windows 10 Professional, and Windows 10 Education.
Install Minikube using Chocolatey
The easiest way to install Minikube on Windows is using Chocolatey (run as an administrator):
After Minikube has finished installing, close the current CLI session and restart. Minikube should have been added to your path automatically.
Install Minikube using an installer executable
To install Minikube manually on Windows using Windows Installer, download minikube-installer.exe and execute the installer.
Install Minikube via direct download
To install Minikube manually on Windows, download minikube-windows-amd64, rename it to minikube.exe, and add it to your path.
Confirm Installation
To confirm successful installation of both a hypervisor and Minikube, you can run the following command to start up a local Kubernetes cluster:
Note: For setting the
--driverwithminikube start, enter the name of the hypervisor you installed in lowercase letters where<driver_name>is mentioned below. A full list of--drivervalues is available in specifying the VM driver documentation.
Caution: When using KVM, note that libvirt’s default QEMU URI under Debian and some other systems is
qemu:///sessionwhereas Minikube’s default QEMU URI isqemu:///system. If this is the case for your system, you will need to pass--kvm-qemu-uri qemu:///sessiontominikube start.
minikube start --driver=<driver_name>
Once minikube start finishes, run the command below to check the status of the cluster:
If your cluster is running, the output from minikube status should be similar to:
host: Running
kubelet: Running
apiserver: Running
kubeconfig: Configured
After you have confirmed whether Minikube is working with your chosen hypervisor, you can continue to use Minikube or you can stop your cluster. To stop your cluster, run:
Clean up local state
If you have previously installed Minikube, and run:
and minikube start returned an error:
machine does not exist
then you need to clear minikube’s local state:
What’s next
- Running Kubernetes Locally via Minikube
Skip to content
How to install Minikube on Windows 10
In this tutorial, I am going to show you how to install Minikube on Windows 10 operating system.
How to install Minikube on Windows 10:
Installing Minikube on Windows 10 is a simple process; here I am providing an easy technique to install minikube along with kubeadm and kubectl on windows.
1. System Configuration:
I am going to install the minicube on the below-configured system.
- Windows 10 Pro 64 Bit Operating system
- RAM 8 GB
- HDD 1TB
- Oracle VirtualBox 5.2.8
- Hyper-V Requirements:
- VM Monitor Mode Extensions: Yes
- Virtualization Enabled In Firmware: Yes
- Second Level Address Translation: Yes
- Data Execution Prevention Available: Yes
2. Prerequisites:
However I am working on the above configurations, the Minikube can be installed, if your system met the below minimum requirements.
- Windows 8 Or above
- Make sure you should install kubectl, before Minicube installation. (No issue – we will install it as part of this tutorial)
- Install Hypervisor (Install Hyper-V or Virtual Box); If you install the Docker Toolbox on your windows machine, it comes along with Virtual Box, you can see my previous tutorial on it.
- Virtualization supported on Windows
You can check this virtualisation support by using systeminfo command on your windows command prompt.
You should see the below information when you hit the systeminfo command on your terminal.
systeminfo
....
....
Hyper-V Requirements:      VM Monitor Mode Extensions: Yes
                           Virtualization Enabled In Firmware: Yes
                           Second Level Address Translation: Yes
                           Data Execution Prevention Available: Yes
3. Install Minikube on Windows 10:
Installing Minicube on windows operating system can be done in 3 different ways,
- Install Minikube using Chocolatey
- Install Minikube using installer
- Install Minikube via the direct download
Out of these three options, in this tutorial, I am going with the third option because of the first two needs installation, whereas third options don’t need any installation process.
4. Download Minikube:
Download the Minikube from official git-hub repository.

Click on above-highlighted minikube-windows-amd64.exe; then the minikube executable will be downloaded into your machine.
Move the downloaded file to C:/minikube (create minikube folder in C: directory) directory and rename it as minikube.exe.
5. Download kubeCtl:
Download the kubeCtl from the official website.

Click on the above-highlighted hyperlink; then the kubectl.exe executable will be downloaded into your machine.
Move this kubectl.exe file into the above-created folder (C:/minikube).
Till this, we can confirm that we have downloaded Minikube.exe and kubectl.exe file and copied these two files into C:/minikube directory like below.

6. Create Path:
Now let’s create a path for the C:/minikube folder.
Goto-> View Advanced System Settings -> Environment Variables -> Select the Path from User variable section -> Click on Edit.
Then you could see the below Edit environment variables window. Click on New button and paste the C:/minikube and click on the Ok button.

7. Start the Minikube:
Open the windows command prompt and hit the minikube start command. Then it starts downloading minikube, kubeadm and kubelet. It will take time to download and set up the things based on your internet speed.

If you see the above Done! message, then you can confirm that minikube,kubectl, kubeadm and kubelet have been successfully installed on your machine.
8. Verify:
To verify the things, you can fire a simple kubectl command, here I am checking for nodes by firing kubectl get nodes command, then I could see the master node information as minikube comes along with a master node.

References:
- Install kubectl
- install minikube
- install Docker toolbox on windows 10
Happy Learning 🙂
Share a word.
Related Posts
Page load link