
Here’s a beginner’s guide to install LibreOffice office productivity suite on Windows 11.
LibreOffice is a free and open-source office suite that is an excellent alternative to Microsoft Office. It includes a word processor (Writer), a spreadsheet program (Calc), a presentation program (Impress), a drawing program (Draw), a formula editor (Math), and a database management program (Base).
Installing LibreOffice on a Windows computer is a straightforward process that can be completed in a few simple steps. In this article, we will guide you through the process of installing LibreOffice on your Windows computer and provide tips on how to use the different programs included in the suite.
LibreOffice comes in two versions. The “Community” and “Enterprise” versions.
The “community” version is for early adopters who want the latest bleeding-edge software tech.
And the “enterprise” version is more stable and may not include all the latest features, but it is ideal for the production environment and professional work.
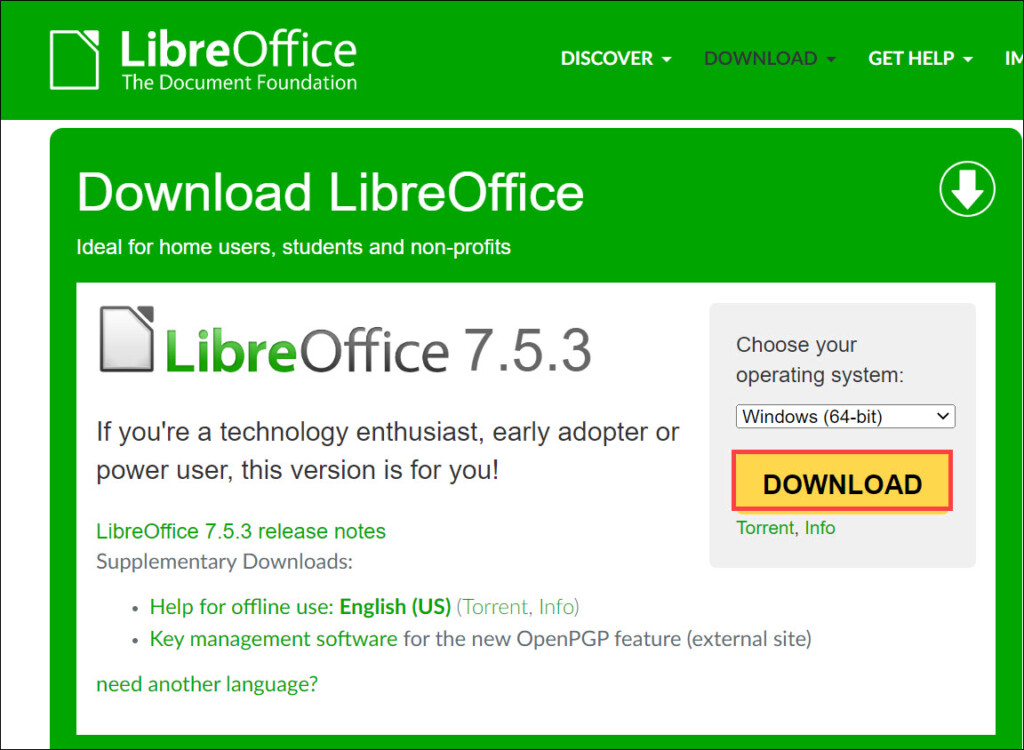
- The top link in the below image is the “community” version, and the bottom is for “enterprise”.
- Choose the one you need and download the Windows 64-bit setup.

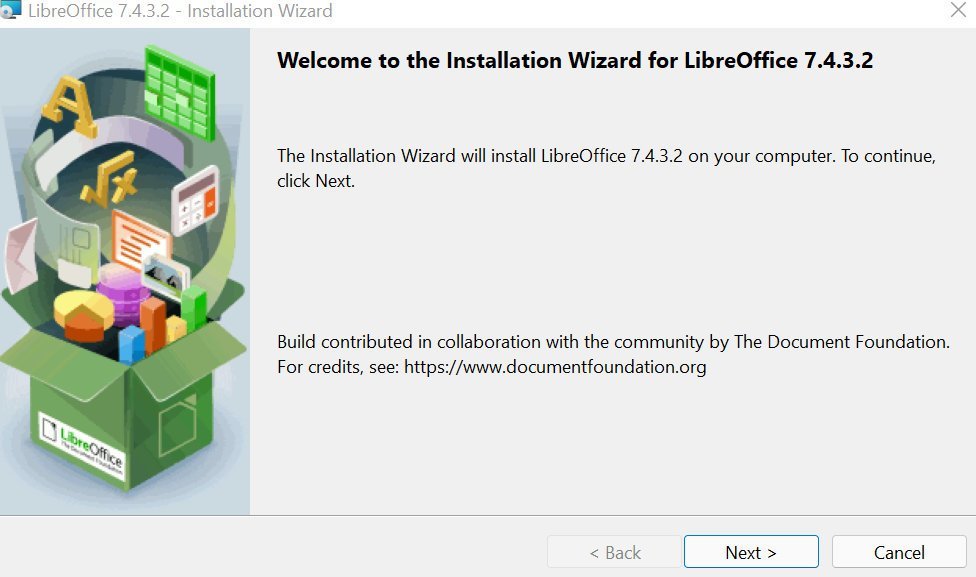
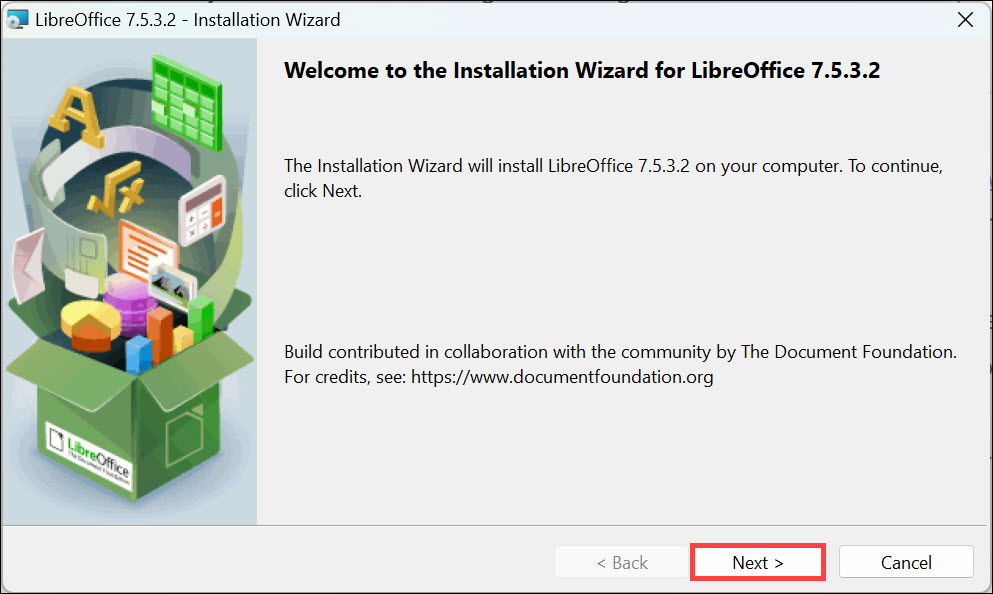
- After downloading, open the exe file to start the set-up. And you should see a screen like the one below.
- Click Next.
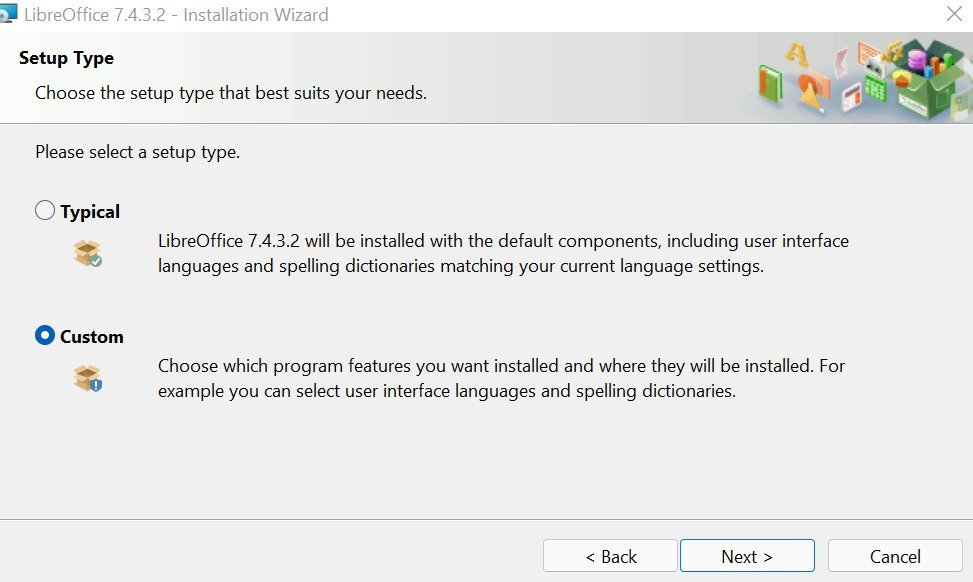
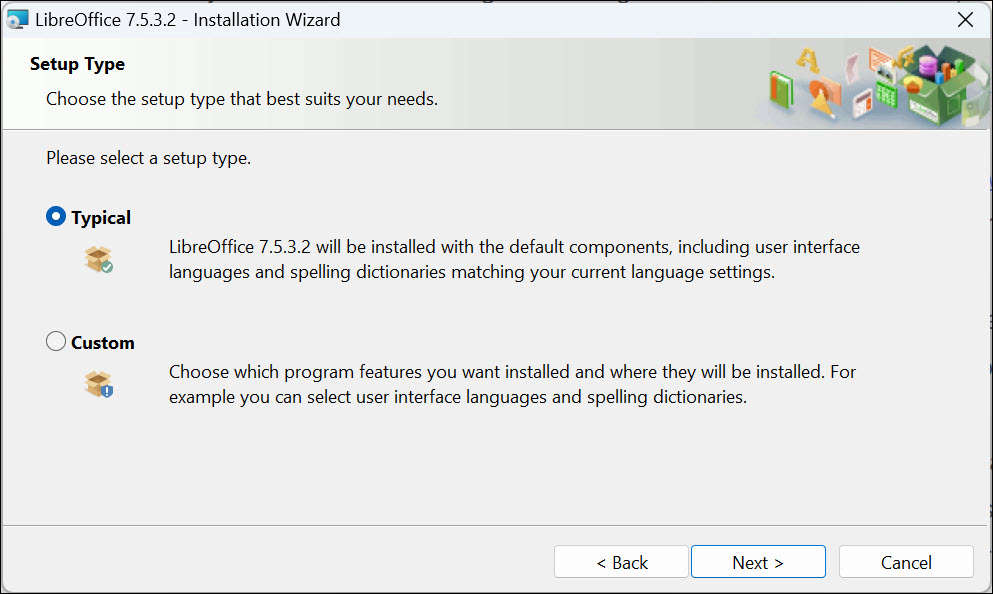
- In the next Setup type screen, you should see two options. The Typical option gives you standard options for installation.
- The custom option lets you select language packs and other options.
- I recommend the Typical option, which works for all use cases.

- On the next page, you can also set LibreOffice for Microsoft Office types such as docx, xlsx, pptx, etc.

- It’s better to create a LibreOffice shortcut on the Windows 11 desktop. It will help you to launch it when you need it.
- Finally, hit Install to start the installation.

- Wait for the installation to complete.
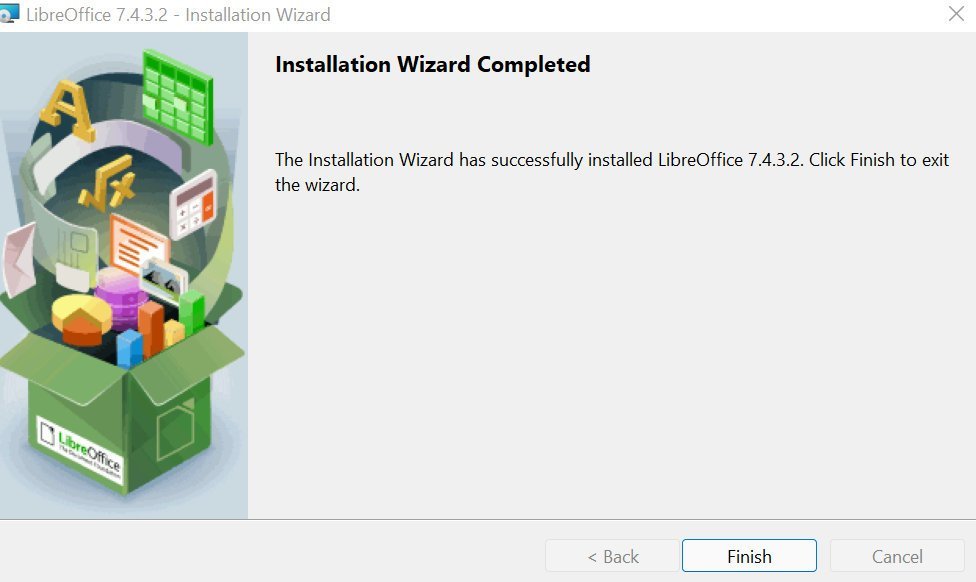
- After completion, click on Finish to close the wizard.
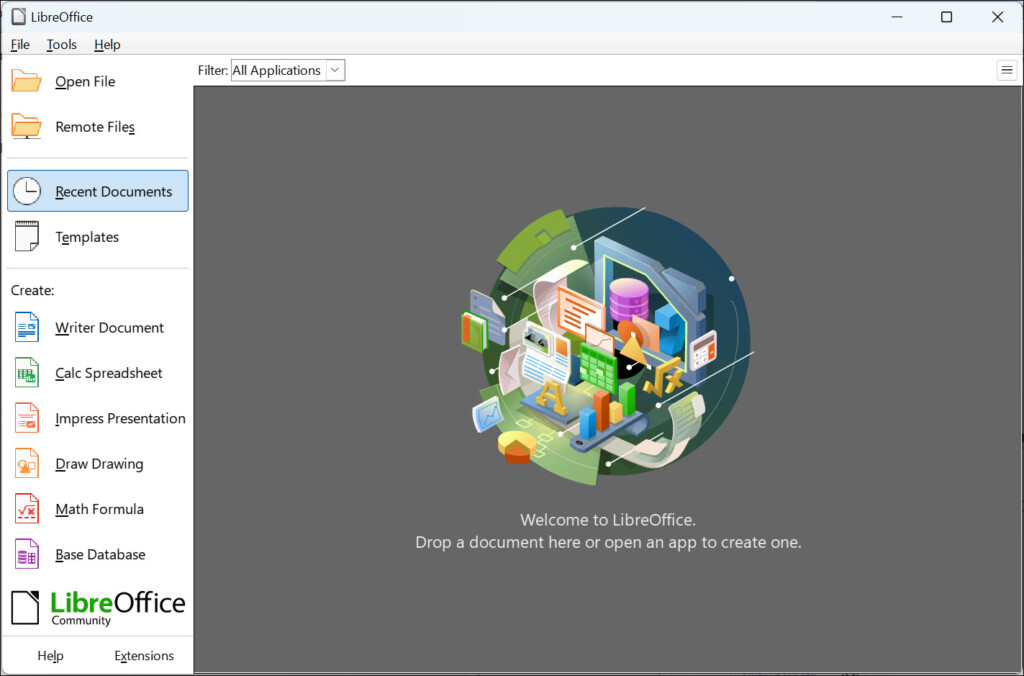
- And you can find LibreOffice in the Windows 11 start menu or in the desktop.

That’s it.
Upgrading LibreOffice on Windows
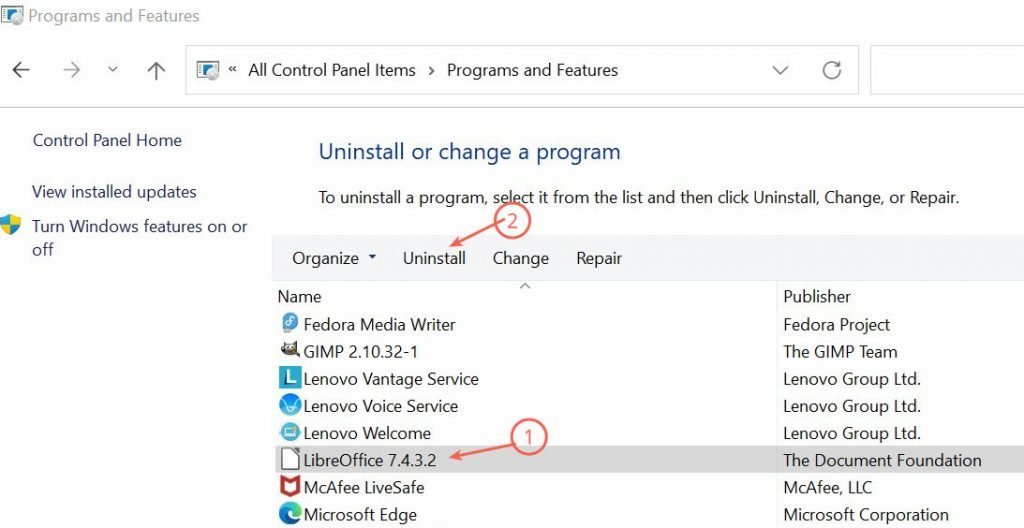
There is no proper upgrade path available to upgrade LibreOffice in Windows. So, when a new version is released, uninstall the version from the control panel (see below).
And then, follow the above steps to download and install it again. LibreOffice preserves your documents, history and other settings. So, re-installing is safe.
Wrapping Up
In closing, LibreOffice is a powerful and versatile office suite that can help you create and edit documents, spreadsheets, presentations, and more. I hope the above guide is simple enough for you to follow.
Remember to update your LibreOffice software for the latest features and security fixes.
Have a question? Let me know in the comment box.

- Get Help /
- Installation Instructions /
- Windows
Windows
Before starting the installation process, check the System Requirements page for the prerequisites for installing LibreOffice on a Windows system.
Enterprise and government users: please check the deployment and migration information page.
You do not have to uninstall any previously installed version of LibreOffice. If you do have an existing installation of LibreOffice, all your preferences will be preserved and that old installation will simply be overwritten.
1. Main Program
1.1 Download
If you are unsure which Windows version you have, press ⊞ Win+Pause to open your system properties window. The LibreOffice Main Installer download page can be selected with a built-in help file for your language:
- Click here for the 32-bit version.
- Click here for the 64-bit version.
Click the green button with white writing which says “DOWNLOAD VERSION”. If the download does not automatically begin, click ‘Save File’. You are invited to give an optional donation.
1.2 Install
Open the folder where the Main Installer has been downloaded and double-click on the Installer.
1.3 Welcome
The Installation Wizard Welcome dialog box opens advising that the installation process is about to be started. Click “Next >”
1.4 Setup Type
Another dialog box opens, giving you a choice whether you want a default installation, or whether you want to choose special locations and components. If you want a default installation, just press “Next >”. If you want to make special choices, click on “Custom” and then press “Next >”.
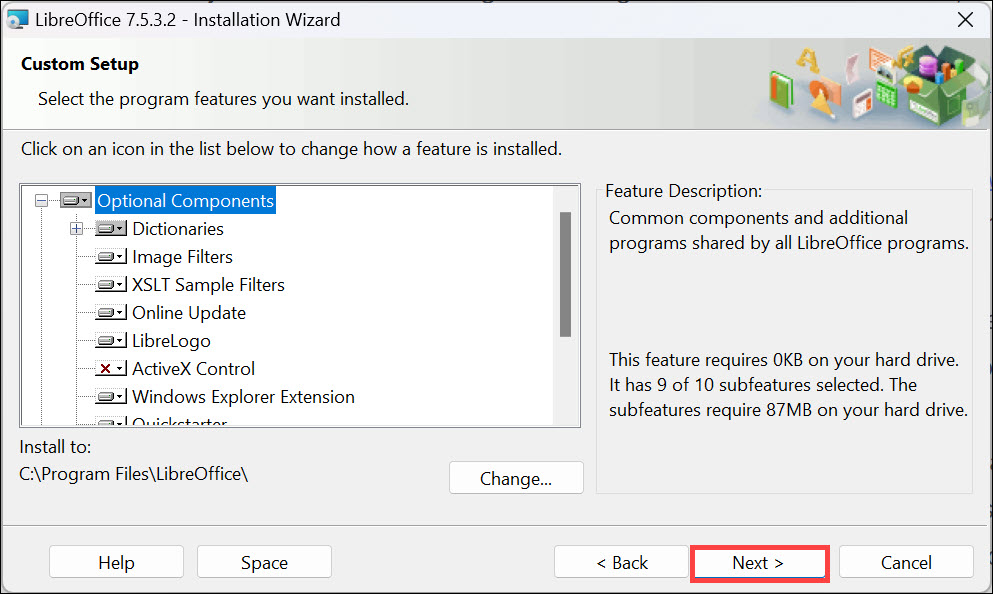
1.5 Custom Setup
The Custom Setup enables changes to the features that will be installed.
If you would like to install the spelling dictionaries, hyphenation rules, thesauri and grammar checkers:
- Click Optional Components
- Click Dictionaries
For instance, to install Hungarian, ensure that Hungarian has to its left the picture and “This feature will be installed on the local hard drive.”
Once all required changes to the features have been completed, click “Next >”
1.6 File Type
Another dialog box opens, inviting you to choose whether to open Microsoft Office documents with LibreOffice. By default, this feature is not enabled. If you want LibreOffice to open Microsoft Office files (documents, spreadsheets and presentations), put a checkmark in all four checkboxes.
Click “Next >”
1.7 Shortcut and Load during system startup
Another dialog box opens, asking you whether:
- A shortcut to open LibreOffice should be placed on your desktop. The default option is to create a shortcut.
- To load LibreOffice during system start-up.
After your selection press “Install”.
1.8 LibreOffice is Installing
If the User Account Control dialog shows, click “Yes” to continue the installation.
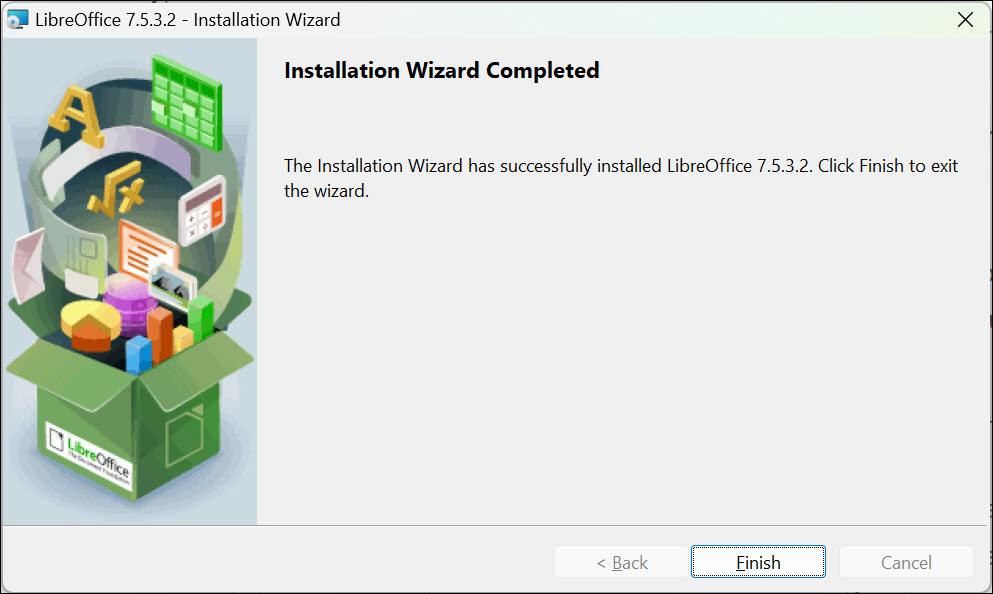
1.9 LibreOffice Installation Completed
Click “Finish”.
2. Built-in Help
If you would like to use the built-in help, you will need to download and install the appropriate file.
The LibreOffice built-in help for your language can be selected by:
- clicking here for the 32-bit version.
- clicking here for the 64-bit version.
If you are unsure which Windows version you have, press ⊞ Win+Pause to open your system properties window.
If you’re looking for an efficient and cost-effective way to optimize your workflow, look no further than LibreOffice on Windows 11. LibreOffice is a powerful open-source office suite that provides all the tools you need to create documents, presentations, spreadsheets, and more – without breaking the bank. It is the best alternative to Microsft Office.
In this blog post, we’ll walk you through the steps of installing and using LibreOffice on Windows 11, so you can start making the most of your time spent in front of your computer.
What Are the Advantages of Using LibreOffice in Windows 11?
LibreOffice is a feature-rich office suite that offers the same basic tools you will find in Microsoft Office but with many additional features and options. Here are a few advantages of using it:
Compatibility: One of the biggest advantages of using LibreOffice in Windows 11 is its compatibility with Microsoft Office files. This means that if you need to share documents with someone who is using Microsoft Office, they will be able to open the file without any issues.
Cost: The most obvious advantage of using LibreOffice is that it’s completely free for everyone. This makes it a great choice for those who are on a tight budget or just don’t want to pay for an expensive program like Microsoft Office.
Customization: LibreOffice offers many customization options so you can personalize the interface and make it look exactly how you want it. You can also add additional features or plugins to extend the functionality of your office suite.
Light to the system: LibreOffice is a lightweight program, so it won’t take up too much space on your computer or slow down its performance.
Compatible with older Windows versions: Unlike Microsoft Office, LibreOffice can be used on old computers as well without any compatibility or performance issues.
What are the System Requirements for LibreOffice?
Before you install LibreOffice on Windows 11, make sure that your computer meets the system requirements. The minimum requirements are:
| Operating System | Microsoft Windows 7 SP1 with KB3063858 update, Windows 8, Windows Server 2012 through 2022, Windows 10 or 11 (LibreOffice is fully supported on Windows 11) |
| RAM | 256 MB RAM (512 MB RAM recommended) |
| Processor | Pentium-compatible PC (Pentium III, Athlon, or a more-recent system recommended) |
| Storage | Up to 1.5 GB available hard disk space |
| Resolution | 1024×768 resolution (higher resolution recommended), with at least 256 colors |
How to Install LibreOffice on Windows 11
Now that you know the minimum system requirements and advantages of using LibreOffice in Windows 11, let’s go through the steps of installing and setting up LibreOffice.
Installing LibreOffice is a fairly straightforward process, and it doesn’t take too long, either. Here are the steps for installing it:
1. Open your preferred web browser and go to the official LibreOffice download page.
2. Select the version of LibreOffice that you want to install. For Windows 11, you need to download 64-bit.
3. Click the Download button to download the setup file. It is approximately 345 MB in size.
4. After the installer is downloaded, open the file and follow the instructions to complete the installation.
5. Select Custom installation if you want selective components to be installed, or else choose Typical setup type to install the default components with default settings.
6. Under Custom setup type, select the Optional Components you want to install, such as Dictionaries, Image Filters, Extensions, and more.
7. You can also select the User Interface language of your choice and change the installation path. Finally, click Next.
8. Once the installation is complete, you need to restart your system to make the changes effective.
9. After restarting the system, you can launch LibreOffice from your Windows Start menu or desktop shortcut.
Now that you have LibreOffice installed on your computer let’s take a look at some of its features and how to use it.
How to Use LibreOffice on Windows 11
LibreOffice comes with several office tools that you can use to create professional-looking documents, presentations, spreadsheets, and more.
Here’s how you can use each of the components:
Writer Document: This is a word-processing tool that lets you create documents. You can format your text, add images, add tables and charts, and do much more.
Calc Spreadsheet: This is a spreadsheet tool that lets you create worksheets to store and analyze data. You can use formulas for calculations and create graphs to visualize your data.
Impress Presentation: This is a presentation tool that lets you create beautiful slideshows with animations, transitions, and more.
Draw Drawing: This tool lets you create vector-based graphics for illustrations, diagrams, flowcharts, logos, and more.
Base Database: This is a database tool that lets you store and organize data in a secure manner. It also supports SQL commands so you can query your database easily.
Math Formula: This tool is used for creating mathematical formulas. It supports a wide range of equations and symbols.
These are some of the features that you can use in LibreOffice on Windows 11. Now let’s take a look at how to customize LibreOffice according to your needs.
How to Customize LibreOffice on Windows 11?
LibreOffice on Windows 11 offers a lot of customization options so you can make it look and feel just the way you want. Some of these customizations include changing the user interface language, setting default document open settings, adding plugins and extensions, and more.
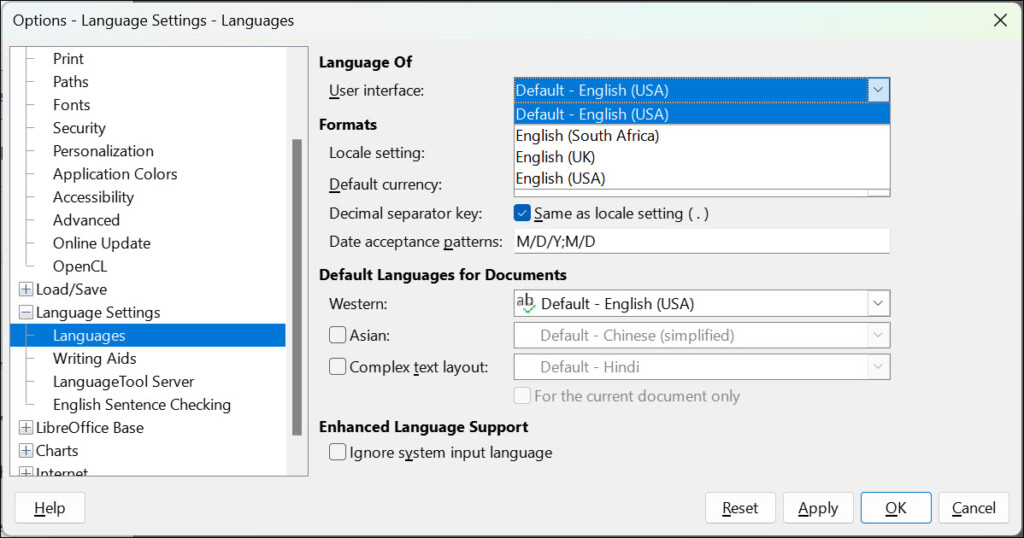
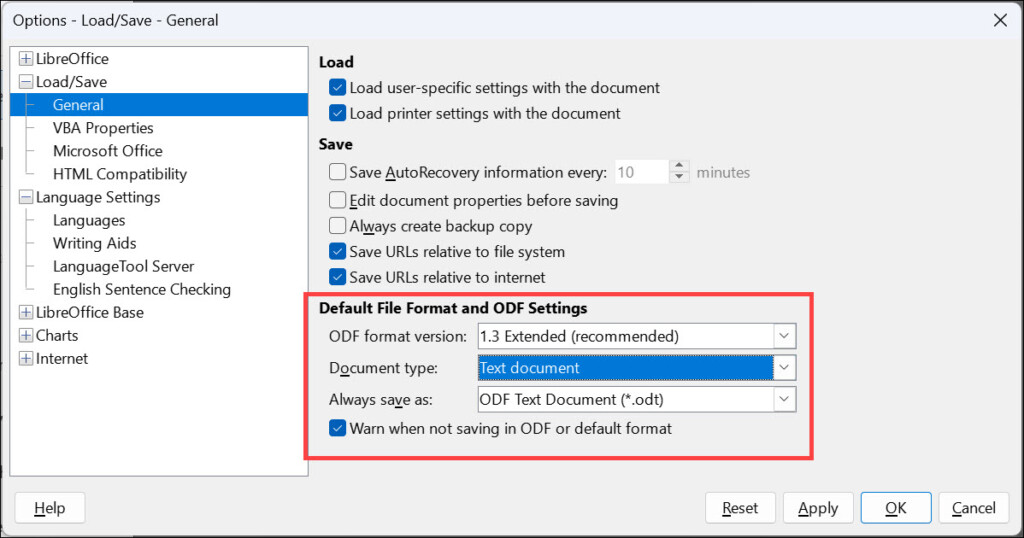
To change the user interface language, go to LibreOffice> Tools > Options> Language Settings. Here you can select the language of your choice.
You can also change the default document open settings by going to LibreOffice> Tools > Options > Load/Save> General. Here, you can set the default file format for all your documents and also choose whether to open files in read-only mode or not.
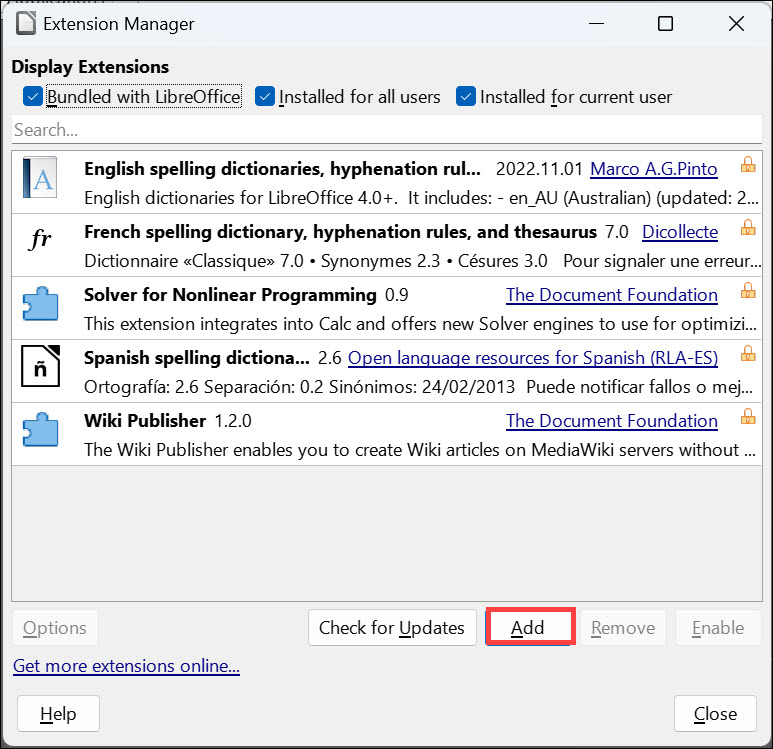
If you want to add extra features to LibreOffice, you can do so by installing plugins and extensions. To install these, go to LibreOffice> Tools > Extension Manager. Here you can browse the list of available extensions and select the ones that you want to install.
These are some of the ways in which you can customize LibreOffice on Windows 11. With the help of these settings, you can make LibreOffice look and behave just the way you want.
FAQs
Is LibreOffice compatible with Windows 11?
Yes, LibreOffice is fully compatible with Windows 11 and can be used to create professional-looking documents, spreadsheets, databases, graphics, and more.
How to Uninstall LibreOffice in Windows 11?
To uninstall LibreOffice from your Windows 11 computer, go to Settings > Apps > Installed Apps. Here, locate LibreOffice and select Uninstall. Follow the on-screen instructions to complete the process.
How to make LibreOffice default on Windows 11?
To make LibreOffice the default office suite on your Windows 11 computer, go to Settings > Apps > Default Apps. Here, search for LibreOffice and set it as the default program.
Conclusion
LibreOffice is an excellent free and open-source office suite that you can use on Windows 11. It comes with a wide range of features and customization options so you can customize it according to your needs. With LibreOffice, you can easily create professional-looking documents, presentations, spreadsheets, databases, graphics, and more.
If you are tight on budget and need an office suite on your Windows 11 computer, LibreOffice is one of the best options out there. Hope this article helped you understand how to install and use LibreOffice on Windows 11. If you have any questions or comments, feel free to let us know in the comment section below.
From The Document Foundation Wiki
- Wiki Home
- Development
- Design
- QA
- Events
- Documentation
- Website
- Localization
- Accessibility
- Marketing
- Diversity
- Wiki Help
Foreword
Installing LibreOffice is very easy!
Follow the descriptions for your operating system:
The video «LibreOffice Installing under Windows 10 / 11» links to this page, which contains further information.
On the homepage of «LibreOffice — The Document Foundation» you will find all the important information around LibreOffice.
LibreOffice is completely free.
Link to the video
Link to the video (in German [DE]):
Installation von LibreOffice unter Windows 10
File names LibreOffice for Windows
File names LibreOffice for Windows 64-Bit
-
Win10 — LibreOffice installation files version 24.8.4 64-Bit — Helppack+Program
-
Win11 — LibreOffice installation files version 24.8.4 64-Bit — Helppack+Program
LibreOffice_x.x.x_Win_x64.msi
LibreOffice_x.x.x_Win_x64_helppack_en-GB.msi
«x.x.x» stands for the version number of LibreOffice.
Information about installing LibreOffice
If the installation files are not on your computer, you can download them for free from the website «LibreOffice — The Document Foundation«.
Install LibreOffice Program for Windows
The installation of LibreOffice with 64-bit is described here.
The installation for 32-bit systems is analogous.
Usually, the files downloaded from the Internet are in the Downloads folder.
Win10
Win11
So if you have found your folder where the files are located, you can start the installation.
Double-click on the file «LibreOffice_x.x.x_Win_x64.msi».
«x.x.x» stands for the version number of LibreOffice.
Follow the installation instructions for the «Program»
Typical
-
Program Wizard Welcome
-
Program Wizard Setup Type/Typical
-
Program Wizard Ready to install the Program
-
Do you want to allow
-
Installing LibreOffice
-
Installation Wizard Completed
Custom
-
Program Wizard Setup Type/Custom
-
Program Wizard Custom Setup/Options
-
Program Wizard Custom Setup/Laguages
-
Program Wizard File Type
-
Program Wizard Ready to Install the Program
It logs on the Installation Wizard Program.
Click on the Next button.
In the next step you now have the option between the installation types «Typical » or «Custom» to select.
If you select «Custom», you can choose «Optional components», such as Options and Dictionaries involve in the installation.
Or select «Additional UI Languages«.
Below the choices, the Path for program installation is given.
With the button Change… you can change the path as you like.
But change the path only if you are a savvy user regarding Windows 10 / 11 and LibreOffice.
When you are satisfied with your selection, click Next.
Next, you can select the file type for the Microsoft-Office File types that you want to open/edit with LibreOffice.
Now you can determine if there should be a Create a shortcut on desktop «Program link» on the desktop.
Here you can also specify whether LibreOffice should be «Load LibreOffice x.x.x during system startup.
«x.x.x» stands for the version number of LibreOffice.
Click on the Install button.
Windows User Account Control (Program) asks «Do you want to allow this app to make changes to your device?».
The installation starts and the installation progress is indicated by a green bar.
Now click on the Finish button.
This is LibreOffice program installed.
Install LibreOffice Helppack for Windows
The installation of LibreOffice with 64-bit (Helppack) is described here.
The installation for 32-bit systems is analogous.
Usually, the files downloaded from the Internet are in the Downloads folder.
Win10
Win11
So if you have found your folder where the files are located, you can start the installation.
Once the program is installed, double-click on the file «LibreOffice_x.x.x_Win_x64_helppack_de.msi».
«x.x.x» stands for the version number of LibreOffice.
Follow installation instructions «Helppack»
-
Helppack Wizard Welcome
-
Helppack Wizard Attention
-
Helppack Wizard Ready to Install the Program
-
Window Do you want to allow
-
Helppack Wizard Copying new files
-
Helppack Wizard Completed
The Installation wizard Helppack are displayed.
Click on the Next button.
You will see the next one Path for the Helppack installation.
With the Change… button, you can change the path as you like.
But change the path only if you are a savvy user regarding Windows 10 / 11 and LibreOffice.
When you are satisfied with your selection, click .
Now click on the Install button.
Windows User Account Control Helppack asks «Do you want to allow this app to make changes to your device?».
Click Yes button.
The installation starts and the installation progress is indicated by a green bar.
After Installing click on the button Finish.
Helppack is now installed.
Control in the Control Panel
Call up Windows Explorer ⊞ Win+E.
Scroll down and select the Control Panel.
Click on Programs and Features.
In the Overview of installed programs you should now see LibreOffice and the Helppack.
LibreOffice fails
In case something goes wrong during installation.
LibreOffice user profile
LibreOffice user profile
LibreOffice repair
You have the possibility to initiate a repair process via the Windows Control Panel.
-
Control Panel in the Taskbar
-
Control Panel dialog — Programs
-
Choose Repair
General Installation Issues (Windows)
General Installation Issues (Windows)
First steps to take before submitting a bug
First steps to take before submitting a bug
Further Informations
Possible Problems during installation
Faq — General Installation Issues (Windows)
Documentation / Manuals
Here you will find the Documentation / Manuals:
Documentation / Manuals
Any questions?
For questions on this topic go to:
Ask.LibreOffice
Get Involved
Join us today and help us to make it even better!
Get Involved
Donate
LibreOffice is Free Software and is made available free of charge.
Your donation, which is purely optional, supports our worldwide community.
If you like the software, please consider a Donation.
For everyday working professionals, working without interaction with digital files is like a day without sunrise. However, an office suite is not just like dedicated software for a dedicated file format. To be a perfect productivity software an office suite must have a word processor, spreadsheet, and presentation software. And to be frank, we all know there’s one software that fulfils all these needs but at the same time, it is pretty expensive. So having an open-source alternative is a great option. Here comes LibreOffice, an open-source office suite to handle all of your everyday document, spreadsheet, presentation-related need. But installing this software sometimes becomes an issue. Therefore we’ll help you in this scenario, so let’s quickly find out how to install LibreOffice on Windows 11.
Video Tutorial: How To Install LibreOffice On Windows 11
Also Read: How To Install Zoom On Windows 11
Step 1: Download LibreOffice
1) Firstly we will download LibreOffice, for our windows 11 machine. Follow the download link provided below and by choosing the appropriate architecture of your Windows 11 operating system, in our case, it’s 64 bit. Click on the Download button.
Download LibreOffice here: https://www.libreoffice.org/download/download/

1) Once the download gets finished open the downloaded file in the folder where it has been downloaded. Double click, on the downloaded file, to start the Installation Wizard.

2) In the Welcome screen, simply click on the Next button to continue LibreOffice installation.

3) In this window you’ll be asked to choose the setup type, so here as well no need to change anything simply click on the Next button.

4) In this final installation window, click on the Install button and LibreOffice installation will begin.

5) After successful installation, click on the finish button to launch LibreOffice on your Windows 11 machine.

6) First glance at LibreOffice, on your Windows 11 will look like the below image.
