To run any Java program you need JDK installed on your windows machine. However, the process of downloading and installing JDK is not that hard. So today let’s download and Install Java JDK JRE in your windows 10.
Video Tutorial: How to Install Java JDK JRE on Windows 10
If you’re still finding it hard installing JDK on your Windows 10 machine then you can refer to the below video for a complete guide.
Step 1: Download the latest version of JDK (Java Development Kit)
1) First things first you’ll need to download a jdk.exe and to download that you’ll have to click on the download link we’ve provided below. From there you’ll be redirected to the official JDK download page. Once you’re on that page click on the “JDK Download” button.
JDK Download Link: https://www.oracle.com/in/java/technologies/javase-downloads
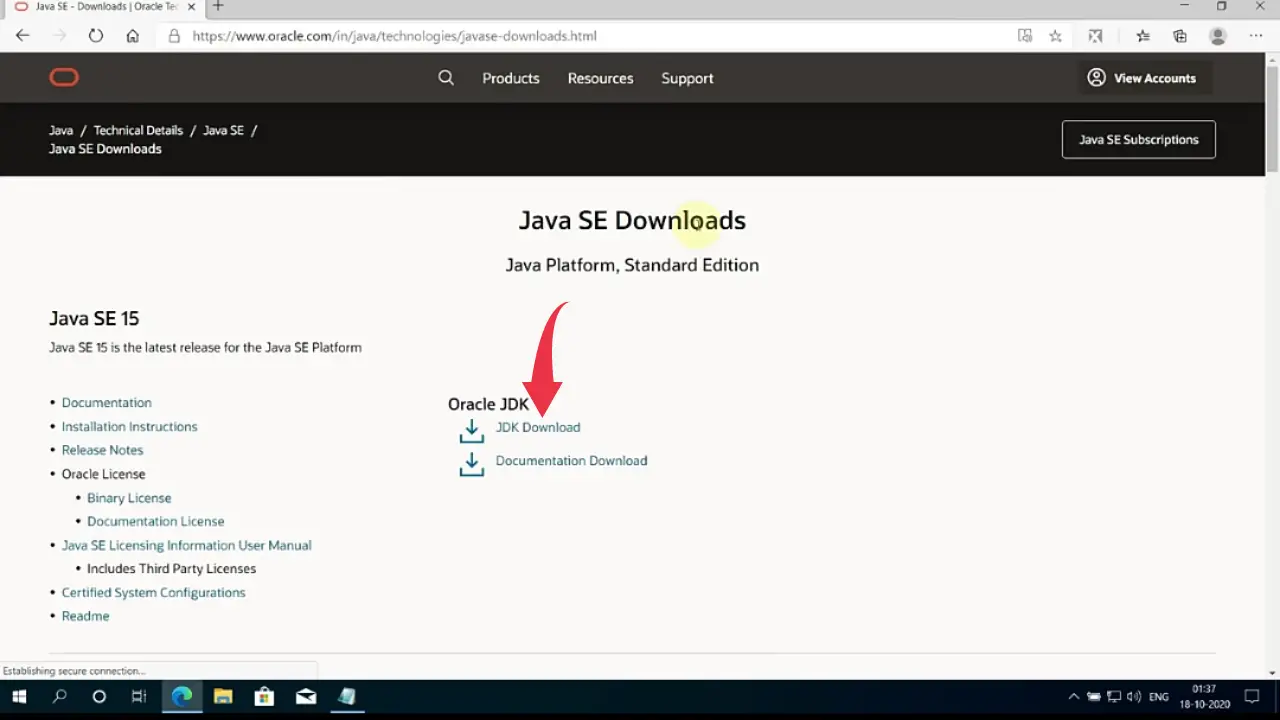
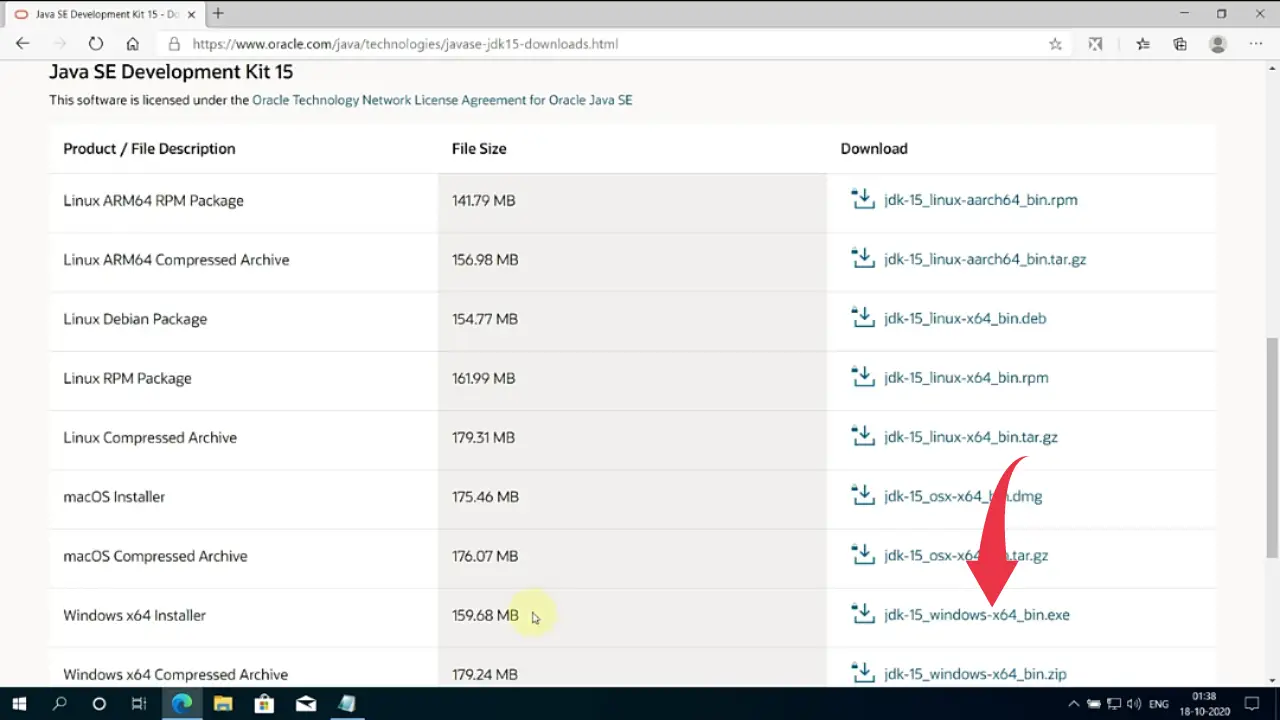
2) After that, you’ll be redirected to the “Java SE Development Kit Downloads” page. Now scroll down and there you’ll see a “windows X64 Installer” row and next to that a download link is given. Click on that link to download the installer for windows 10.
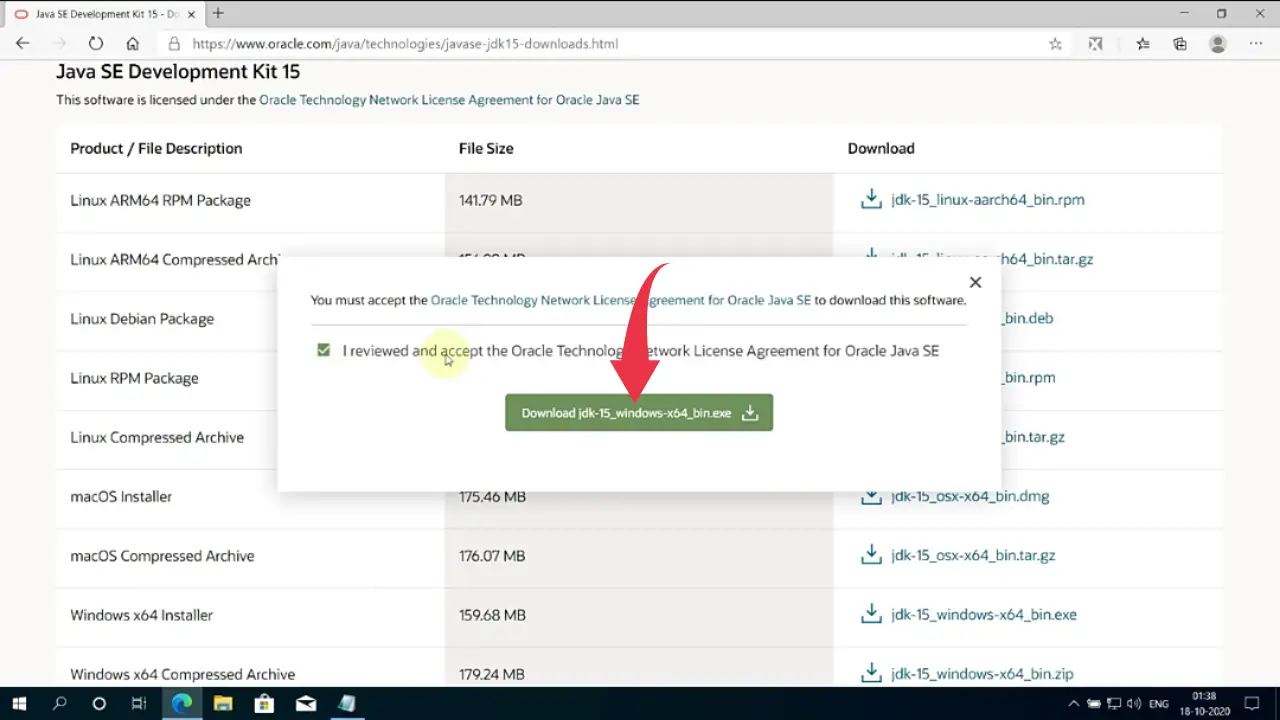
3) A popup screen will appear here, check the license agreement box and click on the long green download button. Depending on your internet connection the JDK file will get downloaded accordingly.
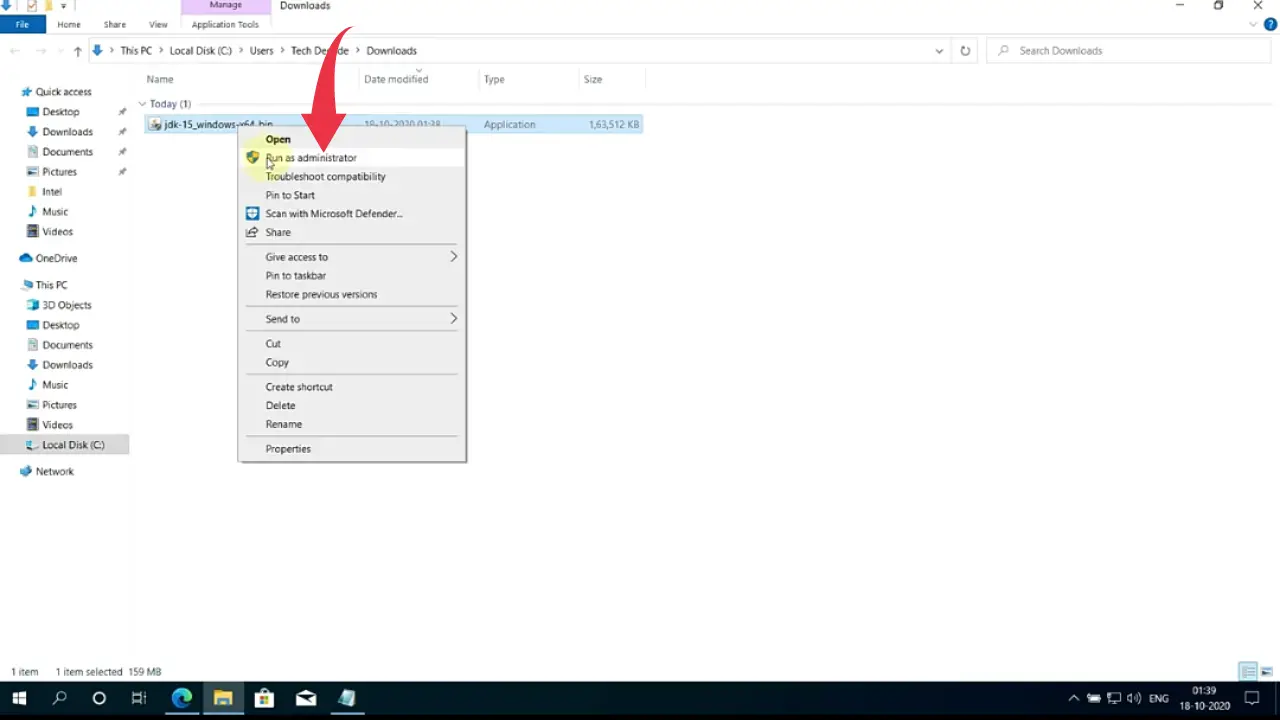
4) Now go to the folder where the downloaded exe file is available, right-click on the file and run it as administrator. A small window will appear to click on yes and the installation will begin.
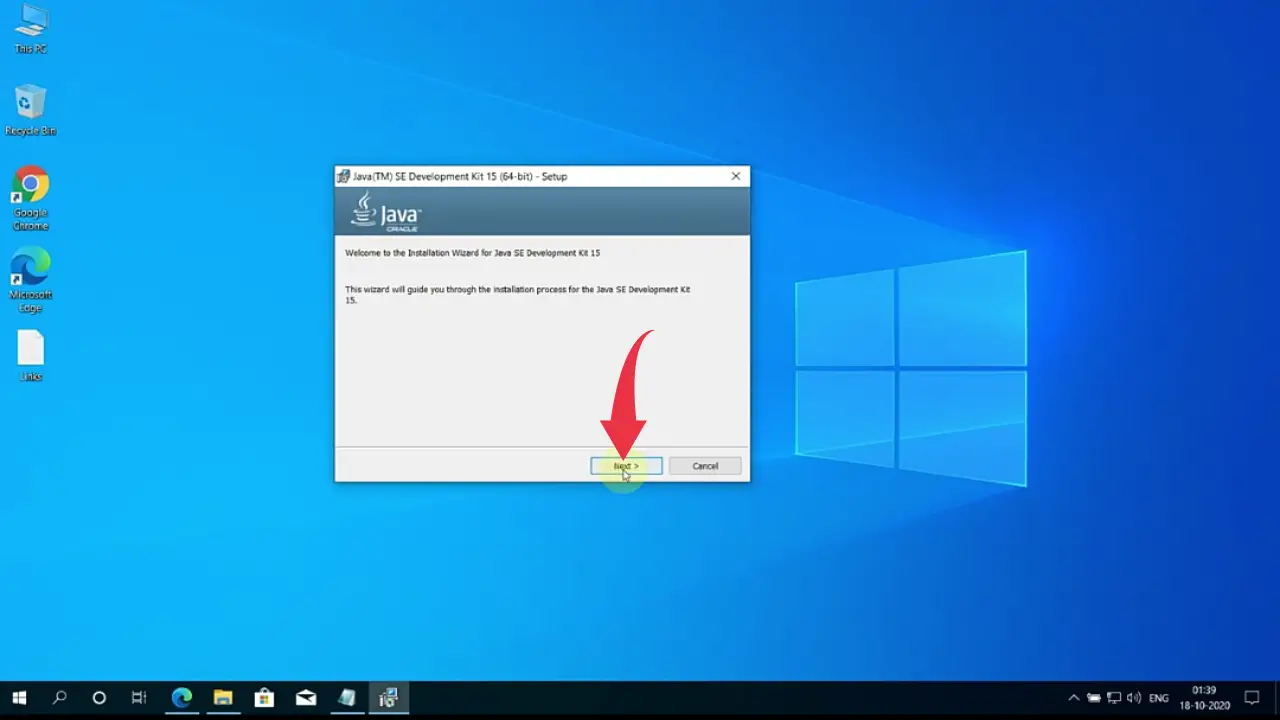
5) Once the installation gets finished a new installation wizard for Java will appear, here click next.
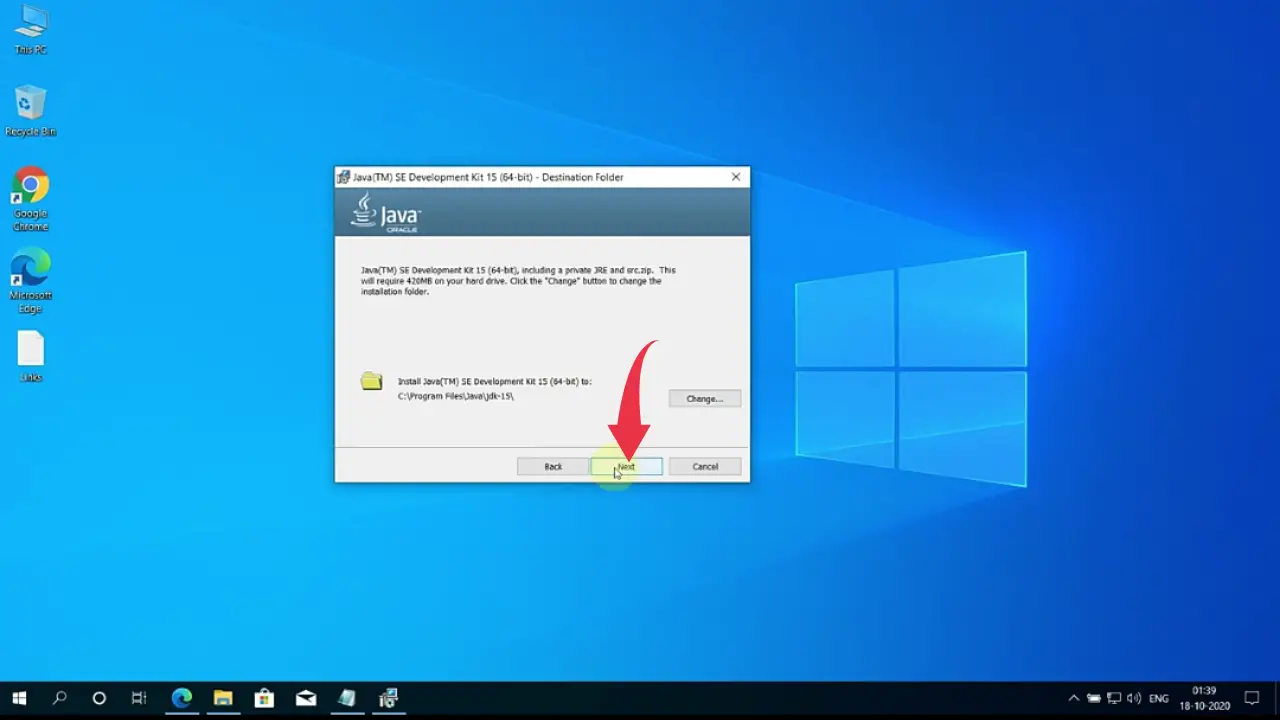
6) After that you’ll be asked to choose the installation folder, here we will go with the default installation folder so click on next.
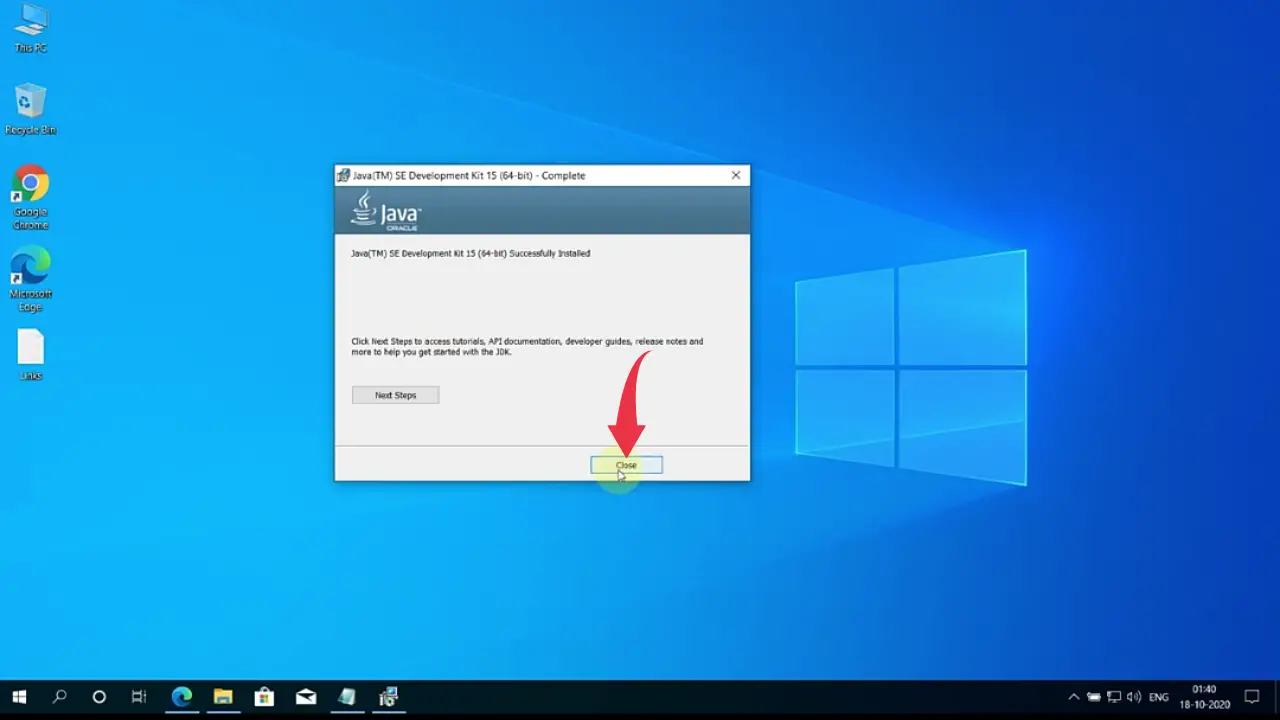
7) A progress bar will appear showing the installation progress, once it gets completed “Java(TM) SE Development Kit successfully installed” will appear on the screen and after that click on the close button.
Congrats 👏👏, by this time you’ve successfully installed JDK in your windows 10 machine.
Step 2: Verify Java JDK JRE Version
1) To check if JDK is installed properly or not, open up your command prompt by pressing the Windows button, type “cmd” and press enter.

2) In the command prompt type, “java –version” and press enter to check the installed version of JDK.
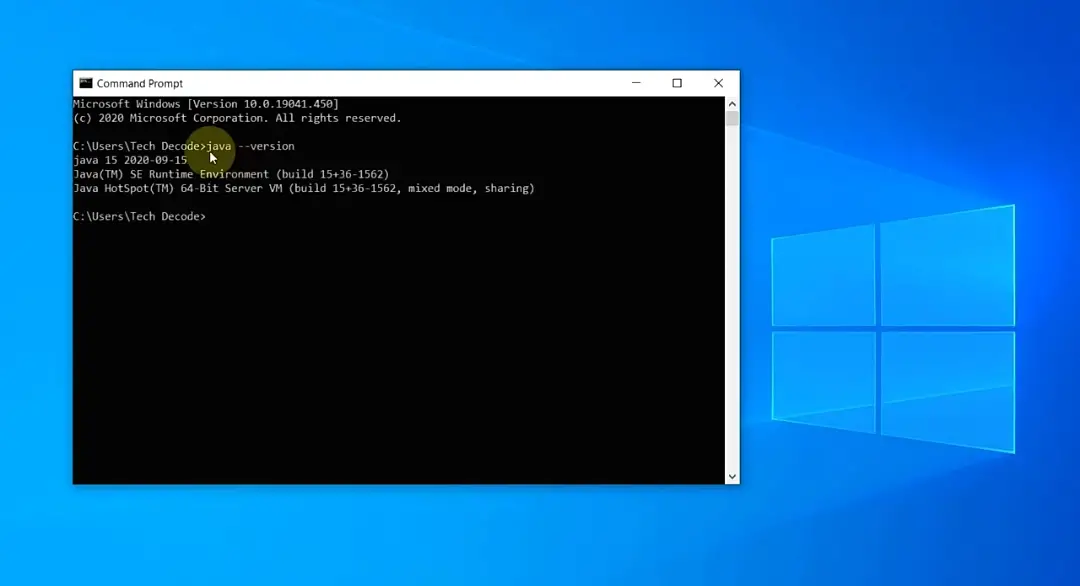
3) After that type “javac –version” and press enter to check the installed version of the java compiler.
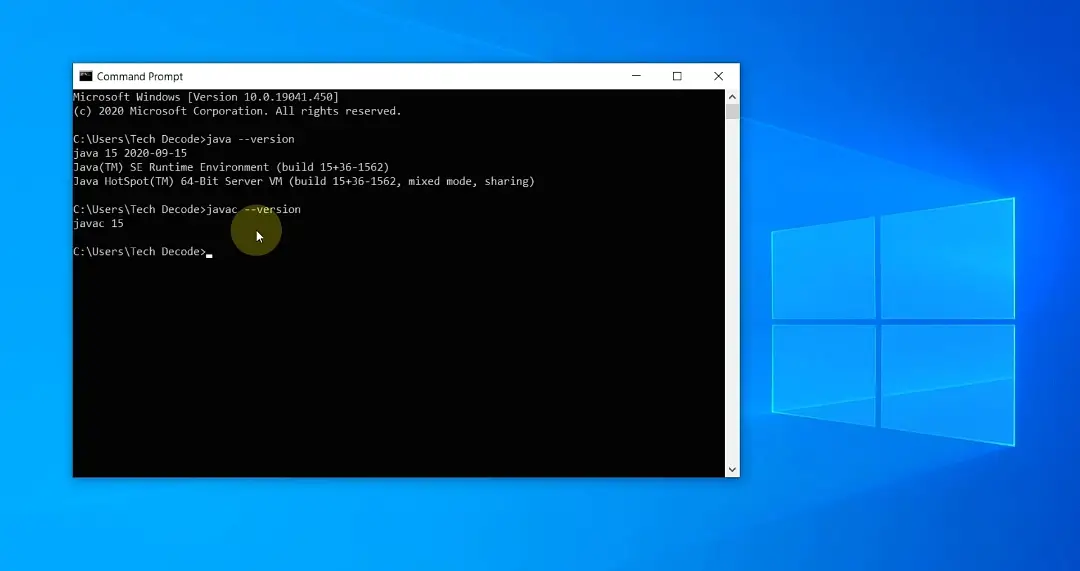
Now pat yourself in the back cause you’ve successfully installed JDK in windows 10 all by yourself🤗🤗.
Also Read: How to Run Java in Visual Studio Code on Windows 10
The object-oriented programming language Java offers advantages such as platform independence, security and multithreading, which you can also use in Windows 10. But, first, clarify whether you need a 32-bit or 64-bit version before installing Java on Windows 10.
Java is one of the most widely used Internet programming languages and is also suitable for users who are just learning programming-learning. In Windows it was already supported since the update 51 for Windows 8. Those who want to use Java on Windows 10 or also on Linux and macOS can download the installation files free of charge from the website of the Java developer Oracle Corporation.
Attention! The Edge browser does not support Java plug-ins, so Java cannot be used in Edge. Browser like Firefox or Safari again require a Java plugin or applet. In addition, you need to clarify whether you need Java as 32-bit or 64-bit for Windows, depending on your operating system.
If you want to get the most out of Java, you should get an overview of the most important Java commands and Java operators. Particularly handy is the comprehensive software development kit (SDK), which includes the Java Development Kit with a collection of utilities, tools and runtime environments.
Is Java already installed?
Before installing Java, you can check if Java is already on your system. This way you save the installation steps and can use Java directly. You can find out whether Java is already present via the display for installed software on the Windows system. To do this, enter “Control Panel” in the Windows search line and click on the corresponding result. Then go to “Programs” > “Programs and Features”. There you will find all installed programs listed alphabetically. If Java is installed, there is also an entry for Java.
You can check whether you need the 64-bit version of Java by pressing the Windows-Shortcut [Windows] + [i] for the Windows settings. In the opened settings you get to the “Device specifications” via “System” > “About”. If it says “64-bit” in the “System Type” section, you can use both the 32-bit and 64-bit versions.
Java has stopped supporting 32-bit systems, so Java only runs on 64-bit operating systems. However, both the 32-bit and 64-bit versions will work fine in these. Therefore, both Java versions are recommended if you alternate between using a 32-bit and 64-bit browser. On the other hand, Oracle Corporation advises using a standard 32-bit browser and the 32-bit Java version for best performance.
Download Java for users
Follow the steps below to install the latest version of Java in Windows 10:
Step 1: In your default browser, open the Java download page from Oracle Corporation java.com. Here you will find the appropriate latest Java version for operating systems such as Windows, macOS, Linux or Solaris.
Step 2: Download the latest Java version for the applicable operating system.
Step 3: Decide whether you want to perform an online download using an executable IFTW file (“Install from the Web”) or as an offline download using an executable file. In the Java setup prompt, confirm that you really want to install Java. By doing so, you automatically agree to Java’s license agreement.
Step 4: With the Java download, you also get the Java Runtime Environment (JRE), which allows you to use Java plug-ins and run Java applets in a compatible browser. The JRE also includes the Java Virtual Machine, the Java main classes and Java libraries.
Have you upgraded your Windows operating system to Windows 11 and wondered if Java can be used with it? Then don’t worry: You can easily install Java on Windows 11.
Download Java: For developers
If you would like to use Java not only in the browser, but also as a programming language including tools, you can download the Java Development Kit (JDK) from the Java website. The JDK includes helpful tools and programs such as a Java editor, a compiler and interpreter, a debugger as well as documentation tools, API classes, archivers, signing programs, tools for applets and performance monitoring, and a web service importer. The Java Runtime Environment (JRE) is also included in the JDK.
Follow these steps to install Java in Windows 10 as a developer:
Step 1: Open the Developer website of Java. On the landing page, you will already see the download button for the current version of Java (as of 2022: Java 18). If you want to use the Java Development Kit, go to the Oracle website for Java downloads.
Step 2: Choose between options like “x64 Compressed Archive” as ZIP file, “x64 Installer” as EXE file or “x64 MSI Installer” as MSI file for the download. Confirm the Oracle Java license agreement for the download.
Step 3: Open the downloaded file and extract the ZIP files first or double-click on the installation file. The installation wizard will now guide you through the simple installation steps. The installation itself takes only a few minutes.
Was this article helpful?
Java JRE installation on Windows
Java JRE installation on Windows
Would you like to learn how to install the Java JRE application on a computer running Windows? In this tutorial, we are going to show you how to install Java JRE on a computer running Windows.
• Windows 2012 R2
• Windows 2016
• Windows 2019
• Windows 10
Windows Playlist:
On this page, we offer quick access to a list of videos related to Windows installation.
Don’t forget to subscribe to our youtube channel named FKIT.
Windows Related Tutorial:
On this page, we offer quick access to a list of tutorials related to Windows.
Tutorial Windows — Java JRE Installation
Access the Java website and download the latest version of Java JRE.
In our example, we downloaded the file named: jre-8u251-windows-x64.exe

Start the Java JRE Installation.
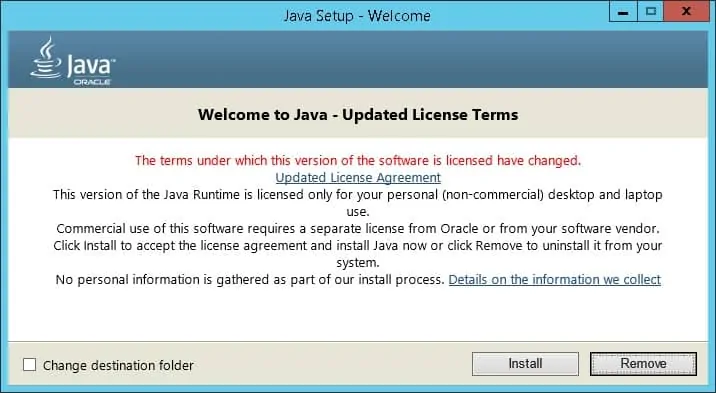
Click on the Install button.
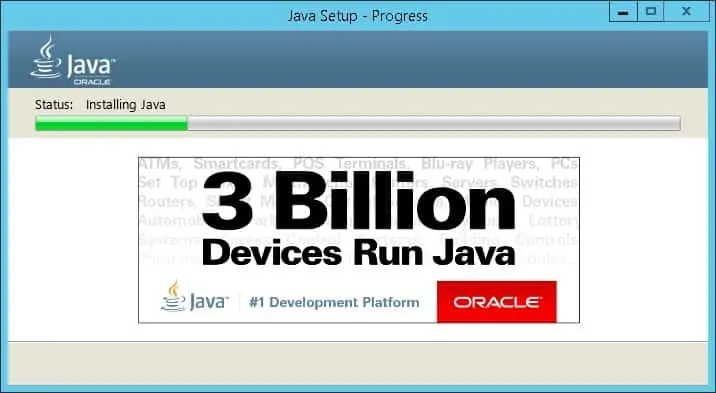
Wait for the Java JRE installation to finish.
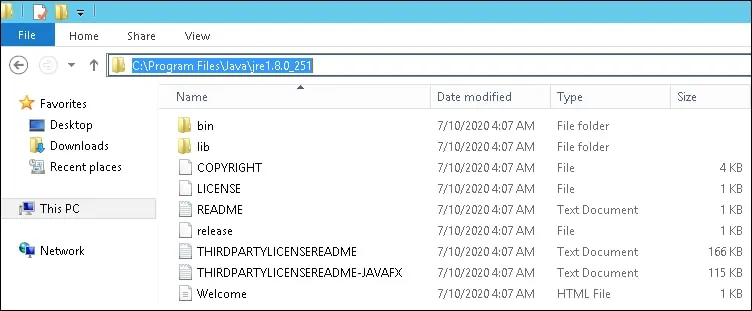
In our example, the Java JRE software was installed on the following directory.
As an Administrator, start a new POWERSHELL command-line prompt.
Create a system environment variable named JAVA_HOME.
Change the command above to reflect your Java installation path.
Start a new DOS command-line prompt.
Verify the existence of the variable JAVA_HOME.
Here is the command output.
Test the Java application using the JAVA_HOME environment variable.
Here is the command output.
Test the Java application without using the environment variable.
Here is the command output.
Congratulations! You have finished the Java JRE installation on Windows.
VirtualCoin CISSP, PMP, CCNP, MCSE, LPIC22020-12-26T12:42:12-03:00
Related Posts
Page load link
Ok
Эта инструкция устарела, используйте вместо неё более новую
Во многих моих тренингах так или иначе используется Java, либо как язык программирования для разработки автотестов, либо как виртуальная машина для запуска приложений, написанных на Java — инструментов тестирования, сред разработки, и даже клиент системы видеоконференций GotoWebinar требует наличия Java.
Поэтому я решил описать процедуру установки Java для операционной системы Windows и последующей настройки системы, потому что, к сожалению, недостаточно просто “запустить инсталлятор и всегда нажимать кнопку Next”.
1. Где взять Java?
На официальном сайте Oracle Java.
2. Какую версию выбрать?
Разумеется, последнюю доступную (на момент написания инструкции это Java 8).
Выбирая из 32-битной и 64-битной версий, берите 64-битную, если ваша операционная система это позволяет, потому что у неё менее строгие ограничения по памяти, доступной исполняемым Java-приложениям.
3. Что устанавливать, JRE или JDK?
Java Runtime Environment, или JRE — это виртуальная машина, позволяющая запускать приложения, написанные на языке программирования Java.
Java Development Kit, или JDK — это набор инструментов, для разработки программ на языке программирования Java (компилятор, архиватор, генератор документации и прочие). JRE разумеется тоже входит в дистрибутив JDK.
Правило очень простое: если вы собираетесь что-нибудь писать на языке программирования Java, значит вам потребуется JDK. А если только запускать готовые программы — тогда достаточно JRE.
4. Установка Java
Вот тут, действительно, всё просто — нужно запустить инсталлятор и следовать указаниям визарда. Можно просто всё время нажимать кнопку Next.
5. Настройка переменных окружения
К сожалению, инсталлятор Java не выполняет настройку переменных окружения, поэтому придётся сделать это вручную после установки.
Во-первых, необходимо установить переменную JAVA_HOME, которая должна указывать на директорию, в которую установлена Java. Многие программы используют эту переменную, чтобы определить, где находится Java.
Во-вторых, надо в переменную PATH добавить путь к директории %JAVA_HOME%\bin. Эта переменная указывает операционной системе список директорий, в которых нужно искать исполняемые файлы, и чтобы можно было запускать Java из консоли, переменная PATH должна быть правильно настроена.
Для установки переменных окружения сначала нужно открыть свойства компьютера, либо использовав сочетание клавиш Win-Pause, либо через меню “Пуск”:

Затем нужно выбрать “Дополнительные параметры системы”, в открывшемся диалоге перейти на вкладку “Дополнительно” и нажать кнопку “Переменные среды”, после чего появится диалог настройки переменных окружения.

Если у вас уже есть переменная окружения JAVA_HOME — надо её отредактировать, если нет — создать новую. В качестве значения нужно указать путь к директории, куда установлена Java, то есть, например c:\Program Files\Java\jdk1.8.0_25\, если вы установили JDK, либо c:\Program Files\Java\jre1.8.0_25\, если вы установили только JRE.
После того, как вы установили значение переменной JAVA_HOME, необходимо отредактировать значение переменной PATH, добавив туда путь к директории, где находятся исполняемые файлы Java, то есть %JAVA_HOME%\bin
И сохранить всё это, закрыв все открытые диалоги в обратном порядке кнопками OK.
Обратите внимание, что если вы устанавливаете JDK, то в названии директории указывается номер версии, поэтому впоследствии, когда вы решите установить более новую версию, не забудьте поменять значение переменной окружения JAVA_HOME.
После того, как вы изменили переменные окружения, новые значения будут действительны только для новых запускаемых программ, уже запущенные программы не узнают о том, что переменные окружения поменялись. Поэтому если вы, например, пытались запустить Java из консоли и у вас не получилось из-за неправильных настроек переменной PATH, вам придётся перезапустить консоль после того, как вы поменяли значение переменной.
6. Удаление лишних файлов
Запустите консоль (cmd) и выполните в ней команду where java.
В результате вы должны увидеть путь к исполняемому файлу java.exe, который операционная система должна успешно обнаружить в том месте, куда вы установили Java. Если файл не нашёлся — значит неправильно настроена переменная PATH и нужно вернуться к предыдущему пункту.
Однако иногда бывает и наоборот, находятся «лишние» исполняемые файлы:

Происходит это из-за того, что инсталлятор Java вместо того, чтобы правильно настроить переменные окружения, пытается положить исполняемые файлы в директорию C:\Windows\system32
Это не очень хорошо — засоряется системная директория, может возникнуть рассогласование версий Java (в разных директориях разные версии). Поэтому надо удалить из каталога C:\Windows\system32 исполняемые файлы java.exe, javaw.exe и javaws.exe, если они там обнаружатся.
Вот и всё, теперь можно пользоваться Java. Только не забывайте о том, что после установки новой версии надо будет обновить переменную окружения JAVA_HOME!
