
This guide provides step-by-step instructions to show you how to install Homebridge on Windows 10 / 11 as a service so it will automatically start on boot. Note: these instructions were originally written for Windows 10, but apply equally well to Windows 11.
- Prerequisites
-
Install Homebridge
- Step 1: Install Node.js
- Step 2: Install Homebridge
- Step 3: Setup Homebridge as a Service
-
Manage and Configure Homebridge
- With the Homebridge UI
- Using the command line
- How To Uninstall Homebridge
- Multiple Instances
- Additional Utilities
- Major Node.js Version Updates
- Configuration Reference
Prerequisites
⚠️ Some users report their iOS devices are not able to connect Homebridge running natively on Windows 10 / 11.
For this reason we recommend running Homebridge in a Linux virtual machine instead.
If you are using Windows 10 / 11 Pro / Edu / Enterprise, you can follow our guide for setting up Homebridge using Hyper-V, otherwise, see the required network settings for a VM running in Virtual Box or VMWare Workstation.
Before you get started, make sure you have the following ready:
- A computer running an update-to-date version of Windows 10 / 11 (this guide is based on 1903).
- An account with Administrator Privileges.
Install Homebridge
Step 1: Install Node.js
Homebridge requires Node.js installed on your system to run. Download the Active LTS version of Node.js (August 2024: v20) and run the installer with all the default options selected:
Node.js active LTS prebuilt installer
Open a new Node.js Command Prompt window as administrator, then check that Node.js and NPM have installed correctly by running the following commands:
# test node.js is working
node -v

# test npm is working
npm -v

Step 2: Install Homebridge
From the administrator Node.js command prompt, run the following command to install Homebridge and the Homebridge UI:
npm install -g --unsafe-perm homebridge homebridge-config-ui-x
Step 3: Setup Homebridge as a Service
To install Homebridge as a service we use the hb-service command provided by the Homebridge UI plugin:

If you see a Windows Firewall warning, make sure you grant Node.js permissions to access your private network.
Manage and Configure Homebridge
With the Homebridge UI
To access the Homebridge UI go to http://localhost:8581 in your browser.
The Homebridge UI will allow you to install, remove and update plugins, and modify the Homebridge config.json.
Review the Configuration Reference at the bottom of this guide.
Using the command line
To view your pairing QR code, you’ll need to view the logs which are stored in the $HOME\.homebridge\homebridge.log file. You can view the from a Node.js command prompt with this command:
To edit your config.json file you can open the $HOME\.homebridge\config.json file in a code editor of your choosing (VS Code is a good option with syntax checking).
Do not edit the config.json file using the a word processor that does text formatting as this will corrupt the file.
After making any changes to your config.json you need to restart Homebridge using by stopping and starting the service in Task Manager. You can also run this command from a Node.js command prompt:
hb-service stop
hb-service start
How To Uninstall Homebridge
Delete the service run the following command from a Node.js administrator command prompt:
Remove Homebridge and Homebridge Config UI X:
npm uninstall -g homebridge homebridge-config-ui-x
You can optionally delete all Homebridge data stored in $HOME\.homebridge and uninstall Node.js.
Multiple Instances
💡 Homebridge now supports Child Bridges which are an easier to manage alternative to running multiple instances.
Some users like to run multiple instances of Homebridge.
The hb-service command makes this easy to do via the --service-name flag.
See the hb-service documentation for instructions.
Additional Utilities
Some plugins may require you to have git installed, or the windows-build-tools to compile native modules.
git
While installing certain plugins you may encounter the spawn git ENOENT or ENOGIT error. To resolve this issue you need to install the git utility. You can download the installer from https://git-scm.com/downloads.
windows-build-tools
The windows-build-tools allow Homebridge plugins to compile native code for your platform. While increasingly rare, some plugins will require this. To install the windows-build-tools open a Node.js command prompt as an Administrator and run:
npm install --global windows-build-tools
Major Node.js Version Updates
It is recommended to run Homebridge on the current stable LTS version of Node.js. As at August 2024, the Active LTS version was v20. You can download new releases from the Node.js website.
Before updating Node.js, stop Homebridge:
Run the Node.js installer with the default options.
Once installed, run this command to rebuild the modules:
# This command can take a very long time to run. Be patient.
hb-service rebuild
Then start Homebridge again:
Configuration Reference
This table contains important information about your setup. You can use the information provided here as a reference when configuring or troubleshooting your environment after setting up Homebridge using the instructions below.
| File Location / Command | |
|---|---|
| Config File Path | %HOMEPATH%\.homebridge\config.json |
| Storage Path | %HOMEPATH%\.homebridge |
| Restart Command | hb-service restart |
| Stop Command | hb-service stop |
| Start Command | hb-service start |
| View Logs Command | hb-service logs |
|
Настройка DCM4CHEE сервера |
||||||
|
||||||
|
||||||
|
||||||
|
||||||
|
||||||
|
||||||
|
||||||
|
||||||
|
||||||
|
||||||
|
||||||
|
||||||
|
||||||
|
||||||
|
||||||
|
||||||
|
||||||
|
||||||
|
||||||
|
||||||
|
||||||
|
||||||
|
||||||
|
||||||
|
||||||
|
||||||
|
||||||
|
||||||
|
||||||
|
||||||
|
||||||
|
||||||
|
||||||
|
||||||
|
||||||
|
||||||
|
||||||
|
||||||
|
||||||
|

Если вы читаете эту статью, то есть вероятность того, что вы «наигрались» с готовыми решениями от вендоров и они перестали вас удовлетворять по тем или иным причинам. Но возможно вы попали сюда по каким-то иным соображениям, поэтому советую вам ознакомиться с предыдущей статьей цикла, описывающей возможные варианты построения своего умного дома. Вдруг вам понравятся другие пути.
А если вы все-таки решили погрузиться в мир Open Source решений, то мы постараемся раскрыть для вас некоторые важные аспекты этого направления.
Open Sourcе — в буквальном переводе означает «открытый код». Это означает, что разработчики не скрывают свой программный код, и его может модернизировать или использовать для своих целей абсолютно любой желающий. Естественно, эти программы являются бесплатными. Их разработкой обычно занимаются программисты-энтузиасты, которые, чаще всего группами, занимаются реализацией идей и превращают их в работоспособный продукт.
Конечно, эти программы можно использовать как для личного использования, так и в коммерческих целях. Обычно, его распространяют, базируясь на идеологии GNU GPL.
Плюсы и минусы
Ввиду того, что опенсорс продукты разрабатываются энтузиастами, у них есть свои плюсы и минусы:
ПлюсыМинусыБесплатноОткрытый код, который можно дорабатывать и изменятьЕго можно просто скачать и установить
Нерегулярность либо отсутствие обновленийОчень частые проблемы при обновлении (вылетают модули и система перестает работать)Проблемы с поддержкой
Отсутствие единого ответственного за продуктДовольно сложная установкаНастройка и внедрение занимают значительное времяТребуются навыки программирования и знание машинной логикиТребуется очень много дополнительной информации для настройки даже тех модулей, для которых существует подробная документация (форумы, чаты и общение со специалистами)
Плюс ко всему, у OpenSource проектов есть один огромнейший минус. Если основная группа разработчиков потеряла интерес к продукту, то он очень быстро «умирает», так как перестает развиваться. Такая же ситуация возможна, если лидер команды решает коммерциализировать продукт, или приходит инвестор, который вообще может закрыть проект или интегрировать его в свой. То есть конечный пользователь останется с тыквой и без туфелек.
Выбор системы
Как мы упоминали в более ранних статьях, у нас уже сформировался некий рейтинг используемых нашими пользователями бесплатных систем управления. Мы не будем рассказывать обо всех, но кратко опишем лидеров нашего рейтинга, чтобы вы понимали особенности каждого из них.
Home Assistant
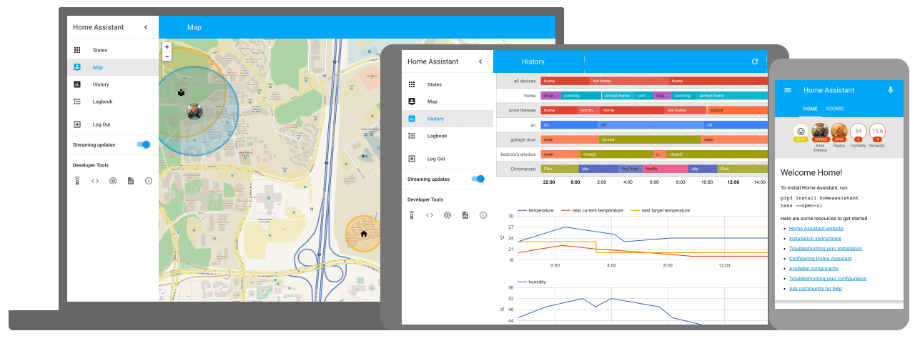
Home Assistant — open source система автоматизации, написанная на языке Python3. Она очень активно развивается, выходят постоянные обновления и появляется поддержка очень большого количества новых устройств. Также она довольно простыми способами интегрируется с большинством популярных экосистем и в ней осуществляется поддержка популярных онлайн-сервисов. В рейтинге сообщества Sprut.ai она занимает первое место.
Данную систему можно установить как на практически любой, достаточно производительный одноплатный ПК, так и на любой полноценный компьютер.
Что касается инструкций по установке, то помимо официальных мануалов от разработчиков, у нас есть целый цикл по установке и настройке системы от Александра Жабунина. Система поддерживает различные способы, в том числе и установку в виде распаковки образа на флешку (у нас на портале есть готовый образ для наших пользователей), но существуют и альтернативные способы установки.
Что касается особенностей системы, то одна из самых главных заключается в том, что система имеет два варианта — простой Home Assistant и Hass.io. Разница между ними в том, что в Hass.io есть раздел с аддонами, которые можно установить прямо из веб интерфейса. В простом Home Assistant такой возможности нет. Плюс к этому, есть еще один нюанс. Официальный образ от разработчика отличается от образов и вариантов установки на нашем портале тем, что у официального варианта нет полноценного доступа до хост-системы. В наших вариантах — доступ есть и он полноценный. Иногда это важно. Но некоторым может быть нет, поэтому они могут воспользоваться обычным вариантом установки, предлагаемым разработчиками. А что касается дополнительных настроек, то на нашем портале есть огромное количество информации на эту тему, которую вы можете с легкостью найти по тегу Home Assistant.
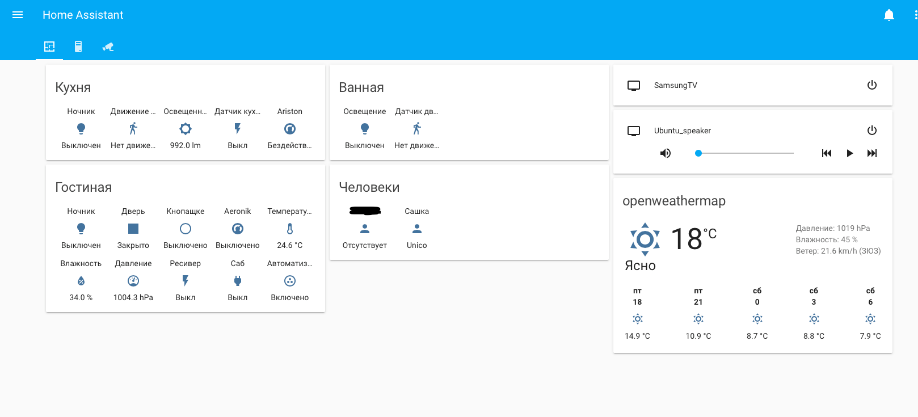
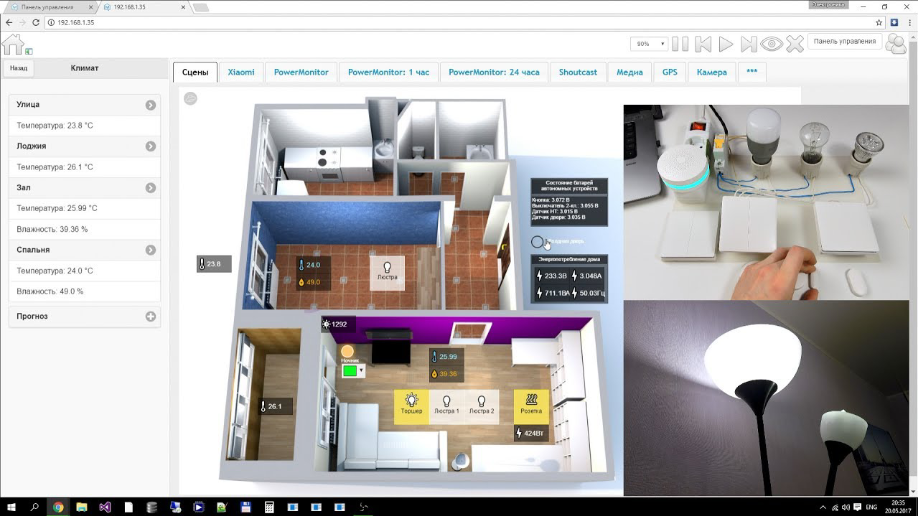
Пример внешнего вида интерфейса.Немного статей по данной системе, с которыми рекомендую ознакомиться.
Home Assistant, статья 1 (установка)
Home Assistant, статья 2 (базовая настройка).
Home Assistant, статья 3 (добавляем устройства)
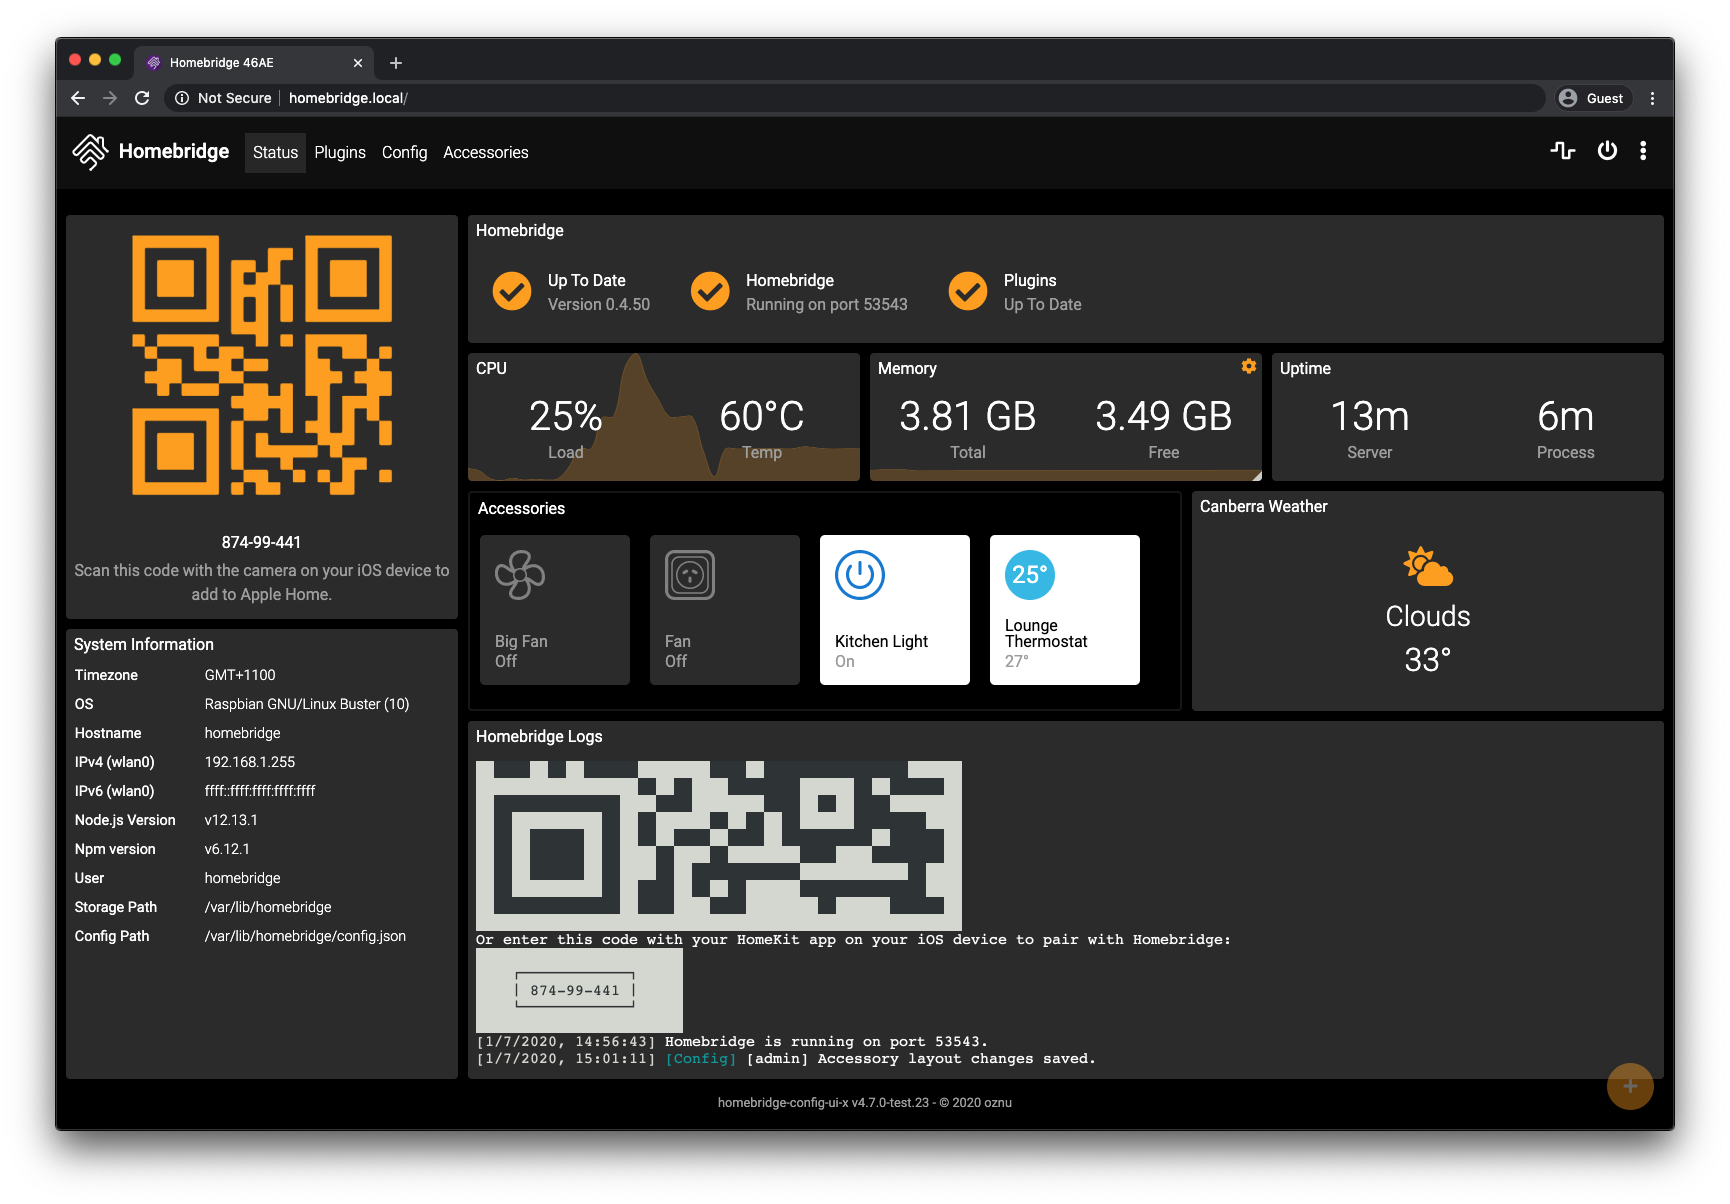
Homebridge

Homebridge — сервер, написанный на Nodejs с использованием API Apple, который позволяет добавить устройства в ваш Дом, которые не имеют сертификацию и изначально не поддерживают интеграцию в Apple HomeKit.
Благодаря слаженной работе разработчиков, на сегодняшний день, в систему интегрировано очень большое количество устройств. На нашем портале вы можете найти очень много статей на тему Raspberry Pi, которые могут вам помочь в настройке и изучении этой системы.
Homebridge является кросс-платформенным решением, которое можно установить на Windows, Linux и Mac OS X.
Также участниками общества были сделаны образы для Raspberry Pi уже с установленными Homebridge Вариант 1 и Вариант 2.
MajorDoMo
MajorDoMo — система автоматизации, написанная на языке PHP. Система быстро развивается и так же, как и все системы, является OpenSource проектом. Имеет свою армию фанатов. Но чтобы настроить данную систему идеально под себя, потребуются немалые знания языка PHP. Хотя есть поддержка модульной структуры и большое количество готовых модулей. К тому же, в отличии от большинства продуктов, Мажордомо имеет очень мощную Российскую команду разработчиков.
Если вы хотите почитать больше материалов на эту тему, воспользуйтесь поиском по тегу MajorDomo на нашем портале.
ioBroker
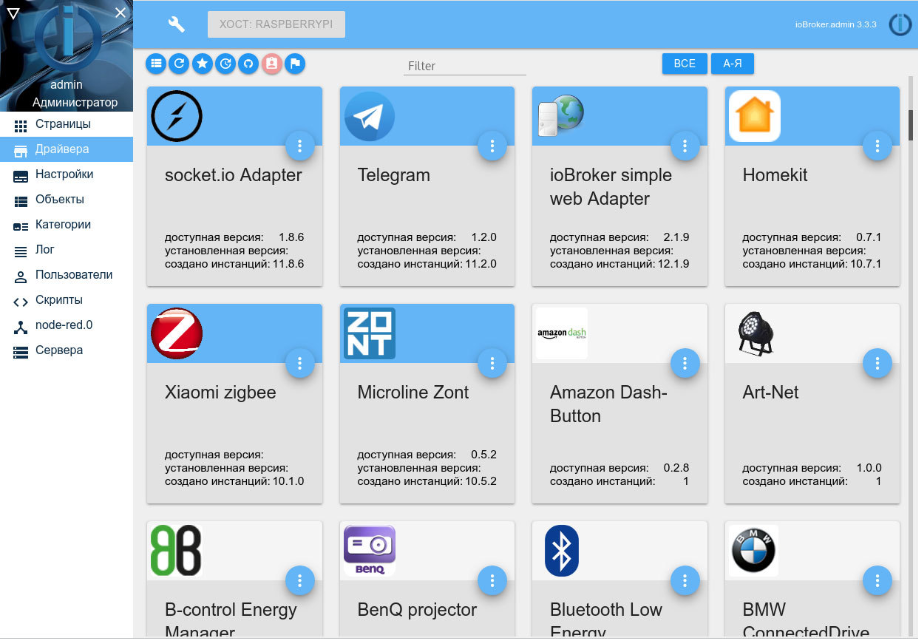
ioBroker — еще одна система для построения умного дома, написанная на NodeJS как и Homebridge.
Система тоже очень хорошо развивается и имеет большое количество интегрируемых устройств. Имеет армию своих фанатов, но интерфейс программы оставляет желать лучшего — дизайн остался еще в 2000х годах. Но, как говорится, «на вкус и цвет».
Хотя некоторые участники нашего сообщества утверждают, что для высоконагруженных систем с большим количеством устройств, ioBroker — это единственное подходящее решение. Это, конечно, может относиться к промышленным автоматизациям, но факт наличия подобного мнения означает, что систему используют даже в таких целях.
Что касается обычного использования системы для классического умного дома, то у нас на портале есть несколько интересных статей на эту тематику:
А если вы хотите почитать побольше, то можете воспользоваться тегом ioBroker на нашем портале.
Node RED
Node RED — визуальная среда программирования, использующая API и онлайн сервисы, соединяющая между собой исполнительные устройства. NodeRED можно установить на любую систему, главное, чтобы можно было установить NodeJS.
Так как данная система является визуальной, то тут Минимум кода и максимум визуальности. Система на нашем портале пользуется большой популярностью и имеет много статей.
Хотя малое количество кода — это не совсем правда. Чтобы создать нечто сложное, вам придется все равно писать и писать код. Для каждого блока в вашей блок-схеме.
Но система обладает значительным преимуществом перед остальными. Она может быть интегрирована с чем угодно.
Например, мы можем использовать Home Assistant только в качестве визуального интерфейса управления и сервера для подключения устройств, а все автоматизации можно выполнять в Node-Red. Он и сам является полноценной системой автоматизации. Есть огромное количество модулей для интеграции тех или иных устройств и систем. Поэтому он и является одним из самых универсальных решений, которое можно водрузить поверх уже существующей системы как дополнение, или создавать на его базе новую, полноценную систему управления вашим умным домом.
Статьи по данной теме можно найти на нашем портале по тегу Node Red.
Domoticz
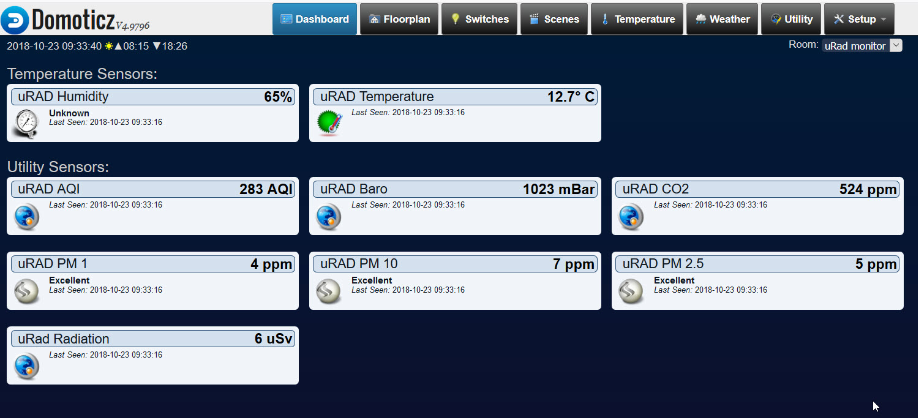
Domoticz — еще одна система управления умными домами. На данный момент тоже активно развивается и можно установить на любую ОС, но система, на сегодняшний день, не является идеальной. Начиная со страшненького дизайна и заканчивая довольно медленным развитием, относительно конкурентов. Именно поэтому в нашем сообществе она не сильно пользуется популярностью.

OpenHab
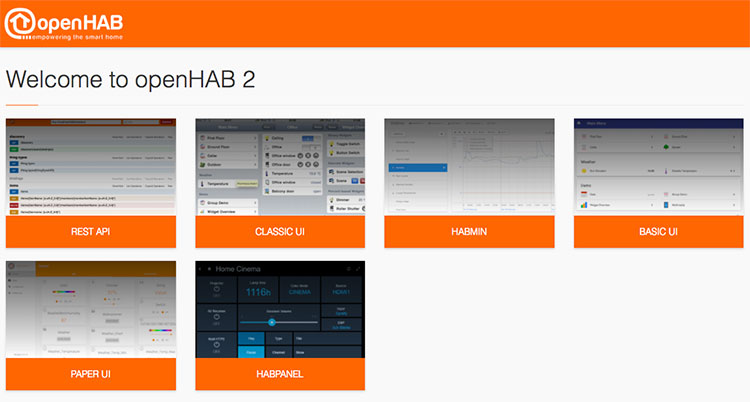
openHAB — это специальный сервер, который может работать на любом компьютере под управлением любой ОС (вы даже можете использовать RaspberryPi). Вся установка заключается в распаковывании дистрибутива сервера и установке Java машины. Далее начинается процесс настройки и созидания.
OpenHAB, по сравнению с предыдущим участником нашего рейтинга — ioBroker, имеет более современный интерфейс и насчитывает поддержку более 50 протоколов и типов устройств.
У системы есть свои плюсы и минусы, для описания которых понадобилось написать отдельную статью.
Но в целом — это довольно популярная система, которой многие с удовольствием пользуются.
Выбор железа
Эта тема достойна отдельной статьи, так как вариантов, куда установить систему для вашего умного дома, существует огромное множество. И мы ее таки напишем. Но в контексте данной статьи, было бы кощунственно не упомянуть самые популярные варианты, которые используют наши участники в качестве ядра для своего умного дома.
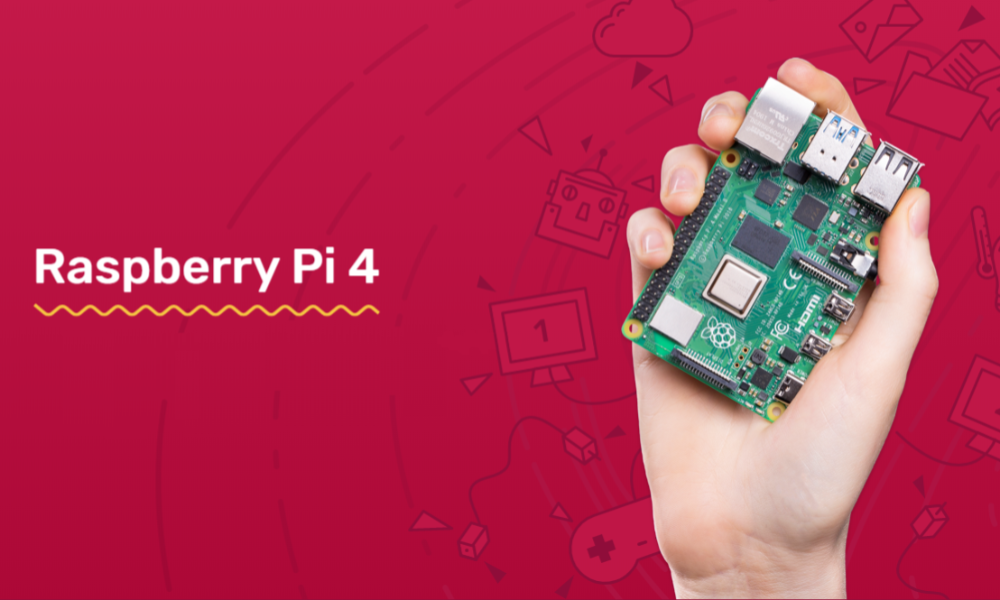
Различные модели Raspberry Pi

Дешевые неттопы
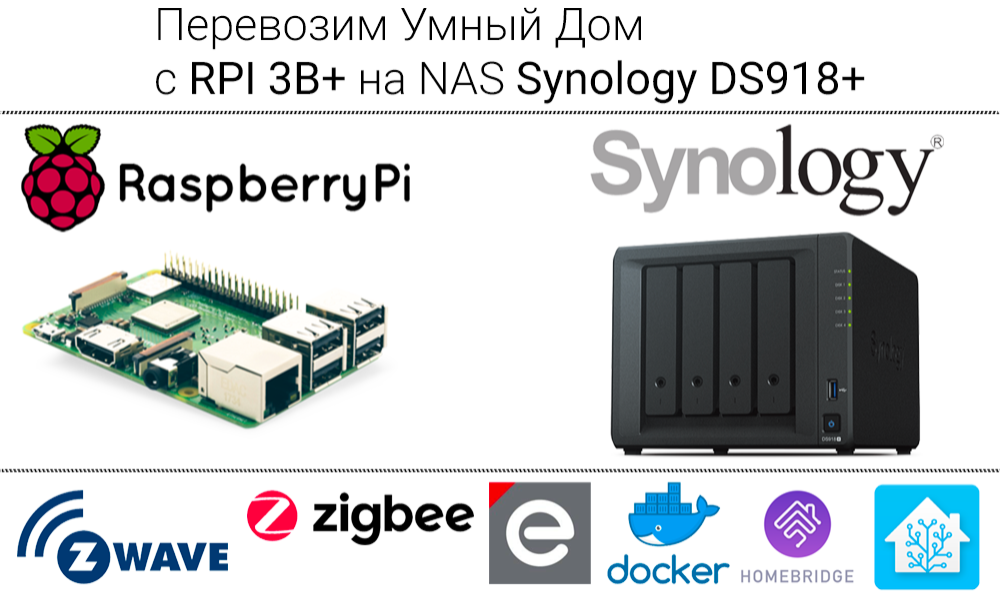
NAS от Synology
Выбор железа ограничен только вашей фантазией, но народ руководствуется прагматичными критериями.
Например, Raspberry Pi — это не очень дорого, потребляет мало электричества и обладает миниатюрным размером. Но производительность, для некоторых задач, может быть недостаточна. Да и флешка — достаточно ненадежное устройство для установки системы с постоянно обновляющимися базами данных. А решения с покупкой б/у-шного неттопа, за смешные деньги, имеют место быть. Причем с производительностью не возникает вообще никаких проблем. И хранение на SSD вполне себе оправдывает все. Ну а тем, кто владеет NAS от Synology — вообще повезло. Туда можно поставить все что угодно в Docker.
Но как я раньше и говорил, все это достойно отдельной статьи, ибо вариантов огромное количество, а плюсы и минусы есть у каждого из них.
Выводы
Основной вывод — вам придется подтягивать свои навыки программирования. Придется читать много на английском языке, так как оказывается даже самые «безумные», на первый взгляд, автоматизации для вашего дома, кто-то уже придумывал и задача так или иначе была решена. Но придется продираться через обсуждения различных вариантов решений задачи, и они будут содержать значительные куски кода, которые вам надо будет переписывать под себя. Это не так сложно, как может показаться, но занимает много времени. Хотя это, скорее, полезный навык в сегодняшних реалиях, когда даже для простейших автоматизаций в HomeKit уже необходимо понимание машинной логики. Иначе никак.
Второй основной вывод — бесплатность. С одной стороны — вам не придется покупать программное обеспечение. С другой — вы будете тратить свое время, а оно тоже стоит денег. Поэтому все подобные решения можно считать условно-бесплатными. К тому же, на железо все равно придется тратиться. Просто выбор намного богаче. И это несомненный плюс.
Третий основной вывод — установленная система без датчиков и исполнительных устройств вам ничего не даст. Вам все равно нужно покупать устройства. Плюс в том, что вы теперь не ограничены одним производителем и вольны выбирать любые подходящие вам решения. И подключать устройства вы сможете как через купленные ранее шлюзы (если они поддерживают эту функцию), так и через USB стики для соответствующих протоколов. Полная свобода.
Поэтому если вы все-таки решили остановить свой выбор на OpenSource решениях, то на данный момент, среди нашего сообщества, наибольшей популярностью пользуются 3 системы: Home Assistant, Homebridge и MajorDoMo.
Если вы хотите немного покодить, хотите хорошую поддержку большинства устройств, продаваемых на рынке, большое и дружное сообщество, которое вам всегда поможет, то ваш выбор — это Home Assistant.
Если перед вами стоит задача только сделать доступными ваши устройства в приложении Дом на вашем iPhone или iPad, то ваш выбор очевиден — HomeBridge. Возиться с кодом все равно придется, но намного меньше, чем в других вариантах.
Если вам нравится веб интерфейс, вы придерживаетесь классических подходов к визуализации, немного знаете язык программирования PHP и обладаете временем и терпением, то ваш выбор — MajorDomo.
Если хотите более функциональную систему с красивым дизайном, но с плохой русскоязычной поддержкой, то это openHAB.
Хотите систему функциональную, но более менее поддерживаемую русскоязычным сообществом, но с убогим дизайном, Domoticz — ваше все. Хотя, сомнительный выбор.
Ну и если вы хотите программировать визуально, то для вас подходит NodeRed.
А вот если для вас определяющим выбором является голосовой ассистент, с помощью которого вы хотите управлять своим умным домом, то в принципе Open Source системы как раз являются лучшим выбором для интеграции, так как у них, обычно, есть поддержка нескольких ассистентов одновременно. И это огромный такой плюс для тех, у кого члены семьи пользуются, например, и Android и iPhone.
Home Assistant интегрируется с Яндекс Алисой, Siri и Google Assistant
HomeBridge — только Siri и Яндекс Алиса
OpenHAB — Яндекс Алиса, Google Assistant и Siri
MajorDomo — Яндекс Алиса, Google Assistant и Siri
ioBroker — Яндекс Алиса, Siri и Google Assistant
Domoticz — Siri и Google Assistant
NodeRED — вообще с чем угодно, зависит от того, как вы его ставите и с чем он взаимодействует.
Так что выбор за вами. Удачи!
Предисловие
Есть несколько моментов, которые надо учесть перед всеми необходимыми действиями:Необходимо использовать только командную строку Windows. Не пытайтесь использовать Windows PowerShell.
Вы должны выполнить следующие шаги, используя учетную запись, которую вы будете использовать для запуска HomeBridge. Это связано с тем, что по умолчанию некоторые установленные модули HomeBridge устанавливаются в учетной записи зарегистрированного пользователя по адресу: C:\Users\_your user name_\AppData\Roaming\npm\node_modulesи не будут доступны из других учетных записей Windows.
Вы можете создать пользователя HomeBridge. А затем выполнить установку при входе в систему под этим пользователем.Итак, приступим!
Установите Bonjour SDK для разработчиков
Загрузите и установите Bonjour for Developers 3.0.0.10 с сайта Apple, затем выберите «Bonjour SDK для Windows», а затем «Bonjour SDK для Windows v3.0» для загрузки. Вам нужно будет подписаться на бесплатную учетную запись Apple Developer.
Установите 64-разрядную версию Nodejs
Загрузите, а затем установите Nodejs v8.9.4 64BIT. Оставьте все значения по умолчанию как есть при установке.
Установите windows-build-tools
Откройте командную строку Windows в административном режиме. Для этого щелкните значок «Пуск в строке меню Windows» и начните вводить «cmd». Когда вы увидите, что приложение Командная строка появляется в результатах поиска, щелкните его правой кнопкой мыши и выберите Запуск от имени администратора. Выполните:
npm install -g windows-build-toolsЭто занимает некоторое время.
Установите OpenSSL 64-bit
Загрузить Open SSL 1.0.2o 64BIT. Вы должны использовать версию 1.0.x из OpenSSL и не использовать версии серии 1.1.x. Это связано с тем, что файл библиотеки был переименован в версии 1.1.x, что вызывает ошибки компиляции во время установки homebridge. Во время установки OpenSSL одно из отображаемых диалоговых окон спросит вас, куда вы хотите установить DLL OpenSSL. Выберите вариант для копирования в «Каталог двоичных файлов OpenSSL.
Вы должны открыть новую командную строку Windows в режиме администратора. Не использовать командную строку Windows, которую вы использовали на шаге выше. Теперь установите Homebridge из командной строки Windows:
npm install -g homebridgeЗапустите Homebridge
Откройте новую командную строку Windows не используйте повторно командную строку из шагов выше. Введите:
Теперь вам нужно создать файл config.json для homebridge. По умолчанию он должен быть помещен в папку:
%userprofile%\.homebridgeDCM4CHEE 2.17.1 Installation Instructions
Version 2.17.1 is the latest version of the archive. It is recommended that you install this version and not an older version because of improvements and bug fixes.
You will find similar (but not as detailed) installation documentation in the doc directory of your dcm4chee distribution.
Minimum System Requirements
JDK 5 or higher
512 MB RAM
200 MB hard disk space (additional to archive storage disk space)
400 MHz CPU
Supported Databases
Need to install separately.
PostgreSQL 8.1+
MySQL 4.1+
Oracle 9i+
SQL Server 2000+
DB2 8.1+
Firebird 2.1+
Hypersonic SQL (Embedded in JBoss AS) — not suitable for production use!
Security Notes
See how to limit the server access.
Compression Notes
For image compression/decompression, dcm4chee utilizes Sun’s Java Advanced Imaging Image I/O Tools 1.1.
- The binary distribution packages of dcm4chee already includes necessary JARs and native libraries for Windows and Linux i586.
- For Linux-amd64, here is the latest Linux binaries (download it and rename to libclib_jiio.so) and replace the old libclib_jiio.so in dcm4chee/bin/native.
- If you have already installed (or are installing) the JAI Image IO distribution from http://download.java.net/media/jai-imageio/builds/release/1.1/ separate from dcm4chee in a standalone or classpath fashion, you should remove the following files, or potentially suffer from version conflicts:
$DCM4CHEE_HOME/server/default/lib/jai_imageio.jar$DCM4CHEE_HOME/server/default/lib/clibwrapper_jiio.jar$DCM4CHEE_HOME/bin/native/clib_jiio.dll$DCM4CHEE_HOME/bin/native/clib_jiio_sse2.dll$DCM4CHEE_HOME/bin/native/clib_jiio_util.dll$DCM4CHEE_HOME/bin/native/libclib_jiio.so
- For Mac OSX and 64 bit Java on Windows there is no free, native Image I/O implementation available. Because of the missing implementations you have to change a file in dcm4chee if you want to have the WADO service running. Please have a look at step 8 to see how to change the file (or modify the settings via the JMX console). See also:
- http://java.net/jira/browse/JAI_IMAGEIO_CORE-103
- http://java.net/jira/browse/JAI_IMAGEIO_CORE-62
- FYI — You can run on 64-bit Windows, you just need to use the 32-bit JDK! In that case you do not need to do the above steps of changing the WADO service.
Additional notes from Nicolas Roduit:
I want to clarify the big misunderstanding about the Java imageio library included in dcm4chee and Weasis. I understand that the compression issue with imageio is confusing.
The imageio lib is used for reading and writing the different image formats (image compression). It contains a pure java part (jai_imageio.jar) and a native part (set in $DCM4CHEE_HOME/bin/native/). The native part only exist for the following operating systems:
- Windows 32-bit
- Linux x86 32 and 64-bit
- Solaris (all processors)
Thanks to Sun and Oracle for this limitation, but that’s not all, some encoders and decoders are exclusively available in the native part. That means NOT available in the pure java part. Here are these TSUIDs:
- 1.2.840.10008.1.2.4.51 JPEG Extended (Process 2 & 4): Default Transfer Syntax for Lossy JPEG 12 Bit Image Compression (Process 4 only)
- 1.2.840.10008.1.2.4.57 JPEG Lossless, Non-Hierarchical (Process 14)
- 1.2.840.10008.1.2.4.70 JPEG Lossless, Non-Hierarchical, First-Order Prediction (Process 14 Selection Value 1): Default Transfer Syntax for Lossless JPEG Image Compression
- 1.2.840.10008.1.2.4.80 JPEG-LS Lossless Image Compression
- 1.2.840.10008.1.2.4.81 JPEG-LS Lossy (Near-Lossless) Image Compression
And some codecs exist in the pure Java library but have a different implementation in the native library (the native implementation is used by default when available):
- 1.2.840.10008.1.2.4.50 JPEG Baseline (Process 1): Default Transfer Syntax for Lossy JPEG 8 Bit Image Compression
- 1.2.840.10008.1.2.4.90 JPEG 2000 Image Compression (Lossless Only)
- 1.2.840.10008.1.2.4.91 JPEG 2000 Image Compression
About dcm4chee
That’s why it is recommended to install dcm4chee on Linux, Solaris or Windows (also with windows 64-bit but only with a 32-bit Java Runtime). Otherwise, the dcm4chee services won’t be able to compress or uncompress some DICOM files. One of the mandatory requirement (WADO spec) of a WADO service is to uncompress any DICOM file. The latter requirement cannot be totally fulfilled if you install dcm4chee on OS X.
We provide on the Osirix website this document which recommends to install dcm4chee on Linux and to use the jpeg2000 compression (if you want to compress all the images stored in dcm4chee).
About Weasis
In the table of Platform Compatibility of DICOM Transfer Syntax you can see the compatibility related to the list above. This compatibility is true ONLY when Weasis loads files from a local storage (not WADO). When downloading images with the WADO service of dcm4chee that contain native imageio library, ALL the images can be read on ALL operating systems, because Weasis (in recent version) is able to request the WADO server for an uncompressed syntax (see WEA-73) when the syntax is not supported by the operating system running Weasis.
Installation Procedure:
1. Download and extract the binary distribution package of dcm4chee:
Download the latest version of dcm4chee that is relevant to the database of your choice from the dcm4che Sourceforge site . Extract the package (e.g. dcm4chee-2.17.1-psql.zip for the PostgreSQL version). When extracting, avoid using a directory that has a name that contains spaces in order to avoid issues with running command line applications with spaces in the path name.
2. Download the binary distribution package of JBoss Application Server 4.2.3.GA:
Download the binary distribution of JBoss 4.2.3.GA from their website and extract it into a different directory.
Use neither JBoss 5 nor JBoss 6, because it is completely re-architected and is significantly different than the 4.2 line of JBoss!
If you want to use JDK 5, don’t download JBoss for JDK 6 (jboss-4.2.3.GA-jdk6.zip) — use jboss-4.2.3.GA.zip!
dcm4chee requires Java Development Kit (JDK) and not just the Java Runtime Environment (JRE).
3. Copy files from JBoss to dcm4chee:
Dcm4chee consists of components that run within the JBoss application server platform. This step will copy the JBoss runtime files to the dcm4chee directory.
Go to the dcm4chee-2.17.1-xxx/bin directory and execute the install_jboss.bat or install_jboss.sh script, as appropriate for your operating system, with the path of your JBoss AS installation directory as a parameter.
For example:
C:\apps\dcm4chee-2.17.1-psql\bin>install_jboss.bat c:\apps\jboss-4.2.3.GA
4. Install the Database Software and create the DCM4CHEE Database:
If you do not already have database software running, install it now. Please follow the vendor’s installation instructions to do so. Some operating systems already come with database software installed (e.g. Mac OSX and MySQL). Even in those cases though, it is helpful for you to review the database vendor’s documentation. After all, the database is an extremely important part of the dcm4chee solution.
See below for links to database-specific installation notes:
- PostgreSQL
- MySQL
- Oracle
- Microsoft SQL Server
- DB2
- Firebird
- Hypersonic SQL
5. Deploy the Audit Record Repository (ARR)
Starting with dcm4chee-2.12.0, the binary distribution package of the archive application does NOT include the dcm4chee Audit Record Repository (ARR) anymore. The ARR maintains an audit log of all transactions within the archive. This is necessary for HIPAA and IHE. Some dcm4chee deployment scenarios call for the deployment of the ARR in a standalone fashion because it acts as an ARR for more than one dcm4chee instance, or multiple applications which can take advantage of an external ARR. Commonly though it is deployed within the dcm4chee archive itself. If you are not running the ARR in a standalone fashion, you must do the following:
- Download the dcm4chee Audit Record Repository 3.0.11 (dcm4chee-arr-3.0.11) available at
http://sourceforge.net/projects/dcm4che/files/dcm4chee-arr/3.0.11/. - Go to the dcm4chee-2.17.1-xxx/bin directory and execute the install_arr.bat or install_arr.sh script, as appropriate for your operating system, with the path of the dcm4chee-arr-3.0.11 installation directory as
parameter.- Because of the growth factor of the audit database, it is recommended to store the records in it’s own database. Create the audit record repository database instance: arrdb, and grant sufficient privileges to the DB user (see the datasource descriptor deploy/arr-xxx-ds.xml for user information, typically arr with pw of arr). Also see above links to DB-specific pages for tips.
6. Set environment variable JAVA_HOME to JDK location.
The dcm4chee startup/shutdown scripts depend on the JAVA_HOME environment variable in order to find the Java executables and libraries. For example, if your JDK is installed at «C:\Program Files\Java\jdk1.5.0_22» then that is the path to JAVA_HOME
If you’re not sure what an environment variable is, check with your IT staff or review this wikipedia page and/or consult the documentation for your operating system.
7. Optional: Adjust maximum allocation of heap memory:
Java programs run with a finite amount of memory allocated to them. If you anticipate high volumes of storage and retrievals, or very large datasets, you may want to increase the max (-Xmx) heap size of the Java process.
For example, in Windows see the file dcm4chee-2.17.1-xxx/bin/run.bat:
rem Sun JVM memory allocation pool parameters. Modify as appropriate.
set JAVA_OPTS=%JAVA_OPTS% -Xms128m -Xmx512m -XX:MaxPermSize=128m
Linux/Unix/OSX: dcm4chee-2.17.1-xxx/bin/run.conf
# Specify options to pass to the Java VM.
if [ "x$JAVA_OPTS" = "x" ]; then
JAVA_OPTS="-Xms128m -Xmx512m -XX:MaxPermSize=128m ..
fi
according available RAM and memory requirements of other processes on this node.
E.g.: if only 512 MB RAM are available, you should decrease the default value -Xmx512m to (e.g.) -Xmx300.
8. Mac OSX and Windows x64 specific changes for the WADO service:
Because there are no native codecs (compression/decompression) for these platforms, it is necessary to edit configuration to disable the loading of the native codecs. These platforms are not able to take advantage of compression/decompression. The only default loading of the codecs is in the WADO service. You can either edit the property within the JMX Console web user interface (see step 11), or edit the configuration files directly:
Change com.sun.media.imageioimpl.plugins.jpeg.CLibJPEGImageWriter to
com.sun.image.codec.jpeg.JPEGImageEncoder for the ImageWriterClass:
$DCM4CHEE_HOME/server/default/conf/xmdesc/dcm4chee-wado-xmbean.xml:
@@ -122,7 +122,7 @@
<name>ImageWriterClass</name>
<type>java.lang.String</type>
<descriptors>
- <value value="com.sun.media.imageioimpl.plugins.jpeg.CLibJPEGImageWriter" />
+ <value value="com.sun.image.codec.jpeg.JPEGImageEncoder" />
</descriptors>
</attribute>
9. Test the installation:
To test your installation, go to the dcm4chee-2.17.1-xxx/bin directory and execute the run.bat or run.sh script, as appropriate for your operating system. Your output should look like the following and contain no error or exception messages:
=========================================================================

JBoss Bootstrap Environment

JBOSS_HOME: /home/gunter/dcm4chee-2.17.1-psql

JAVA: /usr/lib/j2sdk1.5-sun/bin/java

JAVA_OPTS: -Dprogram.name=run.sh -server -Xms128m -Xmx512m
-Dsun.rmi.dgc.client.gcInterval=3600000
-Dsun.rmi.dgc.server.gcInterval=3600000 -Djava.awt.headless=true
-Dapp.name=dcm4chee -Djava.net.preferIPv4Stack=true
-Djava.library.path=/home/gunter/dcm4chee-2.17.1-psql/bin/native

CLASSPATH: /home/gunter/dcm4chee-2.17.1-psql/bin/run.jar:
/usr/lib/j2sdk1.5-sun/lib/tools.jar

=========================================================================

23:17:52,373 INFO [Server] Starting JBoss (MX MicroKernel)...
23:17:52,374 INFO [Server] Release ID: JBoss [Trinity] 4.2.3.GA (build:
SVNTag=JBoss_4_2_3_GA date=200807181439)
:
23:19:49,580 INFO [AjpProtocol] Starting Coyote AJP/1.3 on ajp-127.0.0.1-8009
23:19:49,632 INFO [Server] JBoss (MX MicroKernel) [4.2.3.GA (build:
SVNTag=JBoss_4_2_3_GA date=200807181439)] Started in 1m:57s:103ms
10. Login into web interface:
Connect to the Web Interface at http://localhost:8080/dcm4chee-web3/ of the archare Mozilla-Firefox and Microsoft Internet Explorer v6.x). You should get the User Login Screen. Login in using default Administrator account ‘admin’, with password ‘admin’.
11. Login to JMX Console:
Connect to JBoss’s JMX Console at http://localhost:8080/jmx-console/ and login using also the Administrator account ‘admin’, with password ‘admin’.
Follow the link «group=ONLINE_STORAGE,service=FileSystemMgt» to the configuration page for File System Management service under the «dcm4chee.archive» heading.
Invoke the operation addRWFileSystem(), with argument dirPath specifying the directory, where the archive shall store received objects/images.
If no Storage File System is configured, the archive will auto-configure dcm4chee-2.17.1-xxx/server/default/archive as Storage File System, when receiving the first object/image.
12. Optional: Change the default AE Title
Connect to JBoss’s JMX Console at http://localhost:8080/jmx-console/ and login using also the Administrator account ‘admin’, with password ‘admin’.
Follow the link «service=AE» to the configuration page for AE (Application Entity — a DICOM term for a DICOM node on the network) service under the «dcm4chee.archive» heading.
Invoke the operation updateAETitle with the old AE Title (DCM4CHEE if unchanged from the default), and new AE Title as parameters.
This will update the following configurations:
- update the retrieve AET of file systems, associated to the current retrieve AET of this node
- update retrieveAETs of all instances, series and studies that have files on these filesystems
- update the entry for the retrieve AE in the AE Configuration
- update the AE Title of all services listed by attribute OtherServiceAETitleAttributesToUpdate
13. Optional: Configure image compression:
As noted above, this is not applicable for Mac OSX or 64 bit Windows.
At default configuration, received images are stored as received — in particular, no compression is performed. Lossless compression of received uncompressed images can be activated by attribute «CompressionRules» in the configuration page for the Storage SCP Service (service=StoreScp). E.g. set it to «JLSL», to compress all type of images received from any Storage SCU using JPEG-LS Lossless codec.
14. Optional: Modify web image cache directories:
The directories used for caching generated JPEG representations of archived images requested by Web Access to DICOM Persistent Objects (WADO) can be specified by attributes «CacheDataRootDirectory» and «CacheJournalRootDirectory» in the configuration page for the WADO Service (service=WADOService).
Defaults: dcm4chee-2.17.1-xxx/server/default/wadocachedata and dcm4chee-2.17.1-xxx/server/default/wadocachejournal.
The directory used for caching generated PDF representations of archived Structured Report Documents requested by IHE Retrieve Information for Display (RID) Services can be specified by modifying BASE_DIR=docstore/rid/store in file conf/dcm4chee-docstore/dcm4chee-docstore-cfg.xml (this file will not exists before processing the first RID request).
15. Optional: Allow remote access:
Not necessary with versions 2.13.6 and newer!
By default, JBoss does not bind to anything except the local address. Use
run -b 0.0.0.0
to allow running generic access.
16. Test DICOM storage:
Send some object/images to the archive’s Storage SCP, e.g. by using the send utility of the dcm4che 2.x (dicom toolkit) core package available at Sourceforge here. E.g:
> dcm4che-2.0.23/bin/dcmsnd DCM4CHEE@localhost:11112 ~/mesa/storage/modality/MR
Refresh the Web Interface (http://localhost:8080/dcm4chee-web3/), which shall now show the the list of received studies. You may need to click the ‘binocular’ icon to initiate a search.
Expand one study row to show contained series. Expand one of these series to show contained instances. In the case of images, you can follow the image icon on the right, to invoke a http WADO request for a JPEG presentation of this image, which will be displayed in a separate browser window.
17. Test object retrieval:
To test object retrieval, you need an external Storage SCP acting as Move Destination, e.g. by using the receiver utility of the dcm4che 2.x DICOM toolkit:
> dcm4che-2.0.23/bin/dcmrcv 11113
13:55:14,782 INFO - Start listening on 0.0.0.0/0.0.0.0:11113
Start Server listening on port 11113
You also need to configure an additional Application Entity Title identifying this Move Destination. Do so in the «AE Management» tab within the Web user interface.
E.g. new AET
AE Title: DCMRCV
Hostname: localhost
Port: 11113
Switch back to the Study List («Folder»), mark studies to retrieve using the check box on the right, select «DCMRCV» as send destination in the combo box above and click on the send button left from it.
18. Install as a service:
After verifying that the archive works, you may want to run it as a service so that it stays running even when you log out. If still running in the console window, you may stop the archive by Ctrl+C, and
Windows:
- install it as Windows service executing install_service.bat (see Running dcm4chee PACS as a Windows service or daemon)
- aditional notes:
- to adjust maximum allocation of heap memory — you need to edit install_service.bat (not run.bat)
- for 64-bit Windows download JavaService version 2.0.7.64 from http://javaservice.objectweb.org and replace file bin/JavaService.exe
- if your service fails while starting («Service could not be started») and you are using JDK 6:
- check your your Windows Event Log — if there are messages like «The specified module could not be found.», «Failed creating java …\jvm.dll» — continue with next step
- try to add
%JAVA_HOME%\binto the system PATH environment variable, so java could find filemscvr71.dll(for details see https://issues.apache.org/bugzilla/show_bug.cgi?id=41538 and http://www.duckware.com/tech/java6msvcr71.html)
- many versions of Windows need to be restarted after modifying environment variables (like JAVA_HOME and PATH)
Redhat and Ubuntu Linux:
- copy the init script dcm4chee_init_redhat.sh to /etc/init.d/ and adjust it according your installation location of the archive and the JDK and under which user the archive application shall run.
Mac OSX
- See this forum post (and others) for suggestions and startup item/plist scripts: http://forums.dcm4che.org/jiveforums/thread.jspa?threadID=593&tstart=0