Table of Contents
- Introduction
- Prerequisites
- System Requirements
- Downloading Intel HAXM
- Installing Standalone Intel HAXM on Windows
- Installing HAXM silently on Windows
- Installing Intel HAXM on Windows via Android Studio
- Removing Intel HAXM
- Using Intel HAXM
- Troubleshooting
- Tips and Tricks
Introduction
This document will guide you through installing the Intel Hardware Accelerated Execution Manager (Intel HAXM), a hardware-assisted virtualization engine (hypervisor) that uses Intel Virtualization Technology (Intel VT) to speed up Android development.
Prerequisites
Intel HAXM requires the Android SDK to be installed (version 17 or higher). For more information, refer to the Android developer website (https://developer.android.com/studio/index.html).
System Requirements
Hardware Requirements:
- Intel processor with support for Intel VT-x, Intel EM64T (Intel 64), and Execute Disable (XD) Bit functionality
- At least 4 GB of available RAM, 8 GB recommended
Supported Operating Systems:
- Microsoft Windows 10 64-bit
- Microsoft Windows 8 and 8.1 64-bit
- Microsoft Windows 7 64-bit*
Important: Intel HAXM cannot be used on systems without an Intel processor, or with an Intel processor that lacks the hardware features described in the «Hardware Requirements» section above.
To determine the capabilities of your Intel processor, visit http://ark.intel.com.
Additionally, Intel HAXM can be used only with Android x86 and x86_64 emulator images provided by Intel.
Intel HAXM cannot be used with ARM Android emulator images or non-Intel x86 or x86_64 Android emulator images.
[*] For Windows 7 Service Pack 1, Microsoft security update KB3033929 is required when upgrading HAXM to the latest version (see Known Issues for details). Otherwise, keep using HAXM v7.3.2 instead.
Downloading Intel HAXM
Overview
Intel HAXM can be installed either through the Android SDK Manager (recommended), or manually, by downloading the installer from Intel’s website.
Note:
Intel HAXM does not currently check for updates automatically. To get the latest version, download the Intel HAXM package using the Android SDK Manager (recommended) or from the Intel Developer Zone Android developer site.
Downloading Manually
- Go to https://github.com/intel/haxm/releases.
- Choose the Intel HAXM installer package for your platform.
- Extract the installer and follow installation instructions for your platform.
Downloading through Android SDK Manager
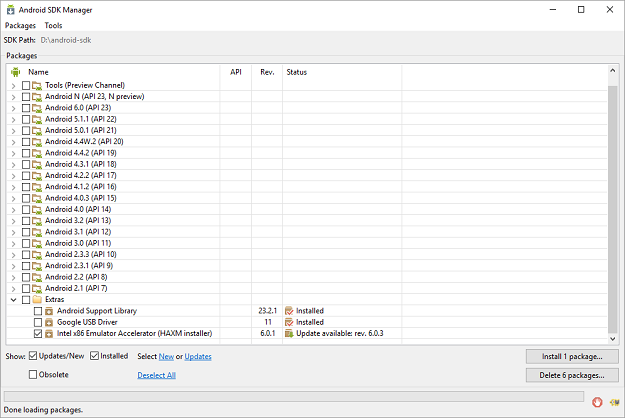
- Start the Android SDK Manager.
- Under Extras, check the box next to «Intel x86 Emulator Accelerator (HAXM).»
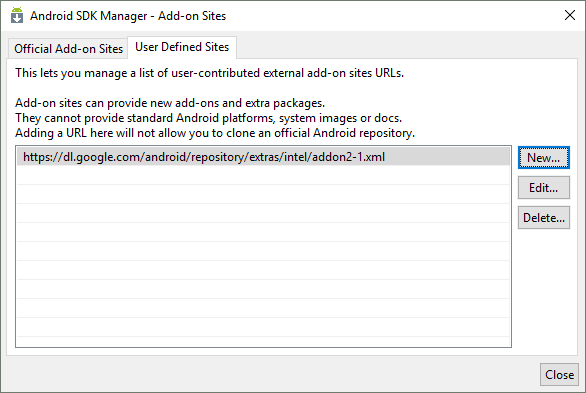
If there is no such option, manually add https://dl.google.com/android/repository/extras/intel/addon2-1.xml to the SDK Manager’s list of add-on sites via Tools > Manage Add-on Sites… > User Defined Sites > New…
- Click the «Install package…» button.
- Review the Intel Corporation license agreement. If you accept the terms, select Accept and click Install.
- The SDK Manager will download the installer to the «extras» directory, under the main SDK directory. Even though the SDK manager says «Installed» it actually means that the Intel HAXM executable was downloaded. You will still need to run the installer from the «extras» directory to get it installed.
- Run the installer inside the <sdk install location>/extras/intel/Hardware_Accelerated_Execution_Manager/ directory and follow the installation instructions for your platform.
Installing Standalone Intel HAXM on Windows
Warning: Intel HAXM installation will fail if your system does not meet the system requirements, including support for Intel processor features, such as Intel Virtualization Technology (Intel VT).
- Download the installer package from https://github.com/intel/haxm/releases or using the SDK manager.
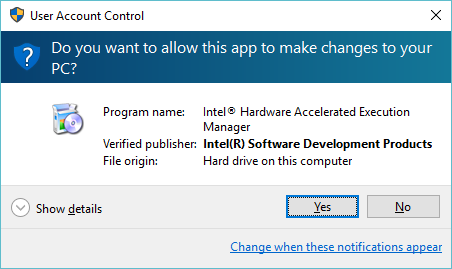
- Run the installer (and accept the UAC prompt, if applicable).
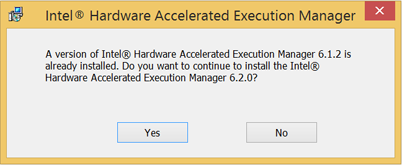
If an older version Intel HAXM is already installed, you will see a notification dialog:Click «Yes» to upgrade Intel HAXM, or click «No» to exit the installation and keep the currently installed version of Intel HAXM.
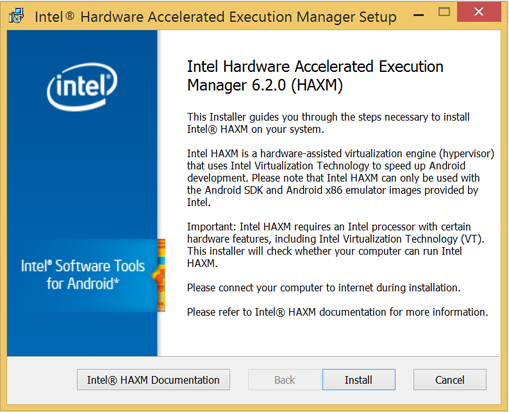
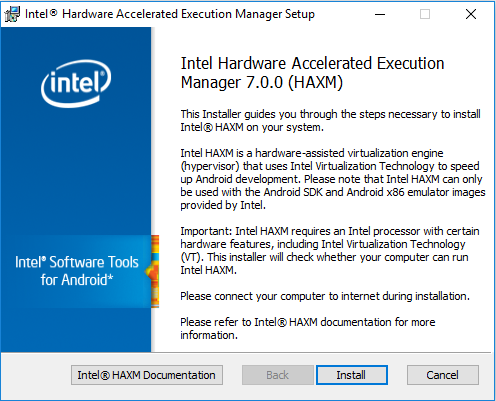
- You will see a setup wizard screen:
Click «Install»
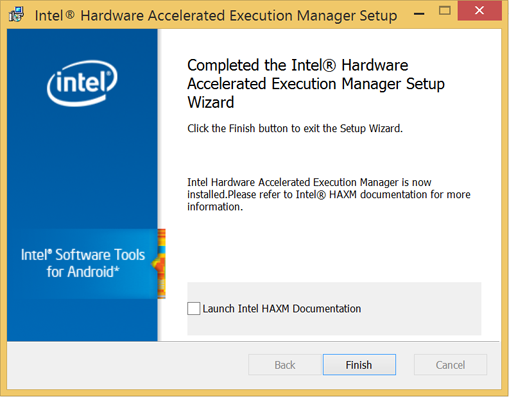
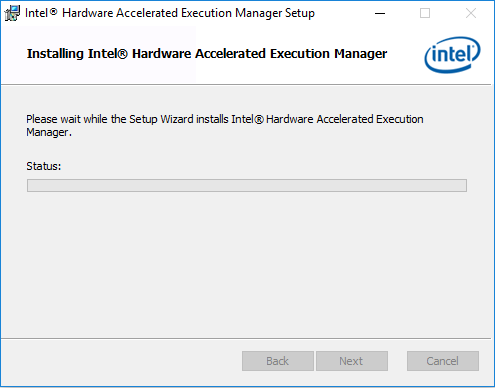
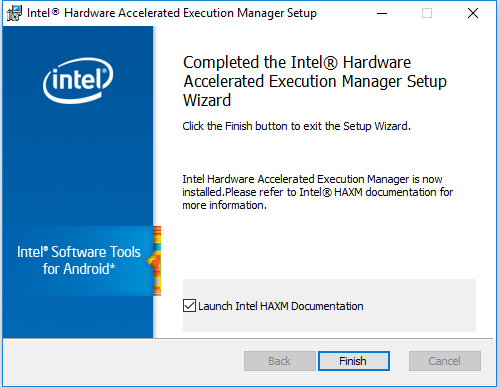
Note: You can access the documentation by clicking Intel HAXM Documentation - When the Intel HAXM installation is finished, you will see the completion screen:
Click «Finish» to exit the installer. Intel HAXM is now installed and ready to use.
To verify that Intel HAXM is running, open a Command Prompt window with administrator privileges (Run as Administrator) and execute the following command:
sc query intelhaxm
If Intel HAXM is working, the command will show a status message indicating that the state is: «4 RUNNING».
To stop or start Intel HAXM, use these commands:
Stop:
sc stop intelhaxm
Start:
sc start intelhaxm
Installing HAXM silently on Windows
- Download the installer package from https://github.com/intel/haxm/releases and extract it locally.
- Enter the extracted folder and run below command in an elevated Command Prompt or Windows PowerShell.
> silent_install.bat
The installer will check the system environment first. If the installation is successful, it will output as below.
Intel HAXM installed successfully!
The installer executable itself also supports to run in silent mode by passing /S on the Command Prompt or Windows PowerShell, e.g.,
> haxm-7.7.0-setup.exe /S
Please note that the parameter /S must be in uppercase.
Installing Intel HAXM on Windows via Android Studio
- Download the Android Studio installer package from http://developer.android.com/sdk/index.html
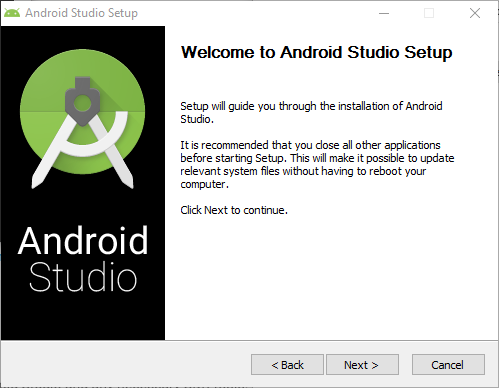
- Run the Android Studio installer
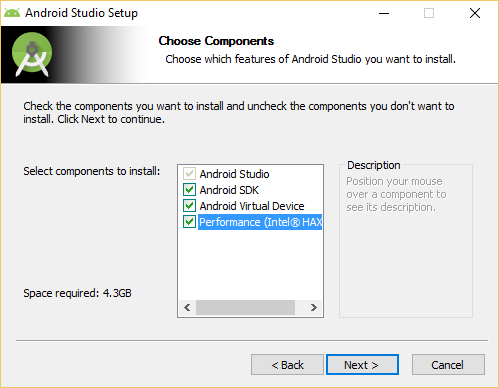
- Select Performance (Intel HAXM) and click Next
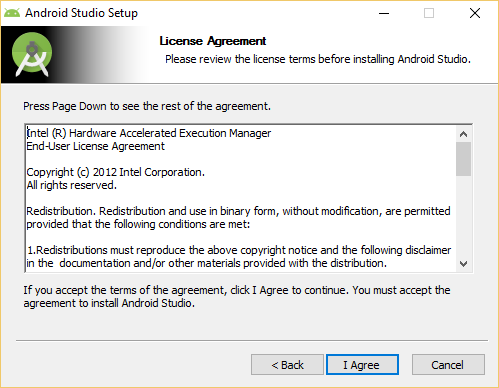
- Accept the Android SDK License Agreement and the Intel HAXM License Agreement
- Select the install location for Android Studio and Android SDK (if you do not have it already on your system).
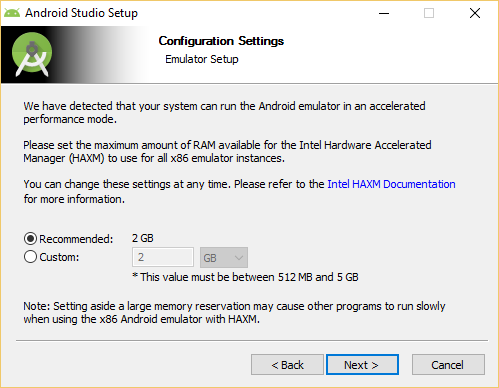
- Configure the amount of RAM available for Intel HAXM
Note: This setting is obsolete since Intel HAXM 6.2.0.
- Click Next and then Install. Wait until the installation has finished. Intel HAXM is now installed and ready to use.
To verify that Intel HAXM is running, open a Command Prompt window with administrator privileges (Run as Administrator) and execute the following command:
sc query intelhaxm
If Intel HAXM is working, the command will show a status message indicating that the state is: «4 RUNNING».
To stop or start Intel HAXM, use these commands:
Stop:
sc stop intelhaxm
Start:
sc start intelhaxm
Removing Intel HAXM
Warning: Close all instances of the Android x86 emulator before removing Intel HAXM. Intel HAXM cannot be removed while in use.
To uninstall Intel HAXM, use Uninstall a program in the Control Panel or uninstall in silent mode as below.
- Launch an elevated Command Prompt or Windows PowerShell.
- Enter the extracted folder of installer package, which is previously downloaded from https://github.com/intel/haxm/releases, and run below command.
> silent_install.bat -u
Important: Removing Intel HAXM will disable acceleration of all Intel x86 Android emulators. Existing x86 Android Virtual Devices will not boot.
Installing Intel HAXM again will re-enable Android emulator acceleration.
Using Intel HAXM
Intel HAXM requires an Android x86 system image provided by Intel. These images can be downloaded through the Android SDK manager or manually from the Intel Developer Zone website.
Intel x86 Android emulator images will automatically be executed using the «emulator-x86» binary, provided with the Android SDK. If Intel HAXM is installed and working, emulation will be accelerated by Intel HAXM (using Intel Virtualization Technology).
Troubleshooting
Execute Disable Bit capability error
When installing Intel HAXM, you may encounter an error regarding Execute Disable Bit support.
This error message can be triggered by the following conditions:
- Execute Disable Bit is not supported by your computer’s processor.
- Execute Disable Bit is not enabled.
Execute Disable Bit is not supported
Intel HAXM requires an Intel processor with Execute Disable Bit functionality and cannot be used on systems lacking this hardware feature. To determine the capabilities of your Intel processor, visit http://ark.intel.com.
Execute Disable Bit is not enabled
In some cases, Execute Disable Bit may be disabled in the system BIOS and must be enabled within the BIOS setup utility. To access the BIOS setup utility, a setup key must be pressed during the computer’s boot sequence. This key is dependent on which BIOS is used but it is typically the F2, Delete, or Esc key. Within the BIOS setup utility, Execute Disable Bit may be identified by the terms «XD», «Execute Disable», «No Execute», or «Hardware DEP», depending on the BIOS used.
Windows hosts may need to enable DEP (Data Execution Prevention) in addition to Execute Disable Bit, as described in this Microsoft KB article: http://support.microsoft.com/kb/875352.
For specific information on entering BIOS setup and enabling Execute Disable Bit, please contact your hardware manufacturer.
Intel Virtualization Technology (Intel VT-x) capability
When installing Intel HAXM, you may encounter an error regarding Intel VT-x support.
This error message can be triggered by the following conditions:
- Intel VT-x is not supported by your computer’s processor
- Intel VT-x is not enabled
Intel VT-x is not supported
Intel HAXM requires an Intel processor with Intel VT-x functionality and cannot be used on systems lacking this hardware feature. To determine the capabilities of your Intel processor, visit? http://ark.intel.com.
Intel VT-x not enabled
In some cases, Intel VT-x may be disabled in the system BIOS and must be enabled within the BIOS setup utility. To access the BIOS setup utility, a key must be pressed during the computer’s boot sequence. This key is dependent on which BIOS is used but it is typically the F2, Delete, or Esc key. Within the BIOS setup utility, Intel VT may be identified by the terms «VT», «Virtualization Technology», or «VT-d.» Make sure to enable all of the Virtualization features.
For specific information on entering BIOS setup and enabling Intel VT, please contact your hardware manufacturer.
Tips and Tricks
Below are some recommendations to get the best experience out of the Android emulator using the Intel HAXM driver.
- Enable the GPU acceleration in the AVD Manager for your image. The Intel HAXM driver executes most CPU instructions natively through Intel Virtualization Technology in the processor and the GPU acceleration offloads the OpenGL calls to the host GPU.
- Make sure the «ANDROID_SDK_ROOT» environment variable is set either in Control Panel > System > Advanced System Settings > Environment Variables or manually each time a new command prompt is launched. The <sdk install location> below typically refers to «c:\Users\<your username>\AppData\Local\Android\sdk»
- set ANDROID_SDK_ROOT=<sdk install location>
- Launch the emulator from the command line to get more verbose output. Use the following command:
- %ANDROID_SDK_ROOT%\tools\emulator –avd <avd_name> -verbose –show-kernel
- It is recommended to disable Hyper-V on Windows 8, 8.1 and 10. As Sandbox,Windows Hypervisor Platform(WHPX) and Windows Subsystem for Linux 2 (WSL2) conflict with HAXM, please disable them on Windows 10 build 1903 or higher version.The best way to disable Hyper-V is as below,
- Open an elevated (i.e. Run as administrator) Command Prompt.
- $bcdedit /set hypervisorlaunchtype off
- Reboot your machine
- Avast Antivirus may interfere with HAXM and cause Android Emulator or QEMU to run very slowly. A workaround is to uncheck «Use nested virtualization where available» in Avast Settings > Troubleshooting.
- More command line options for booting the emulator can be found at Android developer website.
Skip to content
Recently, I have been experimenting with fast virtualization open-source software called Qemu. Before long I discovered that Qemu performs better if we use a hypervisor so that the virtual machines have direct access to the hardware. If you are using Qemu on a Windows host then you can use Intel’s HAXM hypervisor which is acronym for Intel Hardware Accelerated Execution Manager. You can install HAXM in Windows and then you can use it in Qemu and other virtualization software like Android Studio.
Unfortunately, when I tried to install HAXM on my Windows 10 PC, it failed with an error – “The computer does not support Intel Virtualization Technology (VT-x) or it is being exclusively used by Hyper-V. HAXM cannot be installed”. It mentions to disable Hyper-V from Windows Features.
If you have also come across the same error then you can proceed using the following steps:
- Open an elevated command prompt (Win+X then select Command Prompt (Admin)) and enter the following commands:
dism.exe /online /Disable-Feature:Microsoft-Hyper-V
bcdedit /set hypervisorlaunchtype off
- Download Device Guard and Credentials Guard readiness tool from https://www.microsoft.com/en-us/download/details.aspx?id=53337. Extract its contents to a folder, e.g., D:\dgreadiness_v3.6.
- In the elevated command prompt, enter this command:
@powershell -ExecutionPolicy RemoteSigned -Command "D:\dgreadiness_v3.6\DG_Readiness_Tool_v3.6.ps1 -Disable"
- Restart your Widows PC. At boot when asked, disable Device Guard and Credentials Guard by pressing Windows key.
- When Windows has started, you should check whether your PC is ready for installing HAXM. This is done by downloading the latest version of HAXM from https://github.com/intel/haxm/releases/latest extracting it to a folder and launching haxm_check.exe. It should show YES for both VT and NX support.
- Now you can finish installing HAXM on your Windows 10 PC by running intelhaxm-android.exe. After this, you should be ready to use HAXM hypervisor in Qemu without any problems.
HAXM is available for those Intel processors only that come with VT-x technology built inside. It is a great alternative for KVM which is used under Linux.
We use cookies on our website to give you the most relevant experience by remembering your preferences and repeat visits. By clicking “Accept”, you consent to the use of ALL the cookies.
HAXM Installation Failed is a very common error that occurs when installing Android Studio. This guide explains what is Intel HAXM and how to install Intel HAXM. We will also look at various issues that may result in HAXM installation failed error and how to solve them.
Table of Contents
- What is Intel HAXM
- Why HAXM Installation Fails
- Android emulator is already running
- The processor is not Intel-based
- OS Not supported
- Disable the Hyper-V Manager
- Virtualization is disabled in Bios
- PC Does not support Virtualisation
- Antivirus interferes with HAXM Installation
- How to Install HAXM
- Installing from Android SDK Manager
- Direct Download & Install
- Check if Intel HAXM Can be installed
- Check if HAXM is installed
- Reference
- Summary
What is Intel HAXM
The HAXM stands for Hardware Accelerated Execution Manager. It is a cross-platform hardware-assisted virtualization engine (hypervisor), The Android Emulator use HAXM in intel platforms to speedup & improve performance
Why HAXM Installation Fails
The Android Studio Installs Intel HAXM when you install Android Studio. But you may get the HAXM Installation Failed message because of the following reasons
- Android emulator is already running
- The processor is not Intel-based
- Unsupported OS
- Hyper-V Manager must be disabled
- Virtualization must be enabled in Bios ( VT-x )
- The PC must support Virtualisation
- Antivirus (Avast) may interfere with HAXM Installation
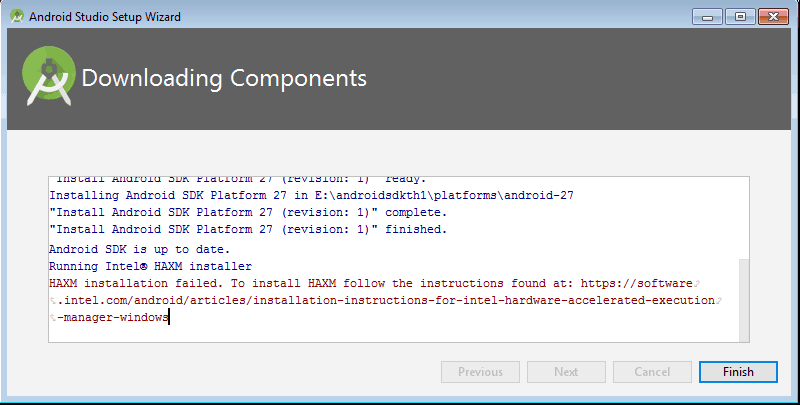
Android emulator is already running
You should stop the Android emulator, if it is already running.
You can stop it from the AVD Manager. On the action, column click down-arrow on the right and click Stop. This stops the emulator.
Or you can restart the computer.
The processor is not Intel-based
Intel HAXM cannot be used on systems without an Intel processor. Even if the processor is Intel, it still needs to have the support VT-x, EM64T, and Execute Disable Bit
For AMD Based PC, you can use the Hyper-V to run the Android Emulator
OS Not supported
- Supported Windows OS is 7, 8, 8.1 & 10.
- Supported macOS is 10.12, 10.13 & 10.14
- Only 64 bit OS is supported.
Disable the Hyper-V Manager
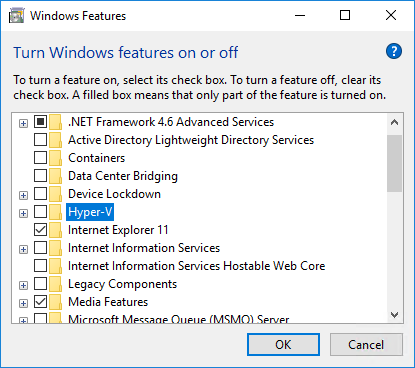
Hyper-V is another Virtualisation technique just like Intel HAXM. You cannot use both at the same time. Hence, It is necessary to Disable Hyper-V. You can follow these steps to disable Hyper-V
- Go to Control Panel -> Programs and Features -> Turn Windows features on or off
- From the window disable Hyper-V options
- Reboot your machine
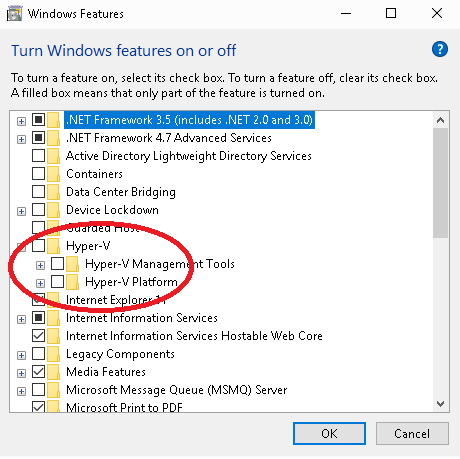
Hyper-V might not be disabled
If you have windows 10 features such as Device Guard and Credential Guard is enabled, it can prevent Hyper-V from being completely disabled.
The Device Guard and Credential Guard hardware readiness tool released by Microsoft can disable the said Windows 10 features along with Hyper-V:
- Download the latest version of the Device Guard and Credential Guard hardware readiness tool.
- Unzip
- Open the Command Prompt using Run as administrator
- Run the following command
@powershell -ExecutionPolicy RemoteSigned -Command "X:\path\to\dgreadiness_v3.6\DG_Readiness_Tool_v3.6.ps1 -Disable"- Reboot.
Virtualization is disabled in Bios
If virtualization is disabled in the BIOS, you need to enable it.
Turn off the PC and then turn it On. Press either F2, DEL, F10 ( The key may differ in your PC) key to enter the BIOS at the startup. You will likely to see a message at the startup regarding the key to press to enter the BIOS

You may see the Virtualisation under any of the following menus.
- Chipset
- Northbridge
- Advanced Chipset Control
- Advanced CPU Configuration
The feature may go by the name
- VT-x
- VT-d (as in the above image)
- Intel Virtualization Technology
- Intel VT
- Virtualization Extensions
- Vanderpool
PC Does not support Virtualisation
Your CPU may not support Virtualisation. You can refer to Does My Processor Support Intel® Virtualization Technology? article to check if your PC Supports Virtualisation
Antivirus interferes with HAXM Installation
The Avast Antivirus interferes with the HAXM installation. It may also slow down the Android Emulator. The workaround is goto Avast Settings > Troubleshooting and uncheck “Use nested virtualization where available” option
How to Install HAXM
There are two ways in which you can install Intel HAXM.
- Using the Android SDK Manager
- Direct Download & Install
Installing from Android SDK Manager
Go to Android SDK Manager (Tools -> SDK Manager) and select SDK Tools. You will find the Intel x86 Emulator Accelerator HAXM installer listed here. Select it and click on OK.
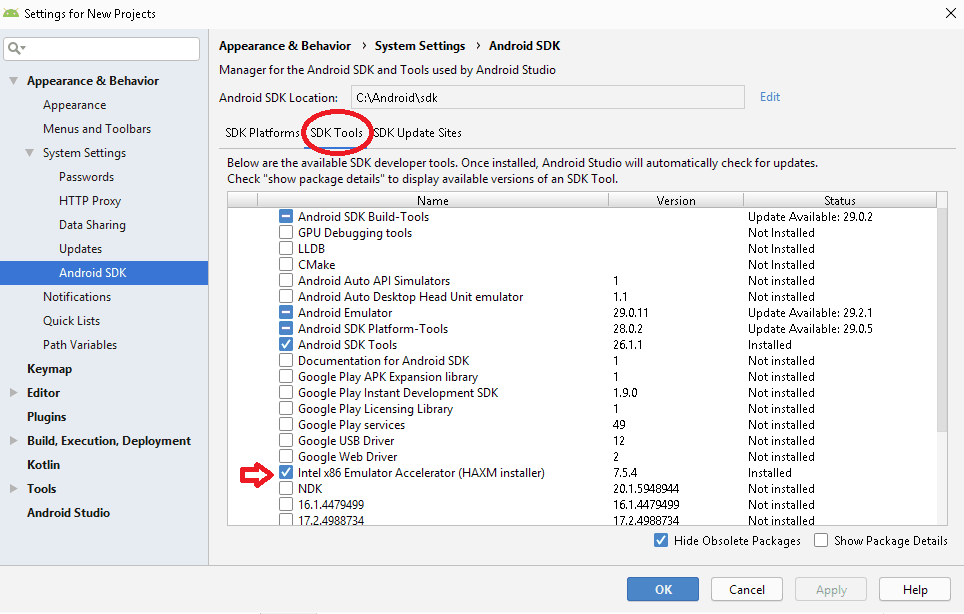
The clicking OK button does not install the HAXM Always. But it will copy the downloaded files to the under the SDK Location/sdk/extras/intel/Hardware_Accelerated_Execution_Manager/
You can then click on the intelhaxm-android.exe to install as shown below
Direct Download & Install
You can directly download the Installer from the link HAXM Releases
Once you unzip the file, you will find the intelhaxm-android.exe
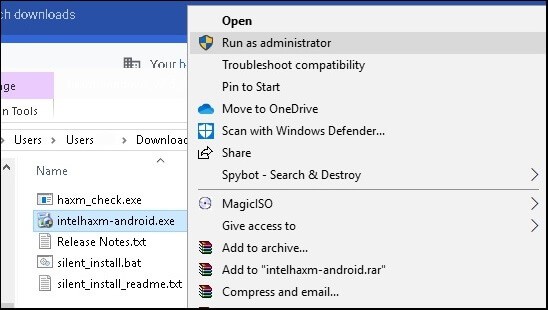
Welcome to the Intel HAXM setup wizard
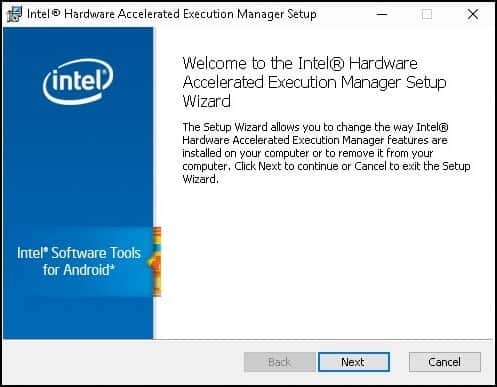
Click on Next to complete the installation.
Check if Intel HAXM Can be installed
Use the haxm_check.exe to check if VT is supported in your PC

Check if HAXM is installed
Finally, you need to check if HAXM is installed and running. You can do it from the command prompt by using the command
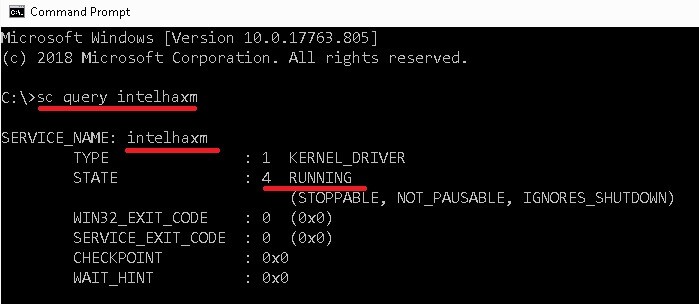
Reference
- HAXM
- Direct Download Link of HAXM
- Does My Processor Support Intel® Virtualization Technology?
- Device Guard and Credential Guard hardware readiness tool
- Android Emulator – AMD Processor & Hyper-V Support
- What is HyperVisor
- EM64T
- Execute Disable Bit
- VT-x
Summary
Installing Intel HAXM is a must if you want to run Android Emulator in Windows PC. Without which the Android Emulator will run very slowly. It is installed, when Android Studio is installed, but you get the HAXM Installation Failed error message. The most common error is due to the fact that Virtualisation is not enabled on your PC. Or because HyperVisor is running or the processor is not intel based. We learned how to solve all these issues in this guide
HAXM is a cross-platform hardware-assisted virtualization engine (hypervisor), widely used as an accelerator for Android Emulator and QEMU.
If you are an android developer, you need not be told the importance of HAXM to android development. In fact in most cases, you can’t run your app after development with HAXM installed on your computer.
Something I noticed is that Windows 10 does not automatically install HAXM during installation. Even when you try to install this tool via prompts from its unavailability windows, it still fails to install leaving the android developer in a frenzy mode, and unable to test or run their projects.
I recently encountered this challenge, and after fixing it, I now want to let those who may be facing a similar challenge know how to install the Intel HAXM (Intel Hardware Accelerated Execution Manager) from android studio.
Below are three methods you can use to install Intel HAXM on your computer — Windows PC, Mac, Linux and other operating systems. At least one of the following methods should work on your OS.
The first method I’ll share is how to install intel HAXM using android studio.
Method 1: How to Install Intel HAXM Through Android Studio
To install HAXM, click «SDK Manager» icon from the tool bar in android studio, or click «Tools → SDK Manager»
|
|
| Click the ‘SDK Manager’ icon — right, or ‘Tools’, and choose ‘SDK Manager’ |
Now click «Android SDK» then click «SDK Tools» on the upper tab. Now you’ll see a list of tools and their status whether they are installed or not.
Tick the checkmark to the left of Intel x86 Emulator Accelerator (HAXM installer). Now click «Apply» or «Ok».

|
| Tick the checkmark to the left of Intel x86 Emulator Accelerator (HAXM installer). Now click «Apply» or «Ok». |
Now you’ll see a prompt with important details on package size, storage location, size after installation, and available disk size in storage location. Click OK.

|
| Click ‘Ok’ |
Read and accept the license agreement, then click Next.
Configure emulator settings and maximum amount of RAM available to Intel HAXM and click ‘NEXT‘
Wait for the tool to install and click ‘Finish’ after the installation completes.
| Intel HAXM successfully installed |
The next step is to run the HAXM installer manually from the HAXM directory.
Even though Android studio indicated that HAXM has been installed, you’d need to still install it using the installer extracted into the install directory.
Navigate to: <sdk install location>\extras\intel\Hardware_Accelerated_Execution_Manager
i.e.:C:\Users\user\AppData\Local\Android\Sdk\extras\intel\Hardware_Accelerated_Execution_Manager
Double click the installer and follow the prompts to install HAXM.
Congratulations! you’ve successfully installed Intel HAXM using android studio. Happy coding! Happy development!!
Manual Methods To Install Intel HAXM
Method 2: How to Install Intel HAXM using the Installer
In order to install intel HAXM using the installer, you’ll need to download the installer first.
To download the installer, head to intel website and download the package. It is a zip archive hosted on GitHub.
You may want to install the latest release of intel HAXM. Click here to download the latest release.
Click the release you wish to download, then download the required installer package for your operating system. Older releases can also be downloaded via the link above.
Now that you’ve downloaded the intel HAXM installer package, you’d need to extract it using a file extraction/compression software like WinRAR, WinZip, and others.
After extracting the file, double click the installer to start installing intel HAXM (Hardware Accelerated Execution Manager on your computer.
Follow the screen prompts to fully install the software on your computer.
| Installing Intel HAXM using the installer. Click next to begin installing |
| Click ‘install’ |
If your computer architecture is capable of installing the package, HAXM will be installed, and you should see a success message.
Method 3: How to Install Intel HAXM Using Silent Install (Silent_Install.bat, Windows Batch File) Via the Terminal or Command Prompt
This method is a little bit technical, but it is also one of the ways you can install HAXM to your computer — Windows PC, Mac OSX, Linux and other operating systems.
To use this method, you’ll first download the installer package hosted on GitHub and fully extract it.
You’ll then need to navigate to the folder containing the silent_install.bat via command prompt, Windows power shell or terminal in elevated privileges.
While in the folder, you’ll then give the install command > silent_install.bat to begin installing HAXM to your computer.
To install using the installer in silent mode, you’ll need to pass an /S which must be in uppercase in elevated command.
E.G:
> haxm-7.7.0-setup.exe /S
If all goes well, intel HAXM will install, and you should see a success message:
Intel HAXM installed successfully!
Congrats! you have successfully installed Intel HAXM. Those are 3 easy, quick and simple methods you can use to install Intel HAXM on your computer. Hope this solves the challenge of installing HAXM on your computer.
Have a brilliant day ahead!
The Intel Hardware Accelerated Execution Manager (Intel® HAXM) is a hardware-assisted virtualization engine (hypervisor) that uses Intel Virtualization Technology (VT) to speed-up Tizen application emulation on Windows and macOS host machines. In combination with Tizen x86 emulator images and the Tizen Studio, Intel® HAXM speed-ups the Tizen emulation on Intel-VT-enabled systems.
This topic describes how to install the HAXM on your Windows or macOS development system.
Hardware requirements:
- Intel processor with support for VT-x, EM64T, and Execute Disable Bit
- At least 1 GB of available memory (2 GB or more is preferred)
Important
Intel® HAXM can only be used on systems with an Intel processor that supports the Intel VT.
Installing Intel® HAXM on Windows
Supported Windows versions: 10/8.1/8/7 (32/64-bit)
HAXM is automatically installed as part of Tizen Studio. If you want to install the HAXM separately, visit http://download.tizen.org/sdk/haxm/7.0.0/win/ and download the Windows installer package.
Table: Windows installer package
| Windows installer | File description | File size | MD5 checksum |
|---|---|---|---|
| IntelHAXM_7.0.0.exe | System driver | 2.89 MB | 1587f7ae42e11c7b22dc674fd776ce252b6a19152e7ca416a748e2bdbf2b36c5 |
To install Intel® HAXM:
-
Run the downloaded installer and accept the UAC prompt.
-
Click Install to start the installation.
Click Intel® HAXM Documentation to access the documentation.
The following screen shows the installation progress.
-
Click Finish to exit the installer, once the Intel® HAXM installation is finished.
The Intel® HAXM is installed and ready to use.
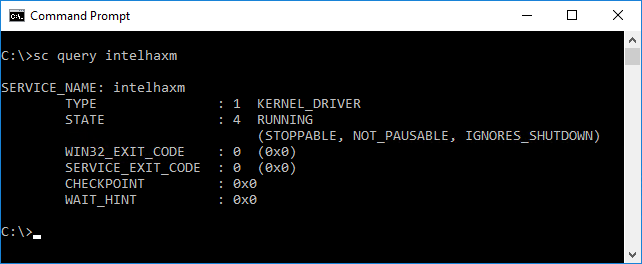
Execute the following command, to verify if Intel® HAXM is running:
sc query intelhaxm
If Intel® HAXM is working, the command displays a status message indicating that the state is “4 RUNNING”.
Starting and Stopping Intel® HAXM
To start or stop Intel® HAXM, open the Command Prompt window with administrator privileges and execute one of the following commands:
- Start HAXM:
sc start intelhaxm - Stop HAXM:
sc stop intelhaxm
Removing Intel HAXM
Warning
Close all instances of the Tizen Emulator before removing the Intel® HAXM.
Run installer or use control panel, to uninstall the Intel® HAXM.
Important
If you remove the Intel® HAXM, the acceleration of the Tizen Emulator is disabled, but the emulator still works. If you install the Intel® HAXM again, the acceleration is re-enabled.
Troubleshooting
If you meet an installation failure because of hardware requirements, check the BIOS/OS settings:
- Ensure VT is enabled in BIOS.
- Ensure Execute Disable Bit is enabled in BIOS.
- Ensure Data Execution Prevention is enabled in Windows. On the Windows platform, click Control Panel > System > Advanced system settings > Advanced tab > Performance section, Options (or Settings), and Data Execution Prevention. Make sure that DEP is enabled.
- Ensure that Hyper-V is disabled (on Windows 8 or after):
- Input Control Panel on the Search box in Windows 10.
- Click Control Panel > Programs and Features > Turn Windows features on or off.
- Disable Hyper-V and click OK.
- Reboot the computer.
Installing Intel® HAXM on macOS
Supported macOS versions: 10.12 Sierra (64-bit), 10.11 OS X El Capitan(64-bit), 10.10 Yosemite (64-bit), 10.9 Mavericks (64-bit), 10.8 Mountain Lion (64-bit)
HAXM is automatically installed as part of the Tizen Studio. If you want to install the HAXM separately, visit http://download.tizen.org/sdk/haxm/7.0.0/mac/ and download the macOS installer package.In case the version 7.0.0 installation fails then the latest version of HAXM can be tried which is available at https://github.com/intel/haxm/releases/tag/v7.7.0
Table: Windows installer package
| macOS installer | File description | File size | MD5 checksum |
|---|---|---|---|
| IntelHAXM_7.0.0.dmg | System driver | 218 KB | fe7e4cd86b7a2b85591397fd6bf2ef43e7b088bfc72badab0c4d3532a65c2a2f |
To install Intel® HAXM:
-
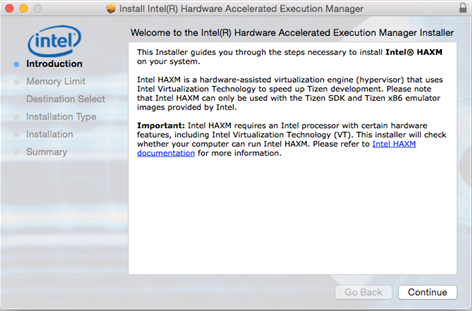
Open the downloaded DMG file and run the installer inside it.
-
Click Continue to start the installation.
-
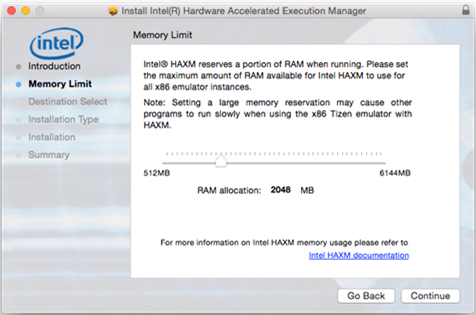
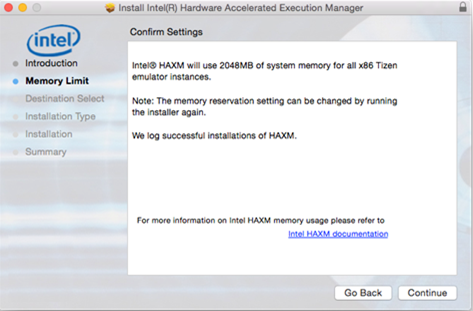
Adjust the amount of RAM to be allocated to Intel® HAXM or set it to 2048 MB as the default value.
The installer also functions as a configuration tool for Intel® HAXM. To change the memory settings later, run the installer again.
-
Confirm your Intel® HAXM memory allocation settings, and click Continue.
-
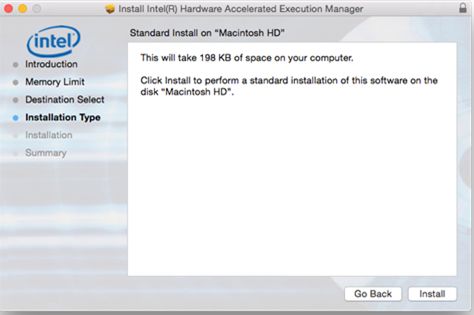
Check the capacity and the disk location of the HAXM driver, and click Install.
-
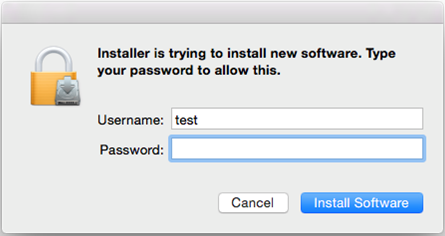
Type your password.
-
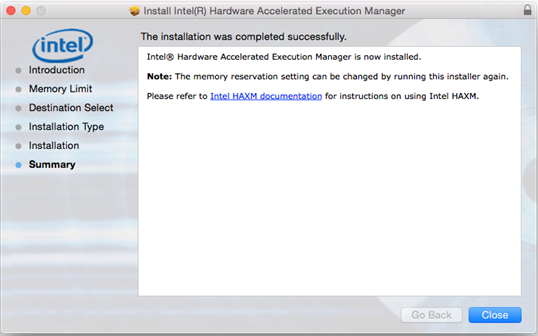
Click Close to exit the installer, once the Intel® HAXM installation is finished.
The Intel® HAXM is installed and ready to use.
Using Intel® HAXM
The Intel® HAXM significantly enhances the performance of the Tizen Emulator. For more information on the emulator details, see Increasing the Application Execution Speed.
- Dependencies
- Tizen Studio 1.0 and Higher

