Hadoop 3.2.1 Windows 10 Installation step by step guide and running MapReduce Jobs
Setup Hadoop on Windows 10 machines
Consolidated instructions on how to setup and run Hadoop on Windows 10 machines. This is exactly written from Hadoop 3.2.1 Installation on Windows 10 step by step guide. Big thanks to Raymond, the original writer. If you already have Hadoop installed and configured on your machine, you can go to the Running MapReduce Jobs section.
Required tools
- Java JDK — used to run the Hadoop since it’s built using Java
- 7Zip or WinRAR — unzip Hadoop binary package; anything that unzips
tar.gz - CMD or Powershell — used to test environment variables and run Hadoop
Step 1 — Download and extract Hadoop
Download Hadoop from their official website and unzip the file. We’ll be using Hadoop 3.2.1. Hadoop is portable so you can store it on an external hard drive. For the purpose of documentation, I will extract it to C:/Users/Anthony/Documents/cp-master.
If there are permission errors, run your unzipping program as administrator and unzip again.
Step 2 — Install Hadoop native IO binary
Clone or download the winutils repository and copy the contents of hadoop-3.2.1/bin into the extracted location of the Hadoop binary package. In our example, it will be C:\Users\Anthony\Documents\cp-master\hadoop-3.2.1\bin
Step 3 — Install Java JDK
Java JDK is required to run Hadoop, so if you haven’t installed it, install it.
Oracle requires you sign up and login to download it. I suggest you find an alternative resource to download it from for example here (JDK 8u261). This resource might not exist forever, so Google ‘jdk version download’.
Run the installation file and the default installation directory will be C:\Program Files\Java\jdk1.8.0_261.
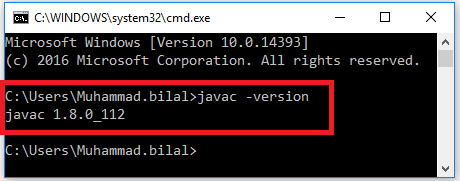
After installation, open up CMD or Powershell and confirm Java is intalled:
$ java -version
java version "1.8.0_261"
Java(TM) SE Runtime Environment (build 1.8.0_261-b12)
Java HotSpot(TM) 64-Bit Server VM (build 25.261-b12, mixed mode)
Step 4 — Configure environment variables
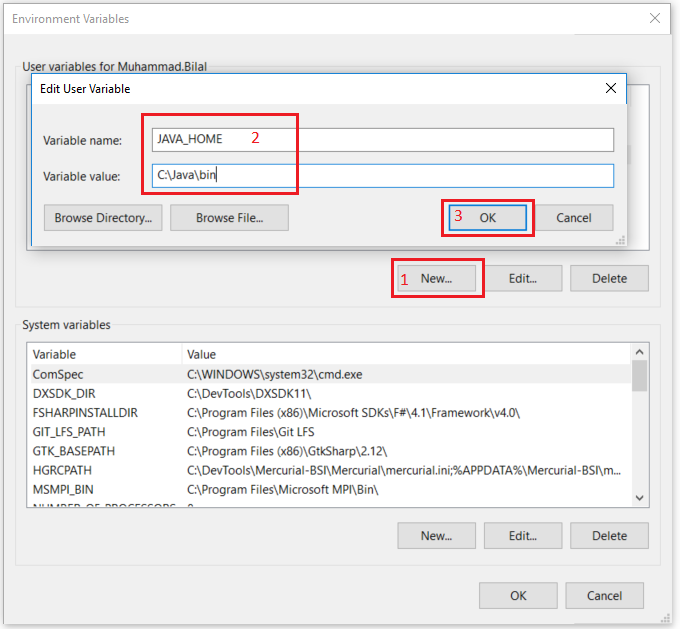
Open the Start Menu and type in ‘environment’ and press enter. A new window with System Properties should open up. Click the Environment Variables button near the bottom right.
JAVA_HOME environment variable
- From step 3, find the location of where you installed Java. In this example, the default directory is
C:\Program Files\Java\jdk1.8.0_261 - Create a new User variable with the variable name as
JAVA_HOMEand the value asC:\Program Files\Java\jdk1.8.0_261
HADOOP_HOME environment variable
- From step 1, copy the directory you extracted the Hadoop binaries to. In this example, the directory is
C:\Users\Anthony\Documents\cp-master\hadoop-3.2.1 - Create a new User variable with the variable name as
HADOOP_HOMEand the value asC:\Users\Anthony\Documents\cp-master\hadoop-3.2.1
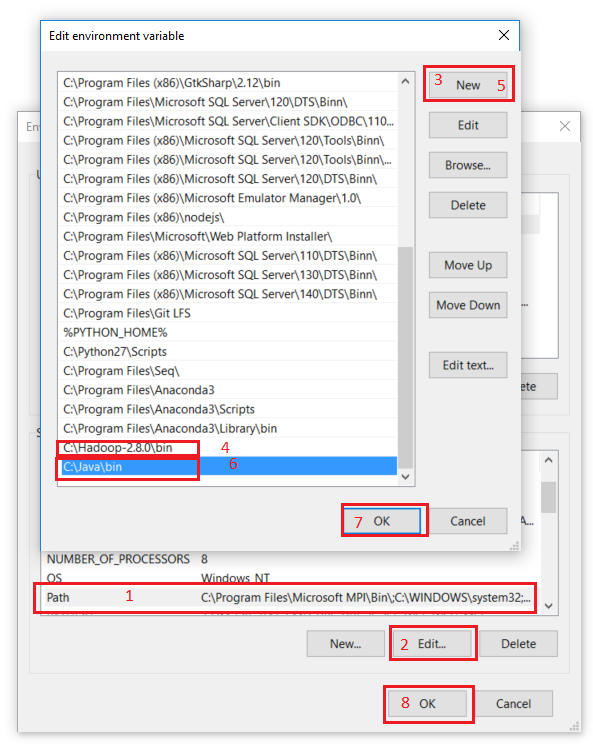
PATH environment variable
We’ll now need to add the bin folders to the PATH environment variable.
- Click
PaththenEdit - Click
Newon the top right - Add
C:\Users\Anthony\Documents\cp-master\hadoop-3.2.1\bin - Add
C:\Program Files\Java\jdk1.8.0_261\bin
Hadoop environment
Hadoop complains about the directory if the JAVA_HOME directory has spaces. In the default installation directory, Program Files has a space which is problematic. To fix this, open the %HADOOP_HOME%\etc\hadoop\hadoop-env.cmd and change the JAVA_HOME line to the following:
set JAVA_HOME=C:\PROGRA~1\Java\jdk1.8.0_261
After setting those environment variables, you reopen CMD or Powershell and verify that the hadoop command is available:
$ hadoop -version
java version "1.8.0_261"
Java(TM) SE Runtime Environment (build 1.8.0_261-b12)
Java HotSpot(TM) 64-Bit Server VM (build 25.261-b12, mixed mode)
Step 5 — Configure Hadoop
Now we are ready to configure the most important part — Hadoop configurations which involves Core, YARN, MapReduce, and HDFS configurations.
Each of the files are in %HADOOP_HOME%\etc\hadoop. The full path for this example is C:\Users\Anthony\Documents\cp-master\hadoop-3.2.1\etc\hadoop
Configure core site
Edit core-site.xml and replace the configuration element with the following:
<configuration>
  <property>
    <name>fs.default.name</name>
    <value>hdfs://0.0.0.0:19000</value>
  </property>
</configuration>
Configure HDFS
Create two folders, one for the namenode directory and another for the data directory. The following are the two created folders in this example:
C:\Users\Anthony\Documents\cp-master\hadoop-3.2.1\data\dfs\namespace_logsC:\Users\Anthony\Documents\cp-master\hadoop-3.2.1\data\dfs\data
Edit hdfs-site.xml and replace the configuration element with the following:
<configuration>
  <property>
    <name>dfs.replication</name>
    <value>1</value>
  </property>
  <property>
    <name>dfs.namenode.name.dir</name>
    <!-- <value>file:///DIRECTORY 1 HERE</value> -->
    <value>file:///C:/Users/Anthony/Documents/cp-master/hadoop-3.2.1/data/dfs/namespace_logs</value>
  </property>
  <property>
    <name>dfs.datanode.data.dir</name>
    <!-- <value>file:///DIRECTORY 2 HERE</value> -->
    <value>file:///C:/Users/Anthony/Documents/cp-master/hadoop-3.2.1/data/dfs/data</value>
  </property>
</configuration>
Configure MapReduce and YARN site
Edit mapred-site.xml and replace the configuration element with the following:
<configuration>
  <property>
    <name>mapreduce.framework.name</name>
    <value>yarn</value>
  </property>
  <property>
    <name>mapreduce.application.classpath</name>
    <value>%HADOOP_HOME%/share/hadoop/mapreduce/*,%HADOOP_HOME%/share/hadoop/mapreduce/lib/*,%HADOOP_HOME%/share/hadoop/common/*,%HADOOP_HOME%/share/hadoop/common/lib/*,%HADOOP_HOME%/share/hadoop/yarn/*,%HADOOP_HOME%/share/hadoop/yarn/lib/*,%HADOOP_HOME%/share/hadoop/hdfs/*,%HADOOP_HOME%/share/hadoop/hdfs/lib/*</value>
  </property>
</configuration>
Edit yarn-site.xml and replace the configuration element with the following:
<configuration>
  <property>
    <name>yarn.resourcemanager.hostname</name>
    <value>localhost</value>
  </property>
  <property>
    <name>yarn.nodemanager.aux-services</name>
    <value>mapreduce_shuffle</value>
  </property>
  <property>
    <name>yarn.nodemanager.env-whitelist</name>
    <value>JAVA_HOME,HADOOP_COMMON_HOME,HADOOP_HDFS_HOME,HADOOP_CONF_DIR,CLASSPATH_PREPEND_DISTCACHE,HADOOP_YARN_HOME,HADOOP_MAPRED_HOME</value>
  </property>
</configuration>
Step 6 — Initialize HDFS and bugfix
Run the following command and you should find the following error:
$ hdfs namenode -format
...
ERROR namenode.NameNode: Failed to start namenode.
...
To fix this, you’ll need to download the a JAR file with the fix. Overwrite the existing hadoop-hdfs-3.2.1.jar in %HADOOP_HOME%\share\hadoop\hdfs with this new JAR file (you can make a backup of the current one before overwriting if you wish).
Step 7 — Start HDFS daemons
Run the following command to start HDFS daemons. When you do so, there should be two new windows that open: one for datanode and the other for namenode:
$ %HADOOP_HOME%\sbin\start-dfs.cmd
Step 8 — Start YARN daemons
You might encounter permission issues as a normal user, so open a command line with elevated permissions. If you have the yarn package manager, you will NOT be able to run YARN daemons since both use the yarn command. To fix this, you must uninstall yarn package manager.
Run the following command (with elevated permissions) to start YARN daemons. When you do so, there should be two new windows that open: one for resource manager and the other for node manager:
$ %HADOOP_HOME%\sbin\start-yarn.cmd
Step 9 — Useful Web portals
The daemons also host websites that provide useful information about the cluster
HDFS Namenode UI info
http://localhost:9870/dfshealth.html#tab-overview
HDFS Datanode UI info
http://localhost:9864/datanode.html
YARN resource manager UI
http://localhost:8088
Step 10 — Shutdown YARN and HDFS daemons
You can stop the daemons by running the following commands:
$ %HADOOP_HOME%\sbin\stop-dfs.cmd
$ %HADOOP_HOME%\sbin\stop-yarn.cmd
Running MapReduce Jobs
After setting up your environment and running the HDFS and YARN daemons, we can start working on running MapReduce jobs on our local machine. We need to compile our code, produce a JAR file, move our inputs, and run a MapReduce job on Hadoop.
Step 1 — Configure extra environment variables
As a preface, it is best to setup some extra environment variables to make running jobs from the CLI quicker and easier. You can name these environment variables anything you want, but we will name them HADOOP_CP and HDFS_LOC to not potentially conlict with other environment variables.
Open the Start Menu and type in ‘environment’ and press enter. A new window with System Properties should open up. Click the Environment Variables button near the bottom right.
HADOOP_CP environment variable
This is used to compile your Java files. The backticks (eg. `some command here`) do not work on Windows so we need to create a new environment variable with the results. If you need to add more packages, be sure to update the HADOOP_CP environment variable.
- Open a CLI and type in
hadoop classpath. This will produce all the locations to the Hadoop libraries required to compile code, so copy all of this - Create a new User variable with the variable name as
HADOOP_CPand the value as the results ofhadoop classpathcommand
HDFS_LOC environment variable
This is used to reference the HDFS without having to constantly type the reference
- Create a new User variable with the variable name as
HDFS_LOCand the value ashdfs://localhost:19000
After creating those two extra environment variables, you can check by calling the following in your CLI:
$ echo %HADOOP_CP%
$ echo %HDFS_LOC%
Step 2 — Compiling our project
Run the following commands in your CLI with your respective .java files.
$ mkdir dist/
$ javac -cp %HADOOP_CP% <some_directory>/*.java -d dist/
Step 3 — Producing a JAR file
Run the following commands to create a JAR file with the compiled classes from Step 2.
$ cd dist
$ jar -cvf <application_name>.jar <some_directory>/*.class
added manifest
...
Step 4 — Copy our inputs to HDFS
Make sure that HDFS and YARN daemons are running. We can now copy our inputs to the HDFS using the copyFromLocal command and verify the contents with the ls command :
$ hadoop fs -copyFromLocal <some_directory>/input %HDFS_LOC%/input
$ hadoop fs -ls %HDFS_LOC%/input
Found X items
...
Step 5 — Run our MapReduce Job
Run the following commands in the dist folder when we originally compiled our code:
$ hadoop jar <application_name>.jar <pkg_name>.<class_name> %HDFS_LOC%/input %HDFS_LOC%/output
2020-10-16 17:44:40,331 INFO client.RMProxy: Connecting to ResourceManager at localhost/127.0.0.1:8032
...
2020-10-16 17:44:43,115 INFO mapreduce.Job: Running job: job_1602881955102_0001
2020-10-16 17:44:55,439 INFO mapreduce.Job: Job job_1602881955102_0001 running in uber mode : false
2020-10-16 17:44:55,441 INFO mapreduce.Job:  map 0% reduce 0%
2020-10-16 17:45:04,685 INFO mapreduce.Job:  map 100% reduce 0%
2020-10-16 17:45:11,736 INFO mapreduce.Job:  map 100% reduce 100%
2020-10-16 17:45:11,748 INFO mapreduce.Job: Job job_1602881955102_0001 completed successfully
...
We can verify the contents of our output by using the cat command just like in shell:
$ hadoop fs -cat %HDFS_LOC%/output/part*
2020-10-16 18:19:50,225 INFO sasl.SaslDataTransferClient: SASL encryption trust check: localHostTrusted = false, remoteHostTrusted = false
...
Step 6 — Copy outputs to our local machine
Once we are satisfied with the results, we can copy the contents to our local machine using the copyToLocal command:
$ hadoop fs -copyToLocal %HDFS_LOC%/output <some_output_directory>/
How to Install Hadoop in Windows 10
Installing Hadoop on Windows 10 can seem daunting, but it’s pretty straightforward if you follow the right steps. First, you need to ensure that Java is installed on your system. Then, you’ll have to download Hadoop and set up some environment variables. Finally, you’ll configure Hadoop and start it up. Let’s break it down into simple steps.
Installing Hadoop on Windows 10 involves several steps that will configure your machine to run Hadoop seamlessly. Here’s how to do it step by step:
Step 1: Install Java
Ensure Java is installed on your computer.
Java is necessary for Hadoop to run. You can download it from the official Oracle website. After downloading, follow the installation wizard to install Java on your system.
Step 2: Set Java Environment Variable
Set the JAVA_HOME environment variable.
Open your system properties and go to the Advanced tab. Click on Environment Variables, then click New under System Variables. Enter JAVA_HOME as the variable name and the path to your Java installation as the variable value.
Step 3: Download Hadoop
Download Hadoop from the official Apache website.
Navigate to the Apache Hadoop official website and download the binary distribution. Choose a stable release to avoid any bugs or issues.
Step 4: Install WinRAR
Install WinRAR to extract Hadoop files.
You will need a tool like WinRAR to unzip the Hadoop binaries you downloaded. Install WinRAR and use it to extract the Hadoop files to a directory of your choice.
Step 5: Configure Hadoop Environment Variables
Set HADOOP_HOME and add it to the PATH.
Go back to Environment Variables in System Properties. Create a new system variable with HADOOP_HOME as the name and the path to your Hadoop directory as the value. Then, edit the PATH variable and add %HADOOP_HOME%bin to it.
Step 6: Edit Hadoop Configuration Files
Configure core-site.xml and hdfs-site.xml.
Navigate to the Hadoop directory and find the conf folder. Edit the core-site.xml and hdfs-site.xml files to set the necessary parameters for your Hadoop setup.
Step 7: Format the Namenode
Open Command Prompt and format the Namenode.
Open Command Prompt as an administrator. Navigate to the bin directory inside your Hadoop folder and run the command «hdfs namenode -format» to format the Namenode.
Step 8: Start Hadoop Services
Start Hadoop services using the command line.
In the same Command Prompt window, start the Hadoop services by running the start-dfs.cmd and start-yarn.cmd scripts. This will start the Hadoop Distributed File System (HDFS) and Yet Another Resource Negotiator (YARN).
After completing these steps, Hadoop should be up and running on your Windows 10 machine, ready to handle big data tasks.
Tips for Installing Hadoop in Windows 10
- Make sure to install the correct version of Java that is compatible with your Hadoop version.
- Always download Hadoop from the official Apache website to avoid security risks.
- If you encounter issues with environment variables, restarting your computer can sometimes solve them.
- Running Command Prompt as an administrator can prevent permission errors.
- Keep your Hadoop configuration files backed up in case you need to revert changes.
FAQ on Installing Hadoop in Windows 10
What is Hadoop?
Hadoop is an open-source framework that allows for the distributed processing of large data sets across clusters of computers.
Do I need to install Java to run Hadoop?
Yes, Java is essential for running Hadoop as it is built on Java.
Can I install Hadoop without admin rights?
You need admin rights to set environment variables and format the Namenode.
How do I check if Hadoop is running?
You can check the running status by accessing the web interfaces of HDFS and YARN, usually available at localhost:50070 and localhost:8088 respectively.
Is it necessary to format the Namenode?
Yes, formatting the Namenode is crucial for initializing the Hadoop file system.
Summary
- Install Java.
- Set Java Environment Variable.
- Download Hadoop.
- Install WinRAR.
- Configure Hadoop Environment Variables.
- Edit Hadoop Configuration Files.
- Format the Namenode.
- Start Hadoop Services.
Conclusion
Installing Hadoop in Windows 10 might seem like climbing a mountain, but with these steps, it’s more like a walk in the park. From installing Java to configuring environment variables, each step is crucial to ensuring your Hadoop setup runs smoothly. Once you’ve completed these steps, you can dive into the world of big data with ease. For further reading, you might want to explore more about Hadoop’s ecosystem, including tools like Hive and Pig. So, what are you waiting for? Start your Hadoop journey today!
Matt Jacobs has been working as an IT consultant for small businesses since receiving his Master’s degree in 2003. While he still does some consulting work, his primary focus now is on creating technology support content for SupportYourTech.com.
His work can be found on many websites and focuses on topics such as Microsoft Office, Apple devices, Android devices, Photoshop, and more.
To Perform setting up and installing Hadoop in the pseudo-distributed mode in Windows 10 using the following steps given below as follows. Let’s discuss one by one.
Step 1: Download Binary Package :
Download the latest binary from the following site as follows.
http://hadoop.apache.org/releases.html

For reference, you can check the file save to the folder as follows.
C:\BigData
Step 2: Unzip the binary package
Open Git Bash, and change directory (cd) to the folder where you save the binary package and then unzip as follows.
$ cd C:\BigData
MINGW64: C:\BigData
$ tar -xvzf  hadoop-3.1.2.tar.gz
For my situation, the Hadoop twofold is extricated to C:\BigData\hadoop-3.1.2.
Next, go to this GitHub Repo and download the receptacle organizer as a speed as demonstrated as follows. Concentrate the compress and duplicate all the documents present under the receptacle envelope to C:\BigData\hadoop-3.1.2\bin. Supplant the current records too.

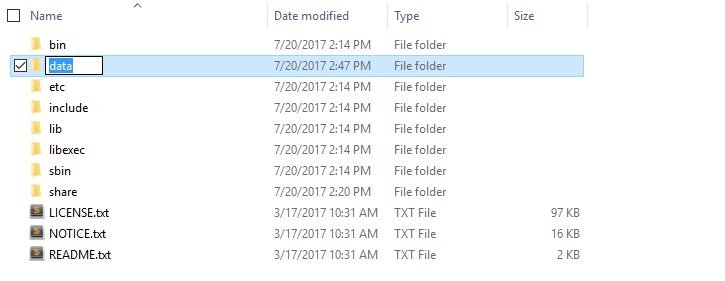
Step 3: Create folders for datanode and namenode :
- Goto C:/BigData/hadoop-3.1.2 and make an organizer ‘information’. Inside the ‘information’ envelope make two organizers ‘datanode’ and ‘namenode’. Your documents on HDFS will dwell under the datanode envelope.

- Set Hadoop Environment Variables
- Hadoop requires the following environment variables to be set.
HADOOP_HOME=” C:\BigData\hadoop-3.1.2”
HADOOP_BIN=”C:\BigData\hadoop-3.1.2\bin”
JAVA_HOME=<Root of your JDK installation>”
- To set these variables, navigate to My Computer or This PC.
Right-click -> Properties -> Advanced System settings -> Environment variables.
- Click New to create a new environment variable.

- In the event that you don’t have JAVA 1.8 introduced, at that point you’ll have to download and introduce it first. In the event that the JAVA_HOME climate variable is now set, at that point check whether the way has any spaces in it (ex: C:\Program Files\Java\… ). Spaces in the JAVA_HOME way will lead you to issues. There is a stunt to get around it. Supplant ‘Program Files ‘to ‘Progra~1’in the variable worth. Guarantee that the variant of Java is 1.8 and JAVA_HOME is highlighting JDK 1.8.
Step 4: To make Short Name of Java Home path


- Set Hadoop Environment Variables
- Edit PATH Environment Variable

- Click on New and Add %JAVA_HOME%, %HADOOP_HOME%, %HADOOP_BIN%, %HADOOP_HOME%/sin to your PATH one by one.

- Now we have set the environment variables, we need to validate them. Open a new Windows Command prompt and run an echo command on each variable to confirm they are assigned the desired values.
echo %HADOOP_HOME%
echo %HADOOP_BIN%
echo %PATH%
- On the off chance that the factors are not instated yet, at that point it can likely be on the grounds that you are trying them in an old meeting. Ensure you have opened another order brief to test them.
Step 5: Configure Hadoop
Once environment variables are set up, we need to configure Hadoop by editing the following configuration files.
hadoop-env.cmd
core-site.xml
hdfs-site.xml
mapred-site.xml
yarn-site.xml
hadoop-env.cmd
First, let’s configure the Hadoop environment file. Open C:\BigData\hadoop-3.1.2\etc\hadoop\hadoop-env.cmd and add below content at the bottom
set HADOOP_PREFIX=%HADOOP_HOME%
set HADOOP_CONF_DIR=%HADOOP_PREFIX%\etc\hadoop
set YARN_CONF_DIR=%HADOOP_CONF_DIR%
set PATH=%PATH%;%HADOOP_PREFIX%\bin
Step 6: Edit hdfs-site.xml
After editing core-site.xml, you need to set the replication factor and the location of namenode and datanodes. Open C:\BigData\hadoop-3.1.2\etc\hadoop\hdfs-site.xml and below content within <configuration> </configuration> tags.
<configuration>
 <property>
    <name>dfs.replication</name>
    <value>1</value>
 </property>
 <property>
    <name>dfs.namenode.name.dir</name>
    <value>C:\BigData\hadoop-3.2.1\data\namenode</value>
 </property>
 <property>
    <name>dfs.datanode.data.dir</name>
    <value>C:\BigData\hadoop-3.1.2\data\datanode</value>
 </property>
</configuration>
Step 7: Edit core-site.xml
Now, configure Hadoop Core’s settings. Open C:\BigData\hadoop-3.1.2\etc\hadoop\core-site.xml and below content within <configuration> </configuration> tags.
<configuration>
 <property>
   <name>fs.default.name</name>
   <value>hdfs://0.0.0.0:19000</value>
 </property>
</configuration>
Step 8: YARN configurations
Edit file yarn-site.xml
Make sure the following entries are existing as follows.
<configuration> <property>
<name>yarn.nodemanager.aux-services</name>
<value>mapreduce_shuffle</value> </property>
<property>
<name>yarn.nodemanager.aux-services.mapreduce.shuffle.class</name>
<value>org.apache.hadoop.mapred.ShuffleHandler</value>
</property>
</configuration>
Step 9: Edit mapred-site.xml
At last, how about we arrange properties for the Map-Reduce system. Open C:\BigData\hadoop-3.1.2\etc\hadoop\mapred-site.xml and beneath content inside <configuration> </configuration> labels. In the event that you don’t see mapred-site.xml, at that point open mapred-site.xml.template record and rename it to mapred-site.xml
<configuration>
 <property>
    <name>mapreduce.job.user.name</name>    <value>%USERNAME%</value>
 </property>
 <property>
    <name>mapreduce.framework.name</name>
    <value>yarn</value>
 </property>
 <property>
    <name>yarn.apps.stagingDir</name>    <value>/user/%USERNAME%/staging</value>
 </property>
 <property>
    <name>mapreduce.jobtracker.address</name>
    <value>local</value>
 </property>
</configuration>
Check if C:\BigData\hadoop-3.1.2\etc\hadoop\slaves file is present, if it’s not then created one and add localhost in it and save it.
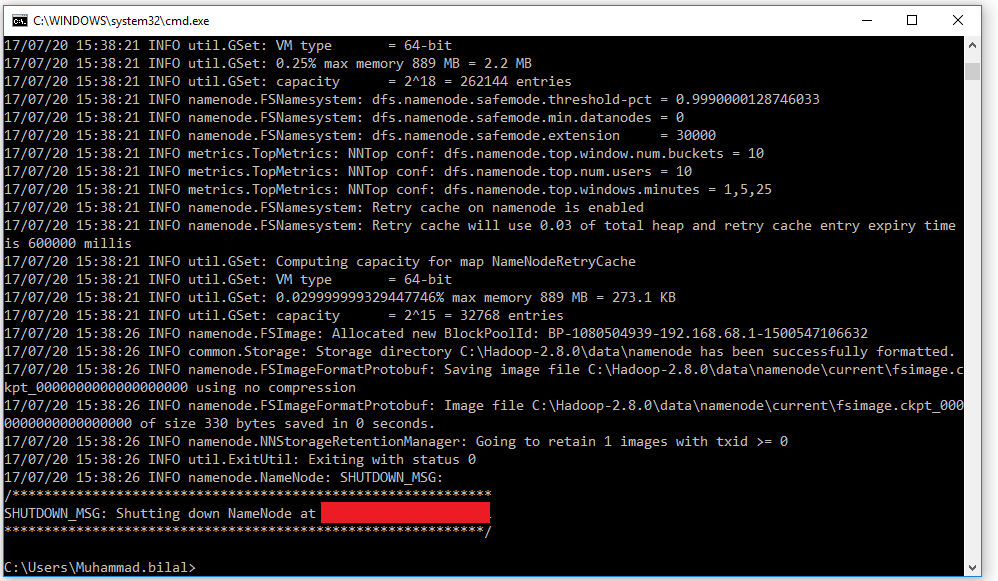
Step 10: Format Name Node :
To organize the Name Node, open another Windows Command Prompt and run the beneath order. It might give you a few admonitions, disregard them.
- hadoop namenode -format

Format Hadoop Name Node
Step 11: Launch Hadoop :
Open another Windows Command brief, make a point to run it as an Administrator to maintain a strategic distance from authorization mistakes. When opened, execute the beginning all.cmd order. Since we have added %HADOOP_HOME%\sbin to the PATH variable, you can run this order from any envelope. In the event that you haven’t done as such, at that point go to the %HADOOP_HOME%\sbin organizer and run the order.

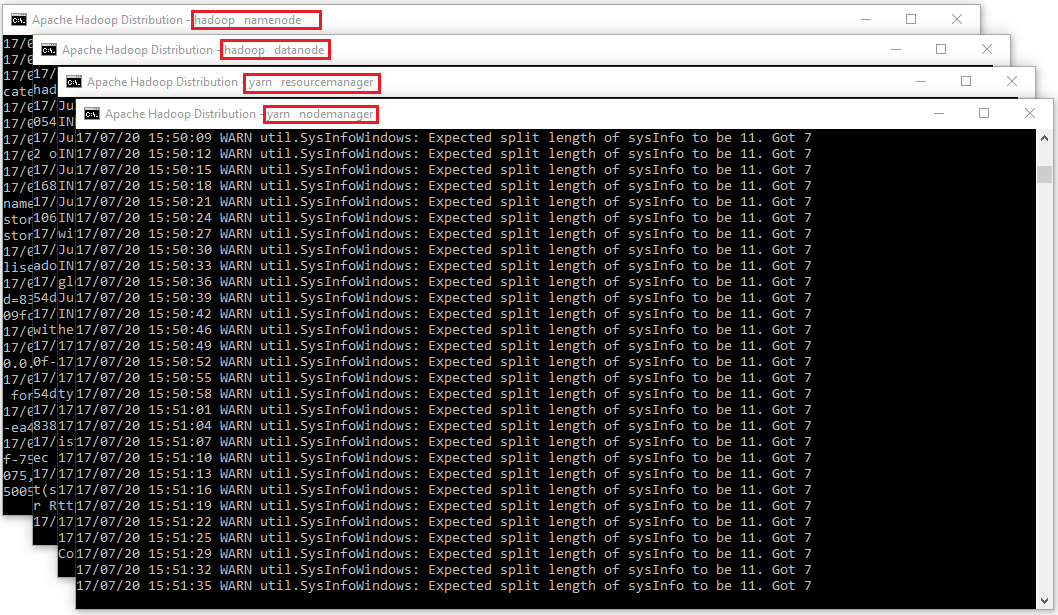
You can check the given below screenshot for your reference 4 new windows will open and cmd terminals for 4 daemon processes like as follows.
- namenode
- datanode
- node manager
- resource manager
Don’t close these windows, minimize them. Closing the windows will terminate the daemons. You can run them in the background if you don’t like to see these windows.

Step 12: Hadoop Web UI
In conclusion, how about we screen to perceive how are Hadoop daemons are getting along. Also you can utilize the Web UI for a wide range of authoritative and observing purposes. Open your program and begin.
Step 13: Resource Manager
Open localhost:8088 to open Resource Manager

Step 14: Node Manager
Open localhost:8042 to open Node Manager

Step 15: Name Node :
Open localhost:9870 to check out the health of Name Node

Step 16: Data Node :
Open localhost:9864 to check out Data Node


This article provides a step-by-step guide to install Hadoop 3.3.0 on Windows 10 via WSL (Windows Subsystem for Linux). These instructions are also applicable for installing Hadoop on Linux systems.
Hadoop 3.3.0 (released on July 14, 2020) is the most recent release in the Apache Hadoop 3.3 line as of the time of this article.
Prerequisites
Follow the steps mentioned on the page below to first enable Windows Subsystem for Linux and then install a Linux distribution of your choice.
Windows Subsystem for Linux Installation Guide for Windows 10
Initial Linux Configuration (optional)
Create a dedicated Hadoop user
We will create a dedicated Hadoop user for executing Hadoop commands. Although not required, it is a recommended step as it separates the Hadoop installation from other software applications and user accounts running on the same machine.
- Create a user group
hadoop
sudo addgroup hadoop
Enter fullscreen mode
Exit fullscreen mode
- Create a user
hduser
sudo adduser hduser
Enter fullscreen mode
Exit fullscreen mode
It will ask for password 2 times followed by user details, just press enter for each prompt and confirm Yes in the end.
- Add user
hduserto user grouphadoop
sudo adduser hduser hadoop
Enter fullscreen mode
Exit fullscreen mode
- Add
hduserto sudoers list so thathdusercan do admin tasks
sudo visudo
Enter fullscreen mode
Exit fullscreen mode
Append after the line «#Allow member of group sudo to execute any command»
hduser ALL=(ALL) ALL
Enter fullscreen mode
Exit fullscreen mode
Then save and close the file.
- Logout of the current session
logout
Enter fullscreen mode
Exit fullscreen mode
- Login again as
hduser
su hduser
cd
Enter fullscreen mode
Exit fullscreen mode
Configure passphraseless ssh
Hadoop requires SSH access to manage its nodes.
This is a critical step and please make sure you follow the steps
Make sure you can SSH to localhost in Ubuntu:
ssh localhost
Enter fullscreen mode
Exit fullscreen mode
If you encounter the error ssh: connect to host localhost port 22: Connection refused, run the following commands:
sudo apt remove openssh-server
sudo apt install openssh-server
sudo service ssh start
Enter fullscreen mode
Exit fullscreen mode
If you cannot ssh to localhost without a passphrase, run the following command to initialize your private and public keys:
ssh-keygen -t rsa -P '' -f ~/.ssh/id_rsa
cat ~/.ssh/id_rsa.pub >> ~/.ssh/authorized_keys
chmod 0600 ~/.ssh/authorized_keys
Enter fullscreen mode
Exit fullscreen mode
Now ssh localhost should work without any passphrase.
Hadoop Installation
Install Java JDK
Update the package index:
sudo apt update
Enter fullscreen mode
Exit fullscreen mode
Check whether Java is already installed:
java -version
Enter fullscreen mode
Exit fullscreen mode
If Java isn’t installed, install Java 8 from OpenJDK via the following command:
sudo apt-get install openjdk-8-jdk
Enter fullscreen mode
Exit fullscreen mode
Check the version installed:
java -version
openjdk version "1.8.0_275"
OpenJDK Runtime Environment (build 1.8.0_275-8u275-b01-0ubuntu1~20.04-b01)
OpenJDK 64-Bit Server VM (build 25.275-b01, mixed mode)
Enter fullscreen mode
Exit fullscreen mode
Download Hadoop binary
Visit the Hadoop releases page to find a download URL for Hadoop 3.3.0:
Hadoop Releases
Run the following command to download the latest binary for Hadoop 3.3.0:
wget https://downloads.apache.org/hadoop/common/hadoop-3.3.0/hadoop-3.3.0.tar.gz
Enter fullscreen mode
Exit fullscreen mode
Wait until the download is completed.
Unzip Hadoop binary
Create a hadoop folder under the user home folder:
mkdir ~/hadoop
Enter fullscreen mode
Exit fullscreen mode
Unzip the downloaded binary package:
tar -xvzf hadoop-3.3.0.tar.gz -C ~/hadoop
Enter fullscreen mode
Exit fullscreen mode
After the package is unzipped, change the current directory to the Hadoop folder:
cd ~/hadoop/hadoop-3.3.0/
Enter fullscreen mode
Exit fullscreen mode
Setup environment variables
nano ~/.bashrc
Enter fullscreen mode
Exit fullscreen mode
Setup Hadoop and Java environment variables at the end of the .bashrc file as below and then save the bash file and close it.
#Set Hadoop-related environment variables
export JAVA_HOME=/usr/lib/jvm/java-8-openjdk-amd64
export HADOOP_HOME=~/hadoop/hadoop-3.3.0
export PATH=$PATH:$HADOOP_HOME/bin
export PATH=$PATH:$HADOOP_HOME/sbin
export HADOOP_CONF_DIR=$HADOOP_HOME/etc/hadoop
export HADOOP_MAPRED_HOME=$HADOOP_HOME
export HADOOP_COMMON_HOME=$HADOOP_HOME
export HADOOP_HDFS_HOME=$HADOOP_HOME
export YARN_HOME=$HADOOP_HOME
Enter fullscreen mode
Exit fullscreen mode
For applying all these changes to the current Terminal, execute the source command.
source ~/.bashrc
Enter fullscreen mode
Exit fullscreen mode
Make sure that Java and Hadoop have been properly installed on your system and can be accessed through the Terminal by,
java -version
openjdk version "1.8.0_275"
OpenJDK Runtime Environment (build 1.8.0_275-8u275-b01-0ubuntu1~20.04-b01)
OpenJDK 64-Bit Server VM (build 25.275-b01, mixed mode)
Enter fullscreen mode
Exit fullscreen mode
hadoop version
Hadoop 3.3.0
Source code repository https://gitbox.apache.org/repos/asf/hadoop.git -r aa96f1871bfd858f9bac59cf2a81ec470da649af
Compiled by brahma on 2020-07-06T18:44Z
Compiled with protoc 3.7.1
From source with checksum 5dc29b802d6ccd77b262ef9d04d19c4
This command was run using /home/daftdey/hadoop/hadoop-3.3.0/share/hadoop/common/hadoop-common-3.3.0.jar
Enter fullscreen mode
Exit fullscreen mode
Configure the pseudo-distributed mode (Single Node mode)
This page below is the official documentation to configure a single node cluster:
Pseudo-Distributed Operation
All the Hadoop configuration files should be located in the ~/hadoop/hadoop-3.3.0/etc/hadoop directory.
cd ~/hadoop/hadoop-3.3.0/etc/hadoop
Enter fullscreen mode
Exit fullscreen mode
The configuration setup steps are as follows:
-
Edit file
hadoop-env.sh:nano hadoop-env.shSet Java environment variable as,
# Java path export JAVA_HOME=/usr/lib/jvm/java-8-openjdk-amd64 -
Edit file
core-site.xml:
core-site.xmlinforms the Hadoop daemon where NameNode runs in the cluster. It contains configuration settings of Hadoop core such as I/O settings that are common to HDFS & MapReduce.nano core-site.xmlAdd the following configuration:
<configuration> <property> <name>fs.defaultFS</name> <value>hdfs://localhost:9000</value> </property> </configuration> -
Edit file
hdfs-site.xml:
hdfs-site.xmlcontains configuration settings of HDFS daemons (i.e. NameNode, DataNode, Secondary NameNode). It also includes the replication factor and block size of HDFS.nano hdfs-site.xmlAdd the following configuration:
<configuration> <property> <name>dfs.replication</name> <value>1</value> </property> </configuration> -
Edit file
mapred-site.xml:
mapred-site.xmlcontains configuration settings of MapReduce application like the number of JVM that can run in parallel, the size of the mapper and the reducer process, CPU cores available for a process, etc.nano mapred-site.xmlAdd the following configuration:
<configuration> <property> <name>mapreduce.framework.name</name> <value>yarn</value> </property> <property> <name>mapreduce.application.classpath</name> <value>$HADOOP_MAPRED_HOME/share/hadoop/mapreduce/*:$HADOOP_MAPRED_HOME/share/hadoop/mapreduce/lib/*</value> </property> </configuration> -
Edit file
yarn-site.xml:
yarn-site.xmlcontains configuration settings of ResourceManager and NodeManager like application memory management size, the operation needed on program & algorithm, etc.nano yarn-site.xmlAdd the following configuration:
<configuration>
    <property>
        <name>yarn.nodemanager.aux-services</name>
        <value>mapreduce_shuffle</value>
    </property>
    <property>
        <name>yarn.nodemanager.env-whitelist</name>
        <value>JAVA_HOME,HADOOP_COMMON_HOME,HADOOP_HDFS_HOME,HADOOP_CONF_DIR,CLASSPATH_PREPEND_DISTCACHE,HADOOP_YARN_HOME,HADOOP_MAPRED_HOME</value>
    </property>
</configuration>
Format namenode
Go to the Hadoop home directory and format the Hadoop namenode:
cd ~/hadoop/hadoop-3.3.0
bin/hdfs namenode -format
Enter fullscreen mode
Exit fullscreen mode
This formats the HDFS via the NameNode. Formatting the file system means initializing the directory specified by the dfs.name.dir variable.
This command should be executed only for the first time. Never format an up and running Hadoop filesystem. You will lose all your data stored in the HDFS.
Run HDFS daemons
The NameNode is the centerpiece of an HDFS file system. It keeps the directory tree of all files stored in the HDFS and tracks all the files stored across the cluster.
On startup, a DataNode connects to the Namenode and it responds to the requests from the Namenode for different operations.
Start NameNode daemon and DataNode daemon
sbin/start-dfs.sh
Starting namenodes on [localhost]
Starting datanodes
Starting secondary namenodes [tars]
Enter fullscreen mode
Exit fullscreen mode
Check status via jps command
jps
8544 SecondaryNameNode
8304 DataNode
8149 NameNode
8702 Jps
Enter fullscreen mode
Exit fullscreen mode
When the HDFS services are successfully initiated, you should be able to see these four processes running.
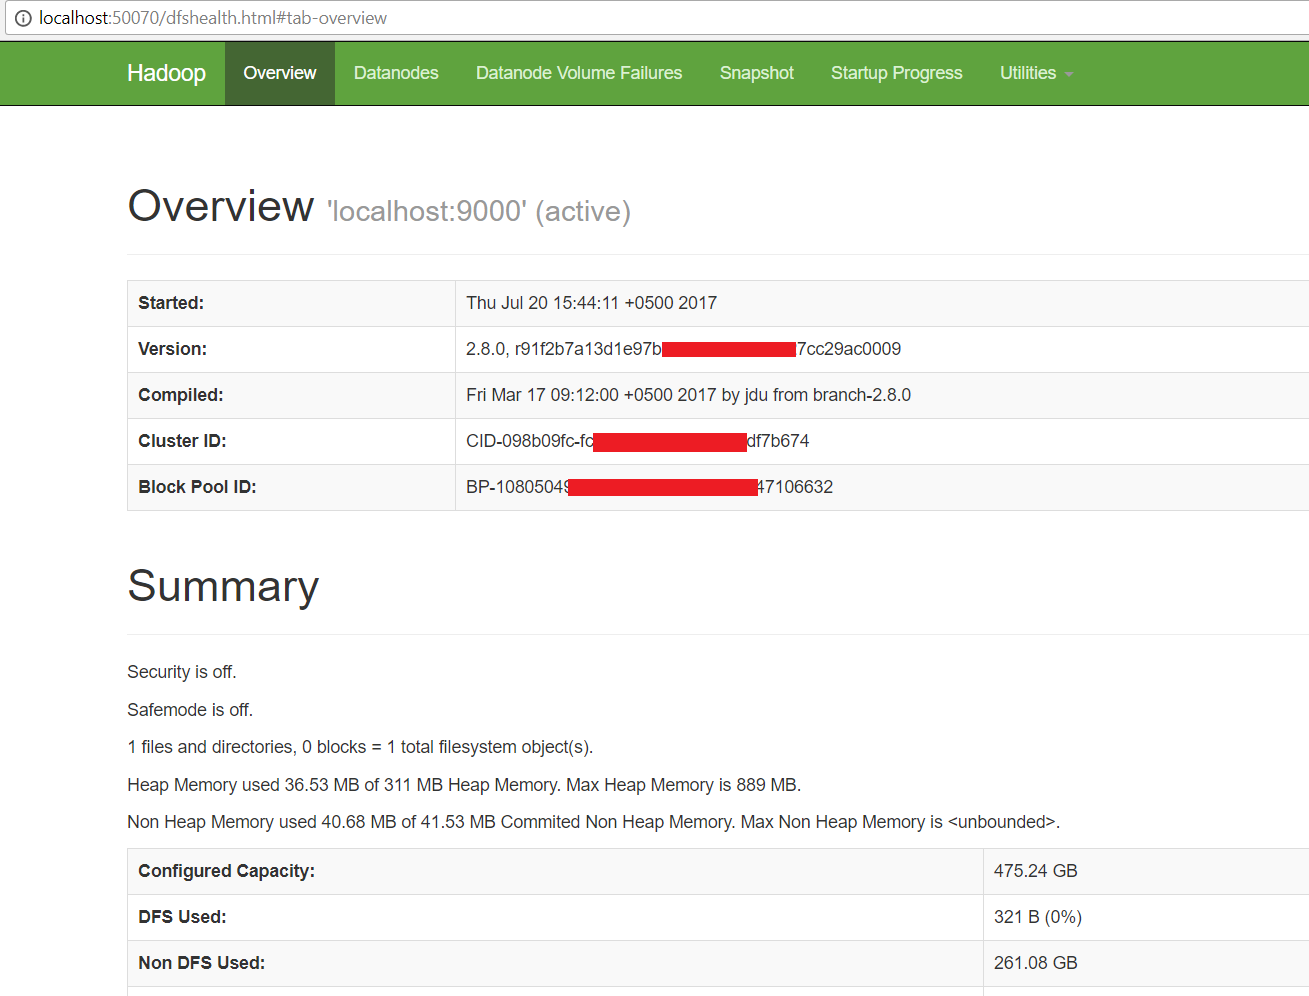
View name node portal
Now open the browser and go to the following URL to view the NameNode interface. Scroll down and see the number of live nodes.
http://localhost:9870/dfshealth.html#tab-overview
The web UI looks like this:

Data nodes information can be also viewed through the Datanodes menu link:

Run YARN daemon
ResourceManager is the master that arbitrates all the available cluster resources and thus helps in managing the distributed applications running on the YARN system. Its work is to manage each NodeManagers and each application’s ApplicationMaster.
The NodeManager in each machine framework is the agent that is responsible for managing containers, monitoring their resource usage, and reporting the same to the ResourceManager.
Start ResourceManager daemon and NodeManager daemon
sbin/start-yarn.sh
Starting resourcemanager
Starting nodemanagers
Enter fullscreen mode
Exit fullscreen mode
Check status using the jps command
jps
11831 ResourceManager
11352 DataNode
12347 Jps
11196 NameNode
11981 NodeManager
11597 SecondaryNameNode
Enter fullscreen mode
Exit fullscreen mode
Once the YARN services are started, two more processes for NodeManager and ResourceManage can be seen running.
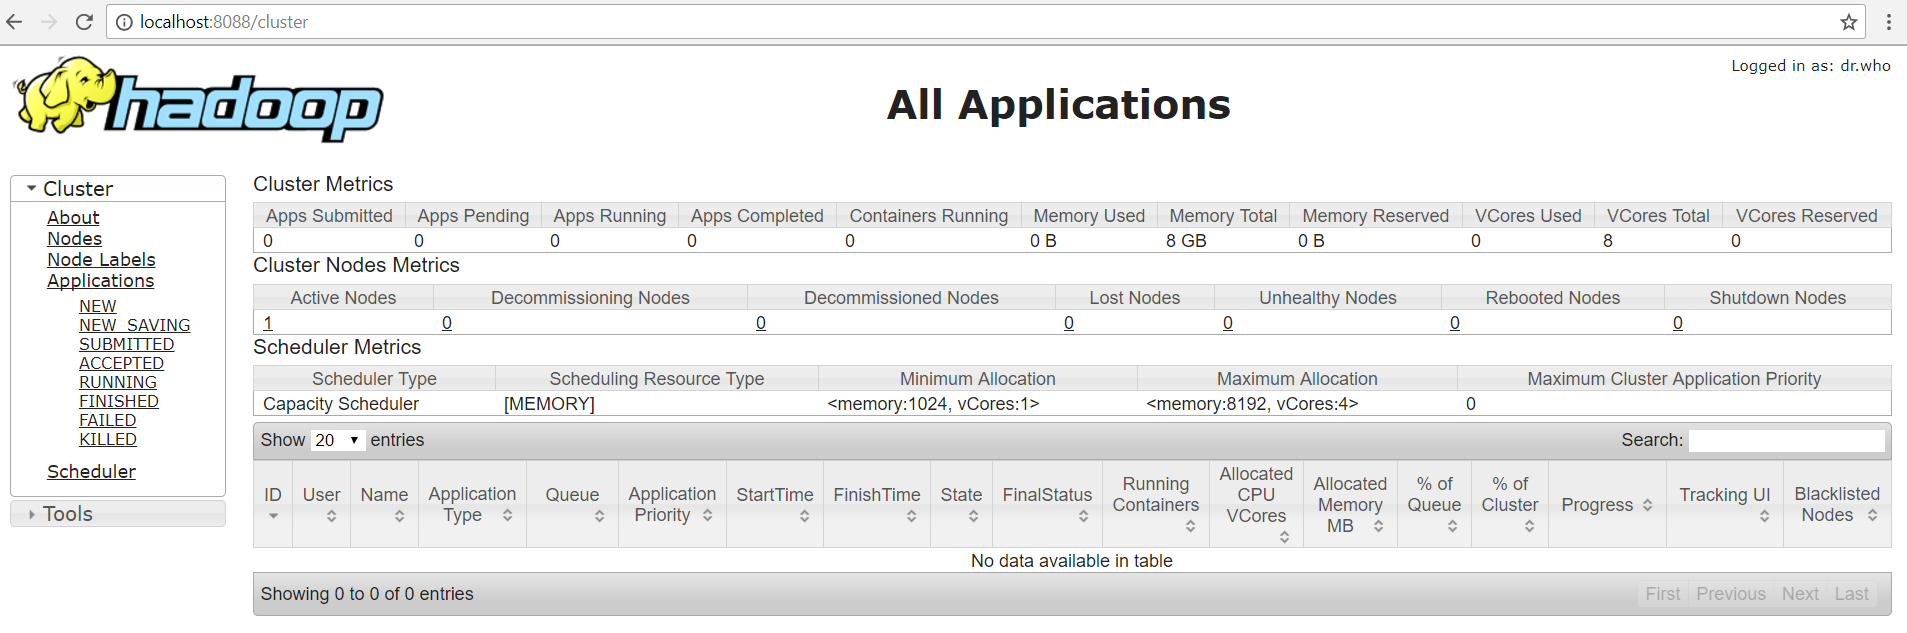
View YARN web portal
Now open the browser and go to the following URL to view the YARN resource manager web UI.
http://localhost:8088/cluster
The web UI looks like this:

Execution of all the Hadoop applications can be monitored through this web portal.
Shutdown Hadoop services
After completion of the execution of all Hadoop applications, the HDFS and YARN services can be stopped as follows:
sbin/stop-yarn.sh
sbin/stop-dfs.sh
Enter fullscreen mode
Exit fullscreen mode
Verify status via jps command, only the jps service should be running:
jps
13257 Jps
Enter fullscreen mode
Exit fullscreen mode
Summary
Congratulations, you have successfully installed a single-node Hadoop cluster in one go on your Linux subsystem of Windows 10. It’s relatively easier compared to installing on Windows as we don’t need to download or build native Hadoop HDFS libraries.
Have fun exploring with Hadoop.
Try out an example application: Hadoop MapReduce computational model to perform analyses on DBLP publication data
If you encounter any issues while following the steps, please post a comment and I will try my best to help.
Further References
Install Hadoop 3.3.0 on Windows 10 using WSL
Install Hadoop: Setting up a Single Node Hadoop Cluster

Step by step Hadoop 2.8.0 installation on Window 10
Prepare:
These softwares should be prepared to install Hadoop 2.8.0 on window 10 64bit
- Download Hadoop 2.8.0 (Link 1 OR Link 2)
- Java JDK 1.8.0.zip Link to download
Set up
-
Check either Java 1.8.0 is already installed on your system or not, use “Javac -version” to check.

-
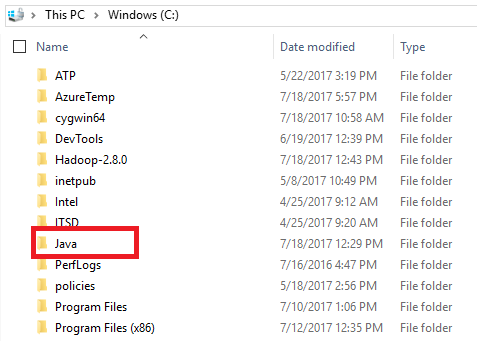
If Java is not installed on your system then first install java under “C:\JAVA”
-
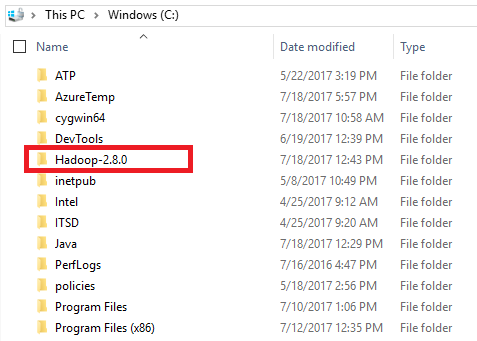
Extract file Hadoop 2.8.0.tar.gz or Hadoop-2.8.0.zip and place under “C:\Hadoop-2.8.0”.
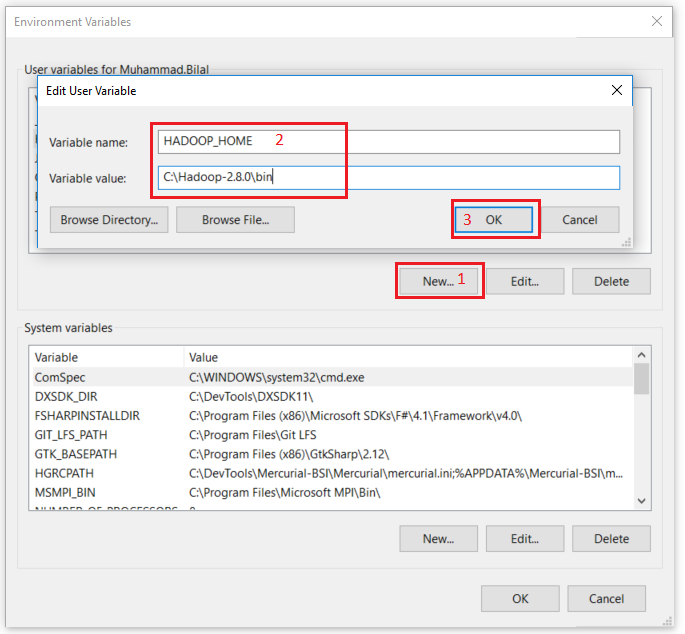
-
Set the path HADOOP_HOME Environment variable on windows 10(see Step 1,2,3 and 4 below).
-
Set the path JAVA_HOME Environment variable on windows 10(see Step 1,2,3 and 4 below).
-
Next we set the Hadoop bin directory path and JAVA bin directory path.
Configuration
- Edit file C:/Hadoop-2.8.0/etc/hadoop/core-site.xml, paste below xml paragraph and save this file.
<configuration>
   <property>
       <name>fs.defaultFS</name>
       <value>hdfs://localhost:9000</value>
   </property>
</configuration>
- Rename “mapred-site.xml.template” to “mapred-site.xml” and edit this file C:/Hadoop-2.8.0/etc/hadoop/mapred-site.xml, paste below xml paragraph and save this file.
<configuration>
   <property>
       <name>mapreduce.framework.name</name>
       <value>yarn</value>
   </property>
</configuration>
- Create folder “data” under “C:\Hadoop-2.8.0”
- Create folder “datanode” under “C:\Hadoop-2.8.0\data”
- Create folder “namenode” under “C:\Hadoop-2.8.0\data”
- Edit file C:\Hadoop-2.8.0/etc/hadoop/hdfs-site.xml, paste below xml paragraph and save this file.
<configuration>
   <property>
       <name>dfs.replication</name>
       <value>1</value>
   </property>
   <property>
       <name>dfs.namenode.name.dir</name>
       <value>/hadoop-2.8.0/data/namenode</value>
   </property>
   <property>
       <name>dfs.datanode.data.dir</name>
       <value>/hadoop-2.8.0/data/datanode</value>
   </property>
</configuration>
- Edit file C:/Hadoop-2.8.0/etc/hadoop/yarn-site.xml, paste below xml paragraph and save this file.
<configuration>
   <property>
    	<name>yarn.nodemanager.aux-services</name>
    	<value>mapreduce_shuffle</value>
   </property>
   <property>
      	<name>yarn.nodemanager.auxservices.mapreduce.shuffle.class</name>
	<value>org.apache.hadoop.mapred.ShuffleHandler</value>
   </property>
</configuration>
- Edit file C:/Hadoop-2.8.0/etc/hadoop/hadoop-env.cmd by closing the command line “JAVA_HOME=%JAVA_HOME%” instead of set “JAVA_HOME=C:\Java” (On C:\java this is path to file jdk.18.0)

Hadoop Configuration
- Dowload file Hadoop Configuration.zip
- Delete file bin on C:\Hadoop-2.8.0\bin, replaced by file bin on file just download (from Hadoop Configuration.zip).
- Open cmd and typing command “hdfs namenode –format” . You will see
Testing
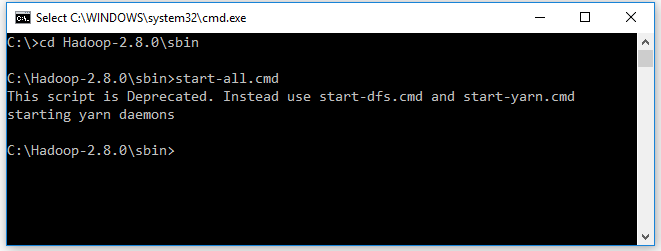
- Open cmd and change directory to “C:\Hadoop-2.8.0\sbin” and type “start-all.cmd” to start apache.
- Make sure these apps are running
- Hadoop Namenode
- Hadoop datanode
- YARN Resourc Manager
- YARN Node Manager
- Open: http://localhost:8088
- Open: http://localhost:50070
Congratulations, Hadoop installed.