Some people would feel frustrating about that after installing Windows server 2016 successfully, the user interface has changed. There is no a graphic user interface, so all the operation would be executed by typing some professional commands. That is not easy for some users who are not familiar with Windows server, especially for the people who is the freshman for Windows server. Then people may ask whether there is a way to enable the GUI in Windows server 2016. Here I would show you how to enable the GUI in Windows server 2016.
Here I would show the detailed steps from scratch.
When we begin installing the new Windows server 2016, there are many options for us.

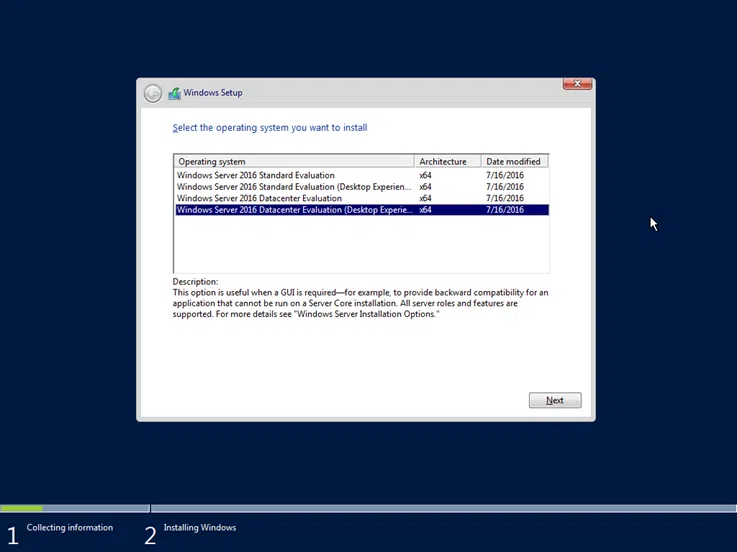
You can see many option are list on the above picture. The options without Desktop Experience are the core editions. They would not offer GUI after installation. And the ones with Desktop Experience would offer full GUI features. If you clear about which is your favor, you would find the problem and has no need to read the under passage. But if you just wrong installed the core edition of Windows server 2016 and you regretted it when finding that all the operations have to be implemented by typing commands. Then you should follow the under steps.
Step 1: Open PowerShell console and type Get-WindowsFeature -Name *GUI* into it.

You would find that all the install state of the GUI features listed are shown as removed. And now you should try to install the removed GUI features. Before that, you should make sure that your server has access to internet.
Step 2: Just type Install-WindowsFeature -Name Server-Gui-Shell, Server-Gui-Mgmt-Infra into PowerShell console and press Enter to execute it.

Typically, when the above operation is completed and you should just type Restart-Computer into the PowerShell console to restart your server. Then you would see windows server 2016 with the full graphic user interface(GUI).
Note: If your server has no access to the internet, you would probably see a large number of error message with red color. Then you have to use your installation media to successfully install server GUI features. Before you can do that, you need to identify appropriate index of Windows server 2016 edition from which you want to install features. The GUI features are only default built in the editions labelled with desktop experience, so you should skip indexes for core editions in the list.

So here i would show you installing the GUI features from a installation media.
Here we go.
Step 1: If you have store the windows server installation media in this system before, just navigate to the path of it. Type the command Get-WindowsImage -ImagePath XXX\XX\X into the console.
Attention : The GUI features information are stored in install.win file located on D:\sources in my system drive, so you should just adapt it to your condition.
Here the GUI features related file’s path is D:\sources\install.wim. Then i just type Get-WindowsImage -ImagePath D:\sources\install.wim into the console to find the system imageindex.

From the first picture in this passage, we know that the imageindex of core edition without GUI is 1 and 3. Then you should just choose the right imageindex between 2 and 4. Here i would choose the imageindex as 2.
Step 2: Type Install-WindowsFeature -Name Server-Gui-Shell, Server-Gui-Mgmt-Infra -Source wim:D:\sources\install.wim:2 into PowerShell console. And press Enter to execute it.

Note: To install feature from non-default location, you should follow the appropriate syntax like below.
InstallationProvider:WIMFileLocation:ImageIndex
So if you want to install the GUI features from a installation media, you should follow the syntax.
Step 3: After the above operation is finished, you should be prompted with the information that you must restart this server to finish the installation process. Just type Restart-Computer into the PowerShell console and execute it.

Then you would find that the full GUI features has been enabled in your Windows server 2016.

The default install of the Windows Server 2016 (Tech preview 2) do not provide Graphical User Interface (GUI) and even the second option only installs the local administrative tools (Server Manager). Not the traditional desktop that we’re used to having in 2012 R2 or 2008 R2 server systems. So if you take the second option (with local admin tools) you basically end up with a server without a desktop and start menu.
I know that this is rather good as the server system gets very slim footprint, reducing the surface, but If you want to install a third party application(s) that needs the GUI and the usual desktop environment ,then you must add something – a full desktop GUI. Windows server 2016 GUI install can be done through PowerShell, and you only need a single line of code. You can also add the GUI by selecting a Feature through adding a new role and feature wizard. (as you do that in Windows Server 2012 R2…)
Note that I’m testing it with a built through VMware Workstation 11. I picked up the default config (Workstation 11 compatible VMs) and the ISO has been detected as Windows 10.
Windows Server 2016 Gui Install – How to:
Step 1: During the setup process I choose the second option – Windows Server Technical preview 2 (with local admin tools), but you could only install the core (tested that as well).
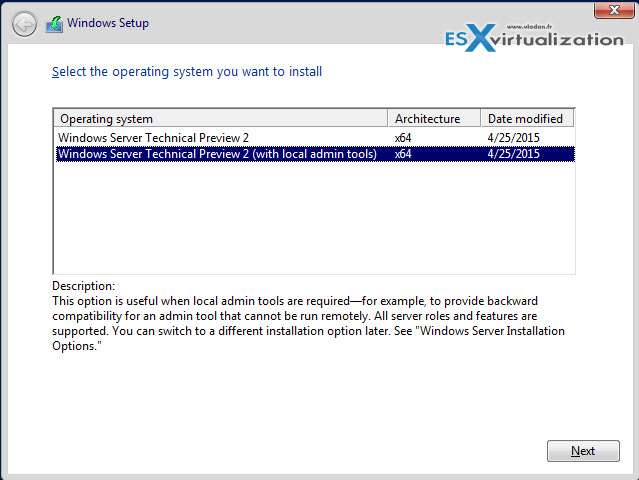
Step 2: After reboot, you’re asked to assign a new password to the user’s account. After that, you’ll end up with a console where the server manager launches automatically. Well, in my case I was using easy install with VMware workstation, so I had an automatical installation of VMware tools followed by another reboot…
But if I would have assigned that password in VMware workstation during the assistant walking me through the creation of the VM, then the double reboot would have happened without my interaction.
Anyway, through Server manager click Add roles and features > skip the first and second page and go directly to “features” where you choose the Server Graphical Shell. I picked the desktop experience in this example but that is not necessary. The desktop experience adds the usual package used for desktop environments:
- Windows Search
- Desktop wallpapers
- Etc…
At the same time, you can tick the checkbox so the server can reboot automatically at the end of the installation process.
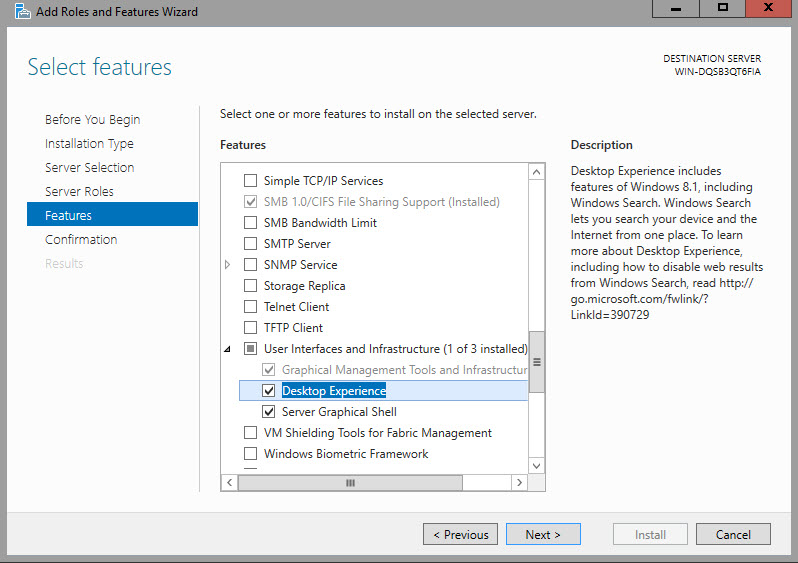
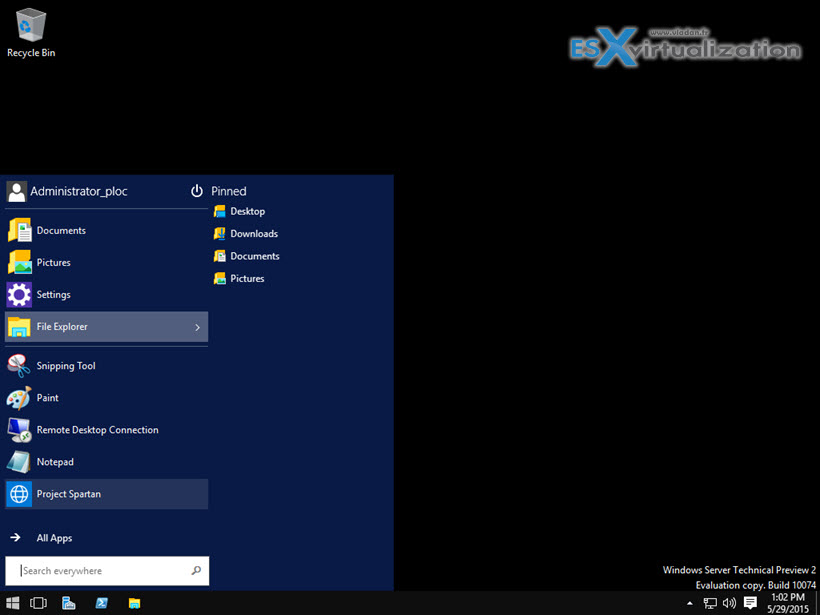
Validate the choice > Next > Install. And after a reboot the server shows well the Full desktop with Start menu and Server Manager.
Option 2: Install the GUI via PowerShell
In case you choose to install just the core (nano) and you don’t have server manager installed, you can use PowerShell. To install the GUI via PowerShell you can enter this single line of code in your PowerShell Window:
Install–WindowsFeature Server–Gui–Shell –Restart –Source wim:D:sourcesinstall.wim:4
Shoot from the lab:

The server reboots automatically at the end (without a prompt). And after the reboot where you’ll see this usual screen…
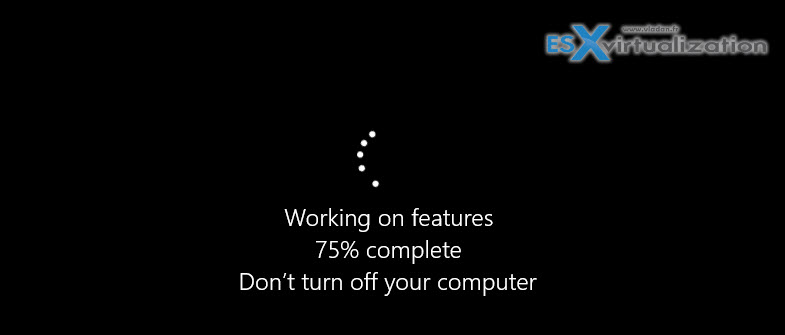
The server reboots and shows GUI, Start Menu AND the Server manager.
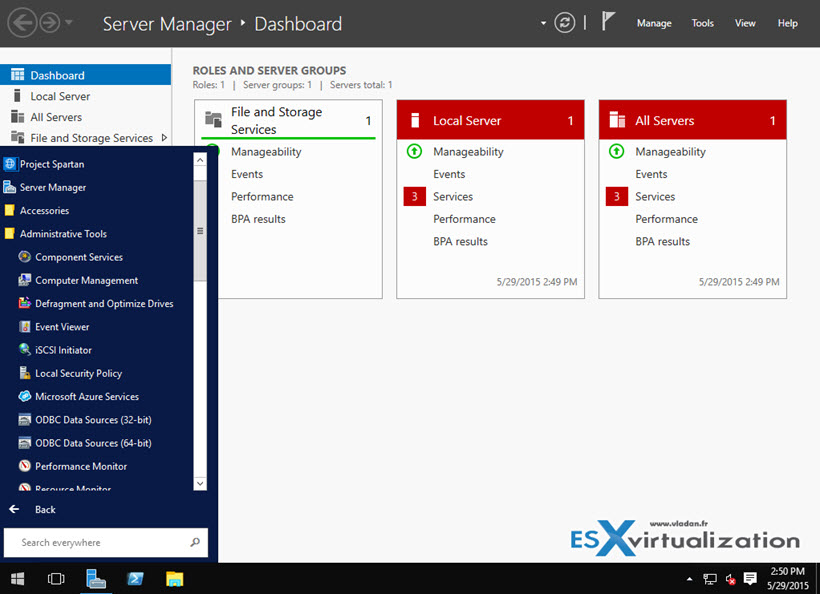
As you can see, the process is quite similar to what’s available in Windows Server 2012 R2, and it’s quite simple.
I don’t think that the GUI will completely disappear. There will still be applications that won’t work in environments without a GUI. Look at the SMBs which usually have 1 or 2 Windows servers (physical, yeah) and which do need to provide not only file level service with domain authentication, but many more custom based enterprise applications, printing, and networks core services etc. So the Windows based servers (with GUI windows on it) will, IMHO, never die…
At the same time, it’s good that we have the option to deploy stripped down version of Windows server (who knows how the final version will look like) without any services. And add more services/roles later via Powershell or from remote workstation via administrative tools.
As you may noticed new server is coming out from Microsoft workshop – Windows Server 2016 – currently technical preview product. This server upon installation is little a bit different as it does not come with standard desktop or GUI and first thing what you will see is command prompt window. This server expect that you Admin will have a good hang of [easyazon_link identifier=”1782173552″ locale=”US” tag=”wn0d5-20″] PowerShell [/easyazon_link] and be able to manage all from [easyazon_link identifier=”0735622620″ locale=”US” tag=”wn0d5-20″] command line [/easyazon_link].
Click inside the command prompt window and type in powershell – it will start [easyazon_link identifier=”B005OEMZE6″ locale=”US” tag=”wn0d5-20″] PowerShell [/easyazon_link] and now you can start play around.
C:\Users\Administrator>powershell
You should now notice the difference – PS in front of the prompt so you are now in PowerShell mode.
Lets list all gui available for the server:
PS C:\Users\Administrator>Get-WindowsFeature *gui*
You should see listed 3 items:
- Graphical Management Tools and Infrastructure
- Server Graphical Shell
- GUI for Windows Server Antimalware
Here is the one liner that will install for you the typical desktop environment on your Windows Server 2016:
PS C:\Users\Administrator>Install-WindowsFeature Server-Gui-shell -Restart
This command will install for you the Desktop experience on server and reboot server to make the changes. Once server is back you have same environment as you used to have in previous server versions.
[easyazon_image align=”none” height=”160″ identifier=”0735684332″ locale=”US” src=”http://blog.technotesdesk.com/wp-content/uploads/2015/08/51O-WjtMrpL._SL160_.jpg” tag=”wn0d5-20″ width=”130″]

Hi Guys! In this blog we are going to install Windows server 2016 GUI, configure Active Directory and Add Windows 7 as a domain client. I will not configure Virtual machine on VirtualBox to do the same you can refer to the previous blog. All the steps are same.
Before starting I want you to perform some specific task.
- Download and Install VirtualBox.
- Download Windows Server 2016.
- Download any version of Windows 7 SP 1.

Follow the following steps:
1.Installing Windows Server 2016 GUI
Select language to install,Time and currency format and Keyboard or input method then click Next.

Click on Install now .

Select the operating system you want to install. Here we are going to select Windows Server 2016 Standard Evaluation(Desktop Experience) then click Next.

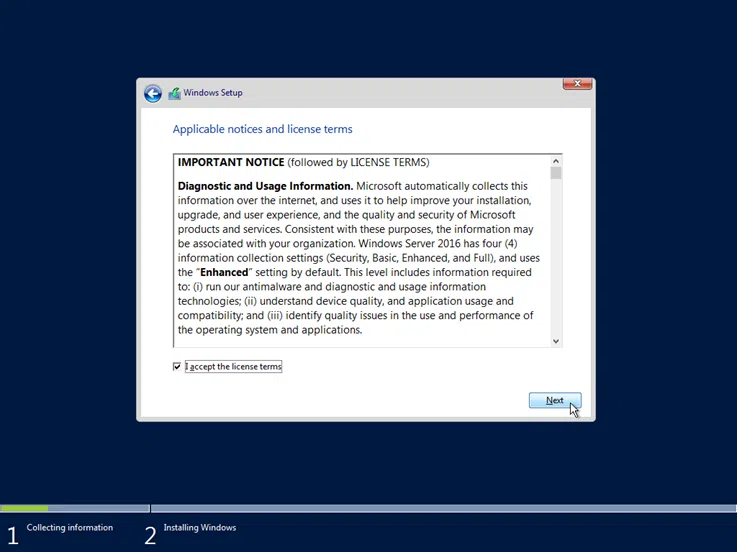
Accept the licence terms and click Next.

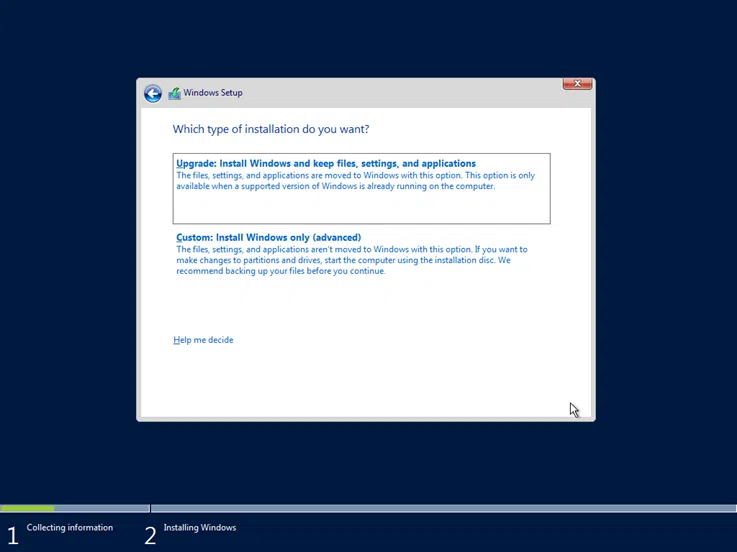
Now, we have click on Custom: Install windows only.

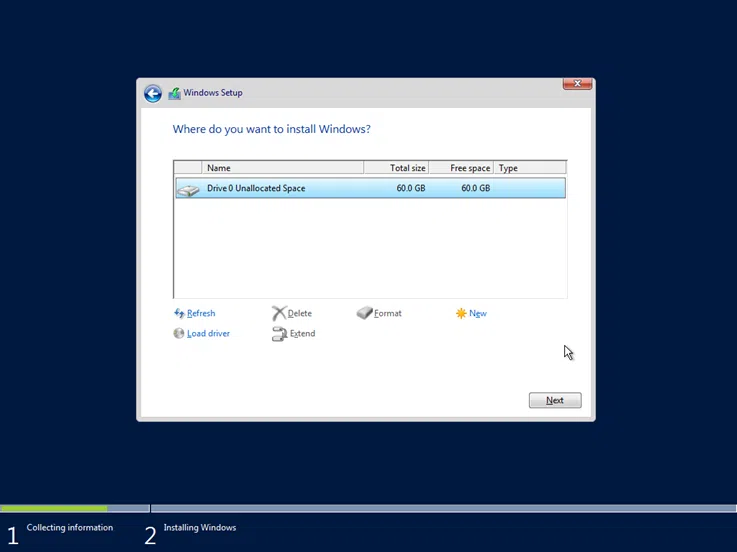
Select the drive and click Next.

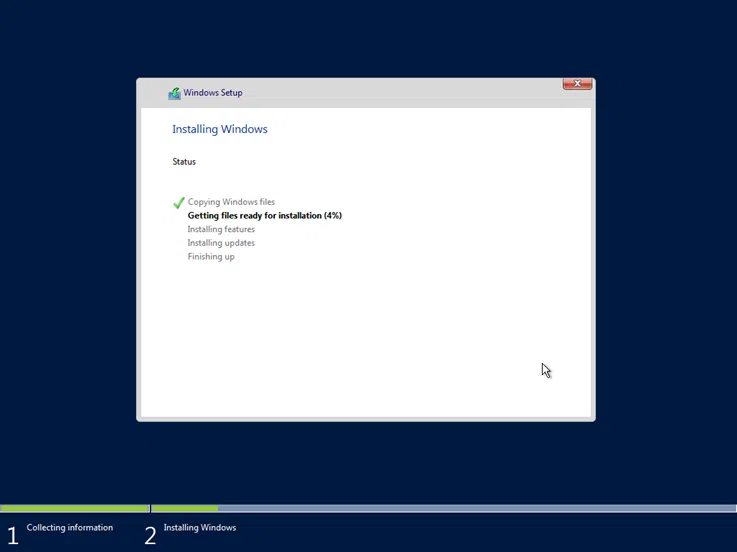
Windows Setup installation started. It will restart the windows several times in between.

It ask for the password,enter the password then click Finish.

Installation completed successfully, Press CTRL + DEL to unlock.

Enter the password and hit Enter.

2.Setting up server configuration
Open Control Panel-> Network and Internet-> Network and Sharing Center-> Change adapter setting-> Ethernet adapter -> Properties

Now, Disable IPv6 and Double click IPv4 then Select Use the following IP address option then set the IP address of the server and click OK.

Run the Server Manager then go to Local Server-> Computer name-> Change . Give a new name to the server and click OK.

3.Configuring Active Directory
Before Configuring check few things.
- Network should be working.
- Check time is proper.
- Check computer name.
Go to Server Manager-> Dashboard-> Add Roles and Features. Add Roles and Features Wizard started click Next.

Select installation type as Role-based or feature-based installation and click Next.

Select destination server then click Next.

In Select server roles check Active Directory Domain Services, it will load all prerequisite feature for the installation then click Add Features.

Then check DNS Services it will load all prerequisite feature for the installation then click Add Features.
Then click Next.

It automatically Select Features for installation according to the selected server roles. Click Next.

It will give notes about Active Directory Domain Services. Click Next.

It will give notes about DNS Server. Click Next.

Confirm installation selections By clicking Install.

Installation started wait till it complete. After completion machine will restart automatically.

Unlock the machine CTRL +DEL then Enter the password. Open Server Manager and click on the notification icon. In notification click on Promote this server to a domain controller.

Active Directory Domain Server Configuration Wizard will open. In Deployment Configuration select Add a new forest and enter Root domain name then click Next.

In Domain Controller Options enter the Password and click Next.

In DNS Options we are not going to install DNS so click Next.

In Additional Options it will automatically take The NetBIOS domain name then click Next.

The wizard will automatically take the path. Click Next.

Review each and every setting and click Next.

It check for all the Prerequisites Check and take 10-15 minutes then click Install.

It will install all the services and give the warning and error message.

After the installation machine will restart. Unlock and enter the password then go to Control Panel-> System and Security-> System and check domain.

And we successfully set up active directory on the server.
4.Adding Domain Client
Install Windows 7 in VirtualBox. Here I have already Windows 7 installed.
Now start the machine. Then press WIN + R and enter ncpa.cpl. It will open Network Adapter
Double click on the Local Area Connection and click on the Properties. Disable IPv6 and Double click on IPV4 and select the Use the following IP Address to set up static IP Address.

Here we are giving IP address 10.0.0.100 to the machine, Subnet mask is same for both the machine 255.255.255.0, Default gateway 10.0.0.1 is also same for both the machine then we are assigning Prefered DNS server to the machine 10.0.0.200 which is IP Address of the server and Alternate DNS Server as 8.8.8.8 then press OK.
Go to My Computer-> Properties-> Change Setting-> Change domain then select domain and Enter domain which we configured on server and press OK.
It will ask for the username and password of the server. Specify the Username and Password of the Server and press OK.

It will give a successful message when connection implemented successfully and restart the machine. Now login to the machine using domain controller credentials.

After login into the machine Go to My Computer-> Properties and we have FQDN (Fully Qualified Domain Name) that is Host name +Domain name.

And we successfully added a client to our domain controller.
References:
- https://www.microsoft.com/en-in/evalcenter/evaluate-windows-server-2016
- https://techverse.net/download-windows-7-iso-x86-x64-microsofts-official-servers/
- https://www.virtualbox.org/wiki/Downloads
I hope you enjoyed my blog. Subscribe to read other upcoming blog. Share the blog with your friends if you found it helpful. If you have any suggestion and feedback, please connect with me on social media or Email me. All details are already in contact.
In today’s article, we will see a typical installation of Windows Server 2016 Desktop Experience, the ‘full’ version including the graphical user interface (GUI).
Before the installation
I mention the following for typical reasons as it is not self-evident for everyone.
- Check the system requirements and instructions given by Microsoft.
- Download the Windows Server 2016 installation ISO from the Evaluation Center, if you like.
- If you are going to install it on a physical machine then you have to burn it to a DVD or a USB flash drive. Personally, I prefer to do it with Rufus.
- You must select the DVD or USB as the boot device in the BIOS/UEFI settings.
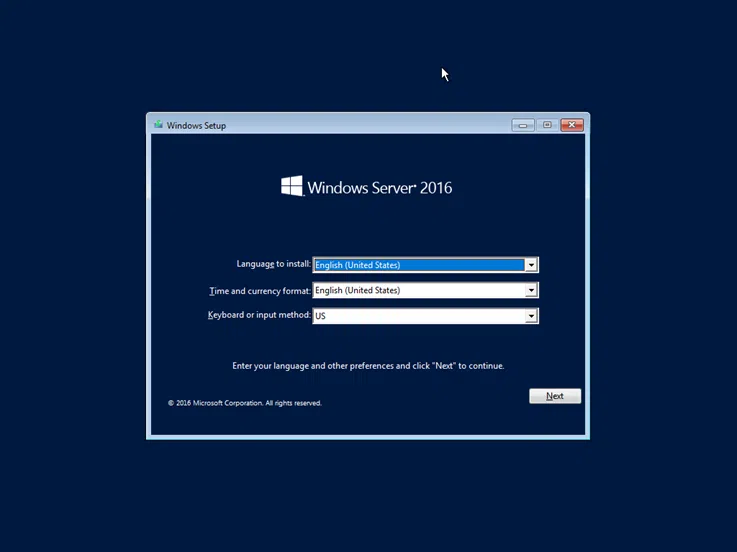
Select Language, Time, and keyboard language and click Next to continue.
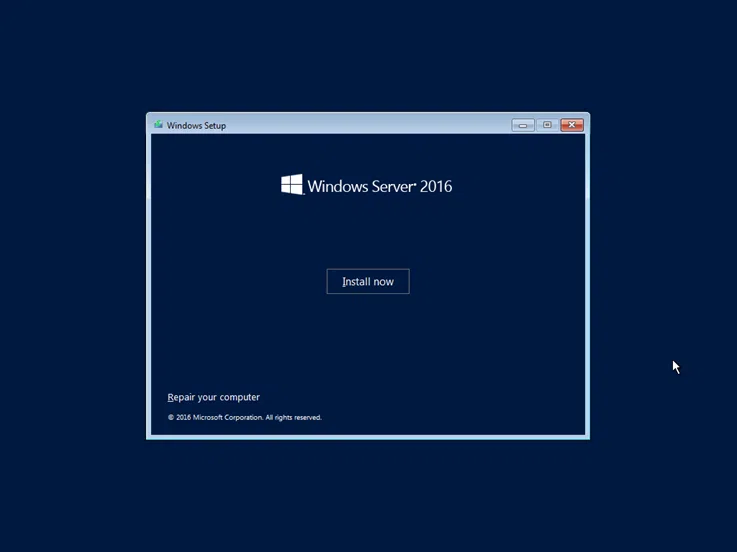
Click the Install now button to continue.
Here, select the version of Windows Server 2016 you are about to install. What you need to keep in mind is selecting the Desktop Experience version, which means the version with the graphical interface will be installed.
Accept the terms of use by selecting I accept license terms option and click Next to continue.
Since it is a clean installation rather than upgrading a previous version, click Custom: Install Windows only (advanced).
Select the disk to be installed in Windows Server 2016. At this point, you can create different partitions as well as load the respective drivers for the drives as long as required by the manufacturer. In a typical installation, you do not have to do anything more than simply selecting the disk.
The installation of Windows Server 2016 is in progress. You will have to wait a few minutes.
After restarting the server, you will be prompted to type the local administrator account password. Ensure that the password meets the basic complexity requirements.

Immediately after, the last actions will be performed and you will be ready to use Windows Server 2016. As you can see, by pressing the Ctrl + Alt + Delete key you can connect to the local administrator account you created in the previous step.

That’s it!
After you’ve finished installing Windows Server 2016, you can go ahead with some of the basic settings you’ll need to do first. Indicatively, the most common are:
- Set time, time zone, and date
- Change server name
- Change basic IPv4 network settings
- Join a local Active Directory domain
