The following guide explains how to install VirtualBox Guest Additions in Windows 10 Virtual Machine.
When you first install Windows 10 in Oracle VM VirtualBox, some advanced features won’t be enabled (as well as correct screen resolution) without guest additions. The features enabled by Guest Additions are: correct screen resolution, mouse pointer integration, seamless windows, time synchronization, shared folders, and shared clipboard.
We can install VirtualBox Guest Additions in Windows 10 by performing these steps:
Access the virtual machine’s menu and go to devices and click: «Install Guest Additions CD Image…».

Go to My Computer (This PC in Windows 10) and open the Guest Additions CD drive under the Devices and drivers section.

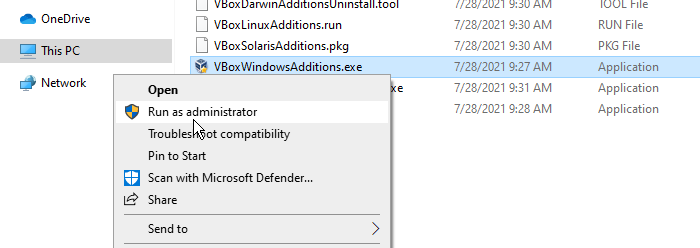
When you double-click the CD drive, the installer may start automatically. If not, right-click on VBoxWindowsAdditions and select Run as administrator.
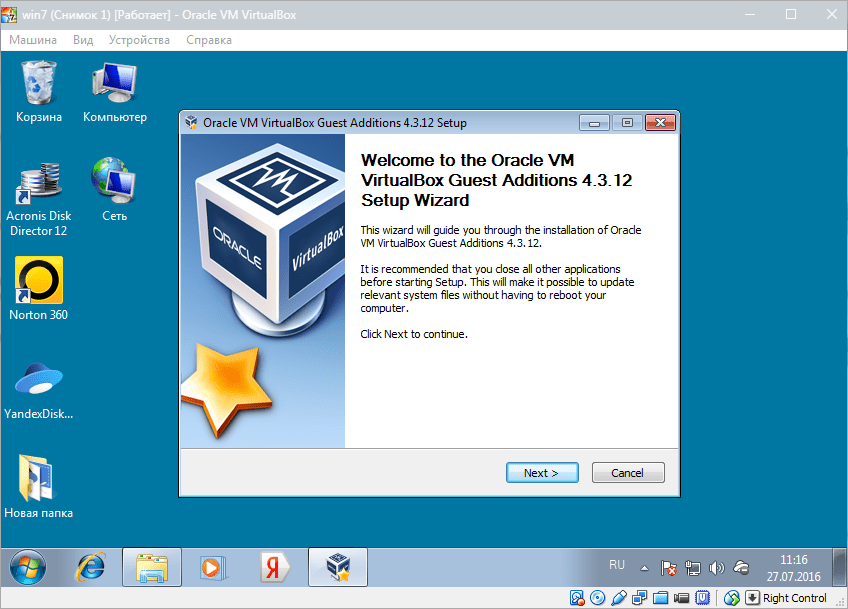
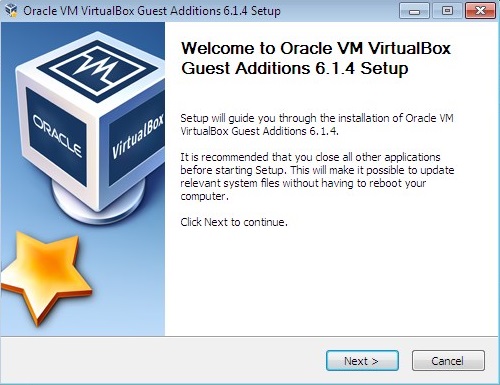
The Guest Additions Setup Wizard will start automatically.
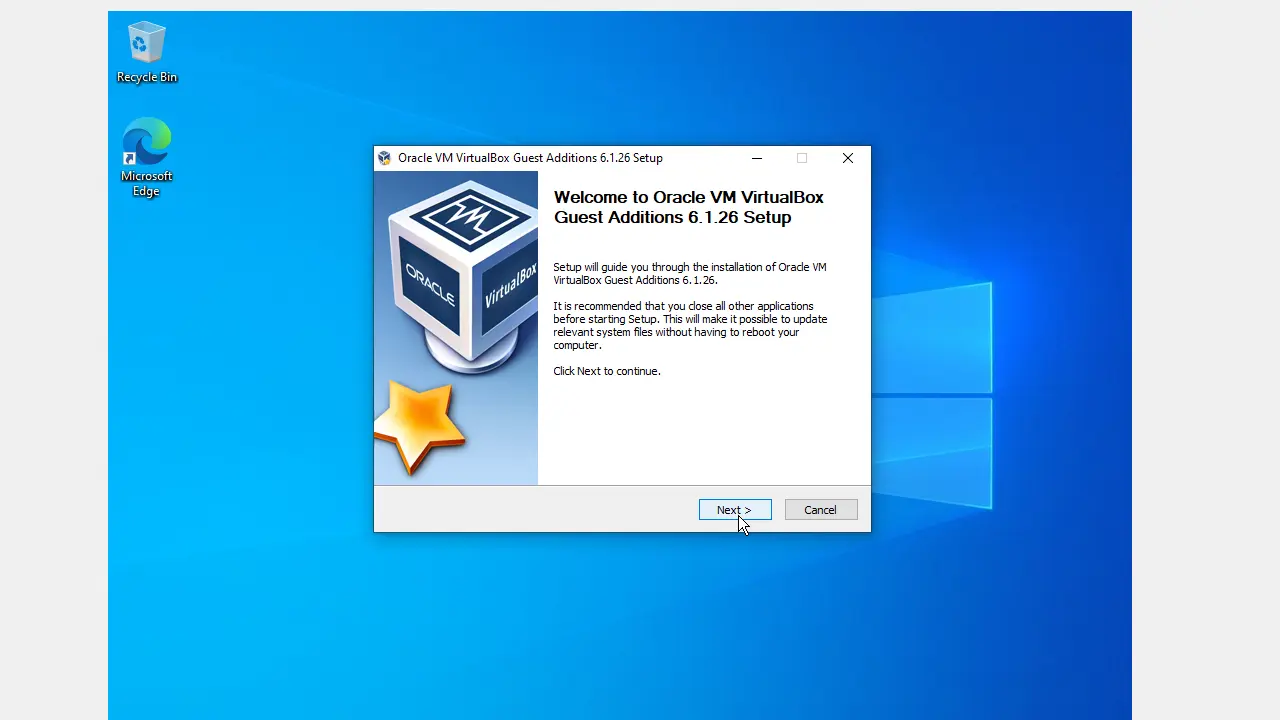
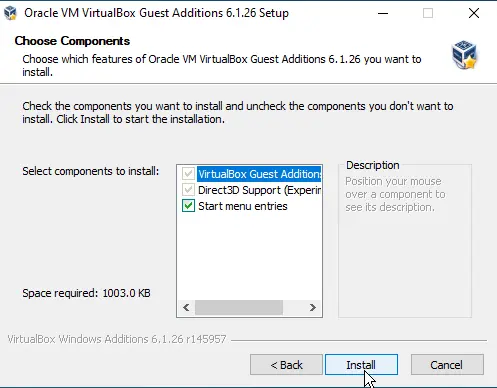
Click Next to continue with default settings and click on Install to begin the process. The setup wizard will begin to install VirtualBox Guest Additions on Windows 10.
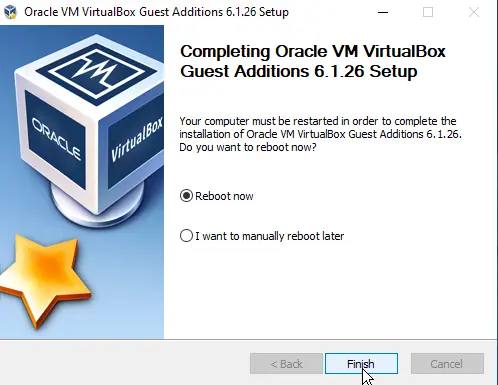
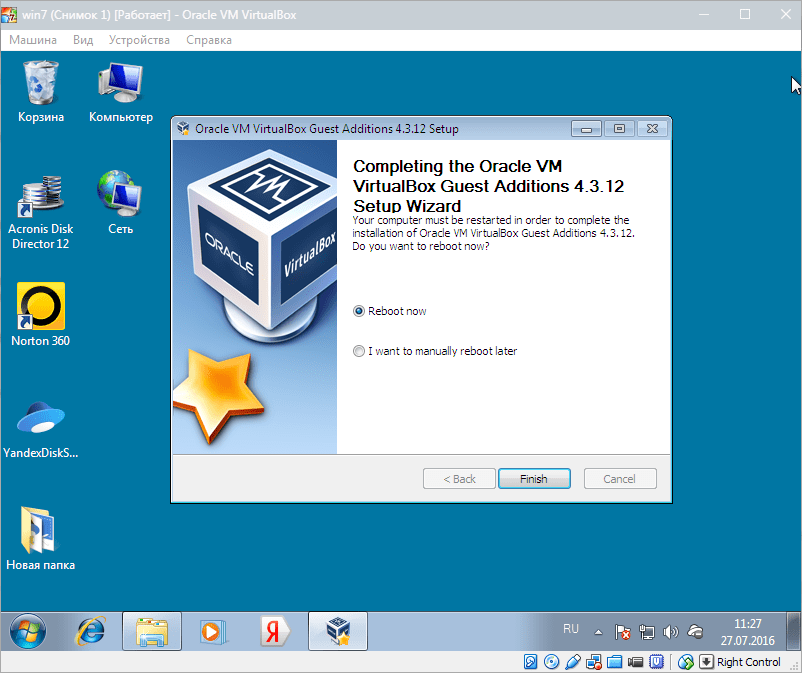
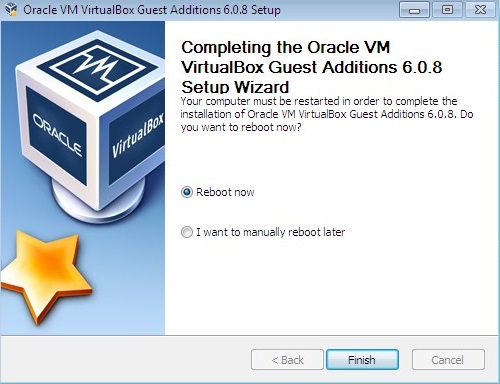
To complete the installation process, we need to reboot the virtual machine. Click on Finish to reboot Windows 10 VM.
With the Guest Additions installed, you’ll be able to access advanced virtual machine features such as keyboard and mouse integration, 3D and 2D video acceleration features, Shared clipboard, Shared folders.

UPDATED 8/21/2023: On VirtualBox, the “Guest Additions” package contains the drivers that allow the Windows 10 virtual machine to operate correctly in a virtualization environment. The VirtualBox Guest Additions is provided as a virtual image to optimize the guest machine with the mouse pointer and keyboard integration so you can navigate the environment and release the peripherals seamlessly.
The package also installs the virtual video drivers to improve the system performance and advanced graphics capabilities, such as hardware acceleration, multi-monitor support, and seamless transition between windows to run apps as if they were installed on the host device. Furthermore, you also get time synchronization, the ability to share the clipboard content and automated logging.
In other words, without the drivers, the virtual machine would perform slow, and many advanced features (such as the ability to change the screen resolution, control transparency, mouse support, etc.) won’t be available or work correctly.
In this guide, you will learn the steps to install the VirtualBox drivers on Windows 10.
To install the Guest Additions on a Windows 10 virtual machine, use these steps:
-
Open VirtualBox on Windows 10.
-
Right-click the virtual machine, select the Start submenu, and choose the Normal Start option.
-
Sign in to your Windows 10 account.
-
Click the Devices menu and select the “Insert Guest Additions CD image” option.

-
Open File Explorer in the virtual machine (Windows key + E).
-
Click on This PC from the left side.
-
Under the “Devices and drives” section, double-click to open the “VirtualBox Guest Additions” disc.
-
Double-click the VBoxWindowsAdditions.exe file to launch the installer.

-
Click the Next button.
-
Click the Next button again.
-
Click the Install button.
-
Select the Reboot now option.
-
Click the Finish button.


Once you complete the steps, the virtual drivers will install, and after the restart, Windows 10 will be able to run normally in a virtual environment.
When a new version of VirtualBox becomes available with more recent drivers, you can use the same instructions to update the Guest Additions on Windows 10. The setup will replace the virtual drivers with the versions as you run the installer.
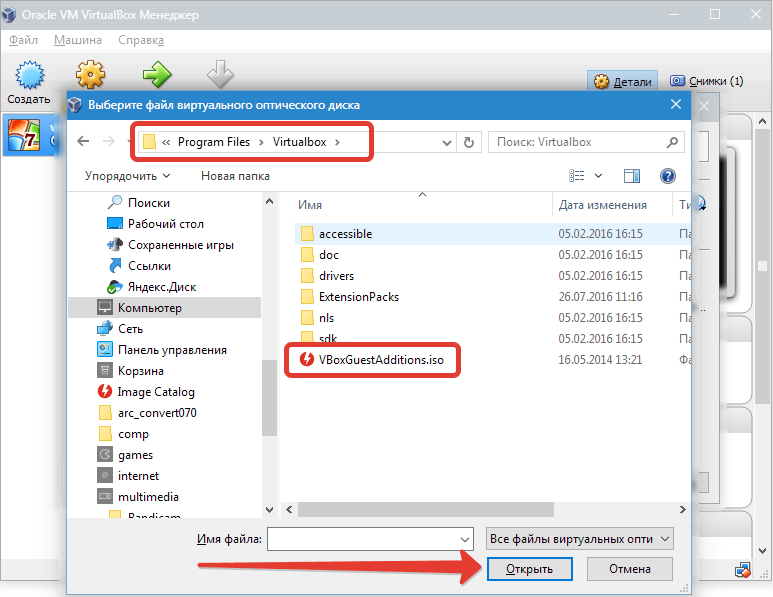
If you cannot mount the image into that machine, the VBoxGuestAdditions.iso is located in the VirtualBox installation folder (in this path: C:\Program Files\Oracle\VirtualBox), which you can use to add the package manually.
Mauro Huculak is a
Windows How-To Expert and founder of
Pureinfotech
(est. 2010). With over 21 years as a technology writer and IT Specialist,
Mauro specializes in Windows, software, and cross-platform systems such as Linux, Android, and macOS.
Certifications:
Microsoft Certified Solutions Associate (MCSA),
Cisco Certified Network Professional (CCNP),
VMware Certified Professional (VCP),
and
CompTIA A+ and Network+.
Mauro is a recognized Microsoft MVP and has also been a long-time contributor to Windows Central.
You can follow him on
YouTube,
Threads,
BlueSky,
X (Twitter),
LinkedIn and
About.me.
Email him at [email protected].
Все способы:
- Подключение образа
- Способ 1: Настройки виртуальной машины
- Способ 2: Подключение внутри гостевой ОС
- Установка
- Вопросы и ответы: 19
VirtualBox Guest Additions (дополнения гостевой операционной системы) – пакет расширений, который устанавливается в гостевую операционную систему и расширяет ее возможности по интеграции и взаимодействию с хостовой (реальной) ОС.
Дополнения, например, позволяют связать виртуальную машину с реальной сетью, без чего невозможен обмен файлами посредством создания общих папок, а также выход виртуалки в интернет. Кроме того, Guest Additions позволяет подключить видеодрайвер, который дает возможность менять расширение экрана виртуальной машины через апплет «Персонализация».
Образ с дополнениями входит в состав дистрибутива VirtualBox, загружаемого с официального сайта, дополнительно его скачивать не нужно.
Подключение образа
Есть два способа подключить образ.
Способ 1: Настройки виртуальной машины
Первый – через настройки виртуальной машины в менеджере. Машина при этом должна быть остановлена.
- Выбираем нужную машину в списке и нажимаем «Настроить».
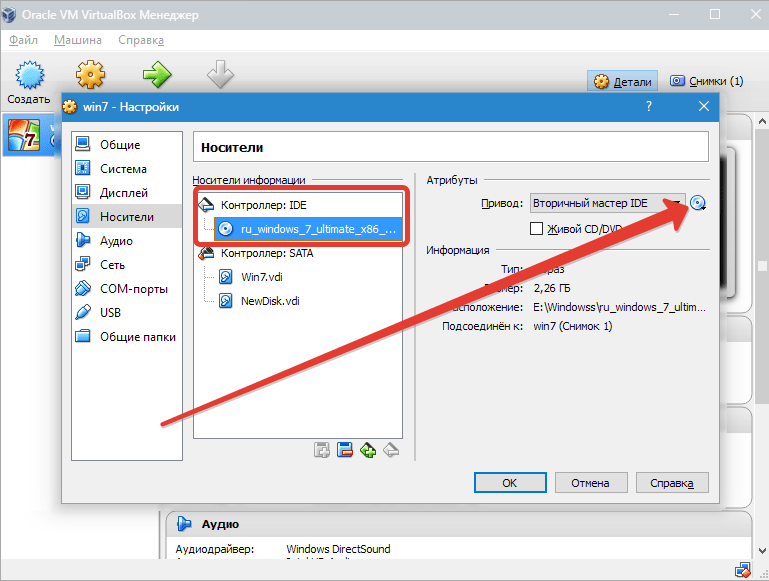
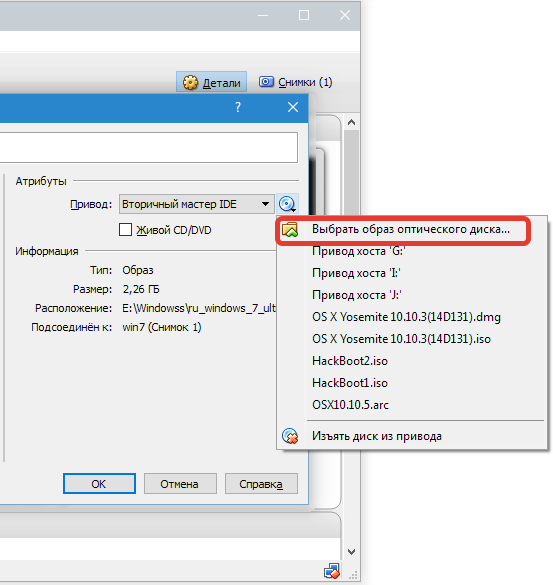
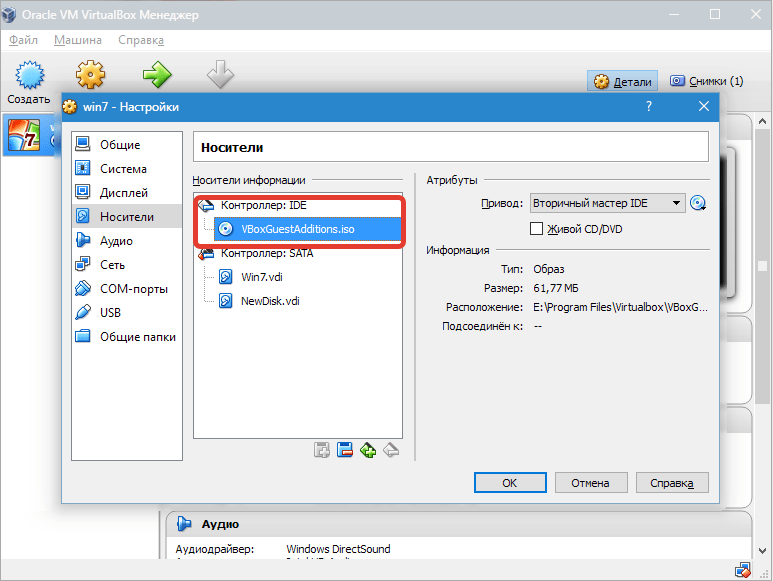
- Переходим на вкладку «Носители», выделяем виртуальный CD привод и нажимаем на значок выбора образа. Затем выбираем пункт «Выбрать образ оптического диска».
- В открывшемся окне находим образ дополнений. Он находится в корне папки с установленной VirtualBox.
- Образ смонтирован, теперь запускаем виртуальную машину.
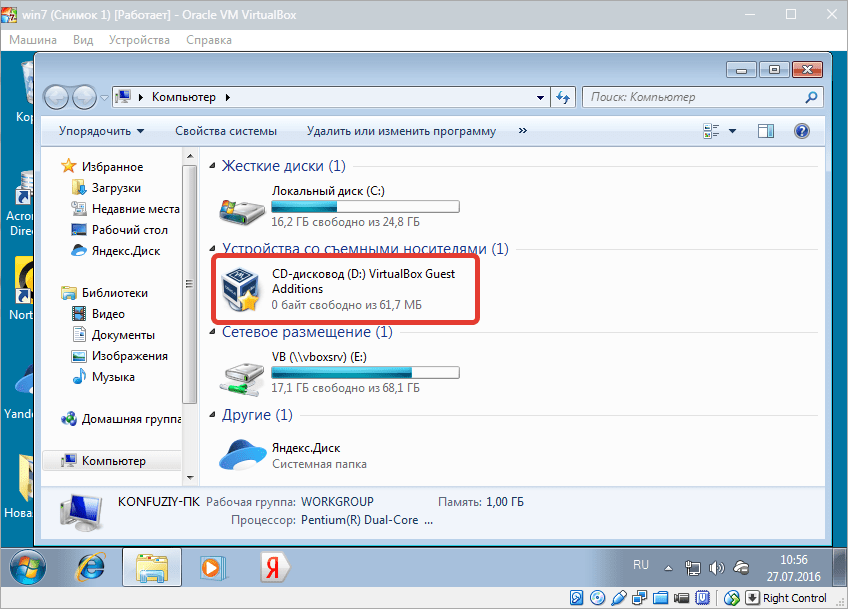
- Открываем папку «Компьютер» (в виртуалке) и видим смонтированный образ.

Такое решение является универсальным для подключения образов дисков к виртуальным машинам. Оно может пригодиться в случае, если Вы подключаете образ, не входящий в состав дистрибутива.
Способ 2: Подключение внутри гостевой ОС
Второй, гораздо более простой способ – подключить Guest Additions прямо из меню запущенной машины.
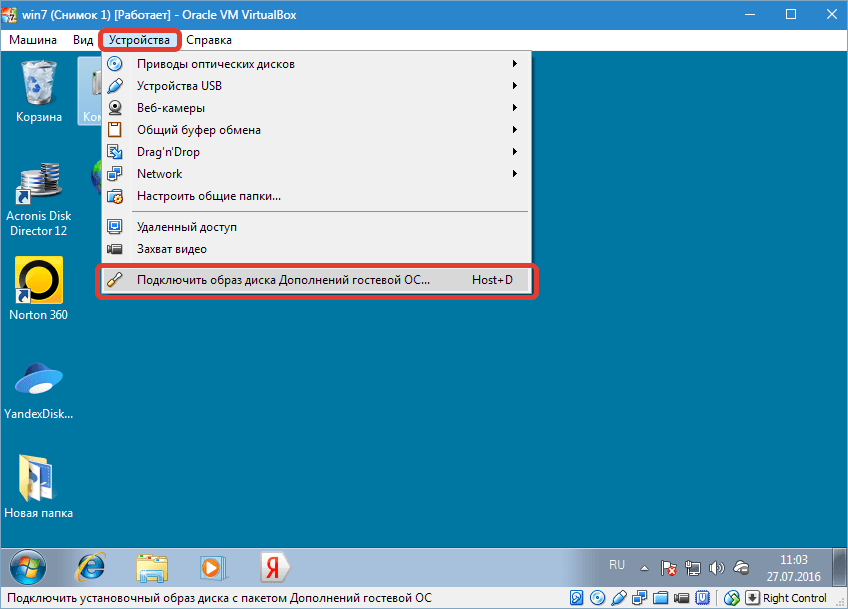
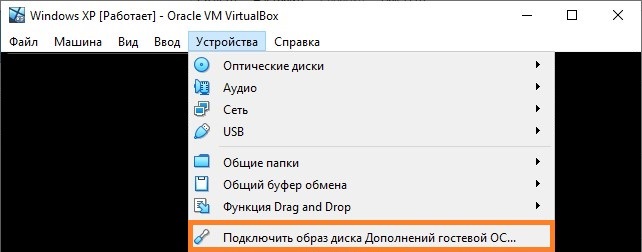
- Переходим в меню «Устройства» и выбираем пункт «Подключить образ диска Дополнений гостевой ОС».
- Как и в предыдущем варианте, образ появится в папке «Компьютер» на виртуалке.
Установка
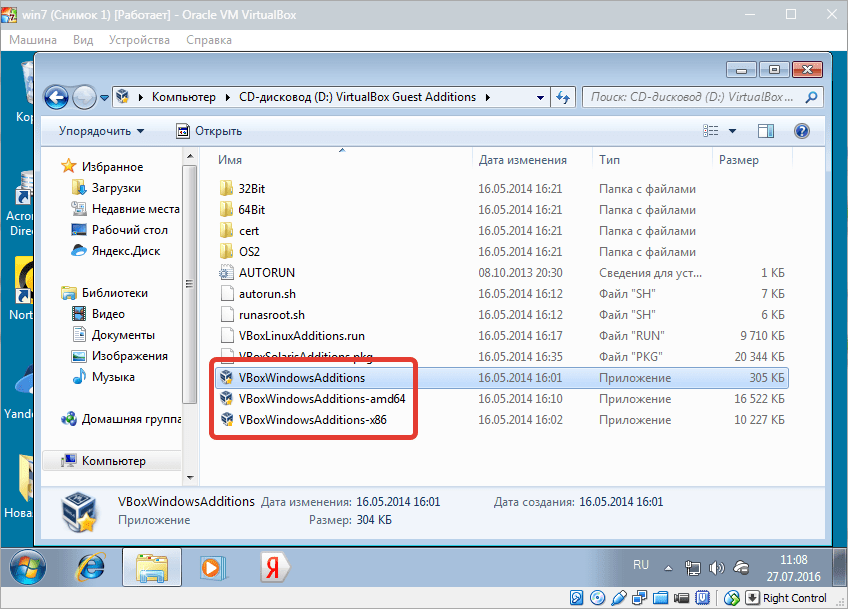
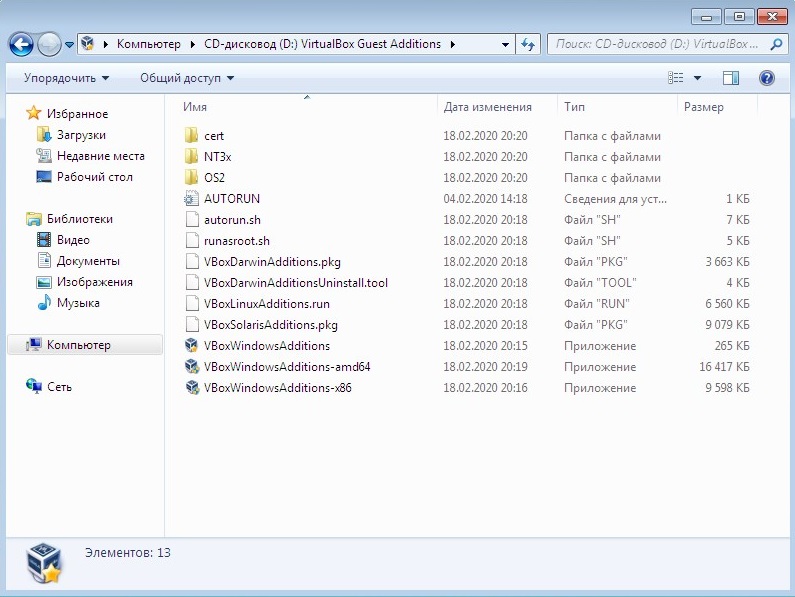
- Открываем смонтированный диск с дополнениями и запускаем файл VBoxWindowsAdditions. Здесь также возможны варианты: можно запустить универсальный установщик, либо выбрать версию, учитывая разрядность гостевой операционной системы.
- В открывшемся окне установщика нажимаем «Далее».
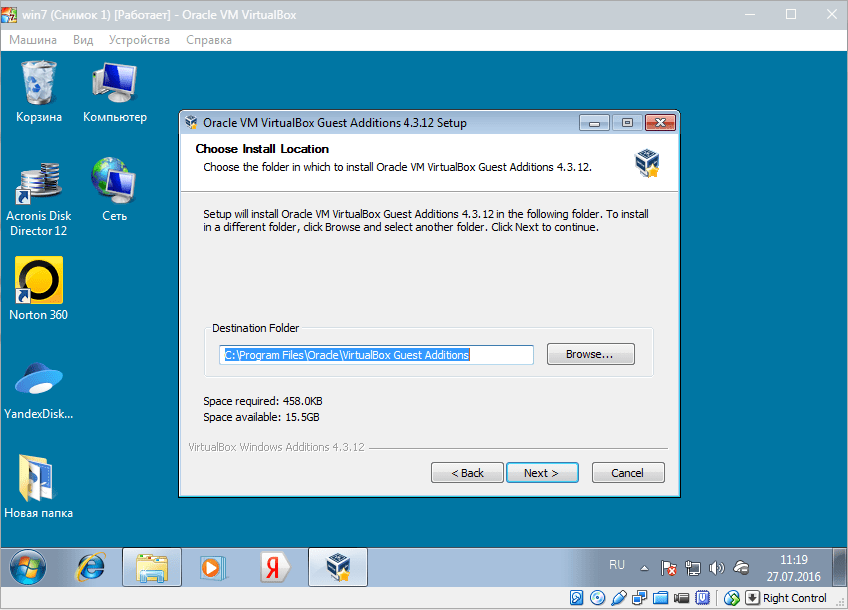
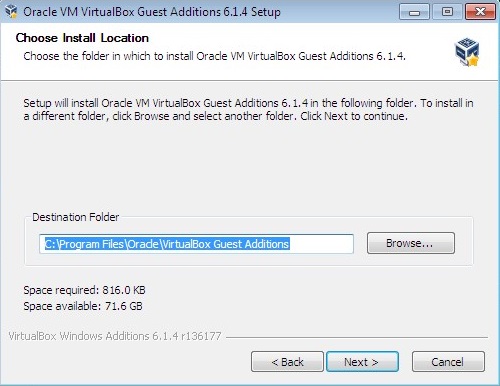
- Выбираем место для установки. В данном случае ничего не меняем.
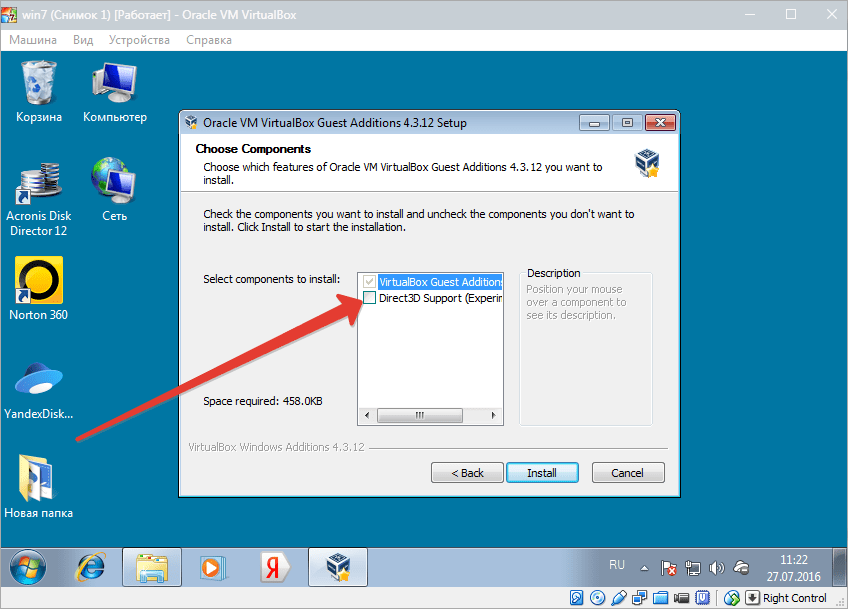
- Здесь видим пустой чекбокс рядом с «Direct 3D Support». Данный драйвер можно установить только в безопасном режиме, поэтому галку не ставим и нажимаем «Install».
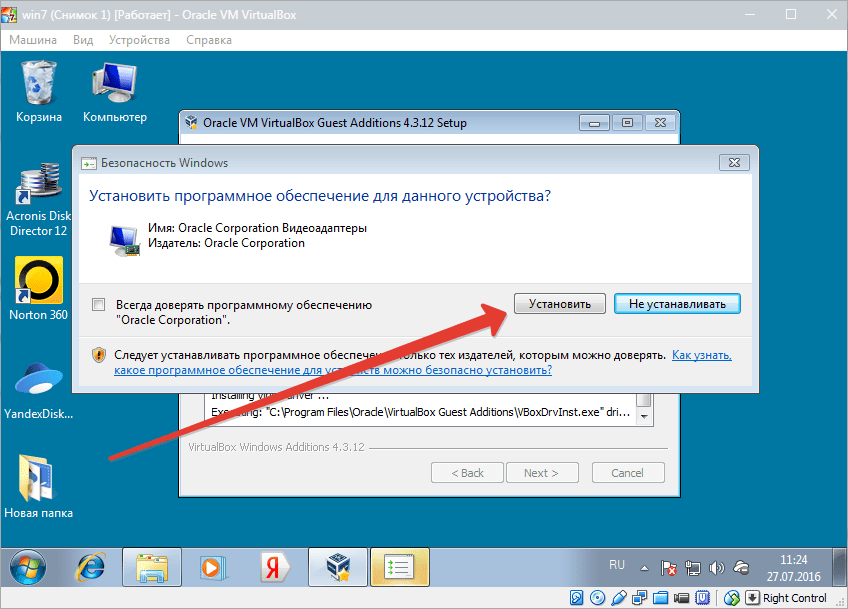
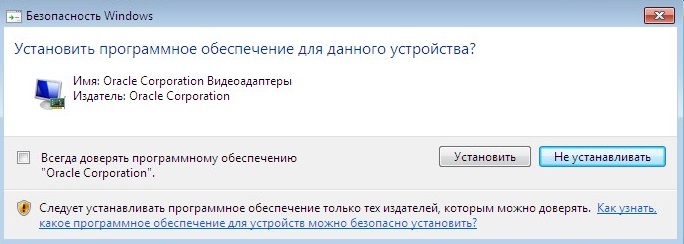
- В процессе установки несколько раз появится окно с предложением подтвердить установку драйверов. Везде соглашаемся.
- По завершению установки VirtualBox предложит перезагрузить машину. Это необходимо сделать.
На этом процесс установки VirtualBox Guest Additions завершен. Теперь можно менять разрешение экрана, создавать общие папки и выходить в интернет с виртуальной машины.
Наша группа в TelegramПолезные советы и помощь
VirtualBox is a powerful open-source virtualization software that allows users to run multiple operating systems on a single physical machine. VirtualBox Guest Additions enhances the performance and usability of virtual machines by providing seamless integration between the host and guest operating systems. In this comprehensive guide, we’ll walk you through the detailed steps to install VirtualBox Guest Additions on Windows 11 and Windows 10.
Understanding VirtualBox Guest Additions
Before diving into the installation process, let’s briefly clarify what VirtualBox Guest Additions is and why it’s essential. Guest Additions is a set of drivers and system applications that optimize the guest operating system running inside VirtualBox. The benefits of installing Guest Additions include:
- Improved Graphics Performance: Enhanced video support, including a higher screen resolution and seamless mouse integration.
- Shared Folders: This feature allows you to easily share files between the host and guest OS.
- Better Network Performance: Guest Additions improves network performance, resulting in faster connectivity.
- Automatic Resizing of Windows: Windows will automatically resize based on the dimensions of the VirtualBox window.
- Clipboard Sharing: Allows you to copy and paste text and files between the host and guest OS.
Now that we understand the significance of Guest Additions, let’s go through the steps to install it on Windows 10 and Windows 11.
Prerequisites
Before you get started with the installation, ensure you have fulfilled the following prerequisites:
- Oracle VM VirtualBox Installed: Ensure that you have the latest version of Oracle VM VirtualBox installed on your computer.
- Windows 10/11 Virtual Machine Created: You must have a virtual machine running either Windows 10 or Windows 11 within VirtualBox.
- Updated System: It’s advisable to keep both your host and guest operating systems updated to avoid compatibility issues.
Step-by-Step Installation Guide
Step 1: Start Your Virtual Machine
- Open Oracle VM VirtualBox.
- Select your Windows 10 or Windows 11 virtual machine from the list.
- Click on the “Start” button to boot the virtual machine.
Step 2: Log into Your Virtual Machine
Once your virtual machine starts, log into your Windows 10 or Windows 11 operating system with your credentials. Ensure you have administrative rights, as you’ll need them to install Guest Additions.
Step 3: Insert the Guest Additions CD Image
- With your virtual machine running, navigate to the top menu.
- Click on “Devices.”
- From the drop-down menu, select “Insert Guest Additions CD Image.”
If a prompt appears asking to download the image, go ahead and click «Download» to let VirtualBox download the Guest Additions image.
Step 4: Open the Guest Additions CD Drive
Once you have inserted the Guest Additions CD image, you should see a prompt inside your Windows guest OS indicating that the CD has been inserted.
- If the prompt appears, click “Run VBoxWindowsAdditions.exe.”
- If no prompt appears, navigate to Windows Explorer. Click on «This PC» or «My Computer,» and locate the CD/DVD drive labeled something like «VirtualBox Guest Additions.»
Step 5: Run the Installation
- In the Guest Additions CD drive, right-click on
VBoxWindowsAdditions.exeand select “Run as administrator.” - If prompted for permissions, click “Yes” to allow the program to make changes to your device.
- The VirtualBox Guest Additions Setup Wizard will launch.
Step 6: Choose Installation Options
-
Click “Next” on the wizard welcome screen.
-
You will be presented with options to install various components such as the following:
- Device Driver (Windows Mouse Integration)
- Graphics Driver
- VBox Shared Folder Driver
- VBox Networking Driver
-
You can keep the default selections and click “Next” to proceed.
Step 7: Accept the License Agreement
- Review the license agreement presented to you in the setup wizard.
- If you agree to the terms, select “I accept the terms in the License Agreement,” and click “Next” again.
Step 8: Choose the Installation Directory
You can choose where to install VirtualBox Guest Additions by modifying the Destination Folder. The default path is generally acceptable. After selecting the desired location, click “Next” to continue.
Step 9: Install
The setup wizard will present you with a summary of the installation parameters you have configured. Review these settings and click on “Install” to proceed with the installation.
Step 10: Allow Driver Installation
During installation, you may see several security warning dialogs from Windows, asking you to confirm the installation of device drivers. Click “Install” or “Allow” for each warning to proceed.
Step 11: Complete the Installation
Once the installation is complete, you will see a final screen of the setup wizard. Click on “Finish.”
Step 12: Reboot Your Virtual Machine
To finalize the installation of VirtualBox Guest Additions, you will need to restart your virtual machine. The wizard should prompt you to restart; if not, manually reboot your VM.
Additional Configuration (Optional)
After the reboot, you might want to configure VirtualBox for optimal use. Here are a few additional steps you can take:
-
Configure Shared Folders:
- Go to the settings of the VM and navigate to “Shared Folders.”
- Click on the plus icon to add a new shared folder, specify a path, and set the folder name. Check “Auto-mount” for easier access.
-
Adjust Display Settings:
- In VirtualBox, go to the settings of your VM, then “Display.” Here you can adjust Video Memory for better performance.
-
Enable 3D Acceleration:
- Under the “Display” settings, enable “Enable 3D Acceleration.” This will allow your VM to leverage the host machine’s GPU.
Troubleshooting Common Issues
While installing VirtualBox Guest Additions usually goes smoothly, you may encounter some issues. Here are common problems and their solutions:
Issue 1: Installation Fails or Hangs
- Solution: Ensure you are running the installer as an administrator. If it still fails, check the Windows Event Viewer for logs that could provide insight into the problem.
Issue 2: Black Screen After Installation
- Solution: If you experience a black screen after installing Guest Additions, boot into Safe Mode and uninstall the graphics driver included in Guest Additions. You can try reinstalling Guest Additions with only the necessary components.
Issue 3: Shared Folder Not Working
- Solution: Verify that you have correctly configured shared folders in the VM settings and that the Guest Additions are properly installed. Ensure that your folder permissions allow access.
Issue 4: Screen Resolution Issues
- Solution: If your Windows virtual machine doesn’t resize properly, go to the Display settings in the VM and ensure that the “Auto-resize Guest Display” option is enabled.
Conclusion
Installing VirtualBox Guest Additions on Windows 10 or 11 is essential for maximizing the performance and usability of your virtual machines. By following this step-by-step guide, you should be able to complete the installation without a hitch. Guest Additions provides vital functionalities such as better graphics performance, shared files, and seamless integration, significantly enhancing your virtualization experience.
As you dive into utilizing your virtual machine, don’t forget to explore other VirtualBox features, such as snapshots and networking options, to further expand your virtual environment’s capabilities. If you face issues, refer to the troubleshooting section, or consult additional resources and forums for guidance.
Happy virtualizing!
Virtual Box, Виртуализация
- 10.04.2020
- 184 667
- 21
- 06.05.2023
- 178
- 170
- 8
- Содержание статьи
- Установка гостевых дополнений VirtualBox
- Windows
- Linux
- Комментарии к статье ( 21 шт )
- Добавить комментарий
- Установка гостевых дополнений VirtualBox
Установка гостевых дополнений VirtualBox
Для улучшения работы с виртуальной машиной, и взаимодействия с ней, в виртуально установленной операционной системе нужно установить специальный набор инструментов, который называется «Гостевые дополнения» («Guest Additions»).
Данный набор инструментов поддерживает следующие операционные системы:
- Windows:
Операционная система Статус Примечание Windows 11 Требуется поддержка AMD-V или Intel VT-x. Windows Server 2019 Требуется поддержка AMD-V или Intel VT-x. Windows Server 2016 Требуется поддержка AMD-V или Intel VT-x. Windows 10 Требуется поддержка AMD-V или Intel VT-x. Windows Server 2012 R2 Требуется поддержка AMD-V или Intel VT-x. Windows 8.1 Требуется поддержка AMD-V или Intel VT-x. Windows Server 2012 Требуется поддержка AMD-V или Intel VT-x. Windows 8 Требуется поддержка AMD-V или Intel VT-x. Windows Server 2008 R2 Windows 7 Windows Server 2008 Windows Vista Windows Server 2003 R2 Windows Server 2003 Windows XP Windows 2000 Windows ME Не поддерживается Windows 98 Не поддерживается Windows NT 4.0 Требуется установленный Service Pack 6a Windows 95 Не поддерживается - Linux (официально поддерживаются Oracle Linux, Fedora, Red Hat Enterprise Linux, SUSE (в том числе openSUSE), Ubuntu);
- Oracle Solaris;
- OS/2.
Для установки гостевых дополнений VirtualBox необходимо выполнить следующие действия:
- Включаем виртуальную машину и ждем загрузки ОС.
- В верхнем меню VirtualBox выбираем пункт «Устройства — Подключить образ диска Дополнений гостевой ОС…«.

Так же можно скачать отдельный образ с гостевыми дополнениями, перейдя по этой ссылке. После перехода по ссылке, нужно будет открыть директорию с нужной версией VirtualBox, и скачать файл, название которого будет начинаться на «VBoxGuestAdditions». После скачивания, данный файл нужно будет смонтировать вручную, как обычный ISO образ.
Дальнейшие действия зависят от того, какая операционная система установлена в VirtualBox:
Windows
- Если в системе не отключен автозапуск, то должен запуститься установщик дополнений гостевой ОС. Если же в системе выключен автозапуск, нужно запустить установщик вручную, найдя его на подключившемся диске в виртуальной машине, под именем VBoxWindowsAdditions.exe.

- Как и установка самого VirtualBox, установка гостевых дополнений максимально упрощена, и по сути представляет из себя нажатие кнопок «Next». С первым окном именно так и следует поступить.

- На следующем будет предложено выбрать место для установки гостевых дополнений. По умолчанию, рассматривается обычная для всех программ директория Program Files.

- Последним шагом, перед непосредственно самой установкой, будет выбор устанавливаемых компонентов:
- VirtualBox Guest Additions — собственно, сами гостевые дополнения VirtualBox;
- Start menu entries — ярлыки в меню «Пуск».
- Direct3D Support — третий компонент, который не выбран по умолчанию, является экспериментальной функцией по включению полноценного 3D ускорения в виртуальной машине. Для «простой» работы он не нужен.
- После нажатия на кнопку «Next» начнется установка гостевых дополнений, во время которой может появится окно с запросом на разрешения установки программного обеспечения для устройства (драйвер), которую необходимо одобрить.

- После установки дополнений потребуется перезагрузка компьютера, которую можно выполнить сразу (оставив отмеченным пункт «Reboot now«), или выполнив её позже самостоятельно (для этого нужно отметить пункт «I want to manually reboot later«).

- После перезагрузки произойдет множество полезных изменений — появится поддержка двухстороннего буфера обмена (о том, как его включить можно прочитать здесь), функция drag-n-drop между основной операционной системой и операционной системой в виртуальной машине, автоматический выбор разрешения экрана на основе размера окна VirtualBox и т. д.
Linux
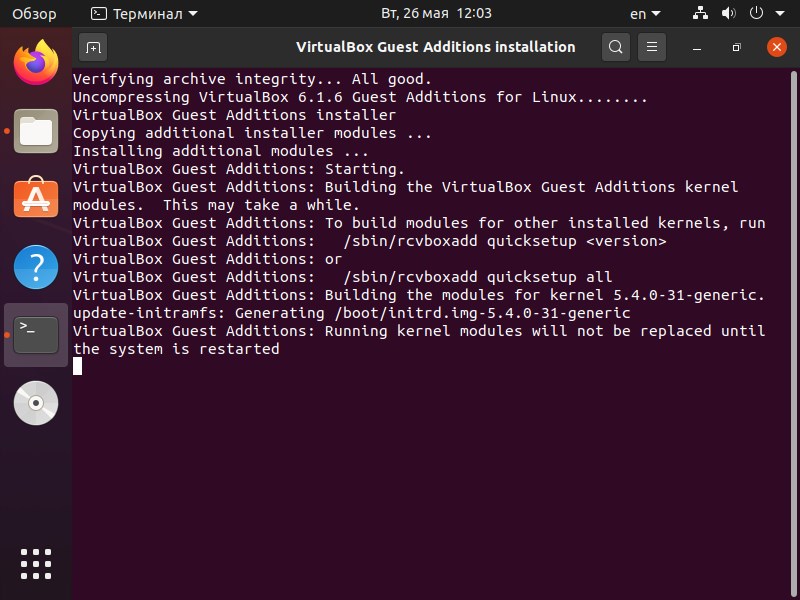
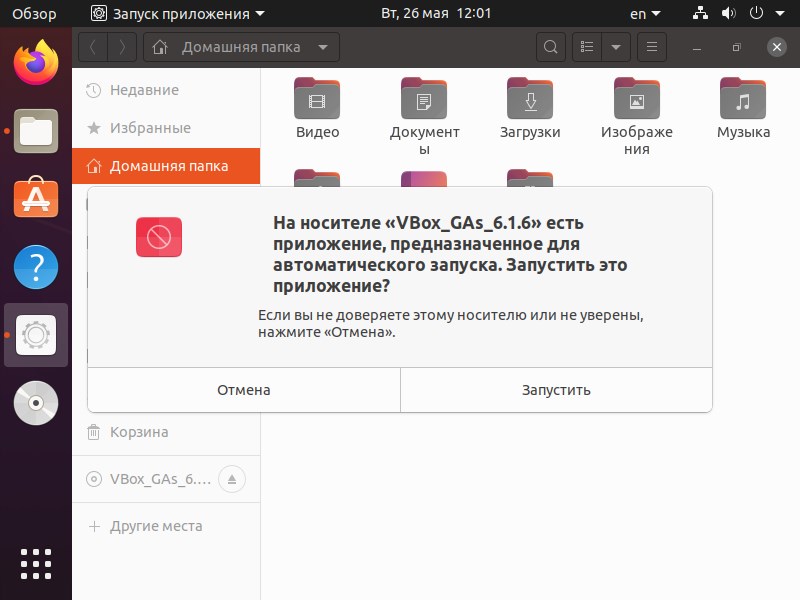
В операционных системах семейства Linux, графический установщик гостевых дополнений отсутствует, вся установка происходит через терминал. Современные дистрибутивы прекрасно сами распознают файл автозапуска на образе с гостевыми дополнениями, и предлагают его запустить автоматически.
Можно так же запустить файл установки гостевых дополнений вручную. Для этого, нужно открыть терминал, и перейти в каталог, куда смонтирован виртуальный образ с файлами установки дополнений. Там же, нужно выполнить команду запуска файла установки:
sudo ./VBoxLinuxAdditions.runЕсли в результате выполнения данной команды, появляется ошибка «Permission denied» (или «Отказано в доступе»), попробуйте выполнить следующую команду:
sudo sh VBoxLinuxAdditions.runПосле выполнения данной команды, начнется установка гостевых дополнений Linux, по завершению которой, понадобится перезагрузка системы.