
As a developer, you typically look for ways to enhance application features. If you mainly work on Java-based applications, befriend and install Groovy on your machine. The Groovy language integrates smoothly with any Java program and adds powerful features, including scripting capabilities for Java programs.
And in this tutorial, you’ll learn how to install Groovy, regardless if you’re on an Ubuntu or Windows machine.
Ready? Jump in and get started with Groovy for better application development!
Prerequisites
This tutorial contains step-by-step demonstrations. To follow along, be sure you have the following:
- An Ubuntu machine – This tutorial uses Ubuntu 22.04.
- A Windows 7 or 7+ machine with Java installed.
Installing Groovy on Ubuntu
Before you install Groovy on your Ubuntu machine, you first need to install Java since Groovy runs on its built-in Java servlet container server. You can use multiple Java implementations to work with Groovy, but OpenJDK is the most popular.
To install Java on your Ubuntu machine:
1. Log in to your Ubuntu machine using your favorite SSH client.
2. Next, run the apt update command below to update your system packages.

3. Once updated, run the following commands to create a directory (mkdir) named ~/install_groovy_demo and switch (cd) to that directory.
These commands don’t provide output, but the ~/install_groovy_demo directory is where you’ll install Java.
mkdir ~/install_groovy_demo
cd ~/install_groovy_demo
4. Now, run the apt install command below to install Java (default-jdk) on your machine.
# Installing Java Version: Java SE 11 (LTS)
sudo apt install default-jdk 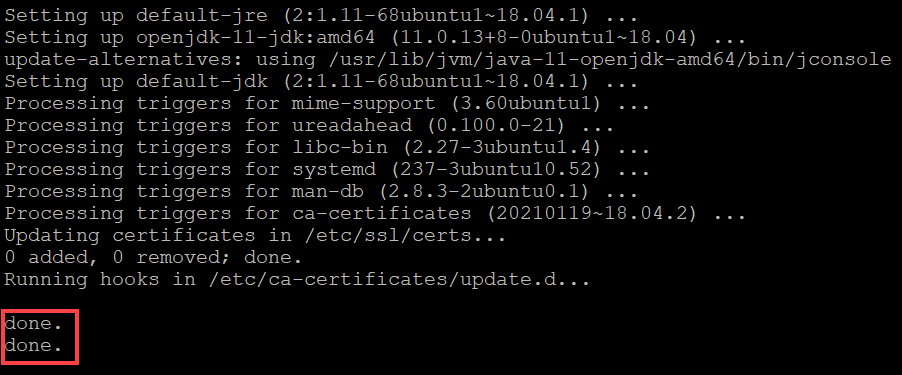
5. After installing Java, run the below java command to check the -version of installed Java on your machine.
# Checking the Version of Java to verify Java installation.
java -version
The output below ensures you’ve successfully installed Java.

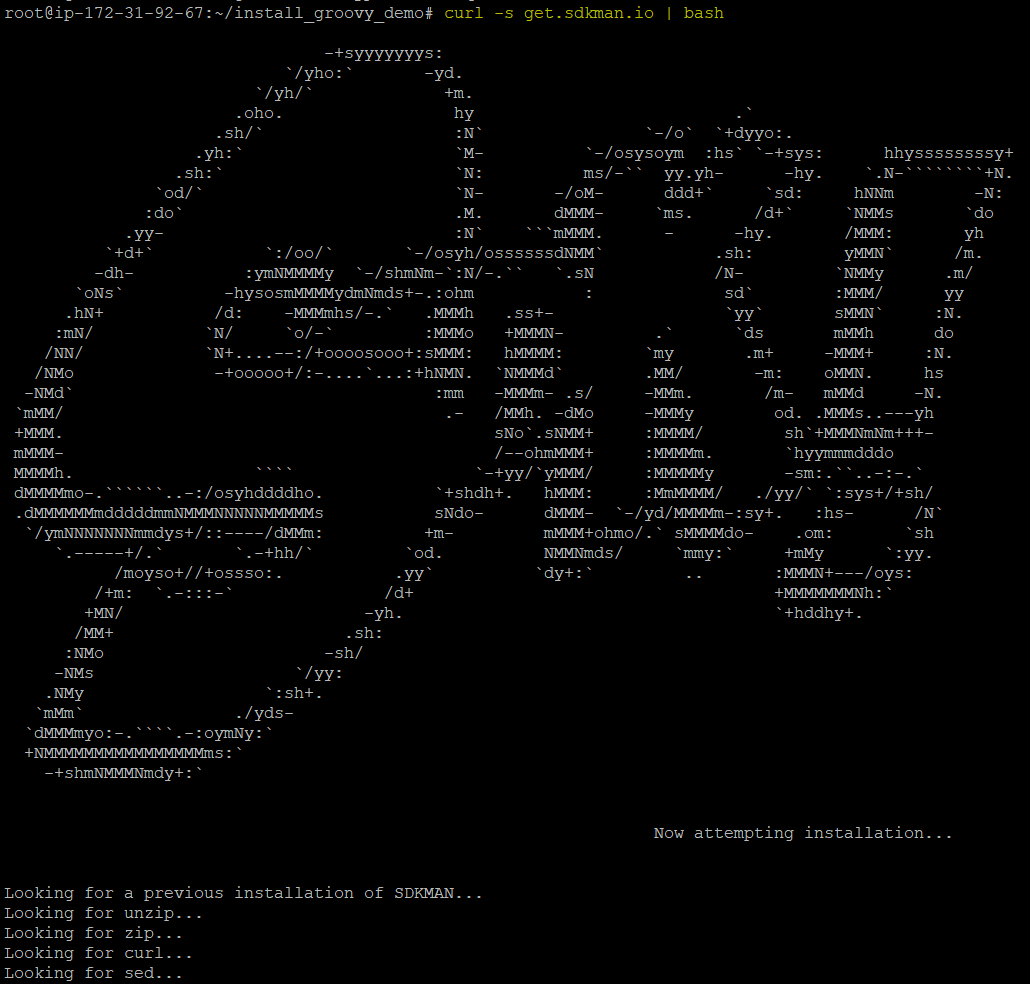
6. Next, run the below curl command to download the Groovy package (get.sdkman.io).
curl -s get.sdkman.io | bashIf the download is successful, you’ll see an output similar to the one below.
7. Once downloaded, run each command below on the bin directory of the Groovy installation folder (~/.sdkman/bin/) to prepare Groovy scripts (sdksdkman-init.sh) to run successfully.
Note that these commands don’t provide output, but you’ll see the outcome in the following step.
cd ~/.sdkman/bin/
source sdksdkman-init.sh
8. Now, run the sdk install command below to install Groovy.
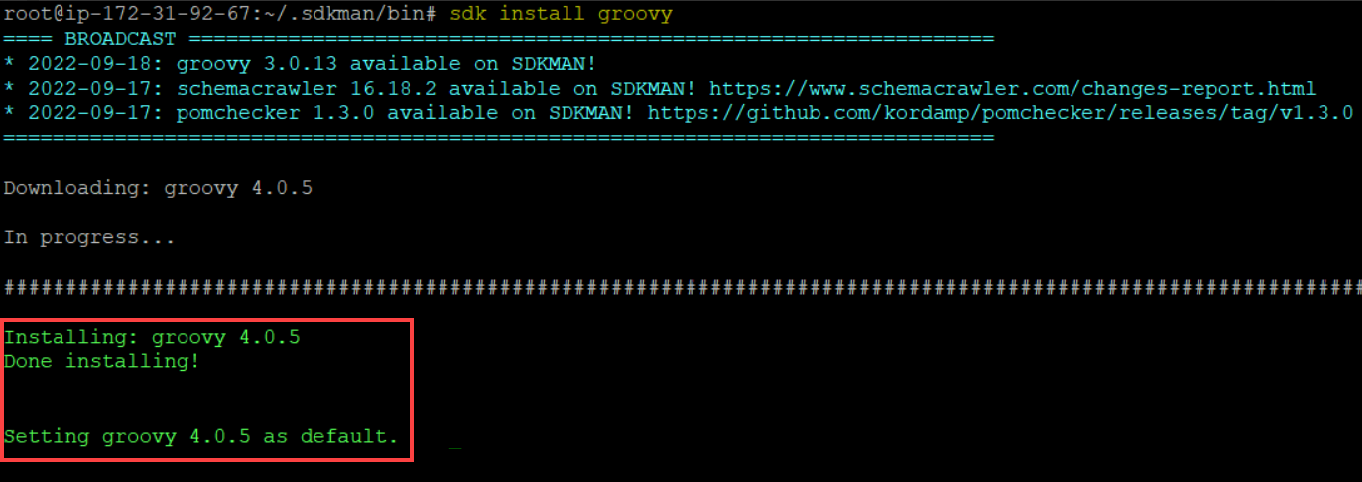
9. Finally, run the below groovy command to verify your Groovy installation.
Executing a Groovy Script on Ubuntu
Great! You’ve successfully installed Groovy on your Ubuntu machine. But how do you know Groovy actually works? In this example, you’ll run a test by executing a simple script to verify if Groovy is appropriately installed.
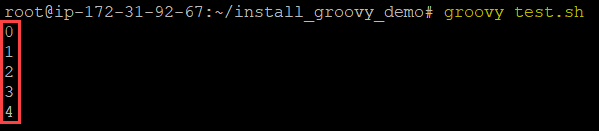
Within the ~/install_groovy_demo directory, create a script named test.sh and populate the below line, which prints (printLn) all the numbers starting from 0 to 4.
0.upto(4) {println "$it"}
Now, run the below groovy command to execute the Groovy script (*test.sh*)
Installing Groovy on Windows
Do you mainly work on a Windows machine? Worry not. Groovy works on Windows too! But like in Ubuntu, you first have to install Groovy on your Windows machine.
1. Open your favorite web browser, navigate Groovy’s official download page, and click the Download tab, as shown below.

2. Next, scroll down to the latest stable release, Groovy 4.0, at this time of writing, and click on Windows Installer (community artifact).
Your browser redirects to a page where you can get the download link for the Windows installer (step three).
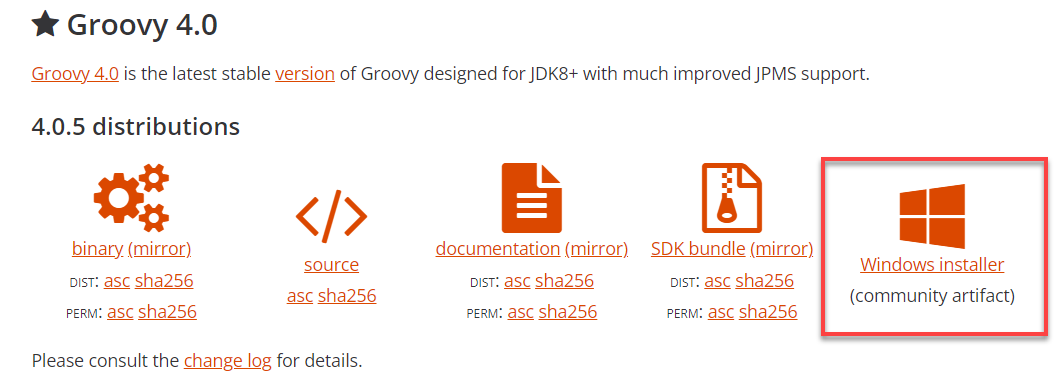
3. Click on the .msi installer’s link (rightmost) to download Groovy.

4. Once downloaded, run Groovy’s Windows installer.
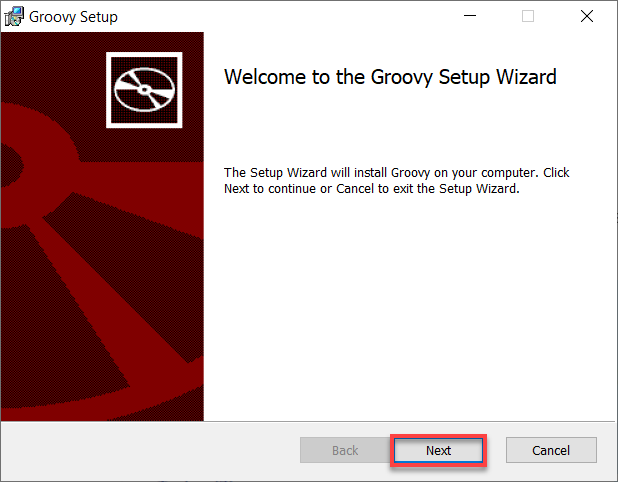
5. Now, click Next when you see the “welcome” page below.
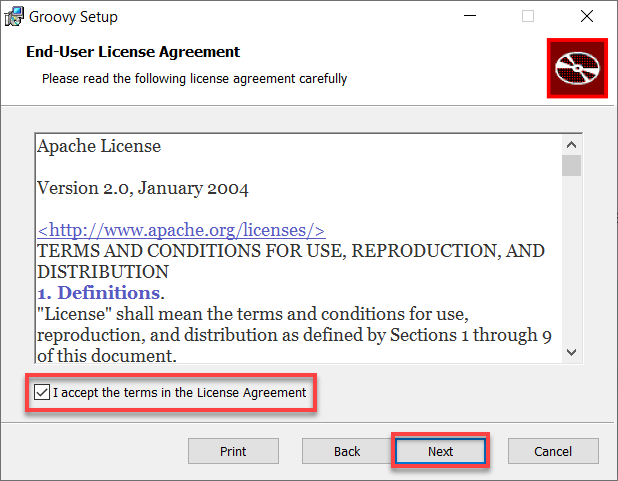
6. Tick the checkbox at the bottom to accept the End-User License Agreement (EULA), and click Next to continue.
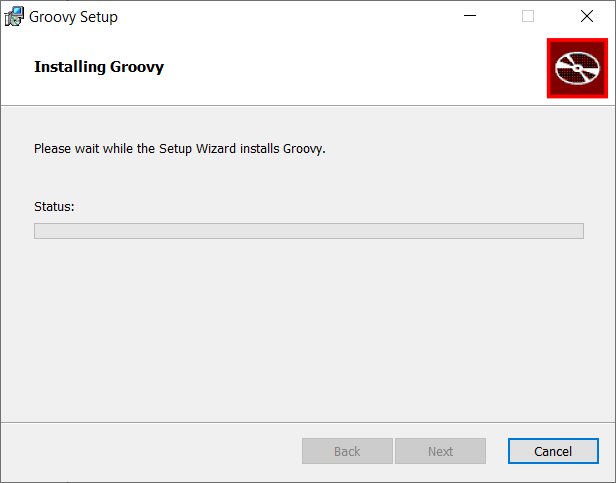
7. Further, select the Groovy setup as Typical, which installs only the common features.
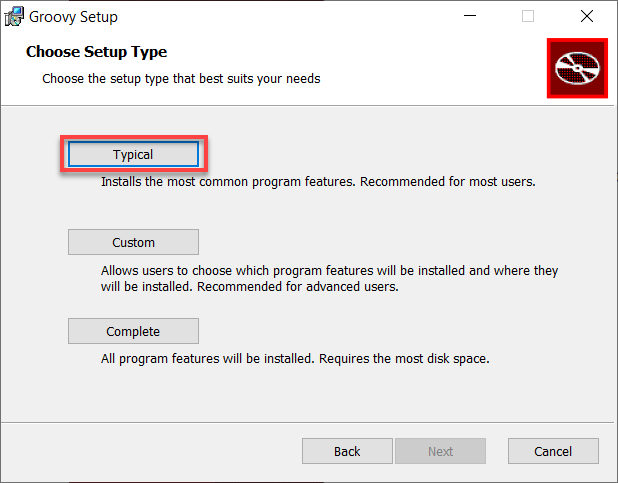
As shown below, the installation begins and may take a few minutes to complete.
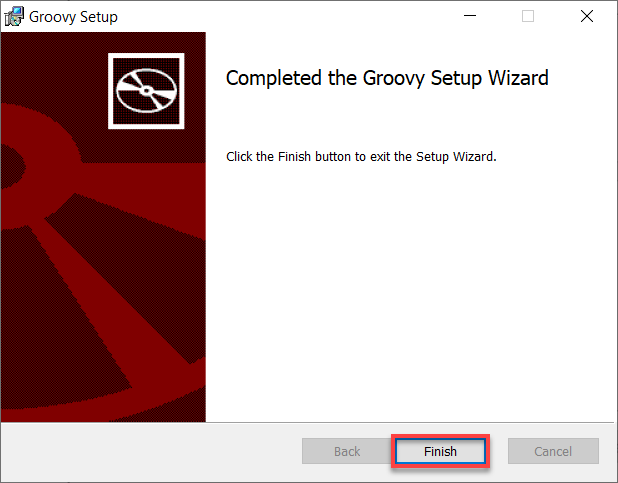
8. Lastly, click on Finish once Groovy has been installed successfully. And at this point, the command line tools Groovy shell and Groovy console are installed by default.
Running a Groovy Command on Windows
You now have Groovy installed on your Windows machine, which should work as expected. But to be safe, you’ll have to test if Groovy works correctly. How?
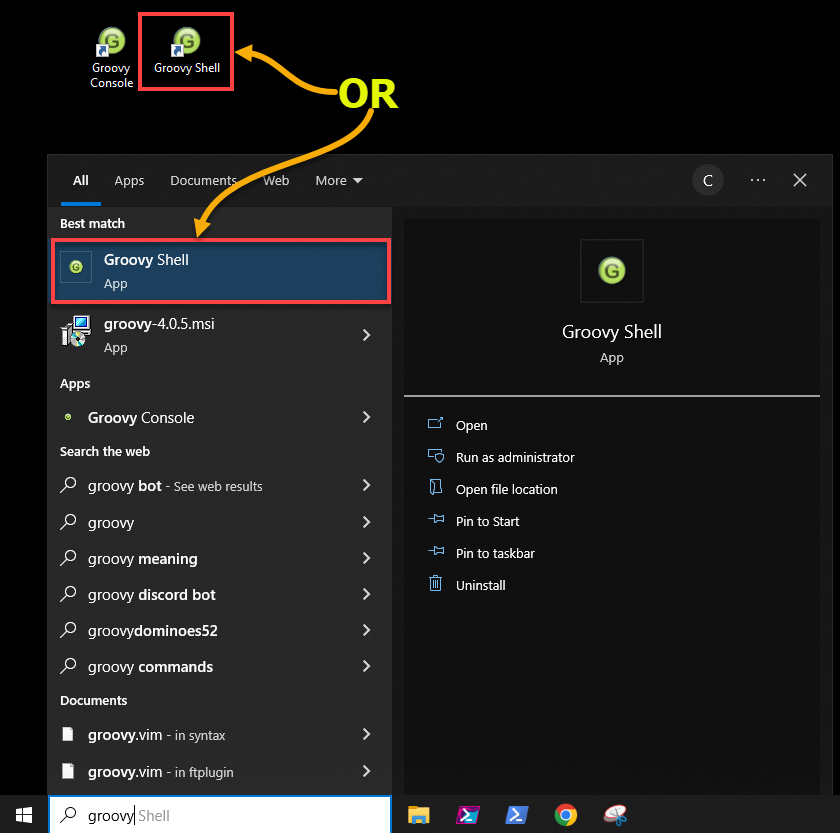
Similar to what you did in Ubuntu, you’ll run a Groovy command on your Windows machine. But instead of Windows PowerShell, you’ll use the Groovy Shell to run commands.
Launch Groovy shell from your Desktop or the Start menu, as shown below.
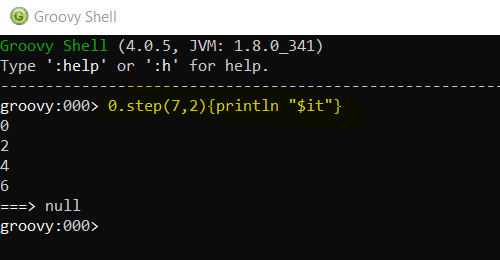
Now, run the below command to print all numbers (printLn) between 0 and 7 with an increment of 2.
0.step(7,2){println "$it"}
Conclusion
In this tutorial, you learned how to install Groovy, a multi-faceted language for the Java platform, on Ubuntu and Windows. You touched on executing a Groovy script and running a Groovy command with similar functions.
After realizing how Groovy works, why not automate web deployments using Groovy and create a Jenkins CI CD pipeline? Drastically improve your software development process today!
Releases Apache Groovy Github Apache groovy is a java syntax compatible object oriented programming language for the java platform. it has features similar to python, ruby, and smalltalk, and can be compiled statically or dynamically. Download groovy™ download 4.0.26. ways to get apache groovy™: download a source or binary distribution. use a package manager or bundle for your operating system. refer to the appropriate apache groovy jars from your build tools. grab the latest plugin for your ide and follow the installation instructions.

The Apache Groovy Programming Language Blogs Apache Groovy 2022 Learn how to download, install and configure groovy, a dynamic language for the java platform. find out the prerequisites, the maven repository, the sdkman! tool, and the ide plugin for groovy. Learn how to use groovy, a dynamic language for the java platform, with this comprehensive documentation. find guides, syntax, tools, apis, and more for different versions of groovy. Learn groovy, a dynamic and agile language that runs on the java platform and has many features similar to python, ruby, and smalltalk. this tutorial covers groovy history, features, installation, syntax, and examples. Apache groovy 13 usages.
Github Apache Groovy Examples Apache Groovy Examples Learn groovy, a dynamic and agile language that runs on the java platform and has many features similar to python, ruby, and smalltalk. this tutorial covers groovy history, features, installation, syntax, and examples. Apache groovy 13 usages. Apache groovy groovy is a powerful multi faceted programming language for the jvm platform. it supports a spectrum of programming styles incorporating features from dynamic languages such as optional and duck typing, but also static compilation and static type checking at levels similar to or greater than java through its extensible static type. This chapter covers the syntax of the groovy programming language. the grammar of the language derives from the java grammar, but enhances it with specific constructs for groovy, and allows certain simplifications. Groovy is a dynamic, scripting language for the jvm that blends with java code and libraries. learn about its essential features, such as dynamic typing, implicit truth, operators, strings, and ast transforms, with examples and code snippets.
Apache Groovy Apache groovy groovy is a powerful multi faceted programming language for the jvm platform. it supports a spectrum of programming styles incorporating features from dynamic languages such as optional and duck typing, but also static compilation and static type checking at levels similar to or greater than java through its extensible static type. This chapter covers the syntax of the groovy programming language. the grammar of the language derives from the java grammar, but enhances it with specific constructs for groovy, and allows certain simplifications. Groovy is a dynamic, scripting language for the jvm that blends with java code and libraries. learn about its essential features, such as dynamic typing, implicit truth, operators, strings, and ast transforms, with examples and code snippets.

The Apache Groovy Programming Language Blogs Natural Language Groovy is a dynamic, scripting language for the jvm that blends with java code and libraries. learn about its essential features, such as dynamic typing, implicit truth, operators, strings, and ast transforms, with examples and code snippets.

Apache Groovy What Is Groovy Used For Blazemeter By Perforce
To install Groovy on different platforms, you can follow these general steps:
For Windows:
- Download the Groovy installer for Windows from the official website.
- Run the installer and follow the on-screen instructions to complete the installation.
For macOS:
- Install Homebrew if you don’t already have it.
- Use Homebrew to install Groovy by running the command «brew install groovy» in the terminal.
For Linux:
- Use a package manager such as apt or yum to install Groovy on your Linux distribution.
- Run the command to install Groovy using the package manager.
For manual installation on any platform:
- Download the Groovy binary distribution from the official website.
- Extract the contents of the downloaded file to a directory of your choice.
- Update your PATH environment variable to include the bin directory of the Groovy installation.
After completing these steps, you should be able to run Groovy commands and scripts from the command line on your platform.
Best Groovy Books to Read of November 2024
1
Rating is 5 out of 5
Groovy in Action: Covers Groovy 2.4
2
Rating is 4.9 out of 5
Groovy Programming: An Introduction for Java Developers
3
Rating is 4.8 out of 5
Programming Groovy: Dynamic Productivity for the Java Developer (Pragmatic Programmers)
4
Rating is 4.7 out of 5
Programming Groovy 2: Dynamic Productivity for the Java Developer (Pragmatic Programmers)
5
Rating is 4.6 out of 5
Mastering GROOVY: A Comprehensive Guide To Learn Groovy Programming
6
Rating is 4.5 out of 5
Making Java Groovy
7
Rating is 4.4 out of 5
Mastering Groovy Programming: Essential Techniques
8
Rating is 4.3 out of 5
Learning Groovy 3: Java-Based Dynamic Scripting
9
Rating is 4.2 out of 5
Groovy 2 Cookbook
How to install Groovy on Windows?
To install Groovy on Windows, follow these steps:
- Download the Groovy binary distribution from the official Groovy website. Choose a version that is compatible with your Windows operating system.
- Extract the downloaded zip file to a folder on your computer. For example, you can extract it to C:\groovy.
- Add the Groovy bin directory to your system’s PATH environment variable. To do this, right-click on the ‘My Computer’ or ‘This PC’ icon on your desktop and select ‘Properties’. Then, click on ‘Advanced system settings’ and click on the ‘Environment Variables’ button. In the ‘System variables’ section, find the ‘Path’ variable and click ‘Edit’. Add a new entry with the path to the Groovy bin directory (e.g., C:\groovy\bin). Click ‘OK’ to save the changes.
- Open a new command prompt window and type ‘groovy -version’ to verify that Groovy has been installed correctly. You should see a message displaying the Groovy version number.
You have now successfully installed Groovy on Windows. You can start writing and executing Groovy scripts using the command prompt or a Groovy-friendly IDE such as IntelliJ IDEA or Eclipse.
What are the requirements for installing Groovy on different platforms?
The requirements for installing Groovy on different platforms are as follows:
- For Windows:
- Java Development Kit (JDK) version 8 or higher installed on the system
- Download the Groovy binary distribution from the official website
- Extract the downloaded ZIP file to a folder on your system
- Set the GROOVY_HOME environment variable to point to the directory where Groovy is installed
- Update the PATH environment variable to include the bin directory inside the Groovy installation folder
- For Mac:
- Java Development Kit (JDK) version 8 or higher installed on the system
- Download the Groovy binary distribution from the official website
- Extract the downloaded ZIP file to a folder on your system
- Set the GROOVY_HOME environment variable to point to the directory where Groovy is installed
- Update the PATH environment variable to include the bin directory inside the Groovy installation folder
- For Linux:
- Java Development Kit (JDK) version 8 or higher installed on the system
- Download the Groovy binary distribution from the official website
- Extract the downloaded ZIP file to a folder on your system
- Set the GROOVY_HOME environment variable to point to the directory where Groovy is installed
- Update the PATH environment variable to include the bin directory inside the Groovy installation folder
- Make the Groovy executable script executable by running the following command: chmod +x $GROOVY_HOME/bin/groovy
Overall, the key requirement for installing Groovy on any platform is to have the Java Development Kit (JDK) installed and the GROOVY_HOME and PATH environment variables configured properly.
What is the purpose of installing Groovy on different platforms?
The purpose of installing Groovy on different platforms is to provide a versatile and flexible development environment for developers. By installing Groovy on different platforms, developers can write and run Groovy code on various operating systems and environments, allowing them to easily create and deploy applications across different platforms. This helps in increasing productivity, reducing development time, and ensuring that the application works consistently across multiple platforms. Additionally, installing Groovy on different platforms also allows developers to take advantage of specific features and optimizations that are available on different systems, maximizing performance and compatibility.
How to install Groovy via package manager on different platforms?
Installing Groovy using package manager is slightly different based on the platform you are using. Here are the steps to install Groovy via package manager on different platforms:
- macOS:
- Use Homebrew package manager to install Groovy on macOS. Run the following command in the terminal:
- Windows:
- The package manager for Windows is Chocolatey. To install Groovy using Chocolatey, run the following command in PowerShell with administrative privileges:
- Linux (Debian/Ubuntu based distributions):
- Use the apt package manager to install Groovy on Debian/Ubuntu based systems. Run the following commands in the terminal:
1 2 |
sudo apt update sudo apt install groovy |
- Linux (Red Hat/CentOS based distributions):
- Use the dnf package manager to install Groovy on Red Hat/CentOS based systems. Run the following commands in the terminal:
1
|
sudo dnf install groovy
|
- Linux (Other distributions):
- For other Linux distributions, you can download the Groovy binary distribution from the official website and manually install it. Here are the general steps to follow:
- Download the binary distribution from the Groovy website.
- Extract the downloaded archive to a location of your choice.
- Set the GROOVY_HOME environment variable in your system to point to the location where you extracted the Groovy distribution.
- Add the bin directory within the Groovy distribution to your system’s PATH variable.
After following these steps, you should be able to use Groovy via the package manager on your respective platform.
Installing Groovy, a versatile and dynamic language for the Java platform, on your system can significantly enhance your programming capability. This guide will walk you through the installation steps for Groovy on both Windows and Mac operating systems in 2025.
What is Groovy?
Groovy is an agile and dynamic language for the Java Virtual Machine (JVM). It combines powerful features from languages like Python, Ruby, and Smalltalk with Java’s robust ecosystem. Groovy is ideal for scripting, rapid prototyping, and creating Domain-Specific Languages (DSLs).
Installing Groovy on Windows
Step 1: Set Up SDKMAN
-
Open Command Prompt: Press
Windows + R, typecmd, and hit Enter. -
Install SDKMAN:
- Execute the following command:
curl -s "https://get.sdkman.io" | bash - Follow the instructions to complete the installation.
- Execute the following command:
-
Initialize SDKMAN: Run
sdk versionto verify that SDKMAN is installed.
Step 2: Install Groovy
-
Use SDKMAN to Install Groovy:
- Run the following command:
sdk install groovy - Wait for the installation to complete.
- Run the following command:
-
Verify Groovy Installation:
- Execute:
groovy -version - Ensure that it displays the installed Groovy version.
- Execute:
Installing Groovy on Mac
Step 1: Install Homebrew
-
Open Terminal.
-
Install Homebrew:
- Execute:
/bin/bash -c "$(curl -fsSL https://raw.githubusercontent.com/Homebrew/install/HEAD/install.sh)" - Follow the on-screen instructions to complete the installation.
- Execute:
-
Verify Homebrew Installation:
- Run:
brew -v - Check the displayed version information.
- Run:
Step 2: Install Groovy
-
Install Groovy Using Homebrew:
- Use the following command:
brew install groovy - Allow the installation process to finish.
- Use the following command:
-
Confirm Groovy Installation:
- Execute:
groovy -version - Verify the installed version number.
- Execute:
Post-Installation Troubleshooting
After installing Groovy, you might encounter some common issues. Here are links to resources that can help you troubleshoot:
-
Groovy MissingPropertyException Troubleshooting: Learn how to resolve
MissingPropertyExceptionin Groovy. -
Checking File Presence in Groovy: A guide for verifying file existence within Groovy scripts.
-
Groovy XML Manipulation: Techniques for manipulating XML files in Groovy.
By following these steps, you can easily set up Groovy on your Windows or Mac system in 2025, enabling you to develop powerful applications with ease.
Quick and Easy Guide: Install Groovy on Windows
Table of Contents
- Introduction
- Prerequisites
- Installing Java
- Installing Groovy
- Downloading Groovy
- System Requirements
- Installing Groovy on Windows
- Configuring Groovy
- Adding Groovy to the Path Environment Variable
- Verifying the Installation
- Checking the Version of Groovy
- Running the Groovy Console
- Conclusion
How to Install Groovy on Windows Operating System
Groovy is a dynamic programming language that runs on the Java Virtual Machine (JVM). It is widely used in the Java ecosystem for scripting, testing, and building Java applications. In this article, we will walk through the step-by-step process of installing Groovy on a Windows operating system.
Prerequisites
Before installing Groovy, make sure that You have Java installed on your system. Groovy requires Java to be already installed in order to run. If you haven’t installed Java yet, you can refer to the links provided in the video description to learn how to install Java on Windows.
Installing Groovy
To install Groovy, follow the steps outlined below:
Step 1: Downloading Groovy
Go to the official Groovy Website and navigate to the download section. There, you will find various options for downloading Groovy. You can either download it directly from the website or use the Windows installer available in the «Embeddable» section.
Step 2: System Requirements
Before downloading Groovy, make sure you meet the system requirements. For Groovy 3, you need to have Java 8 or above installed. For Groovy 2.5 to 2.6, Java 7 or above is required. Ensure that you have the correct JVM version installed, as Groovy requires it to run. You can get the JVM by either installing a JRE or a JDK.
Step 3: Installing Groovy on Windows
Once you have downloaded the Groovy installer, locate the downloaded file in your Downloads folder and double click to run the installer. The installation wizard will appear.
Choose the desired language and click «Next». Accept the terms of the license agreement and click «Next» again.
On the next screen, you can select the Type of installation. It is recommended to keep the default settings and click «Next».
Specify the destination folder where Groovy will be installed. By default, it will be installed in the «Program Files (x86)\groovy» folder. Click «Next» to proceed.
You will see additional options on the next screen. If you don’t want to Create any shortcuts, simply uncheck the corresponding box. Click «Install» to start the installation process.
Once the installation is complete, click «Finish». The installation wizard will close, and you will see a prompt asking you to view the Readme file. You can choose to view it or close the prompt.
Step 4: Configuring Groovy
After the installation, it is important to add the Groovy installation directory to the Path Environment Variable. This will allow you to access Groovy from anywhere on your system.
To add Groovy to the Path Environment Variable, follow these steps:
- Open the Properties of «This PC» or «My Computer» by right-clicking and selecting «Properties».
- Go to «Advanced system settings» and select the «Environment Variables» button.
- In the System Variables section, scroll down and locate the «groovy_home» variable. If it is not present, click «New» to add it manually.
- In the «Variable value» field, enter the path to the Groovy home directory. For example, «C:\Program Files (x86)\groovy».
- Locate the «Path» variable in the System Variables section and select «Edit».
- At the end of the «Variable value» field, add the path to the «bin» folder within the Groovy home directory. For example, «;C:\Program Files (x86)\groovy\bin».
- Click «OK» to save the changes.
Step 5: Verifying the Installation
To verify that Groovy is installed correctly, open a new command prompt and type the following command:
groovy --versionThis command will display the version of Groovy installed on your system. Additionally, you can use the command groovy -V to check the version of Groovy.
You can also check the location of the Groovy installation by running the command which groovy or where groovy depending on your operating system.
Step 6: Running the Groovy Console
As part of the Groovy installation, a Groovy console is also installed. You can start the Groovy console by navigating to the Groovy installation directory and running the groovyConsole.bat file.
The Groovy console provides an interactive environment where you can write and execute Groovy code. It is useful for quick testing and experimentation.
Conclusion
Congratulations! You have successfully installed Groovy on your Windows operating system. You can now start exploring the powerful features of Groovy and leverage its capabilities for scripting, testing, and building Java applications.
Remember to always keep your Groovy installation up to date by following the official releases and updates from the Groovy community.
Enjoy coding with Groovy!
Highlights:
- Groovy is a dynamic programming language used in the Java ecosystem for scripting, testing, and building Java applications.
- Before installing Groovy, ensure that you have Java installed on your system.
- Follow the step-by-step instructions to download and install Groovy on a Windows operating system.
- Configure the Groovy installation by adding it to the Path Environment Variable.
- Verify the installation by checking the version of Groovy and running the Groovy console.
- Start exploring the powerful features of Groovy for your development needs.
FAQs:
Q: Can Groovy run on other operating systems besides Windows?
Yes, Groovy is compatible with various operating systems including Windows, macOS, and Linux.
Q: Do I need to reinstall Groovy if I already have Java installed?
No, if you already have Java installed, you can proceed with installing Groovy without reinstalling Java.
Q: Can I use an IDE to write Groovy code?
Yes, there are several IDEs that support Groovy, such as IntelliJ IDEA, Eclipse, and Visual Studio Code.
Q: Can I uninstall Groovy if I no longer need it?
Yes, you can uninstall Groovy from your system through the control panel or settings app. Make sure to also remove the Groovy installation directory from the Path Environment Variable.