
Last Updated :
16 Sep, 2024
GitLab is a popular DevOps platform that provides a robust solution for source code management, continuous integration/continuous deployment (CI/CD), and other development workflows. While GitLab is typically hosted on Linux servers, it can also be installed on Windows using a virtual machine or Docker.
In this article, we will walk you through the steps to install GitLab on Windows using Docker, which provides a manageable and efficient way to run GitLab without needing to configure a full Linux environment.
Prerequisites
Before installing GitLab on Windows, ensure you have the following prerequisites:
- Windows 10 Pro, Enterprise, or Education: Required for Docker Desktop.
- Docker Desktop: A platform that allows you to run Docker containers on Windows.
- Sufficient System Resources: At least 4 CPU cores and 4GB of RAM for GitLab to run smoothly. Higher specifications are recommended for production environments.
Installing Docker on Windows
To run GitLab on Windows, you’ll need to install Docker Desktop, which enables running containers on Windows systems.
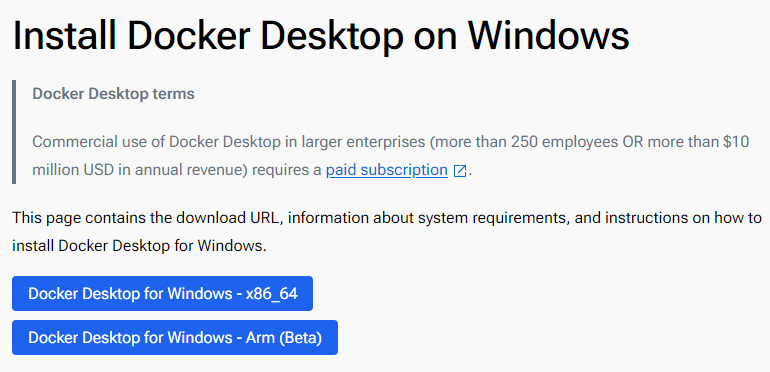
Step 1: Download Docker Desktop
Go to the Docker Desktop website and download the installer for Windows.
Step 2: Install Docker Desktop
- Run the installer and follow the on-screen instructions.
- When prompted, enable the option for Windows Subsystem for Linux (WSL 2) for better performance.
Step 3: Start Docker Desktop
- Once installed, launch Docker Desktop and ensure it is running. You should see the Docker icon in the system tray.
Step 4: Verify Docker Installation
Open Command Prompt or PowerShell and type:
docker --version
You should see the version of Docker installed, confirming that Docker is set up correctly.
Downloading and Running GitLab Using Docker
With Docker installed, you can now download and run GitLab using Docker containers.
Step 1: Pull the GitLab Docker Image
Open PowerShell or Command Prompt and pull the GitLab image from Docker Hub:
docker pull gitlab/gitlab-ee:latest
This command pulls the latest version of GitLab Enterprise Edition. If you prefer the Community Edition, use gitlab/gitlab-ce:latest.
Step 2: Run GitLab in a Docker Container
Create a new directory on your Windows system to store GitLab configuration and data. This ensures data persists even if the container is removed:
mkdir C:\gitlab\data
mkdir C:\gitlab\logs
mkdir C:\gitlab\config
Step 3: Start the GitLab container:
docker run --detach `
  --hostname gitlab.local `
  --publish 443:443 --publish 80:80 --publish 22:22 `
  --name gitlab `
  --restart always `
  --volume C:\gitlab\config:/etc/gitlab `
  --volume C:\gitlab\logs:/var/log/gitlab `
  --volume C:\gitlab\data:/var/opt/gitlab `
  gitlab/gitlab-ee:latest
Options:
- —hostname: Sets the hostname for GitLab (e.g., gitlab.local).
- —publish: Maps ports from the container to the host (HTTP, HTTPS, and SSH).
- —name: Names the container gitlab.
- —restart always: Ensures GitLab restarts automatically if the container stops or the host reboots.
- —volume: Maps local directories to container directories for persistent storage.
Step 3: Wait for GitLab to Initialize:
It may take several minutes for GitLab to initialize. You can monitor the process using:
docker logs -f gitlab
Wait until you see the message indicating that GitLab is ready.
Configuring GitLab
After GitLab starts, you can configure it through the GitLab interface:
Step 1: Access GitLab
- Open a web browser and navigate to http://localhost.
- You should see the GitLab login screen.
Step 2: Set Up the Root Password
The first time you access GitLab, you’ll be prompted to set the root password. Enter a secure password and save it.
Step 3: Log In:
Log in using the username root and the password you just set.
Step 4: Configure GitLab Settings
Navigate to the Admin area to configure GitLab settings, such as email notifications, user management, and project settings.
Accessing GitLab
To access GitLab, simply navigate to the hostname you set during the Docker run command (e.g., http://localhost if using the default setup). If you mapped the ports differently or used a different hostname, adjust the URL accordingly.
Setting Up GitLab Runner (Optional)
GitLab Runner is a tool used for running CI/CD jobs on your GitLab instance. Installing GitLab Runner on Windows allows you to leverage GitLab’s powerful CI/CD pipelines.
Step 1: Download GitLab Runner
Visit the GitLab Runner downloads page and download the binary for Windows.
Step 2: Install GitLab Runner:
- Extract the binary to a directory, for example, C:\GitLab-Runner.
- Open Command Prompt as Administrator and register the runner:
C:\GitLab-Runner\gitlab-runner.exe register
- Follow the prompts to configure the runner with your GitLab instance, including:
- GitLab URL.
- Registration token (found in GitLab’s Admin area under Runners).
- Runner description, tags, and executor type (use shell for simplicity on Windows).
Step 3: Start the Runner
Install and start GitLab Runner as a service:
C:\GitLab-Runner\gitlab-runner.exe install
C:\GitLab-Runner\gitlab-runner.exe start
- Tier: Free, Premium, Ultimate
- Offering: GitLab Self-Managed
You can install GitLab on several cloud providers,
or use one of the following methods.
Linux package
The Linux package includes the official deb and rpm packages. The package has GitLab and dependent components, including PostgreSQL, Redis, and Sidekiq.
Use if you want the most mature, scalable method. This version is also used on GitLab.com.
For more information, see:
- Linux package
- Reference architectures
- System requirements
- Supported Linux operating systems
Helm chart
Use a chart to install a cloud-native version of GitLab and its components on Kubernetes.
Use if your infrastructure is on Kubernetes and you’re familiar with how it works.
Before you use this installation method, consider that:
- Management, observability, and some other concepts are different than traditional deployments.
- Administration and troubleshooting requires Kubernetes knowledge.
- It can be more expensive for smaller installations.
- The default installation requires more resources than a single node Linux package deployment, because most services are deployed in a redundant fashion.
For more information, see Helm charts.
GitLab Operator
To install a cloud-native version of GitLab and its components in Kubernetes, use GitLab Operator.
This installation and management method follows the Kubernetes Operator pattern.
Use if your infrastructure is on Kubernetes or OpenShift, and you’re familiar with how Operators work.
This installation method provides additional functionality beyond the Helm chart installation method, including automation of the GitLab upgrade steps. The considerations for the Helm chart also apply here.
Consider the Helm chart installation method if you are limited by GitLab Operator known issues.
For more information, see GitLab Operator.
Docker
Installs the GitLab packages in a Docker container.
Use if you’re familiar with Docker.
For more information, see Docker.
Source
Installs GitLab and its components from scratch.
Use if none of the previous methods are available for your platform. Can use for unsupported systems like *BSD.
For more information, see Source.
GitLab Environment Toolkit (GET) is a set of opinionated Terraform and Ansible scripts.
Use to deploy a reference architecture on selected major cloud providers.
This installation methods has some limitations, and requires manual setup for production environments.
Unofficial and community-supported distributions
- Debian Native
- FreeBSD
- Arch Linux
- Puppet Module
- Ansible Playbook
- GitLab Virtual Appliance (KVM)
- GitLab on Cloudron
Unsupported Linux distributions and Unix-like operating systems
- Arch Linux
- Fedora
- FreeBSD
- Gentoo
- macOS
Installation of GitLab on these operating systems is possible, but not supported.
For more information, see:
- Installation guides
- Supported and unsupported OS versions for Linux package installations
Microsoft Windows
GitLab is developed for Linux-based operating systems.
It does not run on Microsoft Windows, and we have no plans to support it in the near future. For the latest development status, view this issue.
Consider using a virtual machine to run GitLab.
In the ever-evolving world of software development, GitLab has emerged as a powerful tool for version control and CI/CD processes. Installing GitLab on Windows can seem daunting, but with the right guidance, it’s a straightforward process. This step-by-step guide is crafted to help you navigate through the installation and configuration of GitLab on a Windows environment. From setting up your account to optimizing your workflow, we’ll cover the essential steps to get you started with GitLab on your Windows machine.
Key Takeaways
- GitLab installation on Windows starts with downloading Git Bash and verifying OpenSSL to generate SSH keys for secure communication.
- Setting up a GitLab account involves registering, email verification, and adding SSH keys to your profile to access repositories securely.
- Creating a GitLab project includes navigating the dashboard, configuring project settings, and initializing the repository with a README or pushing existing code.
- Configuring the local machine for GitLab requires cloning the repository, setting up remote repositories, and understanding how to push and pull changes.
- GitLab’s CI/CD pipelines can be leveraged to automate builds and tests, and integrating GitLab with tools like Visual Studio Code and Docker enhances the development workflow.
Getting Started with GitLab on Windows

Downloading Git Bash for Windows
To kick off your GitLab journey on Windows, you’ll need to start by downloading Git Bash. This essential tool not only provides you with Git functionality but also includes a Bash emulation to run Git commands. Head over to the official Git website and select the appropriate version for your system, typically the 64-bit version for modern Windows installations.
Installation is straightforward: run the setup as an administrator, accept the default settings, and complete the installation. Afterward, ensure that OpenSSL is installed by typing openssl -version in Git Bash. You should see a version output, confirming the presence of OpenSSL, which is crucial for SSH key generation.
OpenSSL 3.2.1 30 Jan 2024 (Library: OpenSSL 3.2.1 30 Jan 2024)
Once Git Bash is installed, you’re ready to move on to the next step: generating your SSH keys, which are vital for secure communication with GitLab servers.
Verifying OpenSSL Installation
Before proceeding with the installation of GitLab on Windows, it’s crucial to ensure that OpenSSL is properly installed on your system. OpenSSL is a vital component for secure communications and is required for GitLab to function correctly. To verify the installation, open Git Bash and enter the command openssl -version. You should receive output similar to OpenSSL 3.2.1 30 Jan 2024 (Library: OpenSSL 3.2.1 30 Jan 2024). If you do not see this, you may need to reinstall Git Bash or manually install OpenSSL.
OpenSSL not only secures communications but also plays a key role in generating SSH keys, which are essential for authenticating with GitLab Ultimate and other GitLab versions.
Here are the steps to check your OpenSSL version:
- Open Git Bash.
- Type
openssl -versionand press Enter. - Confirm the version and build date of OpenSSL.
If any issues arise during this process, it’s important to address them before moving on to generating SSH keys. This ensures a smooth setup and secure connection to your GitLab repositories.
Generating SSH Keys with Git Bash
After ensuring that OpenSSL is installed by running openssl -version in Git Bash, you’re ready to generate your SSH keys. This is a crucial step for secure communication with GitLab Premium and other Git services.
To create your SSH keys, execute the following command in Git Bash:
ssh-keygen -t rsa -b 2048 -C "your_email@example.com"
Here’s what each option means:
-t rsa: Specifies the type of key to generate (RSA).-b 2048: Sets the key length to 2048 bits, which is the recommended size for good security.-C: Allows you to add a comment, such as your email, for easy identification of the key.
When prompted, you can enter a passphrase for an extra layer of security or press Enter to skip. Remember to store your passphrase in a secure location if you choose to use one.
Once the process completes, you’ll have two files: id_rsa (your private key) and id_rsa.pub (your public key). The public key is what you’ll add to your GitLab account.
Setting Up Your GitLab Account

Registering a New GitLab Account
To begin your journey with GitLab, you’ll need to create a new account. Start by visiting the GitLab sign-up page and fill in your details. You’ll be asked to provide a username, first name, last name, a valid email address, and a strong password. Click on the ‘Register’ button to proceed.
Once you’ve registered, GitLab will send a verification code to the email address you provided. Check your inbox and enter the code to verify your account. This step is crucial to ensure the security of your account and to gain full access to GitLab’s features.
After verification, GitLab will welcome you and prompt you to define your role and the reason you’re signing up. This information helps tailor your GitLab experience to your needs. You can select from multiple options in the dropdown menu, depending on your purpose. Whether you’re a developer, a project manager, or an educator, GitLab has the tools to support your workflow.
With your account now active, you’re ready to dive into the world of GitLab, where you can manage software projects, collaborate with teams, and harness a multitude of features for your development needs.
Verifying Your Email Address
Once you’ve registered for a GitLab account, you’ll need to verify your email address to activate your account. Check your inbox for a confirmation email from GitLab. This email contains a verification link or code that you must click or enter to confirm your email address.
If you don’t see the email, make sure to check your spam folder or use the search function in your email client. For instance, as mentioned in the GitLab Handbook, you can search for «Confirmation Emails» to locate the message. If you’re still having trouble, consider the following steps:
- Ensure that the email address you provided is correct and accessible.
- Resend the verification email from the GitLab sign-in page if necessary.
After verifying your email, you’ll be prompted to complete your profile by selecting your role and the reason you’re signing up for GitLab. This helps tailor your GitLab experience to your needs.
Adding SSH Keys to Your GitLab Profile
Once you have your SSH key generated, it’s time to add it to your GitLab profile to establish a secure connection. Navigate to your profile settings in GitLab by clicking on your profile picture, then select ‘Edit Profile’. From the side menu, choose ‘SSH Keys’ and click on ‘Add New Key’. Here, you’ll paste the SSH key you’ve copied earlier. Give your key a title for easy identification and set an expiration date if desired.
- Paste the SSH key into the ‘Key’ field
- Provide a descriptive title for the key
- Select the appropriate usage type
- Optionally, set an expiration date for the key
After adding your SSH key, you’ll be able to securely access your GitLab repositories from Windows. This step is crucial for maintaining a secure and efficient workflow. If you encounter any issues, verify that your key is correctly pasted and that there are no extra spaces or line breaks.
With your SSH key added, you’re now set to interact with GitLab repositories without repeatedly entering your credentials.
Creating Your First GitLab Project

Navigating the GitLab Dashboard
Once you’ve logged into GitLab, you’ll be greeted by the dashboard. This is your command center, where you can access all your projects, issues, and more. Start by familiarizing yourself with the main areas: the project list, the issue tracker, and the CI/CD pipeline status. Each section is designed to give you a quick overview of your current work and access to detailed management options.
To create a new project, simply click on the ‘New Project’ button. You’ll be prompted to enter essential details such as the project’s name and visibility settings. Here’s a quick rundown of the steps:
- Navigate to the dashboard and click on ‘New Project’.
- Choose a project name, set the visibility level, and configure additional settings.
- If starting from scratch, initialize the repository with a README file to make it discoverable.
- Alternatively, push an existing repository to GitLab.
Once your project is set up, you can add files by selecting ‘New file’, ‘Upload file’, or ‘New directory’ within the project’s repository section. This initial setup is crucial for a smooth workflow, so take your time to ensure everything is configured to your preference.
Project Configuration and Visibility Settings
Configuring your project’s visibility is a crucial step in setting up your GitLab project. By default, new projects are set to private, meaning only project members can access it. However, you may want to change this setting to internal or public, depending on your collaboration needs.
To adjust the visibility, navigate to your project’s settings and look for the ‘Visibility, project features, permissions’ section. Here, you can select the desired visibility level. Keep in mind that certain restrictions may apply based on your GitLab instance’s global settings or your user permissions.
If you encounter issues when changing the project visibility, ensure you have the necessary ownership permissions and that there are no overriding settings at the instance level.
Below is a list of visibility levels and what they entail:
- Private: Only project members can access the project.
- Internal: All authenticated users can access the project.
- Public: No authentication is required to access the project.
Initializing Your Project Repository
Once you’ve configured your project’s name and visibility settings, it’s time to initialize your repository. If you’re starting a new project, you can initialize the repository with a README file to make it easier for others to understand the purpose of your project. For existing projects, you’ll need to push your code to GitLab.
To get started, follow these steps:
- On the project creation page, you’ll find an option to initialize your repository with a README. Select this if you’re starting fresh.
- If you’re importing an existing project, make sure you have your local repository ready.
- Use the ‘Import project’ tab if you’re migrating from another platform or have a repository URL.
After initializing your repository, you can add new files, create directories, or upload existing files directly through the GitLab interface. This is a great way to start populating your project with the necessary components.
Remember to commit your changes as you go. Each commit serves as a checkpoint that you can revert to if needed. It’s also a good practice to include meaningful commit messages to document the history of your project.
Configuring GitLab Repository on Your Machine

Cloning the GitLab Repository to Your Local Machine
Once you have set up your GitLab repository, the next step is to bring a copy of this repository to your local machine. This process is known as cloning. Cloning creates a local working copy of your project, which you can then modify without affecting the central repository on GitLab.
To clone a repository, you’ll need the repository’s URL. You can find this URL in your GitLab project under the ‘Clone’ button. Here’s a simple step-by-step guide to clone your GitLab repository:
- Open Git Bash or your preferred terminal.
- Navigate to the directory where you want your project to be located.
- Use the
git clonecommand followed by the repository URL.
For example:
git clone https://your-gitlab-server.com/your-repository.git
Ensure that the directory path you choose is the one where you want your local Git project to be created. After entering the command, your local copy will be created in the specified directory.
If you encounter any issues, verify that you have the correct repository URL and that your network settings allow access to the GitLab server. For instance, you might need to enter the base URL for your GitLab server plus the context path that points to your repository.
Setting Up Remote Repositories
Once you have your local GitLab repository initialized, the next step is to set up remote repositories to enable synchronization between your local and remote codebases. Configuring your remote repository is crucial for collaboration and maintaining a central source of truth for your project’s code.
To connect your local repository to the remote GitLab server, you’ll need the repository’s URL. This URL is the pathway for all the git commands that interact with the remote repository, such as git push and git pull. Here’s a simple guide to get you started:
- Obtain the URL of your GitLab repository from the repository’s page on GitLab.
- Open Git Bash and navigate to your local repository’s directory.
- Use the command
git remote add origin YOUR_REPOSITORY_URLto establish a link to the remote repository. - Verify the connection using
git remote -v, which should list the fetch and push URLs for ‘origin’.
Ensure that your local and remote branches are correctly mapped for seamless collaboration. For example, if you’re working on the ‘master’ branch, you would use the command [git pull origin master -u](https://www.geeksforgeeks.org/setup-gitlab-repository-windows-10/) to synchronize your local repository with the remote one.
Remember to replace YOUR_REPOSITORY_URL with the actual URL of your GitLab repository. If you encounter any issues, refer to the troubleshooting section or consult the GitLab documentation for advanced server settings.
Pushing and Pulling Changes
Once you’ve set up your local repository, you’ll need to synchronize your work with GitLab. Pushing changes to GitLab is straightforward. Start by committing your changes locally with git commit. Then, push your commits to the remote repository using git push. If you’re working on a feature branch, ensure you push to the correct branch with git push origin <branch-name>.
To incorporate changes from GitLab into your local repository, use the git pull command. This merges updates from the remote branch into your current branch. It’s a good practice to pull changes regularly to stay in sync with the team’s progress.
To push and pull between your existing project and GitLab, you must issue a [git remote add](https://www.theserverside.com/blog/Coffee-Talk-Java-News-Stories-and-Opinions/How-to-add-and-push-an-existing-project-to-GitLab) command. This provides your local Git repo with the GitLab URL which is essential for the synchronization process.
Ensure your local and remote branches are correctly mapped to avoid conflicts. Regularly fetching and merging changes can help prevent significant merge conflicts later on.
Leveraging GitLab’s CI/CD Pipelines

Understanding the Basics of CI/CD
Continuous Integration and Continuous Deployment, commonly known as CI/CD, are fundamental DevOps practices that automate the stages of software delivery. The automation of these processes ensures that code changes are integrated, tested, and deployed efficiently and reliably.
To set up CI/CD pipelines in GitLab, you start by creating a .gitlab-ci.yml file in your project’s repository. This file defines the pipeline’s structure, including stages for building, testing, and deploying your application. Here’s a simple breakdown of the key components:
- Stages: Logical phases of the pipeline, such as build, test, and deploy.
- Jobs: Tasks that run during a stage. Each job is defined by a script.
- Scripts: Commands that execute the job’s actions.
- GitLab Runner: The open-source agent that runs your jobs.
By optimizing your pipeline, you can reduce build times and improve resource utilization, leading to a more efficient development cycle.
Understanding the CI/CD pipeline’s flow and how to edit it using the Pipeline Editor or integrate third-party tools can greatly enhance your project’s productivity. Regularly reviewing and maintaining your pipeline ensures it remains effective and up-to-date with the latest practices.
Creating Your First Pipeline
To set up your first CI/CD pipeline in GitLab, you’ll need to create a .gitlab-ci.yml file in the root directory of your project. This file defines the pipeline configuration, including stages for building, testing, and deploying your application. Start by specifying the stages of your pipeline, such as build, test, and deploy. Each stage contains jobs that run scripts to perform necessary actions.
For each job, you can define specific commands or scripts that should be executed. Here’s a simple example of a job within the test stage:
stages:
  - test

test_job:
  stage: test
  script:
    - echo "Running unit tests"
    - ./run-tests.sh
GitLab CI/CD enables automation for efficient workflows. Utilize .gitlab-ci.yml, GitLab Runner, and testing/deployment integration for continuous improvement and optimized processes. To ensure your pipeline is functioning as intended, you can validate the syntax and debug any issues within the GitLab pipeline editor.
By automating your build and test processes, you can catch errors early and save time, making your development cycle more efficient and reliable.
Automating Builds and Tests
Automating the build and test processes in your GitLab CI/CD pipeline is a game-changer for maintaining a stable and efficient workflow. GitLab’s CI/CD pipelines are defined using .gitlab-ci.yml files, which allow you to automate repetitive tasks, improve code quality, and accelerate delivery. For instance, a simple pipeline configuration might look like this:
build-job:
  stage: build
  script:
    - echo "Hello, $GITLAB_USER_LOGIN!"
test-job1:
  stage: test
  script:
    - echo "This job tests something"
test-job2:
  stage: test
  script:
    - echo "This job tests something, but takes more time than test-job1."
    - sleep 20
By leveraging GitLab’s integrated CI/CD, you can ensure that every commit or merge request is automatically built and tested, leading to more transparent updates and a more stable environment.
Here are some examples of .gitlab-ci.yml configurations for different programming environments:
- Ruby on Rails: Define test and build stages, and include database configurations.
- Python: Set up build and linting stages, and specify dependencies.
- Rust: Configure the build and test stages, and include necessary compiler options.
- C++: Use
gccfor compiling andcmakefor building. - VueJS: Include
npmcommands and add Static Application Security Testing (SAST).
Remember to customize your pipeline to fit the specific needs of your project and team. With GitLab’s comprehensive features, you can streamline your development process and focus on delivering high-quality software.
Managing Collaborations and Merge Requests

Inviting Team Members to Your Project
Collaboration is key to any successful project, and GitLab makes it easy to bring your team together. Start by navigating to your project’s settings, then select ‘Members’ to add collaborators. Here’s a simple process to invite team members:
- Go to your project’s main page.
- Click on ‘Project Information’ and select ‘Members’.
- Use the ‘Invite member’ button to add team members.
- Enter the email address or GitLab username of the person you want to invite.
- Assign a role that defines the permissions for the user.
Ensure each team member has the appropriate role to match their responsibilities in the project.
Once invited, team members will receive an email notification with a link to join the project. It’s a seamless process that integrates new collaborators quickly and efficiently. If you need to manage multiple team members, consider using GitLab groups for better organization and access control.
Reviewing Code and Managing Merge Requests
Merge Requests (MRs) are central to collaboration in GitLab. They allow you to propose changes, solicit feedback, and ensure code quality before integrating new code into the main branch. Start by creating a new branch for your changes, and once you’re ready, open a merge request.
To streamline the review process, GitLab provides a suite of tools. Use commit message templates to maintain a clear history, and draft merge requests to gather early feedback. Here’s a quick checklist for managing MRs effectively:
- Ensure your code adheres to project guidelines
- Assign reviewers and set approval rules
- Discuss changes and address suggestions
- Resolve any merge conflicts promptly
With GitLab’s robust MR system, you can automate certain checks, like running tests through CI/CD pipelines, to catch issues early. This not only saves time but also enhances the overall quality of your project.
Remember to regularly sync your branch with the main branch to minimize conflicts. When everything is approved, you can merge your changes, using methods like squash and merge for a cleaner history.
Resolving Merge Conflicts
When collaborating on GitLab projects, merge conflicts are an inevitable part of the process. They occur when multiple developers make changes to the same lines of code or when one developer’s changes are not up to date with changes merged into the main branch. Resolving these conflicts promptly is crucial to maintaining a smooth workflow.
To address merge conflicts, follow these steps:
- Fetch the latest changes from the main branch.
- Merge the changes into your feature branch.
- Identify the files with conflicts and carefully review the differences.
- Decide on the final code that should be in the merged file.
- Commit the resolved files to update the merge request.
It’s essential to communicate with your team members during this process to ensure that the resolutions reflect the team’s consensus.
Remember, the goal is to integrate all changes in a way that preserves the integrity of the codebase. Utilize GitLab’s built-in tools, such as the merge request diffs and conflict resolution editor, to assist you. If conflicts are complex, consider a pair programming session to resolve them collaboratively.
Integrating GitLab with Development Tools

Connecting GitLab to Visual Studio Code
Integrating GitLab with Visual Studio Code (VS Code) streamlines your development workflow by allowing you to manage your repositories directly within the IDE. First, ensure that Git is installed on your system and that VS Code is configured to recognize your Git executable. This is crucial for the GitLab extension to function properly.
To connect GitLab with VS Code, follow these steps:
- Install the GitLab Workflow extension from the VS Code marketplace.
- Once installed, access the extension settings to configure it with your GitLab account by providing your GitLab instance URL and personal access token.
- With the extension configured, you can now clone repositories, create merge requests, and manage issues right from VS Code.
It’s important to note that the GitLab Workflow extension also supports features like GitLab Duo Chat, which enhances collaboration by allowing you to discuss code directly within the IDE.
For detailed instructions and troubleshooting, refer to the GitLab Duo Chat documentation and examples. Remember to update the extension regularly to benefit from the latest features and improvements.
Using GitLab with Docker
Integrating GitLab with Docker can significantly streamline your development and deployment processes. Docker containers offer a consistent environment for your applications, ensuring that they run the same way on every machine. This is particularly beneficial when combined with GitLab’s CI/CD pipelines, as it allows for seamless testing and deployment.
To get started, ensure you have Docker installed on your machine. Then, you can use the GitLab CI/CD pipeline to build Docker images and push them to a registry. Here’s a simple workflow:
- Write a
Dockerfilethat defines your application’s environment. - Configure
.gitlab-ci.ymlto automate the build and push process. - Use GitLab’s container registry to store your Docker images.
Italics are used for subtle emphasis, and in this context, we emphasize the .gitlab-ci.yml file, which is central to automating your Docker workflow with GitLab.
By leveraging Docker with GitLab, you can achieve a more efficient and controlled development lifecycle, enhancing the transparency and control in your software development process.
Setting Up GitLab Pages for Your Project
GitLab Pages allows you to publish static websites directly from a repository in GitLab. To get started, you’ll need to create a project specifically for your Pages site. This can be done by navigating to your GitLab dashboard and selecting ‘New Project’.
Once your project is set up, you’ll configure the gitlab-ci.yml file to build your site. Here’s a simple workflow:
- Add your HTML, CSS, and JavaScript files to your project.
- Configure the
.gitlab-ci.ymlfile to use a static site generator like Jekyll, Hugo, or your preferred tool. - Push your changes to GitLab, and the CI/CD pipeline will automatically build and deploy your site to GitLab Pages.
Ensure your repository is set to public if you want your GitLab Pages site to be accessible to everyone.
Remember to check the ‘Settings’ of your project to configure the visibility and access controls for your Pages. GitLab offers detailed documentation and troubleshooting guides to help you if you encounter any issues during the setup process.
Securing Your GitLab Projects

Implementing Access Controls
To secure your GitLab project, it’s crucial to restrict access to authorized individuals. Start by configuring access tokens which serve as secure credentials. These tokens can be project-specific or group-based, ensuring that only the right eyes have the necessary permissions.
- Under Repository access, select the scope for your token. Opt for minimal necessary access to maintain security.
- In the Permissions section, define the access levels for the token. This granularity helps in maintaining control over your repositories and account.
Ensure that project and group access tokens include the api and read_repository scopes. Personal access tokens should also have read_user.
Remember, tokens linked to roles like Owner or Maintainer offer extensive control, so assign them judiciously. For a comprehensive understanding of permissions and roles, the GitLab documentation is an invaluable resource.
Managing Sensitive Data with Environment Variables
In the realm of software development, protecting sensitive data is paramount. Environment variables serve as a secure method to store credentials, API keys, and other sensitive information away from the codebase. By using environment variables, you can ensure that sensitive data is not accidentally committed to version control, thus reducing the risk of exposure.
To set up environment variables in GitLab, navigate to your project’s settings and look for the CI/CD section. Here, you can define variables that will be accessible during the pipeline execution. It’s crucial to restrict the visibility of these variables to maintain security. For instance, you can set variables to be ‘Protected’, meaning they will only be available to pipelines running on protected branches or tags.
When configuring environment variables, always use descriptive names that convey the purpose of the variable without revealing the actual sensitive data.
Remember to periodically review your environment variables and update them as necessary. This practice is part of maintaining a secure GitLab installation and ensures that your data remains protected.
Enabling Two-Factor Authentication
Enhancing the security of your GitLab account is crucial, and enabling Two-Factor Authentication (2FA) is a straightforward way to add an extra layer of protection. Navigate to your Account Settings and locate the ‘Two-factor Authentication’ section to begin the setup process.
To enable 2FA, follow these steps:
- Click the blue button that says ‘Enable two-factor authentication‘.
- Follow the on-screen instructions to complete the setup.
- Record the recovery codes provided and store them in a secure location.
After enabling 2FA, you will need to enter both your password and a verification code from your mobile device whenever you sign in to GitLab. This ensures that even if your password is compromised, your account remains protected.
Remember to update your linked accounts and services with the new authentication method to maintain access to your repositories and integrations.
Optimizing Your Workflow with GitLab Features

Utilizing Issue Trackers for Task Management
GitLab’s built-in issue tracker is a powerful tool for teams to effectively manage tasks. Create, assign, prioritize, and track issues with ease, ensuring nothing slips through the cracks. This feature fosters clear communication and collaboration among team members.
Italics are used to emphasize the importance of prioritization in task management. By setting priorities, teams can focus on what’s most critical, ensuring efficient workflow and timely completion of tasks.
Effective issue tracking is not just about logging tasks; it’s about creating a workflow that aligns with your team’s goals and processes.
Here’s a quick guide to get started with GitLab’s issue tracker:
- Create issues for bugs, feature requests, or any other tasks.
- Assign issues to the appropriate team members.
- Set priorities to help organize the workflow.
- Use labels to categorize and filter issues.
- Track progress with milestones and burndown charts.
Remember, the key to successful issue tracking is maintaining a system that is transparent and accessible to all team members.
Leveraging Labels and Milestones
Efficiently managing your project’s workflow is crucial, and GitLab provides powerful tools like labels and milestones to help you do just that. Labels are essential for categorizing and prioritizing issues, allowing you to streamline your focus on specific areas of work. Milestones, on the other hand, enable you to track progress over time and align your team with project deadlines.
To get the most out of these features, consider the following steps:
- Define a clear labeling system that reflects your project’s needs.
- Create milestones that correspond to your project’s phases or sprints.
- Assign labels to issues and merge requests for better organization.
- Use GitLab’s roadmaps to visualize progress across milestones.
By consistently applying labels and milestones, you’ll enhance the visibility of your project’s progress and ensure that everyone on the team is on the same page.
Remember, while labels help you filter and find relevant issues quickly, milestones give you a high-level view of your project’s trajectory. Utilize both to maximize your project management efficiency.
Customizing Your GitLab Dashboard
Your GitLab dashboard is the mission control for your projects, providing a quick overview and access to your work. Customizing your dashboard can significantly enhance your productivity by ensuring that the most relevant information is always at your fingertips. To begin customizing, navigate to your profile settings and select ‘Preferences’. Here, you can adjust your dashboard to display projects, groups, or activity by default.
GitLab offers a variety of settings to tailor your dashboard experience:
- Appearance: Change the theme and layout to suit your preferences.
- CI/CD: Manage your continuous integration and deployment settings.
- Project Integrations: Configure integrations with external services and tools.
By taking the time to customize your dashboard, you ensure a more efficient and personalized workflow.
Remember to periodically review and update your dashboard settings to align with any changes in your workflow or project requirements. This proactive approach will help you maintain an optimal working environment within GitLab.
Troubleshooting Common GitLab Installation Issues
Addressing Installation Errors
When installing GitLab on Windows, encountering errors can be a common hurdle. Addressing these errors promptly is crucial to ensure a smooth setup process. Begin by consulting the GitLab Documentation, which provides a comprehensive guide on installation methods and troubleshooting. Notably, administration and troubleshooting may require Kubernetes knowledge, especially if you’re considering a Helm chart due to known issues with the GitLab Operator.
To systematically resolve installation errors, follow these steps:
- Verify that your system meets all the supported OSes and prerequisites.
- Check for any deprecation policy that might affect your installation.
- Ensure that the PostgreSQL versions you are using are compatible with GitLab.
- Review the configuration options and custom environment variables to match your environment’s specifics.
- Consult the troubleshooting section for common issues related to DNS, memory constraints, or specific configurations like NGINX or Redis.
If an error persists after following the standard troubleshooting steps, consider seeking help from the GitLab community or support channels. The collective wisdom and experience can often illuminate solutions that are not immediately apparent.
Resolving Connectivity Problems
When you encounter connectivity issues with GitLab, it’s crucial to methodically troubleshoot the problem. Start by checking if your GitLab server is running and accessible. Ensure that the firewall settings are not blocking the necessary ports for GitLab and any integrated services like YouTrack or Kerberos. Use utilities like kinit and klist to test connectivity between the GitLab server and the Kerberos server, as this can often pinpoint where the issue lies.
If the base URL for your server uses a non-standard port or is set to localhost, GitLab may refuse webhook creation. Adjust the settings in the Admin Area to allow requests to the local network from hooks and services.
Additionally, consider the following common solutions to connectivity problems:
- Verify that the external service, such as YouTrack, is available and not blocked by a proxy server.
- Open the necessary ports in the firewall for both GitLab and the external service.
- Update the base URL for your installation to use a proper web address if it’s incorrectly set.
Seeking Help and Resources
When you encounter challenges with your GitLab installation, it’s crucial to know where to turn for assistance. Start by consulting the official GitLab documentation, which provides comprehensive guides and troubleshooting tips. For more specific issues, the GitLab community forum is a valuable resource where you can ask questions and share experiences with other users.
If you require a more structured approach, consider following a step-by-step guide on restarting your GitLab instance. This includes meeting requirements, backing up data, configuring settings, and testing your setup to ensure everything is running smoothly.
For urgent or complex problems, don’t hesitate to reach out to GitLab’s support team. They are equipped to help you navigate through any obstacles you may face.
Remember, the key to effectively resolving issues is to stay calm, methodical, and proactive in seeking out the resources available to you.
Conclusion
Congratulations on making it through our step-by-step guide to installing GitLab on Windows! By now, you should have a solid understanding of how to set up GitLab, from signing up or installing it on your infrastructure to creating projects and managing repositories. We’ve covered the essentials of generating SSH tokens, configuring GitLab with VS Code, and leveraging GitLab’s features to streamline your development workflows. Remember, GitLab is a powerful tool that offers a plethora of capabilities to support your team’s needs. With this guide, you’re well-equipped to harness the full potential of GitLab for your software development projects. Happy coding!
Frequently Asked Questions
What is GitLab?
GitLab is a web-based DevOps lifecycle tool that provides a Git repository manager providing wiki, issue-tracking, and CI/CD pipeline features, using an open-source license.
Can I install GitLab on Windows?
Yes, you can install GitLab on Windows by using Git Bash and following the step-by-step guide to set it up on your own infrastructure.
How do I create a new GitLab project?
After signing in to GitLab, navigate to the dashboard and click on ‘New Project.’ Choose a project name, visibility level, and configure other settings as needed.
How do I generate an SSH key for GitLab on Windows?
You can generate an SSH key using Git Bash by running the command ‘ssh-keygen -t rsa -b 2048 -C “your_comment”‘ and then adding the generated key to your GitLab profile.
How can I integrate GitLab with my development tools?
You can integrate GitLab with tools like Visual Studio Code by installing relevant extensions and configuring them to connect to your GitLab repository.
What are GitLab CI/CD pipelines?
GitLab CI/CD pipelines are automated processes that allow you to build, test, and deploy your code. They are defined in a .gitlab-ci.yml file within your repository.
How do I add team members to a GitLab project?
To add team members to your GitLab project, navigate to your project’s settings, go to ‘Members,’ and invite users by their email or username.
What should I do if I encounter installation issues with GitLab?
If you encounter installation issues, check the GitLab documentation for troubleshooting tips, verify your system requirements, or seek help from the GitLab community.
GITLAB
GitLab is a popular web-based Git repository manager that allows developers to collaborate on code, manage projects, and automate software lifecycles. With its integrated CI/CD pipelines, issue tracking, and version control features, GitLab enhances collaboration among teams and streamlines development processes. In this article, we will guide you through the process of setting up GitLab on a Windows operating system, providing you with a step-by-step approach to get it up and running.
Prerequisites
Before starting the installation of GitLab on your Windows machine, make sure you have the following prerequisites in place:
-
Windows 10 or 11: GitLab can be set up on modern Windows operating systems.
-
Minimum System Requirements:
-
4 GB RAM (8 GB recommended)
-
At least 2 CPU cores
-
At least 20 GB of free disk space
-
-
Windows Subsystem for Linux (WSL): To run GitLab on Windows, you need to enable WSL and install a compatible Linux distribution (like Ubuntu).
Step 1: Install Windows Subsystem for Linux (WSL)
-
Enable WSL:
-
Open PowerShell as an administrator.
-
Run the command:
-
This command installs WSL and the default Ubuntu distribution. Restart your computer if prompted.
-
-
Install a Linux Distribution:
-
If you want to install a specific version of Ubuntu, you can open the Microsoft Store and search for “Ubuntu” or run:
-
Then install your preferred version using:
wsl --install -d <DistributionName>
-
-
Set Up Ubuntu:
-
Launch Ubuntu from the Start menu, and complete the initial setup by creating a username and password.
-
Step 2: Update and Upgrade Ubuntu
Once you have Ubuntu running, it’s a good practice to update your package lists and upgrade any installed packages. Open your Ubuntu terminal and run:
sudo apt update
sudo apt upgrade -y
Step 3: Install Required Dependencies
GitLab has several dependencies that need to be installed. You can install them using the following command:
sudo apt install -y curl openssh-server ca-certificates tzdata perl
Additionally, for GitLab to work smoothly, you need to enable the Postfix mail server. This is essential for sending notification emails from your GitLab instance.
sudo apt install -y postfix
When prompted, select “Internet Site” and set the mail name to your system’s FQDN (Fully Qualified Domain Name).
Step 4: Install GitLab
-
Add the GitLab Package Server:
First, you will need to add the GitLab package repository to your system. Execute the following commands one by one:
curl https://packages.gitlab.com/install/repositories/gitlab/gitlab-ce/script.deb.sh | sudo bash
-
Install GitLab CE:
You can install GitLab Community Edition using the following command. Make sure to replacehttp://gitlab.example.comwith your actual domain or IP address.
sudo EXTERNAL_URL="http://gitlab.example.com" apt-get install gitlab-ce
-
Reconfigure GitLab:
After GitLab has been installed, run the following command to reconfigure it:
sudo gitlab-ctl reconfigure
This command initializes your GitLab server and makes the necessary configurations.
Step 5: Access GitLab
Once the configuration is complete, you can access GitLab from your web browser. Open a browser and navigate to http://gitlab.example.com (or the URL you’ve chosen).
Default Sign-in
-
The default username is
root. -
The initial password is generated during installation and can be found in your log file. You can retrieve it with:
sudo cat /etc/gitlab/initial_root_password
Log in and change your password.
Step 6: Basic Configuration
Configuring SMTP Settings
To enable email notifications, you will need to configure SMTP settings in GitLab:
-
Open the GitLab configuration file:
sudo vi /etc/gitlab/gitlab.rb
-
Locate the
gitlab_rails['smtp_settings']section, and fill it with your SMTP server details. Here’s an example configuration:
gitlab_rails['smtp_enable'] = true
gitlab_rails['smtp_address'] = "smtp.example.com"
gitlab_rails['smtp_port'] = 587
gitlab_rails['smtp_user_name'] = "your-smtp-username"
gitlab_rails['smtp_password'] = "your-smtp-password"
gitlab_rails['smtp_domain'] = "example.com"
gitlab_rails['smtp_authentication'] = "login"
gitlab_rails['smtp_enable_starttls_auto'] = true
-
Save the file and reconfigure GitLab:
sudo gitlab-ctl reconfigure
Creating a New Project
-
After logging in, click on the “New Project” button.
-
Fill in the project details, such as the project name and description.
-
Select visibility level and click on “Create project”.
Conclusion
Setting up GitLab on a Windows machine using WSL is a powerful way to leverage the collaborative capabilities of this tool directly within your Windows environment. By following the above steps, you are now equipped with your GitLab instance, ready to manage your projects efficiently.
Key Takeaways
-
Install WSL and a Linux distribution (preferably Ubuntu).
-
Keep your system packages updated.
-
Follow installation steps and configure SMTP settings for email notifications.
-
Start creating repositories and projects in GitLab.
By integrating GitLab into your development workflow, you will optimize collaboration among your team members and improve overall productivity. Happy coding!
Suggested Articles
GITLAB
GITLAB
GITLAB
GITLAB
GITLAB
GITLAB
In the last article, we saw the various parts of GitLab, its architecture and how GitLab works. If you haven’t already, I suggest reading the previous article first before reading this one. Here is the link
GitLab, A Complete Beginner’s Guide!
In this article lets look at how to set it up locally on your Windows PC, so that you can have your very own GitLab setup running right at your home or organization!
If you are using Mac or Linux, you can follow the links below.
Complete Guide To Setting Up GitLab Locally On Mac.
Complete Guide To Setting Up GitLab Locally On Linux PC..!!
So let’s begin!
Things you will need
All you need are a computer running Windows OS with enough resources (CPU, memory, and disk space) for running the GitLab Server and GitLab Runner. How much resources is enough depends on how much performance you need, the more you have the better it is!
You can also set it up on the cloud over at Gitlab.com, but
- the free plans have some limitations in terms of processing power and hard disk space.
- Also doing it locally gives you more control over the setup and
- it will also be an opportunity to learn you more about GitLab
Hence I suggest taking this route of a local installation.
If you are part of a larger organization, and you wish to install it on the cloud, then you can always take a look at the paid plans of GitLab here link
Approach to install GitLab on Windows
Okay, let’s get back to the task in hand.
As we saw in the previous article GitLab consists of 2 parts.
- GitLab Server and
- GitLab Runner
Also, we have learned in the previous article that it is preferable to set the GitLab server and runners on separate computers. But I am going for a home set up, so I will be setting them both upon the same Windows computer.
The GitLab Server relies heavily on Linux technologies and hence it cannot be installed in our Windows PC natively. If you do some research, there are ways you can do it through the Linux subsystem in windows, but we are not going to take that approach.
The
problem with these workarounds are
- The installation process is a bit complicated and is not recommended for beginners.
- They are only guaranteed to work on a version to version basis. What I mean by that is you need to have a particular version of Windows and a particular version of GitLab for everything to run smoothly. If you update your Windows or if you wish to upgrade your GitLab then you might break your GtiLab set up. Since both Windows and GitLab updates come frequently, it is not such a good idea to waste time trying to fix things every few months.
- It is unofficial and hence support for future versions cannot be guaranteed.
- These unofficial methods will bring their own limitations as opposed to running natively on Linux
Due to these above reasons, we are going to go for a more stable approach of installing the GitLab server in a virtual environment. We will also see in this article the ways to make it run as smoothly and efficiently as possible while making sure it consumes as few resources as possible.
So this
is what we are going to do
- Install the GitLab Server on a Virtual Box running Ubuntu server
- Install GitLab runner natively on Windows.
This approach takes away the cons of using unofficial hacks, as it will work on all versions of you Windows and GitLab and you don’t need to worry too much while updating your software either!
By following the step by step guide shown below you should be able to set everything up and running in an hour or 2 (depending upon how good your internet connection is, it can take longer!)
GitLab Installation Process
STEP#1: Download and install VirtualBox
You can download and install VirtualBox from this link
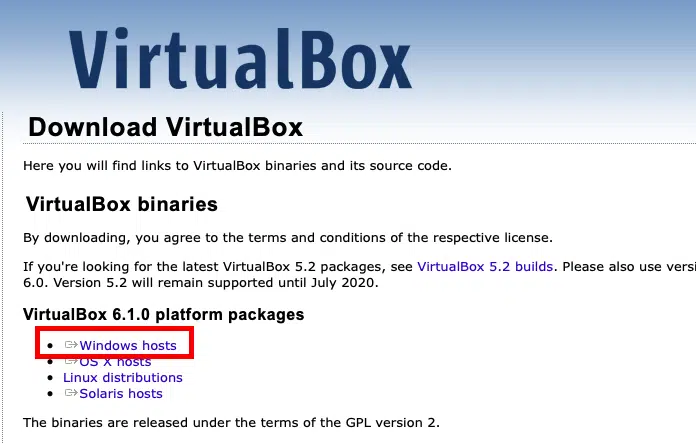
Just click on the Windows hosts and the download should start automatically. The installation process is pretty straightforward, you can just accept the default options and click through to complete the process.
Once the installation is completed you can open VirtualBox from the Start menu in Windows.
STEP#2: Install Ubuntu Server as a Virtual Machine in your Windows PC.
The next step is to get a Linux distro to install our GitLab server. For this purpose, I recommend Ubuntu Server. I chose this particular distro for 2 reasons.
- Ubuntu is known for its stability.
- GitLab Server software has support for Ubuntu
- The server edition is chosen so that it will consume fewer resources on your computer.
For this first, you need the Ubuntu Server image. You can download it from this link.
Ubuntu usually offers 2 sets of packages for us to choose from.
- Long term support version: Has a support period of 5 years
- Latest Version: has all the latest features.
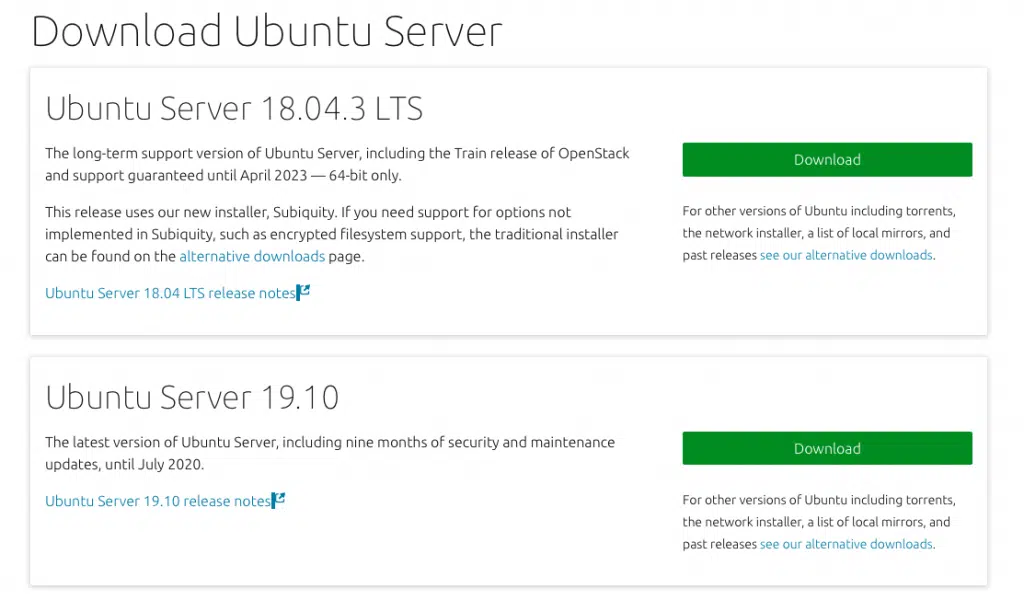
I suggest you go for the LTS one, but then the latest version should also work just fine. So click on a “Download” button and your download should start automatically. It will take some time to complete as the iso is around 900MB.
Once the download is complete you can proceed to the installation process on VirtualBox.
STEP#3: Install Ubuntu Server on VirtualBox
Open VirtualBox Application and click on the “New” button

A window like this should pop up
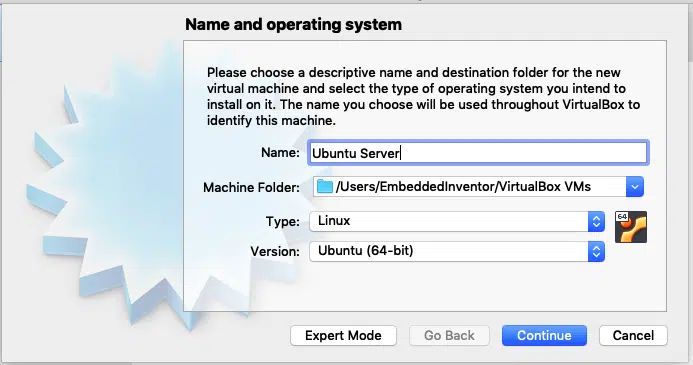
Give your virtual machine a name and choose Linux for type and ubuntu 64 bit for version and click “Continue”.
The next screen usually asks for RAM. GitLab recommends 8GB for a GitLab system with 100 users, I suggest a minimum of 2GB RAM for a home set up, you can give more if you can, just make sure you don’t allot more than 50% of your total available RAM.
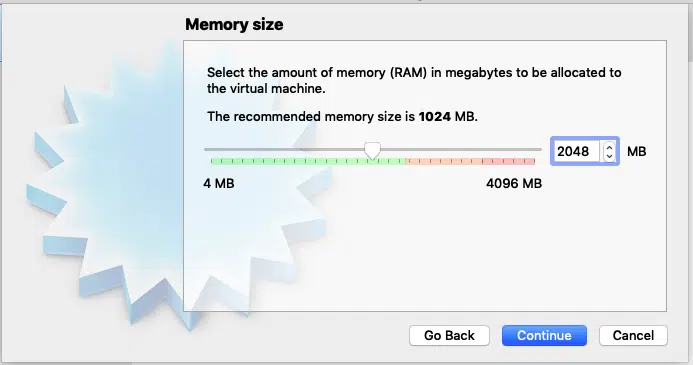
Once you have allocated RAM space, Click “Continue” to the next page.
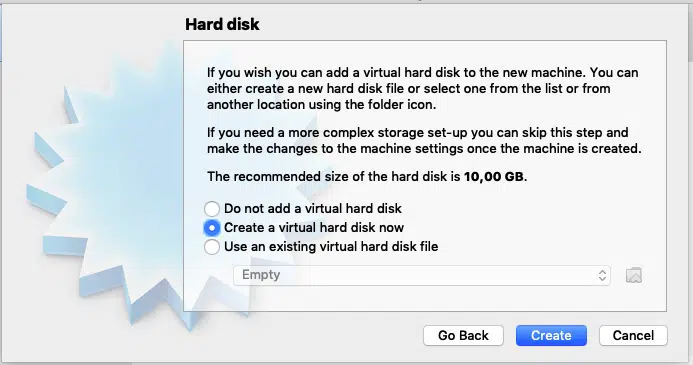
Next, you will be prompted for hard disk. Make sure “Create a virtual hard disk now” is selected and click “Create”
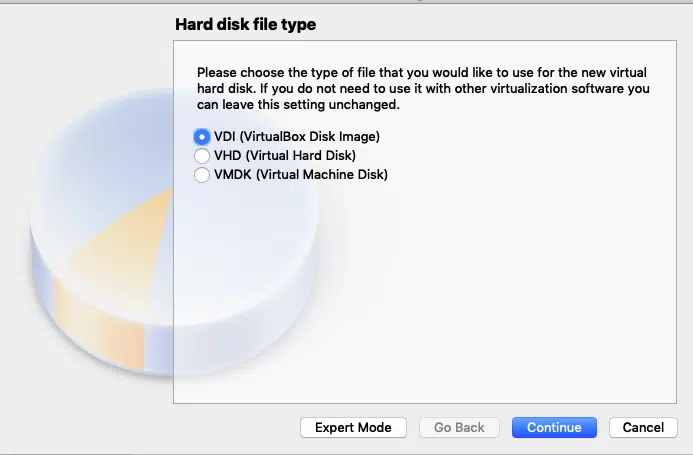
Accept
the default “VDI (VirtualBox Disk Image)” and click
“Continue”
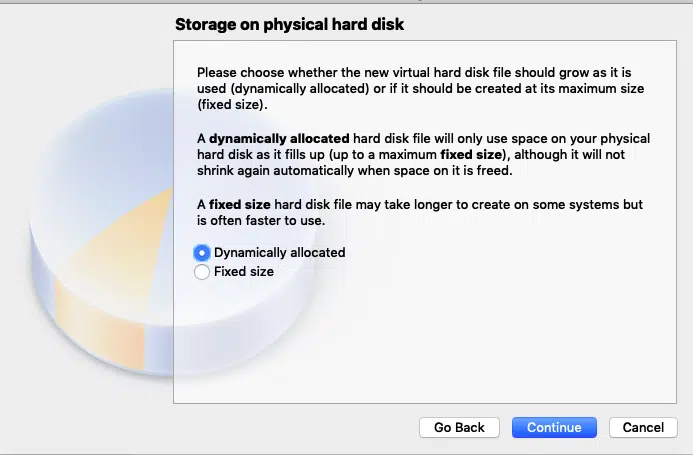
Accept “Dynamically Allocated” and Press continue. This option allocates hard disk space to the virtual machine on the run, so that as you use the more space, more will be allocated.
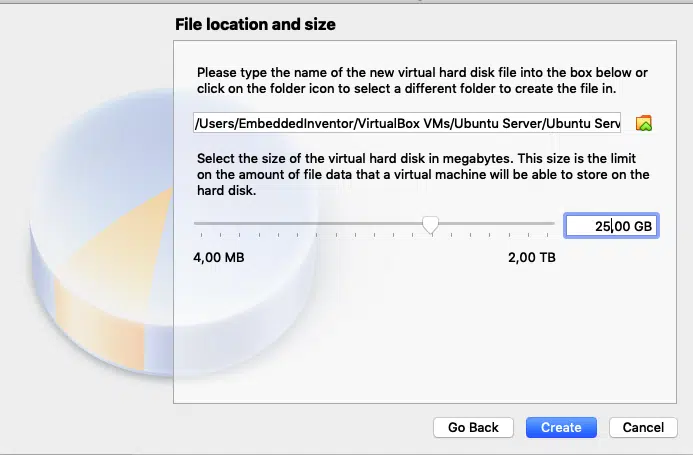
I suggest you allocate at least 25GB of space to the virtual machine, you can allot more if you can. Once you have chosen the disk space click create
Once you have done this, you should be taken back to the main window of VirtualBox and you should see the virtual machine you just created on the left pane of the window as shown in the screenshot below.

Next click on the “Settings”

And click on storage -> empty -> disk icon -> “Choose a disk file”

Select the ubuntu server iso image you have just downloaded and press ok. This is equivalent to inserting the Ubuntu disk in a real machine.

Next, go to settings->Network and choose “Bridged Adapter” in the “Attached to:” drop-down menu and press “OK”
I have explained the reason behind using these network settings in detail in this article, you can go ahead and read that if you are into computer networks.
The short explanation is, we will not be able to access the GitLab server from our other machines on the network unless we choose this option.
That’s it, the configuration is done!
You can now go ahead and click the start button!

Now the installation process will start. Since we have chosen to go with “Ubuntu server” in order to minimize the resource consumption (so that GitLab can take up as many resources as it needs) we don’t get a fancy Graphical UI, like in the desktop version of Ubuntu. You need to navigate the menus during installation only using Keyboard (tab, enter and arrow keys) since the Ubuntu server doesn’t come with mouse support. So go through the process and get it done.
STEP#4: Get the IP address of your ubuntu server
Okay now
once you got the Ubuntu server up and running, you need to find its IP address
and make a note of it.
To do that, use the “ifconfig” command on your Ubuntu server’s terminal

STEP#5: Download and install GitLab server
To download GitLab server, go to the official link on the Gitlab’s Website
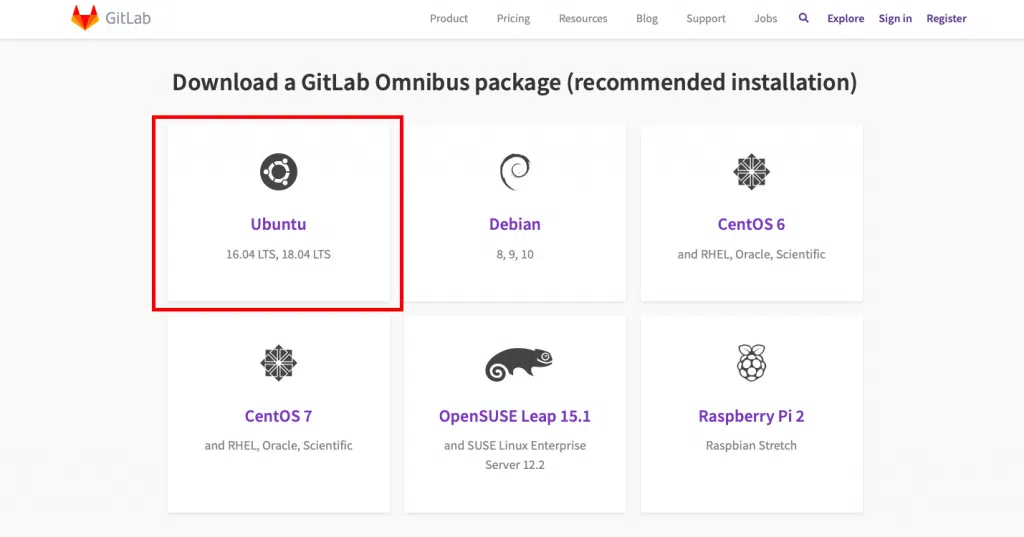
As you can see GitLab official supports several Linux distros, even a Raspberry Pi 2’s Raspbian! We are interested in Ubuntu, so click on the Omnibus Ubuntu Link on as shown in the screenshot above.
Once you click on Ubuntu, the commands you need to enter to install GitLab server will be shown to you.
I am not showing each instruction here since GitLab updates the information presented on their website all the time and that can make this section of the article outdated. Just follow the step by step instructions given in the link to install the GitLab Server on your VM.
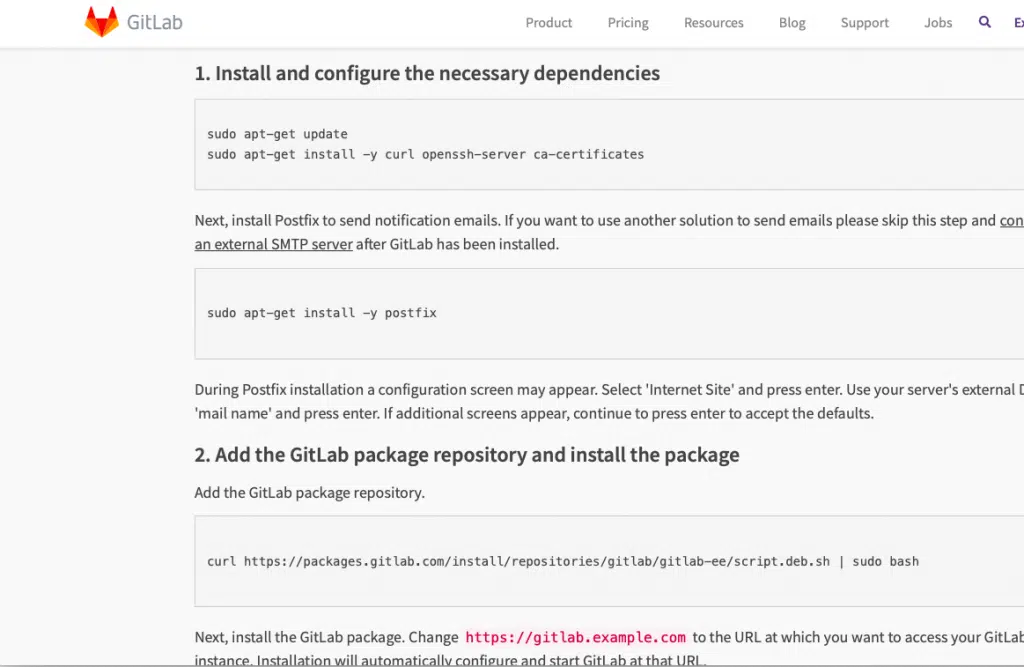
Just type in the commands shown there on you Ubuntu server’s terminal one by one to get GitLab Server installed.
A couple of tips on the GitLab installation instructions
Tip#1
In the postfix installation step (step 1 last command on the GitLab website)
sudo apt-get install -y postfix
you can skip the mail option by choosing the “no configuration” option as shown in the screenshot below.

Tip#2
In the last command of step 2 at GitLab website
sudo EXTERNAL_URL="https://gitlab.example.com" apt-get install gitlab-ee
Make sure you replace the URL with the IP address of the VM that we have made a note of in Step 5 above like this
sudo EXTERNAL_URL="192.168.0.116" apt-get install gitlab-ee
Or to be more precise just place the VM’s IP address that we obtained in Step#4 in its appropriate place
sudo EXTERNAL_URL=”<Your VM’s IP address>” apt-get install gitlab-ee
This step will take a while, so be patient. In my machine it took 4 minutes 48 seconds as shown in the screenshot below, yours can vary depending on the processing power it has.
Once done it will show u something like in the screenshot below.

Once it’s done, you can go ahead to your favorite browser and type in the IP address of your VM and check if the installation has succeeded.

And voila! GitLab server installation has succeeded!
Go ahead and follow the onscreen instructions to set up your password, accounts and everything else!
STEP#6: Download GitLab runners
Before installing GitLab runners you need to install Git on your Windows PC. You can download the latest version of Git in this link.
Now that we have set up the Gitlab server and Git, the next step is to set up the GitLab runner!
At the time of writing this article, the installation process goes like this:
Make a folder on your computer and go to either this link for 32bit version or this link for 64bit version to download the binaries and put them in the folder you created
For getting the most up to date instruction, I am gonna ask you to follow the process given in the GitLab website
STEP#7: Connect the GitLab server to the GitLab runner
GitLab
calls this process of connecting the Server to Runner as “Registering the
GitLab Runner to the Server”
You can follow the instructions for Windows in this link to do the same.
Scroll down to the windows section and you will see something similar to this

Step# 7.1: Start the registration process
To enter these commands you need to open a command prompt with administrator privileges. For this just type cmd on the search menu, right-click on Command prompt and choose run as administrator

After that, just go to the folder to which you have downloaded the Gitlab Runner to and copy the path to that folder

Next, go back to the command line and give the following command
cd <path you copied>
Run the following command to start the registration process
gitlab-runner-windows-amd64.exe register

As shown in the screenshots above, enter your Virtual Machine’s IP address when prompted. Make sure you add “http://” before the IP address.
Once the IP address is entered, the next prompt appears asking you to enter a token, so let’s first go get a token from our GitLab server.
Step#7.2: Obtain token from GitLab Server
Go to your browser and enter the GitLab Server’s IP address. Once you have logged in you can create your first project by clicking on the respective pane as shown in the screenshot below.
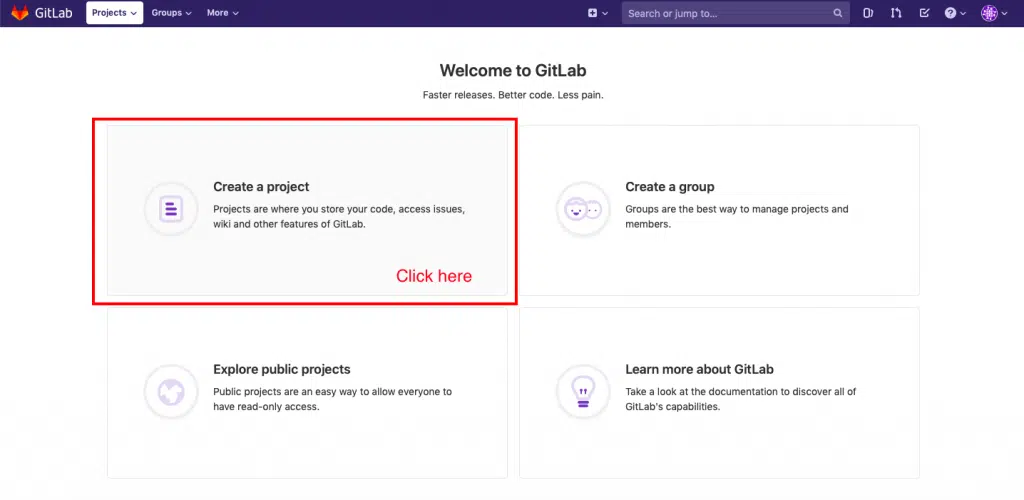
Just give the project a name and click on the create project button. The other field should get populated automatically.

Once you click the button as shown in the screenshot above, you will be taken to your project page.
From there just click on Settings->CI/CD and scroll down a bit and click the “Expand” button next to “Runners” and you will find the token you need as shown in the screenshot below.

This token basically connects your project on the GitLab Server to the GitLab runner.
Step#7.3: Enter the token
Now that we have the token let’s enter it on the Command prompt

Once
entering the token, you will be prompted to give the runner a description, go
ahead and do that.
After that, you will be asked to enter some tags.
What are tags? Why are they needed for GitLab runners?
The
better term for tags can be capabilities.
Consider
this scenario.
Assume you are working in a large team of 1000 developers, who are doing say 50 different projects and your GitLab system has 100 different runners set up with several capabilities to do specific tasks. Some projects may need C compilers, while others may need python interpreters.
Now in order to connect a given project with a free-runner, we need some sort of parameter to tell the GitLab server that this particular free runner is capable of running the scripts needed for that particular job.
This is where tags come into the picture. By giving tags like “C” or “Python” a single runner can be connected to multiple projects and a single project can execute its jobs on several runners to ensure the best possible performance.
Using
these tags the Gitlab server can find a runner with the specific capability to
use for a given job. So give some suitable tags that will imply the
capabilities of your runner.
Once that is done, you will be prompted to enter “executor”.
Executors are programs that run our CI/CD scripts. Type shell and press enter

This will end the registration process the Runner to the server
Once registered you can start the GitLab runner as a Service (background task) by issuing the commands
gitlab-runner-windows-amd64.exe install
gitlab-runner-windows-amd64.exe start

As you can see in the screenshot below, in the task manager app we can see that our gitlab-runner service is running!

Test to see if everything works
By following the 7 steps above, you should have a set up with GitLab Server and Runner running on your system. Its time to test and see if everything works the way it is supposed to work!
First, let’s test the GitLab server by creating a repo and pushing it to the server.
Testing GitLab Server
STEP#1: Make a test git repo
Let’s make a simple git repo on a new folder on our Desktop and push it to the GitLab server.
So open your Git-Bash app, which got installed as you were installing git.

Once opened type in the following commands
cd
cd Desktop
mkdir test_project
cd test_project
touch test.c
The above lines of command are just the fancy way of creating a folder named test_project on your Desktop and a file named test.c inside it. You can also do it through the Graphical User Interface if you want to.
So next, please open the C file using your favorite text editor and type in a simple program for testing, something like the following.
#include <stdio.h>

int main()
{
	printf("Hello Embedded Inventors!");
	return 0;
}
Next, let’s initialize a git repository on our test_project folder. So go back to the terminal cd into the test_project folder and type in the following command
You should receive a reply saying “Initialized empty Git repository”
STEP#2: Push it to the server
Now that we have our git repo ready, let’s push it to our git server. To do that login to your GitLab and go to the project we created earlier. There GitLab shows us the commands needed to push our repo to the server.
First, let’s configure our name and email on the git repository to the ones set on the GitLab server
So enter
the following command.
git config --global user.name "<enter your name here>"
git config --global user.email "<enter your email here>"
Next, we need to connect our server and our repository. To do that just enter the following commands
git remote add origin <your project URL>.git
In my case it is
git remote add origin http://192.168.0.115/EI/test-project.git
To find your project URL, just copy the address bar of your browser while you are on your project’s page in GitLab
Then add our test.c file and commit the changes using the following commands
git add .
git commit -m"first commit"
Then push
your git repo onto the GitLab using the command
git push -u origin master
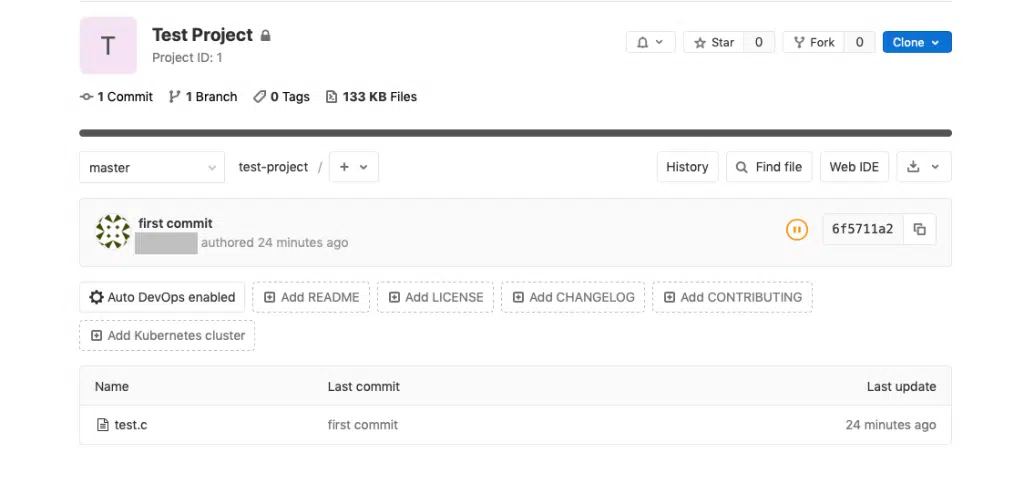
You will be prompted to enter the user name and password of your GitLab account, once done go to your browser and just refresh the page and you should be able to see your test project page in GitLab!
Testing GitLab Runner
STEP#3: Make a simple bash script to build the test.c
file
Create a bash script on your project folder
cd
cd Desktop/test_project
touch build.ps1
Edit it so that it looks something like this
gcc test.c -o test
echo "Build completed"
STEP#4: Create and edit .gitlab_ci.yml to run the
above script
What is .gitlab-ci.yml and why it is needed? This is the file that contains the instructions for the GitLab runners to execute the CI/CD tasks. It should be present in the project’s root folder. It can be used to test if a commit builds correctly, passes some unit tests and if it needs packaging and deployment.
You can
learn more about how to configure it from the official quick start tutorial
here
For the
purpose of testing our installation let’s create a file named .gitlab-ci.yml in
the test_project folder and put the following lines in there.
Make sure you are in the right directory
cd
cd Desktop/test_project
Create the file using the command
Open it with your favorite text editor and type the following lines into it.
build:
  script:
    - powershell -File build.ps1
  tags:
    - test
The last line tells the GitLab server to use the GitLab runner with the tag named “test”. If you gave your GitLab runner installation a different tag, make sure you make the appropriate change to the above lines.
Also,
make sure you use spaces instead of tabs at the beginning of the above lines.
Now add it to the git repository and push it to the Gitlab server
git add .
git commit -m"gitlab yml added"
git push
Now let’s get back to our GitLab server’s URL and see if it worked. Go to the project page and click on CI/CD
You will
be taken to the pipeline page which shows the result of your latest commit.

It will
take a minute or so before it completes the pipeline and as you can see in the
screenshot above, mine took 41 seconds to complete and the status is
“passed”
If you
click on “jobs” under the CI/CD menu, you will be taken to another
page which shows you more information about the execution of our yml file
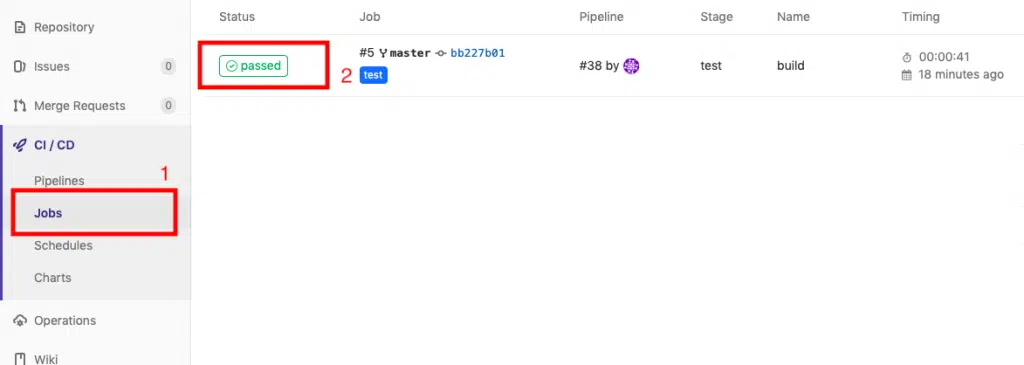
Next click on “passed” as shown in the screenshot above, this will take you to another page which will look something like this.

As you can see, our build.ps1 gets executed by the GitLab runner and it succeeds to compile our project.
And with that, I will conclude this tutorial!
I leave the rest to you to play, explore, experiment and learn GitLab!
I hope you guys enjoyed this article and learned something useful.
You can email us or contact us through this link if you have any questions or suggestions.
If you liked the post, feel free to share this post with your friends and colleagues!