
Установка .NET Framework 3.5 на Windows Server 2012/2016
Запустите службу «Центр обновления Windows»
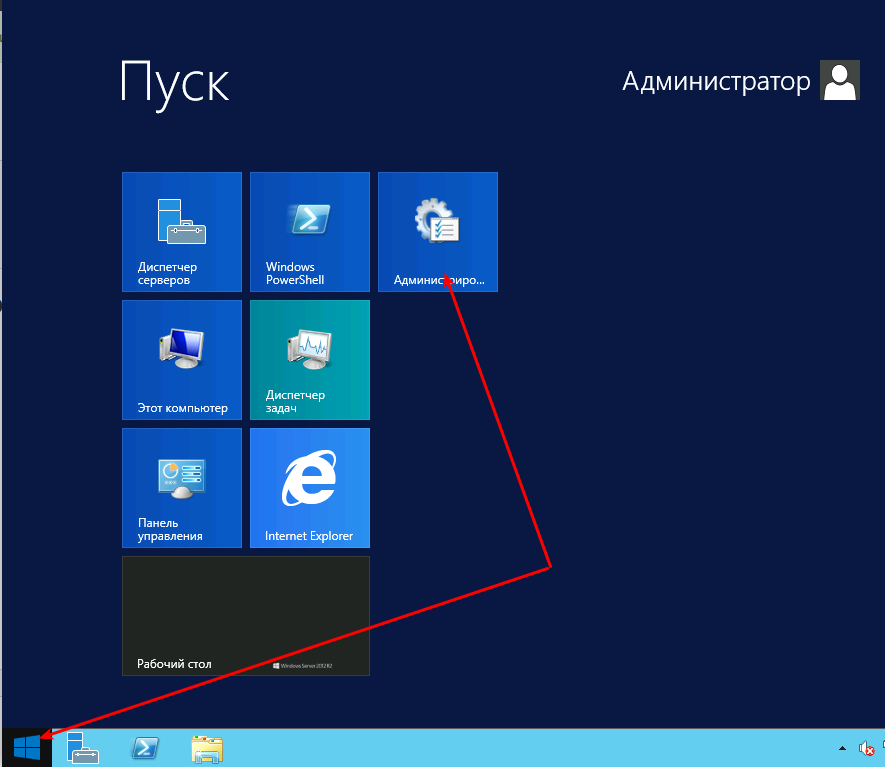
Нажмите «Пуск» и выберите «Администрирование»:
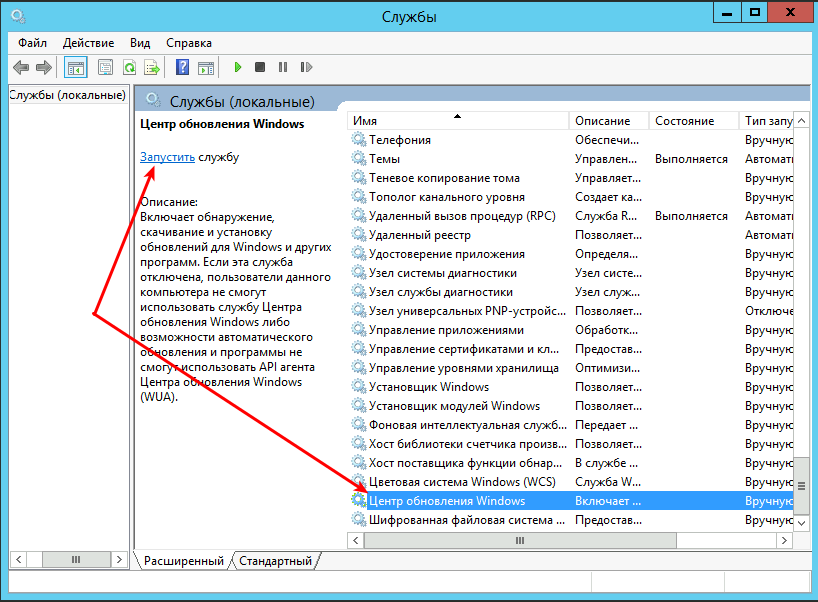
В открывшемся окне перейдите в «Службы»:

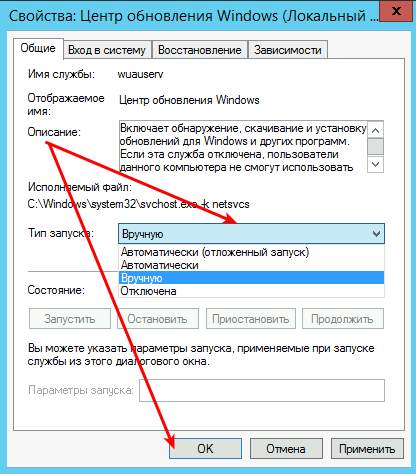
Нажмите правой кнопкой мыши на службе «Центр обновления Windows» и выберите «Свойства»:

Установите тип запуска «Вручную» и нажмите «ОK»:
Запустите службу:
Установите .NET Framework 3.5
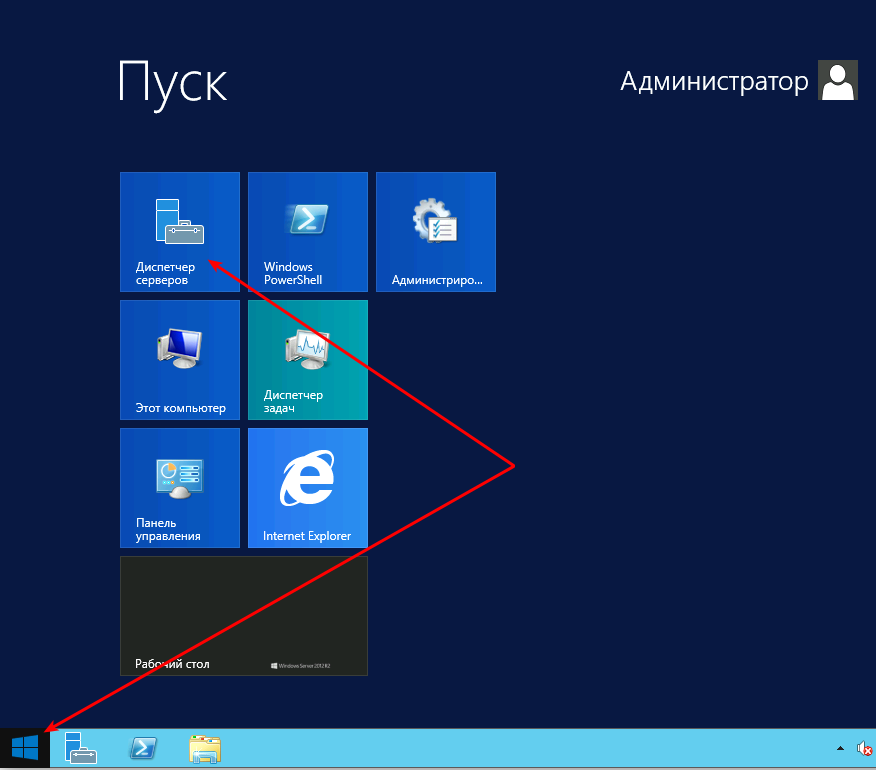
Нажмите «Пуск» и откройте «Диспетчер серверов»:
Нажмите «Управление» и выберите «Добавить роли и компоненты»:

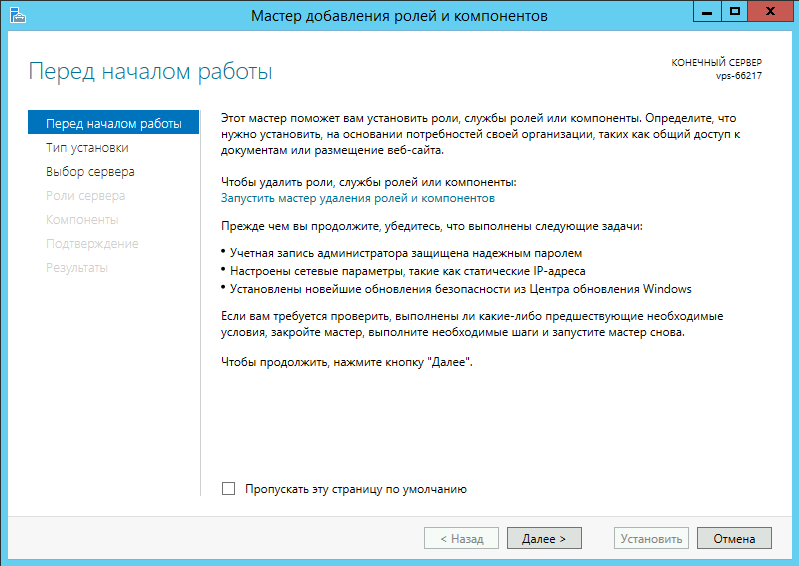
Нажмите «Далее»:
«Далее»:
«Далее»:

«Далее»:
«Далее»:
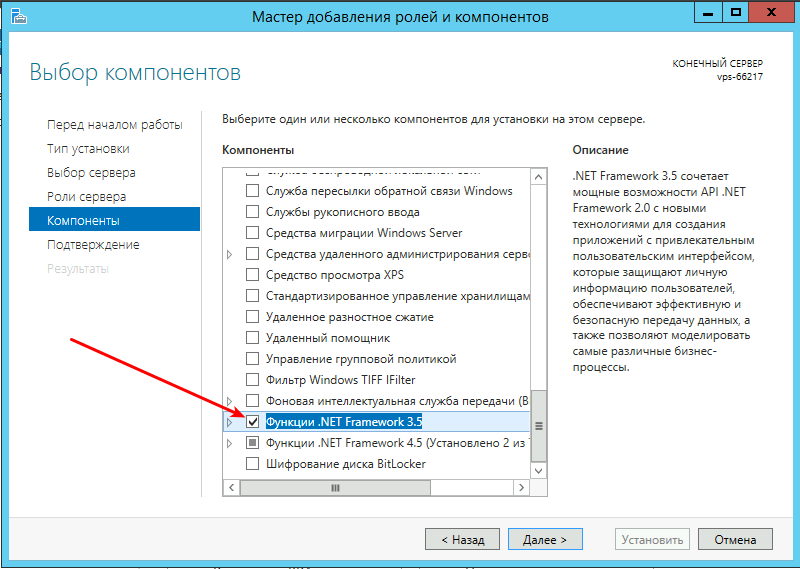
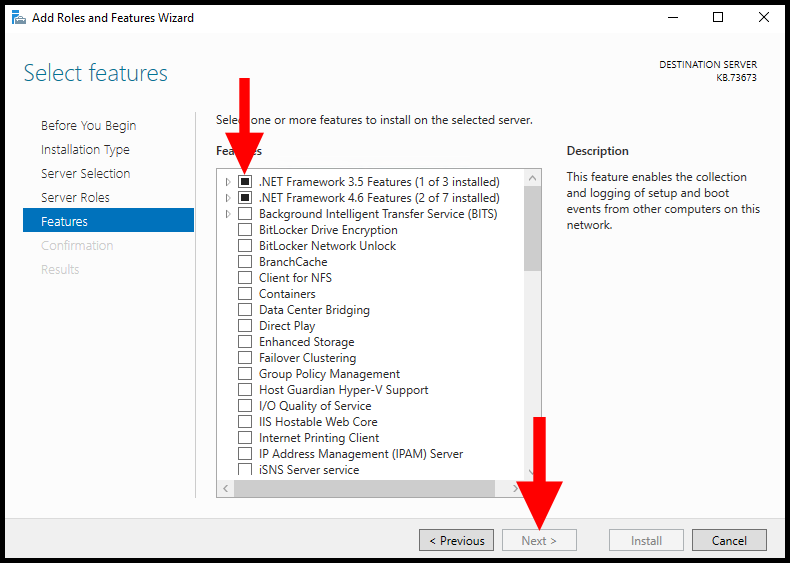
Поставьте галочку напротив компонента «Функции .NET Framework 3.5» и нажмите «Далее»:
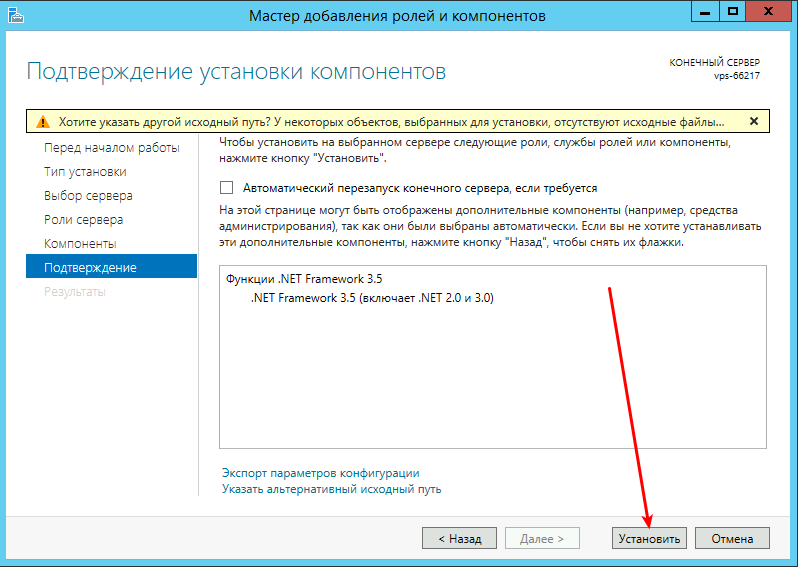
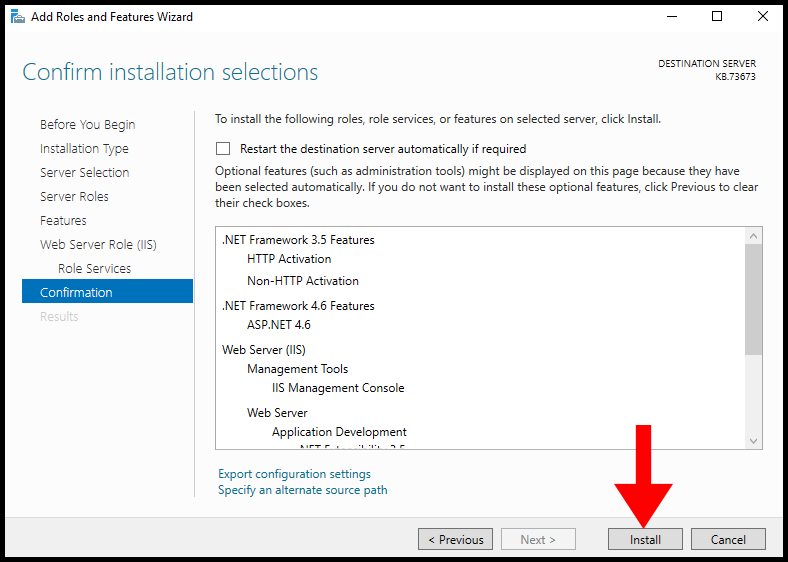
Нажмите «Установить»:
Дождитесь завершения установки:
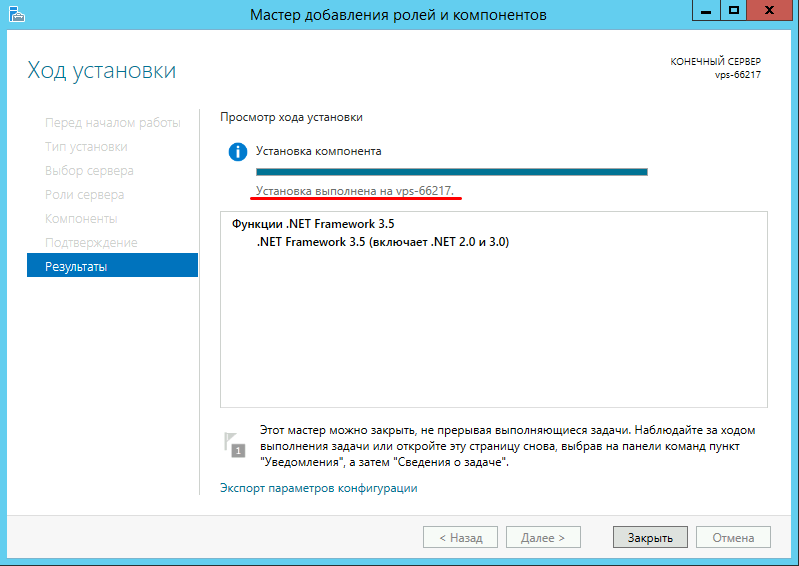
Можете закрыт окно, — .NET Framework 3.5 установлен.
Установка .NET Framework 3.5 на Windows Server 2019
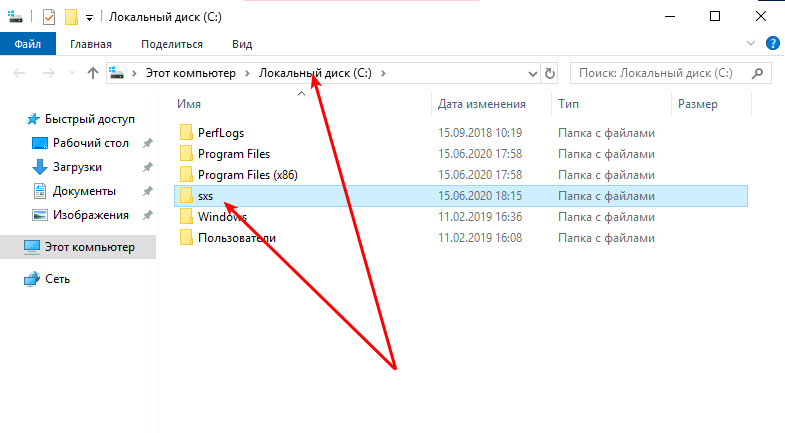
1. Скачайте архив с необходимыми компонентами sources.zip
2. Распакуйте файлы в корень диска С:\:
3. Запустите «Командную строку» от имени администратора:
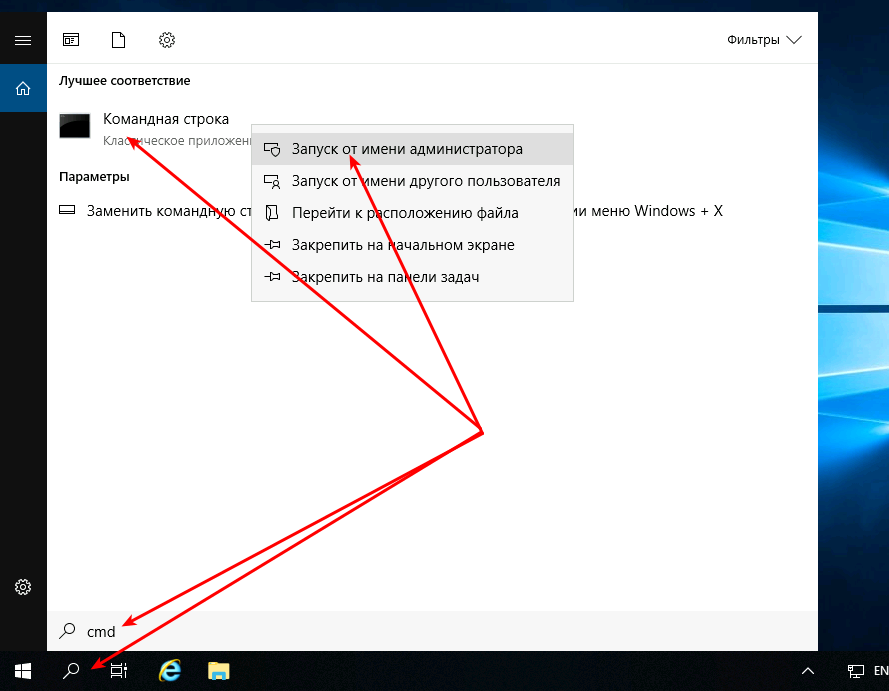
4. Выполните команду с учётом пути к распакованным файлам из архива:DISM /Online /Enable-Feature /FeatureName:NetFx3 /All /LimitAccess /Source:C:\sxs
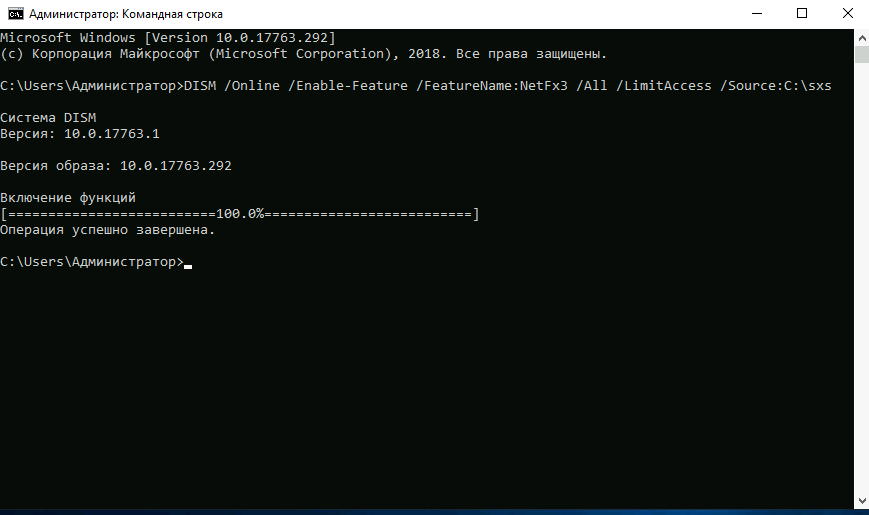
Таким образом компонент Microsoft .NET Framework 3.5 установлен.
Большинство современных приложений Windows требуют наличия установленного .NET Framework. Например, в Windows 11/10 и Windows Server 2022/2019 по умолчанию уже установлена версия NET Framework 4.8. Однако некоторые старые приложения требуют наличия установленного .NET Framework 3.5, 2.0 или даже 1.0.
В этой статье мы рассмотрим, как установить .NET 3.5 в Windows 11/10 и Windows Server 2022/2019/2016.
Содержание:
- Установка .NET Framework 3.5 в Windows 11 и 10
- Как установить .NET 3.5 в Windows Server 2022/2019/2016?
- Настройка параметров офлайн установка .Net 3.5 помощью GPO
Установка .NET Framework 3.5 в Windows 11 и 10
Проверьте, что .NET Framework 3.5 (включает в себя .NET 2.0 и 3.0) не установлен на вашем компьютере. Для этого, откройте консоль PowerShell с правами администратора и выполните команду:
Get-WindowsCapability -Online -Name NetFx3~~~~

В нашем случае .NET 3.5 не установлен (
State=NotPresent
).
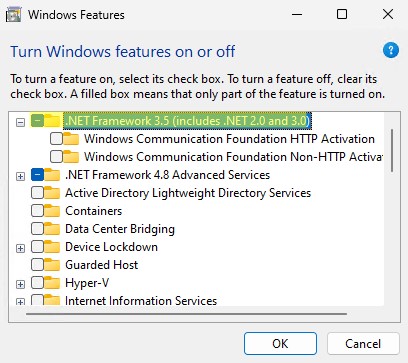
В Windows 10/11 вы можете установить .Net Framework из панели Turn Windows Features on or off:
- Выполните команду
optionalfeatures.exe
; - В списке компонентов выберите .NET Framework 3.5 (includes .NET 2.0 and 3.0), нажмите ОК;

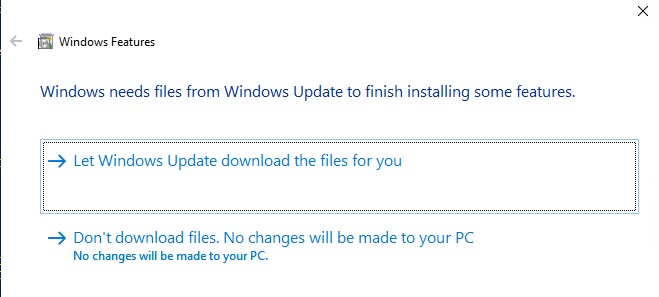
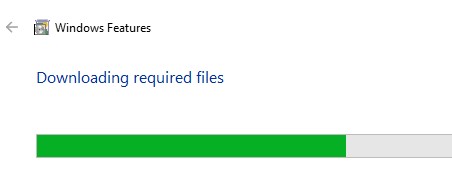
- Если на вашем компьютере есть доступ в Интернет, в следующем окне выберите Let Windows Update download the files for you;
-

- Windows скачает и установить последнюю версию компонента .NET Framework 3.5 с серверов Microsoft Update.

Также вы можете установить .NET Framework 3.5 из командной строки:
- С помощью DISM:
DISM /online /Enable-Feature /FeatureName:"NetFx3" - Из PowerShell:
Enable-WindowsOptionalFeature -Online -FeatureName "NetFx3"
Если ваш компьютер не подключен к интернету или находится в изолированной сети, то при установке .NET 3.5 появится ошибка:
Windows couldn’t complete the requested changes.
The changes couldn’t be completed. Please reboot your computer and try again.
Error code: 0x8024402C
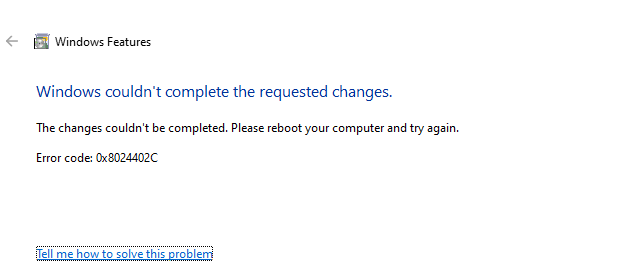
В этом случае вы можете вручную установить компоненты NET 3.5 с вашего установочного образа (диска) Windows. Для этого вам понадобится установочная USB флешка или файл с ISO образом вашей версии Windows (как проверить версию Windows в ISO образе):
- Подключите ваш носитель с ставочным образом Windows к компьютеру. В моем случае у меня есть файл Windows11-22h2.iso. Щелкните по файлы и выберите Mount, чтобы смонтировать образ в виртуальный DVD привод (или воспользуйтесь командой PowerShell:
Mount-DiskImage -ImagePath "C:\distr\Windows11-22h2.iso"
); - В моем случае виртуальному приводу с образом была назначена буква диска E: (мы будем использовать эту букву в следующих командах);
- Чтобы установить .Net 3.5 из файлов компонентов на установочном диске выполните команду:
DISM /online /enable-feature /featurename:NetFX3 /All /Source:E:\sources\sxs /LimitAccess
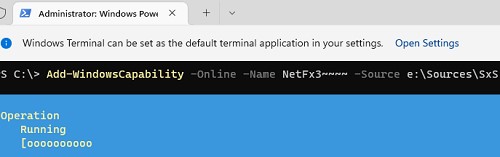
Или (аналогичная PowerShell команда):
Add-WindowsCapability -Online -Name NetFx3~~~~ -Source E:\Sources\SxS
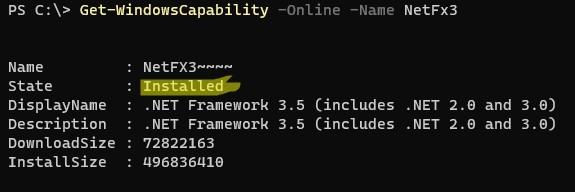
Чтобы проверить, что .NET Framework успешно установлен, выполните команду:
Get-WindowsCapability -Online -Name NetFx3~~~~
Name         : NetFX3~~~~
State        : Installed
DisplayName  : .NET Framework 3.5 (includes .NET 2.0 and 3.0)
Description  : .NET Framework 3.5 (includes .NET 2.0 and 3.0)
DownloadSize : 72822163
InstallSize  : 496836410
Выведите список версий .NET Framework, которые установлены на вашем компьютере:
Get-ChildItem 'HKLM:\SOFTWARE\Microsoft\NET Framework Setup\NDP' -Recurse | Get-ItemProperty -Name version -EA 0 | Where { $_.PSChildName -Match ‘^(?!S)\p{L}’} | Select PSChildName, version
[/alert]
Как установить .NET 3.5 в Windows Server 2022/2019/2016?
В Windows Server 2022,2019,2016 и 2012 R2 вы можете установить NET Framefork 3.5 несколькими способам:
- ерез Server Manager (Add roles and features -> Features -> .NET Framework 3.5 Features -> .NET Framework 3.5 (includes .NET 2.0 and 3.0 );
- С помощью DISM:
DISM /Online /Enable-Feature /FeatureName:NetFx3 /All - С помощью PowerShell:
Install-WindowsFeature NET-Framework-Core
При этом установочные файлы .NET 3.5 для вашей версии Windows Server будут загружены с серверов Windows Update. Чтобы сработал этот метод установки нужно убедиться:
- Ваш Windows Server должен иметь прямой доступ в Интернет. Настройки прокси-сервера и файервола не должны ограничивать доступ к серверам Windows Update.
- Хост не должен быть настроен на получения обновлений с локального WSUS сервера (проверьте настройки обновлений Windows в групповых политиках или напрямую в реестре);
Проверьте значение параметра UseWUServer в реестре:
Get-ItemProperty -Path "HKLM:\SOFTWARE\Policies\Microsoft\Windows\WindowsUpdate\AU" -Name "UseWUServer" | select -ExpandProperty UseWUServer
Если значение параметра равно 1, значить ваш хост будет пытаться получить обновления с локального WSUS сервера. В этом случае при установке .NET 3.5 появится ошибка 0x800F0954. Измените значение параметра на 0 или удалите его, чтобы подключиться напрямую к серверам обновлений Windows Update.
Если ваш сервер имеет доступ в Интернет, но настроен на получение обновлений со WSUS, при устапновке NET Framework появится ошибка 0x800f081f.
Решение: установить .Net 3.5 онлайн с серверов Microsoft и игнорировать локальный WSUS:
- Экспортируйте в reg файл текущие настройки Windows Update в ветке HKLM\Software\Policies\Microsoft\Windows\WindowsUpdate (
reg export HKLM\Software\Policies\Microsoft\Windows\WindowsUpdate c:\WindowsUpdateRegFile.reg
) - Удалите данную ветку (
Remove-Item -Path HKLM:\Software\Policies\Microsoft\Windows\WindowsUpdate -Recurse
) и перезапустите службу:
net stop wuauserv & net start wuauserv - Запустите установку .Net из Интернета:
DISM /Online /Enable-Feature /FeatureName:NetFx3 /All - После окончания установки верните настройки WU, импортировав reg файл (
Reg import c:\WindowsUpdateRegFile.reg
) и еще раз перезапустите службу Windows Update
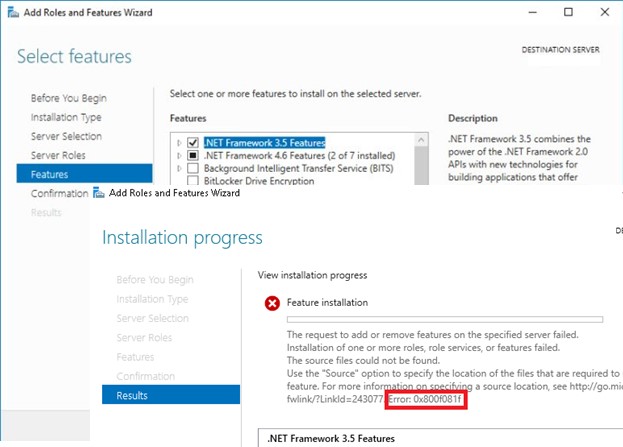
Если с вашего сервера нет прямого доступа в Интернет, то при попытке установить .NET 3.5 в Windows Server через консоль Server Manager появится ошибка 0x800F081F (The source files could not be found), 0x800F0950, 0x8024402c, 0x800F0906 или 0x800F0907 (в зависимости от версии Windows Server).
Хотя .NET Framework 3.5 присутствует в списке компонентов Windows Server 2022/2019/2016/2012R2, на самом деле его бинарные файлы в хранилище компонентов Windows отсутствуют (концепция Features on Demand). Это сделано, чтобы уменьшить размер образа операционной системы на диске. Вы можете проверить наличие.NET Framework 3.5 в локальном хранилище компонентов Windows Server с помощью команды:
Get-WindowsFeature *Framework*
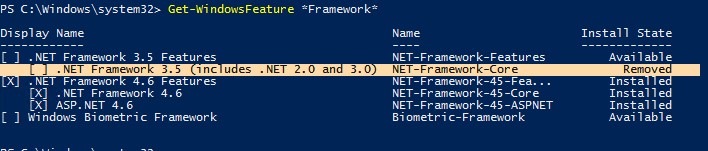
Как вы видите статус компонента
NET-Framework-Core
– Removed.
Для установки NET-Framework-Core вам потребуется дистрибутив с вашей версией Windows Server в виде ISO файла, или в распакованном виде в сетевой папке. Смонтируйте ISO образ с дистрибутивом в отдельный виртуальный диск (например, диск D:).
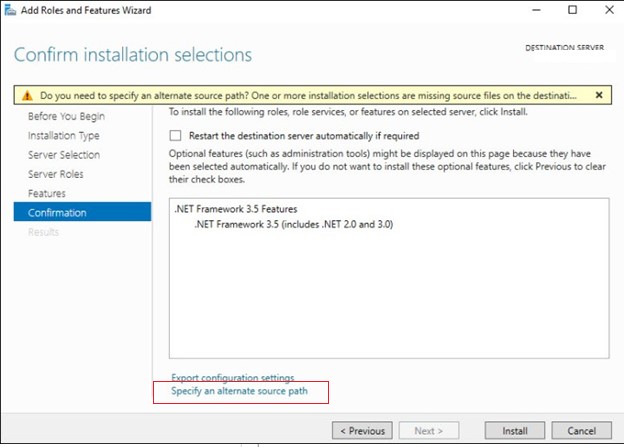
Теперь вы можете установить .Net Framework 3.5 с помощью графической консоли Server Manager:
Установить компонент .Net 3.5 можно из графической консоли Server Manager. Для этого выберите компонент .Net Framework 3.5 Features, но, перед тем, как нажать кнопку Install, нажмите небольшую ссылку внизу мастера — Specify an alternative source path.
- Для этого выберите компонент .Net Framework5 Features. Перед тем, как нажать кнопку Install, нажмите на ссылку Specify an alternative source path внизу;

- Укажите путь к хранилищу компонентов (SXS) дистрибутива Windows Server. Если вы смонтировали дистрибутив в виртуальный привод, это может быть путь
D:\sources\sxs
. Также это может быть сетевая папка, куда вы предварительно скопировали дистрибутив (например,
\\server1\distr\ws2022\sources\sxs
). Нажмите ОК.

Гораздо проще установить компонент Net Framework 3.5 Features из командной строки или консоли PowerShell, запущенной с правами администратора. Просто выполните команду:
Dism.exe /online /enable-feature /featurename:NetFX3 /All /Source:D:\sources\sxs /LimitAccess
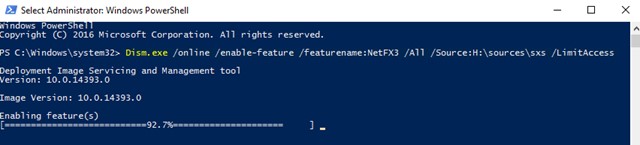
Где
D:\
— диск с вашим дистрибутивом Windows Server.
Параметр LimitAccess запрещает DISM подключение к серверам обновлений для получения установочных файлов компонентов. Используются только файлы в указанном каталоге.
Если вы хотите установить компонент Windows Server с помощью PowerShell, воспользуйтесь командой Add-WindowsFeature:
Add-WindowsFeature NET-Framework-Core -Source d:\sources\sxs
После завершения установки компонента, перезагрузка сервера не требуется.
Также вы можете вручную скопировать 2 cab файла
microsoft-windows-netfx3...
из каталога sources\sxs вашего дистрибутива. В этом случае для установки .Net 3.5 достаточно выоплнить команду:
dism /online /Add-Package /PackagePath:C:install\net35\microsoft-windows-netfx3-ondemand-package~31bf3856ad364e35~amd64~~.cab.
Настройка параметров офлайн установка .Net 3.5 помощью GPO
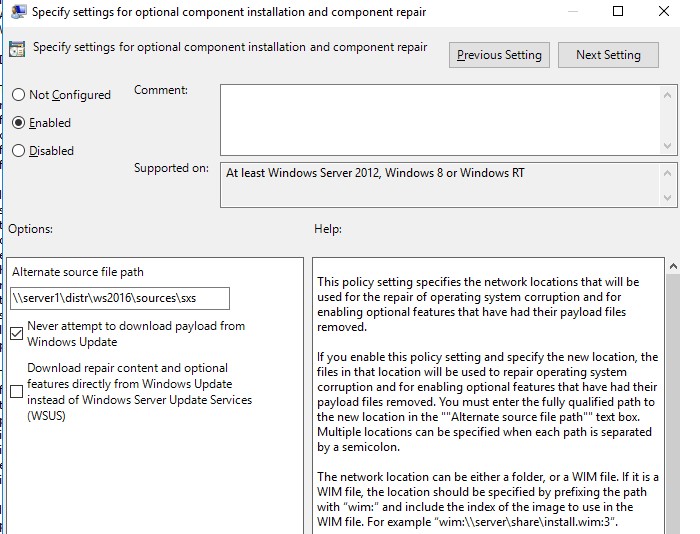
С помощью групповой политики Specify settings for optional component installation and component repair (находится в разделе GPO Computer Configuration -> Administrative Templates -> System) можно настроить особые параметры установки компонентов Windows из локального источника или Windows Update даже при использовании WSUS.
На отдельностоящем компьютере вы можете включить этот параметр политики с помощью редактора локальной GPO (gpedit.msc). В среде Active Directory вы можете создать политику для всех компьютеров/серверов с помощью консоли GPMC.
Здесь можно указать, что при установки или восстановлении компонентов Windows необходимо всегда загружать файлы из Интернета с серверов Windows Update вместо локального WSUS (опция Download repair content and optional features directly from Windows Update instead of Windows Server Update Services — WSUS).
Также можно указать путь к каталогу с компонентами Windows Server (или wim файлу), который нужно использовать при офлайн установке (указывается в параметр Alternate source file path). Вы можете указать:
-
- Путь к сетевой папке в UNC формате (
\\server\distr\ws2016\sxs
) (здесь можно указать несколько UNC путей через точки с запятой:
\\srv1\ws22\sxs;\\fs01\ws22\sxs;\\fs3\sxs
- Путь к сетевой папке в UNC формате (
- Также допустимо указывать WIM файл в качестве источника:
WIM:\\srv1\distr\ws2016\install.wim:2
(в этом случае
2
– это индекс образа вашей редакции Windows Server в WIM файле. Список доступных редакций в файле можно вывести так:
DISM /Get-WimInfo /WimFile:"\\server\distr\ws2016\install.wim"
)
Для разных версий Windows Server нужно использовать разные источники с каталогом SXS. Если в вашей сети есть несколько версии Windows Server, нужно создать отдельные GPO с разными UNC путями к сетевой папке с SXS. Чтобы GPO применялась только к хостам с определенными версиями Windows Server, можно использовать WMI фильтры групповых политик.
Многие приложения для работы в Windows Server 2016 требуют наличия установленного .Net Framework 3.5, несмотря на наличие .NET Framework 4.6, установленного по умолчанию. Например, без .Net 3.5 не удастся установить и запустить SQL Management Studio. Дальше рассмотрим, как установить Net Framework 3.5 в Windows Server 2016.
При попытке установить .Net 3.5 через консоль Server Manager (Add Roles and Features -> Features -> Net Framework 3.5 Features, установка заканчивается с ошибкой 0x800f081f (The source files could not be found). Это связано с тем, что бинарные файлы Net Framework 3.5 в хранилище компонентов Windows отсутствуют.
Для установки потребуется дистрибутив Windows Server 2016 в виде iso файла или в распакованном виде на сетевой шаре. Смонтируйте iso образ с дистрибутивом в отдельный виртуальный диск (например, диск D:). Установить компонент можно из GUI либо с помощью PowerShell.
Инсталляция компонента .Net 3.5 возможна из графической консоли Server Manager. Для этого как и ранее выберите компонент, но, перед тем, как нажать кнопку Install, нажмите небольшую ссылку внизу мастера (Specify an alternative source path).

Дальше укажите привод, это может быть путь D:sourcessxs. Также это может быть сетевая папка, куда вы предварительно скопировали дистрибутив (например, server1distrws2016sourcessxs). Нажмите OK.
Запустите установку.
Еще проще установить компонент Net Framework 3.5 Features из консоли PowerShell, запушенной с правами администратора. Для этого достаточно выполнить команду:
Dism.exe /online /enable-feature /featurename:NetFX3 /All /Source:D:sourcessxs /LimitAccessГде D: — диск с дистрибутивом Windows Server 2016.

Еще можно произвести установку с помощью команды:
Add-WindowsFeature NET-Framework-Core -Source d:sourcessxsПосле завершения установки компонента, перезагрузка сервера не требуется.
Wondering how to install .NET framework 4.8 on windows server 2016? We can help you.
Installing the latest .Net framework on the server improves the performance and speed of the web apps.
At Bobcares, we often receive requests to install the .Net framework on the windows server as part of our Server Management Services.
Today, let’s discuss how our Support Engineers do it easily for our customers.
What is the .NET Framework?
.NET Framework by Microsoft is used to run and create applications and services which are based on the XML web.
The .NET software on Windows cannot run if the .NET Framework is not installed on the system.
The main advantages it provides include, Integration, Reliability, Performance, Productivity, and security.
How to install .NET Framework 4.8 on Windows 2016?
Recently, one of our customers approached us to install the latest .Net framework on his dedicated server. Let’s see how our Support Engineers install the .Net framework for them.
- Initially, we RDP to the server.
- Then open the web browser from the server and download the required .NET Framework from the below link.
https://dotnet.microsoft.com/download/dotnet-frameworkClick on the .NET Framework 4.8 link and the Download .NET Framework 4.8 option.
- Then right-click on the downloaded file. We click on the Properties and unblock it.
- Then double click on the file and complete the installation.
- After the .Net installation, the server will ask for a reboot. So we reboot the server.
- Then we open the corresponding Plesk panel of the server.
- Select the Tools and Settings from the Plesk.
- Then under the Applications & Databases, we choose ASP.NET Settings.
- Then we check whether the new version updates under Framework Version.
How to change the ASP.NET version on an account?
We follow the below steps to change the .Net version of an account.
- Firstly we log in to Plesk.
- Then from the left sidebar, we click Websites & Domains.
- After that select the account and click Hosting Settings.
- Then under the Web Scripting and Statistics, in the Microsoft ASP.NET support (Version) list box, we select the ASP.NET version.
- Finally, we click the Ok button.
Few Installation errors
We have also found that the installation may end up with errors. Here are some such instances and their solution by our Support Techs.
-
Installation failed with error code: (0x8000FFFF), “Catastrophic failure”
While installing .NET Framework v4.8, we may come across a “0x8000ffff catastrophic failure” error.
In order to solve this error we follow the below steps:
- Temporarily turn off the security software.
- Then open the command prompt and run as administrator:
DISM /Online /Cleanup-Image /RestoreHealth
- Check the permission of the C:\Windows\ System32 \CatRoot2\ folder and give full control to the NETWORK SERVICE and SYSTEM and CryptSvc accounts.
-
This application could not be started
Applications for the .NET Framework typically require a specific version of the .NET Framework to install on the system. In some cases, we attempt to run an application without either an installed version or the expected version.
This often produces an error dialog box stating, ‘This application could not be started’
This typically indicates one of the following conditions:
- Corruption of a .NET Framework installation on the system.
- The version of the .NET Framework needed by the application cannot be detected.
Our Support Techs resolve this by following the below procedure:
Initially, we download the .NET Framework Repair Tool (NetFxRepairTool.exe) from the URL: https://www.microsoft.com/en-us/download/details.aspx?id=30135‘
Once the download completes the tool runs automatically.
However, if the .NET Framework Repair Tool recommends any additional action, we select Next.
It displays a dialog box to indicate that changes are complete. We leave this dialog box open while we to try rerun the application.
This should succeed if the .NET Framework Repair Tool has identified and corrected a corrupted .NET Framework installation.
If the application runs successfully, select the Finish button. Otherwise, select the Next button.
If we select the Next button, the .NET Framework Repair Tool displays a dialog box regarding the logs to be sent to Microsoft. Select the Finish button to send diagnostic information to Microsoft.
If we still fail to run the application, we install the latest version of the .NET Framework supported by the version of Windows. Then attempt to launch the application.
In some cases, we may see a dialog box that asks to install the .NET Framework 3.5. Select Download and install this feature, then launch the application again.
[Need more assistance in installing .NET framework 4.8? We’ll help you.]
Conclusion
To conclude, we discussed how to install the .NET framework 4.8 on windows server 2016. Also, we saw how our Support Engineers help our customers install it.
PREVENT YOUR SERVER FROM CRASHING!
Never again lose customers to poor server speed! Let us help you.
Our server experts will monitor & maintain your server 24/7 so that it remains lightning fast and secure.
GET STARTED
var google_conversion_label = «owonCMyG5nEQ0aD71QM»;
Many applications require the .NET Framework to be installed on the Windows Server. The .NET Framework doesn’t come pre-installed, you will need to manually install the .NET Framework on your Windows Server 2012, 2016, or later. In this article, we will go over how to install the .NET framework 3.x or 4.x on Windows Server 2012, 2016, or later.
How to install .NET Framework using Server Manager
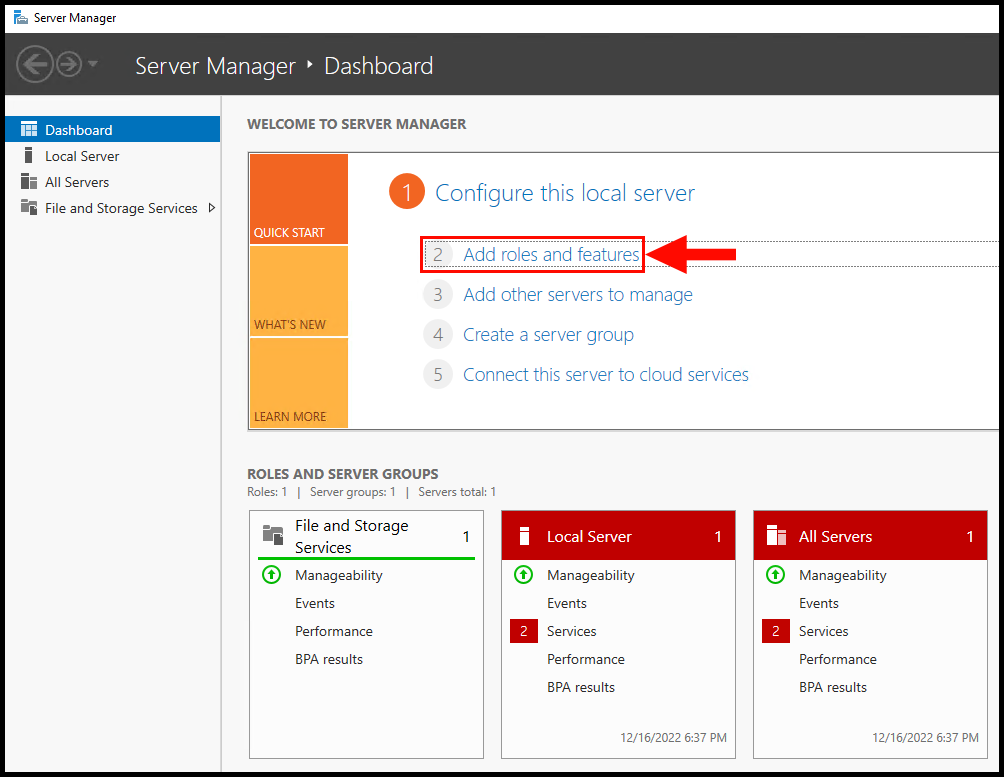
1. To start off, log in to your Windows Server 2012, 2016, or later and then open Server Manager.
2. In the Server Manager window, click on Add Roles and Features.
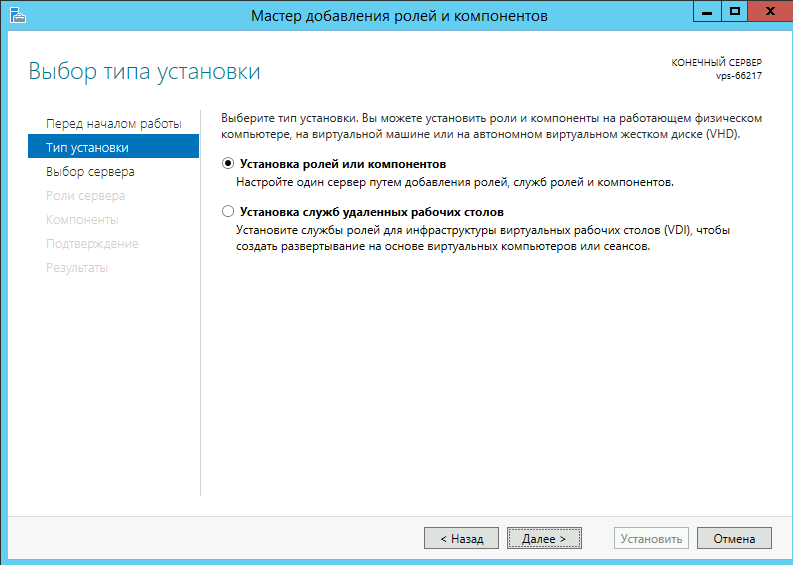
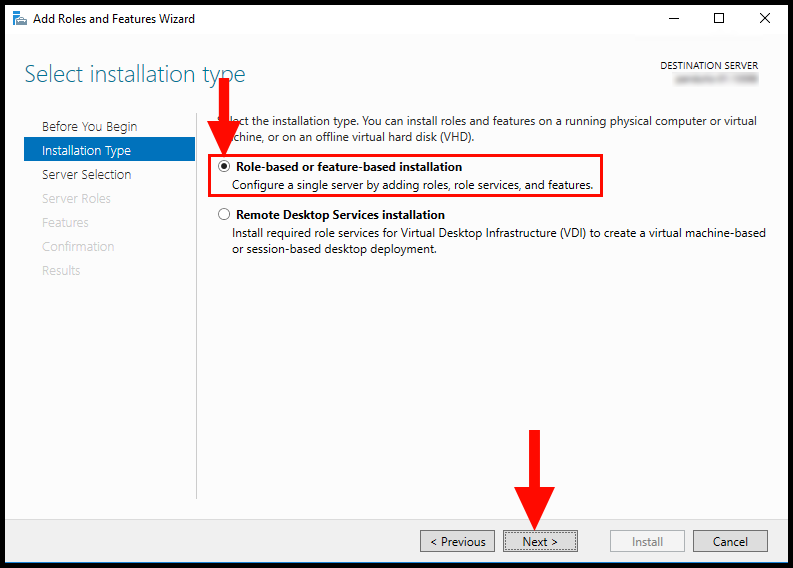
3. Then in the Installation Type section, select Role-based or feature-based installation, and then click Next.
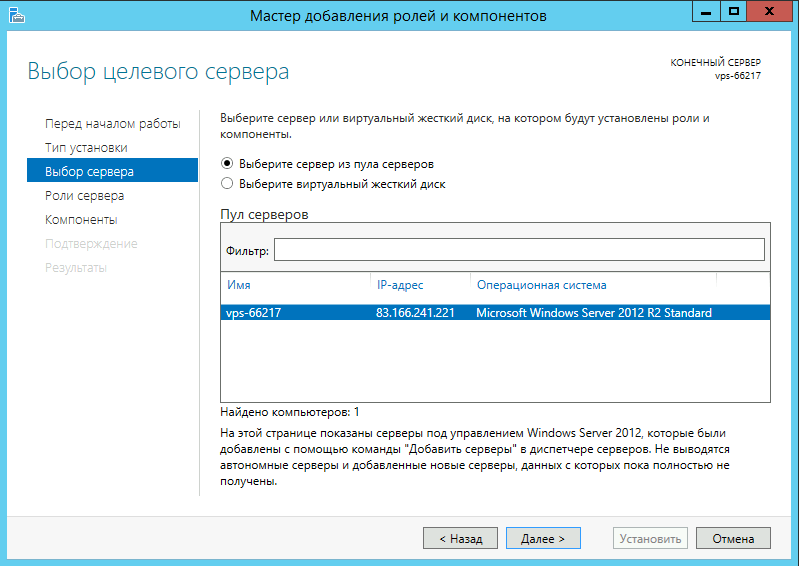
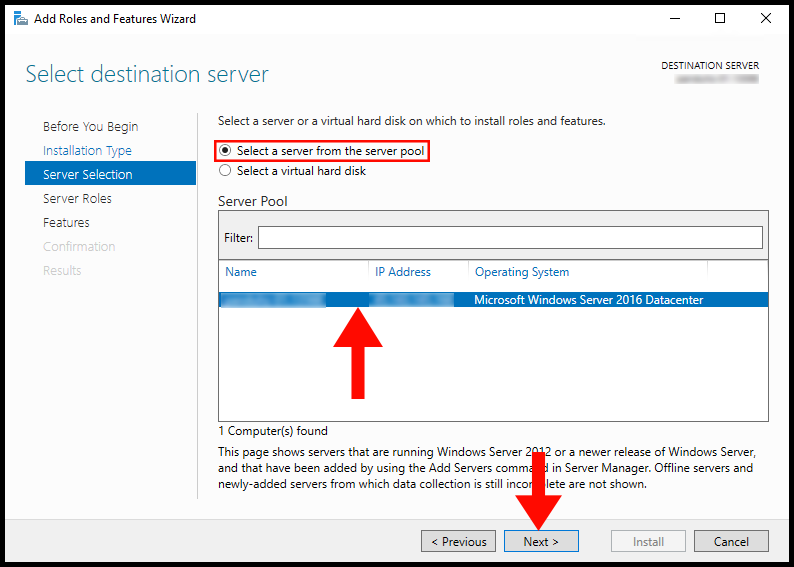
4. Next, the Server Selection page will appear. Select the option Select a server from the server pool and select your server in the Server Pool window. Then, click Next to proceed.
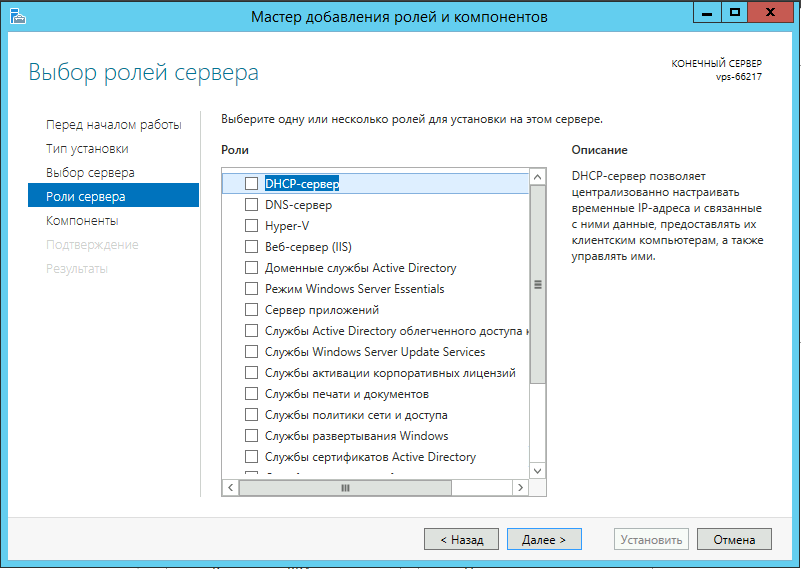
5. Do not select or Deselect anything in Server Roles Section, then click Next to proceed.
6. In the Features section, select the .NET Framework 3.x or 4.x or both, then click Next to proceed.
7. Lastly on the Confirmation screen, select Install to finish.
Once the installation is complete, do not forget to reboot your server in order to complete the installation.
How to install .NET Framework using Offline Installer
If you want to install the .NET framework conveniently, then an offline installer will do the job for you. You just need to download the offline installer from the Microsoft website and process the installation. In this method, you will only need an internet connection while downloading the installer file. Afterward, you will not require an internet connection for the installation.
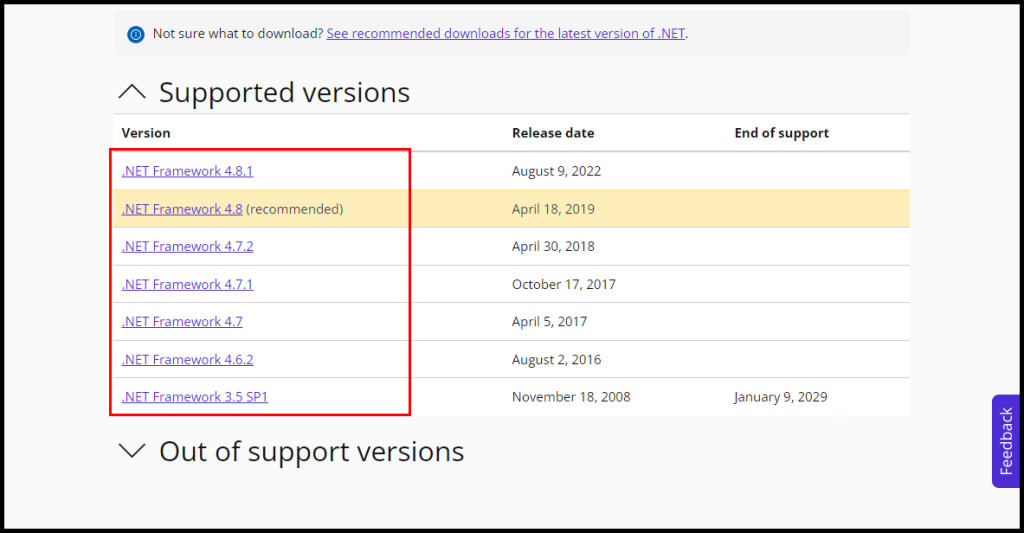
You can download any desired .NET Framework version by using the following URL,
https://dotnet.microsoft.com/download/dotnet-framework/
For this article, we will be installing the .NET Framework 4.8. You can install any version of the .NET Framework as per your requirement.
1. Visit the above URL: https://dotnet.microsoft.com/download/dotnet-framework/ and select the .NET Framework Version.
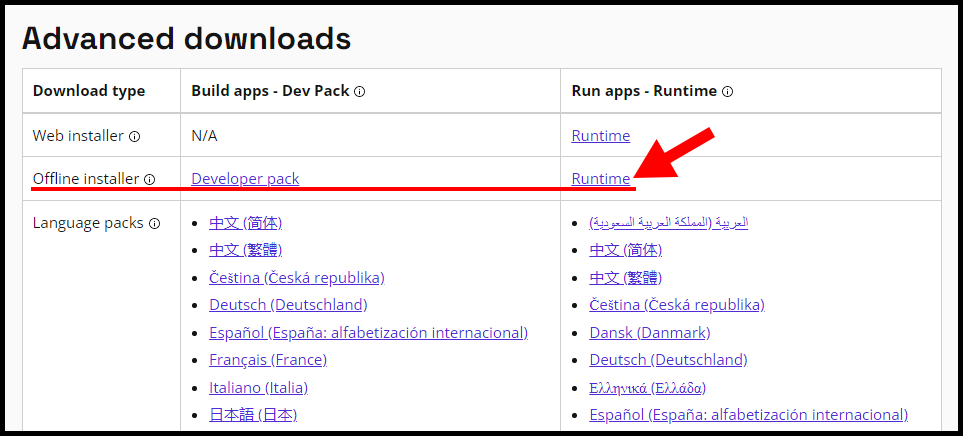
2. Scroll down a little bit and download the Offline Installer from the Advanced downloads section under Run apps – Runtime.
Run apps – Runtime: The runtime includes everything you need to run existing apps/programs built with .NET Framework.
3. Once the download has been completed, click and run the executable file.
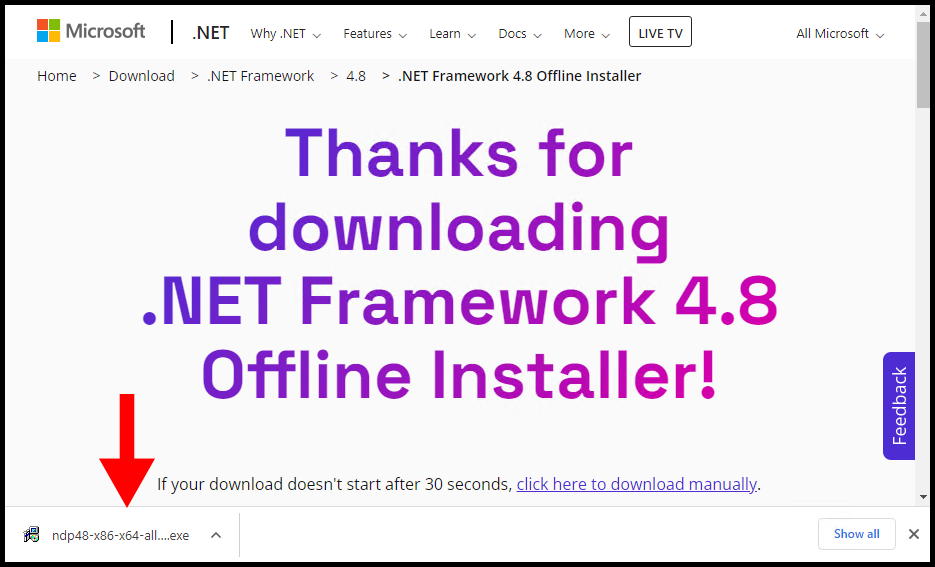
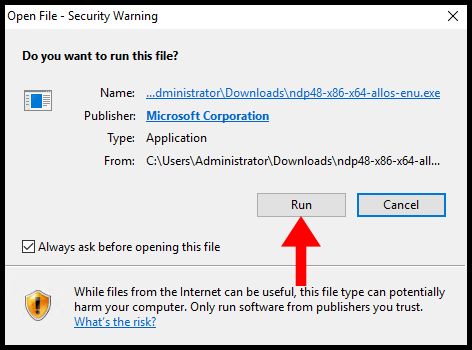
4. You will see the below pop-up warning Do you want to run this file? then click on Run.
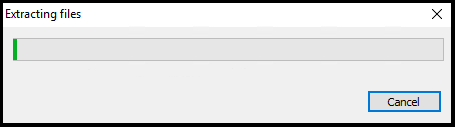
5. Now, windows will extract the files to start the installation.
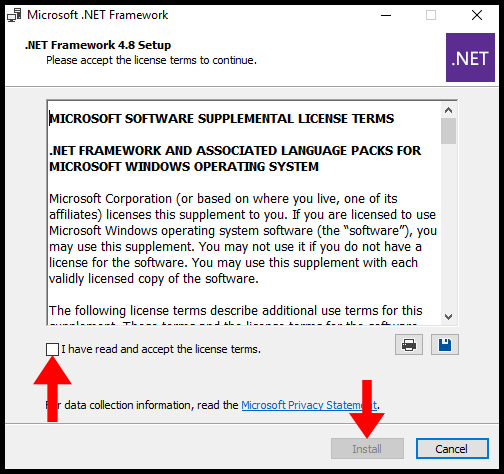
6. Once you have read the license terms, check the box I have read and accept the license terms and then proceed to press Install.
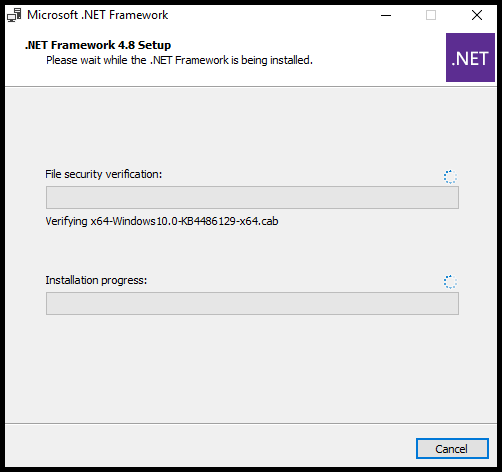
7. Next, the installation will begin.
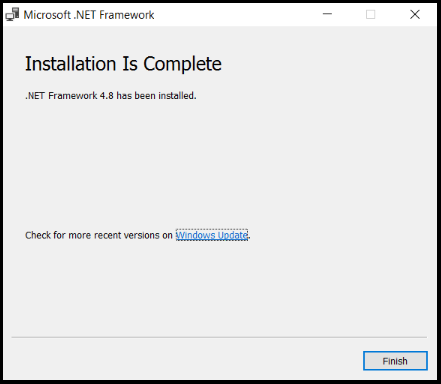
8. Once the installation is done, your server will now have .NET Framework.
How to install .NET Framework using Online Installer
If you want to process the .NET Framework with Online Installer i.e. Web Installer you must have an internet connection while processing the installation.
You can download any desired .NET Framework version by using the following URL,
https://dotnet.microsoft.com/download/dotnet-framework/
For this article, we will be installing .NET Framework 4.6. You can install any version of the .NET Framework as per your requirement.
1. Visit the above URL: https://dotnet.microsoft.com/download/dotnet-framework/ and select the .NET Framework Version.
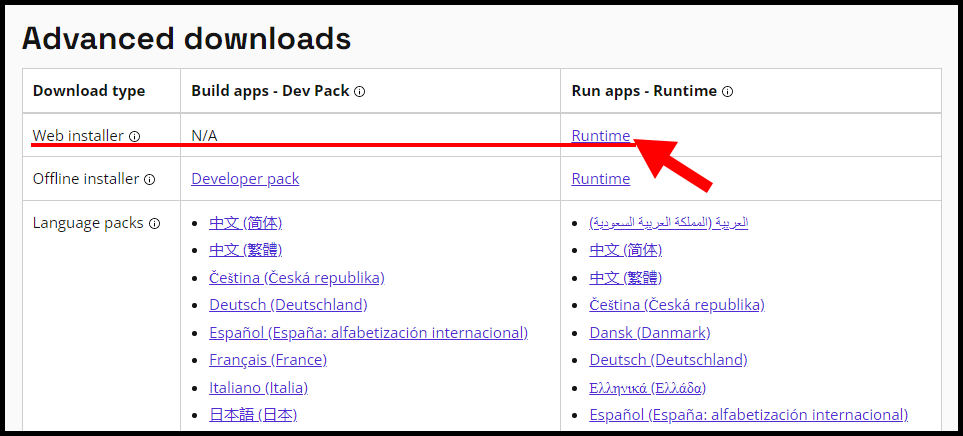
2. Scroll down a little bit and download the Web Installer from the Advanced downloads section under Run apps – Runtime.
3. Once the download has been completed, click and run the executable file.
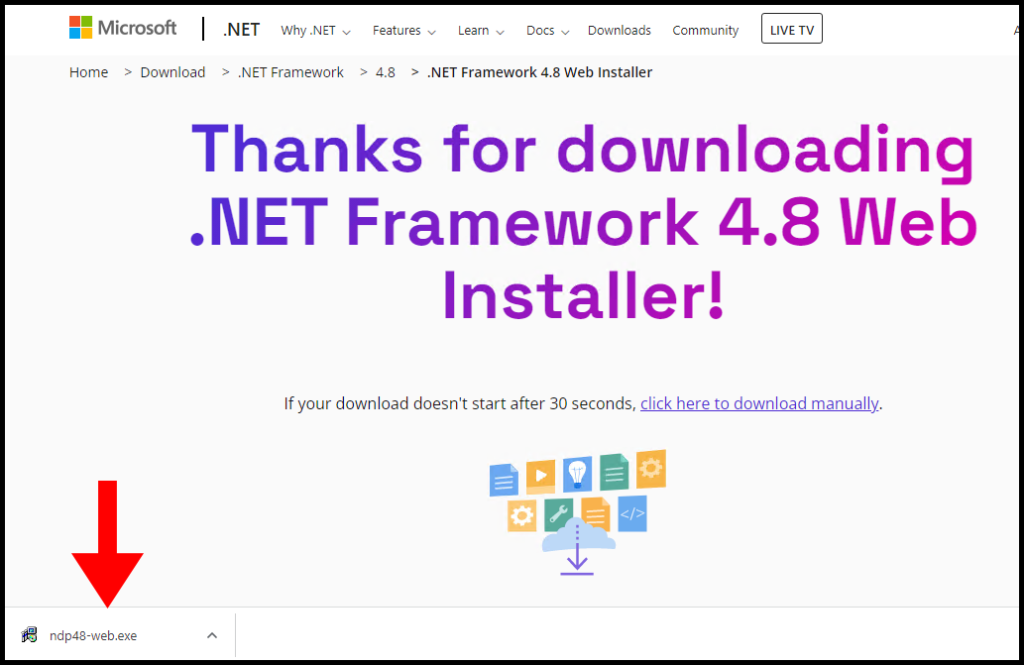
3. You will see one warning Do you want to run this file? then click on Run.
4. Now, windows will extract the files to start the installation.
5. Once you have read the license terms, check the box I have read and accept the license terms and then proceed to press Install.
6. Next, the installation will begin.
7. Congratulations, the .NET framework has been installed on your server.
Errors & Fix
Problem 1) .NET Framework 4 has not been installed because HRESULT 0xc8000222
Resolution:
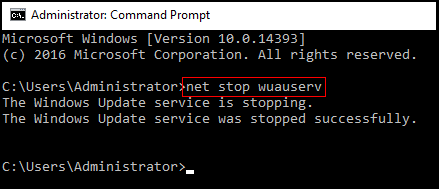
1. First, open Command Prompt.
2. Type “net stop wuauserv” and hit Enter.
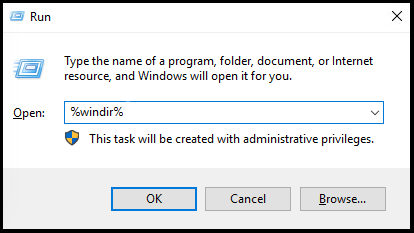
3. Now, open RUN (Windows Key + R) and type %windir%, then hit the OK button.
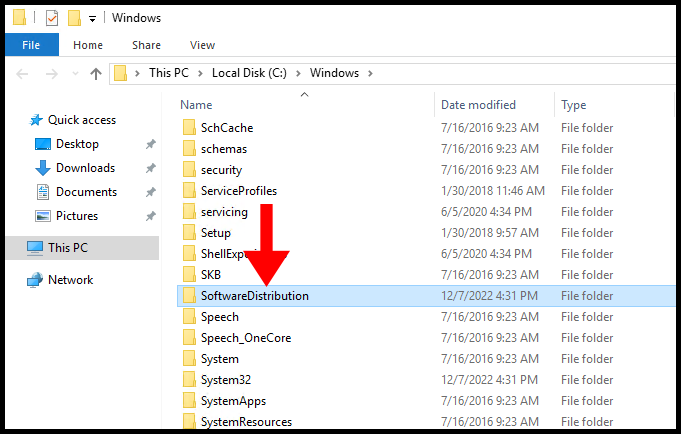
4. Then scroll down and find SoftwareDistribution and rename it to SD-kbp.
5. Finally, reopen Command Prompt and type “net start wuauserv” and hit Enter.
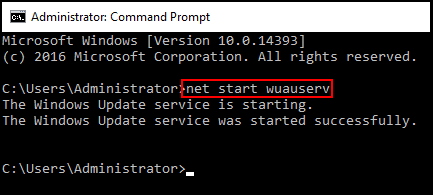
6. Now, try to install the .NET Framework.
Problem 2) The installation fails with the error 0x800f081f.
Resolution: This type of error encounters when supported files for the installation are not found. To install, NET-Framework-Core; you must have ISO of Windows Server 2016 or 2019. Now, mount the ISO file as a virtual drive. (Example E:)
Now specify an alternative source in the “Confirmation” option. There you need to put “E:sourcessxs” and hit OK.
Finally, process with the last steps of the installation.
All the Hyonix Windows VPS comes with Netframework by default