
Elementary OS is a Linux distribution that stands out for its remarkable design and user interface. The developers of elementary OS have put a lot of effort into creating a visually appealing and polished UI that resembles Apple’s macOS X, making it one of the best-looking Linux distributions available today.
But it’s not just about the looks. The latest version of this OS is also lightweight, making it possible to run on older hardware. It is based on the popular Ubuntu distribution, but it also has a distinct desktop environment called Pantheon. The developers have done an excellent job in creating a unique Linux experience that is both user-friendly and functional.
When using elementary OS, one can’t help but notice the attention to detail and the effort put into making it a pleasant experience for the user. The interface is intuitive, and the system is stable and reliable. All in all, elementary OS is an excellent choice for those who value aesthetics, performance, and ease of use.
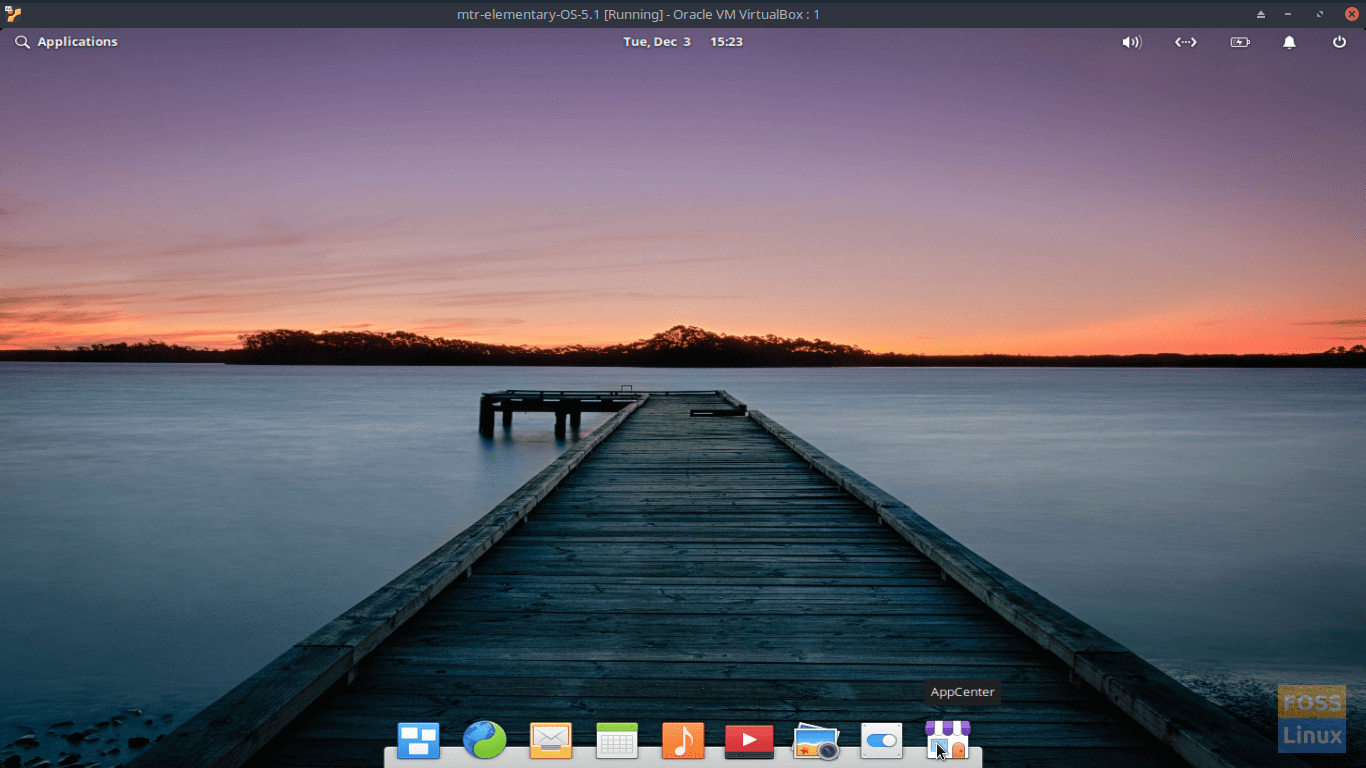
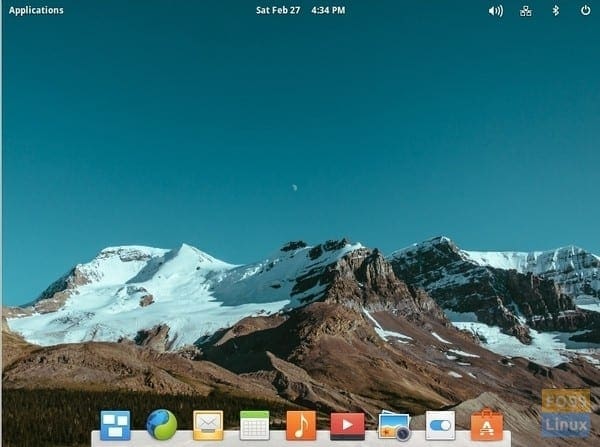
elementary OS desktop
Why choose elementary OS for dual-booting?
Before we get our hands dirty with the installation process, let’s chat about why you might consider elementary OS as a worthy companion to your existing Windows setup. For starters, elementary OS is renowned for its clean, intuitive design, often drawing comparisons to macOS. This makes it an excellent choice for users transitioning from Windows who are looking for a straightforward yet powerful Linux environment.
Moreover, if you’re a developer, a budding software enthusiast, or someone who values privacy and open-source principles, elementary OS provides a robust platform to explore, create, and work without the overhead of Windows. It’s lightweight, fast, and doesn’t come bloated with unnecessary apps, giving you a clean slate to customize your digital workspace.
Pre-installation checklist
Before we embark on this dual-booting adventure, there are a few things you’ll need to ensure a smooth setup:
- Backup your data: This is non-negotiable. Whenever you’re partitioning drives and installing operating systems, there’s a risk, however small, of data loss. Better safe than sorry!
- Download elementary OS ISO file: Download the latest version of elementary OS from its official website. Get the free elementary OS from the developer’s site. Ignore the donation prompt and enter 0 to download it. Test it first if you’re unsure before donating.
- ISO creation software: You also need a tool like Rufus (for Windows PC) or Etcher (for Linux) to create a bootable USB drive.
- Ensure secure boot is disabled: This might require you to tinker with your BIOS/UEFI settings. Secure boot can sometimes prevent the booting of non-Windows operating systems.
- Free up space for elementary OS: You’ll need to shrink your existing Windows partition to make room for elementary OS. This can be done using the Disk Management tool in Windows.
Creating an elementary OS USB installation drive
On Windows
To get started, download and run the Rufus executable file. Keep in mind that during the setup process, your USB drive will be formatted. So, before you begin, make sure to take a backup of any important data you have stored on the drive.

Rufus Bootable USB Creator
Click on the ‘Format Options’ drop-down list. From there, select ‘ISO Image.’ Next, click on the icon next to it and browse through your computer’s files to locate and select the elementary OS ISO file you downloaded earlier.
One important thing to note is the ‘File system’ setting in Rufus. Usually, the default FAT system is selected, but you can also choose FAT 32. Either one should work. Finally, you’ll want to make sure that the ‘Partition scheme and target system type’ is set to ‘MBR partition scheme for BIOS or UEFI.’ This is the most common configuration for most PCs and laptops.
With these settings in place, you’re ready to start the USB creation process.
After you have correctly configured the settings, click on the ‘Start’ button, and Rufus will create a bootable USB drive for you to install elementary OS. Then, you need to insert the USB drive into your computer before starting Windows and boot your PC from it. The method of booting into the USB drive will vary depending on the make and model of your PC. For most computers, pressing the F12, F6 or Esc key during startup should take you to the boot menu. From there, select the USB drive and begin the installation process for elementary OS.
On Linux:
Refer to our step-by-step guide: How to create a Live Linux USB drive using Etcher
Installing elementary OS alongside Windows: A step-by-step guide for dual-booting
During the installation process, the first step is to select the language of your choice. After that, you should click on the ‘Install elementary’ button to proceed with the OS installation. If you want to test the operating system without actually installing it, you can choose the ‘Try elementary’ option. However, please note that this option works like any other Linux Live CD, meaning that you won’t be able to save any data while using it.
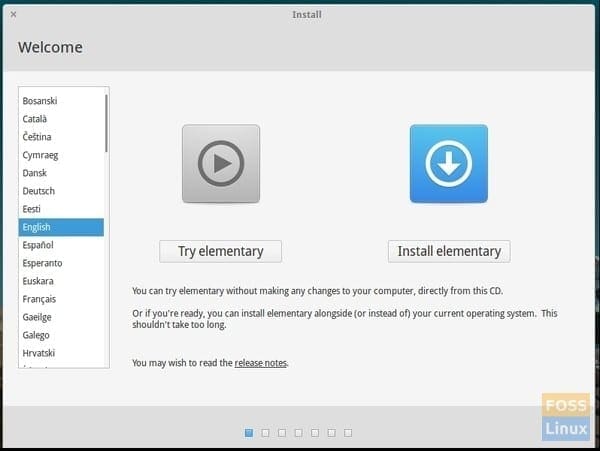
elementary OS installation
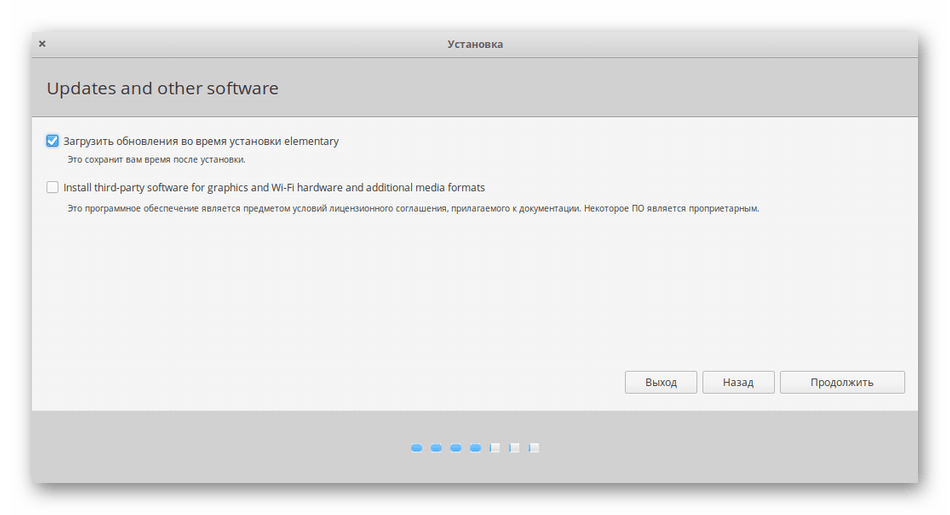
During the next steps of the process, you will be given the option to download updates and third-party software, including MP3 support. MP3 is a commonly used format nowadays, so it is recommended that you select this option and update if you have a fast internet connection. If you do not have a fast internet connection, you can install the update after completing the elementary setup.
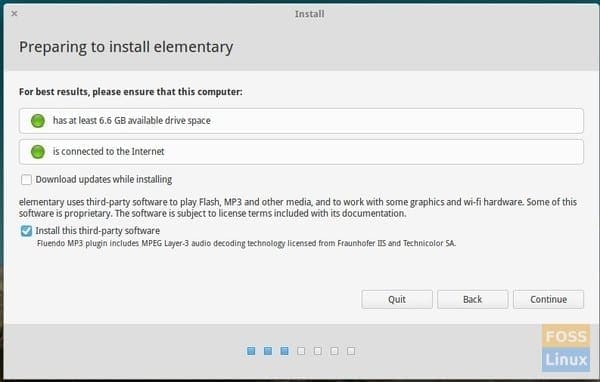
elementary installation preparation
In the following step, you will be presented with various options to choose from for the installation of elementary on your computer.
If you are planning to install elementary on your computer, there are a few options to choose from.
- First, there is the “Erase disk and install elementary” option, which is suitable if you want to have only elementary on your computer. However, keep in mind that this option will wipe out your entire hard drive and delete all partitions. If you wish to dual-boot Windows and elementary, this is not the option for you.
- Another option is to “Encrypt the new elementary installation for security“. This process requires a security key for installation, and at the end, you will have an encrypted installation. This option is not commonly used by general users.
- You can also choose to “Use LVM with the new elementary installation“. This option sets up a logical hard disk volume for easier partition management. However, this option is not suitable for installing elementary alongside an already existing Windows partition.
- Finally, if you want to install elementary alongside another operating system like Windows, Mac, or Linux, you will need to select “Something else“. This option will allow you to continue with the installation process.
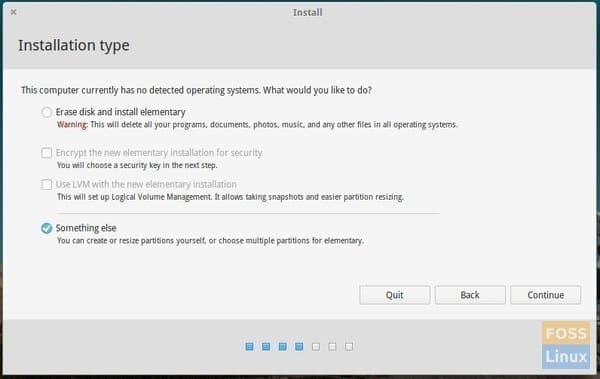
elementary installation options
The following step is highly critical and requires careful attention. It displays all the present hard disk partitions on your computer. You will notice that Windows is in NTFS format. In order to install elementary, you must configure three crucial settings in this scenario.
Root, Swap, and Bootloader
If you did not partition your hard disk before installing elementary, you can do it now. Firstly, select the partition you want to divide and use for elementary. Next, click on ‘New Partition Table.’ After that, specify the bigger free partition to be formatted as Ext4. This is where elementary will be installed.
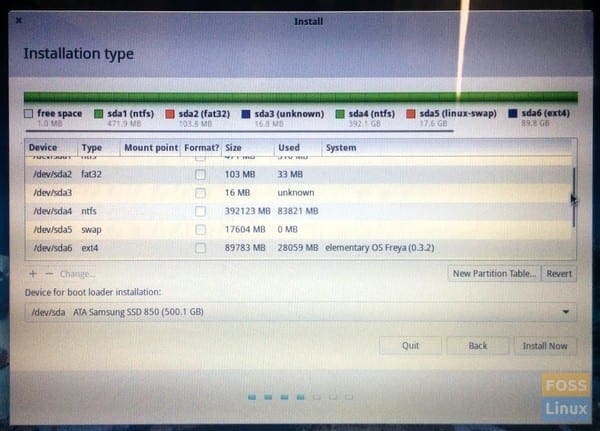
Hard disk Partition Situation
Select ‘Ext4 journaling file system’ as the ‘Use as’ option. Check the ‘Format the partition’ box and set the mount point as ‘/’. This signifies the root directory for elementary OS, which contains all its system files.
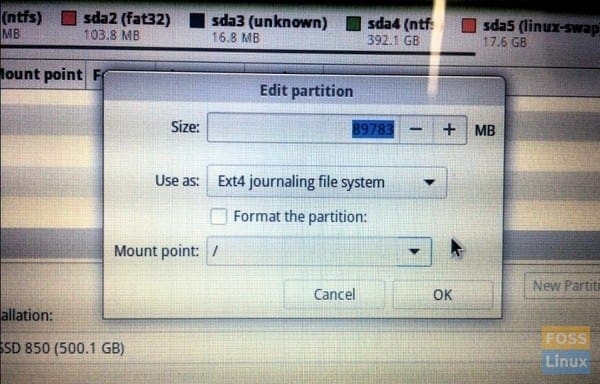
Ext4 File System
To improve your computer’s performance, create a small partition that is twice the size of your computer’s RAM. The size does not have to be precise, but try to be as close as possible. For example, if your computer has 8 GB RAM, then your Linux Swap size should be around 16 GB.
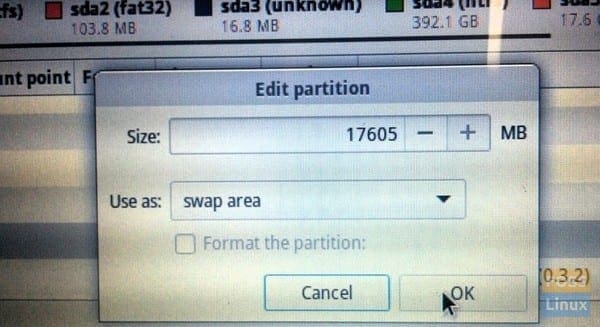
Swap Partition
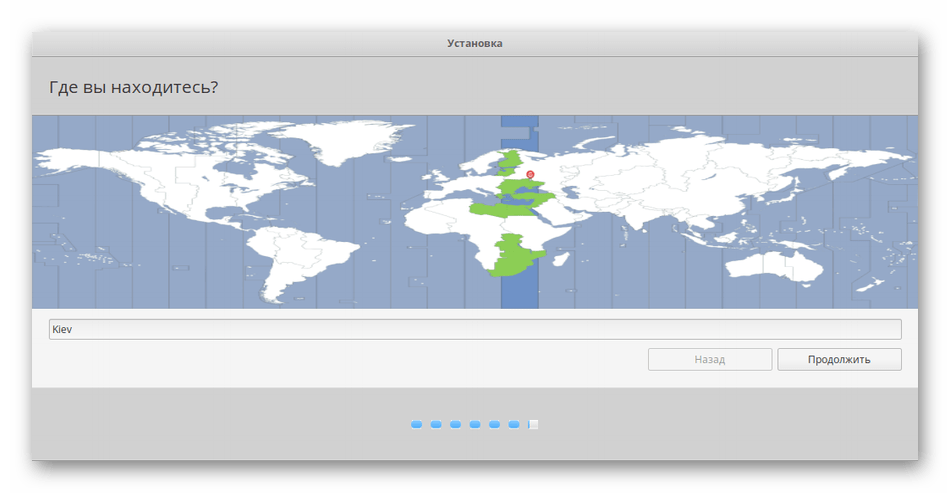
To ensure accurate time display, you can input your location to specify the time zone.
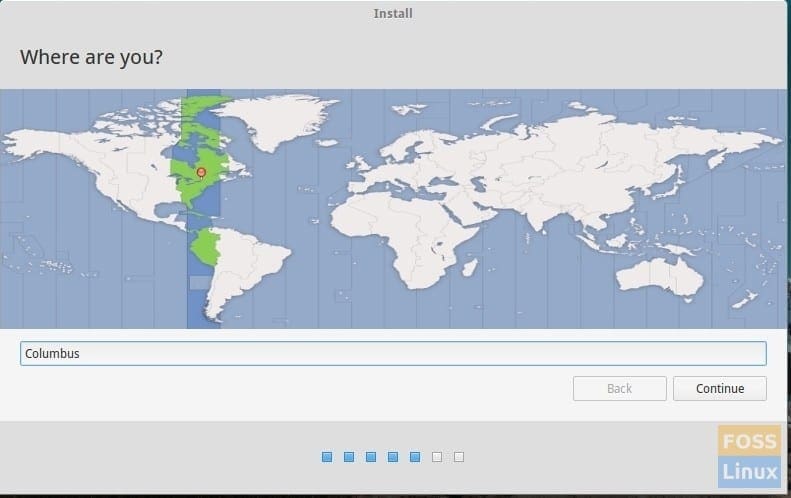
Location
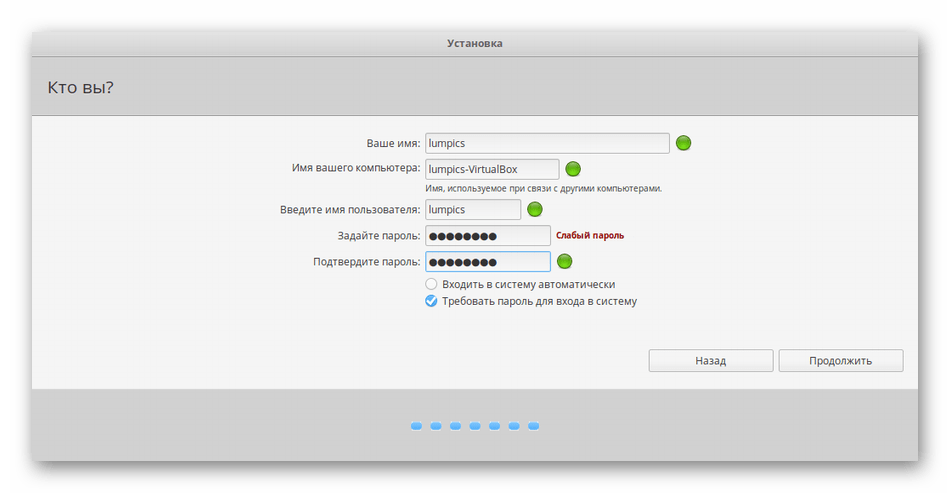
You will need to create a login. It is recommended that you rename your computer’s name during this step. Otherwise, you will have to go through a command-line process to rename it later.

User Login Creation
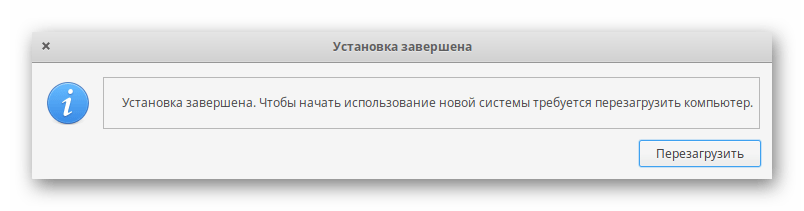
After the installation is complete, you will need to restart the computer.

Congratulations on choosing to use elementary OS, a fast and open-source operating system that is designed to be simple, intuitive, and beautiful. With its user-friendly interface and powerful features, you can easily browse the web, manage your files, and work on your projects with ease. Enjoy the smooth and seamless experience that elementary OS provides and make the most of its advanced capabilities. I hope you have a great time using elementary OS!
elementary OS desktop
Post-installation tips
After successfully setting up your dual-boot system, there are a few post-installation tips I’d like to share:
- Update everything: Just like in Windows, it’s a good idea to check for updates after your first login. Open the Terminal and run
sudo apt-get update && sudo apt-get upgradeto ensure all your software is up to date. - Install additional drivers: Depending on your hardware, you might need to install additional drivers for things like graphics cards or Wi-Fi. The ‘Additional Drivers’ tool in the System Settings can help with this.
- Explore the AppCenter: One of elementary OS’s highlights is its AppCenter, which offers a variety of applications tailored for the elementary experience. Take some time to explore and install apps that suit your workflow.
Frequently Asked Questions (FAQ)
Q: Will dual-booting slow down my computer?
A: No, dual-booting won’t inherently slow down your computer. Each operating system uses the hardware resources independently when booted. However, the available disk space will be divided between the two systems.
Q: Can I access Windows files while using elementary OS?
A: Yes, elementary OS can read and write to Windows file systems (like NTFS). You can access your Windows partitions through the file manager in elementary OS. However, it’s recommended to properly shut down Windows (and disable fast startup) to avoid any issues.
Q: Is it possible to remove elementary OS later if I change my mind?
A: Absolutely. You can remove the elementary OS partitions using the Disk Management tool in Windows. Afterward, you’ll likely need to repair the Windows bootloader using a Windows recovery drive.
Q: Do I need to be a tech expert to dual-boot elementary OS with Windows?
A: Not necessarily. While it helps to have some technical knowledge, especially if you encounter issues, the process is designed to be accessible. Carefully following a guide like this should be manageable for most users.
Q: How do I choose which operating system to boot into?
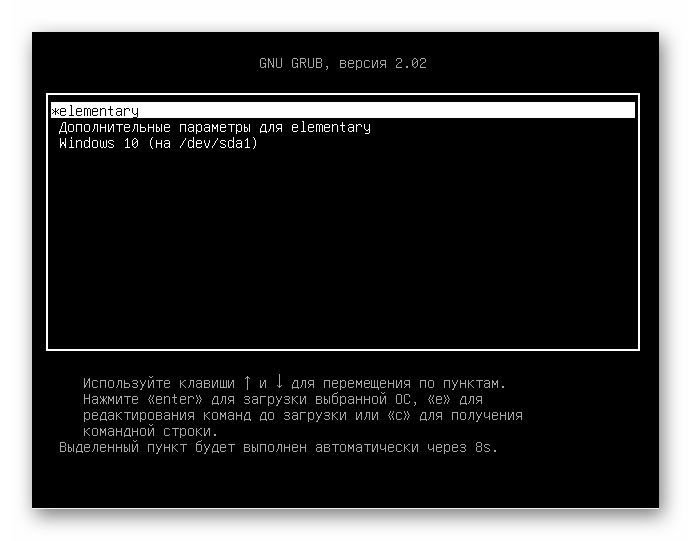
A: After installing elementary OS alongside Windows, your computer will use the GRUB bootloader, which presents a menu each time you start your computer, allowing you to choose between elementary OS and Windows.
Q: Can dual-booting affect my warranty?
A: In most cases, dual-booting should not affect your hardware warranty. However, it’s always a good idea to check your manufacturer’s warranty terms. Software support might be a different story, as manufacturers may not provide support for issues arising on the non-original OS.
Q: What should I do if I encounter an error during installation?
A: Don’t panic. Errors can occur due to various reasons like corrupt installation media, hardware compatibility, or incorrect BIOS settings. Recheck the installation steps, try recreating your bootable USB drive, and ensure all BIOS settings (like Secure Boot) are correctly configured. Searching for the specific error message online can also provide solutions from community forums and support sites.
Q: How can I ensure my data is safe during the process?
A: The best way to protect your data is by backing it up to an external drive or cloud storage before starting the installation process. Avoid making changes to your existing Windows partitions during the installation, except for the space you’re allocating to elementary OS.
Final thoughts
Dual-booting elementary OS with Windows offers a versatile, powerful computing environment that caters to a wide range of needs, from development work to everyday tasks. While the process might seem daunting at first, the rewards, in my opinion, are well worth the effort. Not only do you get to enjoy the simplicity and elegance of elementary OS, but you also retain the full functionality of Windows for those tasks that still require it.
Skip to content
Elementary OS is a relatively newer Linux distribution which is quickly becoming very popular as it provides a very streamlined user interface. It is based on another very popular flavor of Linux – Ubuntu. If you have ever used macOS, then you will find yourself right at home because Elementary OS offers a macOS like desktop experience. Even the desktop wallpapers look similar to the ones you will find on macOS.
If you already have Windows 10 installed on your PC then you can also use the popular Elementary OS Linux on it too. It is very easy to do because Elementary OS offers installation alongside Windows operating system.
Here is how you can install Elementary OS in dual boot configuration with Windows 10:
- Optional, but the sake of safety, the first thing you should do is make a backup of your Windows system partition using Macrium Reflect.
- Next thing you have to do is download Elementary OS ISO from https://elementary.io/.
- Download Rufus from https://rufus.ie/ and use it to create a bootable USB install media for Elementary OS.
- Plug-in the bootable USB media to your PC, reboot it. At the next boot, press F12 to select the USB media as the boot device. You should be able to boot into Elementary OS live.
- When asked, choose to Install elementary on your PC.

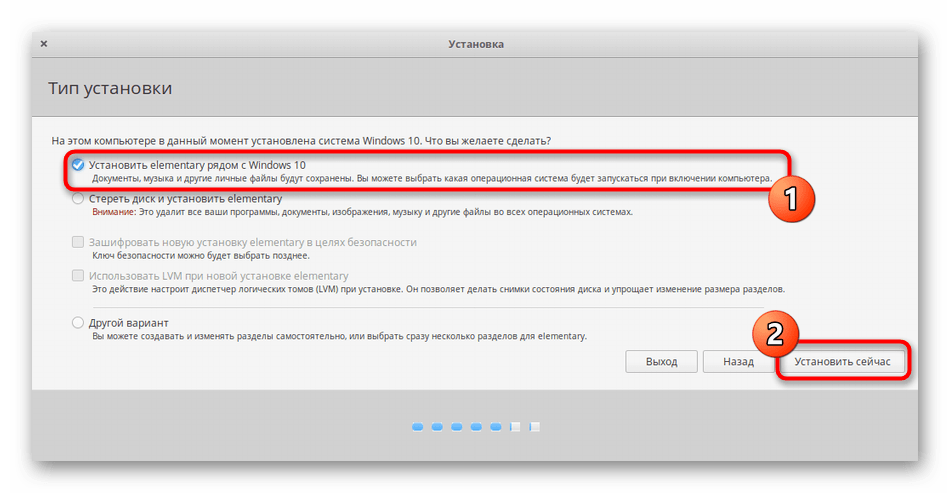
- It will automatically detect Windows installed on your hard drive and display various options. Choose the option labelled Install elementary alongside Windows boot manager.

- On the next screen, you will have to choose the target storage drive on which you want to install Elementary OS. You can also choose the partition space for installing Elementary OS by dragging the middle line. You should ensure that enough space is given to both Windows and Elementary OS. After making the appropriate settings, click on the Install Now button to start the installation.

- Wait for the copying of files, installation of system, and then restart the PC. You will now be able to make a choice between Windows and Elementary OS.


We use cookies on our website to give you the most relevant experience by remembering your preferences and repeat visits. By clicking “Accept”, you consent to the use of ALL the cookies.
Все способы:
- Шаг 1: Разметка дискового пространства в Windows 10
- Шаг 2: Выбор и загрузка дистрибутива Linux
- Шаг 3: Создание загрузочной флешки и настройка BIOS
- Шаг 4: Подготовка и инсталляция
- Шаг 5: Запуск и использование Linux рядом с Windows
- Вопросы и ответы: 4
Шаг 1: Разметка дискового пространства в Windows 10
Корректная инсталляция двух операционных систем рядом возможна только при правильном разделении дискового пространства. На локальном носителе должно быть нераспределенное место, не имеющее никакой файловой системы и не хранящее в себе отдельных элементов. По умолчанию такое пространство отсутствует, поэтому его придется создать самостоятельно путем сжатия раздела жесткого диска. В Windows 10 это осуществляется так:
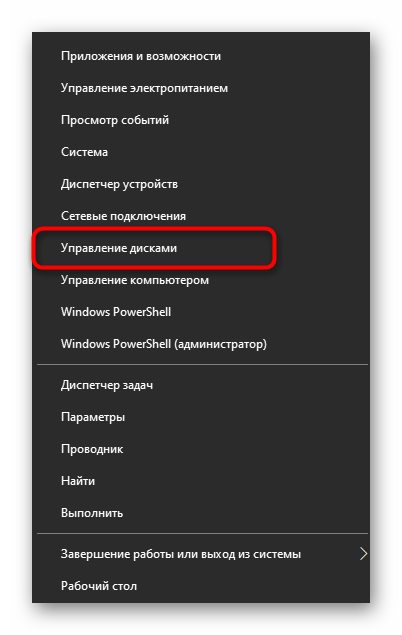
- После загрузки ОС нажмите правой кнопкой мыши по «Пуск» и в появившемся контекстном меню выберите пункт «Управление дисками».
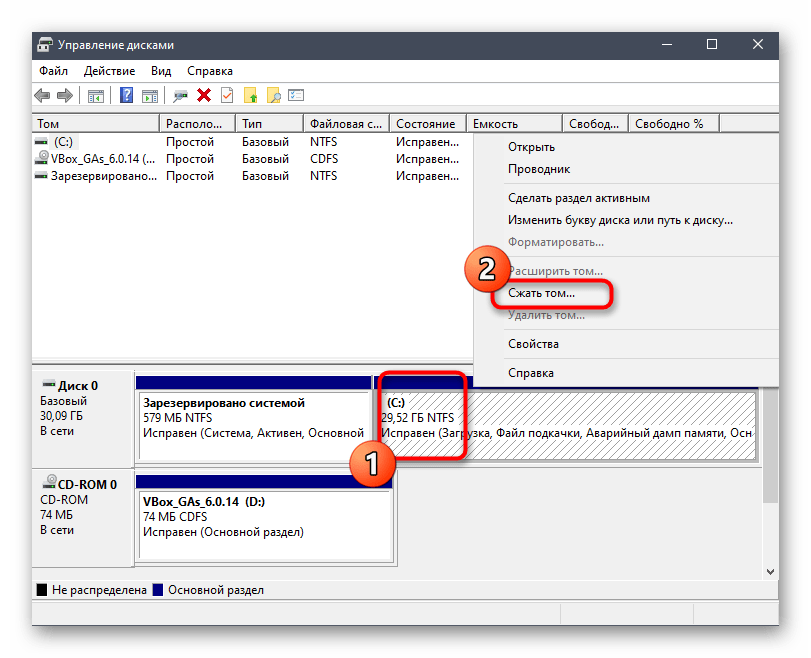
- После перехода в соответствующее меню выберите один из существующих разделов. Лучше всего подойдет тот, где хранятся личные файлы или же просто раздел с большим количеством свободного пространства. Щелкните ПКМ по такому разделу и найдите параметр «Сжать том».
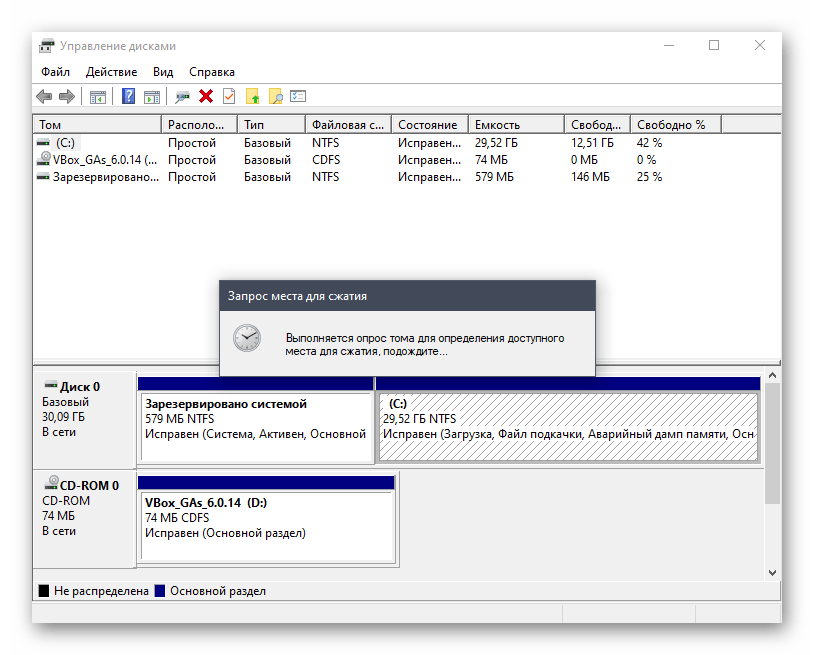
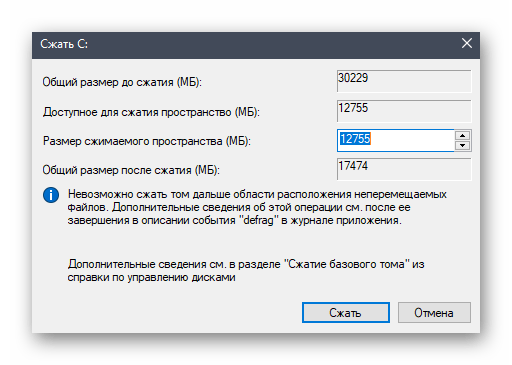
- Ожидайте завершения операции запроса места для сжатия.
- В появившемся окне задайте оптимальный размер сжимаемого пространства в мегабайтах. Именно оно в будущем и станет выделено для второй операционной системы.
- После окончания этой операции вы увидите, что часть диска отмечена черным цветом и имеет атрибут «Не распределена».
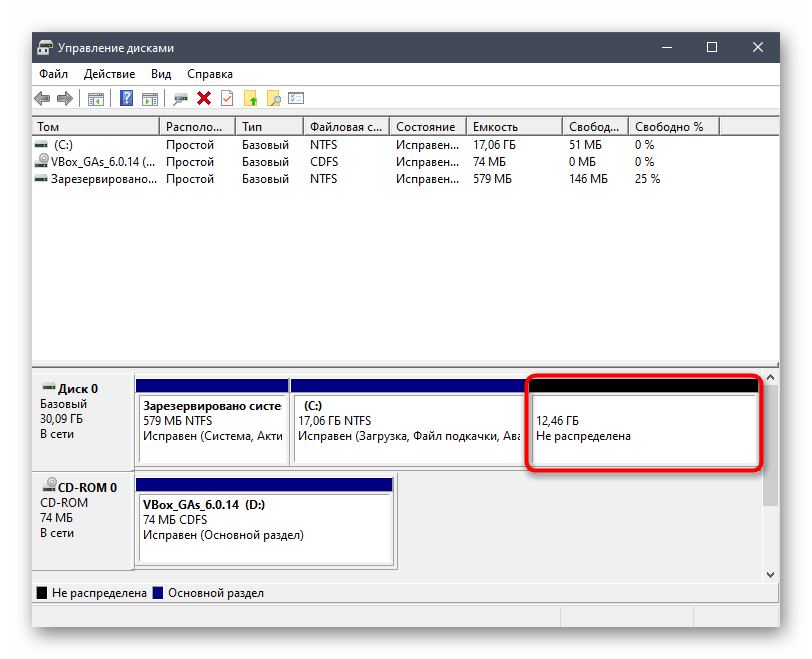
Больше никаких действий с данным пространством производить не нужно, поскольку оно нам необходимо именно в таком виде. Далее уже дистрибутив Linux автоматически создаст новый логический том и определит для него файловую систему.
Шаг 2: Выбор и загрузка дистрибутива Linux
Как известно, сейчас на просторах интернета находится огромное количество самых разных дистрибутивов Linux, за основу которых были взяты популярные сборки, например, Debian или RedHat. Мы советуем прочитать отдельные материалы по теме выбора ОС на нашем сайте, если вы еще не знаете, какой именно дистрибутив хотите инсталлировать рядом с Windows 10.
Подробнее:
Выбор дистрибутива Linux для слабого компьютера
Сегодня мы решили взять за пример один из самых перспективных и лаконичных в плане внешнего вида дистрибутивов под названием Elementary OS. Давайте вкратце рассмотрим, как осуществляется скачивание образа, а вы, отталкиваясь от особенностей официального сайта выбранной сборки, проделаете ту же операцию, получив ISO-файл на свой компьютер для его дальнейшей записи.
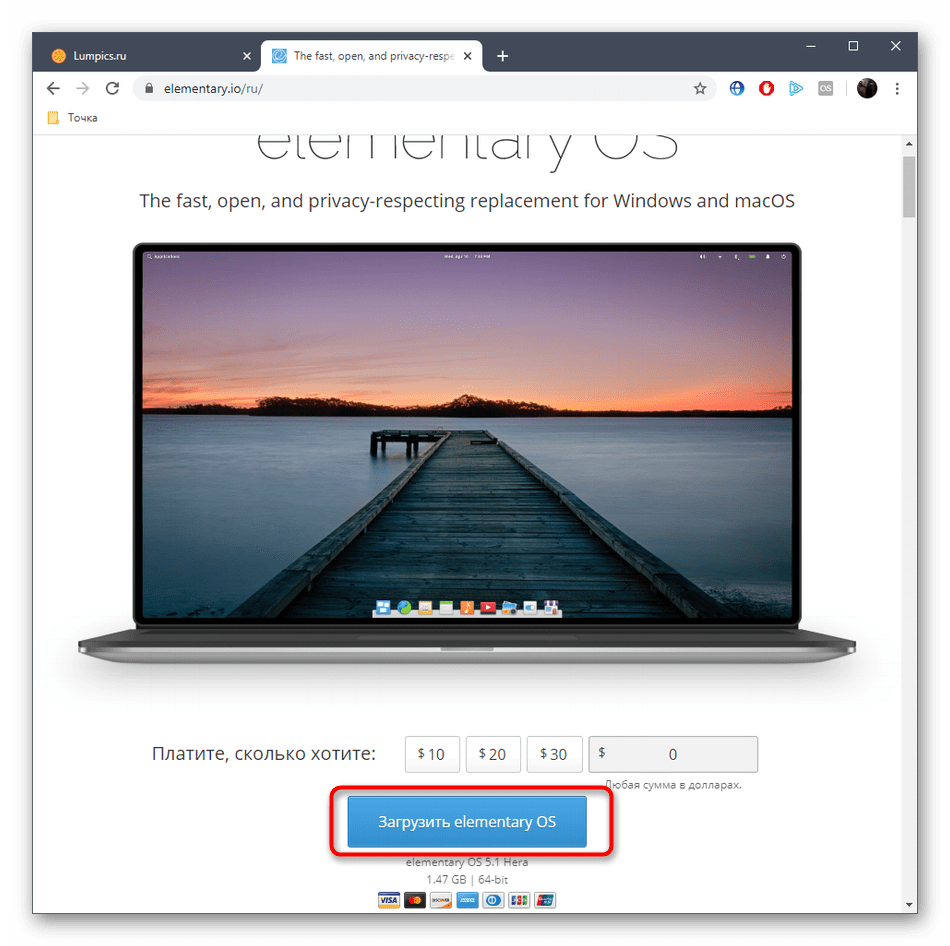
- Перейдите на официальный сайт производителя Linux и откройте раздел с загрузками. В случае с Elementary OS разработчики предлагают заплатить любую цену для скачивания. Если указать 0, то можно получить файл бесплатно.
- Нажмите на кнопку «Загрузить», чтобы перейти к выбору версии дистрибутива.
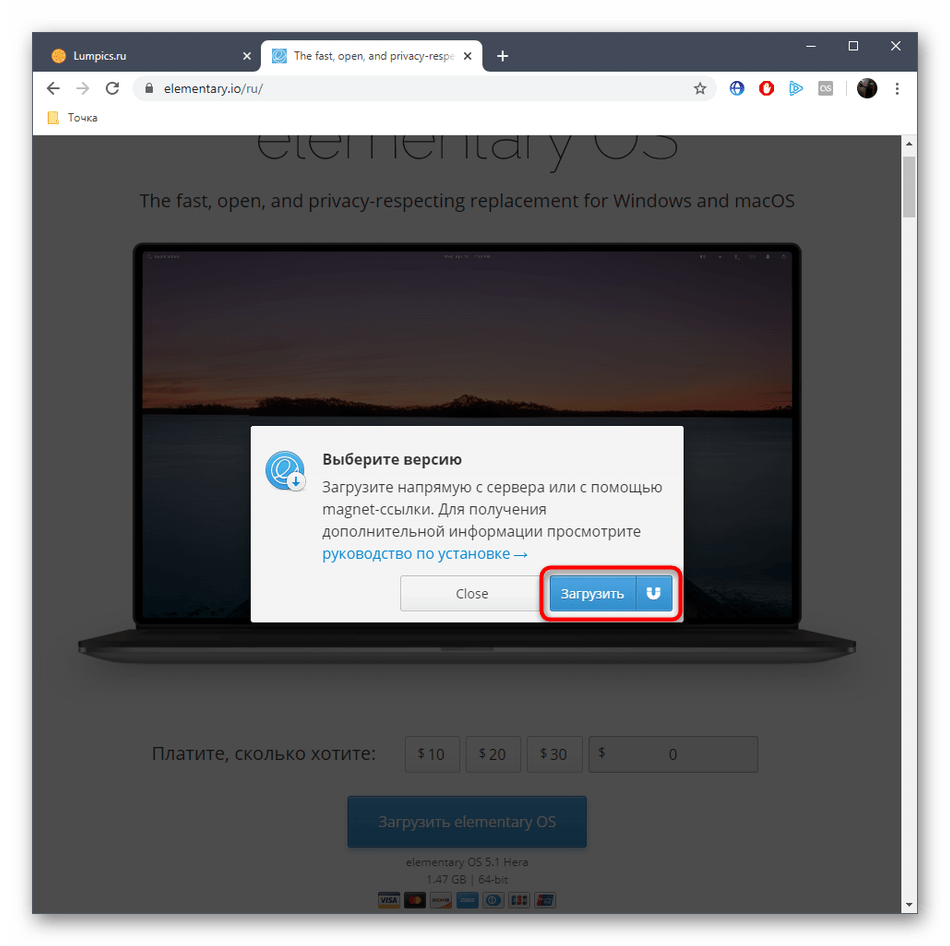
- Вы можете скачать последнюю стабильную сборку напрямую с сервера или выбрать любую другую поддерживаемую и, например, загрузить ее через torrent.
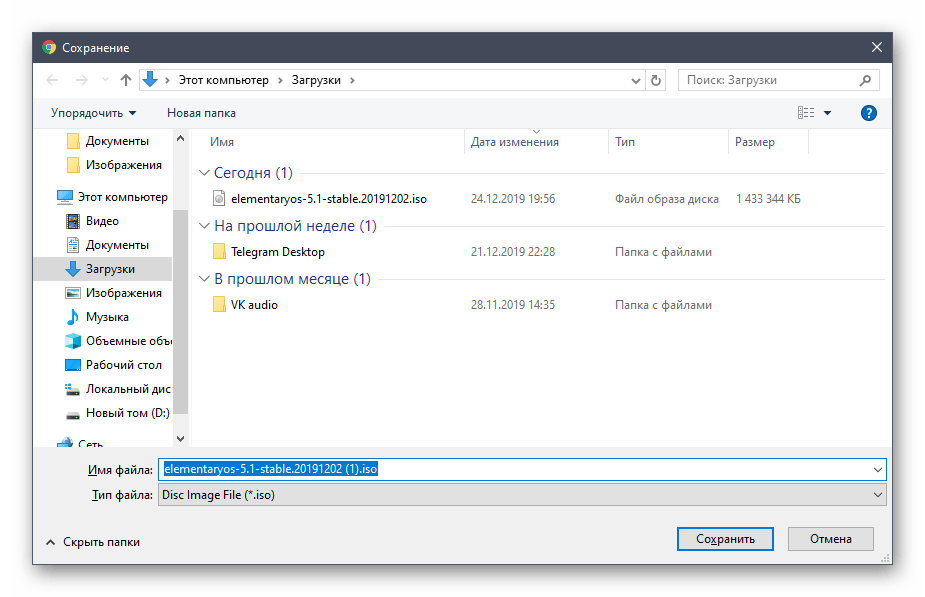
- Выберите место для скачивания образа и дождитесь окончания этой процедуры. После этого переходите к следующему шагу.

Шаг 3: Создание загрузочной флешки и настройка BIOS
К сожалению, нельзя просто загрузить полученный образ, чтобы приступить к инсталляции системы. Для этого его предварительно необходимо записать на съемный носитель, которым чаще всего выступает USB-флешка. Это делает из нее загрузочное устройство, считываемое BIOS как полноценный диск с файлами для установки. Более детально о выполнении этого процесса читайте в отдельном материале на нашем сайте, перейдя по указанной ниже ссылке.
Подробнее: Гайд по записи ISO образа на flash-накопитель
Дополнительно отметим, что в большинстве случаев подобное устройство корректно загружается после включения компьютера, но иногда для этого приходится настроить BIOS, задав приоритет устройств. На нашем сайте так же имеется статья, где приведено руководство по данной теме. Ознакомьтесь с ней, если вдруг с загрузкой возникли какие-то проблемы.
Подробнее: Настраиваем BIOS для загрузки с флешки
Шаг 4: Подготовка и инсталляция
Самый главный шаг сегодняшнего материала — установка Linux рядом с Windows 10. Вы уже знаете, что за пример мы взяли Elementary OS. Это решение было принято не только из-за востребованности самого дистрибутива, но и из-за его графического инсталлятора, который имеет множество схожего с другими инструментами в разных сборках. Остается только следовать инструкции, учитывая особенности выбранной ОС, чтобы справиться с поставленной задачей без возникновения каких-либо трудностей.
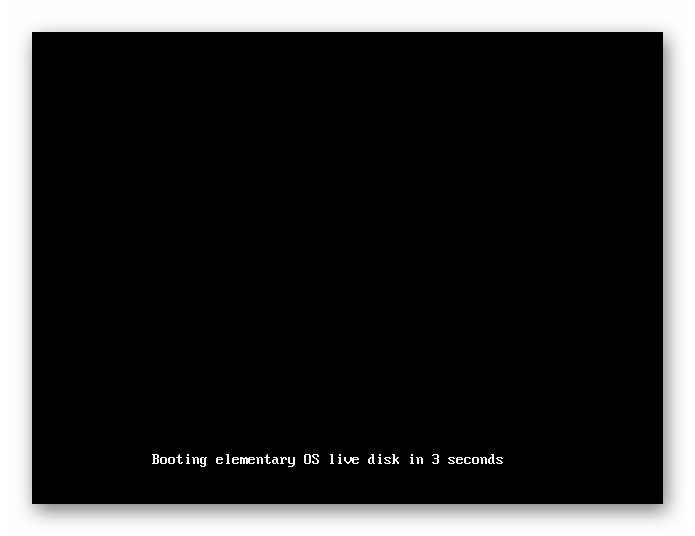
- Вставьте загрузочную флешку в свободный разъем и включите компьютер. Вы будете уведомлены о загрузке Elementary OS через три секунды.
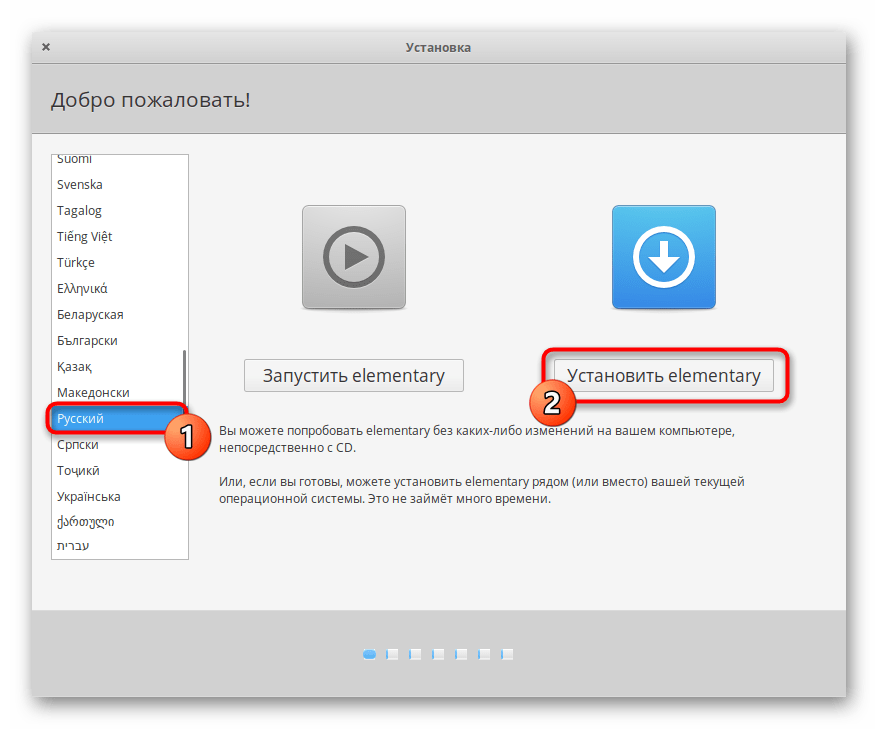
- В окне приветствия выберите оптимальный язык и нажмите на «Установить elementary».
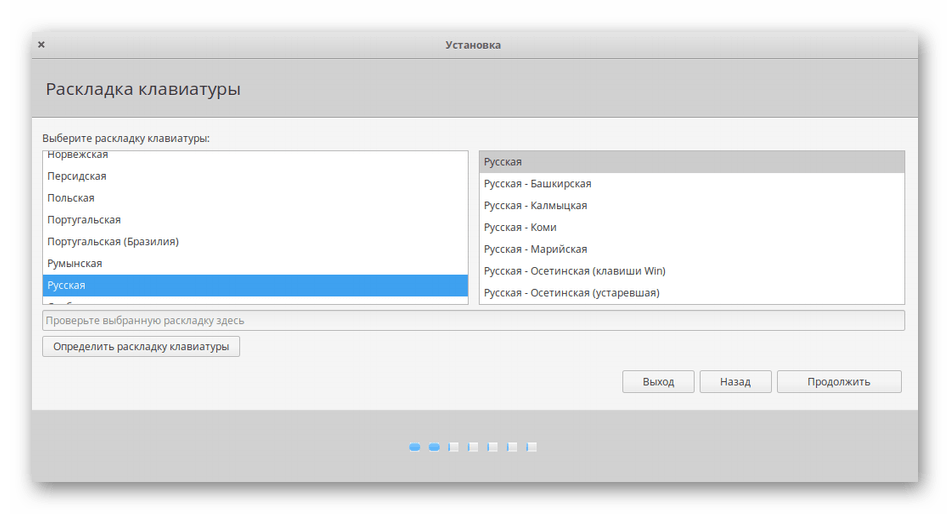
- Воспользуйтесь списком, чтобы определить удобную для себя раскладку клавиатуры. Здесь же можно проверить ее в специально отведенной строке.
- Следующее окно отвечает за выбор компонентов для скачивания. По умолчанию стоит галочка возле пункта «Загрузить обновления во время установки elementary». Мы рекомендуем не снимать ее, а второй пункт активировать по собственному желанию.
- Основное действие, обязательное для выполнения — выбор типа установки. Здесь отметьте галочкой пункт «Установить elementary рядом с Windows 10», а затем нажмите на кнопку для инсталляции.
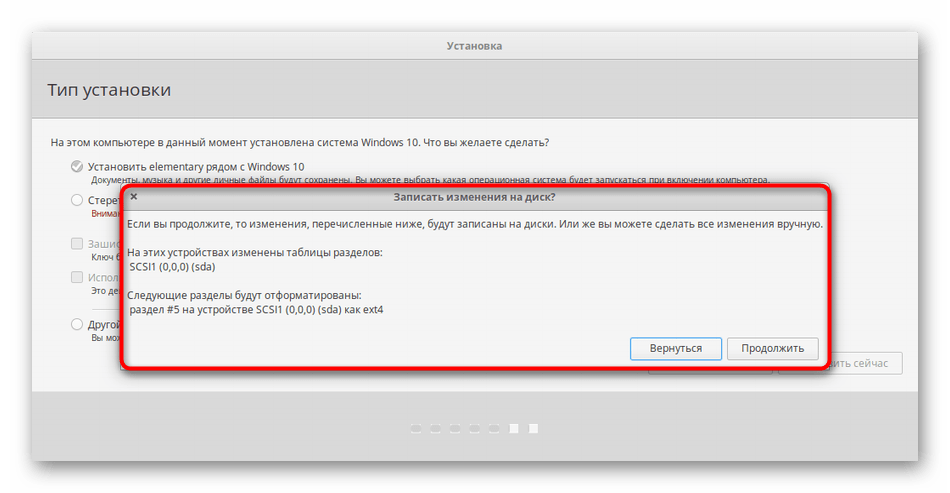
- Подтвердите разметку свободного пространства с формированием новой файловой системы.
- Выберите текущую временную зону. Это требуется для успешной синхронизации времени.
- Последний этап заключается в создании учетной записи пользователя. Ему и будут присвоены права root.
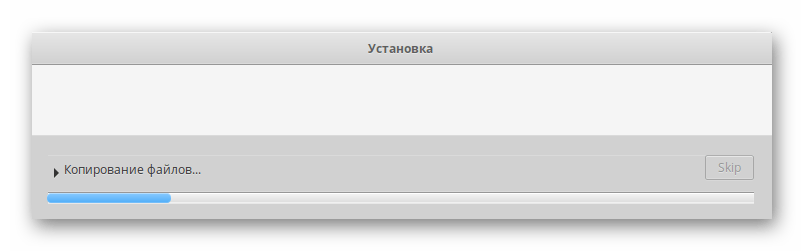
- После этого сразу же начнется инсталляция дистрибутива. Во время этого не выключайте компьютер, иначе весь процесс собьется.
- По окончании появится уведомление. В нем следует кликнуть на «Перезагрузить», а затем можно извлекать загрузочную флешку из разъема, поскольку больше она нам не пригодится.
Шаг 5: Запуск и использование Linux рядом с Windows
Осталось только совершить первый запуск, чтобы удостовериться в корректной работе Linux. Сейчас стандартный загрузчик изменит свой вид. В нем можно будет выбрать, какую именно операционную систему следует включить в этот раз. Для перемещения используются стрелки на клавиатуре, а активация происходит нажатием на клавишу Enter.
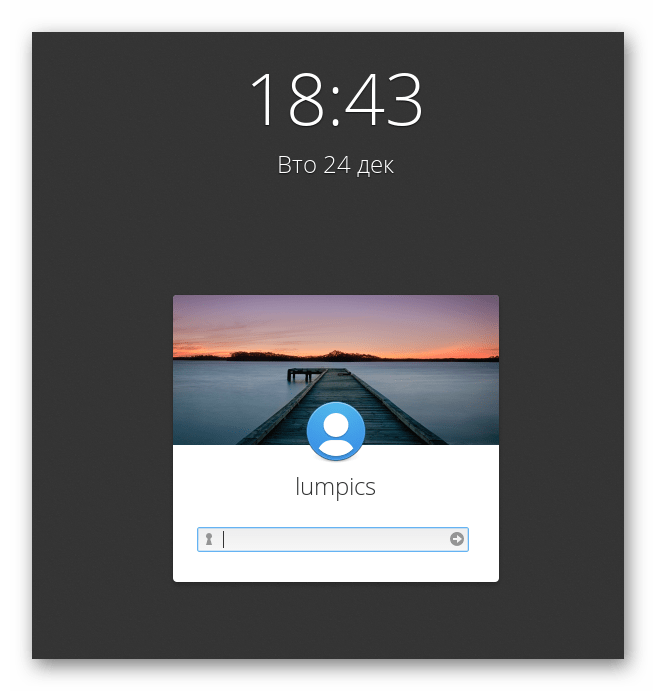
Как видно, появилось окно авторизации в Elementary OS, а это значит, что все предыдущие действия были выполнены верно. Теперь можно входить в свой профиль и начинать взаимодействие с новой ОС.
Многие пользователи, только начинающие свое знакомство с Линукс, еще не знают, как выполнять определенные действия, например, установку программ или создание новых учетных записей, поскольку управление значительным образом отличается от той же Windows. Поэтому мы предлагаем узнать больше при помощи обучающих материалов по темам освоения в Linux, перейдя по указанным ниже ссылкам.
Читайте также:
Установка и настройка файлового сервера в Linux
Настройка почтового сервера в Linux
Синхронизация времени в Linux
Смена паролей в Linux
Перезагрузка Linux через консоль
Просмотр списка дисков в Linux
Смена пользователя в Linux
Завершение процессов в Linux
Графический интерфейс Линукса не заменяет собой консоль полностью, поэтому рано или поздно придется обратиться к классическому приложению «Терминал», чтобы ввести там команды. На нашем сайте так же имеются руководства, посвященные взаимодействию с популярными стандартными консольными утилитами.
Читайте также:
Команда ln / echo / touch в Linux
Сегодня вы узнали о принципах установки Linux рядом с Windows 10. При выполнении этой задачи главное — указать правильный тип инсталляции, чтобы случайно не стереть пользовательские файлы Виндовс или вовсе не сломать эту ОС. Если был выбран другой дистрибутив и принцип его инсталляции непонятен, советуем обратить внимание на другие наши руководства.
Подробнее: Установка ArchLinux / Astra Linux / CentOS 7 / Kali Linux / Linux Mint
Наша группа в TelegramПолезные советы и помощь

The article was originally written for an earlier version of eOS but it is equally applicable to install elementary OS Freya in dual boot with Windows.
elementary OS Freya stable version has been released. It is based on Ubuntu 14.04 LTS. By now, you might have see the new features introduced in Freya. If you are impressed with the features, you might want to give it a try yourself. In this tutorial, we’ll see how to install elementary OS Freya in dual boot with Windows.
I always dual boot Linux with Windows. It gives me a way to recover in case I screw up my Linux system. I was dual booting Windows 8 with Ubuntu 14.10 Beta and I installed Elementary OS Freya in place of Ubuntu 14.10. Though it was for an already dual booted system, this guide can be used to dual boot any Linux OS along with Windows. If you have UEFI, you can follow this tutorial to install Freya in dual boot with Windows 8 UEFI. The article is actually for Ubuntu but works the same for Freya.
Follow the steps below to install Elementary OS Freya in dual boot with Windows:
Step 1: Create a live USB or disk
Download and create a live USB of Elementary OS Freya.
Step 2: Boot in to live USB
Plug the live USB or disk in to the computer and restart the computer. While booting the computer press F10 or F12 function key (defers from computer to computer) to go to the boot menu. In here, choose the option to boot from USB or Removable Media.
Step 3: Start the installation
It takes some time to boot from the live USB or disk. Have some patience. Once it boots in to live disk, you’ll be provided to Try Elementary OS or Install Elementary OS. No need to tell you what to do here.

In next few screens, you’ll be asked to choose the language of the operating system to be installed. It will then do some checks on available space and other petty stuffs.


Step 4: Prepare the partition
Now comes the important stuff. Where to install Elementary OS Linux? My favorite way is to create a separate partitions for Linux and Windows. Since Windows is already installed here, we’ll prepare a new partition to install Elementary OS Luna. Choose Something else in Installation Type window:

Now if you see here, I have 2-3 NTFS partition and some ext4 partitions (from Ubuntu 13.10 installation). If you do not have ext4 partition, don’t worry. I hope that your Windows OS have several (or at least two) drives (read partition) in it. C drive where (usually) Windows is installed and one (or more) other drives. What you need to do here is to delete a NTFS or existing ext4 partition and create some free space. Choose the partition and click Delete. This will delete all the data in that partition and this is why I asked you to verify if you have Windows installed in a different partition.

Step 5: Create root, swap and home
Once you have some free space on your hard drive, its time to install Linux system on it. There are several ways to do it. But in this post, I am going to show you my favorite way and that is to have a Root, a Swap and a Home. I’ll discuss why this is my favorite way in some other article. Lets just focus here on the installation of Elementary OS Luna.
Create a root partition first. Choose on the free space available and click on add.

In here, choose the size of root, choose ext4 file system, and mount point as / (i.e. root):

Now, next is to create swap partition. It is advised by many that Swap should be double of your RAM and stuff like that. Honestly, I don’t care much about it. I just use a value higher than my RAM.

The next step is to create Home. Try to allocate the maximum size to Home. After all this is where you’ll be installing, keeping the files mostly.

Once you have created the Root, Swap and Home partition successfully, click on Install now to proceed with installing Elementary OS Luna (or any other Linux OS). I hope you don’t run into Grub rescue error for messing up with the partition.

Step 6: Follow the trivial instructions
Once you have created the partition successfully, you have almost won the battle, no kidding. Now you will be taken through a number of screens with a number of things to do for which you don’t need to be Einstein or Ramanujan. I have put the screenshots just for reference:


Once the installation is over, you should be notified by a message like this:

And that would be it. On next boot, you will see the option of Elementary OS on grub screen. And thus you can enjoy the beautiful and elegant Elementary OS. I hope you found this guide to install Elementary OS Freya alongside Windows helpful. If you have questions, suggestions or a word of thanks, feel free to drop a comment. Don’t forget to stay in touch on Facebook and Google Plus. See you again with more Elementary OS tutorials.
Elementary OS is a fast, lightweight Linux distribution based on Ubuntu. If you are migrating from a MAC or if you like the looks of Mac OS, then you would love the look and feel of Elementary OS. Visually, elementary OS is crisp, intuitive and a lot of its designs are inspired from Mac OS.
As Elementary is based on the Ubuntu LTS version it’s stable and can be easily used for work PCs. And as it’s based on Ubuntu you can easily find fixes for any problems you face. Elementary OS is even featured in our list of Best Linux distros in 2020. So let’s just install it and use this amazing Linux distro.
Minimum System Requirements for Elementary OS
These are the recommended minimum system requirements for Latest Elementary OS 5.1 Hera
- Intel Core-i3 or comparable dual-core 64-bit processor
- 15 GB of Hard drive Space
- 4 GB of System Memory (RAM)
- 1024×768 Display
If you want you can also follow this step by step guide below.
Download Elementary OS

Let’s start the installation procedure by downloading the Elementary OS. Go to this official download page and download Elementary OS ISO, To download put any amount in custom amount and click on Purchase Elementary OS. You can even download for free by putting zero in the custom amount. But if you like the OS do consider donating something for their awesome work.
When you click on Purchase Elementary OS it’s downloading will begin. Till downloading completes let’s create space for the installation of Elementary OS.
Create Free Space for Installation
As in this tutorial, we are installing Elementary OS alongside Windows we are going to create installation space for Elementary OS by shrinking partition. Type Disk Management in the search box or right-click on the start menu and click on Disk Management.

This opens Disk Management of Windows operating system. Disk management can be used to modify disk partition from within the Windows.
Now find the disk that has a lot of free space and right-click on it. Select Shrink Volume this will open a dialog box. In Enter the amount of space to shrink, enter the amount of space you would like to allocate to the Elementary OS in MB.
Here we are allocating 102400 MB (100 GB) for Elementary OS installation. You can allocate according to your needs but 15 GB is the bare minimum. Then click on Shrink and its done. You will see Unallocated Space of 100.00 GB, just close the disk management now.
Create a Bootable USB drive to Install Elementary OS
To create a bootable USB drive for installation of Elementary OS we are using Rufus. Rufus is free, open-source, easy to use and small in size. Download Rufus from this link and open Rufus.
Open Rufus and Plug a USB flash drive into your PC (Note: All the data on this USB flash drive will be deleted). Rufus autoselects USB drive just verify that it’s the correct flash drive that you want to use.
Now click on SELECT and browse to the downloaded ISO file of Elementary OS. It’s generally in Downloads, select that Elementary ISO file and press START. You don’t generally need to change other settings in Rufus. It will prompt that all the data on this USB drive will be deleted, just click on OK and wait till the process gets completed.
Booting from Elementary OS USB drive.
Now when you are ready to install, you need to boot from USB flash drive to start the installation of Elementary OS. Restart your PC and when the motherboard logo appears, keep pressing the F10 or F12 function key(this key varies from computer to computer).
You will see a screen with options to boot from Windows and USB flash drive. On that screen select USB flash drive by pressing arrow key and then press enter.
If the above method doesn’t work for you then after restart press bios key. Its F1 or F2 generally, and then navigate to the Boot tab. In that tab, devices will appear in boot priority order. In that order move the USB drive at first position and then press F10 to save and exit. After restart your system will automatically boot from the USB drive.
Installation Of Elementary OS

It takes some time to boot from the USB flash drive. As soon as it finishes booting from USB flash drive you will see a glimpse of Elementry OS installer. You will see options to Try Elementary OS or Install Elementary OS. You can also try Elementary OS without even installing it and it doesn’t affect any files on your PC.
When you are sure to install Elementary OS click on Install Elementary OS. Wait and you will see a dialog box to choose Keyboard layout, select it and click on Continue. Then it will ask to connect to Wi-Fi, connect it. After that it will prompt to install updates and software. Tick on both the options and click on Continue.

Now in option to select Installation type, select Something else and click on Continue.
Creating partitions to install
You will see all the partition preset in your system at this point. But as we have already created free space on the hard drive, we just need to create new partitions instead of modifying others. Now follow the instructions below and create the required partitions. If you don’t want to Dual boot then select the partition with the other OS installed and click on – and then follow the steps below.

- Click on Free space of size that we created earlier and then click on + sign.
- First, we need to create a partition for root. Enter 20480 MB in size, tick on Logical and Beginning of this Space. Set mount point as / and click OK. (Here we are creating root partition of 20 GB, you can create according to the space available but 4 Gb should be minimum.)
- Now create the second partition for Swap. Set the size to 4096 MB, tick on Logical and select use as Swap. (If you have less than 8GB of ram Swap should be double of your Physical memory(RAM). But if you have more than 8 GB of physical memory than Swap should be half the size of it.)
- Allot the remaining space to the home partition. Tick on Logical and select mount point as /home, click OK.
- Now when you are done click on Install Now.
On-screen Installation Instructions
After you click Install Now you will get certain simple onscreen instruction. First, select your time zone and press continue. Then it will ask for certain details like name and password. Do note this password will be required to login to Elementary OS. Fill in the details and click on Continue. This will start the installation of Elementary OS on your system.
Completion of Installation of Elementary OS
The installer will take some time to copy all files and complete installation. When the installation completes it will show a prompt that Installation is complete. Click on Restart Now and it will ask you to remove USB, remove USB flash drive and then press enter.

As we have installed Elementary OS alongside Windows after a reboot you will see Grub bootloader to choose between Elementary OS and Windows. Select Elementary OS and press enter.
First Boot of Elementary OS
At the start, you will see your name and password option, enter the password you kept earlier and press enter. As the OS starts you will get a dialog box for Welcome to elementary OS. You can click on Skip all or next depending on your choice.

Conclusion:
This completes the installation of Elementary OS. If you have any question feel free to ask us in comments we would love to help you.