
Шаг 1 из 3. Цели и пожелания
01. Цели и пожелания
02. Сроки и бюджет
03. Контакты
Цели использования
Можно выбрать несколько
вариантов
Игры в 2K
Игры в 4К
Стриминг
Анимация и 3D графика
Фото и графический дизайн
Видеомонтаж
Визуализация и рендеринг
Машинное обучение
Пожелания
Можно выбрать несколько
вариантов
Персональный дизайн
Дерзкий и яркий
Без RGB подсветки
Минималистичный дизайн
Сделайте все по красоте!
В белом исполнении
Компактный размер важен
Кастомное водяное охлаждение
Самый мощный, VIP
Лимитированная версия
Ноутбук
Свой вариант
FAQ
[Windows 11/10] How to Install Drivers Downloaded from the ASUS Site
Applicable Products: Notebook, Desktop, All-in-One PC, Gaming Handheld, Motherboard
Note: The following installation method is exclusively applicable to devices with x86/x64 architecture. For devices with ARM architecture (such as the Qualcomm® CPU platform), please Click Here to learn How to install the driver for ARM-based devices.
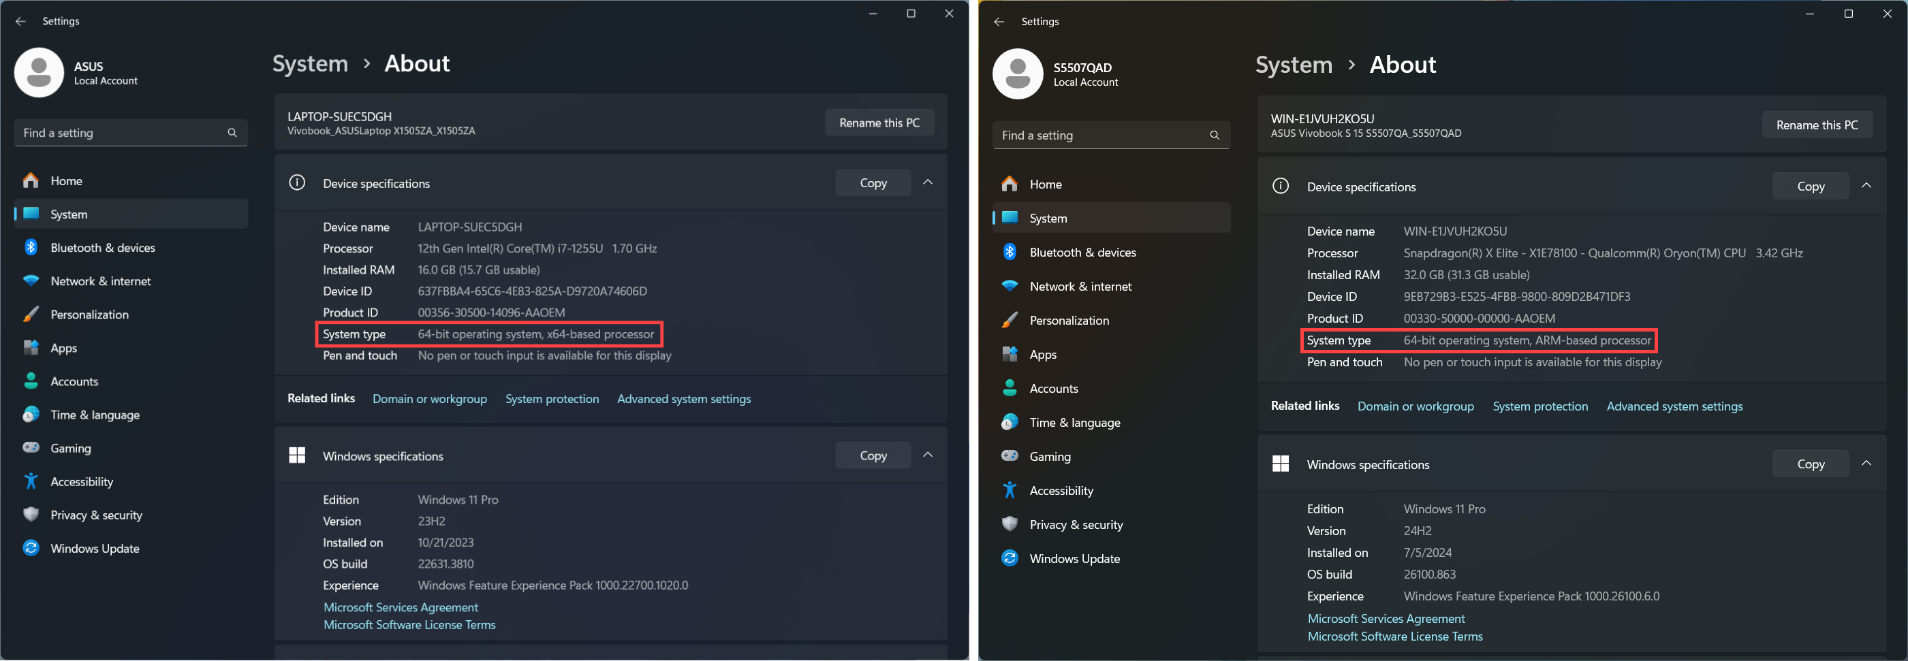
Note: How to determine the architecture of your device
Navigate to Windows Settings > System > About. Here, you can view the architecture of your device under System type. (The image on the left shows an x64 architecture; the image on the right shows an ARM architecture.)
This article explains how to install drivers downloaded from the ASUS support website when the file type is an application (.exe). If the drivers you downloaded from the ASUS support website do not include this file type, please refer to this article: How to Install Drivers When [setup.exe] or [install.exe] Cannot Be Found.
If you need to reinstall the operating system, you can refer to this article for the recommended order of installing drivers: Recommended Order for Installing Drivers.

Note: The following illustrations may vary slightly depending on the model or driver.
- Search for and download the driver you need to install. Learn more about How to search for and download drivers.
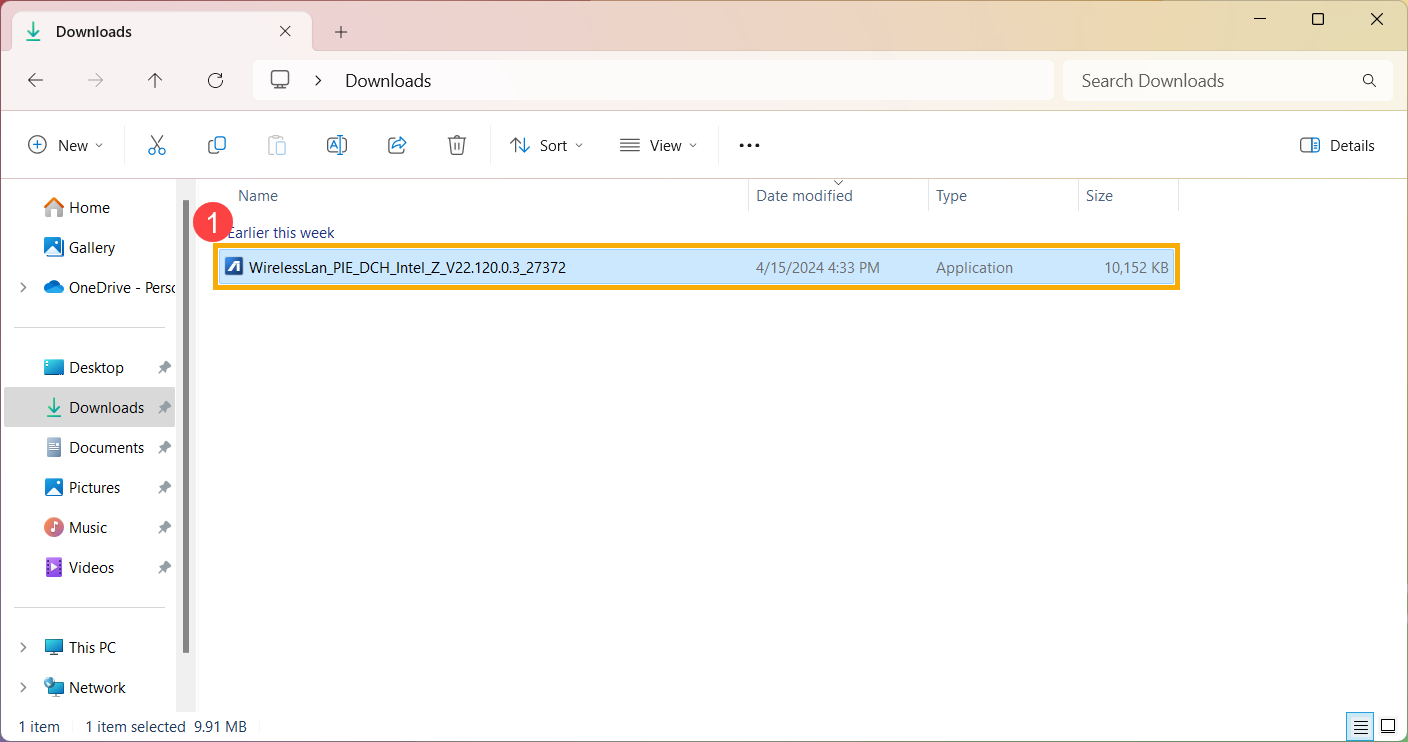
- After downloading, double-click the file you just downloaded to begin the driver installation process①. (Using the WirelessLan_PIE_DCH_Intel_Z_V22.120.0.3_27372 wireless network driver as an example)
Note: If you downloaded a compressed file, right-click and choose ‘Extract All’ first.
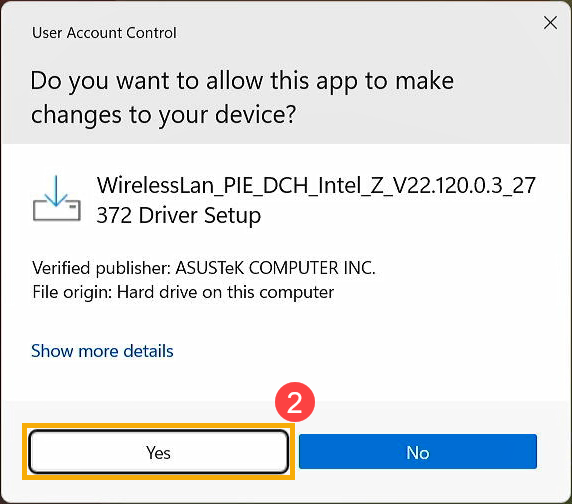
- If a User Account Control window appears, click [Yes]②.
- Choose the language you want to use in the installation program③, then click [OK]④.
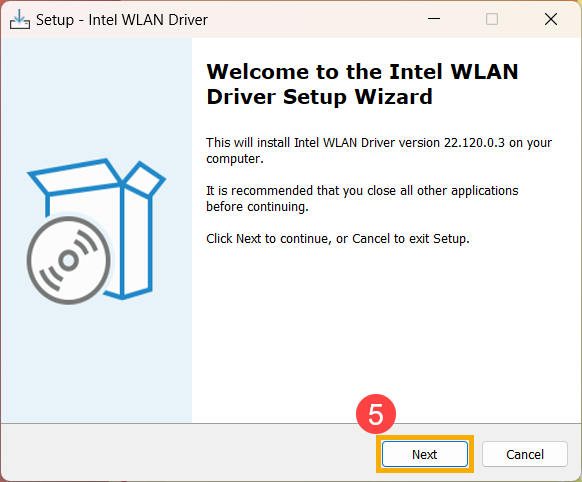
- After the installation program starts, click [Next]⑤ to continue the installation.
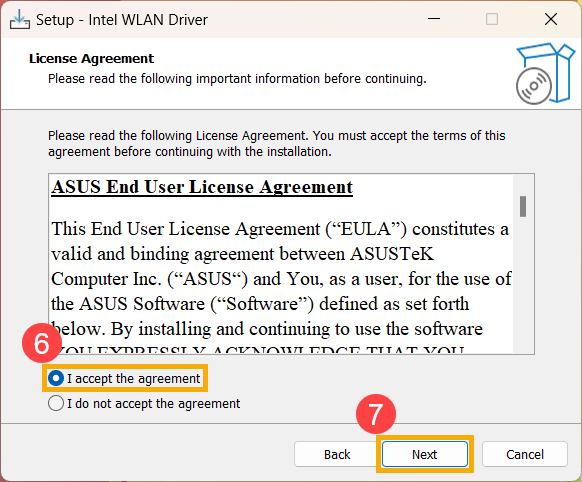
- Please read the ASUS End User Software License Agreement carefully. After confirming, check [I accept the agreement]⑥, then click [Next]⑦ to continue the installation.
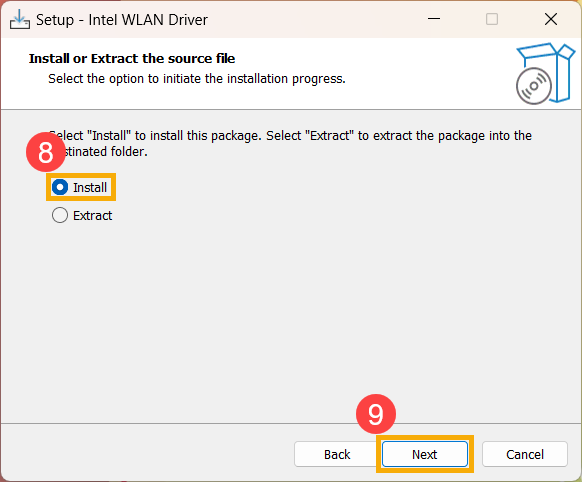
- Choose the action you want to take for this file. Check [Install]⑧, then click [Next]⑨ to continue the installation.
Note: If you choose to extract, this process will only extract the files without installing.
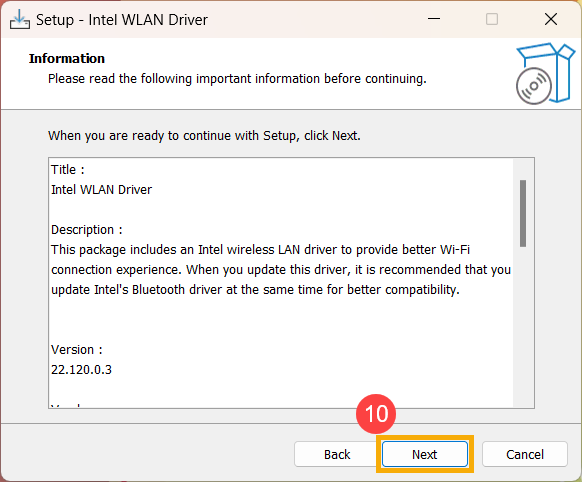
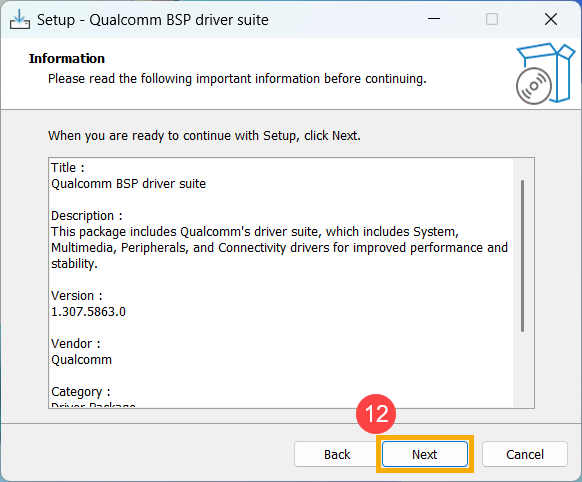
- Please read the following important information before continuing the installation. Then click [Next]⑩ to continue the installation.
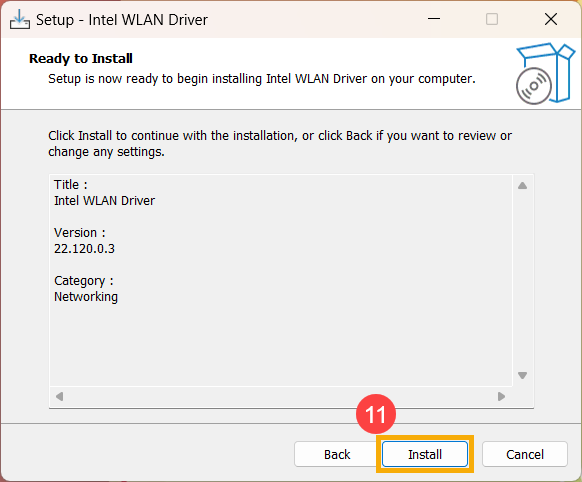
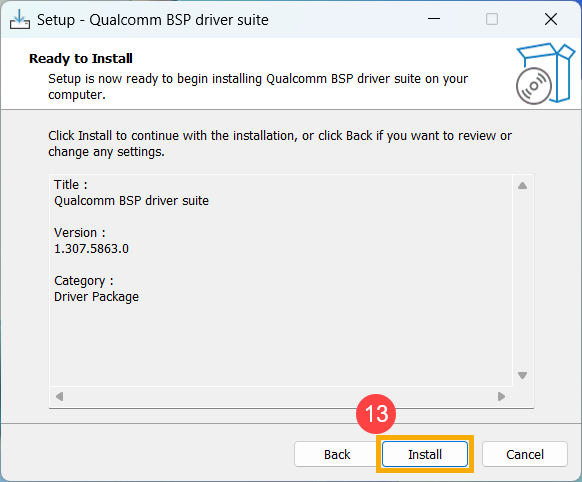
- The installation program is ready to install the driver. Click [Install]⑪ to begin the installation.
Note: Installing drivers may take some time. During the installation, ensure that your device is connected to power and do not force a shutdown to avoid any abnormal issues.
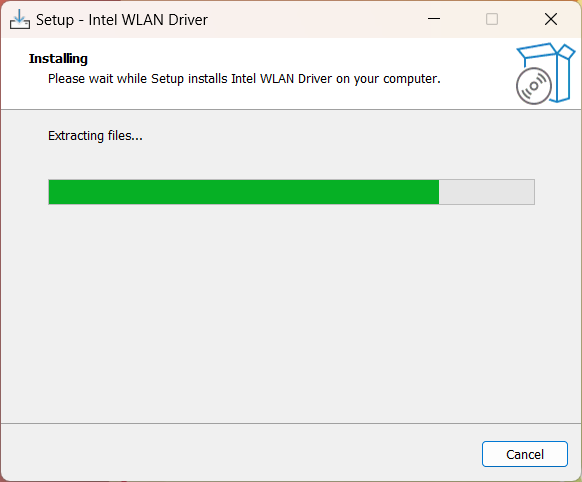
- The installation program is installing the driver. Please wait for the installation to complete.
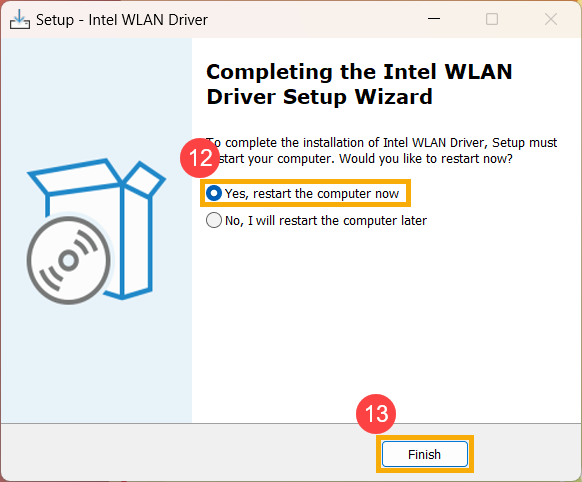
- Some drivers may require restarting your device to complete the setup. Check [Yes, restart the computer now]⑫, then click [Finish]⑬. The device will restart.
Note: Before restarting your device, make sure to save your data to avoid any data loss.
How to install the driver with ARM-based devices
- Go to the ASUS support site with your device’s model name, here you can learn more about How to search and download drivers.
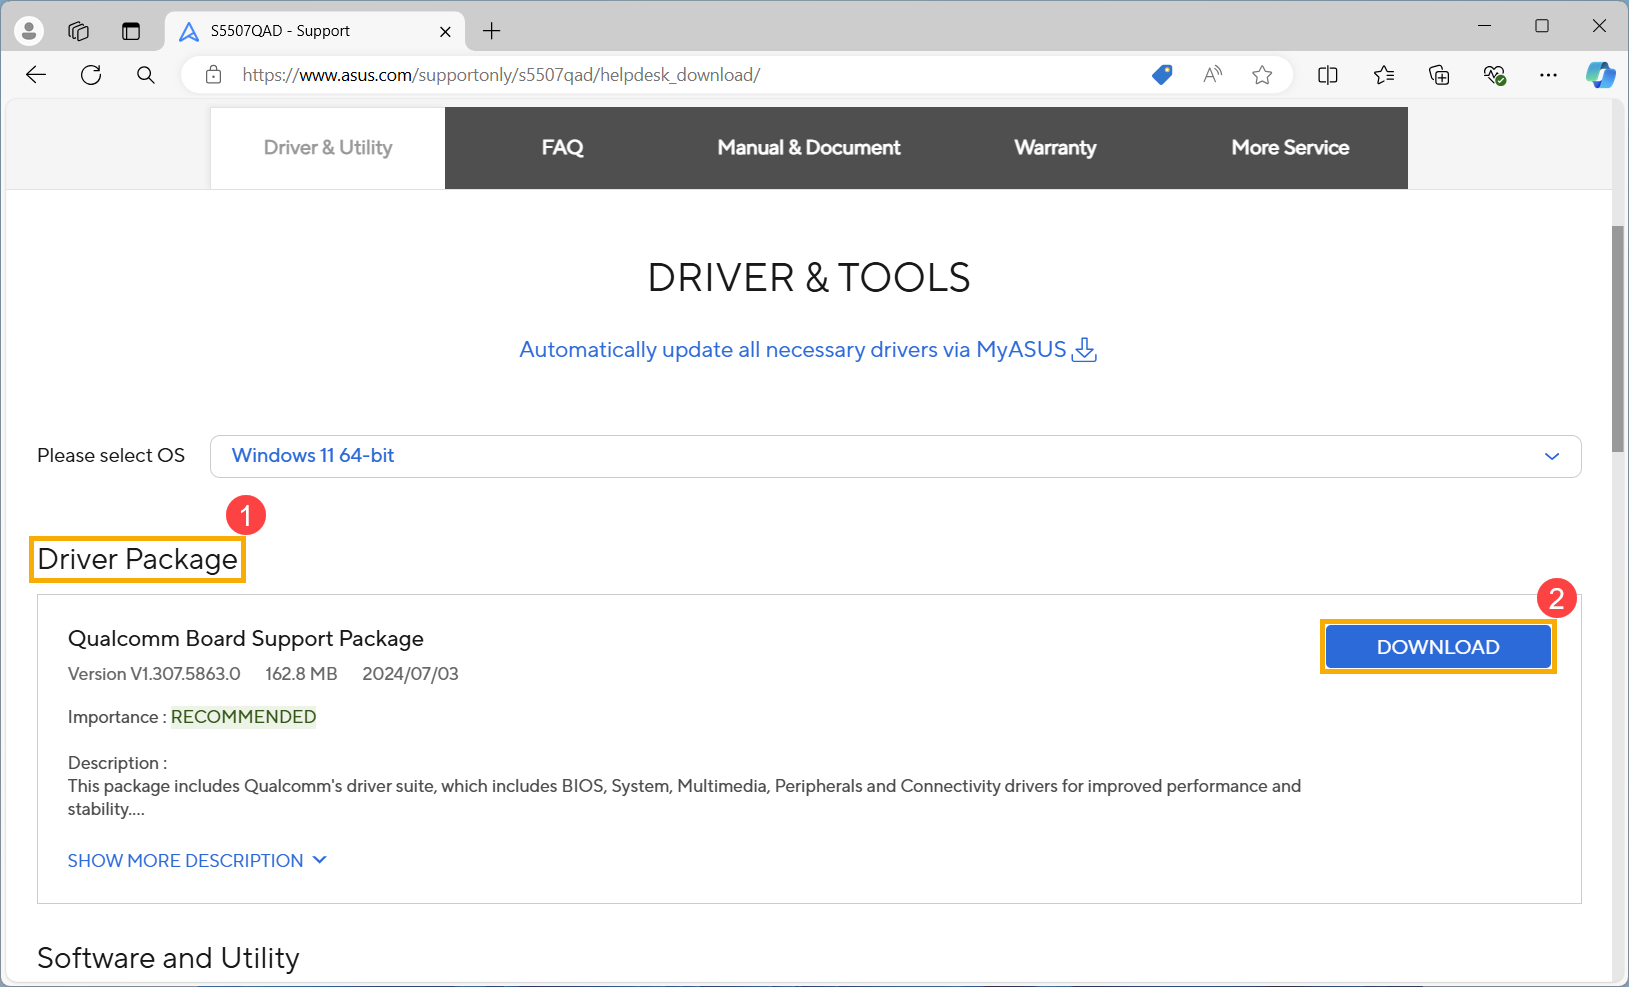
Note: To download the corresponding driver file, please refer to How to check the model name. - After accessing the product support download page, locate the latest version of the Board Support Package① under the Driver Package category, and then click [Download]②.
Note: This package includes BIOS, System, Multimedia, Peripherals and Connectivity drivers. Utilizing this package will update both the BIOS and drivers to the latest versions.
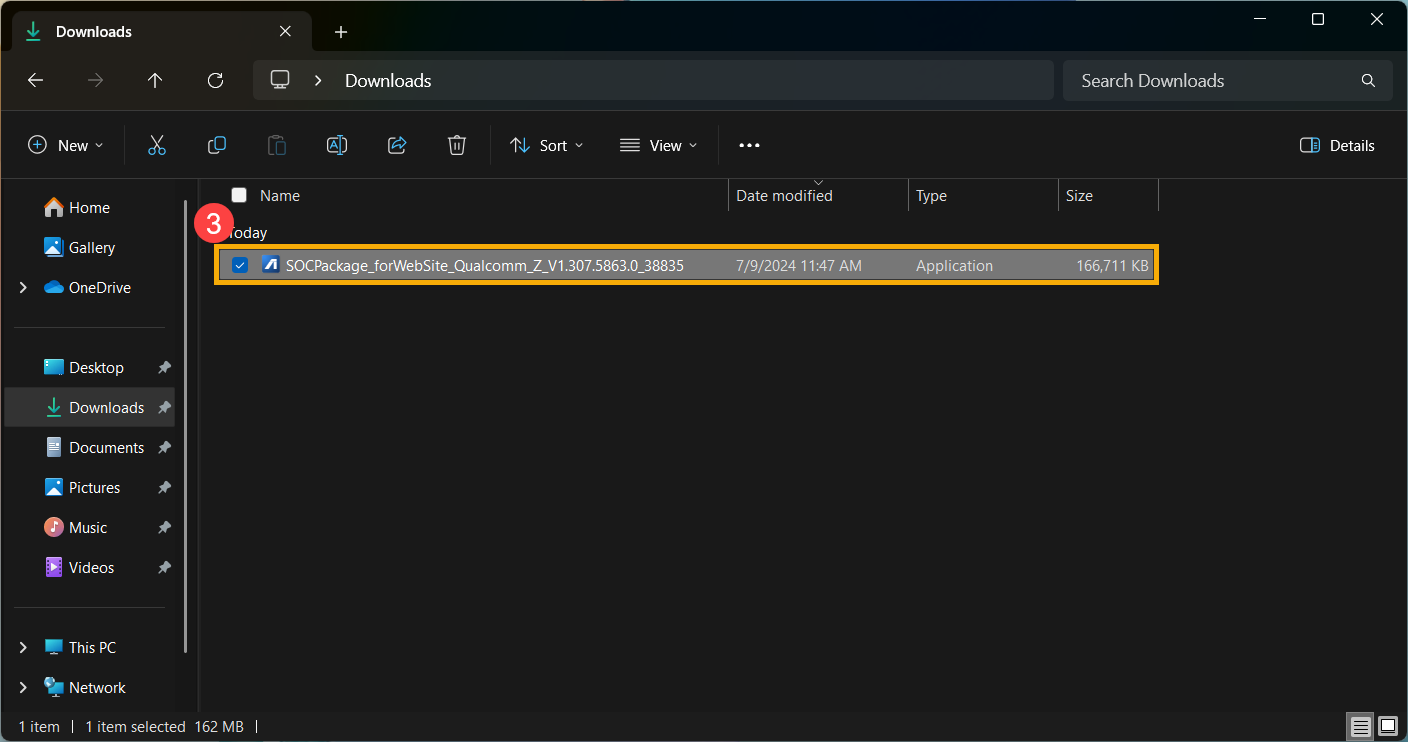
- After downloading, double-click the file you just downloaded to begin the BSP installation process③.
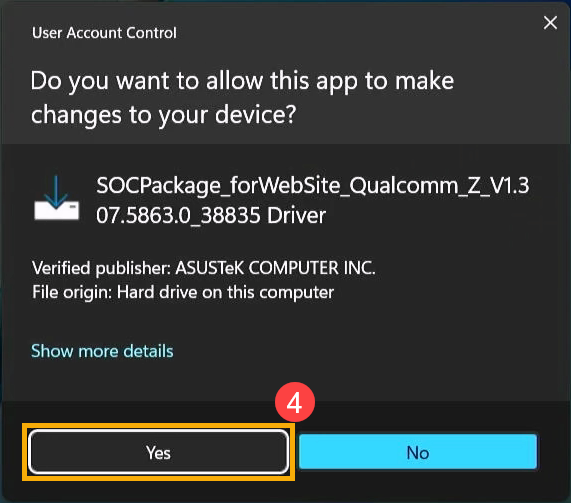
- If a User Account Control window appears, click [Yes]④.
- Choose the language you want to use in the installation program⑤, then click [OK]⑥.
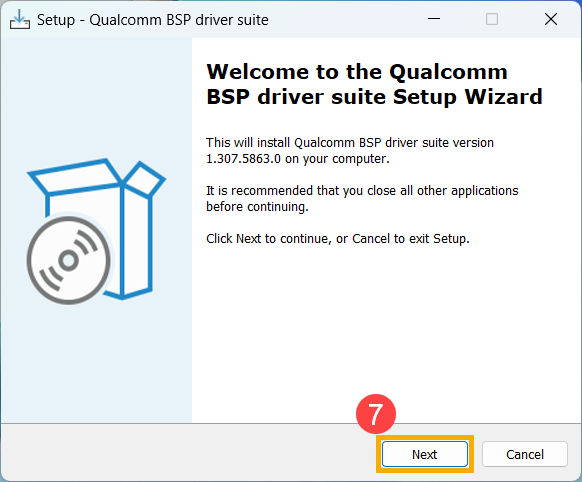
- The setup wizard will guide you to start the BSP installation process, click [Next]⑦.
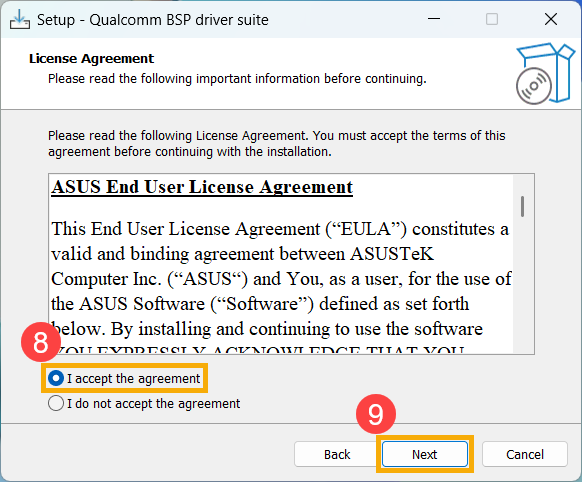
- Please read the License Agreement, and check the box to [I accept the agreement]⑧ and then select [Next]⑨.
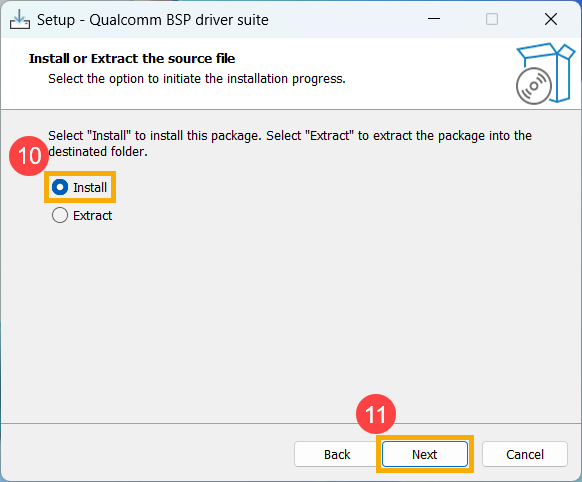
- Follow the indicator to process the BSP update installation.
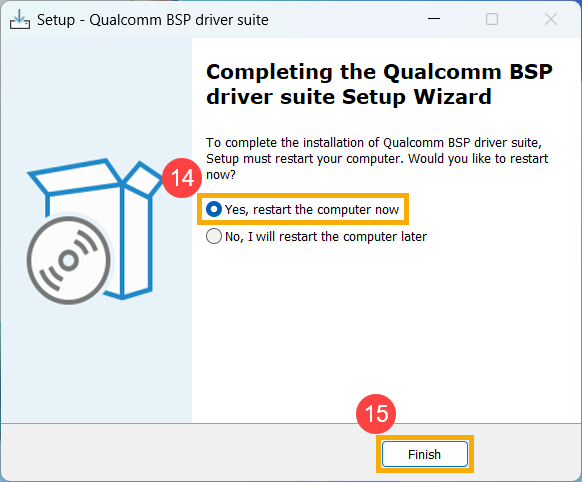
- Select [Yes, restart the computer now]⑭, then click [Finish]⑮. The device will restart and enter the update screen.
Note: Before restarting the device, please ensure to save your work to prevent any data loss.
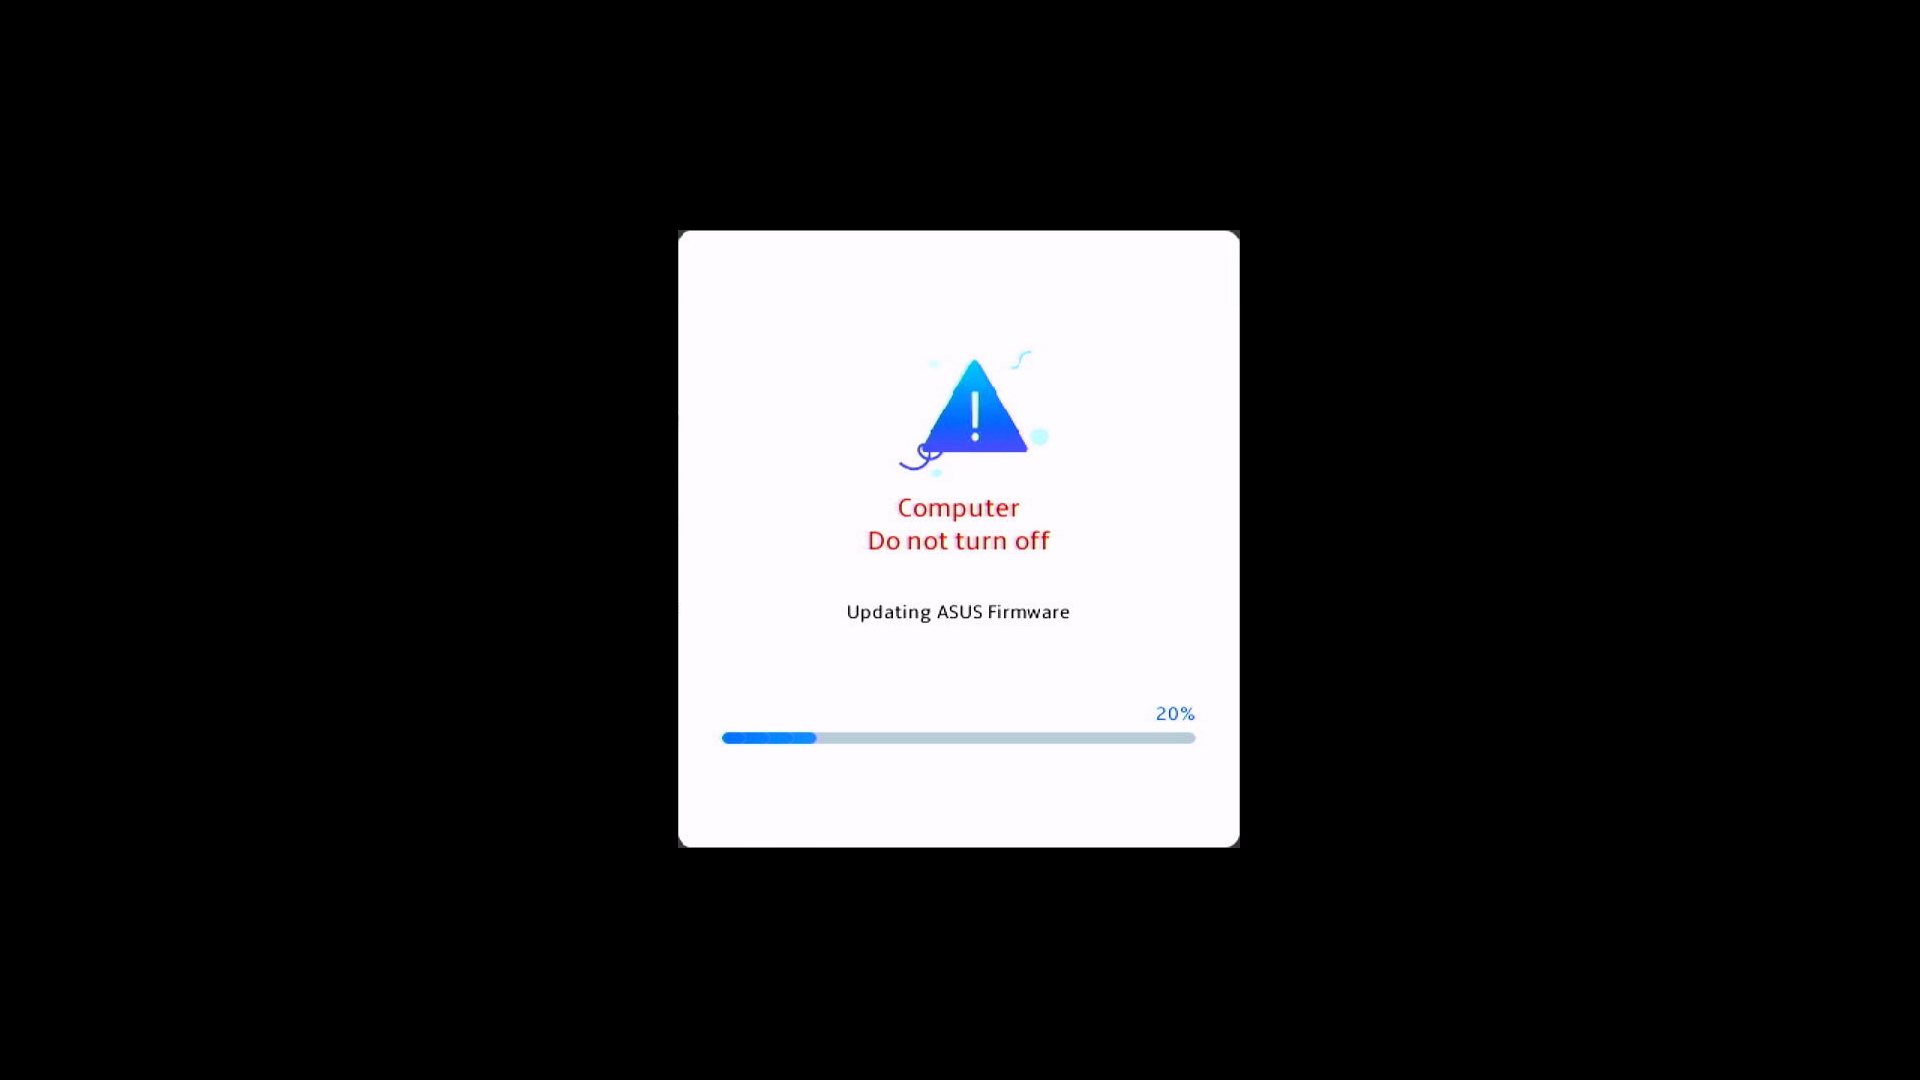
- The device is currently undergoing an update.
Note: Ensure that the device is connected to power and do not force shutdown during the update to prevent any abnormal issues.
- Upon completion of the update, the device will automatically reboot into the Windows operating system.
Was this information helpful?
Yes
No
- Above information might be partly or entirely quoted from exterior websites or sources. please refer to the information based on the source that we noted. Please directly contact or inquire the sources if there is any further question and note that ASUS is neither relevant nor responsible for its content/service
- This information may not suitable for all the products from the same category/series. Some of the screen shots and operations could be different from the software versions.
- ASUS provides the above information for reference only. If you have any questions about the content, please contact the above product vendor directly. Please note that ASUS is not responsible for the content or service provided by the above product vendor.
- Brand and product names mentioned are trademarks of their respective companies.
-
Home
-
News
- ASUS Audio Driver Download and Update Guide
By Alisa |
Last Updated
This post introduces some ways to help you download and update ASUS audio drivers on laptop or PC. For more computer tips and solutions and useful software, you can visit our official website: https://www.minitool.com/.
Way 1. Download and Update ASUS Audio Driver from Device Manager
- Press Windows + X keyboard shortcut and select Device Manager to open Device Manager on Windows 10/11.
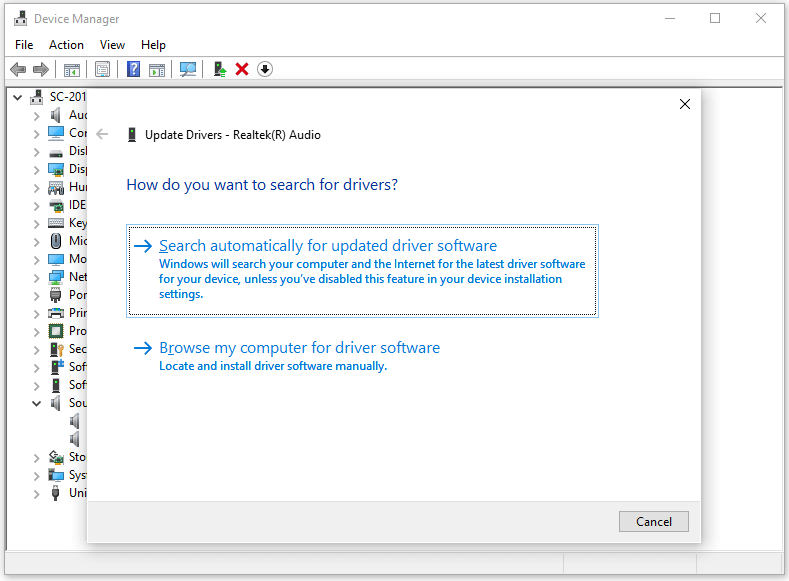
- Expand Sound, video and game controllers category, right-click the ASUS audio device like Realtek Audio and select Update driver.
- In the pop-up window, select Search automatically for updated driver software. Windows will search your computer and the Internet for the latest driver software for your device, download and install the available updates for your ASUS Realtek audio driver. You can also use the same way to update drivers for other components of your ASUS PC or laptop.
Tip: If your ASUS PC or laptop uses Realtek Audio, you can also go to Realtek official website to find the available Realtek audio driver updates to download for your PC.
If you want to download the latest drivers for other ASUS products and firmware, you can also go to ASUS Download Center page. You can enter the model name of your ASUS device and click Driver & Utility next to the product to check available drivers.
Way 2. Update ASUS Audio Driver with Windows Update
Some driver updates may be available with Windows Update. You can download and install ASUS audio driver updates through Windows Update.
Click Start -> Settings -> Update & Security -> Windows Update. Click Check for updates button to check for new updates of your OS. If there are any new updates available for the audio driver, you can click Download to automatically download and install the ASUS audio driver updates.
Way 3. Utilize a Driver Updater Program
To help you manage drivers on your ASUS laptop or PC, you can also use a top free driver updater program. Generally, the driver updater software can help you automatically detect and download newer updates of drivers on PC or laptop.
How to Troubleshoot Sound Problems on ASUS PC/Laptop
If ASUS audio driver is not working, you may try the tips below to troubleshoot sound problems on your ASUS laptop or PC.
Fix 1. Update ASUS audio driver. You can follow the guide above to update ASUS audio driver to see if it help fix the audio problems.
Fix 2. Reinstall ASUS audio driver. Alternatively, you can also select Uninstall when you right-click your audio device in Device Manager to remove the audio driver, then restart your computer to reinstall the ASUS audio driver.
Fix 3. More solutions to fix sound problems in Windows 10.
Bottom Line
This post offers a guide for ASUS audio driver download and update in Windows 10/11. For more computer tips and tricks, you can go to our News library.
If you want some useful computer programs, MiniTool Software provides you free tools like MiniTool Power Data Recovery, MiniTool Partition Wizard, MiniTool ShadowMaker, MiniTool MovieMaker, MiniTool Video Converter, MiniTool Video Repair, etc. If you are interested in these tools, you can download and try them. To recover deleted or lost files, photos, videos, etc. from computers and other storage devices, you can try the best data recovery software – MiniTool Power Data Recovery.
About The Author
Position: Columnist
Alisa is a professional English editor with 4-year experience. She loves writing and focuses on sharing detailed solutions and thoughts for computer problems, data recovery & backup, digital gadgets, tech news, etc. Through her articles, users can always easily get related problems solved and find what they want. In spare time, she likes basketball, badminton, tennis, cycling, running, and singing. She is very funny and energetic in life, and always brings friends lots of laughs.
Все способы:
- Шаг 1: Удаление старого драйвера
- Шаг 2: Установка
- Возможные проблемы
- Вопросы и ответы: 0
Шаг 1: Удаление старого драйвера
Если программное обеспечение уже использовалось в операционной системе, то рекомендуется сначала удалить старый драйвер, чтобы избежать конфликта между версиями ПО Realtek HD. Если ОС «чистая» и звуковой драйвер еще не устанавливался, то можно пропустить этот шаг и сразу переходить к следующему.
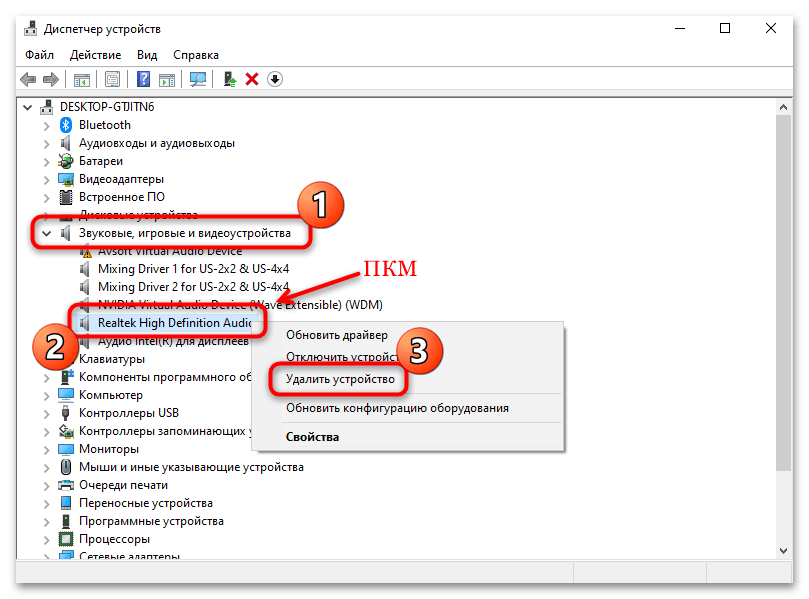
- Откройте встроенное средство «Диспетчер устройств». Для этого можно использовать сочетание клавиш «Win + X», после чего выбрать соответствующий пункт.
- Разверните меню «Звуковые, игровые и видеоустройства» и найдите драйвера для Realtek High Definition Audio. Щелкните по названию правой кнопкой мыши и из контекстного меню выберите функцию удаления устройства.
- В новом окне подтвердите действие.
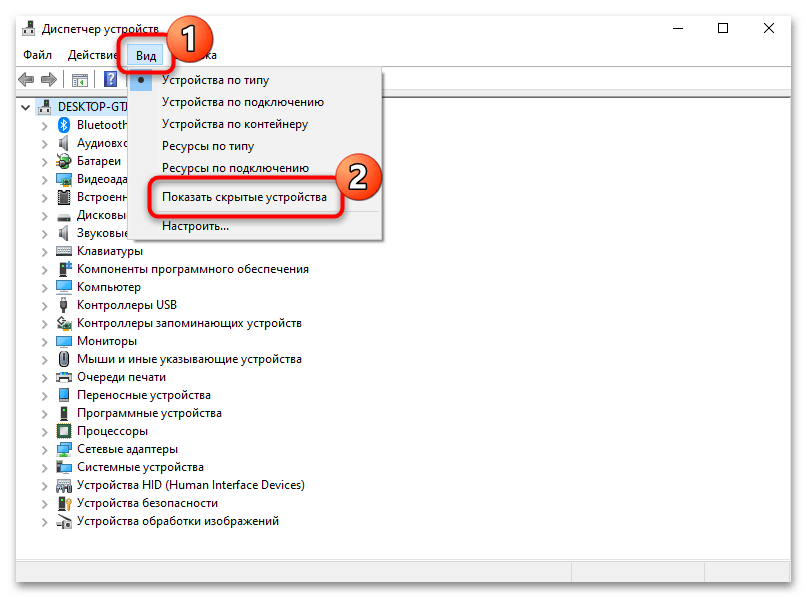
Также рекомендуется поискать дубликаты этого устройства. Для этого на вкладке «Вид» вверху интерфейса «Диспетчера устройств» отметьте опцию «Показать скрытые устройства». Удаляйте ПО аналогичным способом.
После удаления программного обеспечения необходимо перезагрузить операционную систему, чтобы изменения вступили в силу.
Скорее всего, после этого звук пропадет, но после установки Realtek HD все компоненты автоматически возобновят свою работу.
Шаг 2: Установка
Для начала потребуется скачать утилиту Realtek HD, причем нужно определить разрядность и версию операционной системы при загрузке. Процедура инсталляции несложная, поскольку предустановлен пошаговый мастер. Достаточно следовать алгоритму в соответствии с инструкциями.
Скачать Realtek HD
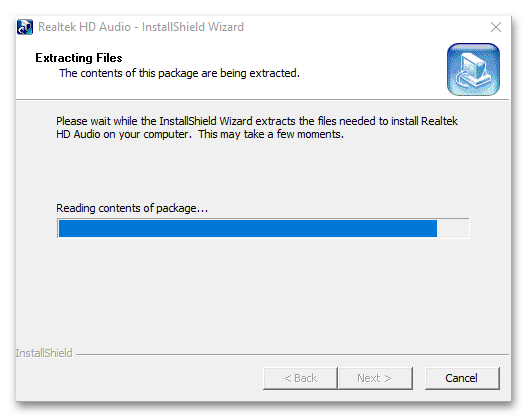
- Скачайте и запустите установочный файл. Автоматически начнется извлечение компонентов, которые необходимы для установки.
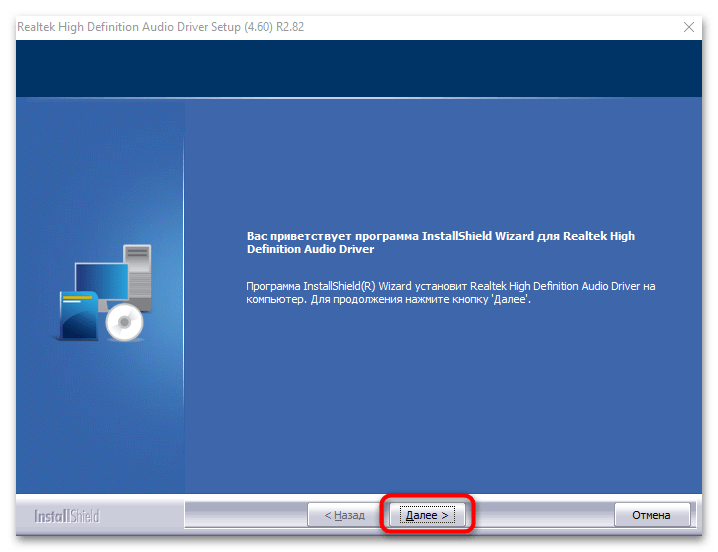
- Запустится пошаговый мастер. Нажмите на кнопку «Далее», чтобы продолжить установку.
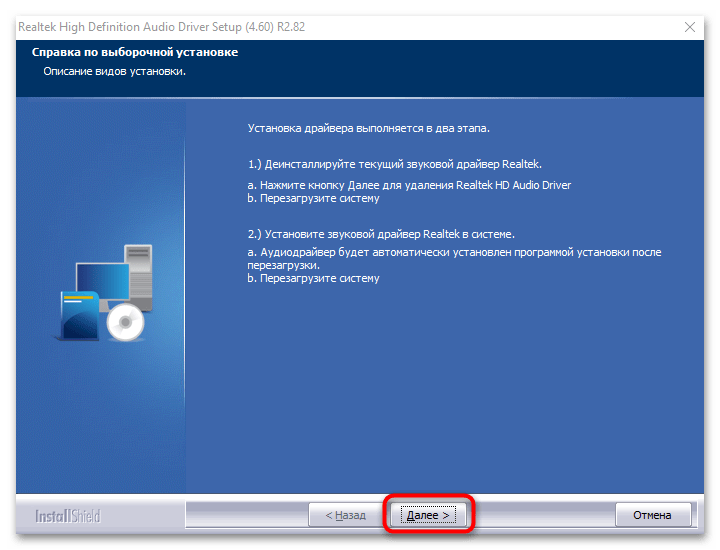
- В следующем окне появится небольшая инструкция. Ознакомьтесь с ней и продолжите инсталляцию.
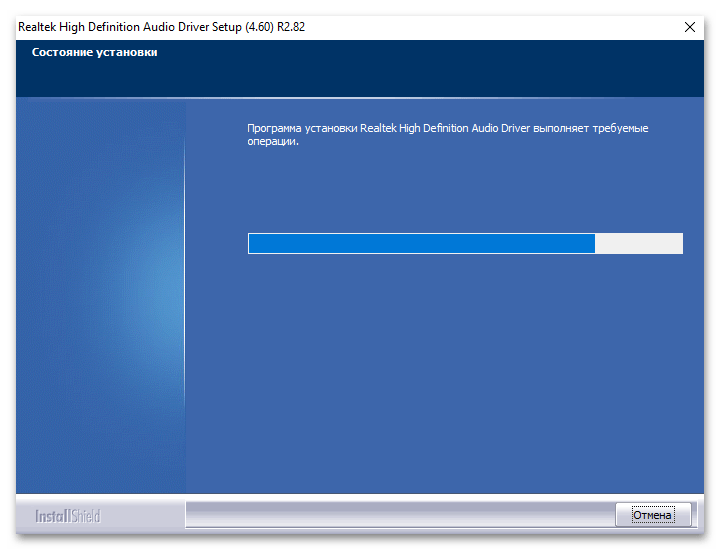
- Если вы пропустили первый шаг с ручным удалением, мастер установки автоматически удалит обнаруженное старое программное обеспечение. Затем начнется установка нужных компонентов. Это может занять некоторое время.
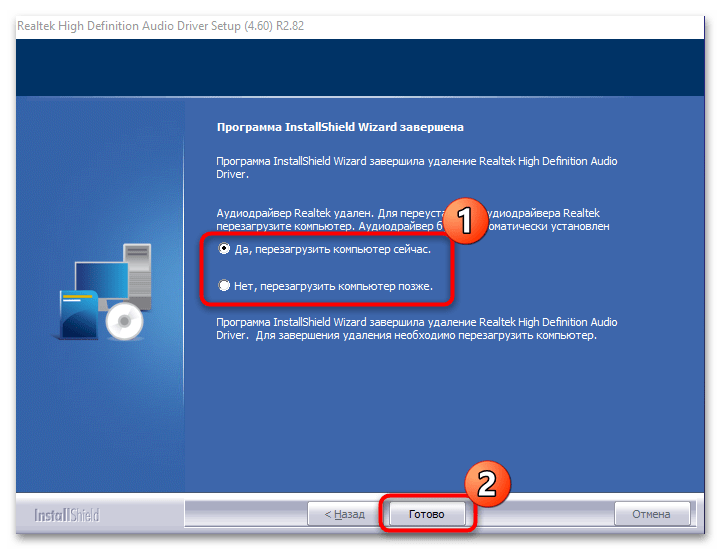
- Когда все будет установлено, программа предложит перезагрузить устройство. Чтобы звук снова появился, рекомендуется сделать это. Но также можно отложить перезапуск на более удобное время. Нажмите кнопку «Готово».
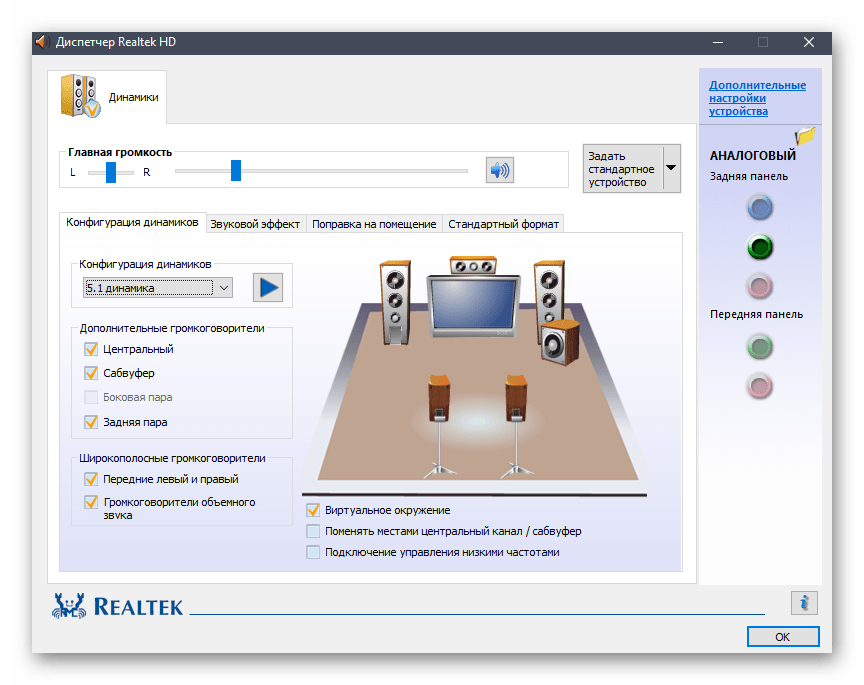
На этом установка Realtek HD завершена. Приложение для дополнительной настройки звука (оно называется Диспетчер Realtek HD) можно найти среди установленного софта, например через поиск в «Пуске» по запросу «realtek». Если не удается найти данную программу, читайте статью дальше.
Кстати, вы также можете устанавливать любые драйверы при помощи специальных помощников.
Подробнее:
Программы для установки драйверов
Как обновить драйверы на компьютере
Возможные проблемы
Если во время установки возникли какие-либо проблемы, то решить большинство из них можно самостоятельно.
Realtek HD не устанавливается
Нередко причиной становится конфликт программного обеспечения или несовместимая с операционной системой версия драйвера. Бывает, что установка Realtek HD не удается из-за неполадок со звуковым оборудованием или чипом на материнской плате; неполадки в Windows также могут стать причиной неудачной инсталляции. Большинство проблем и путей их решения разобрано в нашем отдельном материале.
Подробнее: Не устанавливается Realtek HD в Windows 10
Отсутствует ярлык для запуска / Не стартует вместе с Windows / Автоматически закрывается
Самая распространенная проблема с уже установленным Realtek HD – это отсутствие иконки Диспетчера в трее или значка на рабочем столе. Кроме того, из-за разных сбоев этот Диспетчер может автоматически закрываться или даже не запускаться вместе с операционной системой. Как исправить открытие данного приложения, можете узнать из следующего материала.
Подробнее: Как открыть Диспетчер Realtek HD в Windows 10
Диспетчер Realtek HD не запускается
Если установленный Диспетчер Realtek HD не запускается, источник проблемы следует искать в операционной системе. Наш автор в отдельной инструкции объяснял, что делать в этой ситуации, даже если звуковое оборудование не отображается в «Диспетчере устройств».
Подробнее: Не открывается Realtek HD в Windows 10
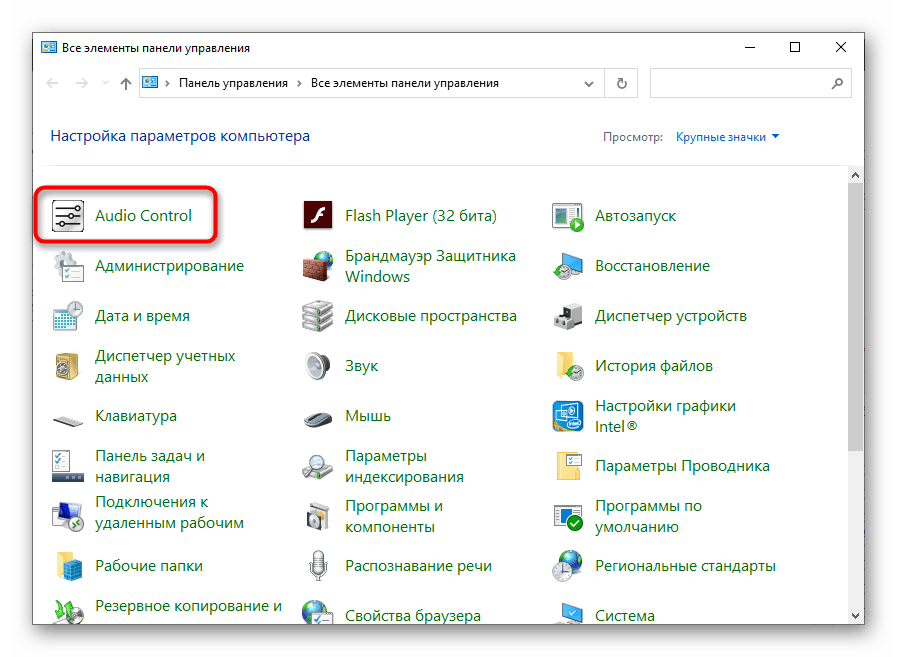
Диспетчер пропал из «Панели управления»
Если вы привыкли запускать Диспетчер Realtek HD через «Панель управления» Windows, но теперь его значка там нет, вывести его можно через «Параметры» Windows 10. Существуют альтернативные методы запуска, о которых можно узнать из отдельного руководства на нашем сайте.
Подробнее: Нет значка диспетчера Realtek HD в «Панели управления»
Наша группа в TelegramПолезные советы и помощь