
-
Download the installer:
-
Miniconda installer for
Windows -
Anaconda Distribution installer for
Windows -
Miniforge installer for Windows
-
-
Verify your installer hashes.
-
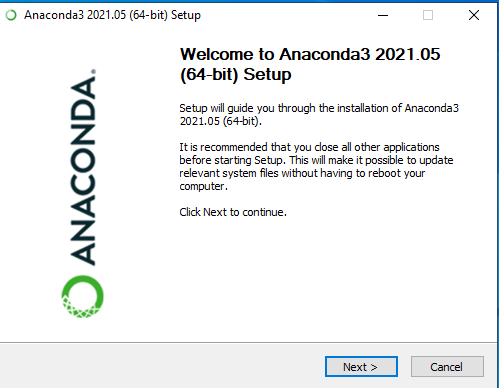
Double-click the
.exefile. -
Follow the instructions on the screen.
If you are unsure about any setting, accept the defaults. You
can change them later.When installation is finished, from the Start menu, open either the Anaconda Command Prompt (cmd.exe)
if using Miniconda or Anaconda Distribution, and the Miniforge Command Prompt if using Miniforge. Powershell
prompts are also available. -
Test your installation. In your terminal window, run the command
conda list. A list of
installed packages appears if it has been installed correctly.
Installing in silent mode#
Note
The following instructions are for Miniconda but should also work
for the Anaconda Distribution or Miniforge installers.
Note
As of Anaconda Distribution 2022.05 and Miniconda 4.12.0, the option to add Anaconda
to the PATH environment variable during an All Users installation has been disabled. This
was done to address a security exploit.
You can still add Anaconda to the PATH environment variable during a Just Me installation.
To run the the Windows installer for Miniconda in
silent mode, use the /S
argument. The following optional arguments are supported:
-
/InstallationType=[JustMe|AllUsers]—Default isJustMe. -
/AddToPath=[0|1]—Default is0 -
/RegisterPython=[0|1]—Make this the system’s default
Python.
0indicates Python won’t be registered as the system’s default.1
indicates Python will be registered as the system’s default. -
/S—Install in silent mode. -
/D=<installation path>—Destination installation path.
Must be the last argument. Do not wrap in quotation marks.
Required if you use/S.
All arguments are case-sensitive.
Example: The following command installs Miniconda for the
current user without registering Python as the system’s default:
start /wait "" Miniconda3-latest-Windows-x86_64.exe /InstallationType=JustMe /RegisterPython=0 /S /D=%UserProfile%\Miniconda3
Updating conda#
-
Open Command Prompt or PowerShell from the start menu.
-
Run
conda update conda.
Uninstalling conda#
-
In the Windows Control Panel, click Add or Remove Program.
-
Select Python X.X (Miniconda), where X.X is your version of Python.
-
Click Remove Program.
Note
Removing a program is different in Windows 10.
Last Updated :
20 Apr, 2022
Anaconda is open-source software that contains Jupyter, spyder, etc that is used for large data processing, data analytics, heavy scientific computing.
Conda is a package and environment management system that is available across Windows, Linux, and MacOS, similar to PIP. It helps in the installation of packages and dependencies associated with a specific language like python, C++, Java, Scala, etc. Conda is also an environment manager and helps to switch between different environments with just a few commands.
Installing Conda on Windows:
Follow the below steps to install conda on windows:
Step 1: Visit this website and download the Anaconda installer.

Step 2: Click on the downloaded .exe file and click on Next.
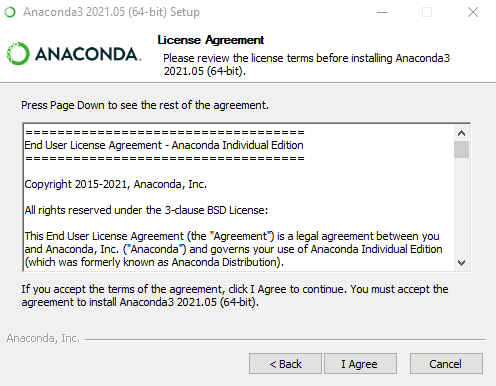
Step 3: Agree to the terms and conditions.
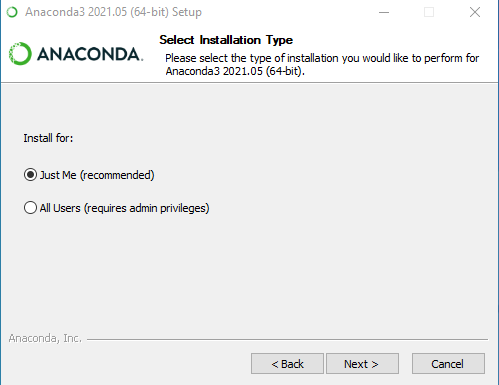
Step 4: Select the installation type.
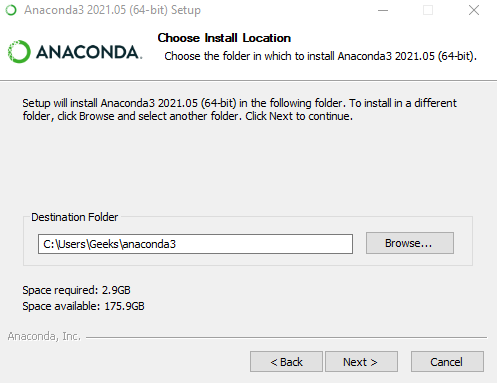
Step 5: Choose the installation location.
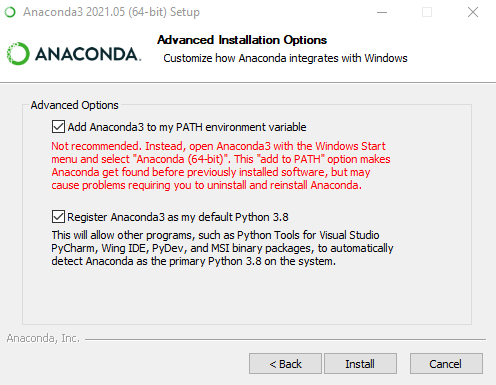
Step 6: Now check the checkbox to add Anaconda to your environment Path and click Install.
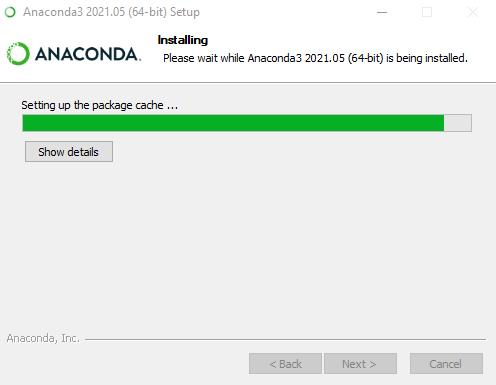
This will start the installation.
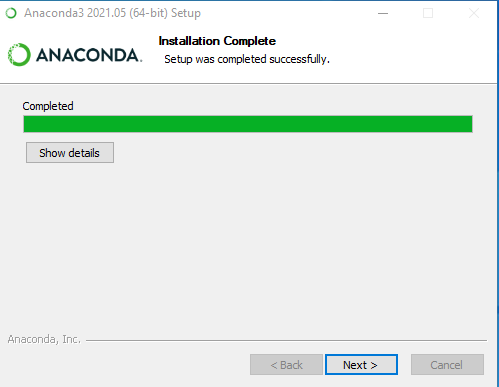
Step 7: After the installation is complete you’ll get the following message, here click on Next.
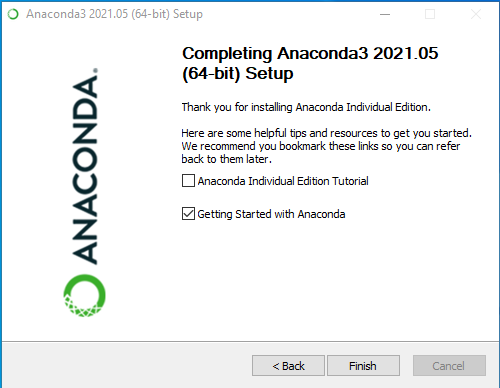
Step 8: You’ll get the following screen once the installation is ready to be used. Here click on Finish.
Verifying the installation:
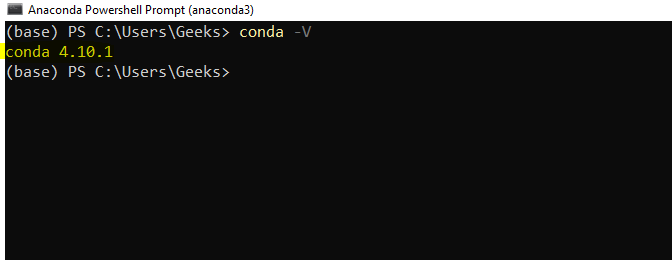
Now open up the Anaconda Power Shell prompt and use the below command to check the conda version:
conda -V
If conda is installed successfully, you will get a message as shown below:
This page provides instructions for installing Anaconda Distribution on Windows, macOS, and Linux.
Basic install instructions
Advanced install options
For more advanced installation instructions, such as installing with silent mode, installing on older operating systems, or multi-user installs, see Advanced installation.
Other ways to get Anaconda or Miniconda
For instructions on using Anaconda Docker images or the Anaconda Cloudera Distributed Hadoop cluster, see Applications/Integrations.
Problems?
- Troubleshooting guide for general troubleshooting
- Help and support for resources such as community support and bug reports
What’s next?
Get started programming with Anaconda in the Getting started with Anaconda guide.
Visit Anaconda.com to start programming for FREE in a notebook. Learn how from Anaconda Learning, too!
Here in this tutorial, we will learn the steps to install open source Anaconda Navigator on WSL- Windows Subsystem for Linux – Windows 10 or 11 using Ubuntu 20.04/22.04 Linux App.
Install Anaconda Navigator on the WSL Ubuntu app for Windows 10 or 111. Enable WSL and Install Ubuntu App2. Open Ubuntu Linux APP3. Update and Upgrade the WSL app4. Download Anaconda Navigator5. Run the installer script6. Accept the License terms7. Select the Installation directory8. Reload the Shell9. Start using the Anaconda on WSL Ubuntu10. Run Anaconda Navigotr GUI on WSL
Although Anaconda Navigator by default is available for Windows 10 or 11 in the executable file format. However, if you still want to install it on the Linux interface that is running on WSL 1 or WSL 2 Linux Apps such as Ubuntu, then that is possible as well.
If you want to know about the Anaconda, it is essential software that has been developed to use with Python and other scientific packages and their dependencies, such as conda. It supports Linux, Mac, and Windows systems, and can easily solve the coexistence, switching, and various third-party packages of multiple versions of Python.
The installation of Anaconda is quite easy and for those who don’t want to deal with the command-line interface to install packages, various dependencies, and create an environment it also offers the Graphical user interface called Anaconda Navigator…
Once Anaconda is installed, python, conda, numpy, scipy, pandas, and other common scientific computing packages that may be used in general are installed, without the need to download the configuration separately. Due to the split of python3 and python2, using virtualenv to configure with pip, is often very handy.
Install Anaconda Navigator on the WSL Ubuntu app for Windows 10 or 11
Those who are familiar with the working of Linux would already know the installation process of Anaconda on WSL 1 or 2, however, the key thing is how to access its graphical user interface i.e Navigator. And that you will know here.
1. Enable WSL and Install Ubuntu App
Those who are new to WSL – Windows 10 Subsystem for Linux must know that the Ubuntu Linux App we download from the Microsoft store will not work until and unless the WSL feature is not enabled on the system. Therefore, I am assuming that you have already activated and downloaded the WSL along with the Linux app to run over it. However, if not then follow this tutorial: How to enable the Windows Subsystem for Linux feature.
2. Open Ubuntu Linux APP
Now, go to the search box and type Ubuntu. Select version 20.04 or 22.04, whatever is available on your Windows 10 or 11 to be used with WSL.

3. Update and Upgrade the WSL app
Before moving further let’s make sure already existing packages on the Linux system are up to date and have their latest state. For that simply run:
sudo apt updatesudo apt upgrade4. Download Anaconda Navigator
Open the browser of your Windows 10 or 11 system and go to the official website of Anaconda to download it, here is the link for the same. Scroll to the bottom, right-click on the Linux 64-Bit (x86) Installer, and copy its link.

After that get back to the Ubuntu WSL app, type wget and paste the link, for example:
wget paste-linkExample:
wget https://repo.anaconda.com/archive/Anaconda3-2022.10-Linux-x86_64.shWait for some time until it won’t get completely downloaded on your system. The size of the script will be around 550 MB, thus it would take some time depending on the internet connection you have.
5. Run the installer script
Now we have the Anaconda Installer script, let’s run it to trigger the installation process. type ls
You will see the downloaded file.
Type bash or ./ with filename
For example, the name of the file we downloaded in this tutorial is Anaconda3-2022.10-Linux-x86_64.sh, thus the installation command will be:
bash Anaconda*-*-Linux-x86_64.sh

or

./Anaconda*-*-Linux-x86_64.sh
6. Accept the License terms
The installer will get activated and ask you to press the Enter key to start the process. When the License Term appears, either read it using the Enter key or just skip the same by simply pressing the ‘q’ key on the keyboard.
After that type Yes to accept the terms and conditions.
7. Select the Installation directory
By default, the Anaconda Navigator on Linux will create the installation folder under the home directory of the system. Thus, you can let it use the same. However, if you want to use some other place on the system then assigned that path and then press the Return key.
Wait for a few minutes until the process of setting up Anaconda Navigator on WSL Ubuntu has not been completed. Once done move to the next step.

8. Reload the Shell
Instead of closing the Ubuntu WSL app to make sure the installation will take place effectively, simply reload the shell. For that:
source ~/.bashrc9. Start using the Anaconda on WSL Ubuntu
Now you can start using the command-line interface for creating the Anaconda environment with different packages for the various projects without interfering with one and another. Well, those who would like to have the Graphical User interface go to the next step.
Error:
QStandardPaths: XDG_RUNTIME_DIR not set, defaulting to '/tmp/runtime-h2s'
qt.qpa.screen: QXcbConnection: Could not connect to display
Coulld not connect to any X display.
10. Run Anaconda Navigotr GUI on WSL
As we know by default, the WSL will not let you open the Graphical Apps straight on the default shell screen, However, there is an alternate way of doing that.
Go to MobaXterm and download it. This is lightweight software that comes with various inbuilt tools to access SSH servers, VNC, SFTP, Command Terminal, and more.
- Open the MobaXterm, once you have that on your system.
- Click on the Session option given in the Menu of its.
- Select WSL available at the end of the tools menu.
- From Basic WSL Setting, click on the Dropdown box and select Ubuntu and press the OK button.
- Now you will see your Ubuntu WSL app on MobaXterm, great.
- There, simply type:
anaconda-navigator - That’s it, this will open the graphical user interface of the Anaconda running on the Ubuntu WSL app of Windows 10.
- Start creating environments and Installation of different packages directly from the GUI of Navigator.


This article will cover in a nutshell my journey back into Linux for Python development. I was running Python on my Win10, but when Chris Moffitt over at Practical Business Python (excellent site!) wrote about Using WSL to Build a Python Development Environment on Windows – Practical Business Python, I had to give it a crack. So I have to give credit to Chris for his post and please check it out as he goes into much more depth than what I will cover.
This article will be 1 of 3 setup articles I plan to write. This was my first setup and while I was running some deep neural network models, my Surface Pro 3 was grinding to a halt. So I set up a newer Surface Laptop 3 on WSL 1 (WSL 2 not available on the newer Surface machines!) with Debian and pip python management. I found the dual setup cumbersome, so I moved over to a Mac for my third setup.
Some things may be dated as I performed the setup some months ago. Be sure to check the docs for the latest commands.
Install Windows Subsystem for Linux
I will be closely following Microsoft’s Guide and for screenshots and in-depth explanations refer to Chris’s article.
WSL 1 or 2
Refer to the docs for a comparison of WSL 2 and WSL 1. They claim WSL 2 has “increase file system performance and support full system call compatibility.”
WSL should be stock standard in 2020, but at the time of writing, I still could not upgrade to the 2020 version of Windows 10 on my new Surface laptop 3. So I will copy and paste the criteria for info. Hopefully, MS will have rolled it out and we can ignore this blurb.
To update to WSL 2, you must meet the following criteria:
– Running Windows 10, updated to version 1903 or higher, Build 18362 or higher.
– Check your Windows version by selecting the Windows logo key + R, type winver, select OK. (Or enter the ver command in Windows Command Prompt). Please update to the latest Windows version if your build is lower than 18361. Get Windows Update Assistant.
For this setup I went with WSL 2. Since MS hasn’t yet released WSL 2 on stock Windows 10, you must sign over your details to Microsoft to enable the Windows Insider Programme. Once you agree to send them all your data, they will invite you into the program and under Settings > Windows Insider Programme you have the option to pick your channel, which will install the required version of Windows 10 to enable WSL 2.
Install your Linux Distribution of Choice
Open the Microsoft Store and choose your favourite Linux distribution.
In the Microsoft store, a search for WSL will bring up common distros. I choose Ubuntu 18.04 LTS at the time and later upgraded to version 20.04 LTS once it was available.
For my Surface Laptop 3 setup, I tried Debian (78 MB), as it is more minimalist compared with Ubuntu (444 MB).
Initializing a newly installed distro
Click the “launch” button in the Microsoft Store app, or launch from the distro from the Start menu.
Set up a new Linux user account and password.
You can choose any username and password you wish – they have no bearing on your Windows username.
Update and upgrade your distro’s packages with:
sudo apt update && sudo apt upgrade
Windows does not automatically update or upgrade your Linux distro(s): This is a task that the Linux users prefer to control themselves.
Enable the optional components
Enable both Windows Subsystem for Linux, and Virtual Machine Platform optional features before installing WSL 2.
Open PowerShell as Administrator and run:
dism.exe /online /enable-feature /featurename:Microsoft-Windows-Subsystem-Linux /all /norestart

dism.exe /online /enable-feature /featurename:VirtualMachinePlatform /all /norestart
Please restart your machine to finish installing both components.
Confirm the features were enabled by clicking the Start or Windows icon and typing in Turn Windows features on or off and ensure the following are checked:
☑︎ Virtual Machine Platform☑︎ Windows Subsystem for Linux
Set a distro to WSL 2
Run the following to get your <Distro> name in PowerShell:
wsl --list --verbose or wsl -l -v
Then set:
wsl --set-version <Distro> 2
Here is my output after running the commands in PowerShell as an Administrator:
PS C:\WINDOWS\system32> wsl -l -v

  NAME            STATE           VERSION
* Ubuntu-18.04    Stopped         1

PS C:\WINDOWS\system32> wsl --set-version Ubuntu-18.04 2

Conversion in progress, this may take a few minutes...
WSL 2 requires an update to its kernel component. For information please visit https://aka.ms/wsl2kernel

PS C:\WINDOWS\system32>
From the first command it confirms that my Ubuntu-18.04 is on WSL 1. When I try to set it to WSL 2, I get the notice to update its kernel component. Go to https://aka.ms/wsl2kernel to download and install.
Note it takes over 1 minute with no status or progress bars. So don’t quit early cause you think nothing is happening (like I did)
Then back to PowerShell and try again:
PS C:\WINDOWS\system32> wsl --set-version Ubuntu-18.04 2

Conversion in progress, this may take a few minutes...
For information on key differences with WSL 2 please visit https://aka.ms/wsl2
Conversion complete.
PS C:\WINDOWS\system32>
💯Success! Set to WSL 2.
If you want to make WSL 2 your default architecture or set any new distribution installed to WSL 2, run the following command:
wsl --set-default-version 2
Now Linux should run on your Windows machine. Next section will cover some Extras worth considering.
Extras
The following are some notes I took while going through Scott Hanselman’s video on converting a diehard machead to WSL.
Windows terminal (preview)
Install the Windows Terminal Preview by Microsoft Corporation in the Windows store.
Some key bindings set in the defaults.json for reference. Refer to the docs for more details.
// In defaults.json
{ "command": "closePane", "keys": "ctrl+shift+w" }
{ "command": { "action": "splitPane", "split": "horizontal"}, "keys": "alt+shift+-" },
{ "command": { "action": "splitPane", "split": "vertical"}, "keys": "alt+shift+plus" }
The Windows terminal will come setup with the Windows PowerShell, cmd and Azure Clould Shell. To add your WSL distro to the list, open the settings and copy one of the other shells and amend to suit. Just remember to make the guid value unique by changing a few letters around.
To replace PowerShell with Ubuntu at terminal startup, update the settings.json file by copying the Ubuntu guid value and pasting it into the defaultProfile attribute towards the top of the file.
Note: If you like to set a tooltip in the
tabTitleattribute, shells like bash may ignore it. Hence, just update thenameattribute to suit. Usage:"name": "Ubuntu-18.04"changed to"name": "Ubuntu-20.04"after updating. Tried thetabTitlewithout success.
PowerToys
I had previously used PowerToys many years ago to resize images and was surprised to see that it was still alive. Microsoft has made PowerToys open-source and available on GitHub
The Shortcut Guide and File Explorer (Preview Panes) for SVG and Markdown previews are worth having a look into.
WSL Python Installation
Python package management is a bit of a basket case as outline in this article Overview of python dependency management tools.
For this setup I went with Conda, but will probably go the Unix setup of: pyenv + pip + venv + pip-tools discussed in the article.
Conda
Download the installer. Move from Windows downloads folder to \\wsl$\Ubuntu-18.04\home\bradley\downloads\
Change to the cd ~/bradley/downloads/ directory in the terminal and verify hashes with:
sha256sum Miniconda3-latest-Linux-x86_64.sh
Run the following and accept the defaults:
bash Miniconda3-latest-Linux-x86_64.sh
Test the installed with:
conda list
Run an update:
conda update conda
Add an environment:
conda create --name work
conda activate work
conda info --env
conda install -c anaconda python
conda list
See the docs on managing Conda environments.
To activate this environment by default, add source activate work to .bashrc.
vim ~/.bashrc
# >>> conda initialize >>>
...
source activate work
# <<< conda initialize <<<
Jupyter Notebooks
Install Jupyter into the newly created work environment and then run with the --no-browser flag.
$ conda install -c anaconda jupyter
$ jupyter notebook --no-browser
Add Virtual Environment to Jupyter Notebook
I installed my work environment per this site with the following codes:
pip install --user ipykernel
python -m ipykernel install --user --name=work
>>> Installed kernelspec myenv in /home/user/.local/share/jupyter/kernels/work
I created a JupyterLab configuration file and installed nb_conda_kernels per this site.
jupyter notebook --generate-config
conda install nb_conda_kernels
Updated the following in the created jupyter_notebook_config.py
c.NotebookApp.notebook_dir = 'C:/Users/<user>/<folder>'
This created the Python [conda env:root] and Python [conda env:work]* environments as shown in the tutorials. I don’t know why the * is showing after the work and discovered that when the computer sleeps it spins up the default Python kernel??
Launch Windows Apps within WSL
Open windows explorer into a WSL folder by entering explorer.exe . into the shell.
explorer.exe .
Windows Package Manager
Linux has apt – Advanced Package Manager. Mac has brew – The Missing Package Manager for macOS (or Linux). Windows has choco – Chocolatey Software The Sane Way to Manage Software on Windows.
Let’s setup Python on the Windows side using Chocolately.
Windows Python Installation
I followed this article How To Install Python 3 and Set Up a Local Programming Environment on Windows 10 and Chocolately’s install docs.
Before starting, it might be a good idea to open up the Command Reference docs in a new tab.
Start PowerShell and “Run as Administrator” and run the following commands:
# Steps 1 & 2 - Go to  https://chocolatey.org/install and copy script.
# Run powershell as administrator and paste these commands

cd ~

Set-ExecutionPolicy Bypass -Scope Process -Force; [System.Net.ServicePointManager]::SecurityProtocol = [System.Net.ServicePointManager]::SecurityProtocol -bor 3072; iex ((New-Object System.Net.WebClient).DownloadString('https://chocolatey.org/install.ps1'))

choco upgrade chocolatey

# Step 3 - Installing the Text Editor nano (Optional)
choco install -y nano

# Step 4 - Installing Python 3
choco install -y python3
python -V
>>> Python 3.8.5
python -m pip install --upgrade pip

# Step 5 - Setting Up a Virtual Environment
mkdir python-projects\py38
cd python-projects\py38
python -m venv .venv
ls .venv
>>> Outputs 3 directories and pyvenv.cfg

# Step 6 - Set ExecutionPolicy to allow scripts to run
Set-ExecutionPolicy -Scope CurrentUser
>> RemoteSigned
cd ~
.\python-projects\py38\.venv\Scripts\activate
Now set the virtual environment within the Windows Environment Variables: (Stack overflow)
Windows Start button > type: View advanced system settings > Advanced tab > Environment Variables
Edit the Path System variable by putting the virtual environment paths first as the system will look at the start and move along until it finds an active python environment to use.
Set C:\Users\berno\python-projects\py38\.venv\Scripts\ then C:\Users\berno\python-projects\py38\.venv\Scripts\python.exe before the system Python.
Finished
This was my first setup with WSL and Python. As mentioned at the top, I have changed things as I moved from one device to another, but I hope this was generic enough to get anyone interested up and coding quickly.
If you have any queries or comments, please drop them below. You are a legend if you hung in until this point!