
Все способы:
- Шаг 1: Удаление старого драйвера
- Шаг 2: Установка
- Возможные проблемы
- Вопросы и ответы: 0
Шаг 1: Удаление старого драйвера
Если программное обеспечение уже использовалось в операционной системе, то рекомендуется сначала удалить старый драйвер, чтобы избежать конфликта между версиями ПО Realtek HD. Если ОС «чистая» и звуковой драйвер еще не устанавливался, то можно пропустить этот шаг и сразу переходить к следующему.
- Откройте встроенное средство «Диспетчер устройств». Для этого можно использовать сочетание клавиш «Win + X», после чего выбрать соответствующий пункт.
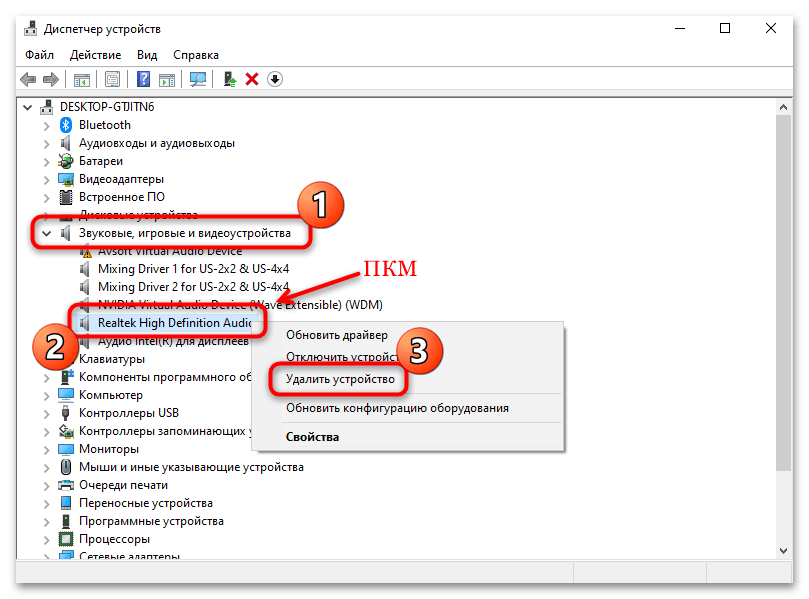
- Разверните меню «Звуковые, игровые и видеоустройства» и найдите драйвера для Realtek High Definition Audio. Щелкните по названию правой кнопкой мыши и из контекстного меню выберите функцию удаления устройства.
- В новом окне подтвердите действие.
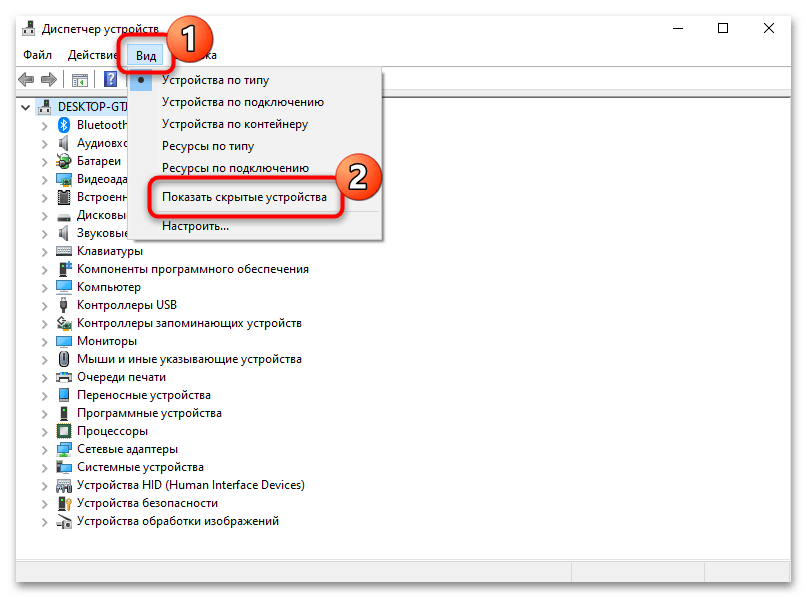
Также рекомендуется поискать дубликаты этого устройства. Для этого на вкладке «Вид» вверху интерфейса «Диспетчера устройств» отметьте опцию «Показать скрытые устройства». Удаляйте ПО аналогичным способом.
После удаления программного обеспечения необходимо перезагрузить операционную систему, чтобы изменения вступили в силу.
Скорее всего, после этого звук пропадет, но после установки Realtek HD все компоненты автоматически возобновят свою работу.
Шаг 2: Установка
Для начала потребуется скачать утилиту Realtek HD, причем нужно определить разрядность и версию операционной системы при загрузке. Процедура инсталляции несложная, поскольку предустановлен пошаговый мастер. Достаточно следовать алгоритму в соответствии с инструкциями.
Скачать Realtek HD
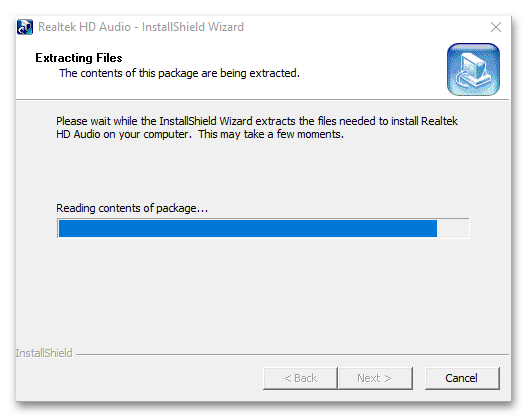
- Скачайте и запустите установочный файл. Автоматически начнется извлечение компонентов, которые необходимы для установки.
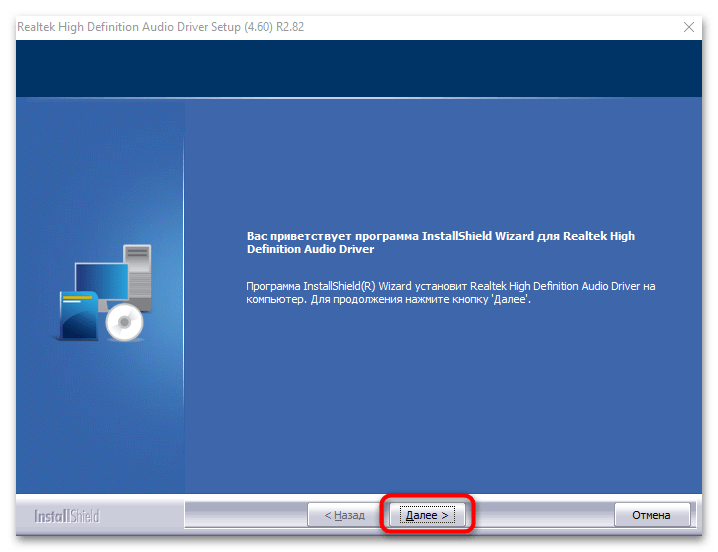
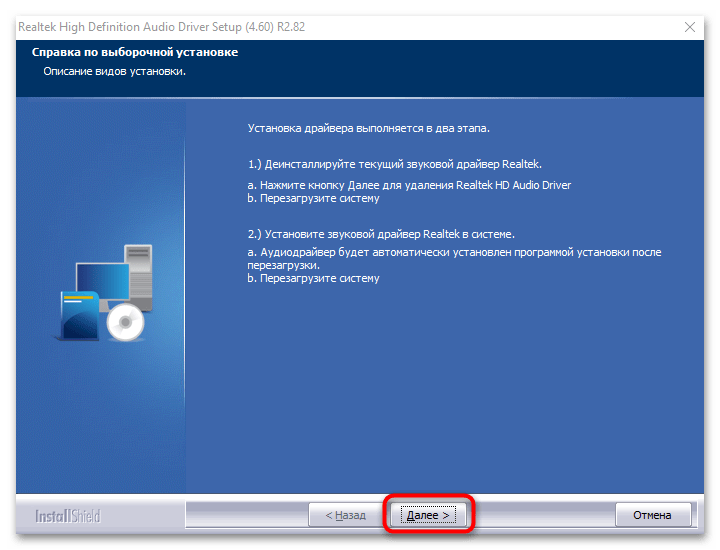
- Запустится пошаговый мастер. Нажмите на кнопку «Далее», чтобы продолжить установку.
- В следующем окне появится небольшая инструкция. Ознакомьтесь с ней и продолжите инсталляцию.
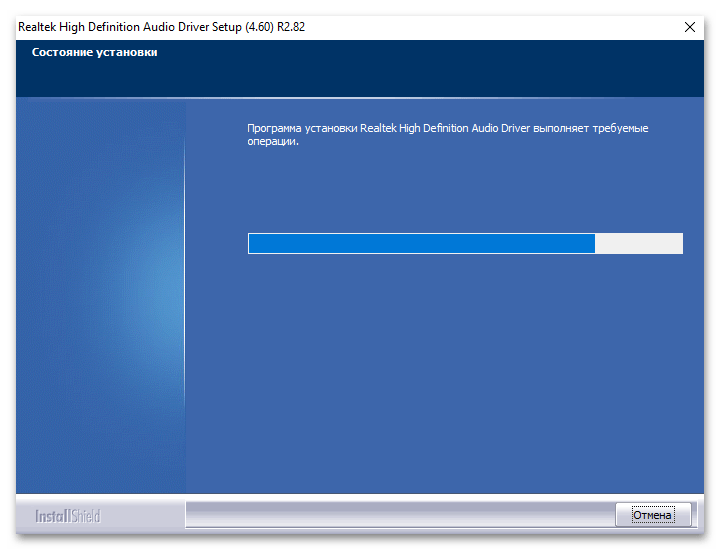
- Если вы пропустили первый шаг с ручным удалением, мастер установки автоматически удалит обнаруженное старое программное обеспечение. Затем начнется установка нужных компонентов. Это может занять некоторое время.
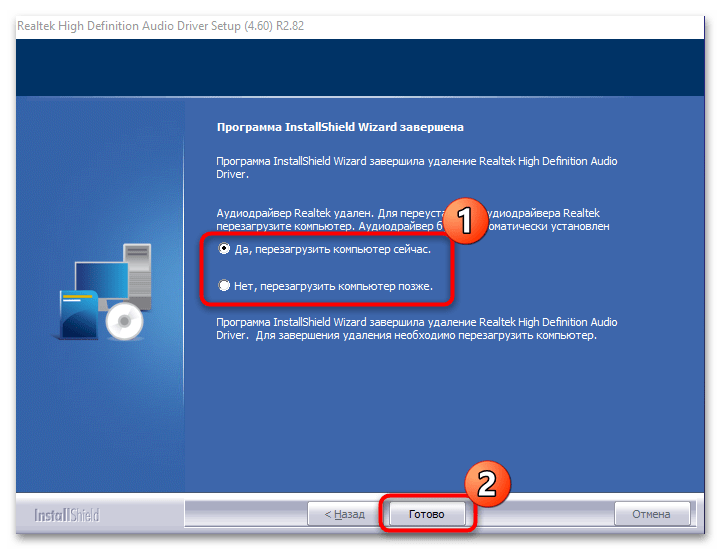
- Когда все будет установлено, программа предложит перезагрузить устройство. Чтобы звук снова появился, рекомендуется сделать это. Но также можно отложить перезапуск на более удобное время. Нажмите кнопку «Готово».
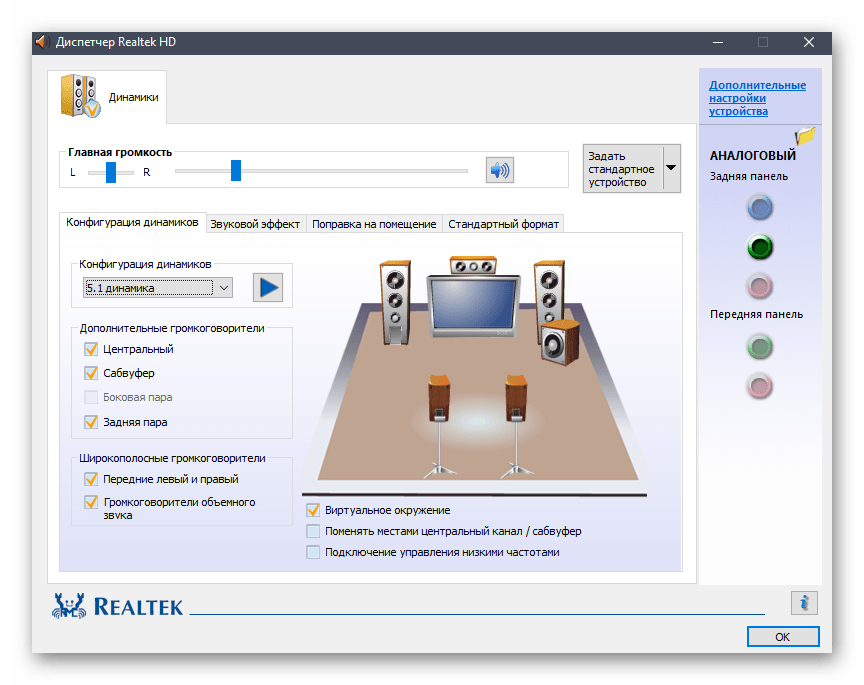
На этом установка Realtek HD завершена. Приложение для дополнительной настройки звука (оно называется Диспетчер Realtek HD) можно найти среди установленного софта, например через поиск в «Пуске» по запросу «realtek». Если не удается найти данную программу, читайте статью дальше.
Кстати, вы также можете устанавливать любые драйверы при помощи специальных помощников.
Подробнее:
Программы для установки драйверов
Как обновить драйверы на компьютере
Возможные проблемы
Если во время установки возникли какие-либо проблемы, то решить большинство из них можно самостоятельно.
Realtek HD не устанавливается
Нередко причиной становится конфликт программного обеспечения или несовместимая с операционной системой версия драйвера. Бывает, что установка Realtek HD не удается из-за неполадок со звуковым оборудованием или чипом на материнской плате; неполадки в Windows также могут стать причиной неудачной инсталляции. Большинство проблем и путей их решения разобрано в нашем отдельном материале.
Подробнее: Не устанавливается Realtek HD в Windows 10
Отсутствует ярлык для запуска / Не стартует вместе с Windows / Автоматически закрывается
Самая распространенная проблема с уже установленным Realtek HD – это отсутствие иконки Диспетчера в трее или значка на рабочем столе. Кроме того, из-за разных сбоев этот Диспетчер может автоматически закрываться или даже не запускаться вместе с операционной системой. Как исправить открытие данного приложения, можете узнать из следующего материала.
Подробнее: Как открыть Диспетчер Realtek HD в Windows 10
Диспетчер Realtek HD не запускается
Если установленный Диспетчер Realtek HD не запускается, источник проблемы следует искать в операционной системе. Наш автор в отдельной инструкции объяснял, что делать в этой ситуации, даже если звуковое оборудование не отображается в «Диспетчере устройств».
Подробнее: Не открывается Realtek HD в Windows 10
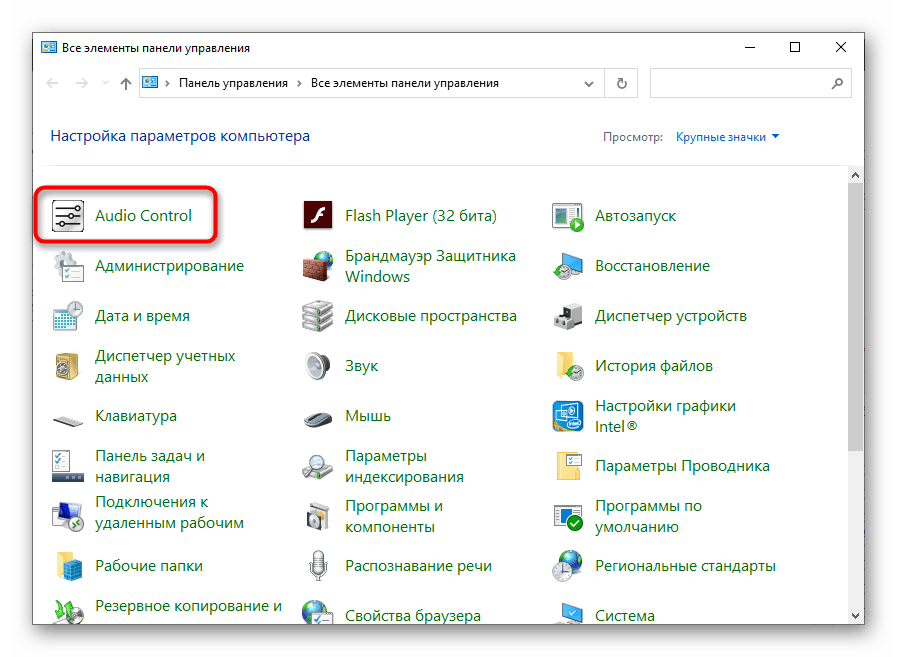
Диспетчер пропал из «Панели управления»
Если вы привыкли запускать Диспетчер Realtek HD через «Панель управления» Windows, но теперь его значка там нет, вывести его можно через «Параметры» Windows 10. Существуют альтернативные методы запуска, о которых можно узнать из отдельного руководства на нашем сайте.
Подробнее: Нет значка диспетчера Realtek HD в «Панели управления»
Наша группа в TelegramПолезные советы и помощь
Do you have a problem with your Realtek HD Audio Manager on your Windows 10 computer? Let us assist you by providing some information on how to download, install or reinstall your audio manager.
Realtek HD Audio is an audio driver for system sound that supports DTS, Dolby, and Surround Sound. It is not mandatory to install Realtek HD Audio, but it is very helpful.
The application used for managing audio settings on the PC is called RealTek HD Audio Manager. This application allows you to configure your microphone/speaker settings and try out different sound effects as well.

In this article we have compiled several methods that will serve as a complete guide to download, install or reinstall Realtek HD Audio Manager on your computer.
Table of Contents
Reinstall Realtek HD Audio using the Device Manager
- Open the Device Manager. You can do this by simply pressing the Windows key + X + M.
- Here you will see a list of several categories. The one that you need to explore at the moment is the Sound, video, and game controllers category. Once you expand this category, you will find the Realtek HD Audio Definition option.
- Right-click on Realtek HD Audio Definition and click the uninstall button.

- Once the application is successfully uninstalled, you need to click on the Action tab in the toolbar of the Device Manager window.
- In the action tab, select the Scan for Hardware Changes option and wait for Windows to complete the scan.

- Once you press this option, Windows will search for Realtek HD Audio Driver automatically. The Realtek HD Audio Manager will be installed along with it as well.


Download the Realtek HD Audio Manager and driver
If the above method does not work for you, you have nothing to worry about. Hopefully you will be able to manually download and install the application on your computer. Let’s look at how you can download and install this audio manager manually.
- Visit Realtek’s official download page and download the software version that is suitable for your operating system and processor type. If you have a 32-bit or 64-bit processor running on either Windows 10, 8, or 7, you can download this version.
- Once you download the correct version, the next step is to run the executable file on your system.

- Now follow the instructions in the application installation dialogue box to install it on your computer.

This will install RealTek Audio Driver 2.82 on your system. It will install the driver as well as RealTek Audio Manager. If you are running Windows 10, you should get an updated Realtek audio driver from Windows Update. Otherwise, you can download the latest update patch from Microsoft from the following link:
Download RealTek Audio Driver update Version 6.0.9098.1 (For Windows 10 Version 1903 or later)
Download RealTek Audio Driver update Version 6.0.9098.1 (For Windows 10 Version 1809 or later)
Download RealTek Audio Driver update Version 6.0.9098.1 (For Windows 10 Version 1803 or later)
The installation of this update will update the driver to the latest version (up to January 2021).

Troubleshooting Realtek HD Audio Manager
There are times when simply installing or reinstalling the audio driver will not work. Generally, we can troubleshoot the problem of the driver not getting installed correctly in a few common situations.
Let’s discuss the fixes here.
Fixing driver conflicts
Realtek audio drivers can conflict with existing audio drivers (even if they are from Microsoft). For generic sound, Microsoft installs UAA Bus Driver for High Definition Audio. It should be disabled or removed before we can install Realtek audio drivers.
- Open up the Device Manager and double-click on System devices.
- Look for Microsoft UAA Bus Driver for High Definition Audio option
- Right-click on this option and select “Disable” from the menu that appears
- Now, open up “Settings” by typing it in the search bar of your taskbar.
- Once the Settings window opens, click on Apps & Features
- Now, select the “Realtek High Definition Audio Driver” and choose the Uninstall option to completely remove the driver from your system before trying to reinstall it.
- Once you uninstall the driver, consider reinstalling it and check whether it’s working or not.
Enable RealTek Audio on system startup
- Open up the Task Manager by right-clicking on your taskbar and selecting “Task Manager” from the list of options that appear
- Click on “Startup” from the list of tabs in the Task Manager
- Now, consider searching for the Realtek HD Audio Manager
- Once you locate the Realtek HD Audio Manager, check the Status tab in front of it.
- If the status is Disabled, you will have to enable it. You can do that by right-clicking on the Realtek HD Audio Manager in the list and selecting the Enable option from the list of options that appear.
- Once you have enabled it, consider restarting your system for the Realtek HD Audio Manager to be completely enabled, up, and working.
Error: Install Realtek HD Audio Driver Failure [Error OxC0000374]
Some users have reported that they are facing the error code OxC0000374 while trying to install the Realtek HD Audio Driver. However, you should know that the error code can be different for different users and cases.
This problem can happen due to different reasons. Different causes can create an error like this. However, sometimes, these issues appear when you have a dead sound card. Keep in mind that you will not be able to apply a software fix to clear this issue if you are having problems with your physical sound card. The only solution to a dead sound card is replacing it with a brand new one.
In case of a dead sound card, Windows will show you a yellow exclamation mark with an “Unknown device” label. You won’t be able to install the drivers for your sound card because the hardware is not responding to the system. Hence, none of the solutions that we have mentioned here will work for you if your sound card needs to be replaced.
Find malfunctioning sound drivers and update them
If you are unable to install the sound card drivers, consider updating them directly through the Device Manager through the following procedure:
- Search for Device Manager in the Windows Search option next to the Start icon in the Taskbar
- Once the Device Manager opens up, start looking for the Sound driver option
- After finding the Sound options, consider inspecting them for a bit and see whether any of them have a question mark or an exclamation mark in front of them
- If any of the drivers on that list have an exclamation or a question mark, right-click on that driver.
- By right-clicking on the driver, a list of options will appear. Select the Update Driver option from this list
- Once you select this option, you may have to provide a confirmation.
Once the driver is updated, consider restarting your system to see if the problem has been resolved. If the error is not resolved, consider continuing with this second method.
Adding legacy hardware through Device Manager
Another method that is applicable to tackle this situation is adding legacy hardware. However, this method is only considered when you are trying to fix the missing Sound, video, and game controllers from the Device Manager.
- Open up the device manager by pressing Windows Key + X and then pressing the M key from the keyboard when the list of options appears on the lower-left corner of your pc screen.
- Once the Device Manager opens up, click on select the Action tab from the toolbar and choose the Add legacy hardware option from the drop-down menu.
- A window will appear. Click Next and choose the option you want to go with from the menu that appears in the Add Hardware window.
- Once the list of hardware is displayed, select the driver you want to install and proceed.
Once the driver is installed, reboot your system and test it to confirm whether it works or not. If it does not, you can consider disabling the UAA Bus Driver and reinstalling the Realtek HD Audio Driver. These drivers usually conflict with each other and once the UAA driver is removed, Realtek HD Audio Driver works normally.
The Last Resort
If none of the above solutions work for you, you can consider rolling back to a previous system restore point where the Realtek HD Audio Manager and its driver were working properly on your computer system.
If there is no system restore point on your computer, your System Restore utility will not be able to do anything to resolve the issues you are facing with either your Realtek HD Audio Manager or your Realtek HD Audio Driver. However, if you use this option with a previously saved point, your data won’t be affected.
Understand that this solution is the last option and do it only if none of the methods that we mentioned in this article are working for you.
- To restore your system to a previous state, start by pressing opening up the Run utility with Windows Key + X and then R later on when the menu appears.
- Now, type “rstrui” in the run “Open” box and hit the Enter key.
- Once the System Restore Window appears in front of you, click the “Next” button.
- If you have created any System Restore points in the past, you will be able to see them in the list that appears in the System Restore utility window.
- Check the “Show more restore points” option to display all of the system restore points that you have created.
- Now, select the restore point that is most suitable for you depending upon the time when it was created and click on the Next button option.
- However, make sure not to select a restore point where the audio drivers were not working correctly or were missing from the system. There’s no use reverting to this kind of state.
- Once you have confirmed your restore point, click the Next button.
- Once you click the Next button, Windows will start to restore your system to a point that is discussed in the “Description” field. Click the “finish” button and wait for the process to complete.
The above were some methods that you can implement if you are unable to find the Realtek HD Audio Manager on your PC or if it is not working correctly. If any of the above procedures are not working for you, maybe it’s time to replace your sound card to continue experiencing sounds from your computer system. Remember, applying software fixes to a hardware problem is never going to work and is a waste of time as well. Hence, make sure that you have confirmed that the sound card is working perfectly fine before applying the above methods.
Conclusion
Realtek HD Audio Manager is an important utility and often comes pre-installed in the latest version of Windows like Windows 10 and and most probably Windows 11. However, there might be some problems that are forcing the audio manager to not function properly on your system. In such situations, you need to follow the simple step-by-step guide mentioned in the article.
Just implement any of the above strategies, and hopefully, your Realtek HD Audio Driver will come to life again by integrating with the Realtek HD Audio Manager. If it does not, maybe replacing the whole sound card might be a better option that could save you a lot of time. Anyone can follow the above steps to install the Realtek HD Audio Manager and fix these minor issues themselves.
The PC no sound issue could indicate missing or faulty audio drivers. When your computer has no sound, you may want to check if you’re using the latest correct audio driver. In this post, you’ll learn how to install the latest Realtek audio driver easily for your computer.
You can update your Realtek audio driver in three ways – just choose the method that works best for you:
Method 1: Update the Realtek audio driver via Device Manager
Method 2: Download and install the Realtek audio driver from manufacturers
Method 3: Update the Realtek audio driver automatically (Recommended)
Method 1: Update the Realtek audio driver via Device Manager
- On your keyboard, press the Windows logo key + R to open the Run box. Type devmgmt.msc and hit Enter. This will open the Device Manager.
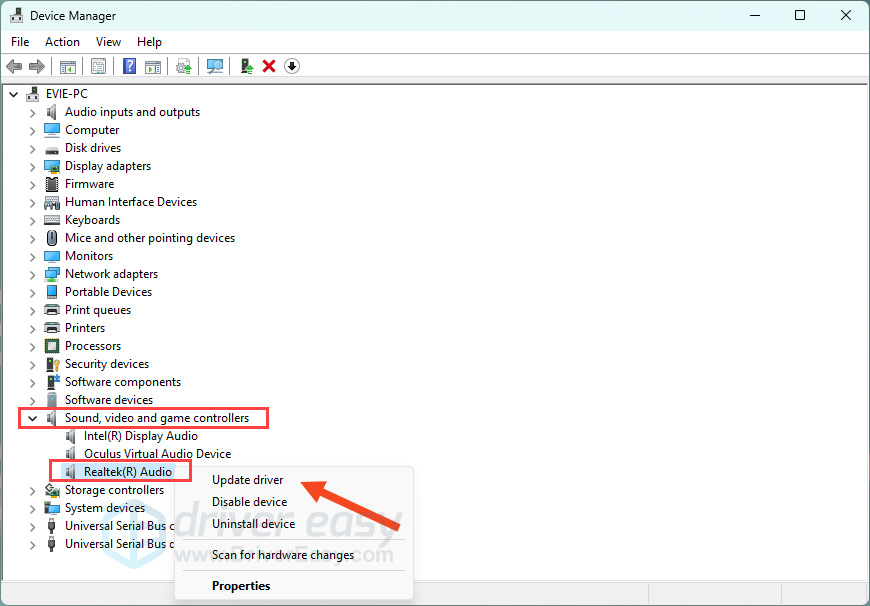
- In the Device Manager, expand the category Sound, video and game controllers. Right-click on your Realtek Audio device and select Update driver.

- Follow any on-screen instructions. When finished, restart your computer to apply the changes.

Method 2: Download and install the Realtek audio driver from your device manufacturer
For the most compatible driver, it’s best to visit your PC or motherboard manufacturer’s support website (e.g., Dell, HP, ASUS, Lenovo, MSI). Below we’ll detail the steps to download and install the latest audio driver for your Dell, HP, and Lenovo devices. It’s important to note that your screen might look slightly differrent when you search for drivers, but the steps you take should remain consistent.
First, you’ll need to identify your system model. Follow the steps below:
- On your keyboard, press the Windows logo key + R to open the Run box. Type msinfo32 and hit Enter. This will open the System Information window.
- From there, locate System Model. You’ll need this information later.


Dell
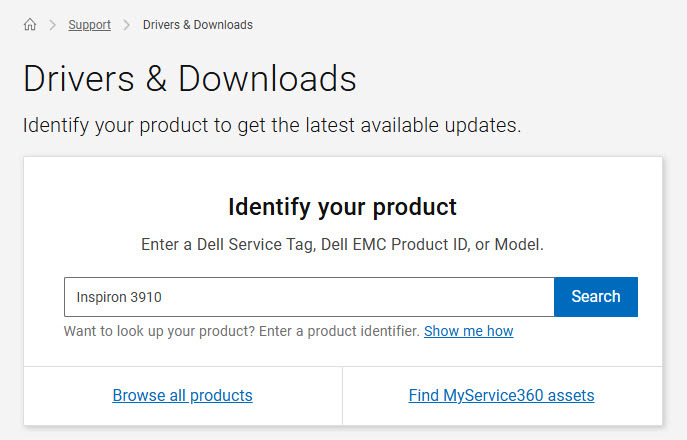
- Go to Dell Drivers & Downloads page. Input your model (e.g. Inspiron 3910) into the search field and hit Enter.

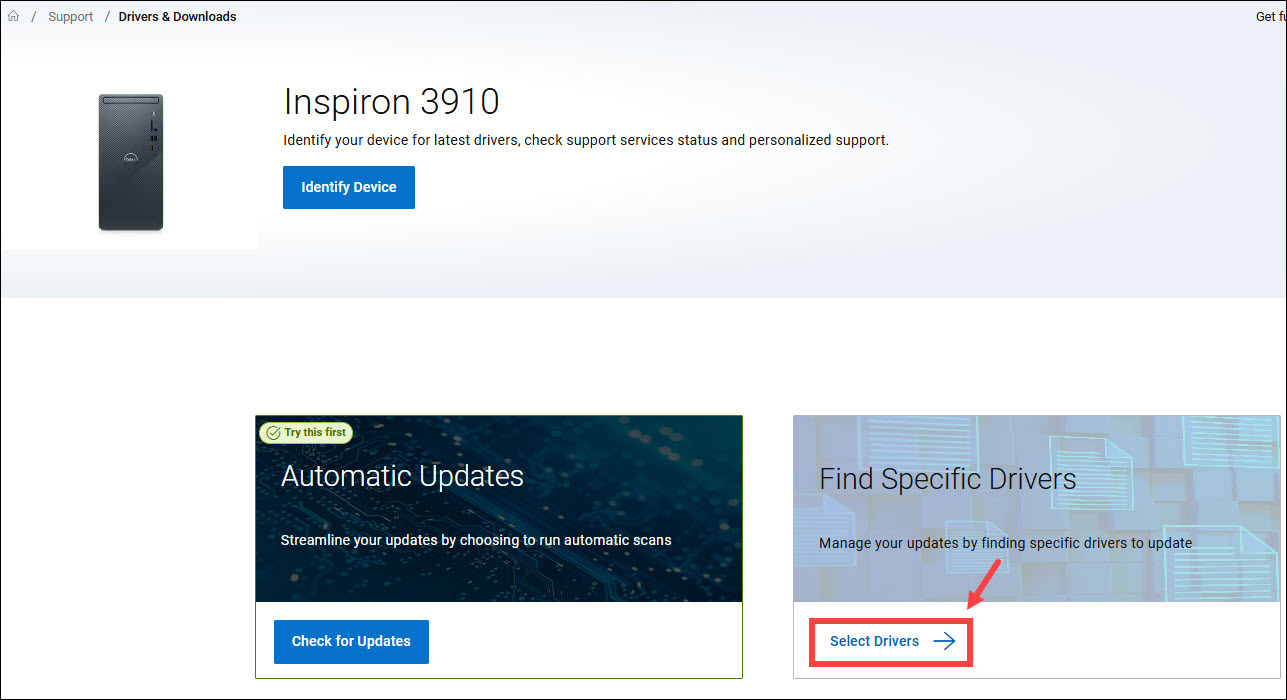
- Click Select Drivers.

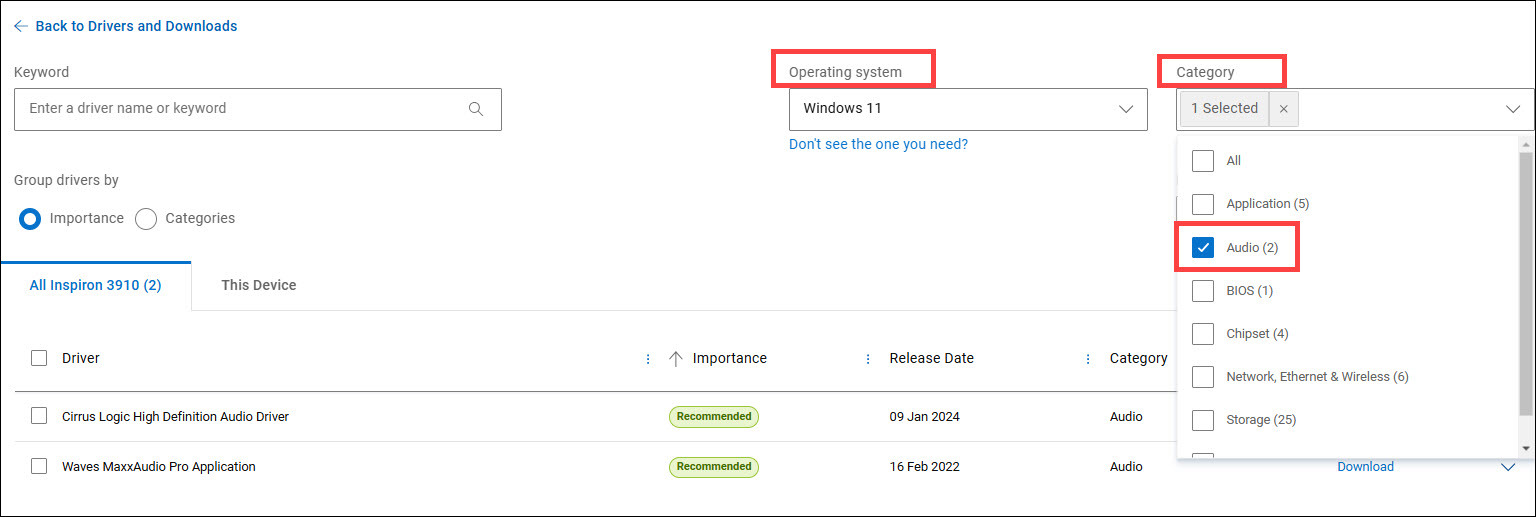
- Select the operating system from the drop-down menu, and select Audio as the Category, or you can simply enter the specific driver name into the search field. Then you should be able to see available audio drivers. Then download the one you need.

HP
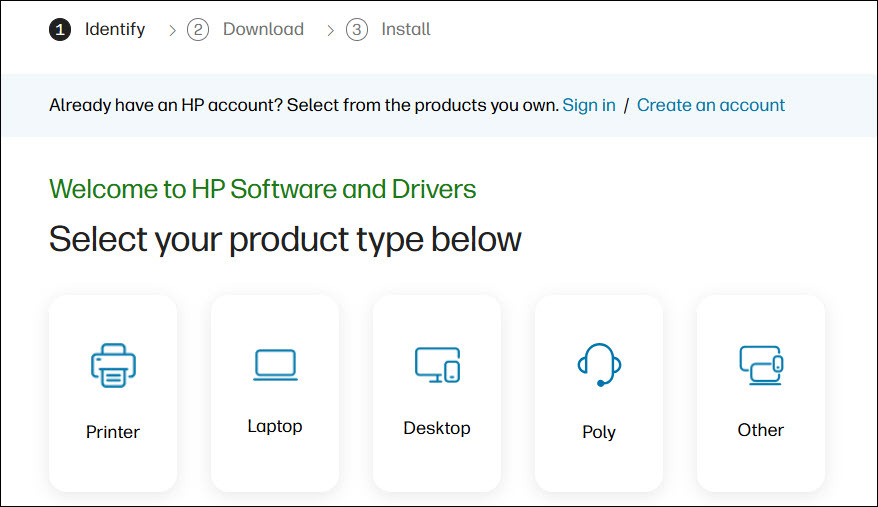
- Go to HP Support page.
- Select your device.

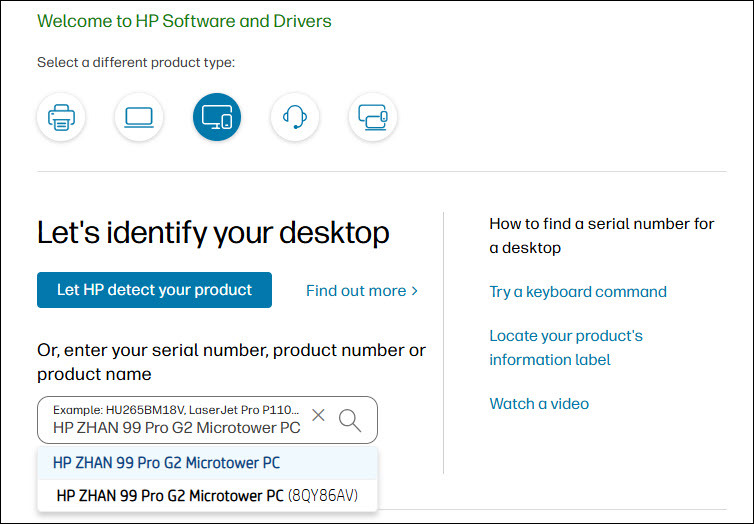
- Input your model into the search field (e.g. HP ZHAN 99 Pro G2 Microtower PC) and select it when it appears on the search results.

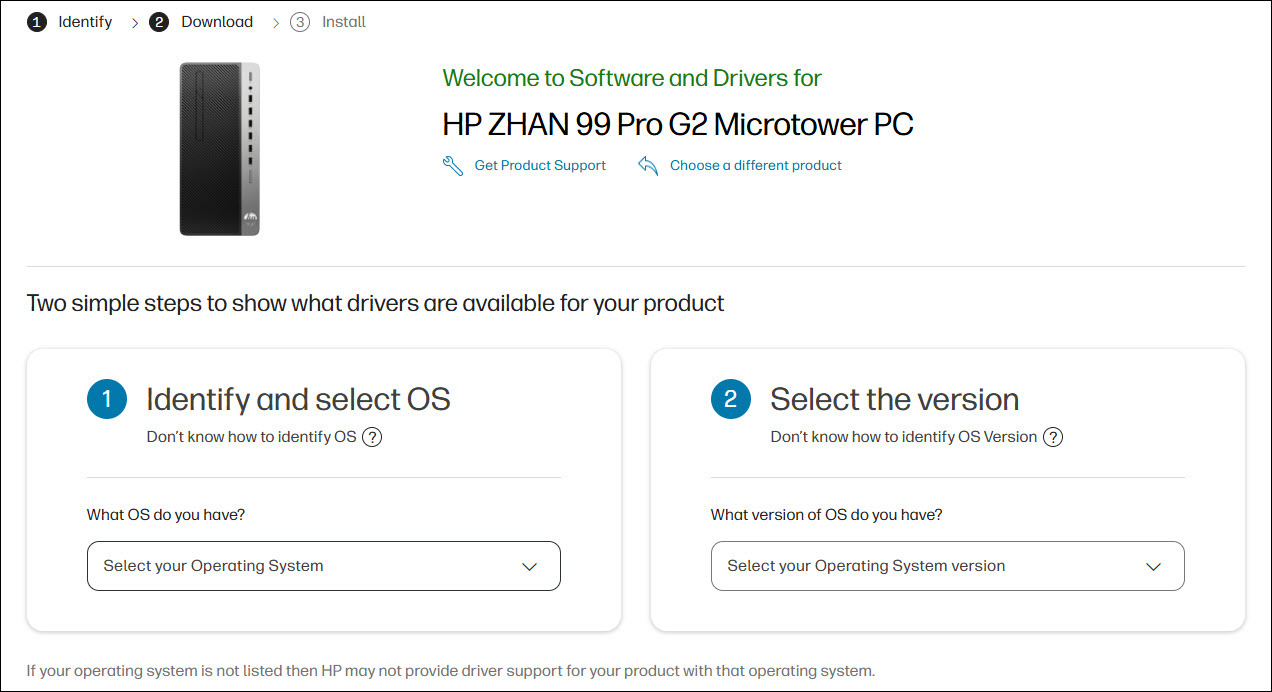
- Selec the operating system and version you have from the drop-down menu.

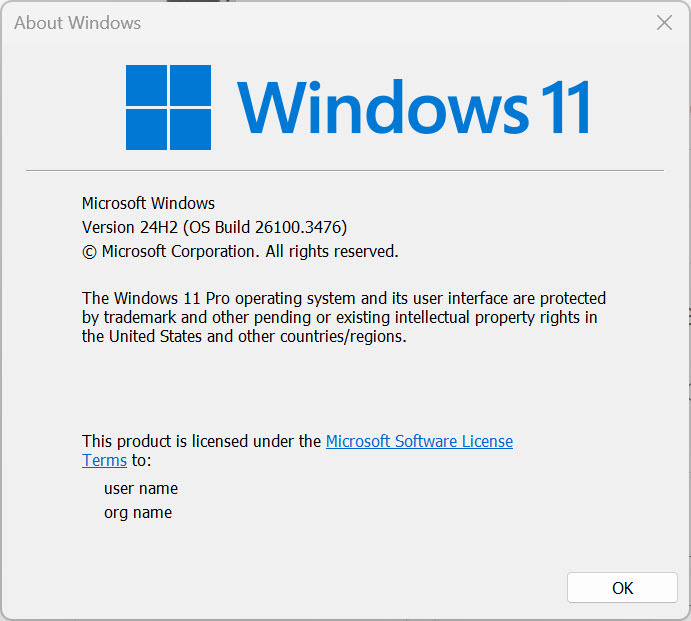
If you have no idea of the operating system you have, simply open the Run box by pressing the Windows logo key + R, then paste winver, and hit Enter to view it.

- Expand the Driver-Audio category, find the driver you need and download it.

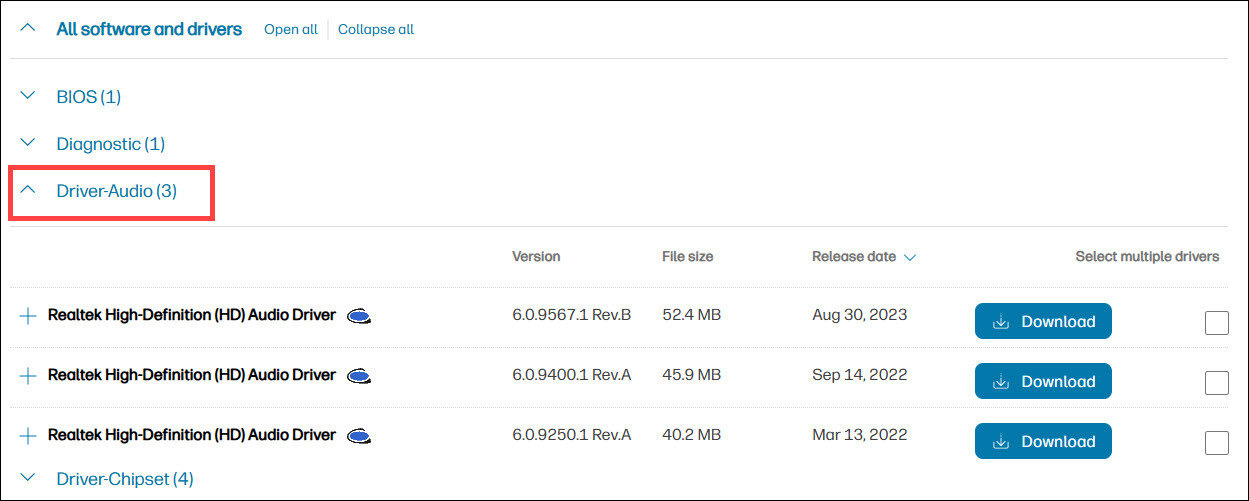
Lenovo
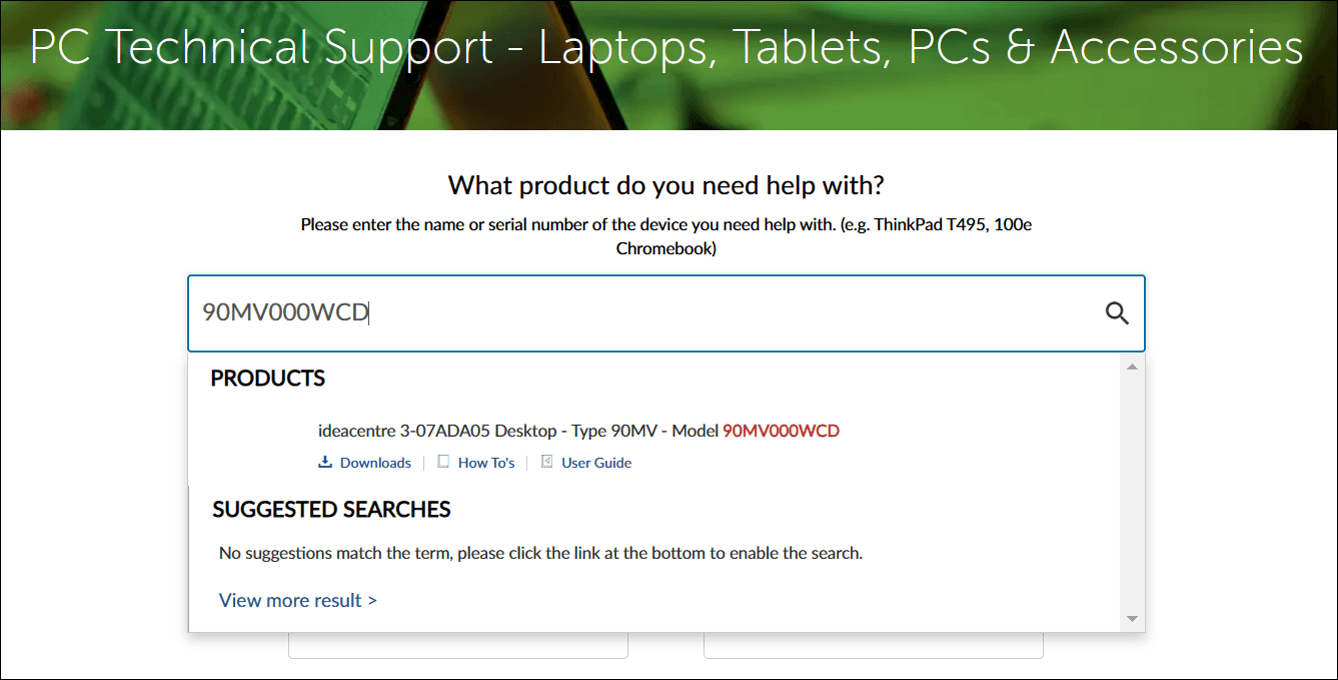
- Go to the Support page.
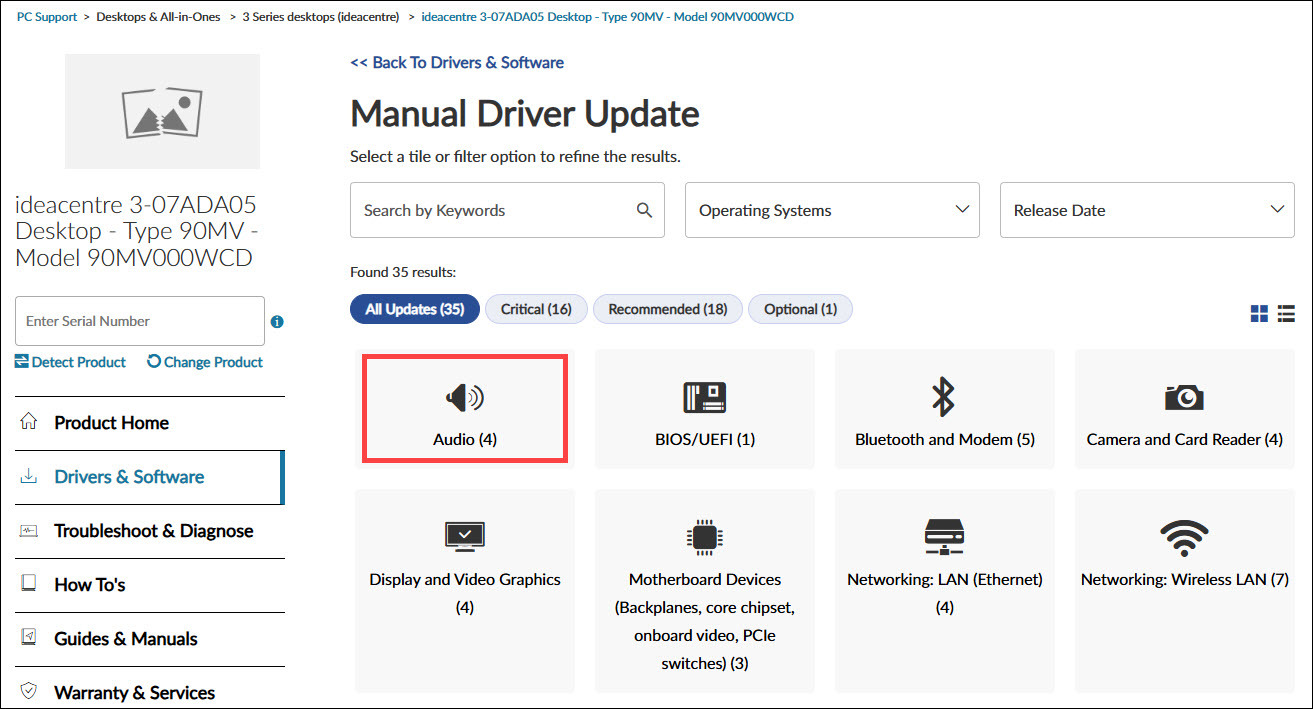
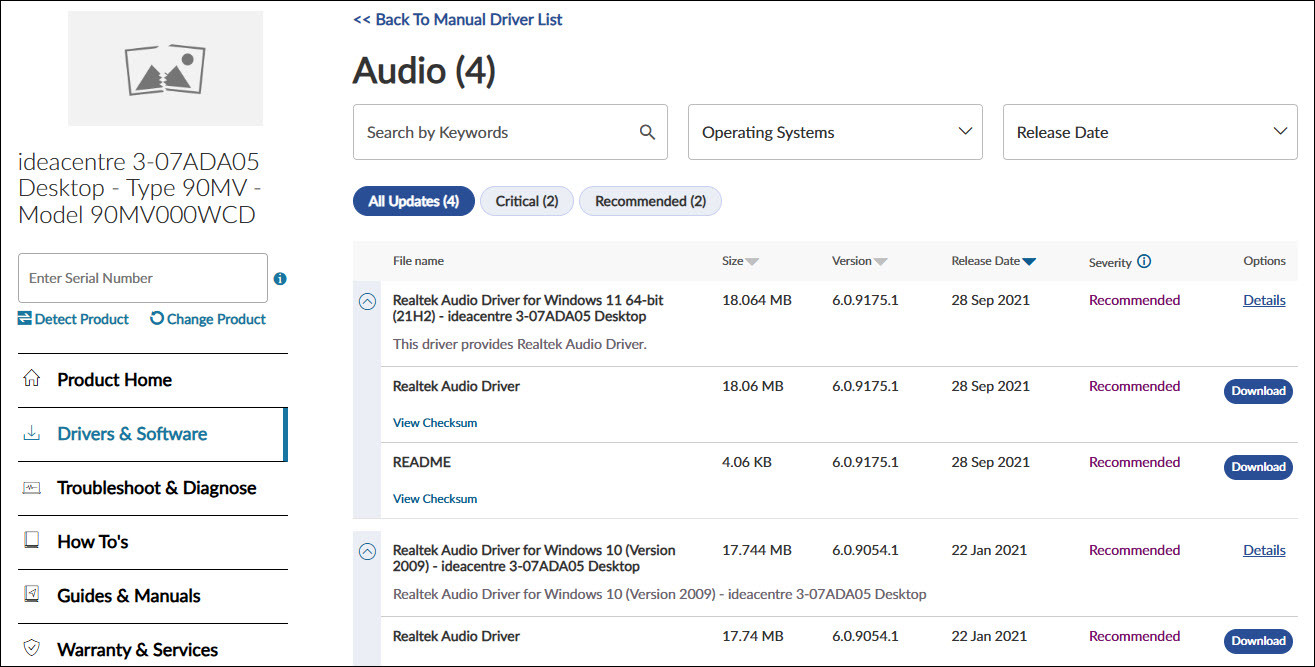
- Enter the model (e.g. 90MV000WCD) into the search field and hit Enter.

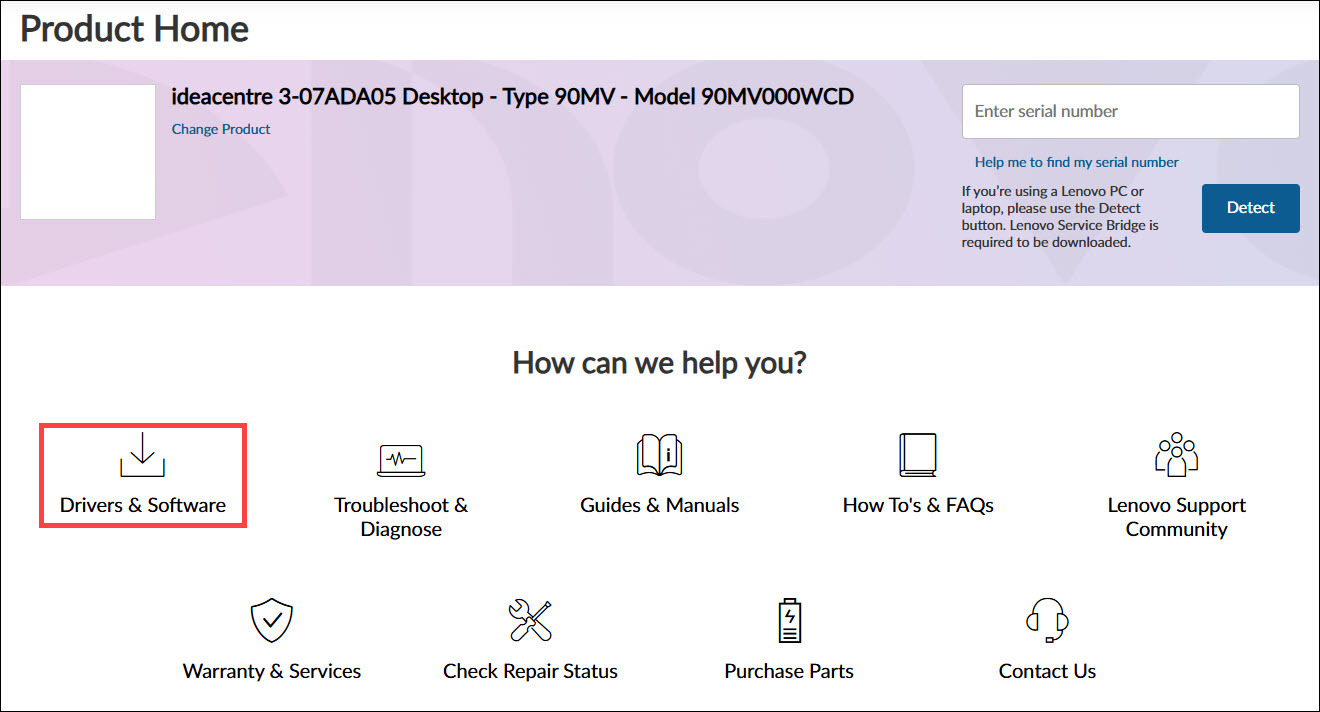
- Click Drivers & Software.

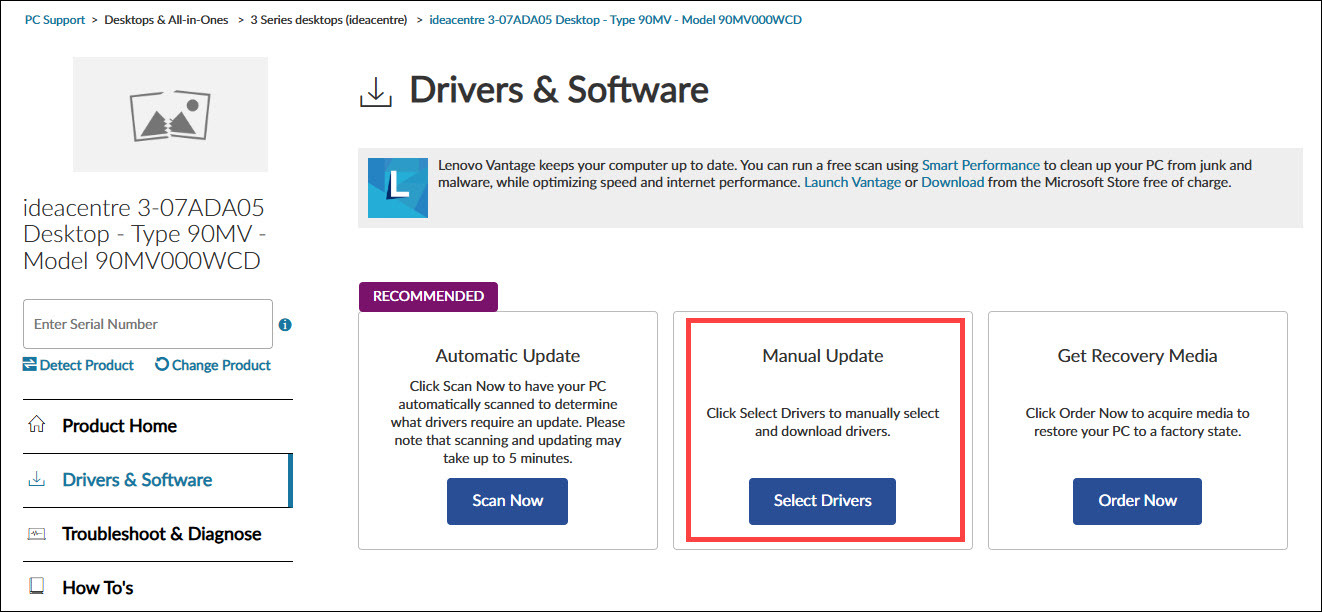
- Click Select Drivers.

- Select Audio.

- Select your operating system, find the audio driver you’re looking for and follow the on-screen instructions to download and install it.

Method 3: Update the Realtek audio driver automatically
If manually searching for driver updates is time-consuming, you can try Driver Easy.
Driver Easy scans your computer to detect outdated or missing drivers. It simplifies the update process by eliminating the need to identify your operating system or search for the correct drivers. While Driver Easy is a paid software, it offers a 7-day free trial, allowing you to evaluate its features before committing.
Driver Easy simplifies the process of updating all your drivers safely and automatically with just a few mouse clicks. Here’s how you can do it:
1) Download and install Driver Easy.
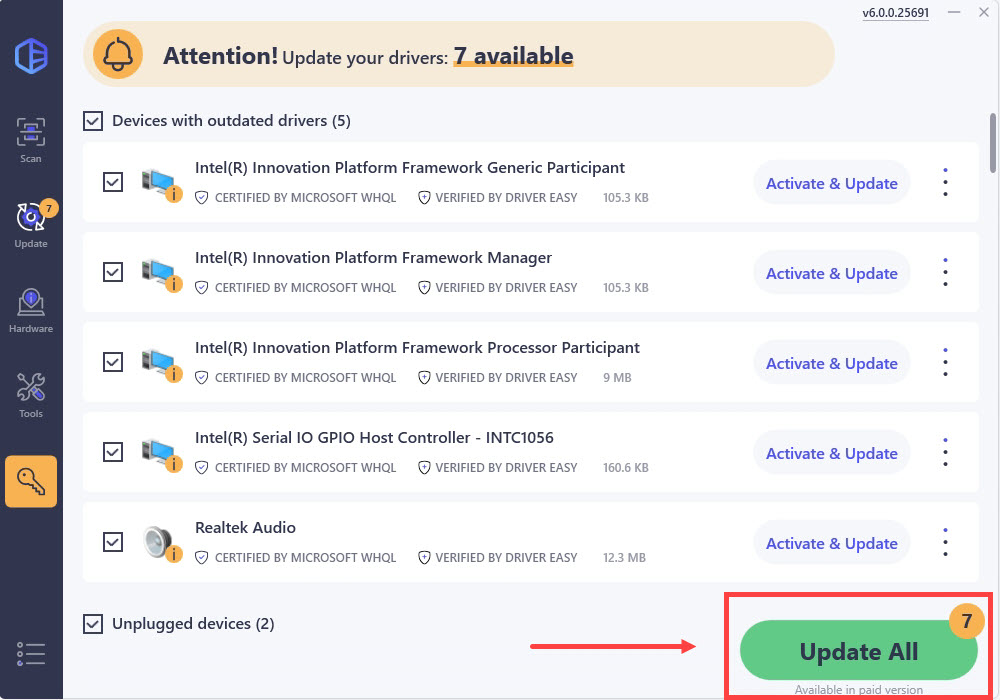
2) Click the Scan Now button. Driver Easy will detect all problem drivers instantly.

3) Click the Update All button to download and install all drivers automatically, direct from the manufacturer. (This requires the Pro version. You’ll be prompted to upgrade when you click Update All. You can opt for the free trial to try all Pro features in 7 days, or you can go Pro now with a discount on us.)
If you need assistance, please contact Driver Easy’s support team at support@drivereasy.com.
Hopefully, you find the tips helpful to update the Realtek audio drivers easily. If you have any questions, please leave your comments below. I’d love to hear of any ideas or suggestions.
321
321 people found this helpful
Available in other languages
Votre problème de périphérique audio est fort probablement lié à votre pilote audio. Suivez notre texte et téléchargez rapidement le correct pilote audio.
Sammi is a dedicated content writer at Driver Easy. And her mission is simple: She’s here to help you solve your issues and make your digital life smoother.
Her journey into providing troubleshooting guides started when she graduated from university, and ever since, she’s been fueled by a deep passion for assisting users. There’s nothing more satisfying to her than helping individuals overcome their tech challenges and providing solutions that work.
To ensure she’s always well-equipped to assist you, she keeps her finger on the pulse of the tech world. She’s an avid reader of tech news from websites like The Verge, PCMag, and Wired, and she’s a devoted follower of tech YouTube channels. This dedication to staying informed allows her to provide you with up-to-date insights, step-by-step guides, and solutions that truly make a difference.
So if you’re facing game launch issues, or encountering errors, she’s here to support you every step of the way.
How to Update Realtek HD Audio Drivers in Windows 10: If you are looking for a way to update Realtek HD audio drivers then don’t look any further as today in this article we are going to see how to update them easily using as few steps as possible. Realtek HD Audio Drivers are the most commonly used sound drivers in Windows 10. If you will you open Device Manager and expand Sound, video and game controllers then you will find the Realtek High Definition Audio (SST) or Realtek HD device.

You may also need to update Realtek HD audio drivers if you’re facing no sound issue, sound not working, or headphones not working, etc. So without wasting any time let’s see How to Update Realtek HD Audio Drivers in Windows 10 with the help of the below-listed guide.
Table of Contents
Note: Make sure to create a restore point just in case something goes wrong.
Method 1: Update Realtek HD Audio Drivers using Device Manager
1. Press Windows Key + R then type devmgmt.msc and hit Enter to open Device Manager.

2. Expand “Sound, video and game controllers” then right-click on Realtek High Definition Audio and select Update Driver.

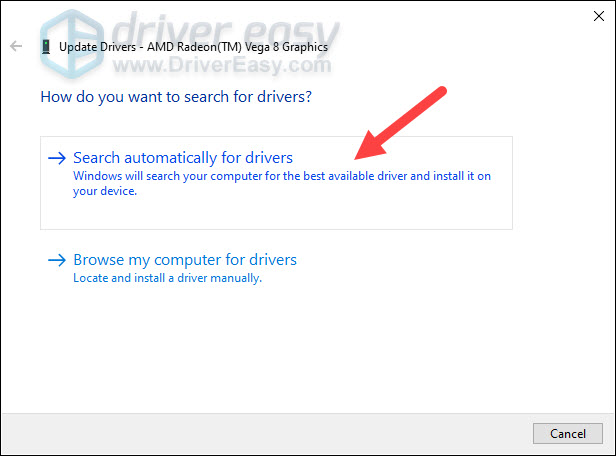
3. On the next screen click on “Search automatically for updated driver software“.

4. Wait for the process to finish finding the latest available update for your sound drivers, if found, make sure to click on Install to complete the process. Once finished, click Close and reboot your PC to save changes.
5. But if your driver is already up-to-date, then you will get a message saying “The best driver software for your device is already installed“.

6. Click on Close, and you don’t need to do anything as the drivers are already up-to-date.
7. Once finished, reboot your PC to save changes.
If you’re still facing the Realtek High Definition Audio Driver Issue then you need to manually update the drivers, just follow this guide.
1. Again open Device Manager, then right-click on Realtek High Definition Audio & select Update driver.
2. This time click on ” Browse my computer for driver software.“

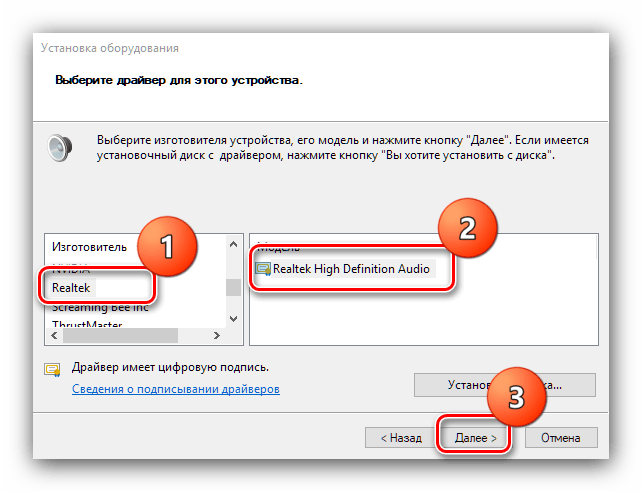
3. Next, select “Let me pick from a list of available drivers on my computer.“

4. Select the appropriate driver from the list and click Next.

5. Let the driver installation complete and then restart your PC.
Method 2: Download and Install the Realtek Audio Driver from OEM Manufacturers
Chances are Windows is not able to find the latest update using the above method because of improper internet network connection or for any other reason, so just to sure go to the Realtek website.
1. Open your favorite web browser then navigate to this website.

2. You will be directed towards the download page, now under “PC Audio Codecs” select to the latest driver available.
Note: Make sure to download the proper driver according to your system architecture.
3. If you’re unable to find then either you need the driver for AC’97 Audio Codecs Software or High Definition Audio Codecs Software.

Note: For most of the users, you need to download the High Definition Audio Codecs, but if you’re on an old system then only you need to download AC’97 Audio Codecs.

4. Once the file is downloaded, double-click on the setup file and follow the on-screen instructions to install the latest Realtek High Definition Audio drivers.
Method 3: Update the Realtek audio driver automatically
1. Press Windows Key + I and then select Update & Security.
2. Then under Update status click on “Check for updates.“

3. If an update is found for your PC, install the update and reboot your PC.
Method 4: Add a Legacy hardware
1. Press Windows Key + R then type “devmgmt.msc” (without quotes) and hit enter to open Device Manager.
2. In Device Manager select Sound, video and game controllers and then click on Action > Add legacy hardware.

3. Click Next, select ‘Search for and install the hardware automatically (Recommended).’

4. Manually install the drivers and then reboot your system to save changes.
Recommended:
- Fix HDMI Sound Not Working in Windows 10
- How to Fix YouTube Running Slow On Your PC
- Fix Service Host: Local System High CPU and Disk Usage
- How to Fix Windows Update Error 80244019
That’s it you have successfully learned How to Update Realtek HD Audio Drivers in Windows 10 but if you still have any queries regarding this tutorial then feel free to ask them in the comment’s section.
One of the most important components of your PC or laptop is the audio driver. It is software that is specifically designed to enable your device to communicate between your external and built-in sound devices and the operating system. They are especially important if you plan to use high-quality external microphones such as the Lark 150 dual mics by Hollyland.
If your device does not have a sound driver installed, you will not be able to hear any system sounds, listen to any type of audio, or record anything with audio.
In addition, to functioning as your device’s audio software, allowing your system to play audio files; sound cards play another role.
They help facilitate an added functionality that helps with volume and sound equalization as well as process surround sound capabilities. Quality audio drivers help optimize your internal and external audio hardware, providing a better and smoother experience.
Why Do You Need Realtek Audio Drivers?
One of the most prominently utilized audio drivers, especially in Windows systems, is the Realtek High Definition Audio driver. The sound driver provides a swath of features and functionalities, supporting different types of your audio card such as playing surround sound, Dolby, and DTS.
It is an important component that helps boost your device’s sound performance and capabilities and comes with a litany of features. For example, it is easily accessible. You can right-click on the speaker icon on your taskbar and access different functionalities and settings.
In addition, the sound driver also offers a ton of multimedia tools and sound options such as an intuitive equalizer settings menu to adjust the quality of your internal and external audio hardware.
Plus, by accessing the sound manager setting, you can also manually configure your speak settings, choosing between different sound capabilities such as Stereo sound, 5.1 Speaker, and Quadraphonic.
How You Can Identify Your Current Audio Driver Version
The process is quite straightforward, all you have to do is:
Step 1: Access the Device Manager setting via the Windows menu. Just type “Device Manager”.

Step 2: Find and click on “Sound, Video, and Game Controllers”. Right-click on the device mentioned and click on “Properties”.
Step 3: Click on the Driver tab and you will be able to see what version is currently installed.
Preparing for Installation
Checking System Requirements
If you want to check your system requirements for the correct audio drivers, there is a simple way you can do this. On your Windows search bar, type “dxdiag” and press enter.
This command is going to automatically open a new dashboard displaying your system’s audio and video information – such as the types of drivers installed and whatnot.
Next, find and click on the Sound icon, which is going to display all the information related to your installed audio drivers.
You will be able to see the data such as the name and version of your audio driver as well as the brand. You can use this information to see whether you can upgrade to the latest version of your sound driver.
Ensuring Windows Update is Not Running
Windows 10 or 11 has a built-in automated update feature that is going to perpetually update your Realtek audio driver as needed. Should you choose to download and install a new version of the Realtek sound driver, it is recommended that you turn off the automatic Window Update feature. This is how you can do that:
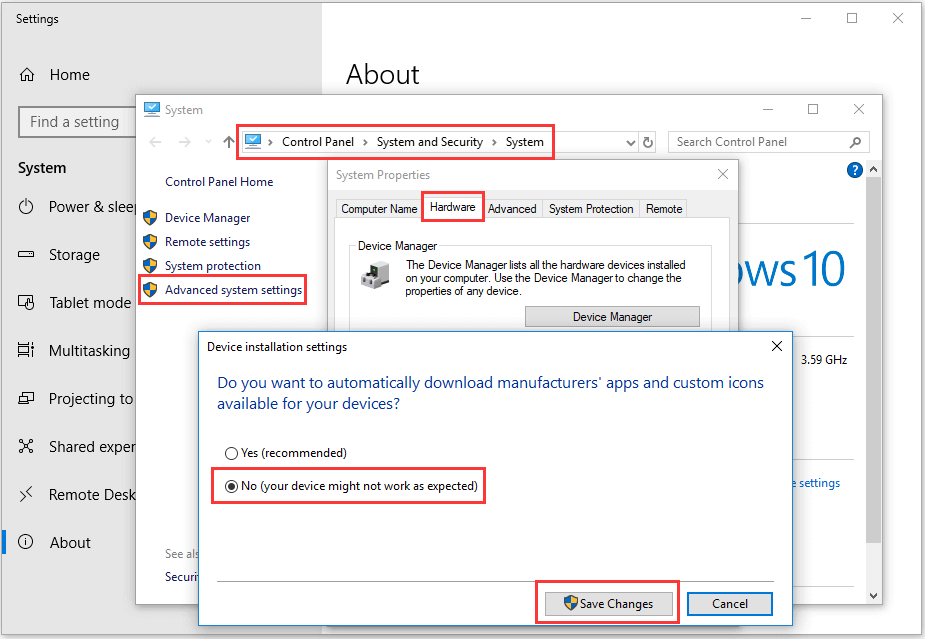
Step 1: Type Window + R to open the control panel of your system. In the dialog box, type “Control Panel” and hit enter.
Step 2: Once you open the dashboard, find and click on the following commands, “System and Security”, on the drop-down menu, click on “Advanced System”, then click on “Settings” à “Hardware” à and “Device Installation Settings”.
You will be given the option “No (Your Device Might Not Work As Expected”, click on it and then exit the menu by clicking on ” Save Changes”.
This is going to turn off the automatic driver update functionality.
How To Download a Realtek Audio Driver
Official Sources for Download
While there are numerous third-party websites that you can use to download the latest version of Realtek audio drivers, if you want a more official source, it is a good idea to install the audio drivers from Intel.com. Alternatively, you can also check out TheWindowsClub.com.
Verifying the Correct Version for Your System
To find out what audio driver you currently have installed on your device, here are the steps you need to follow:

Step 1: Type “Device Manager” on the Windows search bar and hit enter.
Step 2: Find and click on “Sound, Video, and Game Controllers”.
Step 3: Click on the “Driver” tab and then click on “Details”.
Uninstalling Previous Drivers
Accessing Device Manager
To install a new audio driver, you’ll need to first uninstall and remove your previous sound drive you can do this by”
Step 1: Press Windows + X to open the “Device Manager” interface.

Step 2: To locate your existing audio driver, find and click on “Sound, Video, and Game Controllers” and expand the menu.
Step 3: To uninstall your current audio driver, search for your audio driver under the “Sound, Video, and Game Controllers” menu and right-click on it. Next, select and click on “Uninstall Device” from the menu.

Step 4: After the audio driver is uninstalled, do not install the new driver before rebooting the system. Your PC will likely give you an automatic prompt to restart the system after the process.

Installing the Realtek Audio Driver
After you have downloaded the Realtek audio driver for your Windows device, you will then need to install it. The process is simple and all you need to do is:
Step 1: Access the downloaded folder, which will typically be in a ZIP format. Right-click on the folder and click on “Extract All”.

Step 2: Select the installation destination of the files, which is typically Drive C.

Step 3: After the files have been extracted, find and double-click on Setup.exe.

Step 4: The rest of the installation process is automatic, all you have to do is follow the instructions and prompts.
Verifying the Installation
Checking Device Manager for Installation Status
To check and see if your Realtek audio driver has been successfully installed, do this:
On the Windows search bar, type “Device Manager” and press enter. Next, find “Sound, Video, and Game Controllers.
Find the name of the audio driver you have installed under the drop-down menu. If you can see it, it means it has been properly installed.
Testing Audio Output
To test your audio output, right-click on the Speaker icon on the Windows taskbar. On the menu, select and click on “Open Sound Settings”. Next, select your output device from the “Output” menu on the interface and play any audio file.
Adjusting Audio Settings if Necessary
On the very same menu mentioned above, find and click on “Advanced Sound Options”. Here you will be able to adjust the master volume, select your output and input devices, and adjust your system and Google Chrome sounds individually.
Troubleshooting Common Installation Issues
Dealing with Failed Installation Attempts
If you have encountered a failed installation error, the best way to remedy the situation is to reinstall the Realtek audio driver.
By accessing the Device Manager settings via the Windows search bar, find and click on the Sounds, Video, and Game Controllers icon and expand the search.
Next, right-click on the Realtek HD Audio Driver and uninstall the driver. Reboot your PC and reinstall the audio driver setup you have downloaded.
Resolving Audio Quality Issues
The optimal way to resolve audio quality issues is to right-click on the Speaker icon and click on “Open Sound Settings”. Here you will be able to run the troubleshooter under “Master Volume” and manually check for audio and microphone sounds.
If there is an issue, reconfigure your audio settings and check your hardware. Inspect whether your external audio devices are properly connected. If the problem persists, make sure all Windows Updates are properly installed.
Addressing Compatibility Problems
Audio driver compatibility complications are mainly caused by corrupted and outdated sound drivers. You will keep on hearing distorted noises and sounds, decreasing your audio experience. The best way to counter these issues is to ensure your Realtek HD sound driver is always up to date and frequently run malware scans to check and get rid of viruses or infected files.
Updating Realtek Audio Drivers
There are some telltale signs that you will notice immediately if your audio drivers are seriously outdated. For example, you may not hear any audio at all, when you listen to music or any other audio file, you will keep hearing annoying crackling and distorted noises, and audio for a lot of your app will not work.
If you encounter these issues, it is best to update your audio driver by accessing your Device Manager settings. Find and click on Sound, Video, and Game Controllers. Expand the search and look for your Realtek audio driver. Right-click on it and click on “Update Driver”.
Once your audio drivers are properly installed and configured, you’ll want to ensure excellent audio quality for your recordings or online sessions. A wireless lavalier microphone can significantly enhance sound clarity and convenience, letting you produce stunning recordings without tangled wires.

Hollyland LARK M2S – Wireless Clip-on Microphone
- 7g Lightweight, Titanium Clip, Discreet Design
- Clear sound with 24-bit/48kHz, 70dB SNR, 116dB SPL
- Noise Cancellation & 300m Long-Range Stability
- Works with Camera/iPhone/Android/Laptop
- Perfect for Content Creators, Online-Teaching, Streaming
Frequently Asked Questions Related to Installing Realtek Audio Drivers
- How do I know if I need to update my Realtek Audio Driver?
If you keep having audio distortions or crackling sounds or if your system keeps giving you “No Audio” found errors, it is time to update your Realtek sound driver.
- Can I install Realtek Audio Driver on any Windows version?
Yes. Realtek audio drivers are one of the most commonly used sound drivers, especially on Windows systems. You can download and install Realtek audio drivers on any Windows system later than Windows Vista.
- What should I do if my audio isn’t working after installation?
The best way to combat this problem is to uninstall the driver from the Device Manager setting, reboot the system for the uninstall to take full effect, and then reinstall the latest version of the Realtek audio driver.
- How can I uninstall Realtek Audio Driver if needed?
You can uninstall your current Realtek audio driver by going to Device Manager. Then, click on Sounds, Video, and Game Controllers. Next, expand the menu right-click on Realtek HD Audio Driver, and then click on “Uninstall Driver”.