
Atom – это многофункциональный текстовый редактор от разработчиков GitHub. Он поддерживает огромное количество различных расширений, благодаря которым его можно сравнить с настоящей средой разработки. Другая особенность – платформа Electron, на которой держится Atom. Она включает в себя Node.js и движок от Chrome – такой инструментарий позволяет разрабатывать приложения для рабочего стола на основе веб-технологий.
О том, чем еще хорош Atom и как им пользоваться, поговорим в сегодняшней статье.
Установка Atom
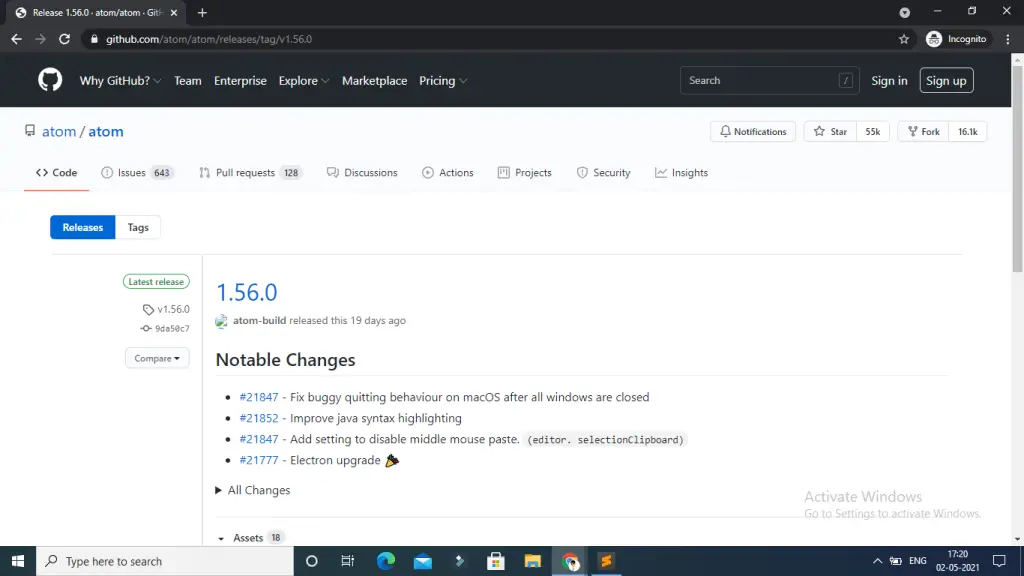
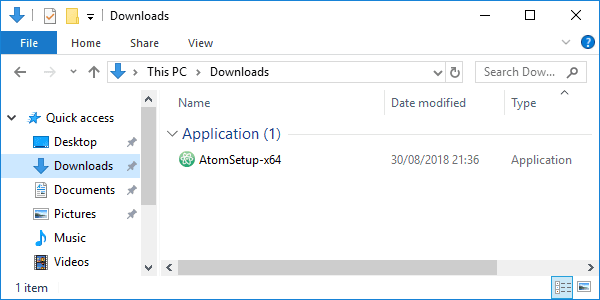
Скачать текстовый редактор для ОС Windows мы можем напрямую из GitHub. Переходим по этой ссылке, пролистываем вниз страницы и находим там файл AtomSetup-x64.exe.

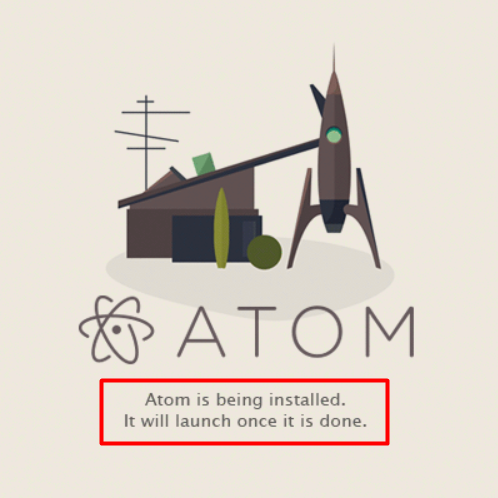
После запуска установщика перед нами отобразится небольшое окно, информирующее нас о том, что программа находится в процессе установки.
Как только инсталляция будет завершена, откроется новое окно – главный экран самой программы. С него мы и будем начинать взаимодействие с редактором, но об этом уже в следующем разделе.
Если вы пользователь операционной системы Linux, то для нее вы также можете скачать установщик из того же репозитория. Там доступны deb- и rpm-пакеты, а также есть возможность собрать программу из исходников.
Установка выполняется с помощью следующей команды:
sudo dpkg -i atom-amd64.deb
Для Ubuntu мы также можем воспользоваться менеджером пакетов snap:
snap install atom
Комьюнити теперь в Телеграм
Подпишитесь и будьте в курсе последних IT-новостей
Подписаться
Как пользоваться Atom
В данном разделе мы рассмотрим весь необходимый функционал, который может потребоваться каждому веб-разработчику.
Устанавливаем пакеты
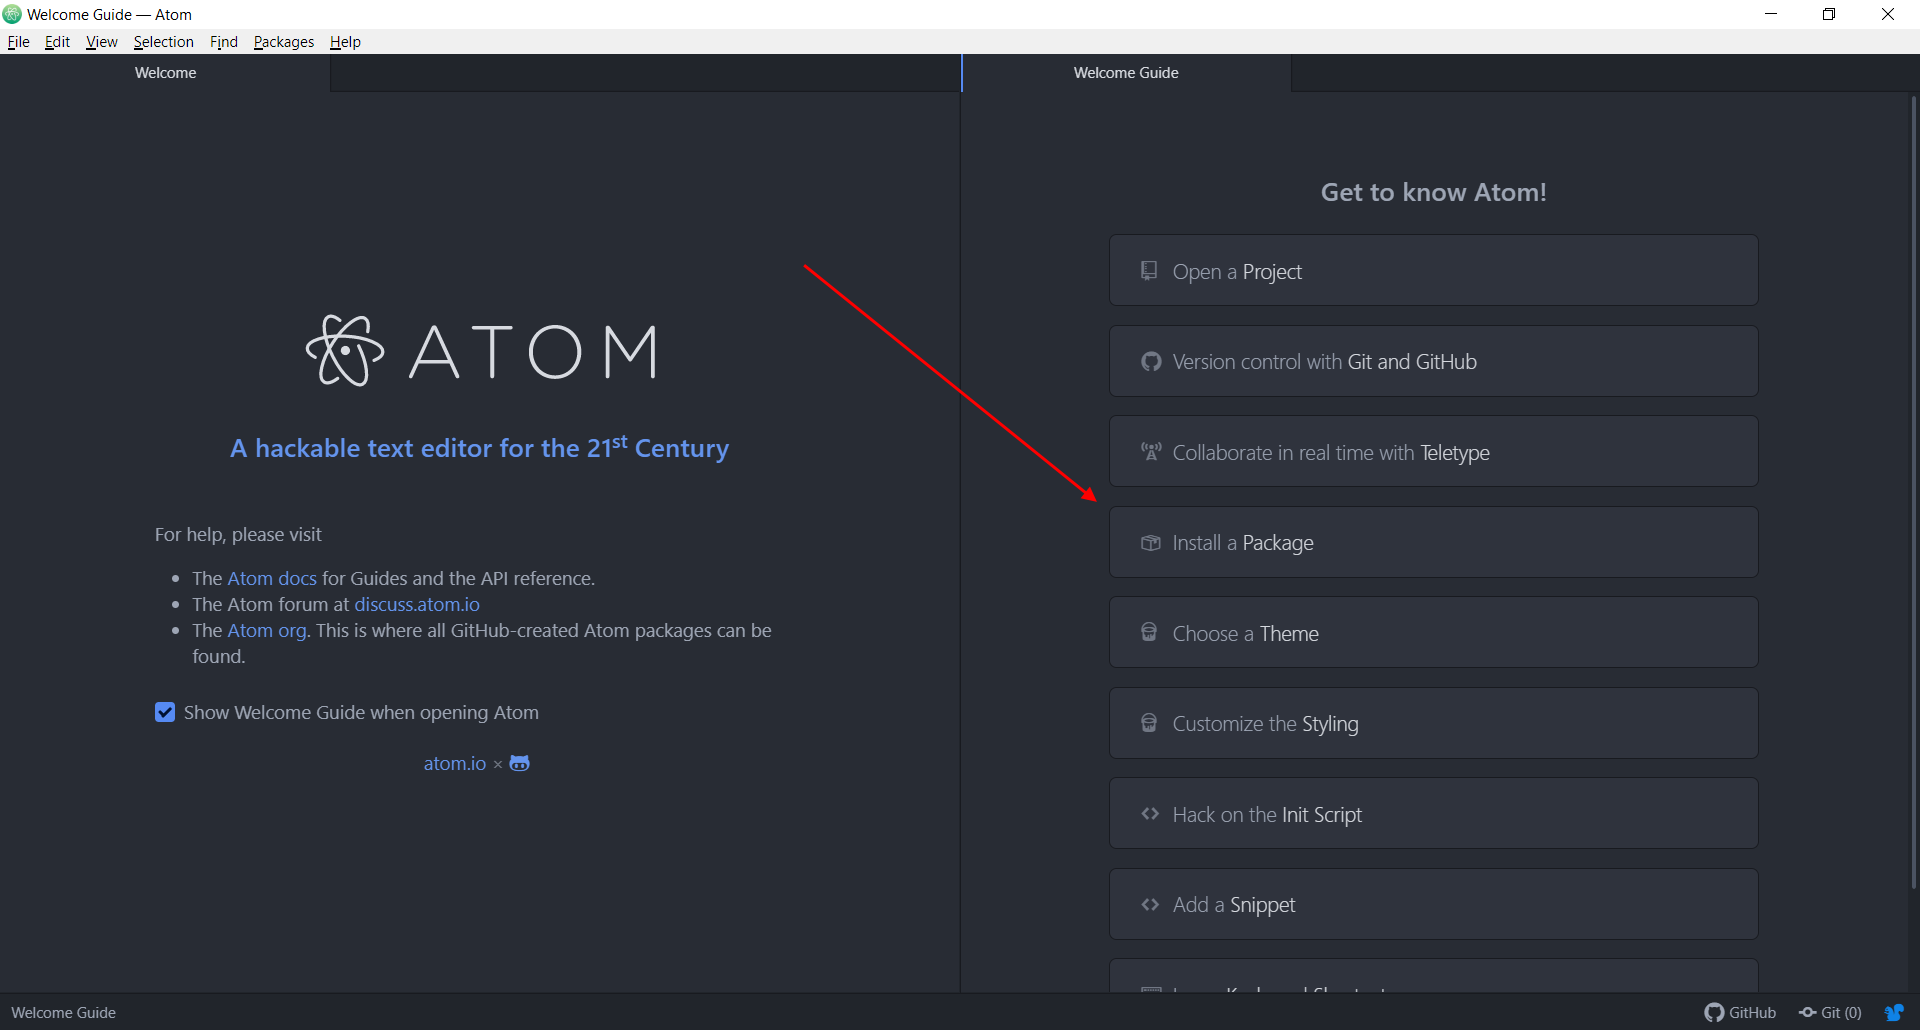
Пакеты – это одна из ключевых особенностей, с помощью которых можно расширять функционал программы. Их установка проста: достаточно открыть поисковое меню, найти нужный пакет и нажать на кнопку установки.
Выглядит это следующим образом:
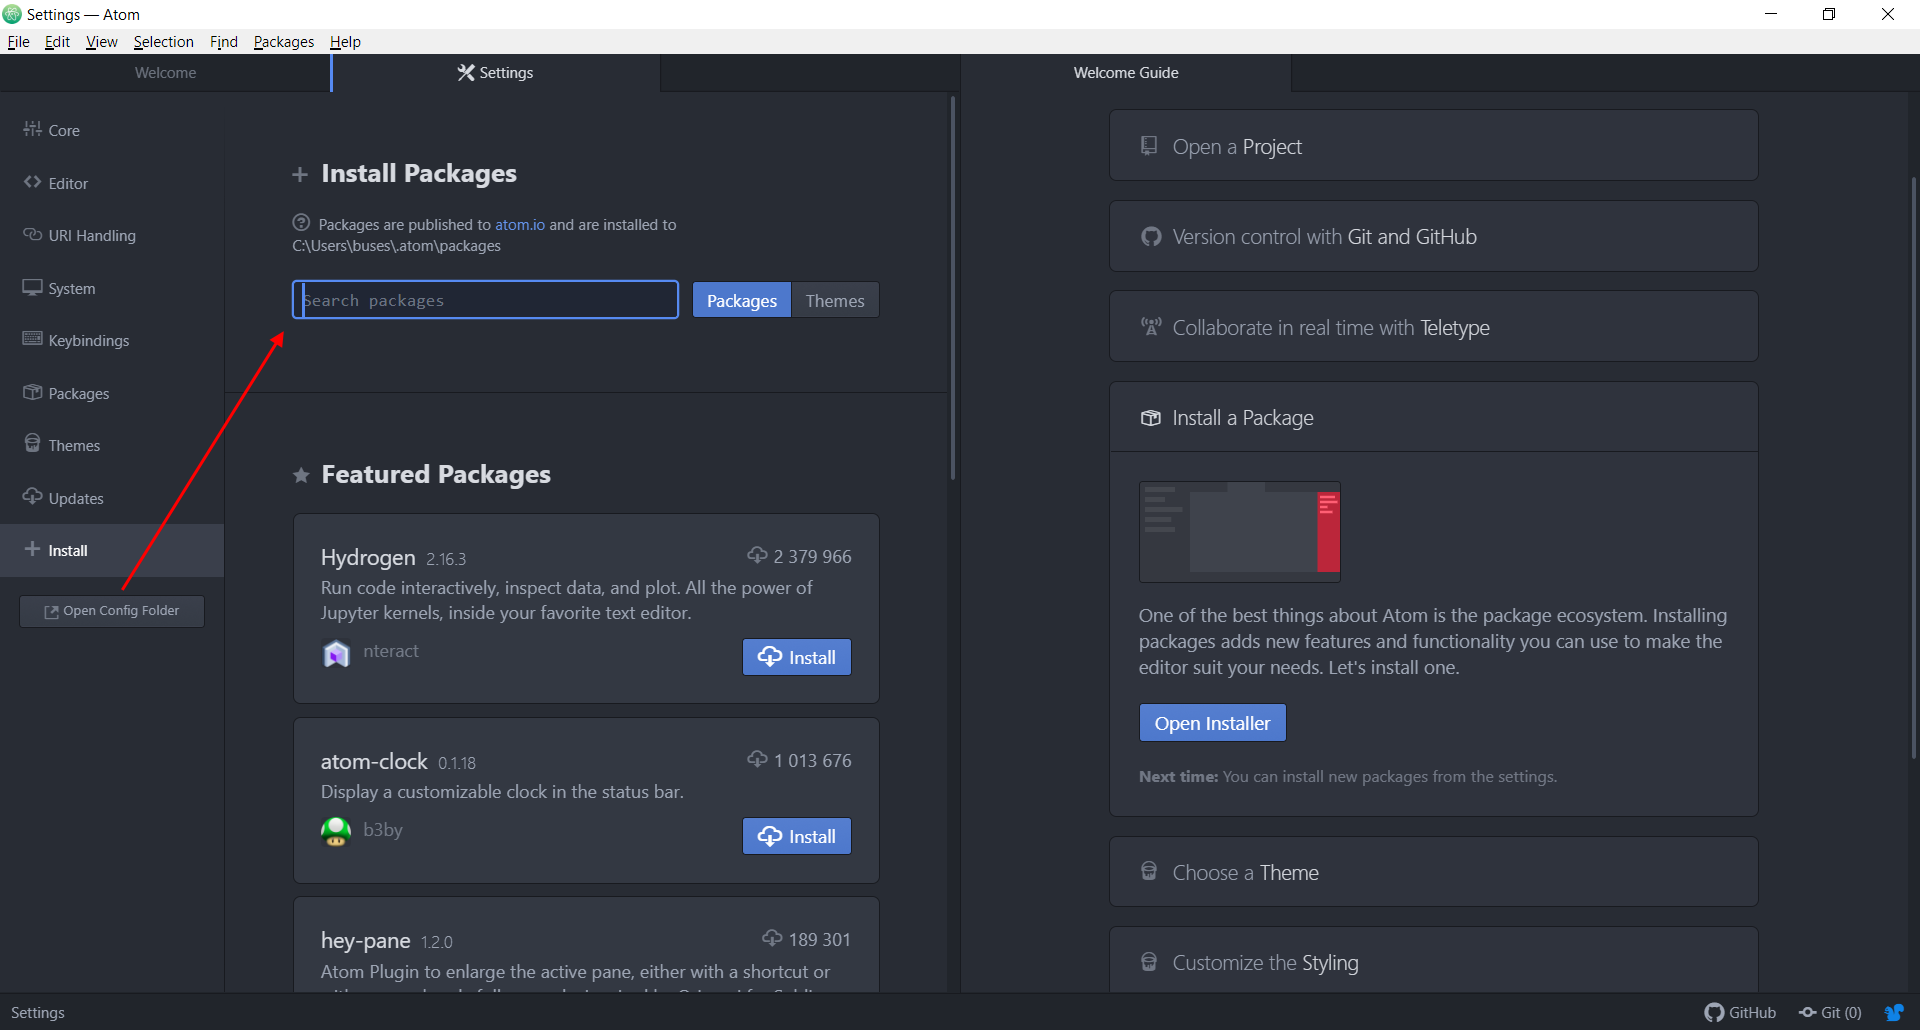
- Запускаем программу, если он еще не открыта, и на главном экране выбираем «Install a Package».

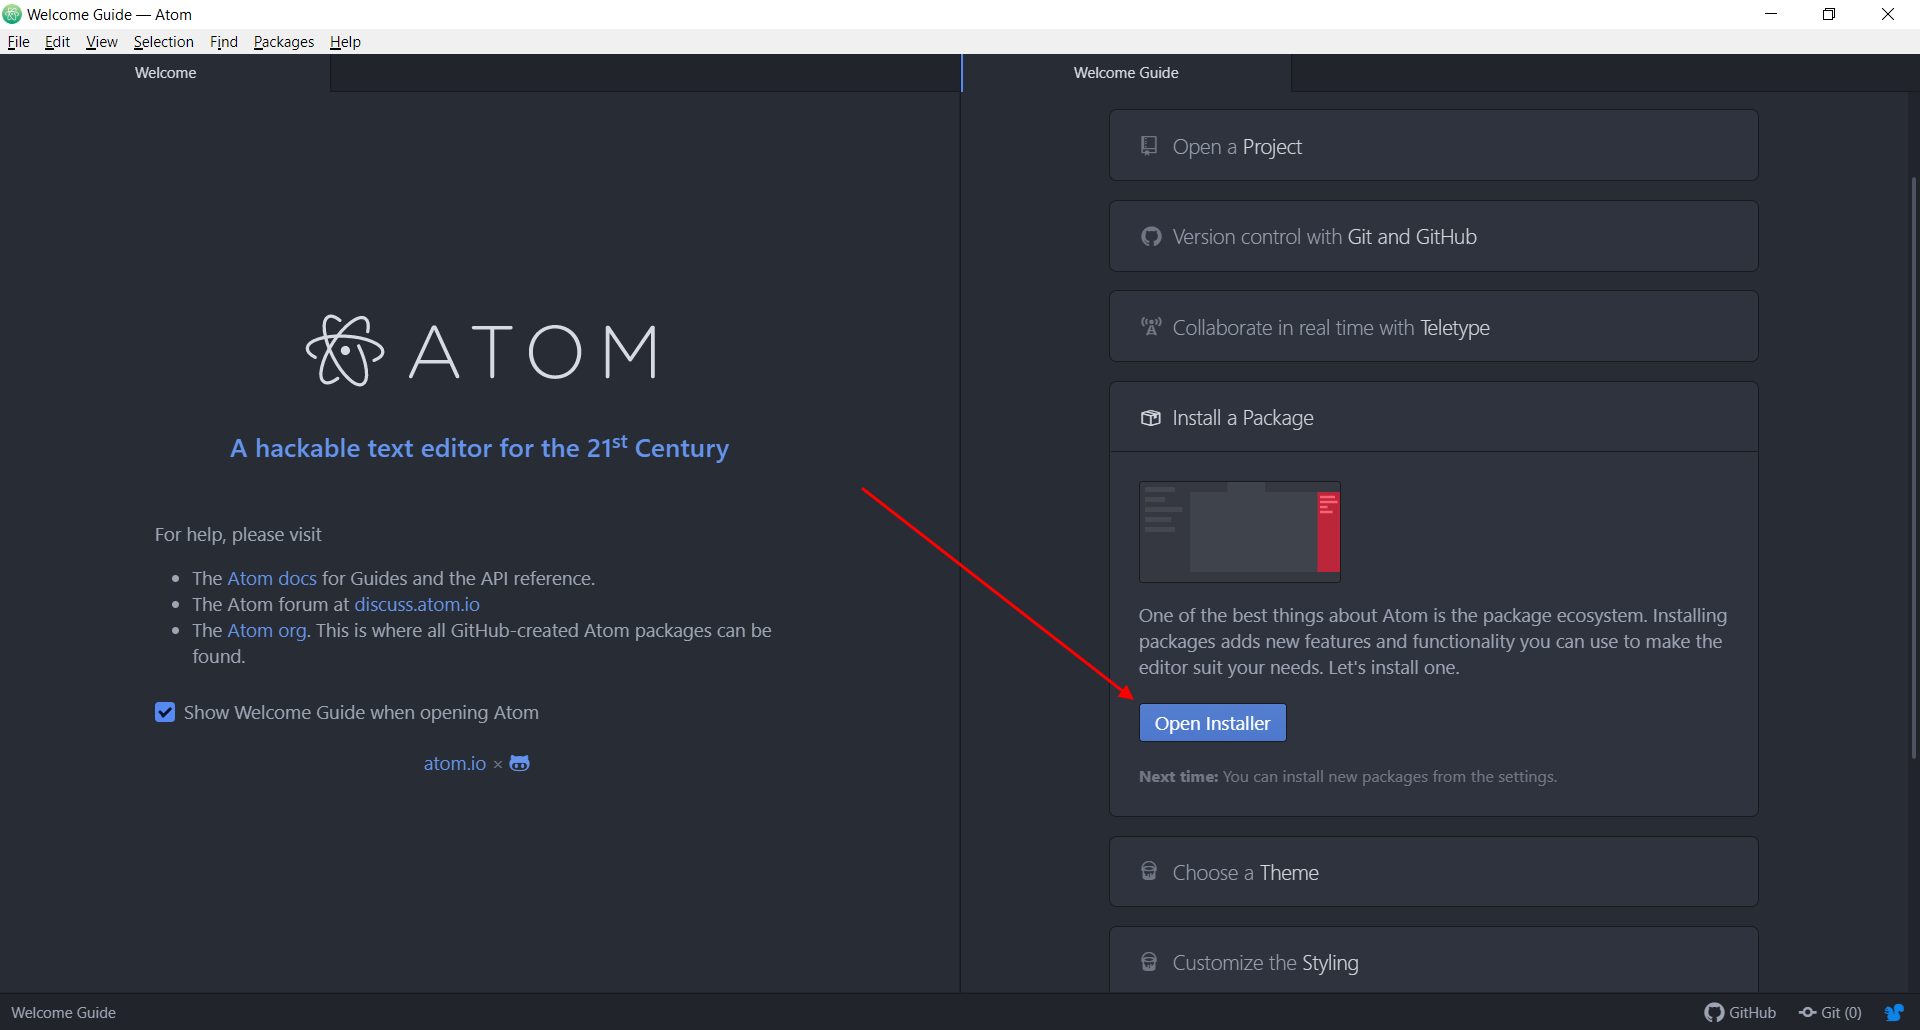
- В раскрывшемся окне выбираем «Open Installer».
- Перед нами открывается дополнительная вкладка в левой части окна. Это поисковая форма, через которую можно находить и устанавливать всевозможные пакеты Atom.
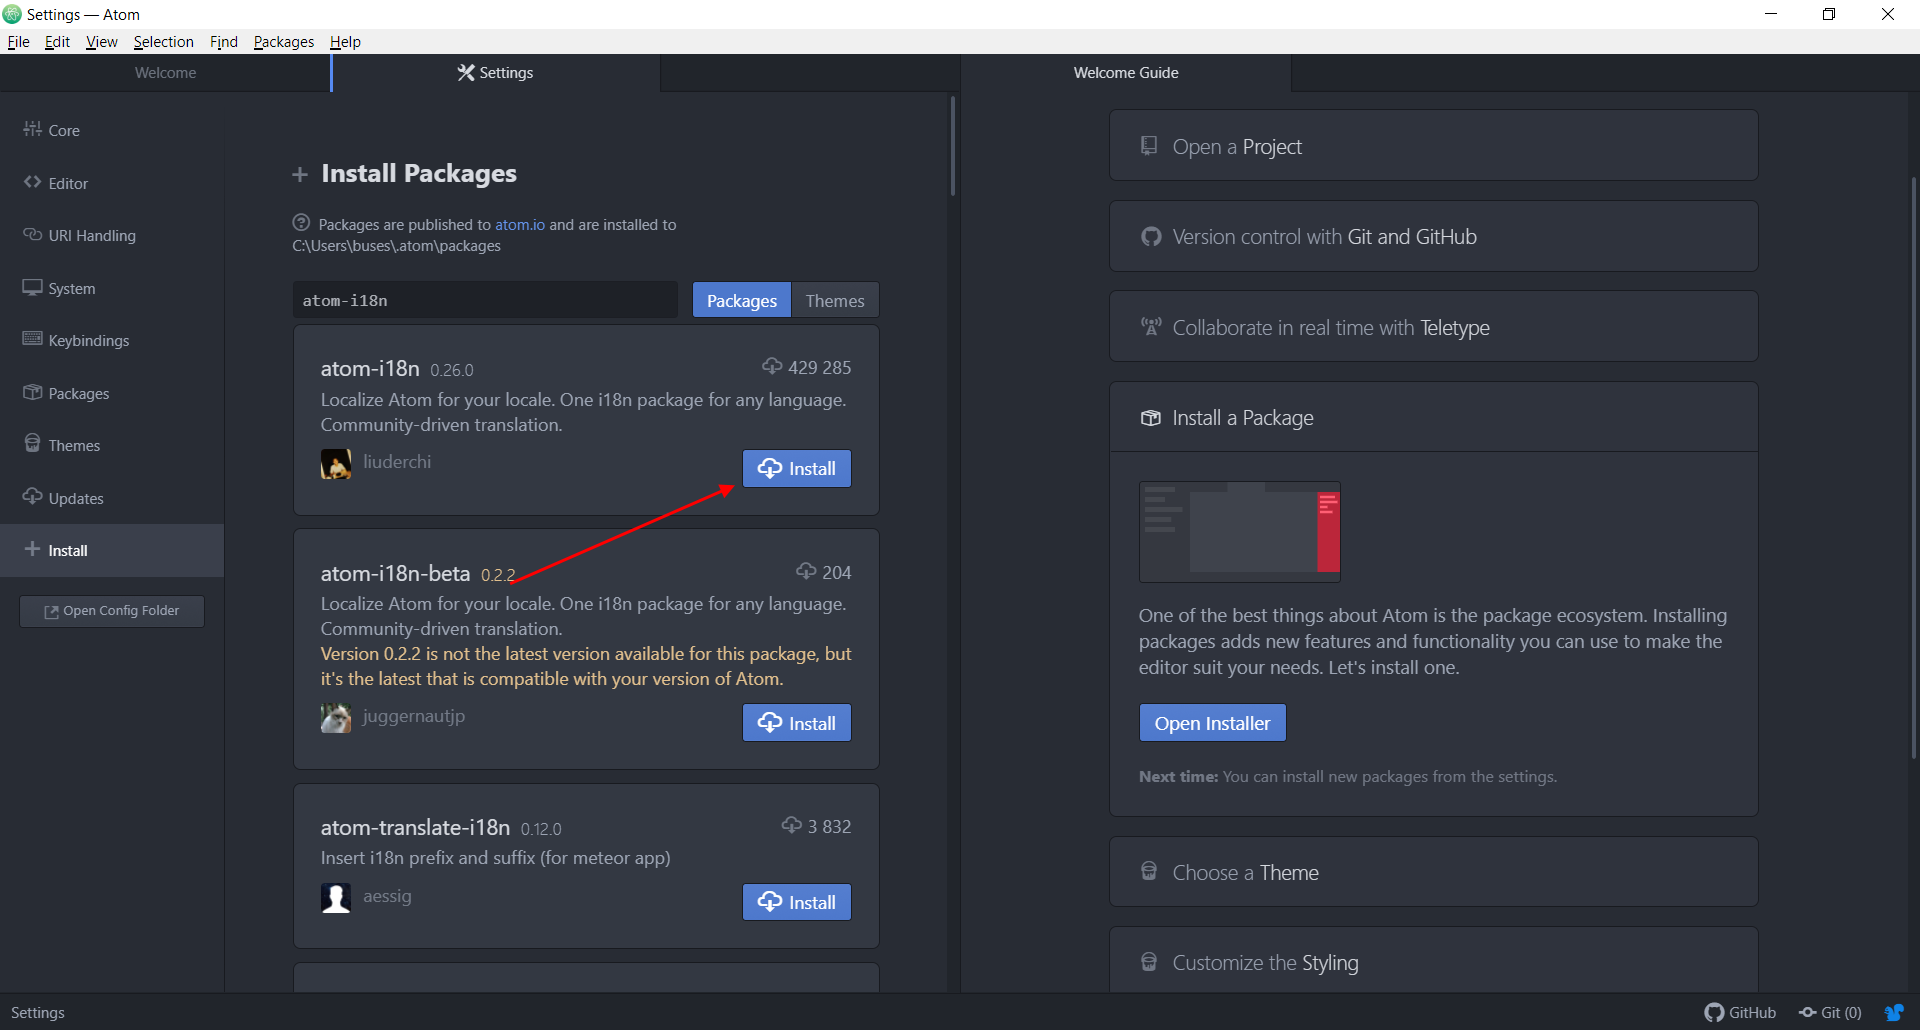
- Для примера давайте установим пакет, позволяющий изменять язык программы. Он называется atom-i18n – вводим его в строку поиска и в первой карточке нажимаем на «Install».
Вот такими простыми действиями мы можем устанавливать любые расширения в редакторе Atom. О том, как ими пользоваться, поговорим далее.
Русифицируем Atom
Многие не рекомендуют русифицировать Atom, так как разработчику нужно постоянно практиковать свой английский. Однако, если вы только начинаете погружаться в разработку, лучше начать с русскоязычного интерфейса.
Для русификации у нас уже все установлено, достаточно нажать пару кнопок:
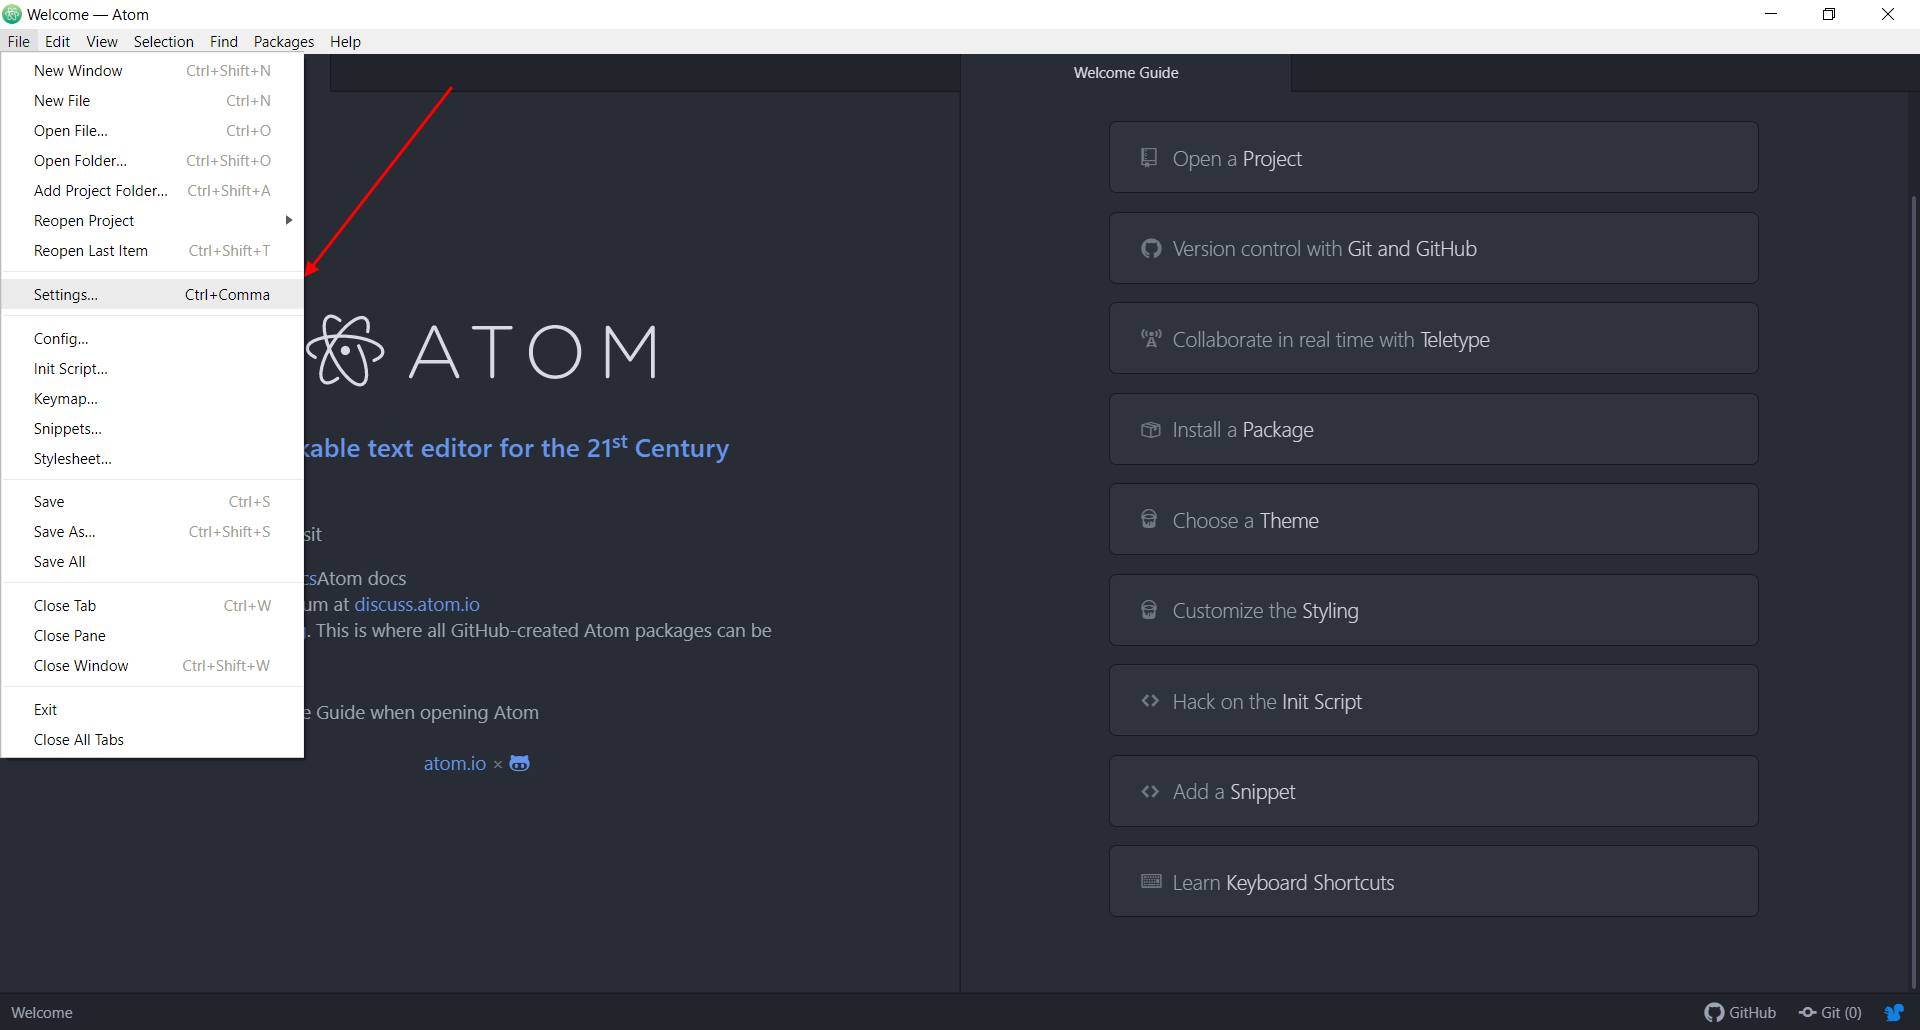
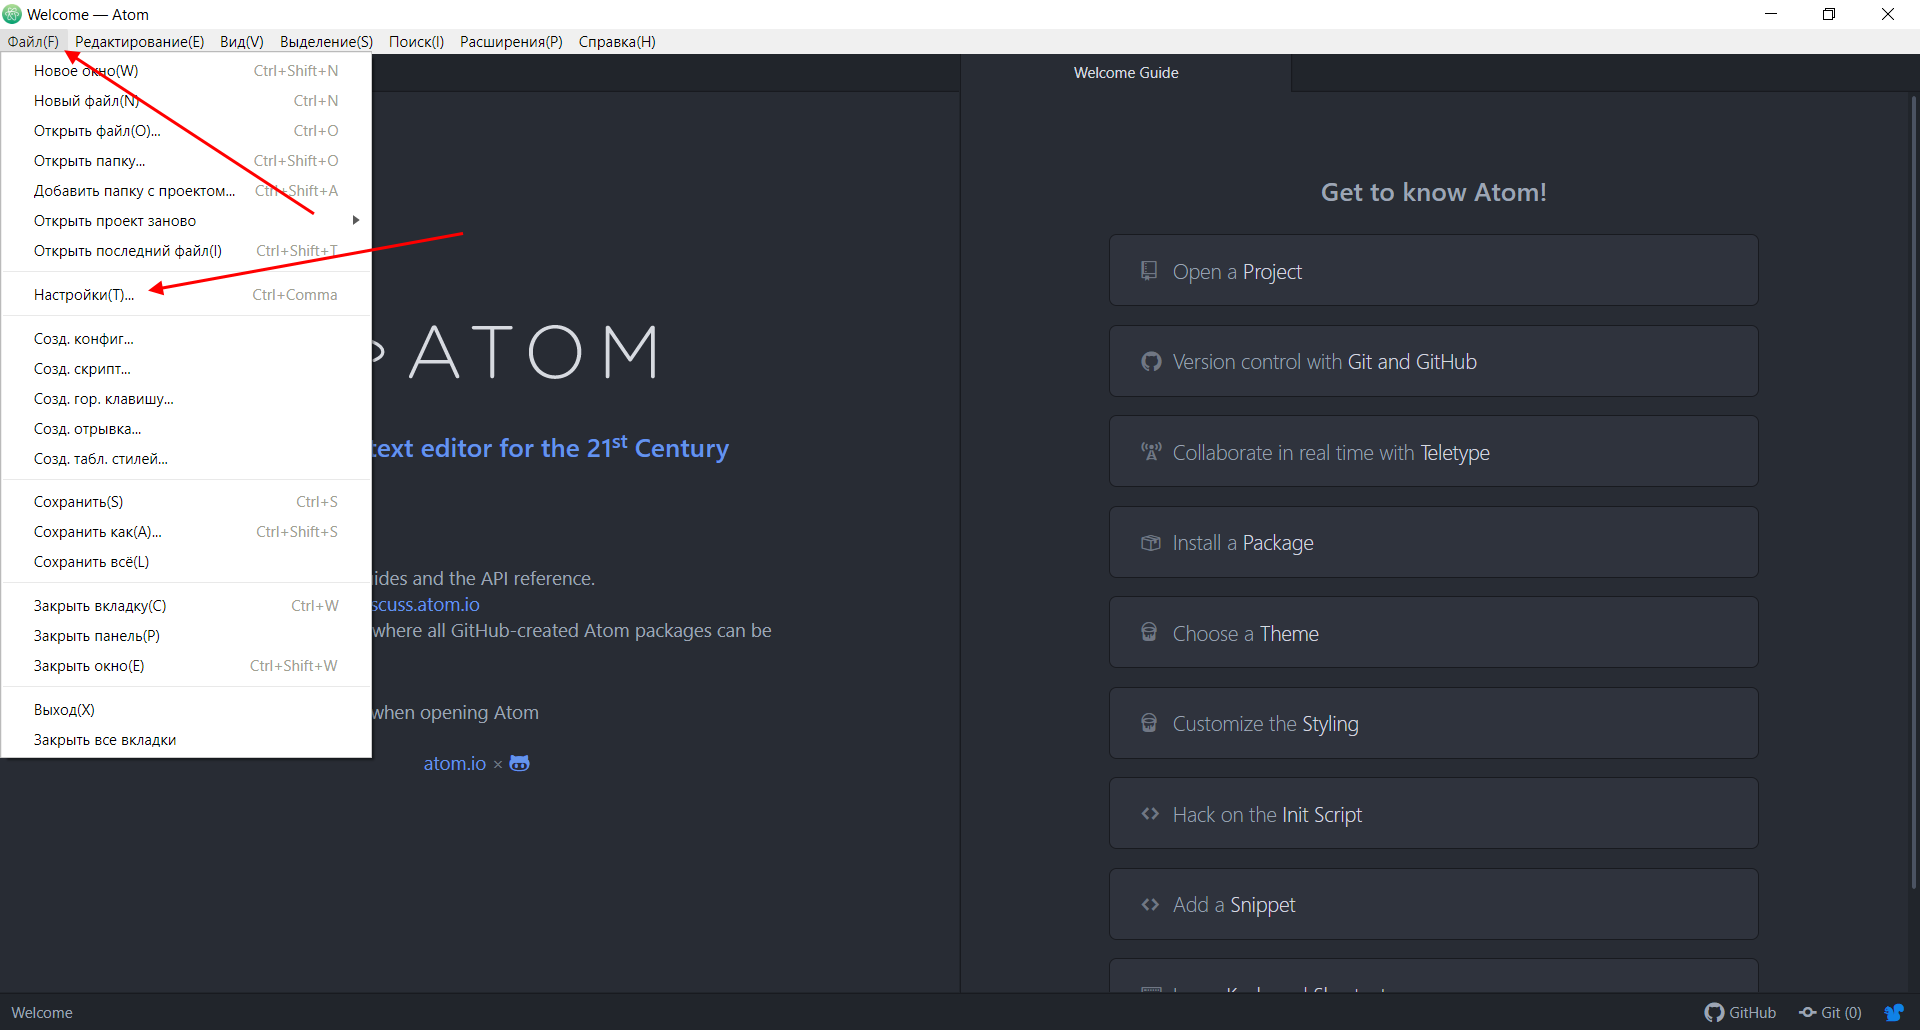
- В верхнем меню кликаем по «File» и выбираем «Settings…».
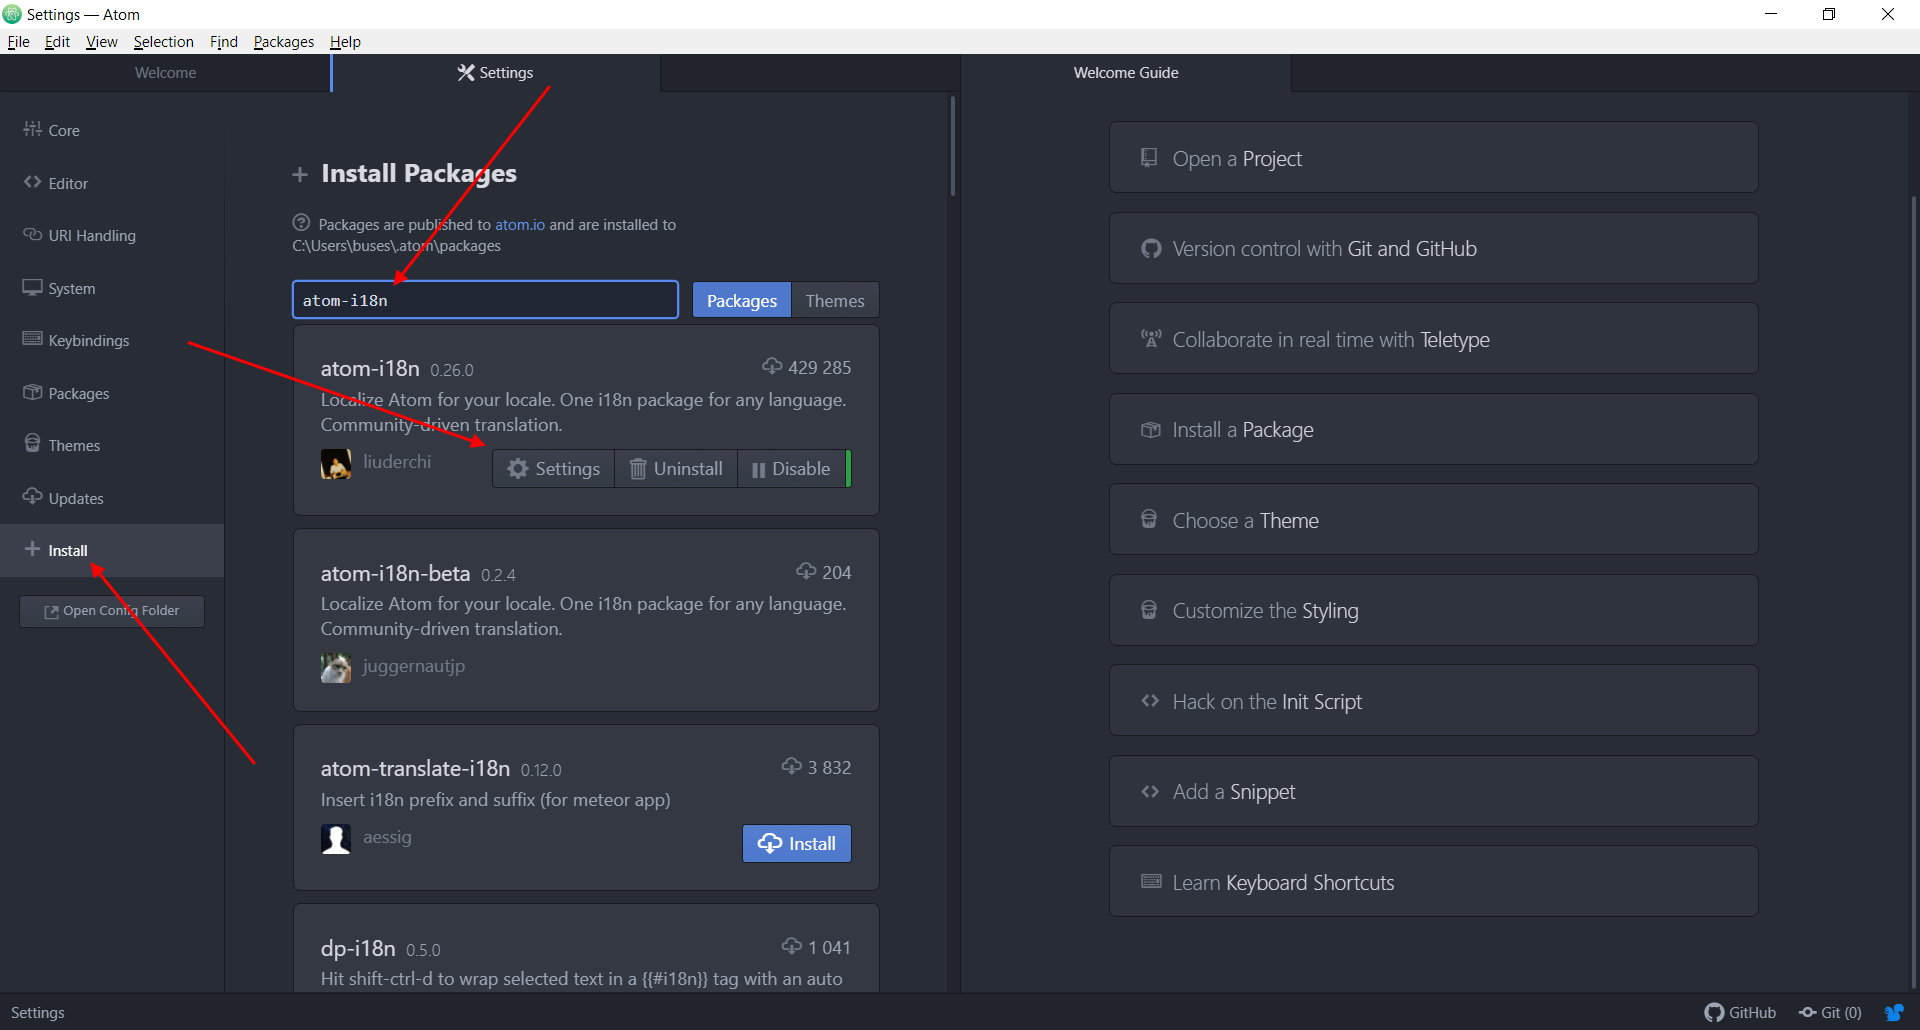
- Следующим шагом переходим в подраздел «Install» и вводим название установленного ранее расширения. Затем жмем на «Settings».
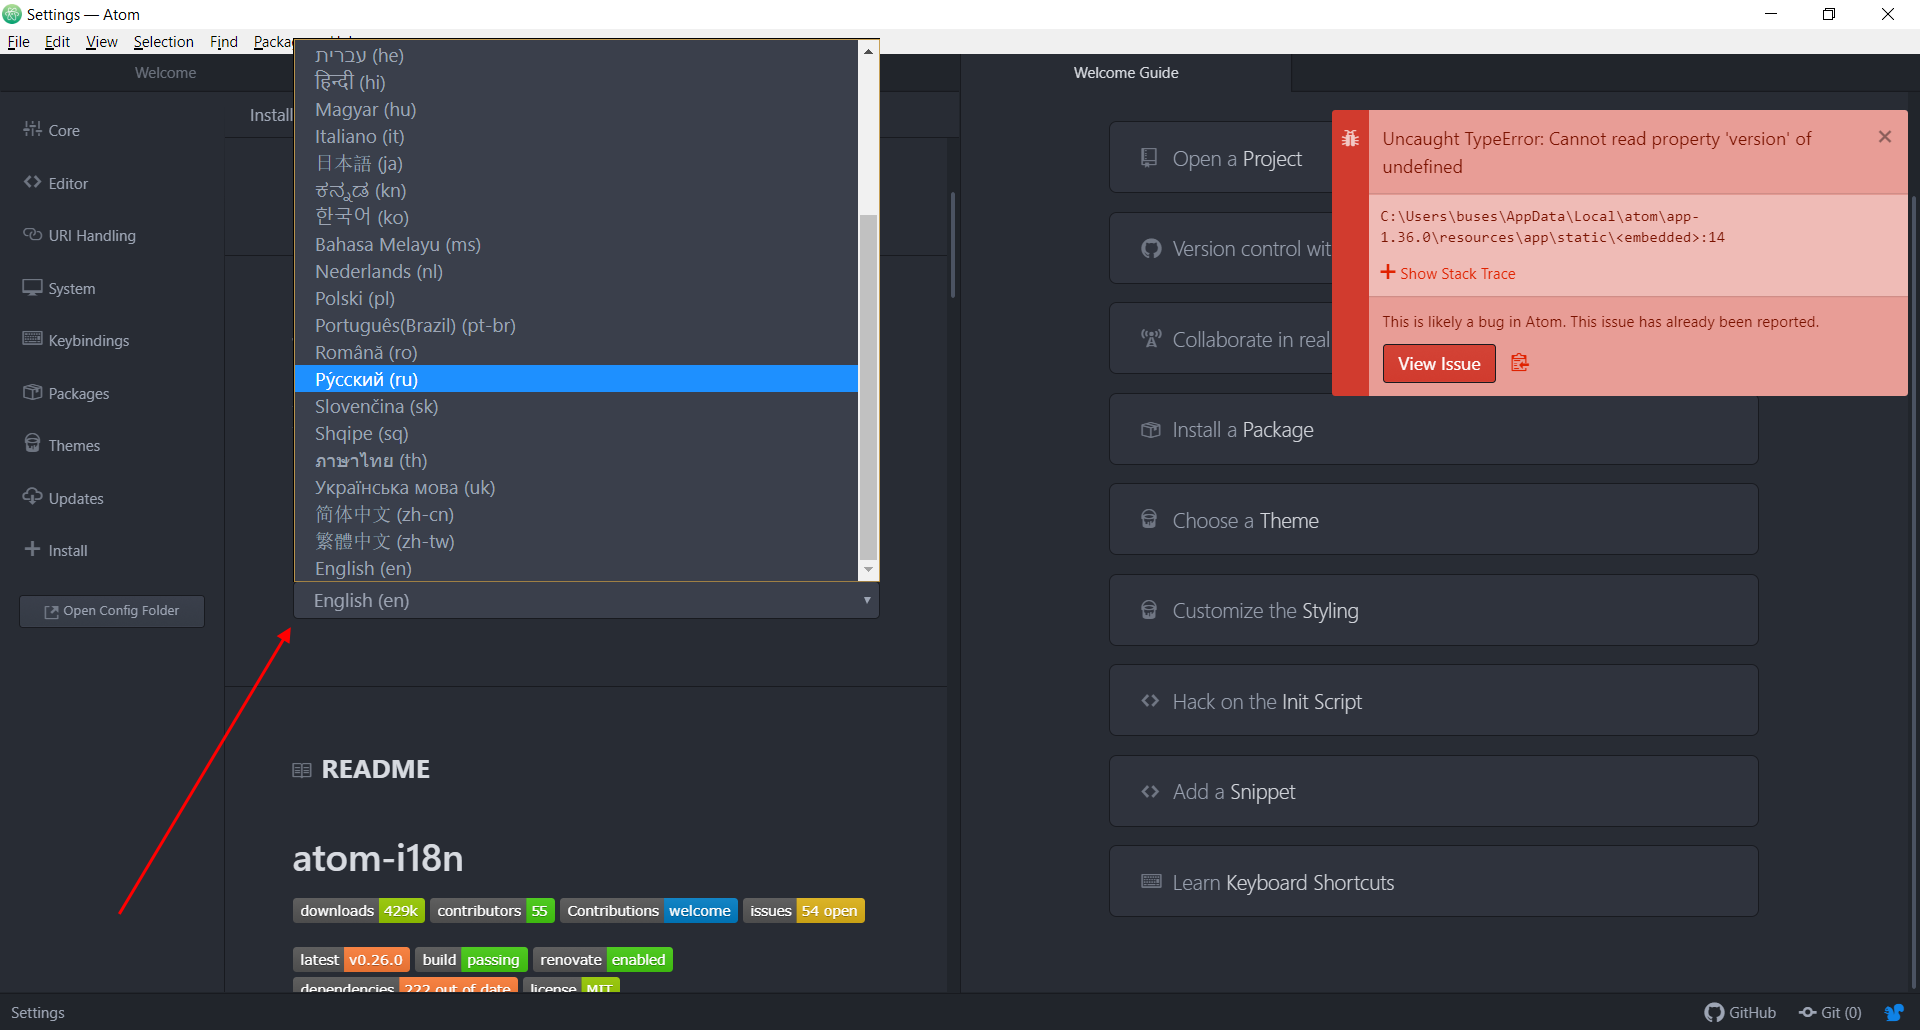
- Пролистываем немного ниже и кликаем по кнопке «English (en)». В отобразившемся окне выбираем нужный нам язык.
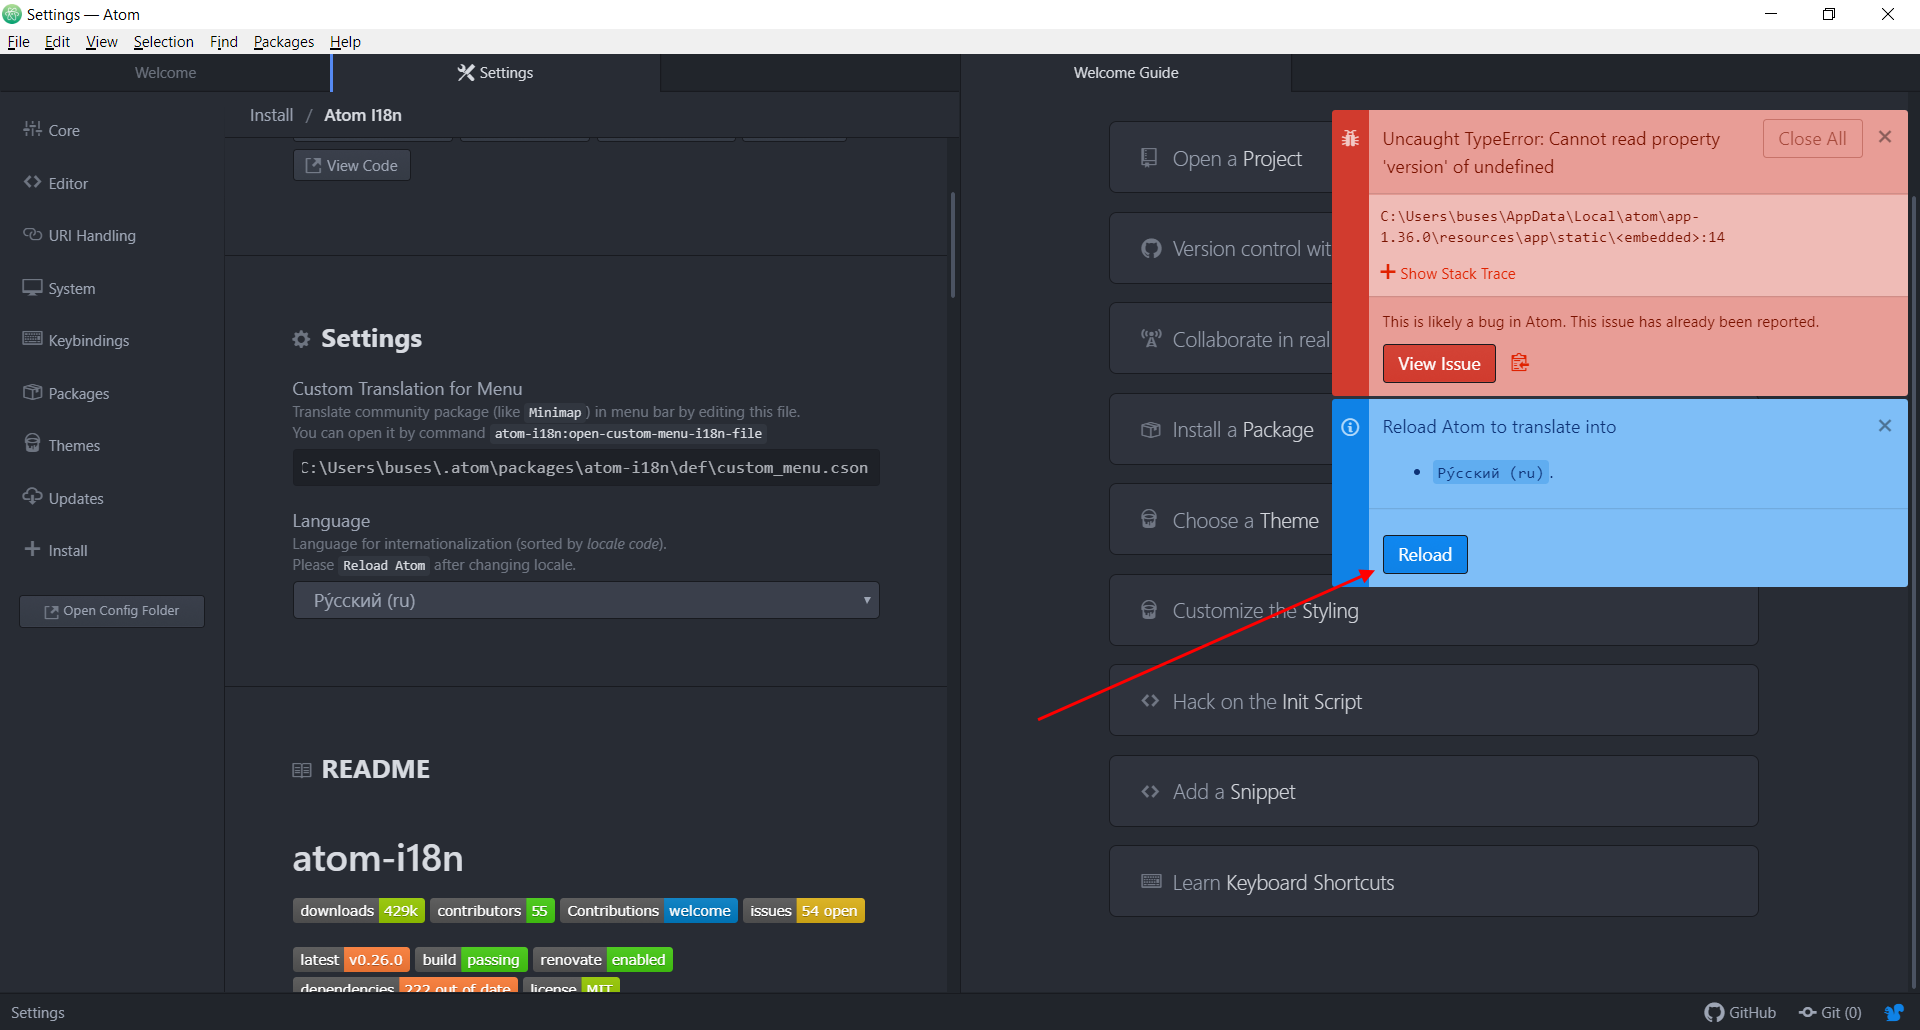
- После этого в правой части отобразится новое окно с кнопкой «Reload». Кликаем по ней – таким образом мы перезагрузим программу и сделаем ее русифицированной.
- В результате мы получаем переведенный на русский язык текстовый редактор Atom.
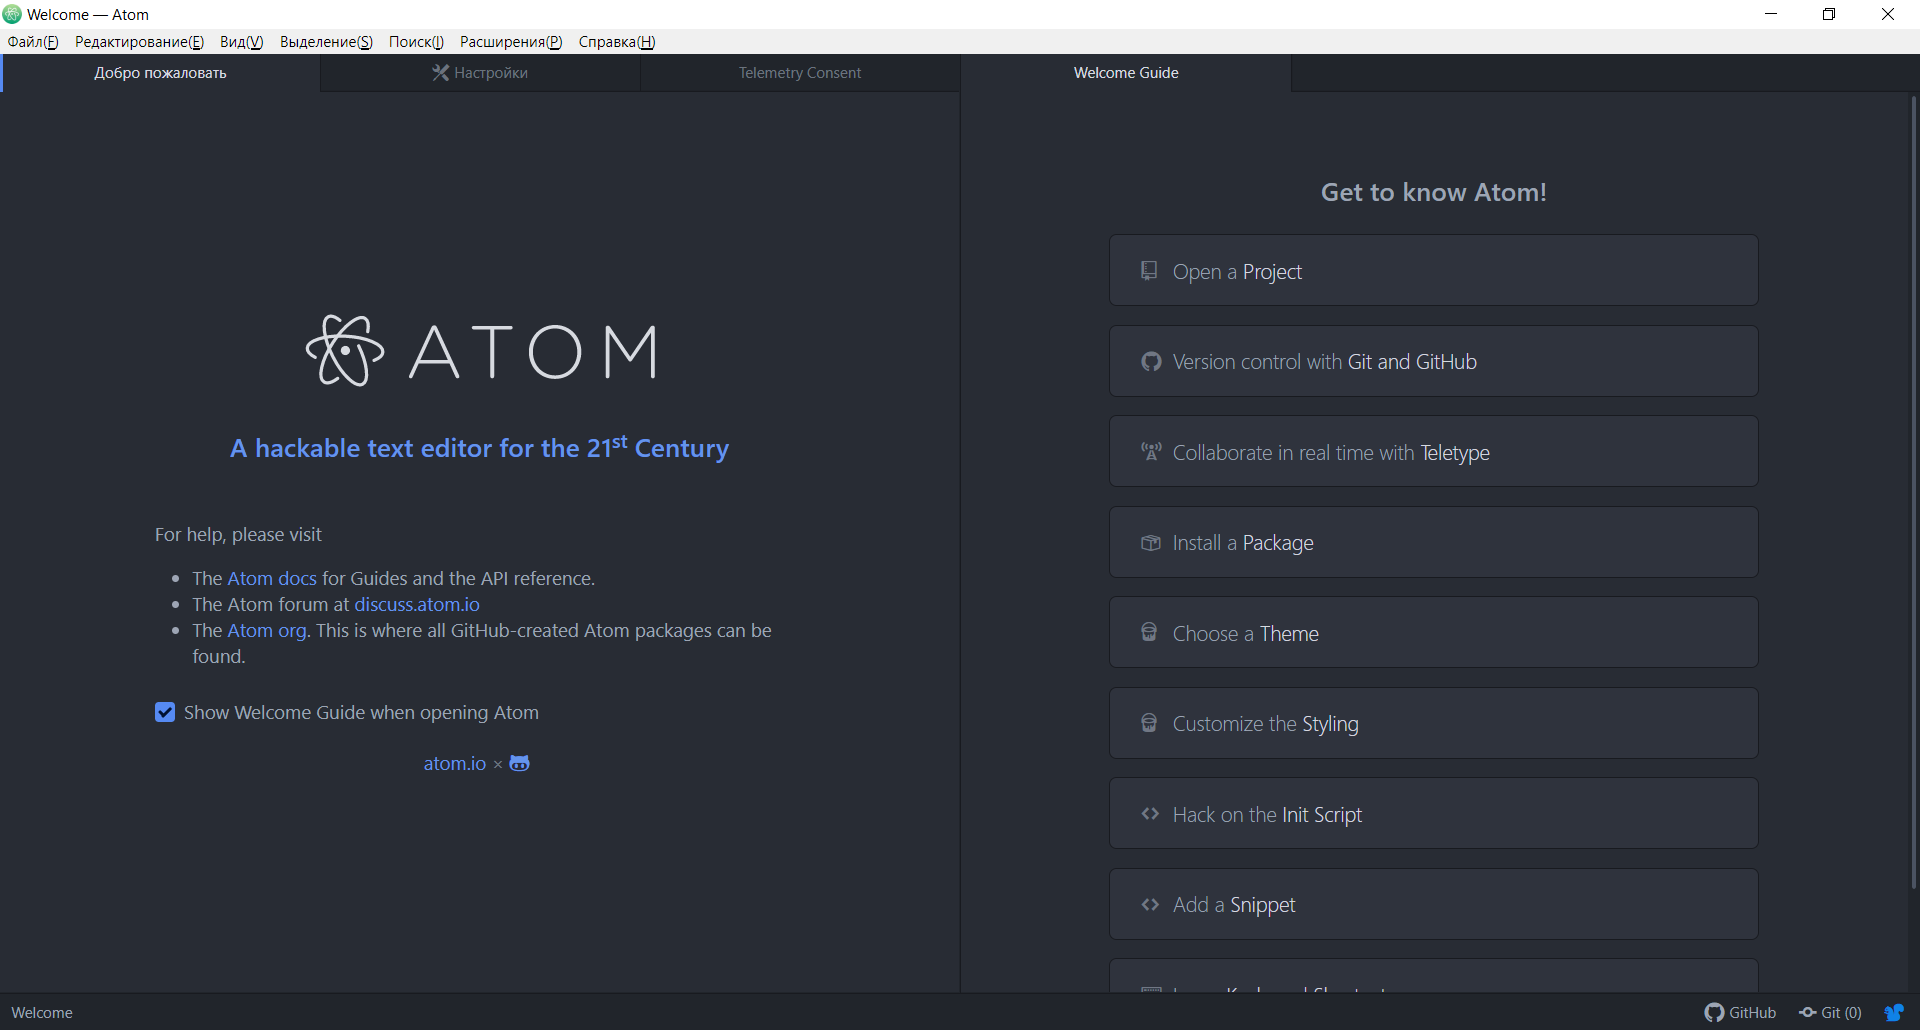
Обратите внимание на то, что основные кнопки для начала работы не были переведены, но если открыть настройки или посмотреть на меню, то там все будет на русском.
Изменяем тему оформления
Не совсем обязательные действия в виде выбора оформления темы, но иногда хочется изменить стиль программы. Для это необходимо выполнить следующее:
- Открываем в меню «Файл» и выбираем «Настройки…».
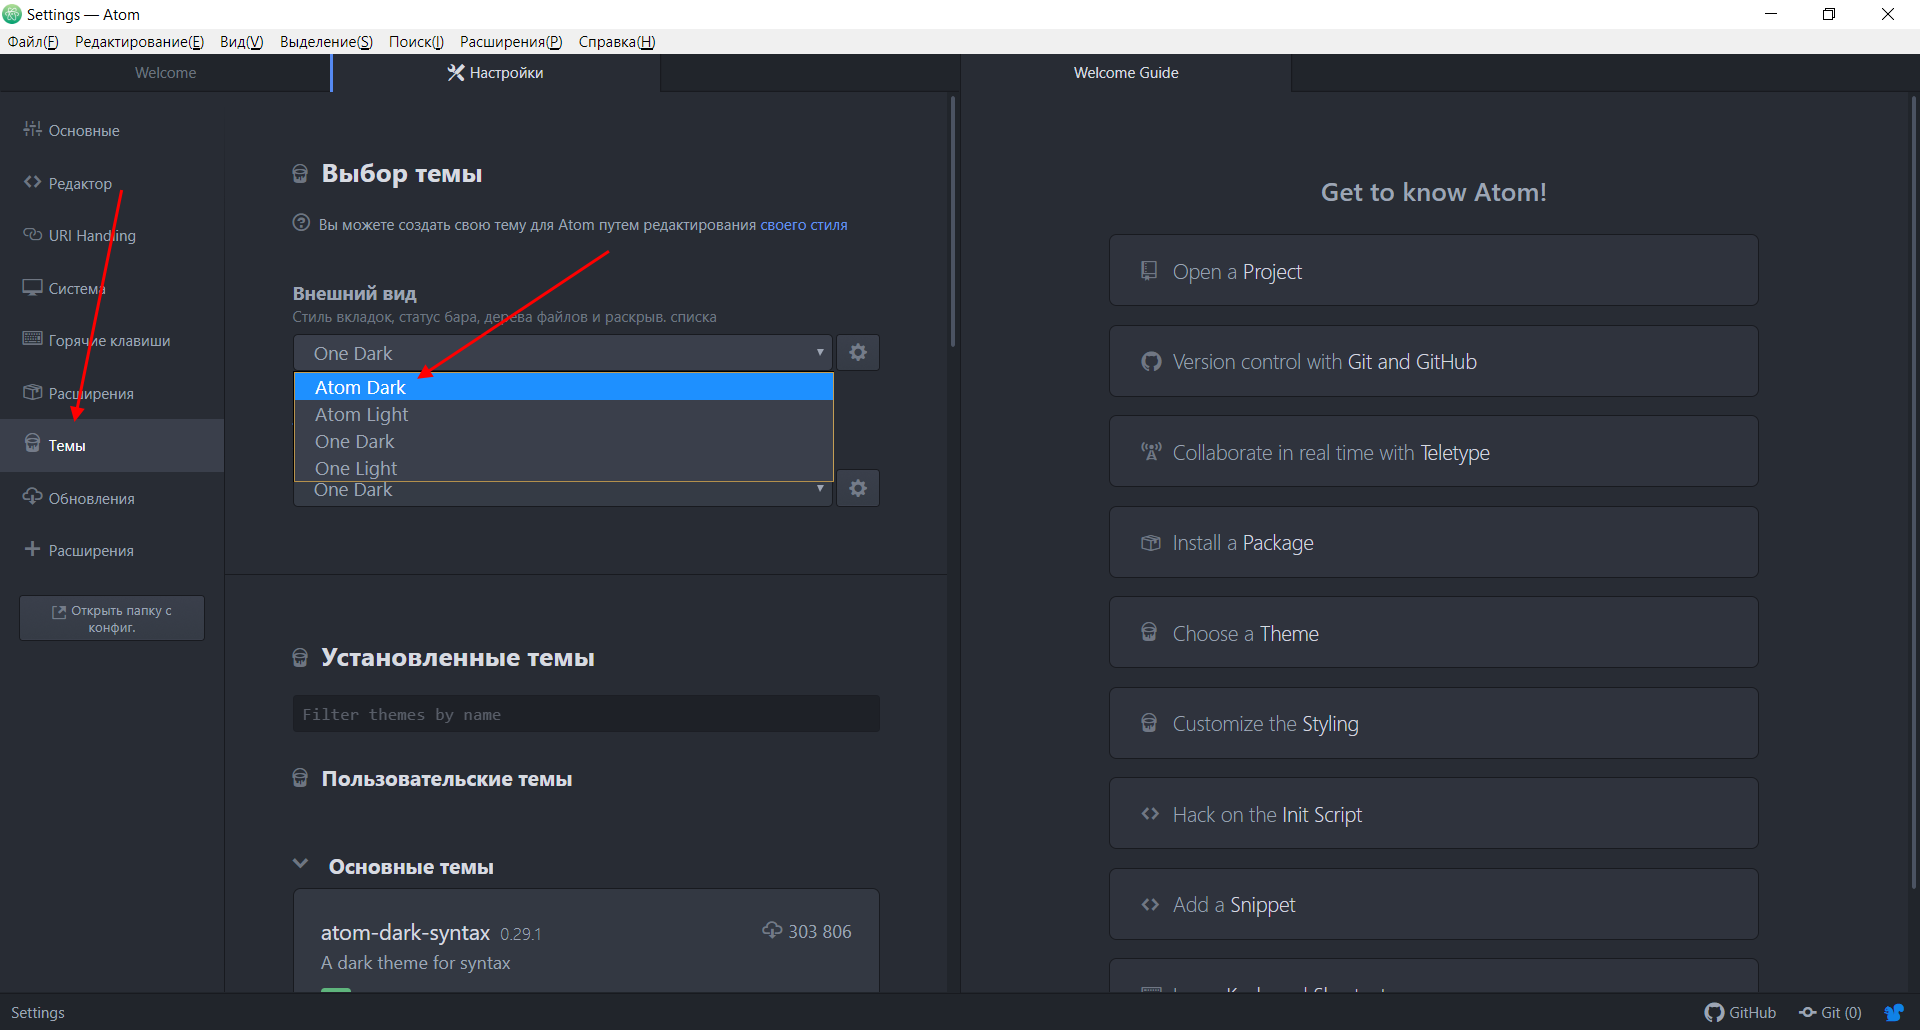
- Переходим во вкладку «Темы» и в правой части находим блок «Внешний вид». Именно через него мы и можем изменять оформление редактора. Для примера давайте выберем «Atom Dark» и посмотрим, как преобразится окно программы.
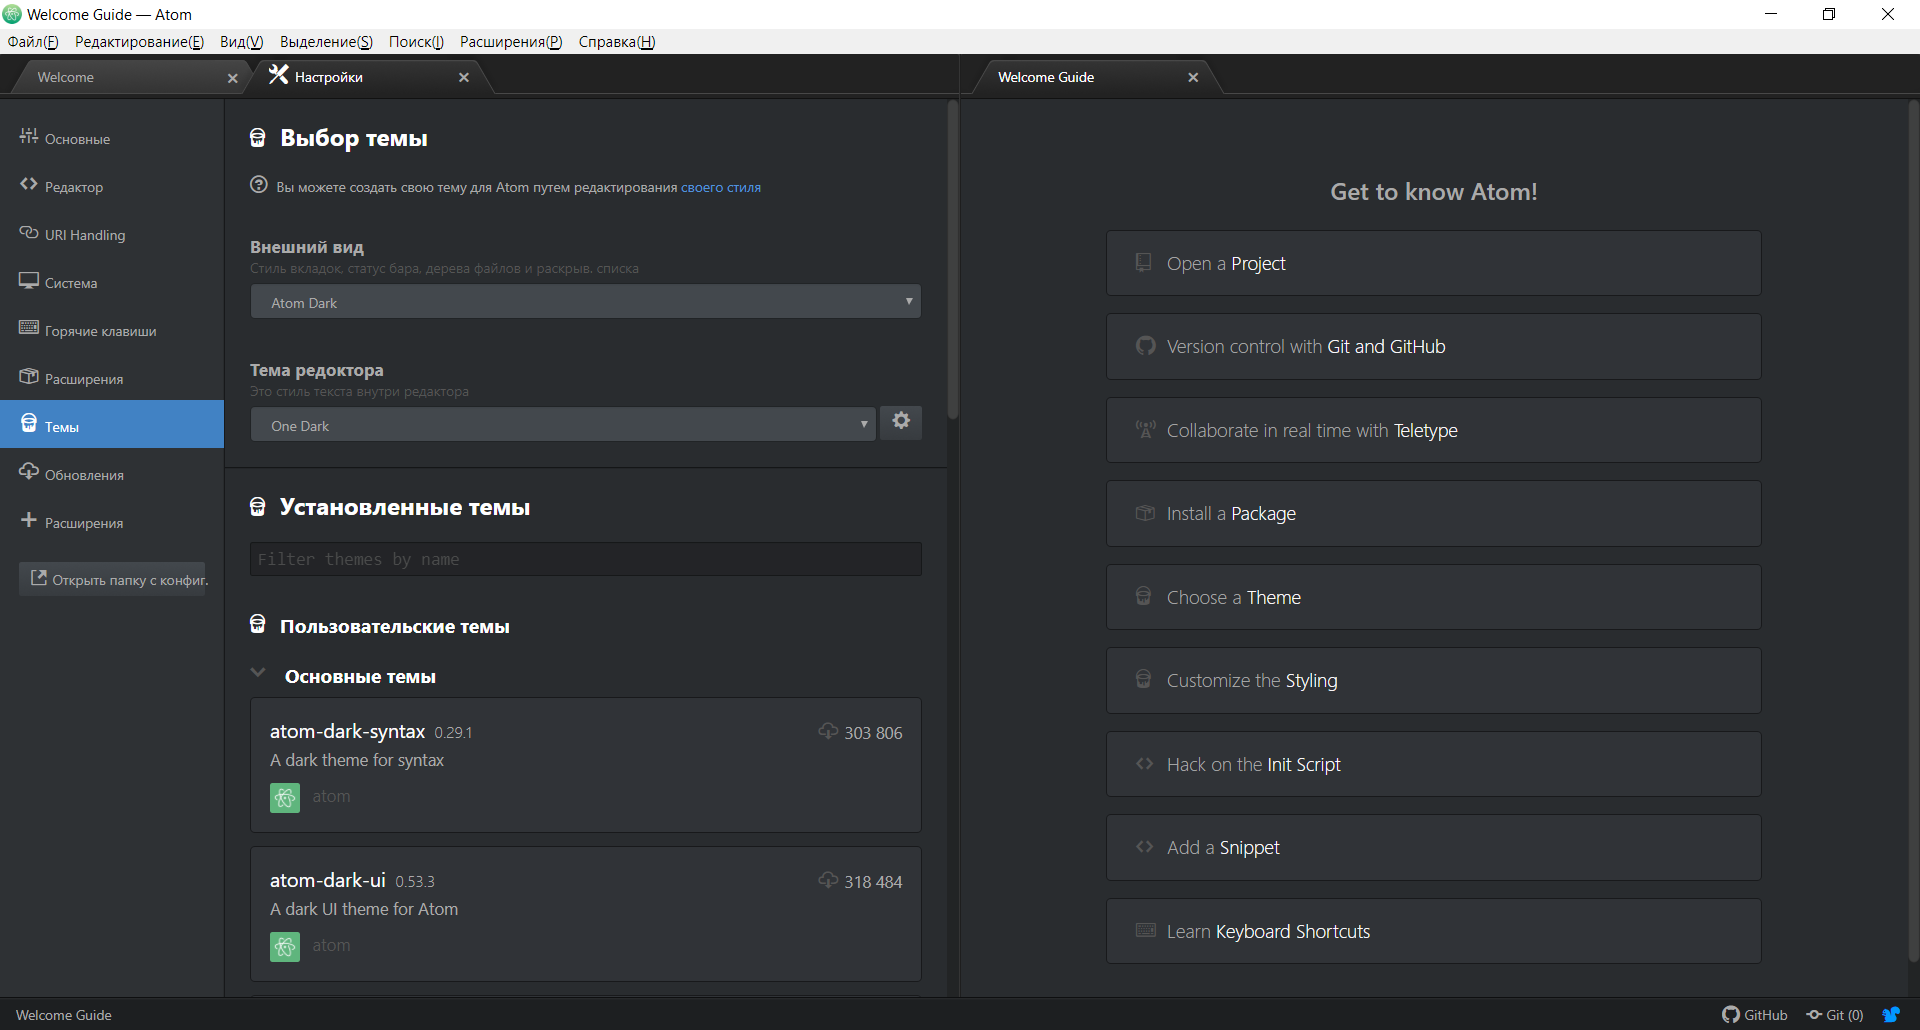
- В результате получаем:
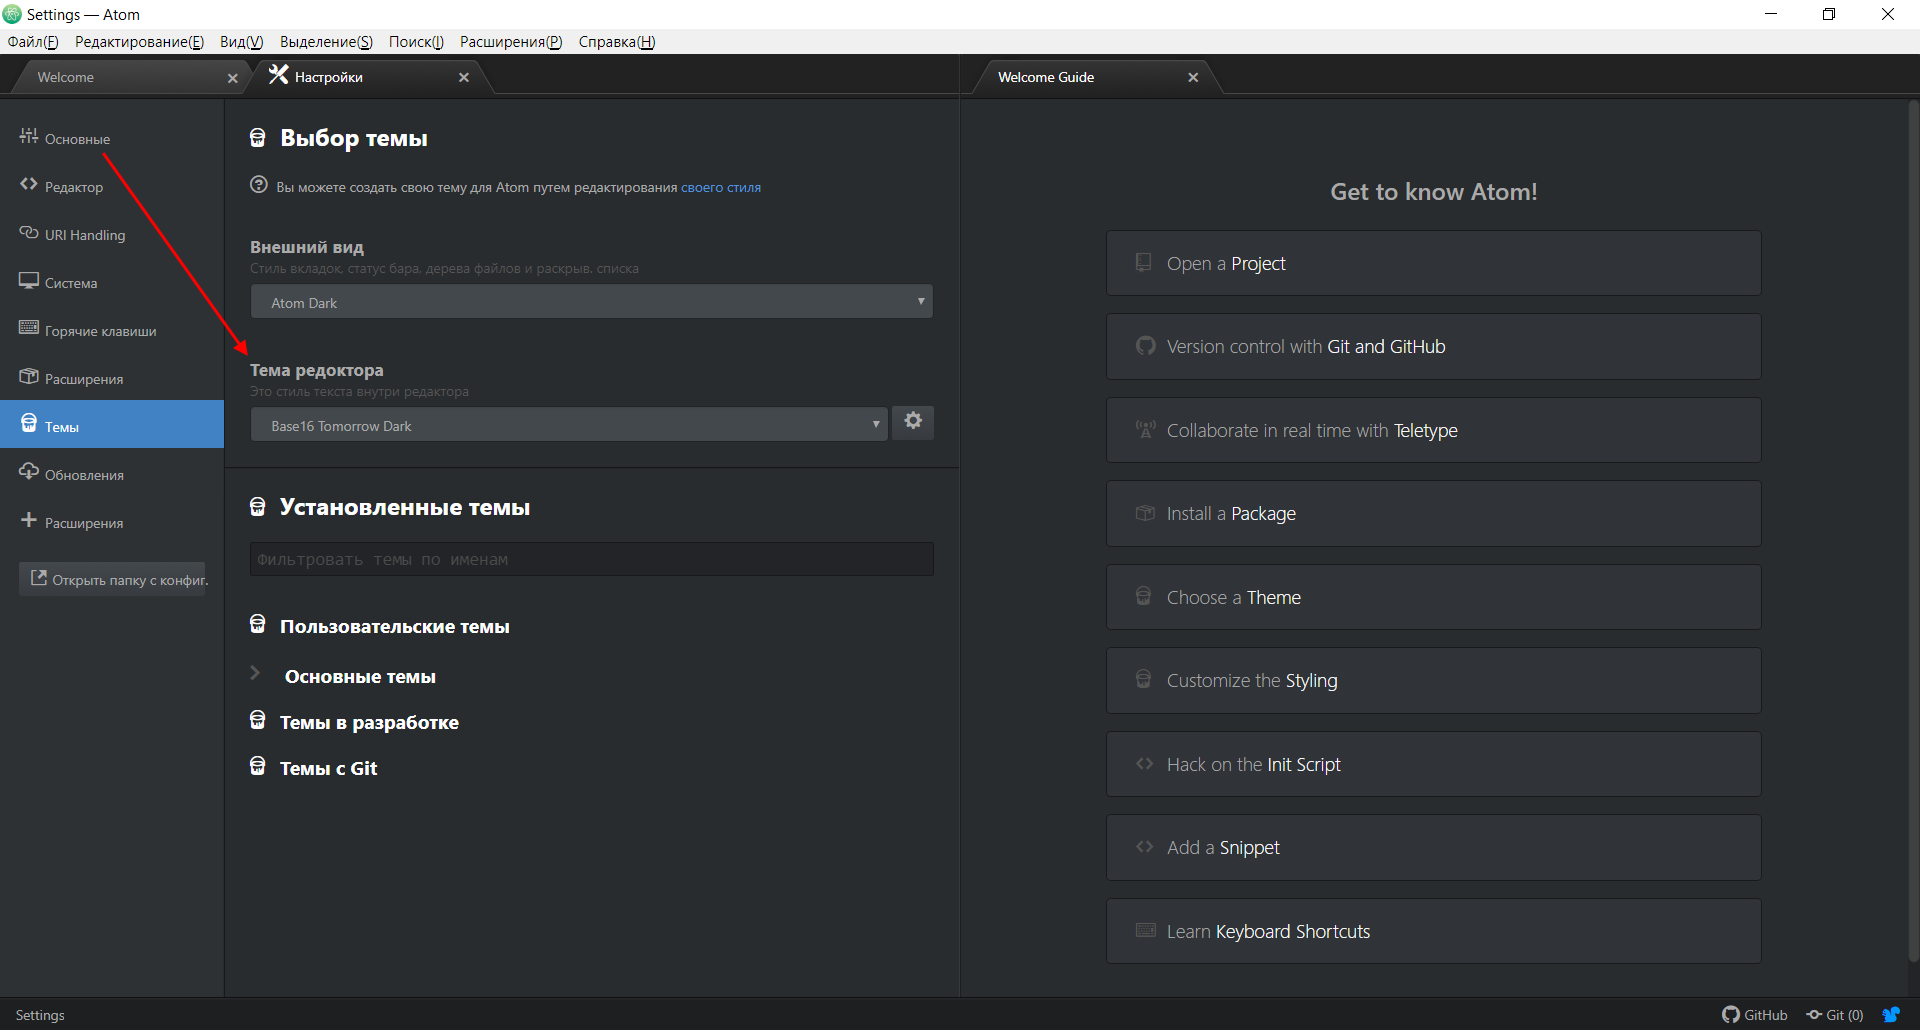
- Здесь же мы можем отдельно поменять тему редактора кода.
Подсветка синтаксиса и ошибок
Изначально в Atom подсветка синтаксиса доступна для всех популярных языков: PHP, HTML, Json, SQL, XML, CSS, CoffeeScript, JavaScript, Java, C/C++, Go. При необходимости мы можем добавить подсветку и для других языков.
Если вы пользуетесь шаблонизатором twig, то в Linux его можно добавить через пакет:
atom-twig
Для улучшения вида файлов можно установить пакет:
logo-file-icons
Также вы можете установить пакет Linter для подсветки ошибок. Например, чтобы добавить Linter для PHP, CSS, JSON и HTML, следует установить расширения:
- linter
- linter-ui-default
- linter-php
- linter-csslint
- linter-json-lint
- linter-htmllint
Теперь, если вы допустите ошибку в PHP или другом поддерживаемом языке, то текстовый редактор сразу же об этом сообщит.
Поддержка GIT
Думаю, не нужно объяснять, что такое система контроля версий. Сегодня она используется практически везде. Чтобы синхронизировать Atom и GIT, достаточно установить пакет git-plus. Если в папке проекта есть Git-репозиторий, то вы будете видеть измененные и новые файлы, а также их текущее состояние.
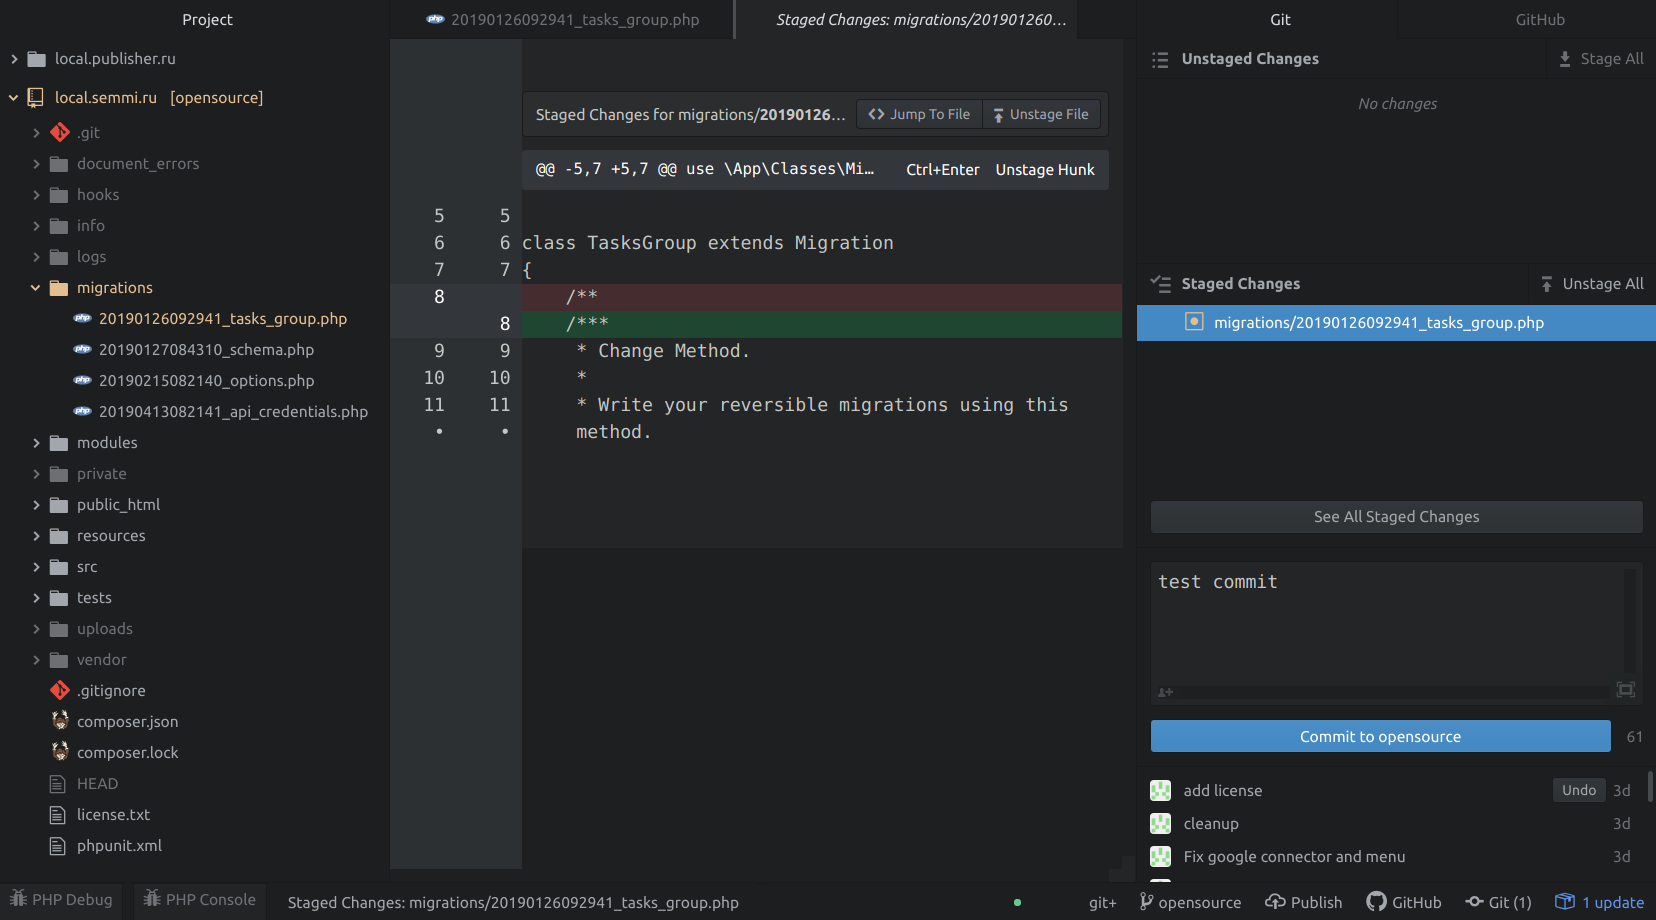
При необходимости мы можем сделать и коммит – для этого необходимо в нижнем правом углу нажать на кнопку Git. Затем указать измененные файлы, ввести описание коммита и нажать на кнопку «Commit to имя_ветки». Возле кнопки Git мы также можем найти другие кнопки, предназначенные для переключения между ветками и публикации изменений в удаленный репозиторий.
Автоматическое форматирование
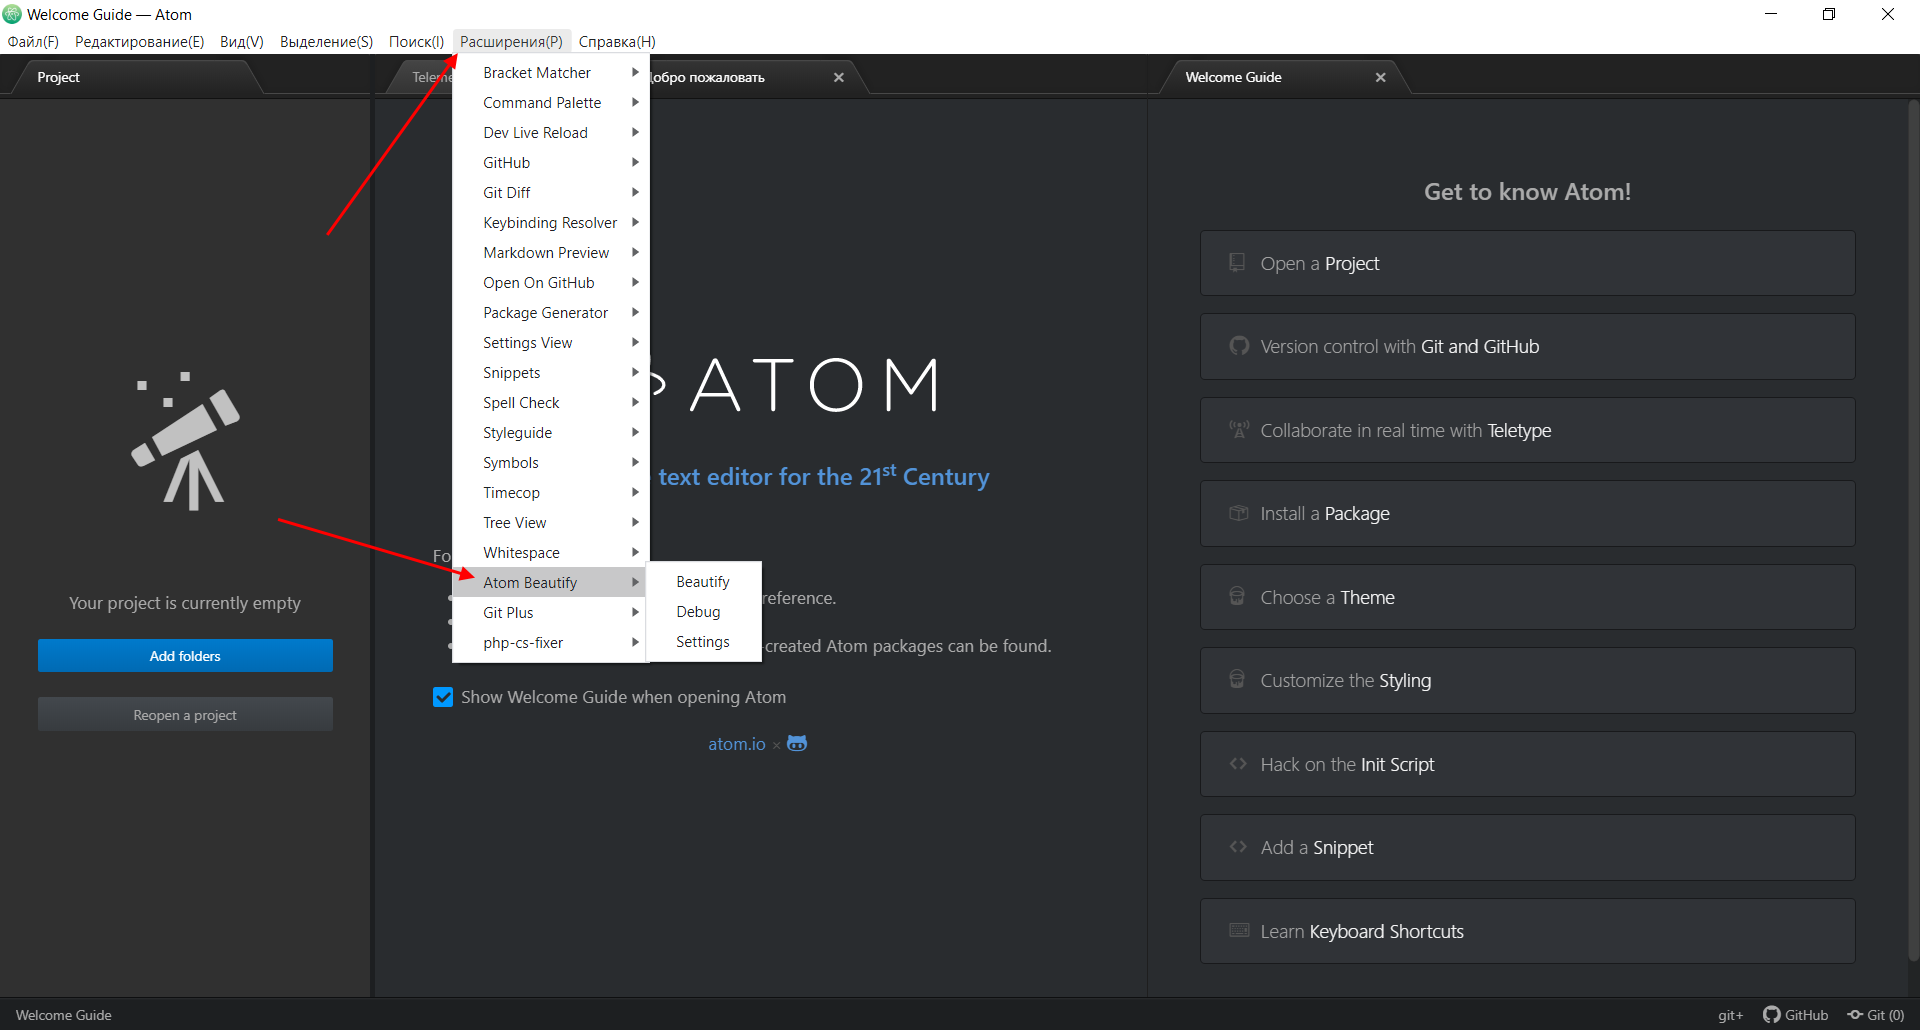
Без автоматического форматирования кода сегодня практически никуда. Всего в один клик можно отформатировать нужный фрагмент кода – для этого достаточно установить дополнительные расширения. Например, чтобы подключить форматирование для PHP, то следует скачать atom-beautify и php-cs-fixer.
После установки вы можете перейти в меню «Расширения» и увидеть все доступные плагины.
Редактор в стиле VIM
Если вы привыкли работать с редактором Vim, то в Atom можно подключить все возможности Vim. Для этого следует установить два дополнительных расширения:
- vim-mode-plus
- ex-mode
С помощью него мы можем перемещаться по тексту с помощью клавиш h, j, k, l, выделять его с помощью v, использовать y, x и p для копирования и вставки, / для поиска, а также команды vim, например :w, для сохранения документа.
Префиксы в CSS
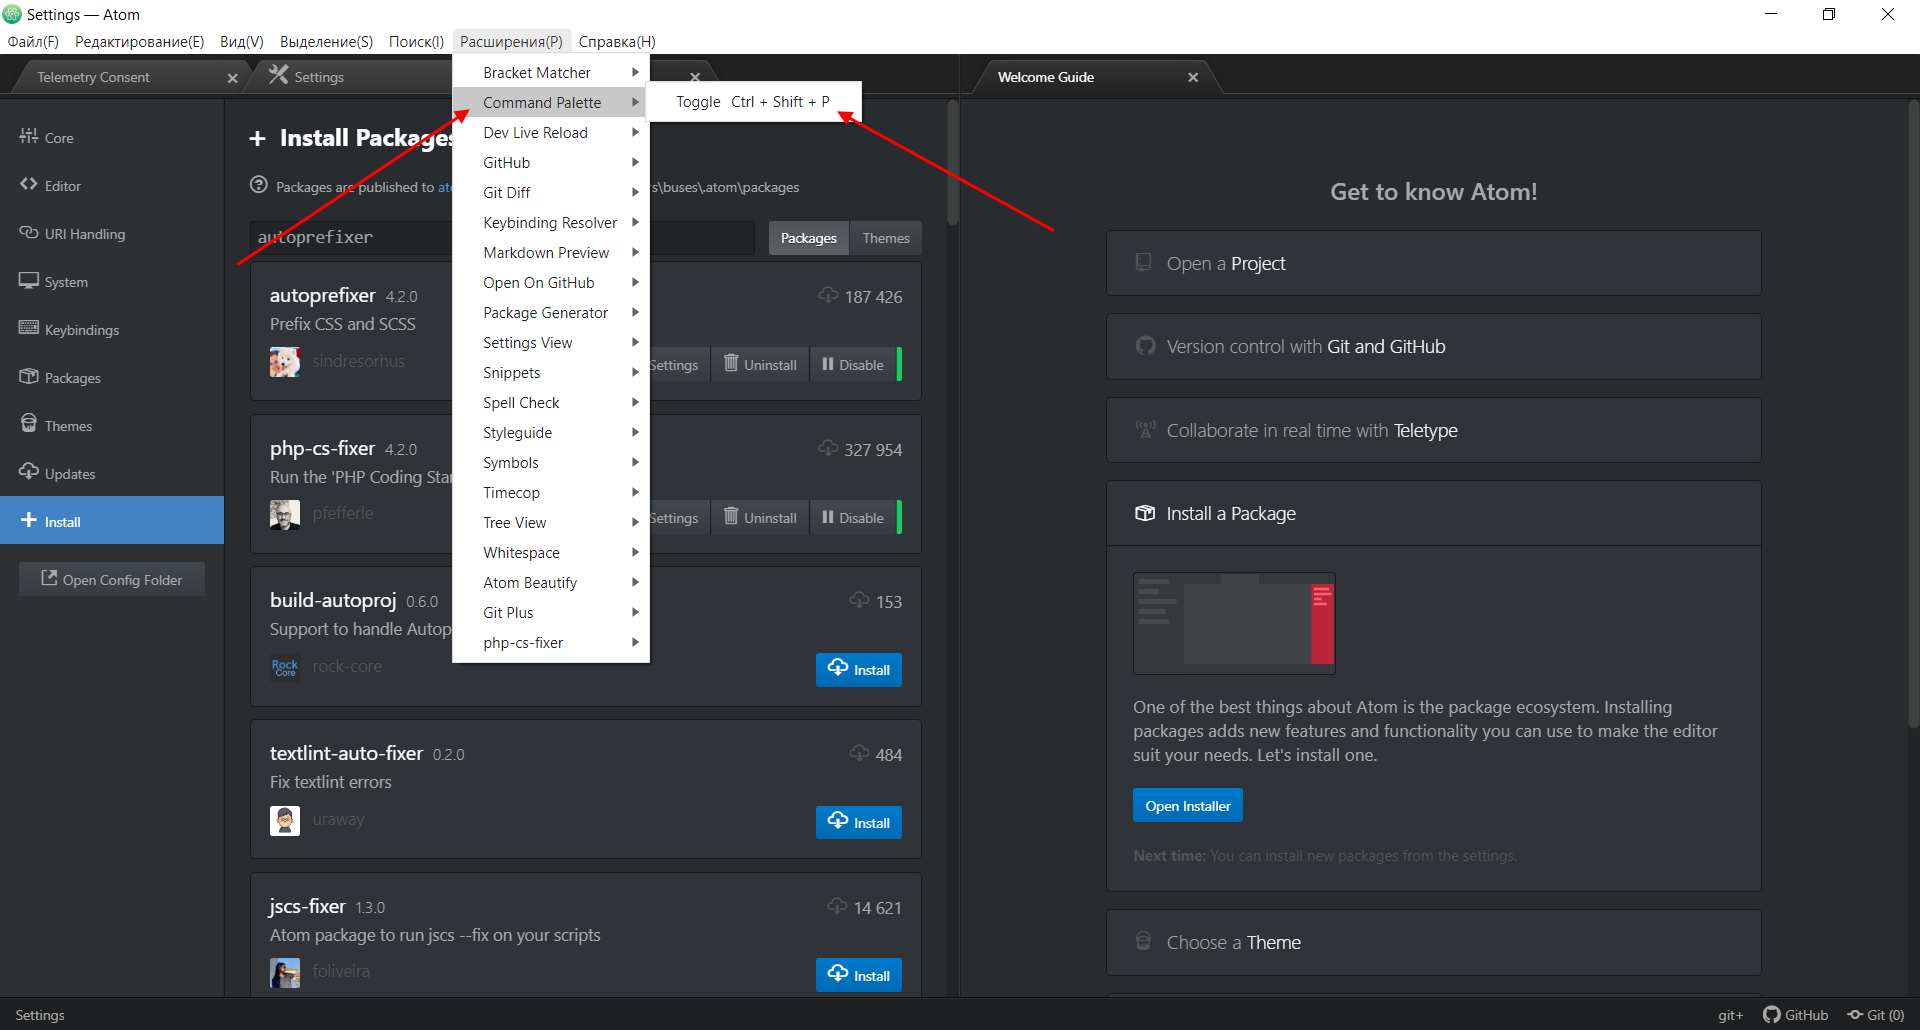
Префиксы в CSS позволяют обращаться к определенному браузеру и задавать свойства, именуемые только для него (-webkit, -moz, -ms). Писать каждый раз такие длинные слова не очень удобно, поэтому лучше воспользоваться специальным расширением autoprefixer. Оно автоматически прописывает префиксы к выделенному коду.
Как только пакет будет установлен, выделяем нужный фрагмент кода и переходим в меню «Расширения» -> «Command Palette» -> «Toggle».
В отобразившейся поисковой строке вводим запрос «Autoprefixer» и кликаем по первой строке.
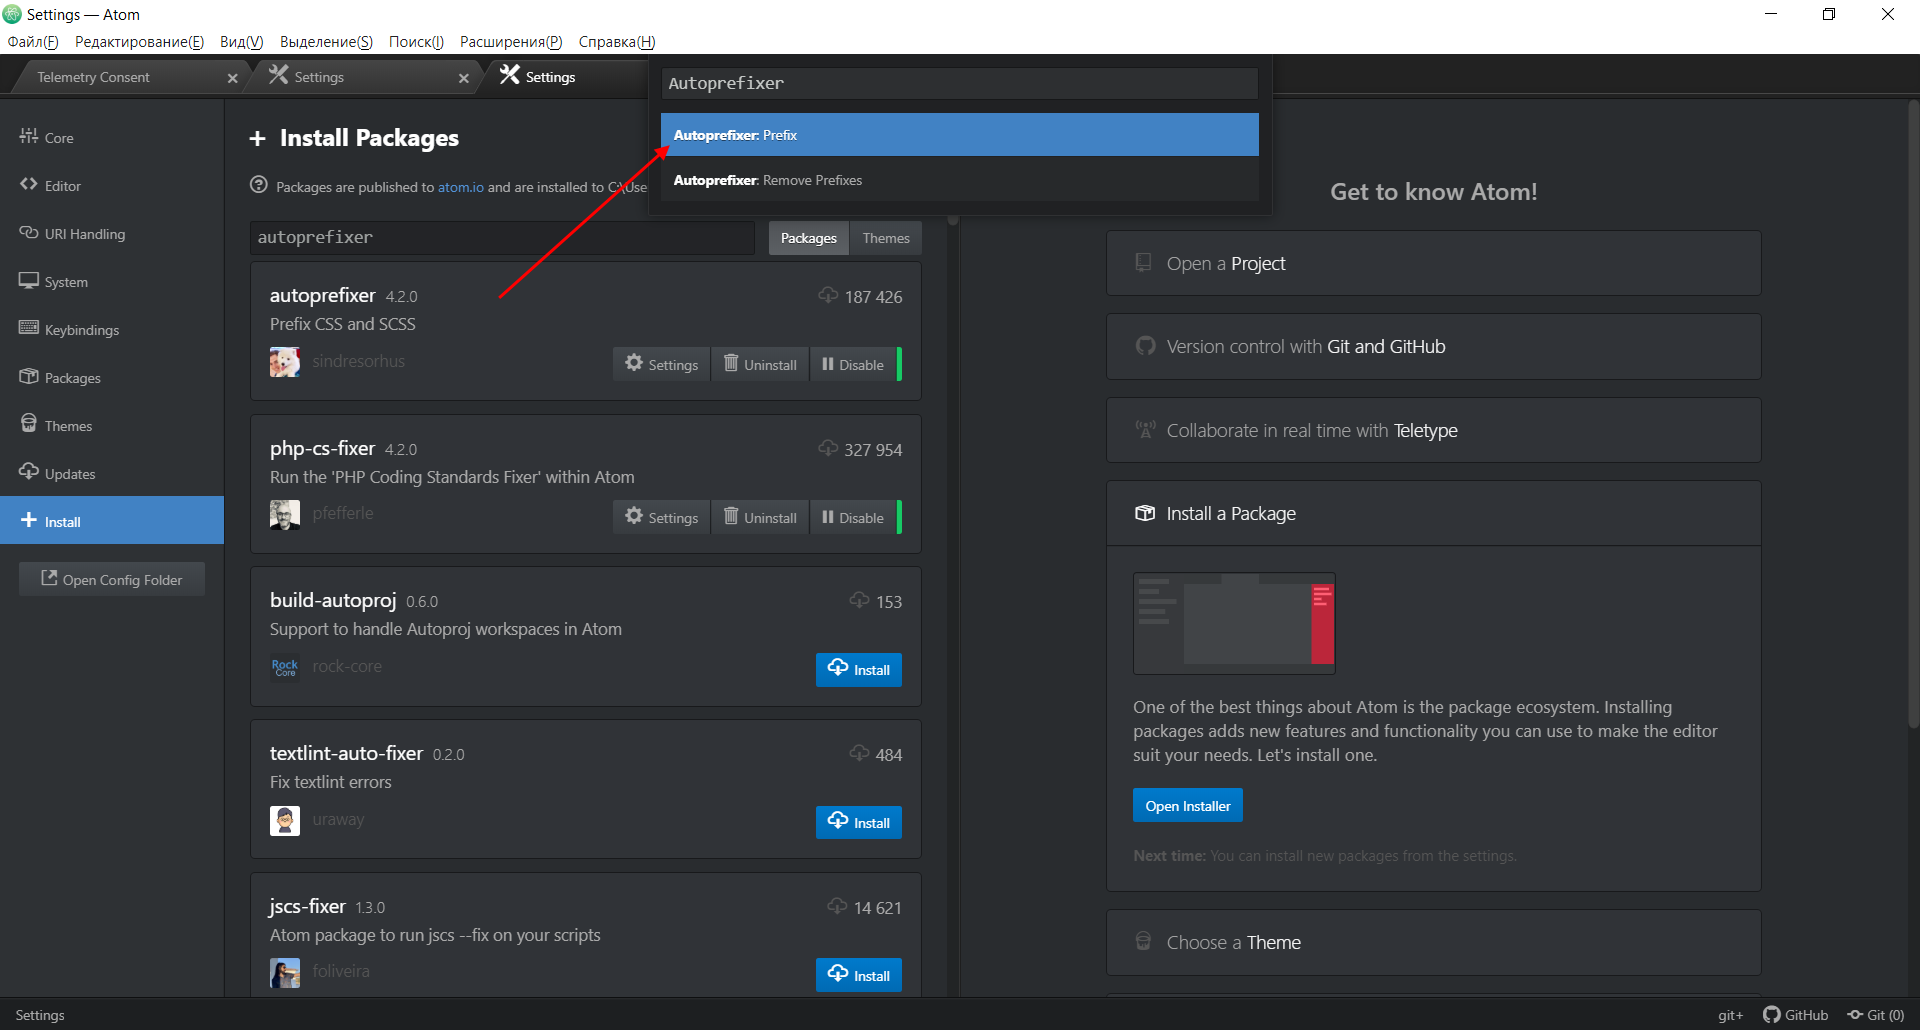
Таким образом, в CSS произойдет автоматическая расстановка префиксов.

Отладка в PHP Atom
Если вы планируете работать с крупными проектами, то без отладки не обойтись никак. Для PHP в этом может помочь специальный отладчик Xdebug. В Ubuntu для его установки следует выполнить команду:
sudo apt install php-xdebug
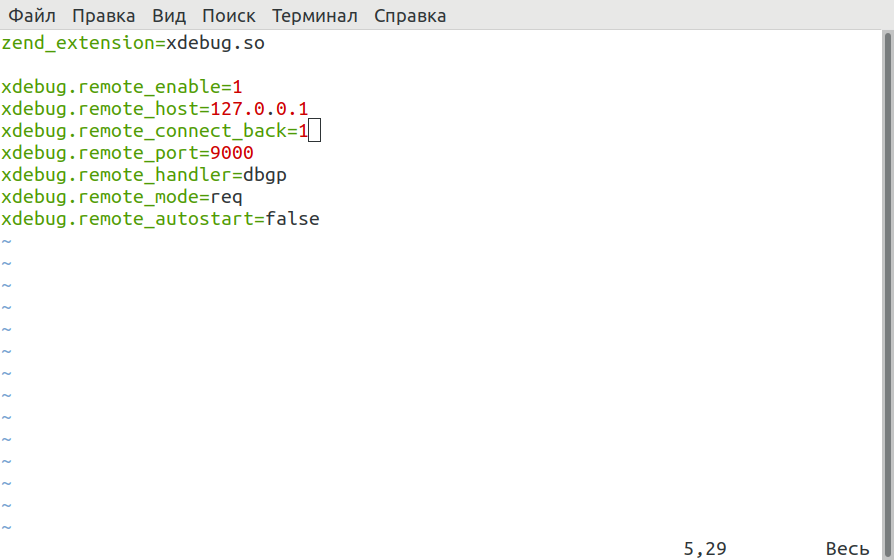
После этого открыть файл xdebug.ini командой:
sudo vi/etc/php/7.2/mods-available/xdebug.ini
В файл прописать следующие параметры:
zend_extension=xdebug.so

xdebug.remote_enable=1

xdebug.remote_host=127.0.0.1

xdebug.remote_connect_back=1

xdebug.remote_port=9000

xdebug.remote_handler=dbgp

xdebug.remote_mode=req

xdebug.remote_autostart=false
Обратите внимание на значение параметра xdebug.remote_autostart – оно должно быть false. В противном случае отладчик будет запускаться для всех скриптов, что требуется далеко не всегда. Чтобы применить внесенные изменения, необходимо перезапустить веб-сервер командой:
sudo systemctl restart apache2
Дополнительно нужно установить еще один пакет php-debug – в нем также следует прописать все зависимости, которые предлагает среда:
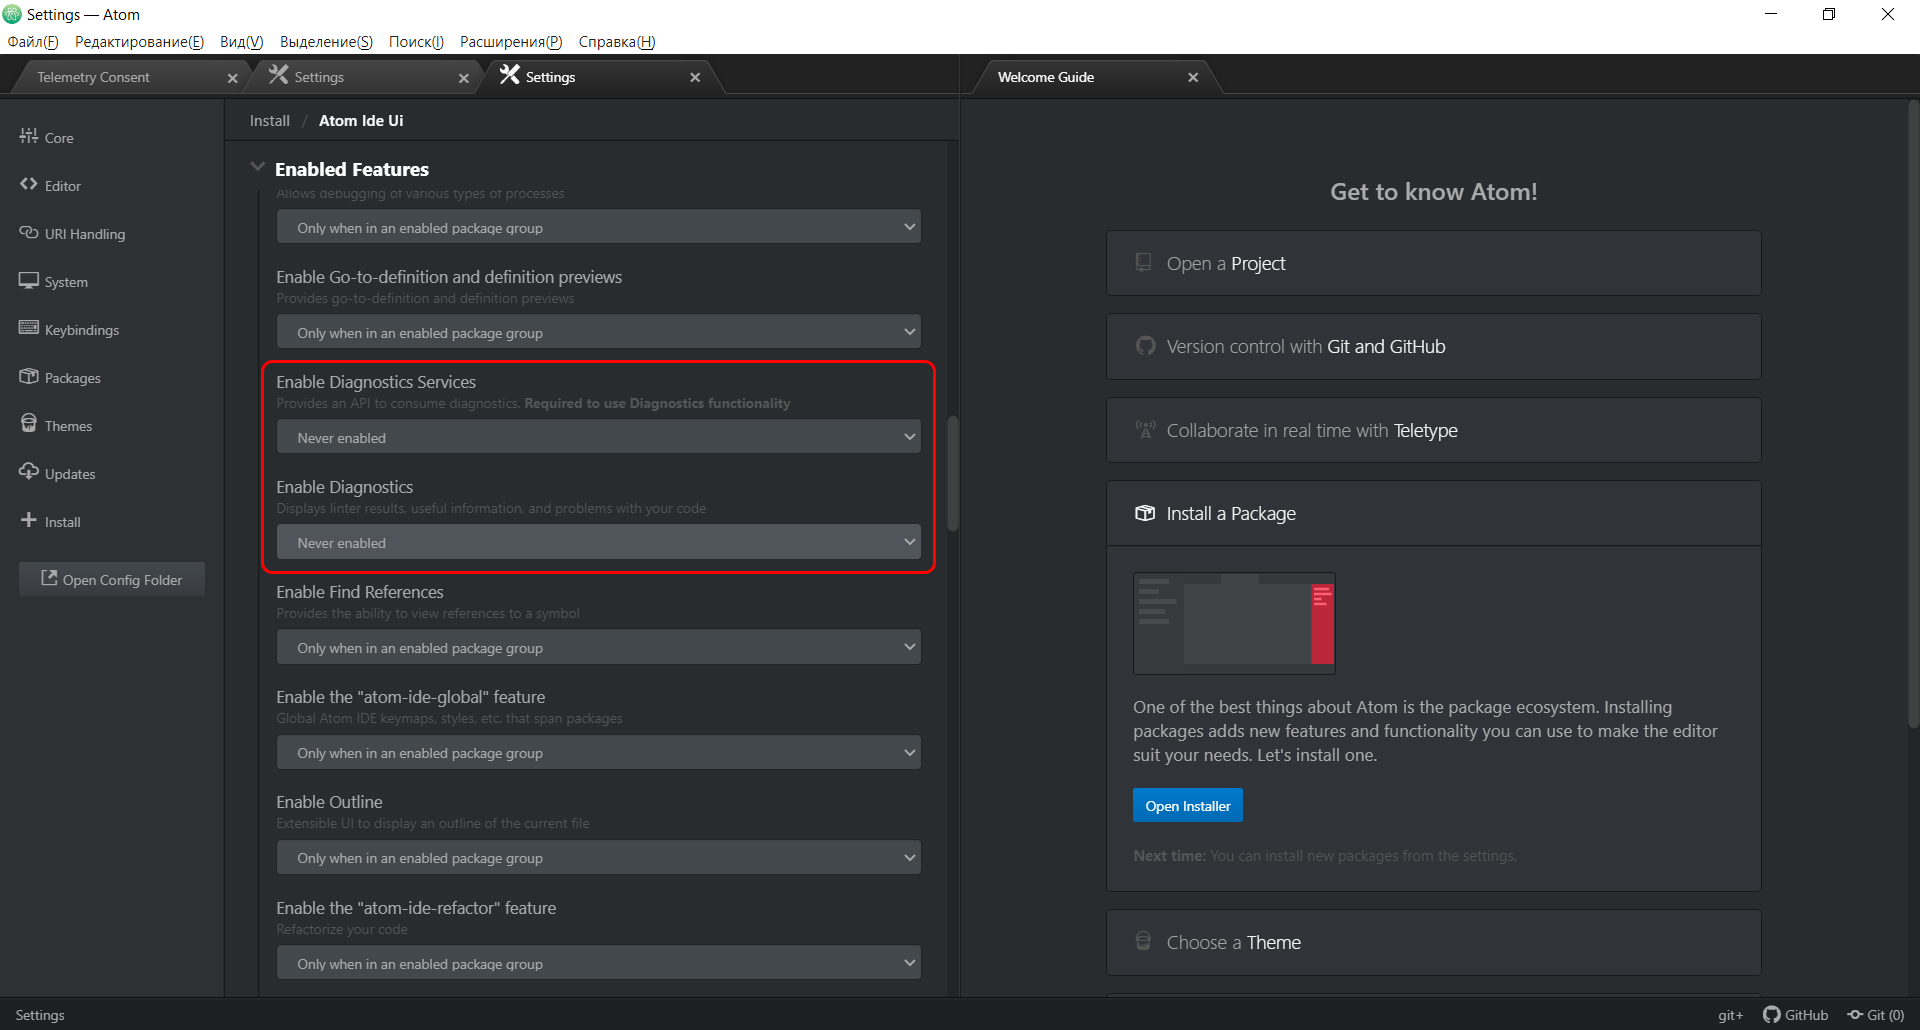
Также рекомендую отключить показ надписи « You have both linter and atom-ide-diagnostics enabled, which will both display lint results for Linter-based packages», которая будет появляться при каждом запуске. Для этого необходимо открыть настройки пакета atom-ide-ui и в пункте «Enabled Fetures» деактивировать опции «Diagnostics Services» и «Diagnostics». Достаточно их раскрыть и выбрать «Never enabled».
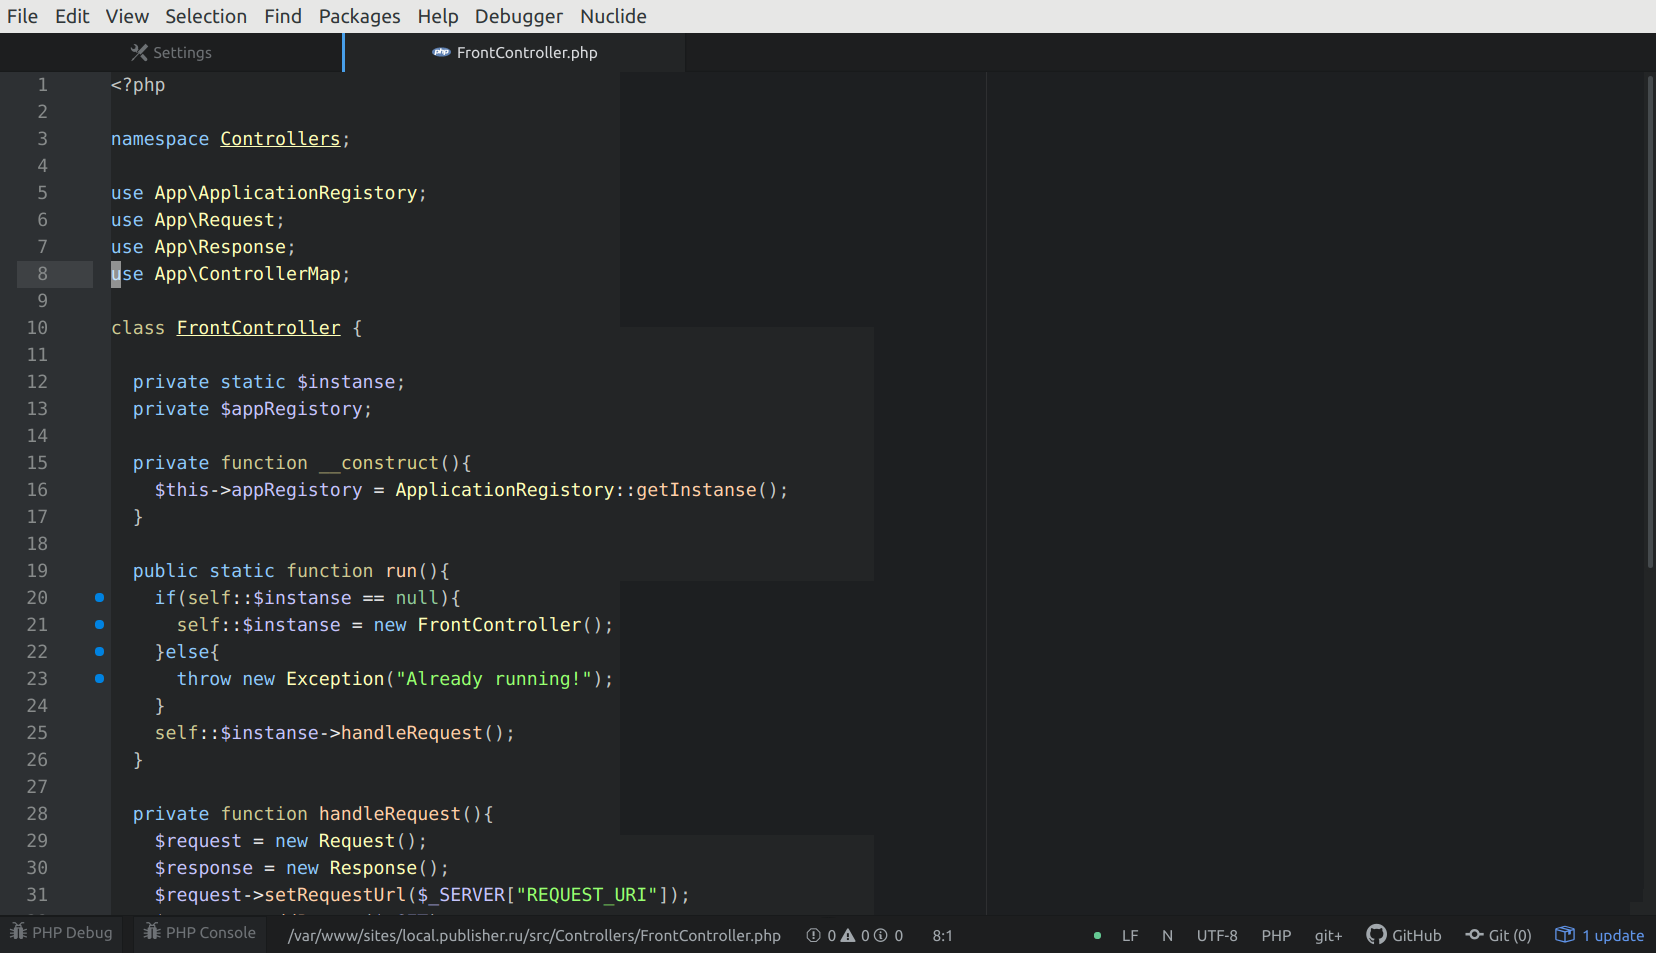
Теперь можно включить отладку – для этого следует кликнуть напротив строчки, на которой нужно поставить точку остановки.
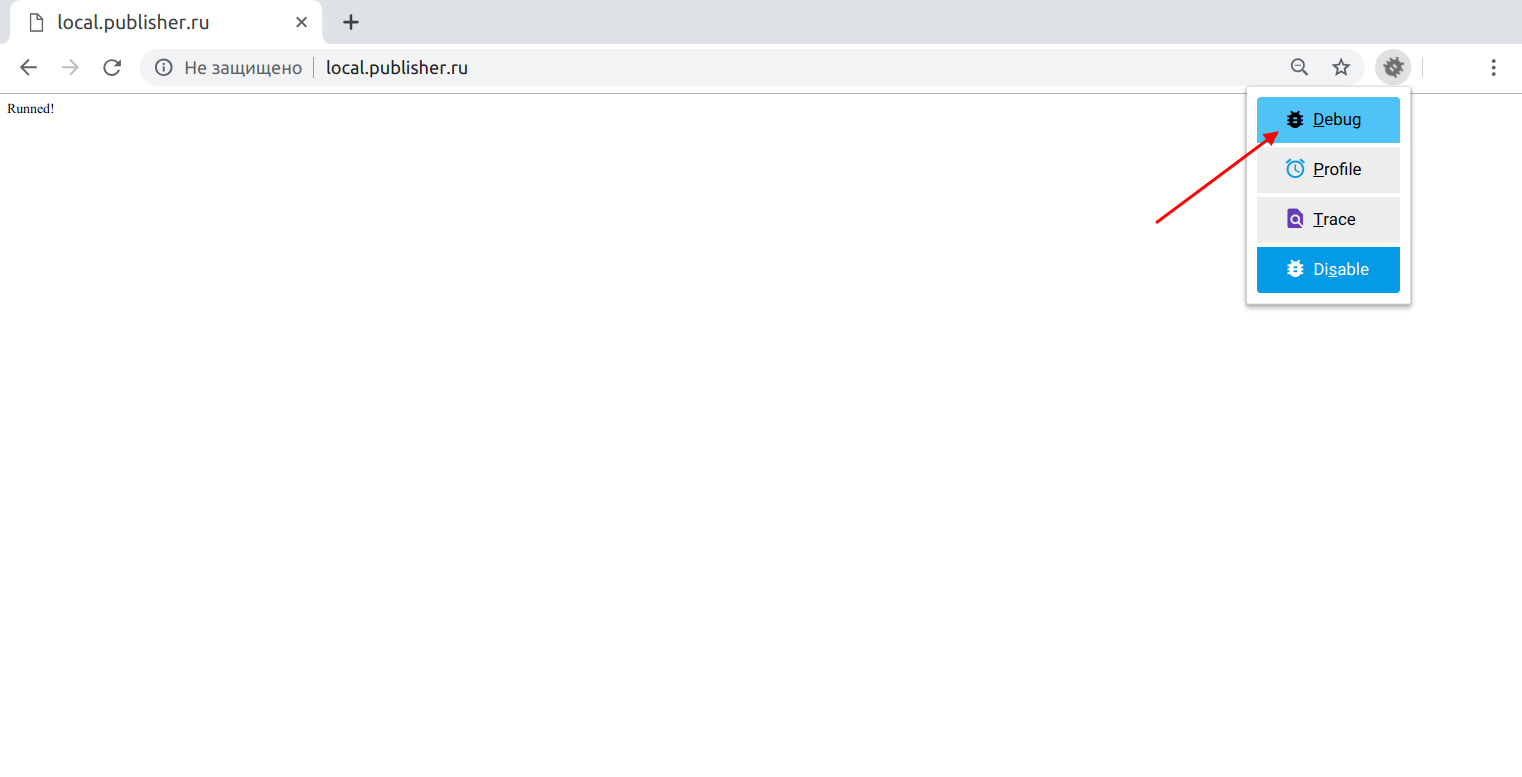
Теперь следует поработать с браузером, так как по умолчанию отладка там отключена. Потребуется скачать дополнительное расширение Xdebug helper. Загружаем его, затем в верхней части активируем и жмем «Debug».
Осталось перезапустить страницу – в результате в Atom должен запустить отладчик.
Работа с проектами в Atom
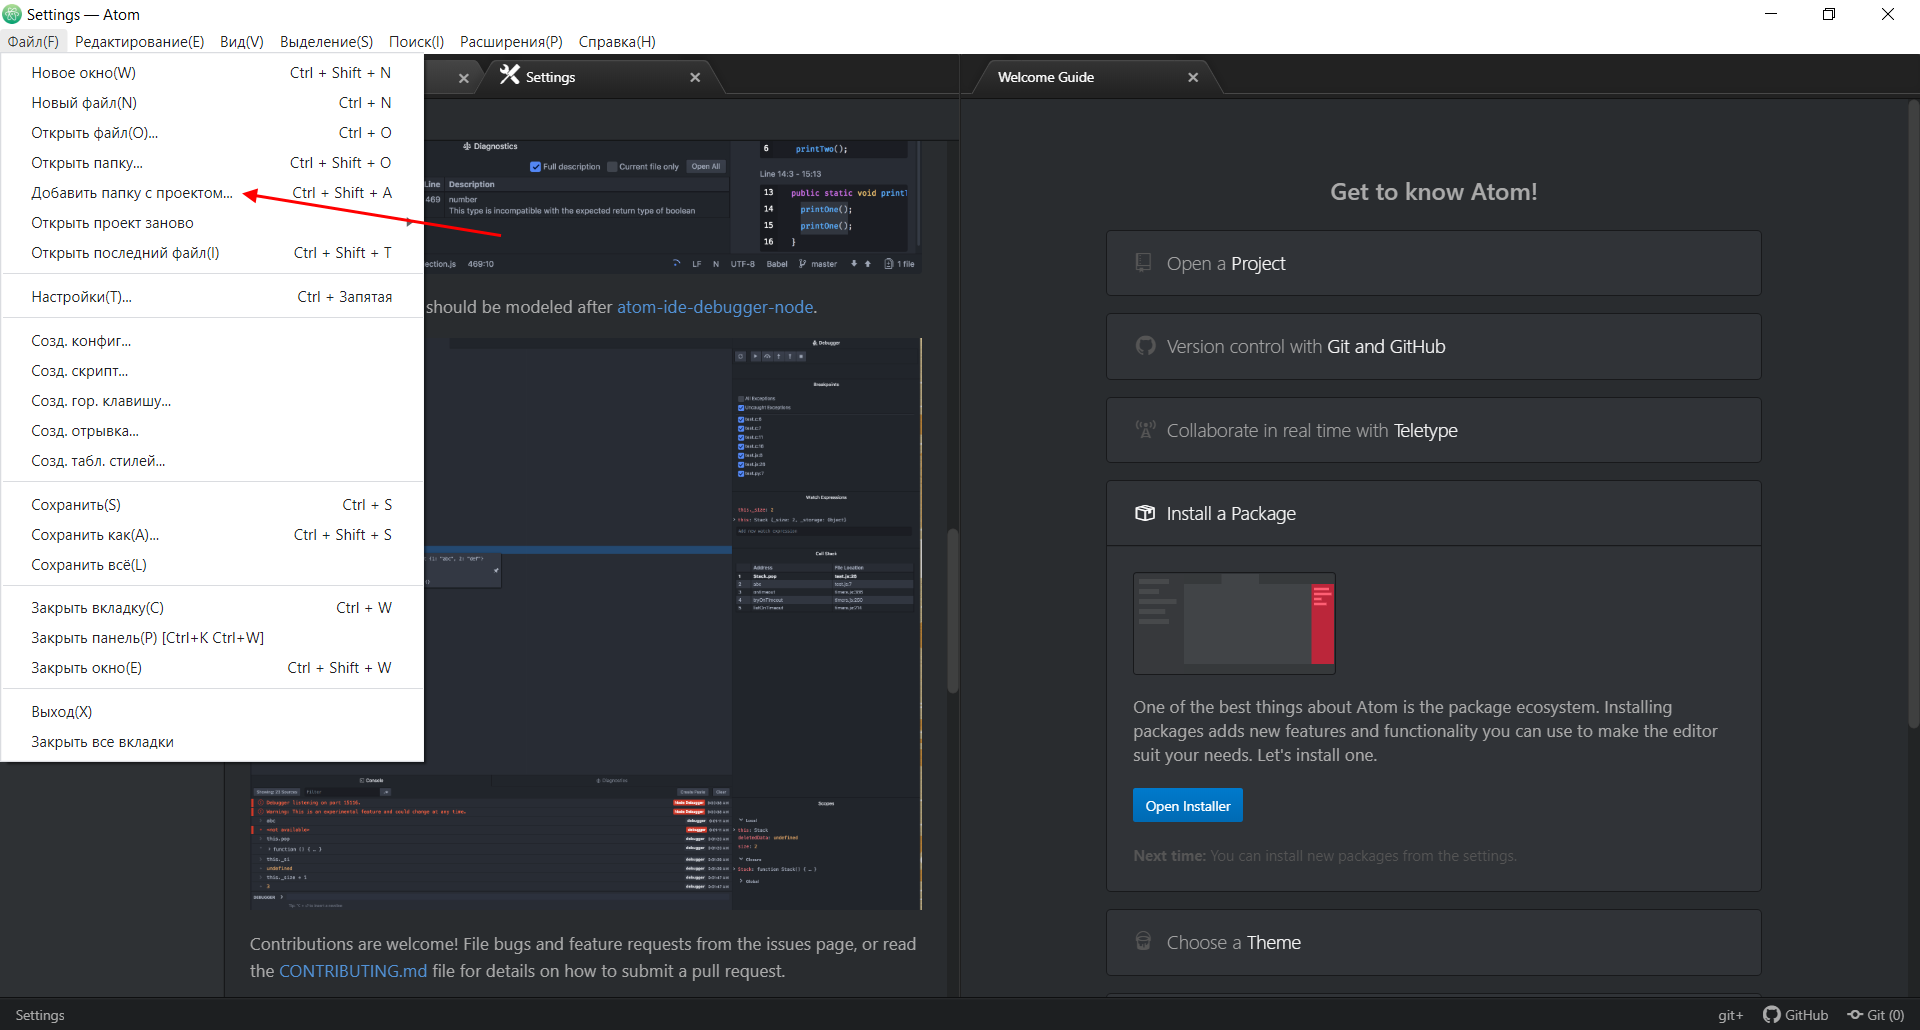
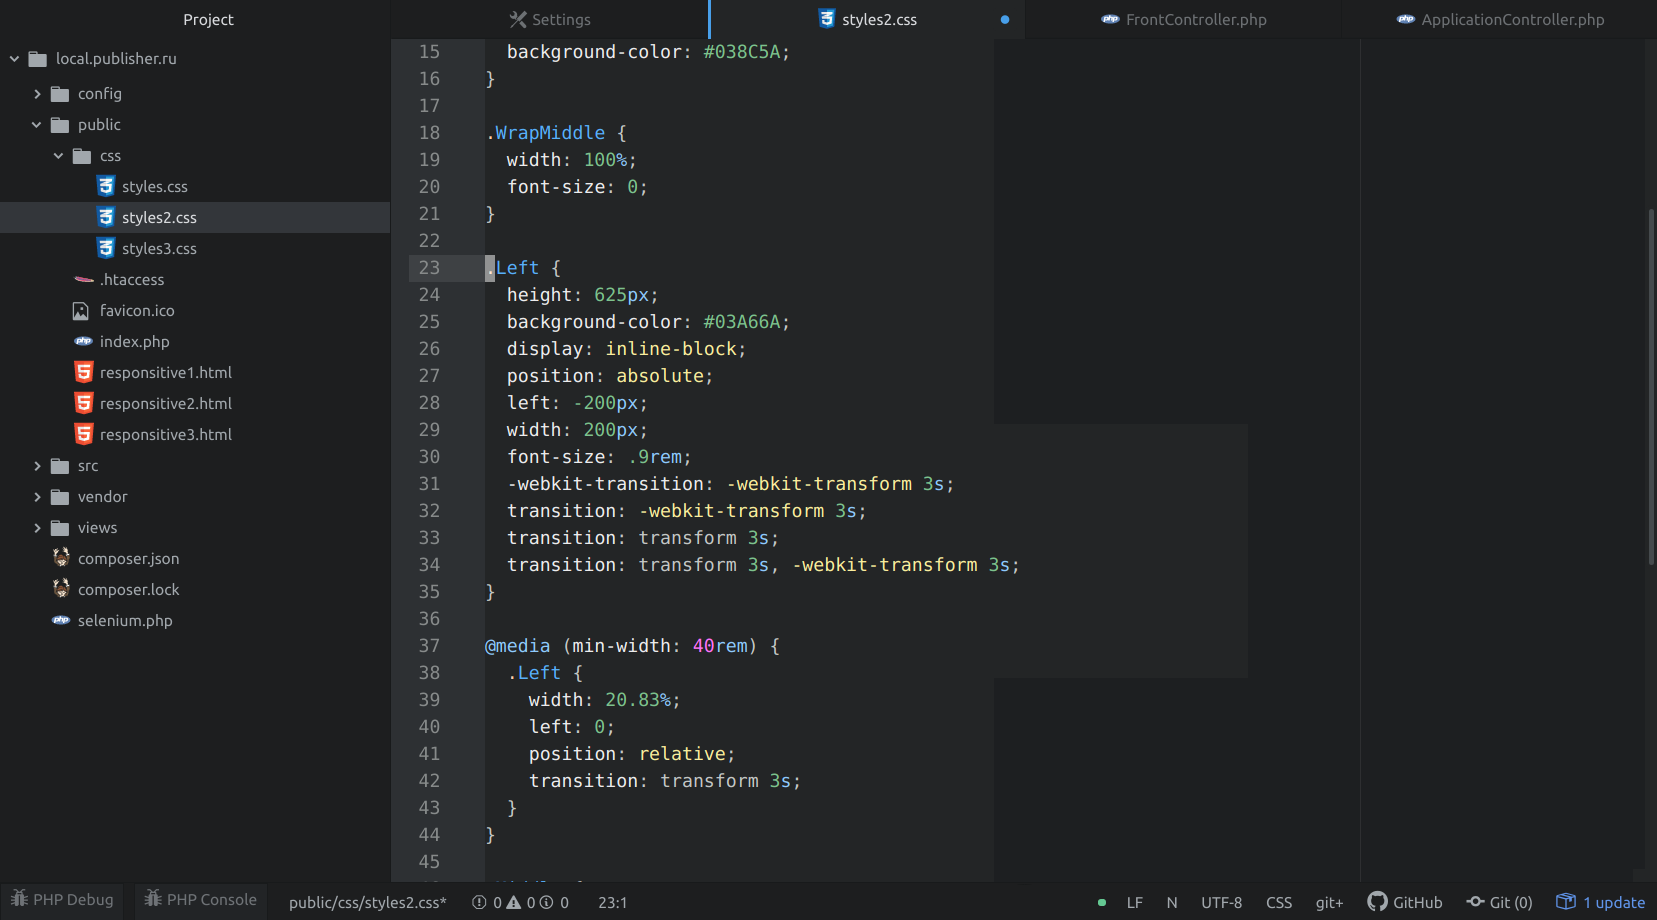
Вот и подходит к концу мое руководство по использованию редактора Atom. Осталось рассказать еще о такой особенности, как проекты. Мы можем не просто открывать css-, html- и php-файлы, но и загружать целые проекты. Это удобно, когда в разработке задействуется большой набор файлов. Для этого необходимо выбрать «Добавить папку с проектом».
Теперь мы увидим проект в виде дерева:
Горячие клавиши
Горячие клавиши – это то, с чем нужно дружить. Использование различных комбинаций ускорит вашу работу в разы, поэтому рекомендую ознакомиться с ними поближе. Не нужно их заучивать, просто время от времени используйте, и они сами запомнятся.
- Ctrl + S – сохраняет файл;
- Ctrl + Shift + P – запускает консоль;
- Ctrl + Shift + T – открывает последнюю закрытую вкладку;
- F5 – сортировка;
- Ctrl + P – открывает поиск по проекту;
- Ctrl + F – поиск и замена;
- Shift + Ctrl + F – поиск по всем файлам проекта;
- Ctrl + Shift + D – дублирует строку;
- Ctrl + / – комментирует строки;
- Ctrl + J – складывает строки в одну;
- Ctrl + Alt + F2 – позволяет поставить метку около строки;
- F2 – перемещение между метками строк;
- Ctrl + Space – вызывает автодополнение;
- Ctrl + K + U – устанавливает буквы заглавными;
- Ctrl + K + L – устанавливает буквы маленькими;
- Ctrl + M – позволяет перейти к закрывающейся или открывающейся строке;
- Ctrl + Shift + : – вызывает подсказку;
- Ctrl + Alt + V – превью SVG-файлов;
- Ctrl + Alt + B – автоматически расставляет отступы в коде;
- Alt + Ctrl + I – вызывает инструменты разработчика.
Сегодня мы поговорили о мощном текстовом редакторе Atom, который отлично подойдет как для начинающих, так и для опытных веб-разработчиков. Надеюсь, что статья была для вас полезной, и теперь работа с этим редактором кода для вас не страшна. Спасибо за внимание!
Время на прочтение4 мин
Количество просмотров99K
Вчера вышла сборка редактора Atom от GitHub для Windows, до этого был доступен только для Mac OS.
А установка для *nix систем описана в официальном репозитории проекта.
Здесь я расскажу как мы его устанавливали для следующих ОС, в порядке убывания сложности:
- Windows 7
- Ubuntu 14.04
- OpenSUSE 13.1
А так же первые впечатления от его использования.
Сразу оговорюсь, для Windows и Ubuntu установка — это пара шагов. Для OpenSUSE, чуть больше.
Внимание трафик — картинки.
Windows 7
Так же заявлена поддержка Windows 8, но к сожалению (или к счастью?) в нашей команде она не используется, но думаю работать будет.
- Скачиваем архив с сайта или из репзитория
- Распаковываем
- Запускаем atom.exe
- Работаем
Ubuntu
Мы устанавливали на Ubuntu 14.04, рекомендуется не ниже 12.04
В поиске простого пути мы нагуглили ресурс на котором уже есть собранный для Ubuntu PPA (персональный архив пакетов ).
Для установки запускаем терминал и выполняем следующий код:
sudo add-apt-repository ppa:webupd8team/atom
sudo apt-get update
sudo apt-get install atom
Примечание с сайта — PPA доступен для Ubuntu 14.10, 14.04, 13.10 и 12.04. Ubuntu 12.10 и 13.04 более не поддерживаются Canonical.
Примечание наше — мы ставили на только установленные Ubuntu и OpenSUSE
OpenSUSE
Тут мы решили следовать инструкции и воспользовались ещё одной статьёй
По шагам команды и действия в консоли с описанием:
- Подготовка к установке. Устанавливаем пакеты:make, gcc, gcc-c++, glibc-devel, и libgnome-keyring-devel, git через консоль вводим:
sudo zypper install make gcc gcc-c++ glibc-devel libgnome-keyring-devel git - Установка Node.JS в консоли:
sudo zypper addrepo http://download.opensuse.org/repositories/devel:languages:nodejs/openSUSE_Tumbleweed/devel:languages:nodejs.repo sudo zypper refresh sudo zypper install nodejs - Далее используем Python 2 для установщика пакетов npm:
sudo npm config set python /usr/bin/python2 -g git: sudo zypper install git - Создаем папку для установки и переходим в неё.
Клонируем Атом к себе.
Переходим в папку с Atom.mkdir ~/src && cd ~/src git clone https://github.com/atom/atom cd ~/src/atom - Собираем, устанавливаем и создаём ярлык Atom используя VIM
sudo npm config set python /usr/bin/python2 -g script/build sudo script/grunt install vim /usr/share/applications/atom.desktop - В Vim пишем
[Desktop Entry]
Type=Application
Encoding=UTF-8
Name=Atom
Comment=Atom editor by GitHub
Exec=/usr/local/bin/atom
Icon=/home/cg/.atom/atom.png
Terminal=false
нажимаем ESC, вводим :wq и копируем значок изображения
cp ~/src/atom/resources/atom.png ~/.atom
Первый запуск
«Приветственый экран атома»

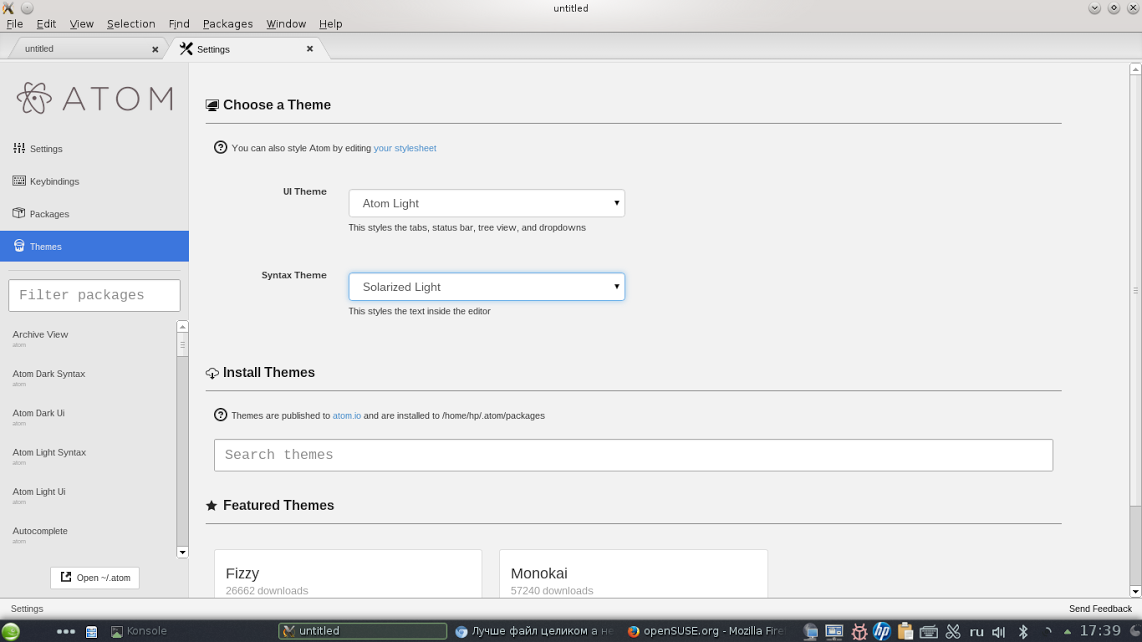
«Настройка темы»
Что называется — две новости:
1. Из приятного — при запуске не появляется диалога о лицензионном соглашении, и рука не тянется за таблеткой от жадности — для тестирования полнофункциональной версии.
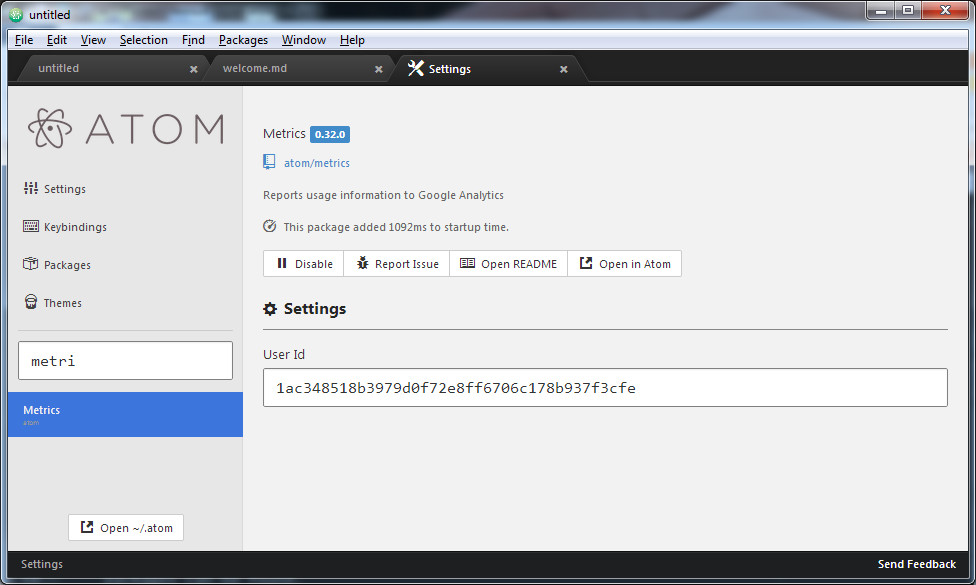
2. По умолчанию Atom отправляет следующую анонимную статистику:
- Уникальный идентификатор генерируемый из MAC адреса машины разработчика;
- Ширина и высота экрана;
- Используемая версия Atom`a;
- Какие вкладки открыты;
- Разные скоростные характеристики (время запуска, загрузки и т.п).
Это отключается в меню Pakages -> Settings View -> Uninstall Packages в фильтре выбираем Metrics
«Отключение метрики»
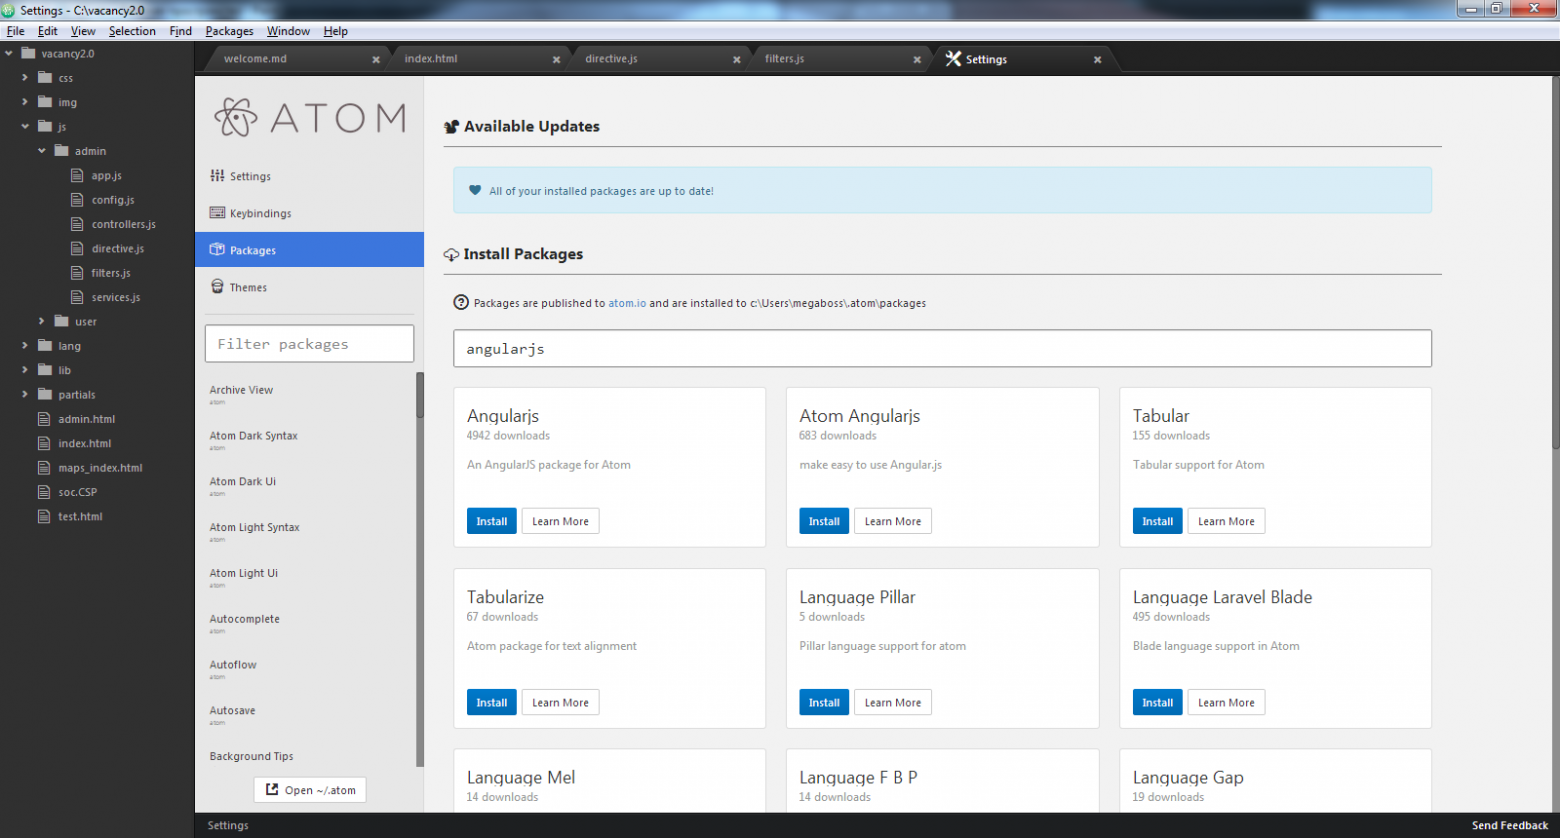
«Установка AngularJS плагина.»
«После установки (оригинал изображения и описание плагина atom.io/packages/angularjs)»
«Рабочее пространство»
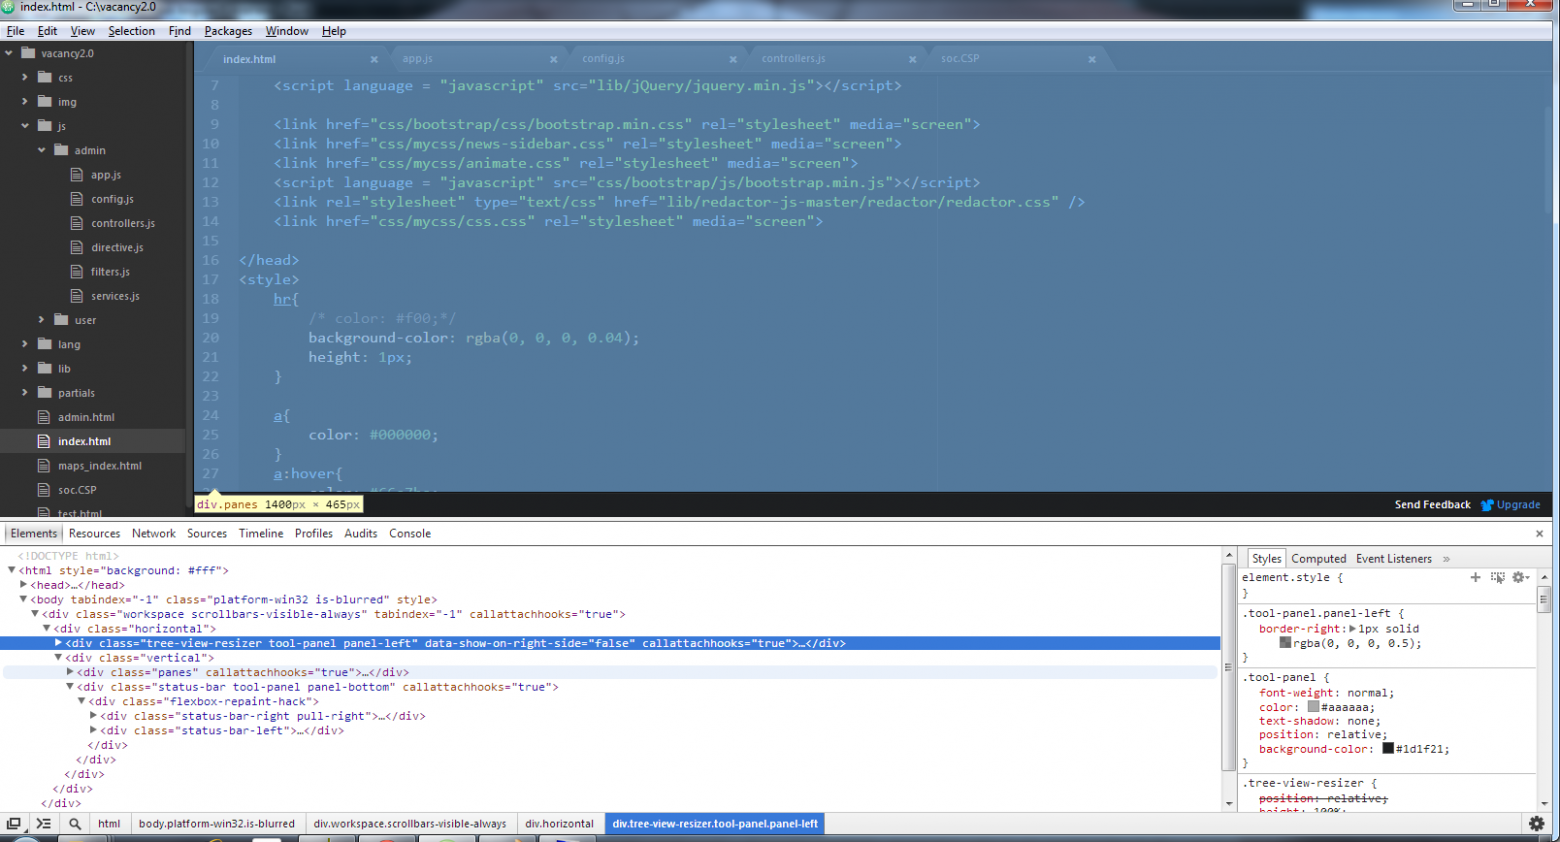
Atom использует движок chromium поэтому доступна отладка самой среды. View->Developer->Togle Developer Tols или Alt + Ctrl + I
«Запуск отладчика»
Так же заявлено что производительность является главным приоритетом команды разработчиков Atom поэтому есть возможность использовать движок React от FaceBook, как наиболее быстрый, по их мнению. Какой используется сейчас — не знаю. В ближайшее время обещают сделать React движком по умолчанию.
«кнопка Use React Editor»
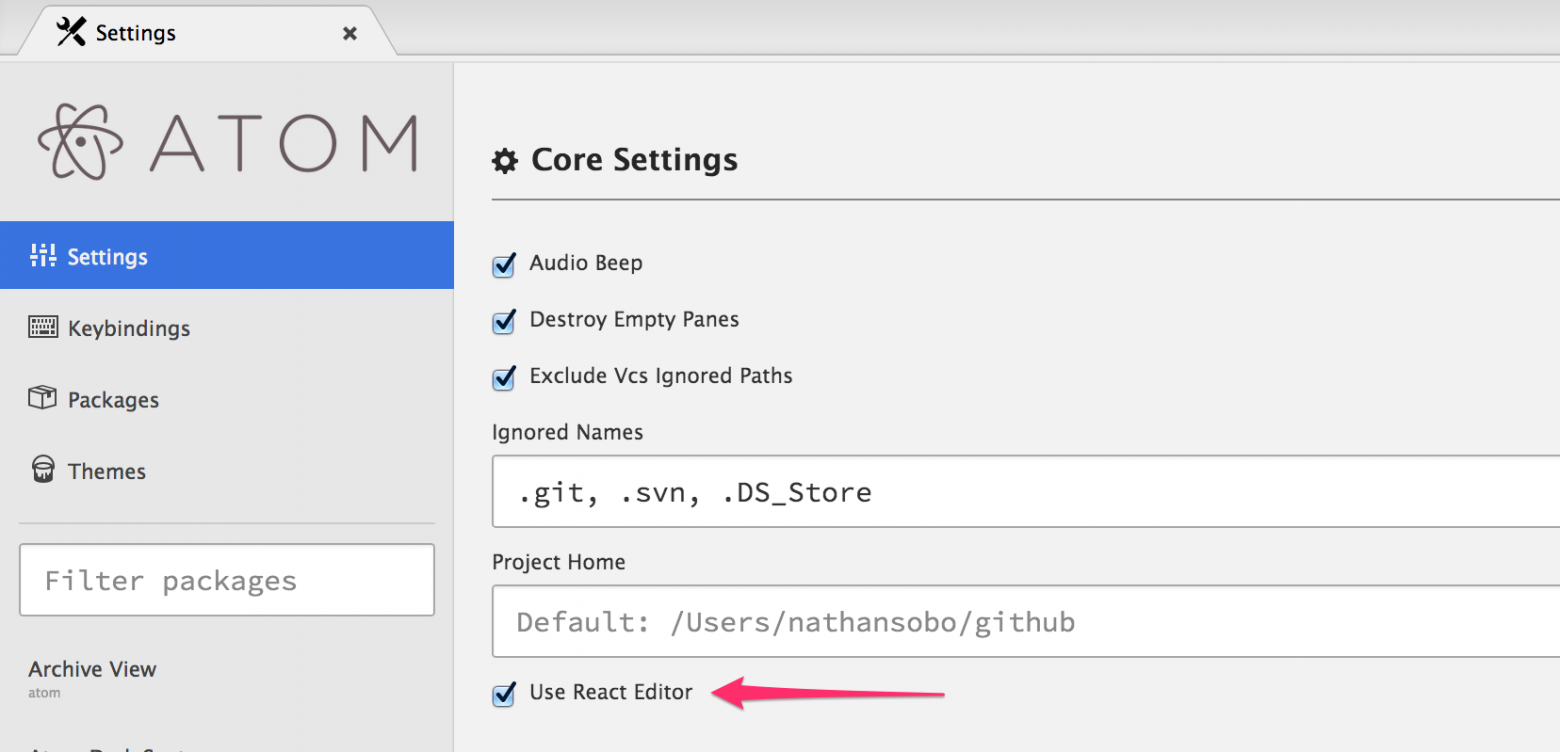
Изображение взято из блога Atom
Отличия и сравнения с другими IDE (в которых мы работали):
- Бесплатно — условное преимущество, например если Вы учитесь или преподаёте в техническом ВУЗе, техникуме или работаете в opensource проекте у многих крупных производителей есть академические программы и скидки. Например JetBrains IDEA, Microsoft DreamSpark, InterSystems Caché campus и многие другие. Правда у упомянутого в комментариях Sublime скидок нет (Educational discounts are not presently offered);
- Мощь сообщества — с момента выхода версии для Windows до выхода этого поста прошло около суток, а в в проекте было уже более полусотни комитов, учитывая что работа ведётся более двух лет динамика радует;
- Скорость сообщества — например плагин AngularJS от разработчиков Angular-UI вышел через несколько дней после первого объявления об Atom;
- На острие прогресса — автообновление, с той точки зрения что Вы всегда будете работать в IDE поддерживающей новейшие технологии. К примеру сам Atom использует Flex;
- Сила корпораций — проект использует движки от Google и Facebook, а это внушает надежду на то что время потраченое на изучение и последующее использование не будет потрачено зря;
- Сразу portable — удобно для Windows, распаковал, запустил и удалил без следов и заморочек, если не понравился;
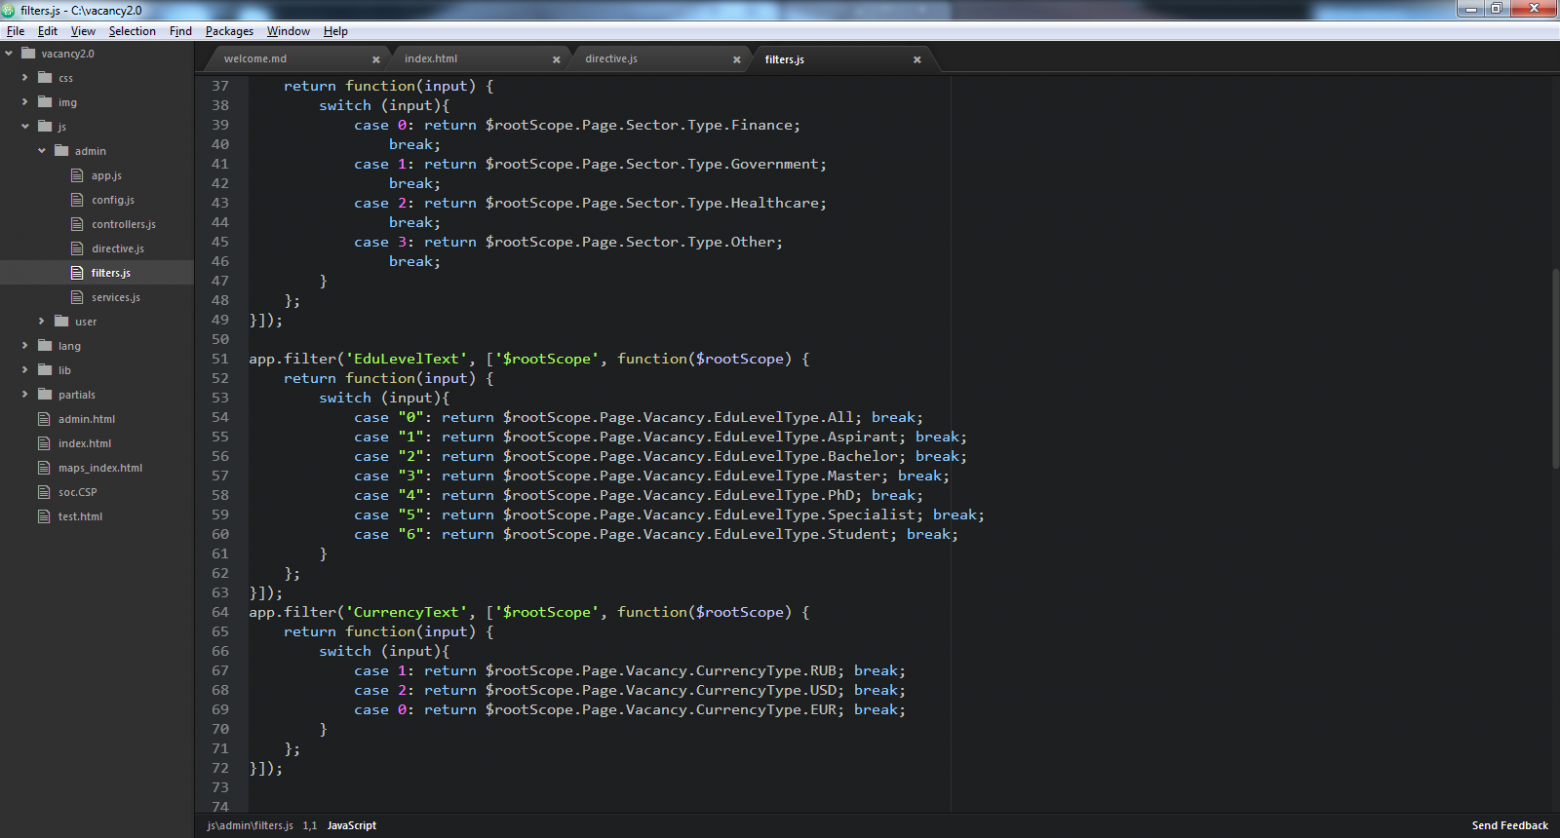
- Можно править модули внутри самого редактора, как в Sublime, ниже скрин с примером.
Про производительность не могу сказать ничего внятного. Субъективно:
- На всех машинах нашей команды запускается быстро, к слову «круче» i3 процессоров нету;
- Занимает в памяти более 100 мегабайт при запуске, для сравнения Sublime ~30 а WebStorm несколько сотен.
Сделали «свой» пакет копируя и переименовав предустановленный ZEN

Ссылки:
- https://atom.io/
- http://www.webupd8.org/
- http://codeghar.wordpress.com/
- Настройка Atom от GitHub для работы с PHP, Python и некоторыми другими языками программирования
Atom is a text editing tool developed by GitHub that is open-source. The application is designed for use in programming, scripting, and working with documents. Atom supports many programming languages and hence is ideal for both professionals and amateurs. With an intuitive user interface, programmers can increase productivity because it offers options for personal preference customization.
Atom is beneficial for Windows users because of its adjustable nature. Community developed packages can be used to add functionalities, themes can be applied to change the appearance of the interface, and integrated Git features improve productivity in teamwork. Atom also works on multiple operating systems so users can switch from Windows to other systems and not have to deal with compatibility issues regarding their projects.
The purpose of this article is to explain in detail the different steps you need to take in order to download and install Atom on a Windows computer.
Downloading Atom IDE on Windows
Although Atom IDE’s official development has ended, users can still download its final version from GitHub. The last stable release, version 1.60.0, is available on Atom’s GitHub repository. This is a safe and secure source provided by the original developers, ensuring that you get an authentic and untampered version of the software:

Install Atom IDE on Ultahost’s Windows VPS!
Experience the reliability of Ultahost’s Windows VPS for hosting your Atom IDE. With a high-performance virtual server, you get the flexibility needed to run your site smoothly.
To download Atom, visit Atom Releases on GitHub. On the page, scroll down to the “Assets” section. Here, you’ll find downloadable files for various operating systems, including Windows. Select the appropriate file for your system—choose the .exe file for 64-bit Windows or 32-bit if your computer requires it. Once downloaded, you can proceed with the installation process:
While Atom IDE remains functional, it’s important to note that it will not receive future updates or bug fixes. For ongoing support and new features, consider exploring actively maintained alternatives, such as Visual Studio Code or Sublime Text. However, if you prefer to use Atom for its familiar interface and features, this version will serve you well.
Once the download begins, it should take only a few minutes, depending on your internet speed. After the file is downloaded, locate it in your system’s default downloads folder or the folder you selected during the process. You are now ready to move on to the installation phase, which will bring you one step closer to exploring the features of Atom IDE.
Installing Atom IDE on Windows
Installing Atom IDE on a Windows system is straightforward and user-friendly. Once you have downloaded the installer file (a .exe file) from the GitHub releases page, locate it in your downloads folder or the directory you specified during the download process. You don’t need to provide any additional input as it can be installed automatically:
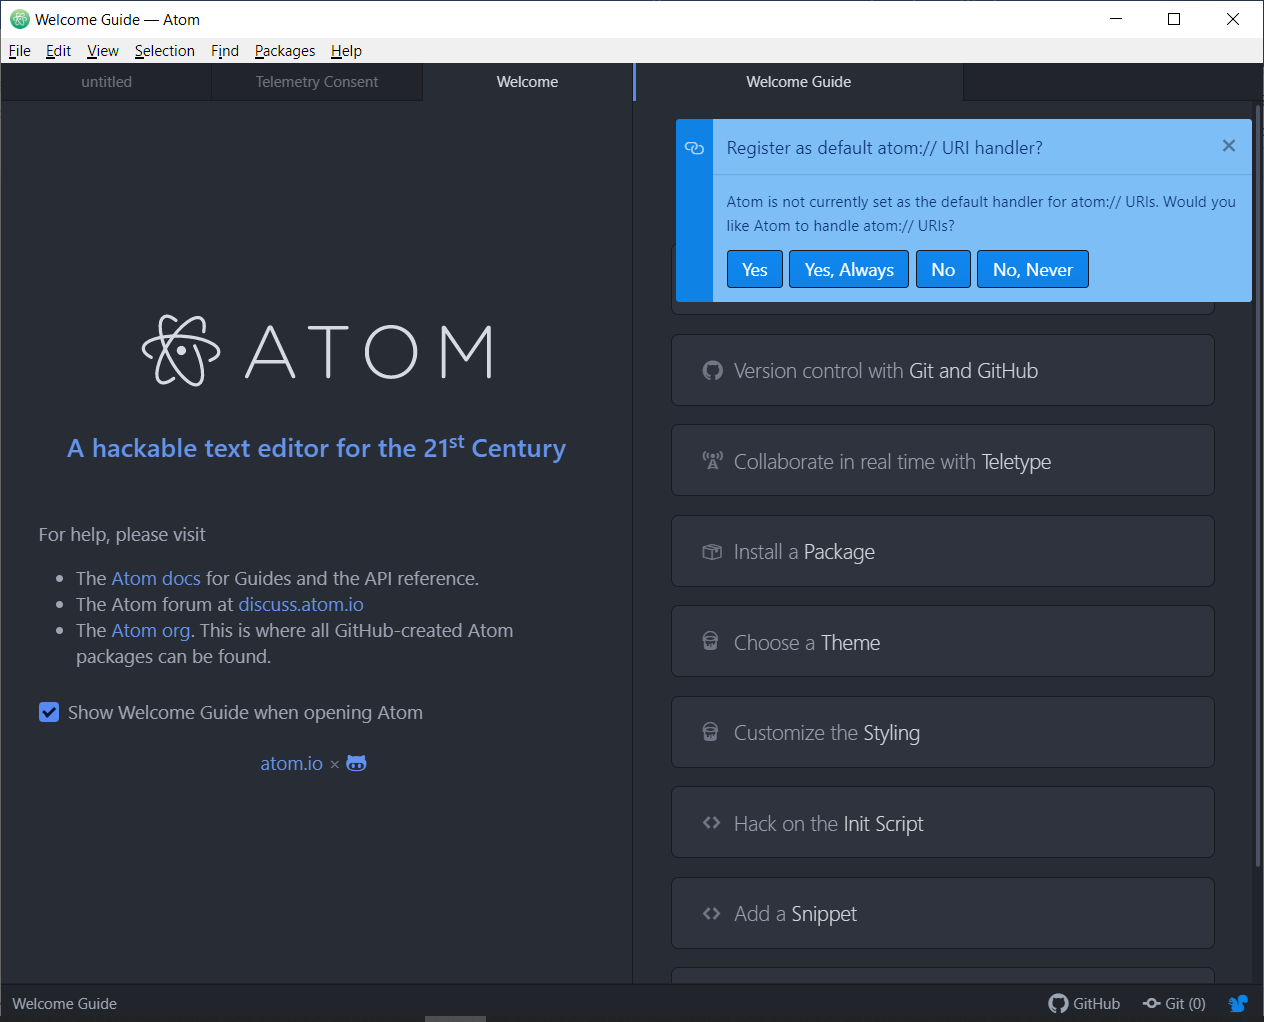
After the installation is complete, Atom will launch automatically, and you will be greeted by its main interface. If it doesn’t open immediately, you can find the Atom shortcut on your desktop or in the Start menu. Open it to access the editor:
The main interface of Atom is clean and intuitive, featuring a central editor area, a file explorer on the left side, and menus for tools and settings. At this stage, you can start exploring the editor, configuring its settings, or installing packages to enhance its functionality.
Key Features of Atom IDE
Atom IDE offers a range of features that make it a favorite among developers. Below are its standout features explained under separate subheadings:
Fully Customizable Interface
Atom’s standout feature is its customizability. Users can tweak every aspect of the editor, from themes to keybindings. You can choose from pre-designed themes or create your own to make the editor fit your preferences. This flexibility allows developers to create a personalized coding environment.
Built-in Git Integration
Atom simplifies version control by including Git integration. You can view changes, stage files, and make commits directly within the editor. The Git panel provides a convenient way to manage repositories without switching to an external application, improving workflow efficiency.
Rich Plugin Ecosystem
Atom supports a variety of community-developed packages that extend its functionality. Whether you need tools for specific programming languages, code snippets, or advanced debugging, you’ll find a plugin for almost every need. Installing and managing packages is seamless through Atom’s built-in package manager.
Multi-platform Support
Atom works across Windows, macOS, and Linux, ensuring a consistent experience regardless of the operating system. This makes it a great choice for teams using different platforms.
Smart Autocomplete
Atom’s autocomplete feature intelligently suggests code snippets, reducing the time spent typing repetitive code. It supports multiple programming languages, making it useful for developers working across diverse technologies.
Split Pane Editing
Atom allows users to split the editor into multiple panes, enabling you to work on several files simultaneously. This feature enhances productivity, especially when comparing or editing files side by side.
Conclusion
You can download Atom Windows in just a few steps. After downloading the installer from Atom’s official website, users simply need to run the setup file and follow the on-screen instructions. The process is quick and requires no advanced technical knowledge, making it accessible for beginners.
Once installed, users can customize the IDE by adding packages and themes through the built-in package manager. Atom’s user-friendly interface and lightweight design ensure a smooth experience, allowing developers to focus on their coding tasks without unnecessary distractions. Whether for web development or general programming, Atom provides all the essential tools for effective development.
Installing Atom IDE on Windows can be a simple process for beginners. Upgrading to an Ultahost cheap VPS hosting provides a more streamlined and efficient solution which is the ideal environment for effective development tools. This eliminates compatibility issues and simplifies the installation process.
FAQ
How do I download Atom IDE?
Download Atom from its official website and choose the installer for your operating system.
Is Atom IDE free?
Yes, Atom is an open-source and free IDE, available for Windows, macOS, and Linux.
Can I customize Atom IDE?
Yes, you can customize Atom by installing packages, changing themes, and adjusting settings.
Does Atom support multiple programming languages?
Atom supports many languages by default and allows users to add language packages for additional support.
Is Atom IDE suitable for beginners?
Yes, Atom’s simple interface and easy setup make it a good choice for beginners.
How do I install packages in Atom?
You can install packages directly from the Atom interface by accessing the settings and using the package manager
Can I use Atom without internet access?
Yes, Atom can be used offline once it is installed on your computer. However, you will need an internet connection to download initial packages or updates.
Installing Atom
To get started with Atom, we’ll need to get it on your system. This section will go over installing Atom on your system as well as the basics of how to build it from source.
Installing Atom should be fairly simple. Generally, you can go to https://atom.io and you should see a download button as shown here:


The button or buttons should be specific to your platform and the download package should be easily installable. However, let’s go over them here in a bit of detail.
Installing Atom on Mac
Atom follows the standard Mac zip installation process. You can either press the download button from the https://atom.io site or you can go to the Atom releases page to download the atom-mac.zip file explicitly. Once you have that file, you can click on it to extract the application and then drag the new Atom application into your «Applications» folder.
When you first open Atom, it will try to install the atom and apm commands for use in the terminal. In some cases, Atom might not be able to install these commands because it needs an administrator password. To check if Atom was able to install the atom command, for example, open a terminal window and type which atom. If the atom command has been installed, you’ll see something like this:
which atom
/usr/local/bin/atom
$
If the atom command wasn’t installed, the which command won’t return anything:
which atom
$
To install the atom and apm commands, run «Window: Install Shell Commands» from the Command Palette, which will prompt you for an administrator password.
Installing Atom on Windows
Atom is available with Windows installers that can be downloaded from https://atom.io or from the Atom releases page. Use AtomSetup.exe for 32-bit systems and AtomSetup-x64.exe for 64-bit systems. This setup program will install Atom, add the atom and apm commands to your PATH, and create shortcuts on the desktop and in the start menu.
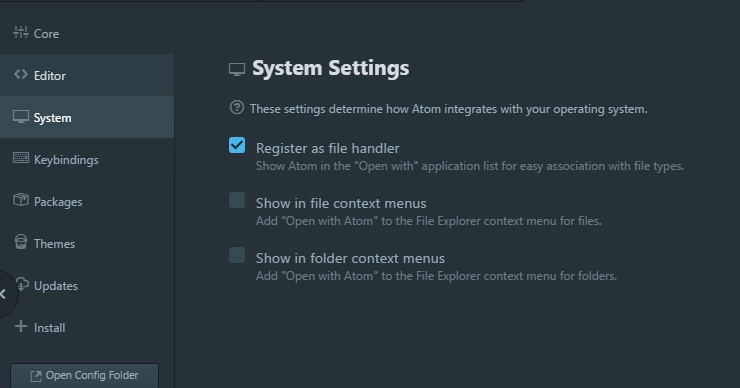
The context menu Open with Atom in File Explorer, and the option to make Atom available for file association using Open with..., is controlled by the System Settings panel as seen above.
With Atom open, click on File > Settings, and then the System tab on the left. Check the boxes next to Show in file context menus, as well as Show in folder context menus. And you’re all set.
Installing Atom on Linux
You can install Atom on Linux using your distribution’s package manager by configuring it to use one of our official package repositories. This will also enable you to update Atom when new releases are published.
Debian and Ubuntu (deb/apt)
To install Atom on Debian, Ubuntu, or related distributions, add our official
package repository to your system by running the following commands:
wget -qO - https://packagecloud.io/AtomEditor/atom/gpgkey | sudo apt-key add -
sudo sh -c 'echo "deb [arch=amd64] https://packagecloud.io/AtomEditor/atom/any/ any main" > /etc/apt/sources.list.d/atom.list'
sudo apt-get update
You can now install Atom using apt-get (or apt on Ubuntu):
# Install Atom
sudo apt-get install atom
# Install Atom Beta
sudo apt-get install atom-beta
Alternatively, you can download the Atom .deb package and install it directly:
# Install Atom
sudo apt install ./atom-amd64.deb
Red Hat and CentOS (YUM), or Fedora (DNF)
To install Atom on CentOS, Oracle Linux, Red Hat Enterprise Linux, Scientific Linux, Fedora, or related distributions that use the YUM or DNF package managers, add our official package repository to your system by running the following commands:
sudo rpm --import https://packagecloud.io/AtomEditor/atom/gpgkey
sudo sh -c 'echo -e "[Atom]\nname=Atom Editor\nbaseurl=https://packagecloud.io/AtomEditor/atom/el/7/\$basearch\nenabled=1\ngpgcheck=0\nrepo_gpgcheck=1\ngpgkey=https://packagecloud.io/AtomEditor/atom/gpgkey" > /etc/yum.repos.d/atom.repo'
You can now install Atom using dnf (or yum depending on your distribution):
# Install Atom
sudo dnf install atom
# Install Atom Beta
sudo dnf install atom-beta
Alternatively, you can download the Atom .rpm package and install it directly:
# On YUM-based distributions
sudo yum install -y atom.x86_64.rpm
# On DNF-based distributions
sudo dnf install -y atom.x86_64.rpm
SUSE (zypp)
To install Atom on openSUSE or other distributions that use the Zypp package manager, add our official package repository to your system by running the following commands:
sudo sh -c 'echo -e "[Atom]\nname=Atom Editor\nbaseurl=https://packagecloud.io/AtomEditor/atom/el/7/\$basearch\nenabled=1\ntype=rpm-md\ngpgcheck=0\nrepo_gpgcheck=1\ngpgkey=https://packagecloud.io/AtomEditor/atom/gpgkey" > /etc/zypp/repos.d/atom.repo'
sudo zypper --gpg-auto-import-keys refresh
You can now install Atom using zypper:
# Install Atom
sudo zypper install atom
# Install Atom Beta
sudo zypper install atom-beta
Alternatively, you can download the Atom .rpm package and install it directly:
sudo zypper in -y atom.x86_64.rpm
Updating Atom
You should consider updating Atom periodically for the latest improvements to the software. Additionally, When Atom receives hotfixes for security vulnerabilities you will want to update your version of Atom as soon as possible.
«Automatically Update» is enabled by default in Core Settings of the Settings View, which will allow Atom to check for updates automatically. If you disable this setting you can update Atom manually.
To perform a manual update:
- Click on the
Atom > Check for Updatemenu item in the menu bar. - Search for
Application: Aboutin the Command Palette and click theCheck nowbutton.
Atom will begin to update if an update is available.
«Automatically Update» is enabled by default in Core Settings of the Settings View, which will allow Atom to check for updates automatically. If you disable this setting you can update Atom manually.
To perform a manual update:
- Click on the
Help > Check for Updatemenu item in the menu bar. - Search for
Application: Aboutin the Command Palette and click theCheck nowbutton.
Atom will begin to update if an update is available.
If you are using Atom’s official package repositories, use your distribution’s package manager to update Atom. Otherwise, you will need to manually download and install the latest .rpm or .deb package from https://atom.io. For more details, see Installing Atom on Linux.
Portable Mode
Atom stores configuration and state in a .atom directory usually located in your home directory (%userprofile% on Windows). You can however run Atom in portable mode where both the app and the configuration are stored together such as on a removable storage device.
To setup Atom in portable mode download the zip/tar.gz package for your system and extract it to your removable storage.
Then create a .atom directory alongside the directory that contains atom.exe, for example:
e:\atom-1.14\atom.exe
e:\.atom
Then create a .atom directory alongside the Atom.app application, for example:
/MyUSB/Atom.app
/MyUSB/.atom
Then create a .atom directory alongside the directory that contains the Atom binary, for example:
/media/myusb/atom-1.14/atom
/media/myusb/.atom
Portable Notes
- The
.atomdirectory must be writeable - You can move an existing
.atomdirectory to your portable device - Atom can also store its Electron user data in your
.atomdirectory — just create a subdirectory calledelectronUserDatainside.atom - Alternatively you can set the
ATOM_HOMEenvironment variable to point wherever you want (you can write a .sh or .cmd script to temporarily set it and launch it from that) - Portable mode installations will not automatically update
Building Atom from Source
The Hacking on Atom Core section of the flight manual covers instructions on how to clone and build the source code if you prefer that option.
Proxy and Firewall Settings
Behind a Firewall?
If you are behind a firewall and seeing SSL errors when installing packages you can disable strict SSL by running:
apm config set strict-ssl false
Using a Proxy?
If you are using a HTTP(S) proxy you can configure apm to use it by running:
apm config set https-proxy YOUR_PROXY_ADDRESS
You can run apm config get https-proxy to verify it has been set correctly.
How to install atom text editor in windows 11/10 system. In this tutorial, you will learn how to install atom text editor on windows 11/10 system using .exe file.
This guide shows simple and easy way for installing Atom on windows 11/10 64 bit version system. Using this guide you will install atom 1.56.0 version with the windows 64-bit version.
Follow the following steps and install Atom text editor in windows 10:
Step 1 – Download Atom Text Editor .exe File
First of all check your windows bit version and click on the given below link to download atom text editor exe file:
- For 32-bit = AtomSetup.exe
- For 64-bit = AtomSetup-x64.exe
You can visit the following link and download the latest atom text version .exe file: Atom latest release page.
At the time of writing the latest stable Atom release was version: 1.56.0
Please wait while the file is complete download.
Step 2 – Install Atom In Windows
In this step, Open the location of the downloaded atom steup file.
Double-click it to run the installer.
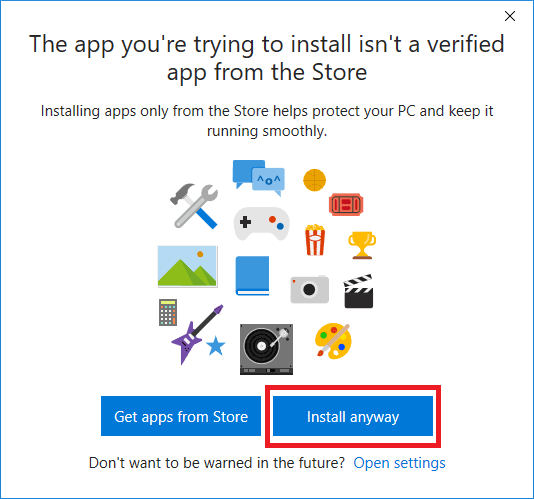
On Windows 10 a pop-up window will appear: The app you're trying to install isn't a verified app from the Store
Click on Install anyway.
The installer will open and start the setup.
The setup program will install Atom, add the atom and apm commands to your Windows PATH variable. It will also create shortcuts on your desktop and in the start menu.
Once the installation is complete, Atom text editor will launch.
Step 3 – Use Atom Text Editor
To start and use Atom text editor, so double-click on the atom text editor icon. Which is on the desktop shortcut.
The Welcome Guide editor should now open as shown below.
Note that, The easiest way is to install Atom on windows 10 64 bit version.
Conclusion
This tutorial has been shown you how to install Atom text editor on windows 11/10 64 bit version. To learn more about how to use Atom, from beginner basics to advanced techniques, visit their official documentation page.
That’s it. Atom text editor has been download on your windows 10 64 bit version.
Greetings, I’m Devendra Dode, a full-stack developer, entrepreneur, and the proud owner of Tutsmake.com. My passion lies in crafting informative tutorials and offering valuable tips to assist fellow developers on their coding journey. Within my content, I cover a spectrum of technologies, including PHP, Python, JavaScript, jQuery, Laravel, Livewire, CodeIgniter, Node.js, Express.js, Vue.js, Angular.js, React.js, MySQL, MongoDB, REST APIs, Windows, XAMPP, Linux, Ubuntu, Amazon AWS, Composer, SEO, WordPress, SSL, and Bootstrap. Whether you’re starting out or looking for advanced examples, I provide step-by-step guides and practical demonstrations to make your learning experience seamless. Let’s explore the diverse realms of coding together.
View all posts by Devendra Dode