
This is an article detailing different methods of Arch/Windows coexistence.
Important information
Windows UEFI vs BIOS limitations
Microsoft imposes limitations on which firmware boot mode and partitioning style can be supported based on the version of Windows used:
Note: The following points only list configurations supported by the Windows Setup even though Windows itself may still work on these unsupported configurations. A good example of this is Windows 11 which still works on a BIOS/MBR configuration once the Windows Setup check is bypassed.
- Windows 8/8.1 and 10 x86 32-bit support booting in IA32 UEFI mode from GPT disk only, OR in BIOS mode from MBR disk only. They do not support x86_64 UEFI boot from GPT/MBR disk, x86_64 UEFI boot from MBR disk, or BIOS boot from GPT disk. On market, the only systems known to ship with IA32 (U)EFI are some old Intel Macs (pre-2010 models?) and Intel Atom System-on-Chip (Clover trail and Bay Trail) Windows Tablets, which boot ONLY in IA32 UEFI mode and ONLY from GPT disk.
- Windows 8/8.1 and 10 x86_64 versions support booting in x86_64 UEFI mode from GPT disk only, OR in BIOS mode from MBR disk only. They do not support IA32 UEFI boot, x86_64 UEFI boot from MBR disk, or BIOS boot from GPT disk.
- Windows 11 only supports x86_64 and a boot in UEFI mode from GPT disk.
In case of pre-installed Systems:
- All systems pre-installed with Windows XP, Vista or 7 32-bit, irrespective of Service Pack level, bitness, edition (SKU) or presence of UEFI support in firmware, boot in BIOS/MBR mode by default.
- MOST of the systems pre-installed with Windows 7 x86_64, irrespective of Service Pack level, bitness or edition (SKU), boot in BIOS/MBR mode by default. Very few late systems pre-installed with Windows 7 are known to boot in x86_64 UEFI/GPT mode by default.
- ALL systems pre-installed with Windows 8/8.1, 10 and 11 boot in UEFI/GPT mode. Up to Windows 10, the firmware bitness matches the bitness of Windows, ie. x86_64 Windows boot in x86_64 UEFI mode and 32-bit Windows boot in IA32 UEFI mode.
An easy way to detect the boot mode of Windows is to do the following[1]:
- Boot into Windows
- Press
Win+Rkeys to start the Run dialog - In the Run dialog type
msinfo32and press Enter - In the System Information windows, select System Summary on the left and check the value of BIOS mode item on the right
- If the value is
UEFI, Windows boots in UEFI/GPT mode. If the value isLegacy, Windows boots in BIOS/MBR mode.
In general, Windows forces type of partitioning depending on the firmware mode used, i.e. if Windows is booted in UEFI mode, it can be installed only to a GPT disk. If Windows is booted in Legacy BIOS mode, it can be installed only to an MBR disk. This is a limitation enforced by Windows Setup, and as of April 2014 there is no officially (Microsoft) supported way of installing Windows in UEFI/MBR or BIOS/GPT configuration. Thus Windows only supports either UEFI/GPT boot or BIOS/MBR configuration.
Tip: Windows 10 version 1703 and newer supports converting from BIOS/MBR to UEFI/GPT using MBR2GPT.EXE.
Such a limitation is not enforced by the Linux kernel, but can depend on which boot loader is used and/or how the boot loader is configured. The Windows limitation should be considered if the user wishes to boot Windows and Linux from the same disk, since installation procedure of boot loader depends on the firmware type and disk partitioning configuration. In case where Windows and Linux dual boot from the same disk, it is advisable to follow the method used by Windows, ie. either go for UEFI/GPT boot or BIOS/MBR boot. See https://support.microsoft.com/kb/2581408 for more information.
Boot loader UEFI vs BIOS limitations
Most of the Linux boot loaders installed for one firmware type cannot launch or chainload boot loaders of the other firmware type. That is, if Arch is installed in UEFI/GPT or UEFI/MBR mode in one disk and Windows is installed in BIOS/MBR mode in another disk, the UEFI boot loader used by Arch cannot chainload the BIOS installed Windows in the other disk. Similarly if Arch is installed in BIOS/MBR or BIOS/GPT mode in one disk and Windows is installed in UEFI/GPT in another disk , the BIOS boot loader used by Arch cannot chainload UEFI installed Windows in the other disk.
The only exceptions to this are GRUB in Apple Macs in which GRUB in UEFI mode can boot BIOS installed OS via appleloader command (does not work in non-Apple systems), and rEFInd which technically supports booting legacy BIOS OS from UEFI systems, but does not always work in non-Apple UEFI systems as per its author Rod Smith.
However if Arch is installed in BIOS/GPT in one disk and Windows is installed in BIOS/MBR mode in another disk, then the BIOS boot loader used by Arch can boot the Windows in the other disk, if the boot loader itself has the ability to chainload from another disk.
Note: To dual-boot with Windows on same disk, Arch should follow the same firmware boot mode and partitioning combination used by the Windows installation.
Windows Setup creates a 100 MiB EFI system partition (except for Advanced Format 4K native drives where it creates a 300 MiB ESP), so multiple kernel usage is limited. Workarounds include:
- If you are installing Windows from scratch, you can dictate the size of the EFI system partition during installation. See #The EFI system partition created by Windows Setup is too small
- Mount ESP to
/efiand use a boot loader that has file system drivers and is capable of launching kernels that reside on other partitions. - Reduce the size of the Windows partition and replace the existing ESP with a new, larger one.
- Backup and delete unneeded fonts in
esp/EFI/Microsoft/Boot/Fonts/[2]. - Backup and delete unneeded language directories in
esp/EFI/Microsoft/Boot/(e.g. to only keepen-US). - Use a higher, but slower, compression for the initramfs images making sure to decompress the loadable kernel modules and firmware. E.g.
COMPRESSION="xz"
COMPRESSION_OPTIONS=(-9e)
MODULES_DECOMPRESS="yes"
UEFI Secure Boot
All pre-installed Windows 8/8.1, 10 and 11 systems by default boot in UEFI/GPT mode and have UEFI Secure Boot enabled by default. This is mandated by Microsoft for all OEM pre-installed systems.
Arch Linux install media does not support Secure Boot yet. See Secure Boot#Booting an installation medium.
It is advisable to disable UEFI Secure Boot in the firmware setup manually before attempting to boot Arch Linux. Windows 8/8.1, 10 and 11 SHOULD continue to boot fine even if Secure boot is disabled. The only issue with regards to disabling UEFI Secure Boot support is that it requires physical access to the system to disable secure boot option in the firmware setup, as Microsoft has explicitly forbidden presence of any method to remotely or programmatically (from within OS) disable secure boot in all Windows 8/8.1 and above pre-installed systems
Note:
- If Windows used BitLocker and stored the key in the TPM for automatic unlock on boot, it fails to boot when Secure Boot is disabled, instead showing a BitLocker recovery screen. This is not permanent however, and you can easily boot Windows again by simply re-enabling Secure Boot.
- On Windows 11, disabling Secure Boot after install will not cause problems as long as TPM is working normally.
Warning:
The factual accuracy of this article or section is disputed.
Reason:
Secure Boot changes should not affect BitLocker: the issue might be self-signing the windows boot loader and chain-loading it from a boot loader: as long as the Windows boot loader stays signed with MS keys, and the Microsoft certs enrolled it should be fine.
Is the issue disabling it and booting Windows or disabling, reenabling it and then booting Windows?
The first one would be understandable, the second one is something to warn about.
(Discuss in Talk:Dual boot with Windows)
If you intend to use Secure Boot for Linux as well, you may need to perform changes to the Secure Boot settings. Those changes prevent unlocking the BitLocker disk without the recovery key, leading to permanent data loss. Before proceeding, check if this is the case and save your BitLocker recovery key if not already done. This is especially important if Windows was preinstalled by the vendor.
Fast Startup and hibernation
There are two OSs that can be hibernated, you can hibernate Windows and boot Linux (or another OS), or you can hibernate Linux and boot Windows, or hibernate both OSs.
Warning: Data loss can occur if Windows hibernates and you dual boot into another OS and make changes to files on a filesystem (such as NTFS) that can be read and written to by Windows and Linux, and that has been mounted by Windows [3]. Similarly, data loss can occur if Linux hibernates, and you dual boot into another OS etc. Windows may hibernate even when you press shutdown, see section #Windows settings.
For the same reason, if you share one EFI system partition between Windows and Linux, then the EFI system partition may be damaged if you hibernate (or shutdown with Fast Startup enabled) Windows and then start Linux, or hibernate Linux and then start Windows.
ntfs-3g added a safe-guard to prevent read-write mounting of hibernated NTFS filesystems, but the NTFS driver within the Linux kernel has no such safeguard.
Windows cannot read filesystems such as ext4 by default that are commonly used for Linux. These filesystems do not have to be considered, unless you install a Windows driver for them.
Windows settings
Fast Startup is a feature in Windows 8 and above that hibernates the computer rather than actually shutting it down to speed up boot times.
There are multiple options regarding the Windows settings for Fast Startup and hibernation that are covered in the next sections.
- disable Fast Startup and disable hibernation
- disable Fast Startup and enable hibernation
- enable Fast Startup and enable hibernation
The procedure of disabling Fast Startup is described in the tutorials for Windows 8, Windows 10 and Windows 11. In any case if you disable a setting, make sure to disable the setting and then shut down Windows, before installing Linux; note that rebooting is not sufficient.
Disable Fast Startup and disable hibernation
This is the safest option, and recommended if you are unsure about the issue, as it requires the least amount of user awareness when rebooting from one OS into the other. You may share the same EFI system partition between Windows and Linux.
In a Windows command-line shell with administrator privileges:
> powercfg /H off
Disable Fast Startup and enable hibernation
This option requires user awareness when rebooting from one OS into the other.
If you want to start Linux while Windows is hibernated, which is a common use case, then
- you must use a separate EFI system partition (ESP) for Windows and Linux, and ensure that Windows does not mount the ESP used for Linux. As there can only be one ESP per drive, the ESP used for Linux must be located on a separate drive than the ESP used for Windows. In this case Windows and Linux can still be installed on the same drive in different partitions, if you place the ESP used by linux on another drive than the Linux root partition.
- you can not read-write mount any filesystem in Linux, that is mounted by Windows while Windows is hibernated. You should be extremely careful about this, and also consider Automount behaviour.
- If you shut down Windows fully, rather than hibernating, then you can read-write mount the filesystem.
Note: You can avoid this issue for a drive by mounting a drive as an external drive in Windows and ejecting the drive in Windows before hibernating.
Enable Fast Startup and enable hibernation
The same considerations apply as in case «Disable Fast Startup and enable hibernation», but since Windows can not be shut down fully, only hibernated, you can never read-write mount any filesystem that was mounted by Windows while Windows is hibernated.
Note: Windows updates may re-enable Fast Startup, as reported in [4][dead link 2024-07-30 ⓘ].
Windows filenames limitations
Windows is limited to filepaths being shorter than 260 characters.
Windows also puts certain characters off limits in filenames for reasons that run all the way back to DOS:
<(less than)>(greater than):(colon)"(double quote)/(forward slash)\(backslash)|(vertical bar or pipe)?(question mark)*(asterisk)
These are limitations of Windows and not NTFS: any other OS using the NTFS partition will be fine. Windows will fail to detect these files and running chkdsk will most likely cause them to be deleted. This can lead to potential data-loss.
NTFS-3G applies Windows restrictions to new file names through the windows_names option: ntfs-3g(8) § Windows_Filename_Compatibility (see fstab).
Installation
The recommended way to set up a Linux/Windows dual booting system is to first install Windows, only using part of the disk for its partitions. When you have finished the Windows setup, boot into the Linux install environment where you can create and resize partitions for Linux while leaving the existing Windows partitions untouched. The Windows installation will create the EFI system partition which can be used by your Linux boot loader. If you are installing Windows from scratch, do note that the EFI System partition created by Windows Setup will be too small for most use cases. See #The EFI system partition created by Windows Setup is too small.
Windows before Linux
BIOS systems
Using a Linux boot loader
You may use any multi-boot supporting BIOS boot loader.
Using the Windows Vista/7/8/8.1 boot loader
This section explains how to:
- install a linux boot loader on a partition instead of the MBR;
- copy this boot loader to a partition readable by the Windows boot loader;
- use the windows boot loader to start said copy of the linux boot loader.
Note: Some documents state that the partition being loaded by the Windows boot loader must be a primary partition but usage of an extended partition has been documented as working.
- When installing the boot loader, install it on your
/bootpartition rather than the MBR. For details on doing this with GRUB, see GRUB/Tips and tricks#Install to partition or partitionless disk, for Syslinux, see the note at Syslinux#Manually, for LILO see LILO#Install to partition or partitionless disk.
- Make a copy of the VBR:
dd if=/dev/disk of=/path/to/linux.bin bs=512 count=1
where
/dev/diskis the path of the partition on which your boot loader is installed and/path/to/is the mounted filesystem on which you want the copy to be readable by the Windows boot loader.
- On Windows, the linux.bin file should now be accessible. Run cmd with administrator privileges (navigate to Start > All Programs > Accessories, right-click on Command Prompt and select Run as administrator):
bcdedit /create /d "Linux" /application BOOTSECTOR
BCDEdit will return a UUID for this entry. This will be referred to as
UUIDin the remaining steps.bcdedit /set UUID device partition=c: (or the drive letter on which linux.bin is kept) bcdedit /set UUID path \path\to\linux.bin bcdedit /displayorder UUID /addlast bcdedit /timeout 30
On reboot, both Windows and Linux should now show up in the Windows boot loader.
Note: On some hardware, the Windows boot loader is used to start another OS with a second power button (e.g. Dell Precision M4500).
For more details, see https://www.iceflatline.com/2009/09/how-to-dual-boot-windows-7-and-linux-using-bcdedit/
UEFI systems
If you already have Windows installed, it will already have created some partitions on a GPT-formatted disk:
- a Windows Recovery Environment partition, generally of size 499 MiB,
- an EFI system partition with a FAT32 filesystem, containing the Windows Boot Manager,
- a Microsoft Reserved Partition, generally of size 128 MiB,
- a Microsoft basic data partition with a NTFS filesystem, which corresponds to
C:, - potentially system recovery and backup partitions and/or secondary data partitions (corresponding often to
D:and above).
Using the Disk Management utility in Windows, check how the partitions are labelled and which type gets reported. The Reserved Partition may not be visible in the Disk Management utility in which case it can be identified using diskpart in windows cmd. This will help you understand which partitions are essential to Windows, and which others you might repurpose. The Windows Disk Management utility can also be used to shrink Windows (NTFS) partitions to free up disk space for additional partitions for Linux.
Warning: The first 4 partitions in the above list are essential, do not delete them.
You can then proceed with partitioning, depending on your needs. The boot loader needs to support chainloading other EFI applications to dual boot Windows and Linux. An additional EFI system partition should not be created, as it may prevent Windows from booting.
Note: It only appears when Linux is installed on the second hard disk and a new EFI system partition is created on the second hard disk.
Simply mount the existing partition.
Tip:
- rEFInd and systemd-boot will autodetect Windows Boot Manager (
\EFI\Microsoft\Boot\bootmgfw.efi) and show it in their boot menu automatically. For GRUB follow either GRUB#Windows installed in UEFI/GPT mode to add boot menu entry manually or GRUB#Detecting other operating systems for a generated configuration file. - To save space on the EFI system partition, especially for multiple kernels, increase the initramfs compression.
Computers that come with newer versions of Windows often have Secure Boot enabled. You will need to take extra steps to either disable Secure Boot or to make your installation media compatible with secure boot (see above and in the linked page).
Linux before Windows
Even though the recommended way to set up a Linux/Windows dual booting system is to first install Windows, it can be done the other way around. In contrast to installing Windows before Linux, you will have to set aside a partition for Windows, say 40GB or larger, in advance. Or have some unpartitioned disk space, or create and resize partitions for Windows from within the Linux installation, before launching the Windows installation.
UEFI firmware
Windows will use the already existing EFI system partition.
Follows an outline, assuming Secure Boot is disabled in the firmware.
- Boot into windows installation. Watch to let it use only the intended partition, but otherwise let it do its work as if there is no Linux installation.
- Follow the #Fast Startup and hibernation section.
- Fix the ability to load Linux at start up, perhaps by following #Cannot boot Linux after installing Windows. It was already mentioned in #UEFI systems that some Linux boot managers will autodetect Windows Boot Manager. Even though newer Windows installations have an advanced restart option, from which you can boot into Linux, it is advised to have other means to boot into Linux, such as an arch installation media or a live CD.
Windows 10 with GRUB
The following assumes GRUB is used as a boot loader (although the process is likely similar for other boot loaders) and that Windows 10 will be installed on a GPT block device with an existing EFI system partition (see the «System partition» section in the Microsoft documentation for more information).
Create with program gdisk on the block device the following three new partitions. See [5] for more precise partition sizes.
| Min size | Code | Name | File system |
|---|---|---|---|
| 16 MB | 0C01 | Microsoft reserved | N/A |
| ~40 GB | 0700 | Microsoft basic data | NTFS |
| 300 MB | 2700 | Windows RE | NTFS |
Create NTFS file systems on the new Microsoft basic data and Windows RE (recovery) partitions using the mkntfs program from package ntfs-3g.
Reboot the system into a Windows 10 installation media. When prompted to install select the custom install option and install Windows on the Microsoft basic data partition created earlier. This should also install Microsoft EFI files in the EFI system partition.
After installation (set up of and logging into Windows not required), reboot into Linux and generate a GRUB configuration for the Windows boot manager to be available in the GRUB menu on next boot.
Troubleshooting
Couldn’t create a new partition or locate an existing one
See #Windows UEFI vs BIOS limitations.
Cannot boot Linux after installing Windows
See Unified Extensible Firmware Interface#Windows changes boot order.
Restoring a Windows boot record
By convention (and for ease of installation), Windows is usually installed on the first partition and installs its partition table and reference to its boot loader to the first sector of that partition. If you accidentally install a boot loader like GRUB to the Windows partition or damage the boot record in some other way, you will need to use a utility to repair it. Microsoft includes a boot sector fix utility FIXBOOT and an MBR fix utility called FIXMBR on their recovery discs, or sometimes on their install discs. Using this method, you can fix the reference on the boot sector of the first partition to the boot loader file and fix the reference on the MBR to the first partition, respectively. After doing this you will have to reinstall GRUB to the MBR as was originally intended (that is, the GRUB boot loader can be assigned to chainload the Windows boot loader).
If you wish to revert back to using Windows, you can use the FIXBOOT command which chains from the MBR to the boot sector of the first partition to restore normal, automatic loading of the Windows operating system.
Of note, there is a Linux utility called ms-sysAUR that can install MBR’s. However, this utility is only currently capable of writing new MBRs (all OS’s and file systems supported) and boot sectors (a.k.a. boot record; equivalent to using FIXBOOT) for FAT file systems. Most LiveCDs do not have this utility by default, so it will need to be installed first, or you can look at a rescue CD that does have it, such as Parted Magic.
First, write the partition info (table) again by:
# ms-sys --partition /dev/sda1
Next, write a Windows 2000/XP/2003 MBR:
# ms-sys --mbr /dev/sda # Read options for different versions
Then, write the new boot sector (boot record):
# ms-sys -(1-6) # Read options to discover the correct FAT record type
ms-sys can also write Windows 98, ME, Vista, and 7 MBRs as well, see ms-sys -h.
Restoring an accidentally deleted EFI system partition
If you have a GPT-partitioned disk and erased (e.g. with mkfs.fat -F32 /dev/sdx) the EFI system partition, you will notice that Windows Boot Manager will either disappear from your boot options, or selecting it will send you back to the UEFI.
To remedy it, boot with a Windows installation media, press Shift+F10 to open the console (or click NEXT > Repair Computer > Troubleshoot… > Advanced > Command Prompt), then start the diskpart utility:
X:\Sources> diskpart
DISKPART> list disk
Select the appropriate hard drive by typing:
DISKPART> select disk number
Make sure that there is a partition of type system (the EFI system partition):
DISKPART> list partition
Select this partition:
DISKPART> select partition number
and assign a temporary drive letter to it:
DISKPART> assign letter=G:
DiskPart successfully assigned the drive letter or mount point.
To make sure that drive letter is correctly assigned:
DISKPART> list vol
 Volume ###  Ltr  Label        Fs     Type        Size     Status     Info
 ----------  ---  -----------  -----  ----------  -------  ---------  --------
 Volume 0     E                       DVD-ROM         0 B  No Media
 Volume 1     C                NTFS   Partition    195 GB  Healthy    Boot
 Volume 2         WINRE        NTFS   Partition    400 MB  Healthy    Hidden
 Volume 3     G                FAT32  Partition    499 MB  Healthy    System
Close diskpart:
DISKPART> exit
Navigate to C:\ (or what your system drive letter is):
X:\Sources> cd /d C:\
Next is the «magic» command, which recreate the BCD store (with /s for the mount point, /f for firmware type, optionally add /v for verbose):
C:\> bcdboot C:\Windows /s G: /f UEFI
Tip: If it hangs up after a minute, hit Ctrl+c. This happens sometimes, but you will get a message like boot files successfully created and it will have worked just fine.
You should now have Windows Boot Manager working as a boot option, and thus have access to Windows. Just make sure to never format your EFI system partition again!
Note: Remove the drive letter G assigned to the EFI system partition to keep it from showing up in My Computer.
See [6], [7] and [8].
The EFI system partition created by Windows Setup is too small
By default, Windows Setup creates a 100 MiB EFI system partition (except for Advanced Format 4K native drives where it creates a 300 MiB ESP). This is generally too small to fit everything you need. You can replace the existing EFI system partition with a new, larger one.
If you are installing Windows from scratch, you can dictate the size of the EFI system partition during installation[9]:
- Select your installation target and make sure it has no partitions.
- Click New and then the Apply buttons. The Windows installer will then generate the expected partitions (allocating nearly everything to its primary partition) and just 100MB to the EFI.
- Use the UI to delete the
System,MSR, andPrimarypartitions. Leave theRecoverypartition (if present) alone. - Press
Shift+F10to open the Command Prompt. - Type
diskpart.exeand pressEnterto open the disk partitioning tool. - Type
list diskand pressEnterto list your disks. Find the one you intend to modify and note its disk number. - Type
select disk disk_numberwith the disk number to modify. - Type
create partition efi size=sizewith the desired size of the ESP in Mebibytes (MiB), and pressEnter. See the note at EFI system partition#Create the partition for the recommended sizes. - Type
format quick fs=fat32 label=Systemand pressEnterto format the ESP - Type
exitand pressEnterto exit the disk partitioning tool andexitfollowed byEnteragain.
Once Windows is installed, you can resize the primary partition down within Windows and then reboot and go about your usual Arch install, filling the space you just created.
Alternatively, you can use the Arch install media to create a single EFI system partition of your preferred size before you install Windows on the drive. Windows Setup will use the EFI system partition you made instead of creating its own.
Unable to install Windows Cumulative Update on BIOS system
On BIOS systems, Windows cumulative updates may fail with the error We couldn’t complete the updates. Undoing changes. Don’t turn off your computer. In such case, while in Windows, you need to set the Windows partition as active.
C:\> diskpart
DISKPART> list disk
DISKPART> select disk number
DISKPART> list partition
DISKPART> select partition number
DISKPART> active
DISKPART> exit
After successfully installing the Windows update, mark back your Linux partition as active, using the commands above.
Note: Setting a partition as active in the diskpart tool in Windows has the same effect as setting the boot flag in GParted.
Time standard
- Recommended: Set both Arch Linux and Windows to use UTC, following System time#UTC in Microsoft Windows. Some versions of Windows revert the hardware clock back to localtime if they are set to synchronize the time online. This issue appears to be fixed in Windows 10.
- Not recommended: Set Arch Linux to localtime and disable all time synchronization daemons. This will let Windows take care of hardware clock corrections and you will need to remember to boot into Windows at least two times a year (in Spring and Autumn) when DST kicks in. So please do not ask on the forums why the clock is one hour behind or ahead if you usually go for days or weeks without booting into Windows.
Bluetooth pairing
When it comes to pairing Bluetooth devices with both the Linux and Windows installation, both systems have the same MAC address, but will use different link keys generated during the pairing process. This results in the device being unable to connect to one installation, after it has been paired with the other. To allow a device to connect to either installation without re-pairing, follow Bluetooth#Dual boot pairing.
See also
- Booting Windows from a desktop shortcut
- One-time boot into Windows partition from desktop shortcut
- Windows 7/8/8.1/10 ISO to Flash Drive burning utility for Linux (MBR/GPT, BIOS/UEFI, FAT32/NTFS)
Dual Boot Arch Linux and windows 11/10 . Install Arch Linux With GUI alongside windows 11. This is a complete step by step tutorial of Arch linux installation 2024.
This Article walks you through the installation guide of Arch Linux With Plasma Desktop and dual Boot with windows 11. Using dual boot you can setup windows 11 and arch Linux on the same drive.
The Pre-requisites of this video
* You need Windows 11 or Windows 10 installed on your PC or laptop.
* An 8 GB or higher USB drive to create a bootable disk with ArchLinux
* At least 40GB of free space reserved from your existing drive.
Creating Free Space For ARCH LINUX
- Open command prompt and type DISKMGMT to access disk manager.
- View connected drives and their partitions.
- Identify the target drive (e.g., Drive 0) with its partitions.
- Choose the C Or D or Any Drive for ArchLinux and right-click on it.
- Select “shrink volume” to allocate free space for ArchLinux.Allocate a minimum of 40GB or more (type in MegaBytes, e.g., 200,000 MB).Click “shrink” to create unallocated free space

Download ArchLinux & Make Bootable USB
- Download the Arch ISO from HERE
- Connect a USB stick to your computer.Use Rufus to burn the downloaded ISO image to the USB drive.
Create System Restore Point
It is recommended to create a System Restore point before installing Archlinux. This option allows you to take a snapshot of the current state of the system. If something goes wrong with the Arch installation, you can use this backup to restore your system to normal.
BIOS Settings
- Reboot your computer.
- During the reboot, enter the BIOS settings using the keyboard shortcut (commonly F2, F9, or ESC).
- In UEFI BIOS, enable USB boot and set the USB drive as the primary boot order.
- Disable secure boot in the BIOS settings.
- If available, enable options like Microsoft’s third-party UEFI.
- Consider clearing any keys or certificates after disabling secure boot.
- Save the changes in the BIOS settings.
- Your system should now boot into ArchLinux from the USB drive.
- If the boot fails, use the boot menu to load Arch install media.
Increase Console FONT
Now, on your monitor, you will see a terminal expecting input. Note that the mouse functionality is disabled so you need to rely on the keyboard
Type setfont ter-132n and press enter to increase the size of the console.
Using iWCTL for WIFI Connection
If using built-in WiFi support, use the iwctl tool to connect to the internet.
- To find list of network interfaces type:
iwctl device list - To search for WIFI Networks type:
iwctl station wlan0 get-networks - To connect to WIFI network type:
iwctl station wlan0 connect WIFI_NAME - Once connected run :
ping google.comto check internet connection (Interrupt Ping with CTRL + C) - Then type the command to syncnorize the package database:
pacman -Sy - Then Type this command :
pacman -S archlinux-keyring
Create Partitions For Arch Linux
- Type
lsblkto list all connected drives on the PC. - Identify the main drives, focusing on SDA or NVME (ignore loops).
- NVME0n1 is MY drive with Windows 11, and SDA is the BootableUSB.

- Create partitions for Arch Linux using earlier free space.
- Type cfdisk /dev/nvme0n1 and press enter.
- Use arrow keys for selection and enter key for confirmation.

- Scroll to free space and create 3 partitions: EFI, ROOT, and swap.
- Create EFI partition (e.g., 800MB) with type EFI System.
- Create ROOT partition (e.g., 20GB or higher) with type Linux file system.
- Use remaining free space for swap partition with type Linux SWAP.
- Write changes to alter the disk and exit from CFDisk.

Formatting Partitions
- Type lsblk to view all newly created partitions
- NVME0N1P5 for EFI, NVME0N1P6 for Root, and NVME0N1P7 for Swap.
- Format the Arch EFI Partition (e.g., NVME0N1p5)
mkfs.fat -F32 /dev/nvme0n1p5 - Format the root partition (e.g., NVME0N1p6)
mkfs.ext4 /dev/NVME0N1p6 - Format the swap partition (e.g., nvme0n1p7)
mkswap /dev/nvme0n1p7
Mount Partitions
- Mount the root partition (e.g., NVME0n1p6) to the “mnt” directory.
mount /dev/nvme0n1p6 /mnt - Create a directory inside “
mnt” and name it “boot,” then mount the EFI partition to this directory.
mkdir /mnt/boot
mount /dev/nvme0n1p5 /mnt/boot
- Enable the swap partition by typing
swapon /dev/nvme0n1p7 - Verify proper mounting of all partitions by typing
lsblk

Installing ArchLinux
Now, it’s time to install the Arch Linux to the root partition which Is mounted to /mnt.
pacstrap -i /mnt base base-devel linux linux-headers linux-firmware amd-ucode sudo git nano vim neofetch htop cmake make bluez bluez-utils networkmanager cargo gcc mpvRun the above command to start installing the base system of Arch Linux. Accept the defaults. This will take some time, sit back, relax, and don’t interrupt the computer.
Generate File System Table (FSTAB)
It’s time to generate a file system table. If you notice, the NVME partitions are mounted to the live session of USB, but when we boot arch from the main drive we need to tell the system to mount all these partitions to the same location.
genfstab -U /mnt >> /mnt/etc/fstabCHROOT To Newley Installed system
So far we are running everything from the Live Session. It’s Time to enter, into the drive where we have installed Arch Linux. For that type:
arch-chroot /mnt
Now you can see the prompt has changed to something else, which means we have entered into the actual drive as a root user.
Change Root Password
Then type passwd and set the root password. This is a superuser account and is known as a top-tier user in Linux.
Adding a Standard User
Also, we are going to create a standard user by tying the below command and replace the username placeholder with your name
useradd -m -g users -G wheel,storage,video,audio -s /bin/bash USER_NAMEThen set the password by typing
passwd USER_NAMENow, we have added this new user to the wheel group and other groups. The Wheel group allows the user to access root privileges with a sudo command. For that, we need to edit the sudoers file. Type the below command
EDITOR=nano visudo
Uncomment the line in the image and save the changes with CTRL + O and CTRL + X to Exit.
SetupTimezone/Region
- Use
ln -sf /usr/share/zoneinfo/and press tab to see the list of available options. - Choose the appropriate timezone, for example
ln -sf /usr/share/zoneinfo/Asia/Kolkata /etc/localtime - Synchronize the current time with the hardware clock using
hwclock --systohc

Setup System Language
It’s time to set a system language by generating a locale. Type the below command
nano /etc/locale.genScroll all the way and uncomment the below line in the image and save the changes. This is going to tell the system to use American English as the system locale.

Now type the below commands to generate a locale & Config file
locale-genecho "LANG=en_US.UTF-8" >> /etc/locale.confSetup Host Name
Now, type the below command to set up the hostname of this computer. In this case, I am going to say “archlinux” and save the changes
echo "archlinux" >> /etc/hostnameThen type nano /etc/hosts and add the below lines.

Make sure you replace the GREEN part with your hostname and save the changes
Grub-Installation
It’s time to install the grub boot loader which is going to help boot arch Linux. Type the below commands
pacman -S grub efibootmgr dosfstools mtoolsgrub-install --target=x86_64-efi --efi-directory=/boot --bootloader-id=GRUBgrub-mkconfig -o /boot/grub/grub.cfgEnable Services
systemctl enable bluetoothsystemctl enable NetworkManagerThen exit from Chroot by typing exit & Unmount the partitions by typing
umount -lR /mntShutdown the computer and eject the USB Stick
Connecting TO WIFI Using NMCLI
Once the system is restarted you can see the grub menu. From here you can boot into only Arch for now and Windows 11 boot entry will be missing.
We are going to fix that issue in a moment. For now, let’s just boot into Arch Linux. Now log in with your user account & increase the console font by typing below command
setfont -d- Check the status of all network interfaces:
nmcli dev status - Turn on the WIFI Radio:
nmcli radio wifi on. - View available wifi networks with the command specified
nmcli dev wifi list - Connect to wifi using the relevant command, replace placeholders with your network information and enclosing the password in double-quotes
sudo nmcli dev wifi connect WIFI_NAME password "WIFI_PASSWORD" - Update the PACMAN database with:
sudo pacman -Sy
Installing GUI
It’s time to install the desktop environment. For Plasma Desktop Run the below commands
sudo pacman -S xorg sddm plasma-meta plasma-wayland-session kde-applications noto-fonts noto-font-emoji ttf-dejavu ttf-font-awesomesudo systemctl enable sddmFor GNOME Desktop
sudo pacman -S xorg gdm gnome gnome-extra sudo systemctl enable gdmThen Reboot the system
sudo reboot nowand this time Arch Linux will boot With a GUI Environment
Fix Discover App Backend
The first thing to do after installing ArchLinux is to fix the Discover app backend. To do so open KONSOLE and type the below command to install flatpak and use it as a backend for discover.
sudo pacman -Sy flatpakInstall NVIDIA Drivers (Optional)
If you have a modern NVIDIA graphic card, it’s recommended to install NVIDIA proprietary drivers.
"This is completely optional, installing this package on older systems may or may not work, so please refer to this article"
Anyway, inside the konsole you can type the below command to set up NVIDIA drivers.
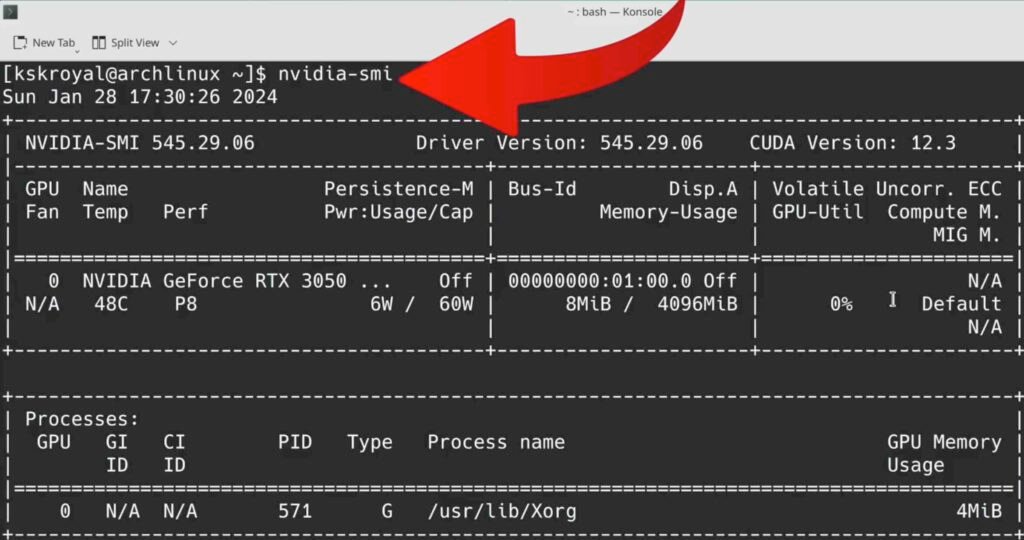
sudo pacman -Sy nvidia Once it’s done, reboot your computer. Now if I type nvidia-smi command inside the terminal you can see it shows the NVIDIA driver information.
Adding Windows Entry To GRUB
- Install OS-Prober with the command provided
sudo pacman -Sy os-prober - Edit the grub file,
sudo nano /etc/default/grub - Set the
GRUB_TIMEOUT=20 - Scroll to the bottom and uncomment the line related to os-prober.

Save changes with ctrl + o and exit with ctrl + x.
Run grub-mkconfig -o /boot/grub/grub.cfg to update the grub configuration.Verify that Windows boot manager is detected.

Reboot the system. Using the grub menu you can boot into either Arch or Windows 11
Removing ArchLinux From Dual Boot
- Reboot your computer and boot into Windows 11.
- Open Disk Management utility by typing diskmgmt in the search bar.
- Delete each new partition by right Clicking created during ArchLinux installation, starting with swap and root partitions.

- “Note that the LINUX EFI partition cannot be deleted using Disk Management“
- Open Command Prompt as an administrator and type
DISKPART - Type
list diskto view all connected drives, select the appropriate drive with
select disk 0 - Type
list partitionto view all partitions on the selected drive. - Identify the Arch EFI partition (e.g., partition 5).

- Select the Arch EFI partition with
select partition [number] - Type
DELETE PARTITION OVERRIDEto remove the partition. - Verify the deletion in Disk Management; the free space is now available.
- Utilize the gained free space to merge it back into Windows 11 partitions
Watch the YouTube Video:
Newb’s Guide to installing Arch Next to Pre-installed Windows 10
The steps I took to dual boot Arch Linux alongside the preinstalled Windows 10 that came with my new Lenovo Ideapad. I used Ubuntu exclusively for the last 6 years so I’m Window’s illiterate. I don’t know a whole lot about the inner workings of Linux either.
Pre-Instllation Steps
Prepare the preinstalled Windows to share the system.
Verify the boot mode…
- Boot into Windows
- Press Win key and ‘R’ to start the Run dialog
- In the Run dialog type «msinfo32» and press Enter
- In the System Information windows, select System Summary on the left and check the value of BIOS mode item on the right.
- Make sure the value is UEFI, which means Windows boots in UEFI/GPT mode
Disable secure boot
- Open Settings (The gear icon in the start menu)
- Click «Updates & Security»
- In the «Recovery» menu, click «Restart now» under the «Advanced startup» header
- After restart, choose the «Troubleshoot» option.
- Choose «Advanced Options»
- Choose «UEFI Firmware Settings»
- Press the restart button to load the UEFI firmware
- In the Security settings find and disable Secure Boot
- In the Boot settings also find and disable Fast Boot
Disable Fast Startup
- Open Control Panel (Press Windows key, Type «Control Panel» and press enter)
- In the «View by» menu, choose «Small Icons» and click on «Power Options».
- Open «Choose what power buttons do» on the left side menu.
- Click «Change settings that are currently unavailable»
- Uncheck «Turn on Fast Startup» and save changes.
Shrink the Windows partition
- Press Windows Key + R and type diskmgmt.msc — hit enter
- Right click the C drive and choose «Shrink Volume»
- Enter the amount of space to shrink the partition (I shrunk mine by 200000mb — 200 gigs)
- Click «Shrink»
Make a bootable USB
- Choose a mirror from www.archlinux.org/download — I used the American pair.com mirror because it’s the first reputable domain I recognised.
- Download the .iso file.
- Download Rufus from https://rufus.akeo.ie/
- Plug in a new USB stick and open Rufus
- Select the USB drive and the downloaded Linux iso.
- Choose the GPT partition scheme, FAT32 file system
- Press start
Install Arch
We’re ready to boot and install Arch.
Boot the USB
- Plug in the USB
- Hold down the shift key while clicking Restart
- Choose «Troubleshoot» then «Advanced Options» then «UEFI Firmware Settings» then restart.
- In the Boot menu, find your bootable USB and move it up above the Windows boot manager so it will boot the USB first.
- Save and exit
Load keyboard layout & locale
- Type
loadkeys usat the command line and press enter - Type
locale-genat the command line and press enter
Hookup them internets
- At the command line type
rfkill unblock wifiand press enter - Type
iw devand press enter. It will tell you the name of the Wifi interface. - Type
wifi-menu <wifi_interface_name>(using your actual interface name) and press enter. - A UI will show allowing you to choose a network and log into it.
- After logging in,
ping google.comto verify the internets work. After a few packets are sent, CTRL+C to stop pinging — if it says no packets were lost then we’re good.
Partitioning
- First type
free -m, hit enter. Take note of the amount of total memory available. - Type
gdisk /dev/sdaand hit enter to start the GPT partitioning program - Create SWAP partition
- At the prompt, type
n, press enter to create a new partition - It will prompt for a partition number. Just hit enter to use the default.
- It asks where to start the first sector. Press enter to accept the default which is automatically the start of unallocated space.
- It asks for the last sector. Type
+12GB(I have 12 gigs of memory — if you have more or less you should adjust accordingly) and press enter. - If it says anything other than «Linux Filesystem» type
8200at the next prompt. Hit enter.
- At the prompt, type
- Create Root partition
- At the prompt, type
n, press enter to create a new partition - It will prompt for a partition number. Just hit enter to use the default.
- It asks where to start the first sector. Press enter to accept the default which is automatically the start of unallocated space.
- It asks for the last sector. Press Enter to accept the default and use all of remaining unallocated space.
- If it says anything other than «Linux Filesystem» type
8300at the next prompt. Hit enter.
- At the prompt, type
- At the prompt, type
W, press enter to write changes to the drive. When prompted, typeYand press enter to confirm.
Create SWAP space
- Type
gdisk -l /dev/sda, press enter and take note of the partition number of the Swap part. - Type
mkswap -L "Linux Swap" /dev/sda7(My swap partition was number 7 — if yours is 5 use /dev/sda5 instead). Hit enter. - Type
swapon /dev/sda7(again, using the apprpriate swap partition number). Hit enter. - Verify status of swap space by typing
free -mand press enter. If the last line starts with «Swap:» we’re good.
Format and mount the root partition
- Type
gdisk -l /dev/sda, press enter and take note of the partition number of the Root part. - Type
mkfs.ext4 -L /dev/sda8(My root partition was number 7 — if yours is 6 use /dev/sda6 instead). Hit enter. - Type
mount /dev/sda8 /mnt(again, using the apprpriate swap partition number). Hit enter.
Start the installation
- Type
pacstrap /mnt base, hit enter.
Mount the EFI partition
- Type
gdisk -l /dev/sda, press enter and take note of the partition number of the EFI part. - Type
mount /dev/sda1 /mnt/boot/efi(My efi partition was number 1 — if yours is 2 use /dev/sda2 instead). Hit enter.
Configure the system
- Type
genfstab -U /mnt >> /mnt/etc/fstab. Hit enter. - Type
cat /mnt/etc/fstab, press enter, to verify the file was created correctly. - Change root into the new installation: type
arch-chroot /mntand press enter.
Set the timezone
- Type
cd /usr/share/zoneinfo && lspress enter. Take note of the appropriate region and use it as follows… - Type
cd <region> && ls(replacing<region>with the most appropriate region.) press enter. Take note of the most appropraite city. - Type
ln -sf /usr/share/zoneinfo/<region>/<city> /etc/localtime(replacing<region>and<city>with the most appropriate region and city.) - Type
hwclock --systohc. Hit enter.
Set the host
- Create the file
/etc/hostnameand write your hostnme in it with nano or vim - Create the file
etc/hostsand populate it like this (replacingmyhostnamewith whatever you put in your hostname file.)
127.0.0.1	localhost
::1		localhost
127.0.1.1	myhostname.localdomain	myhostname
Create the root user’s password
- Type
passwdand press enter - Enter a new root password and press enter. verify it and press enter.
Create new initramfs image
- Type
mkinitcpio -p linux. Hit enter.
Install Grub bootloader
- Type
pacman -Syu grub efibootmgrand hit enter. - Type
pacman -Syu efibootmgrand hit enter. - Type
grub-mkconfig -o /boot/grub/grub.cfg. Hit enter. - Type
grub-install /dev/sda. Hit enter. - Verify the install… Type
ls -l /boot/efi/EFI/arch/. Hit Enter. If you see a file called grubx64.efi then all is well.
Create new user
- Type
useradd -s /bin/bash -m username(replace «username» with the new user’s name). Hit enter. - Type
passwd username(replace «username» with the new user’s name). Hit enter. - Enter and verify the password.
Install a desktop environment and some important packages
- Type
pacman -Syu gnome-desktop. Hit enter. - Type
pacman -Syu gdm. Hit enter. - Type
systemctl enable gdm. Hit enter. - Type
pacman -Syu xterm. Hit enter. - Type
pacman -Syu iw. Hit enter. - Type
pacman -Syu dialog. Hit enter. - Type
pacman -Syu vim. Hit enter. - Type
pacman -Syu wpa_supplicant. Hit enter. - Type
pacman -Syu os-prober. Hit enter. - Type
grub-mkconfig -o /boot/grub/grub.cfg. Hit enter.
Unmount and reboot
- Remove USB
- Type
exit. Hit enter. - Type
umount -R /mnt. Hit enter. - Type
reboot. Hit enter. - After a moment it will load back into Arch, this time with a desktop GUI.
In this guide, you will learn how to Dual boot Arch Linux with Windows 10 on UEFI system. This guide assumes that you already have Windows 10 installed on your system.
Prerequisites
Before you begin configuring the dual-boot setup, ensure that the following requirements are met:
- A bootable installation medium of Arch Linux (Either USB or DVD). To download the latest Arch Linux ISO, proceed to the official Arch Linux download page. Once you have downloaded the ISO image, grab an 8GB USB drive and make it bootable using Rufus tool or any other application that can create a bootable USB drive.
- A fast and stable internet connection for downloading and installing software packages.
Step 1) Create a separate partition for installation of Arch Linux
For the dual boot setup to work, we need to create a separate partition on the hard drive on which Arch Linux will be installed. To do so, head over to the disk management utility by pressing Windows Key + R. In the dialogue box, type diskmgmt.msc and hit ENTER.
This launches the disk management utility displaying the various disk partitions on your hard drive. We are going to create an unallocated partition by shrinking the C drive. If you have a bigger partition than the C drive, feel free to use it for creating the separate partition,
So, we are going to right-click on drive C and select the ‘Shrink Volume’ option as shown
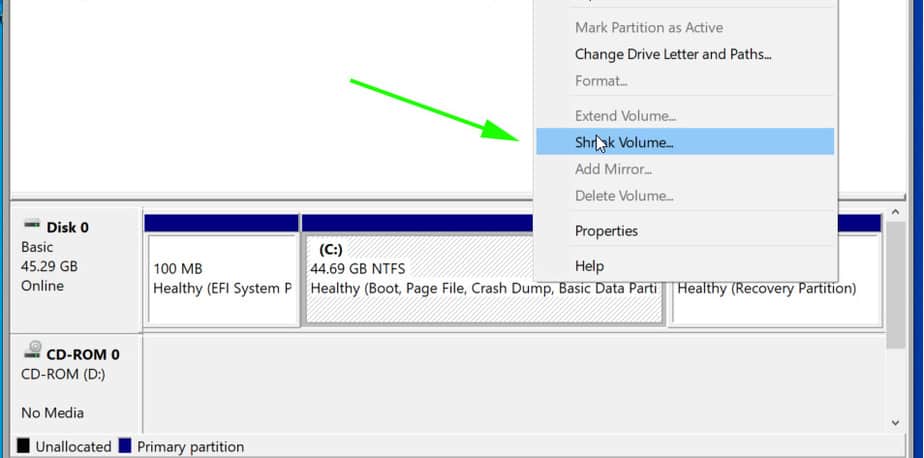
On the pop-up dialogue box that appears, we are going to specify the amount to shrink as shown. This is the amount that will be designated for the installation of Arch Linux. In our example, we have shrunk 20 GB of hard disk space will serve as the unallocated space.
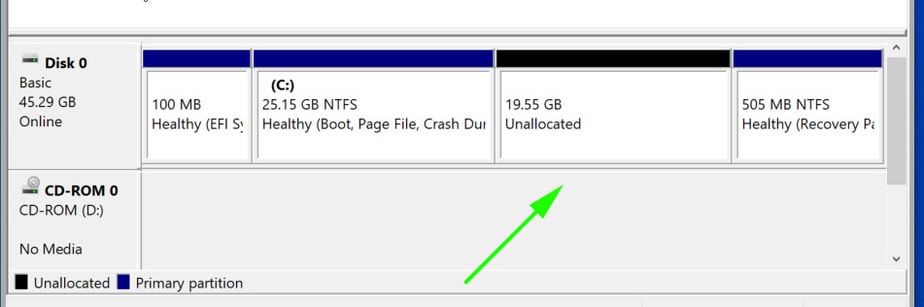
Once you are satisfied, click on the ‘Shrink’ button.

Your unallocated space will be indicated as shown below. In our case, we have set aside approximately 20G for the installation of Arch Linux.
With the unallocated partition in place, plug in your bootable USB and reboot your PC.
Step 2) Configure BIOS to boot from bootable medium
Before you begin with the installation process, it’s prudent to set the boot priority in the BIOS to select your bootable medium as the most preferred option. Depending on your vendor, you can press the Esc, or F10 key to enter the BIOS and navigate to the boot priority Menu.
Also note that we are using the UEFI mode for installation.

Once you have selected your boot medium, press the ESC button to continue with the booting process.
Step 3) Begin the installation of Arch Linux
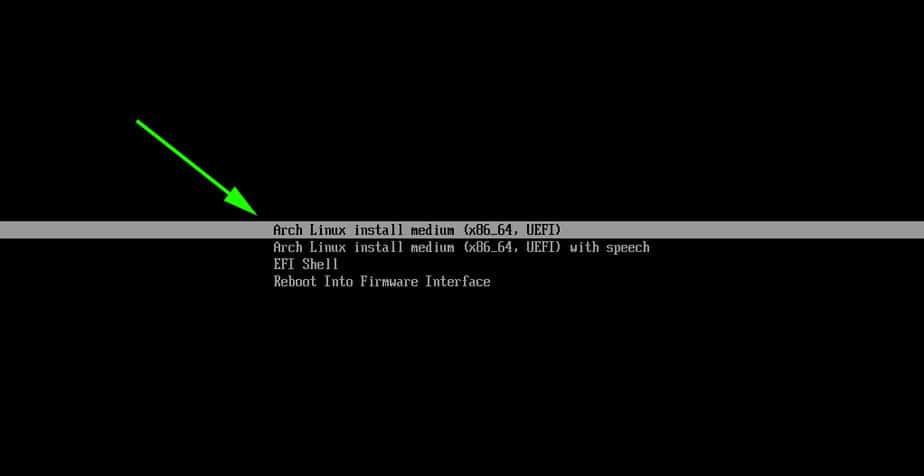
On the bootup screen, you will be presented with options as shown below. Select the first option – Arch Linux install medium (x86_64, UEFI) and hit ENTER.
This initialize Arch Linux as evidenced by the boot messages on the screen.
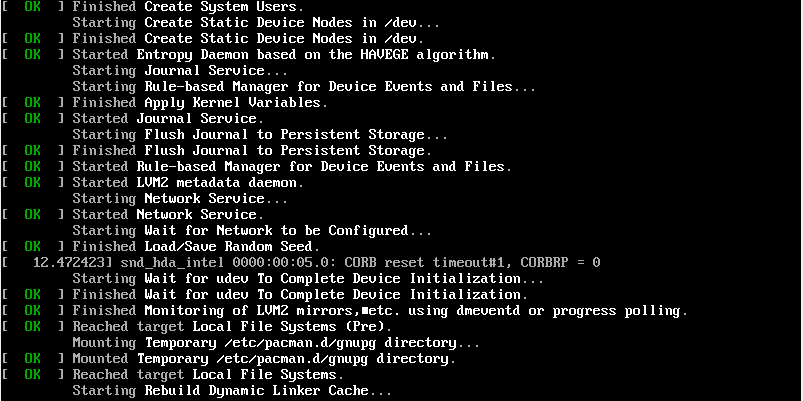
After a few seconds, this ushers you to the prompt as shown below.

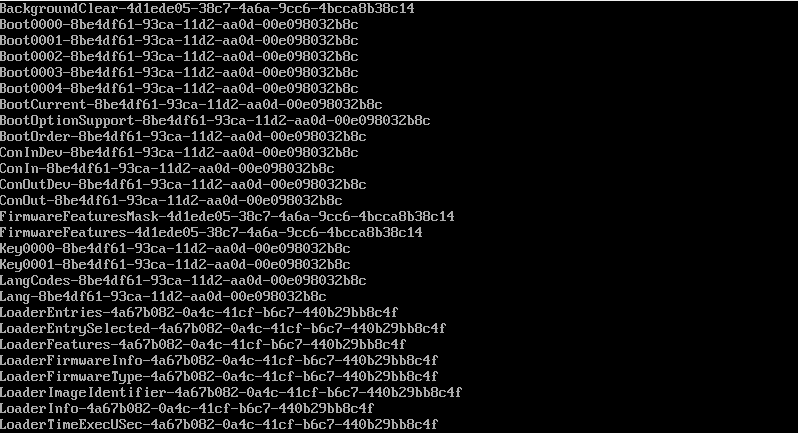
To confirm that you have EFI support, run the command:
# ls /sys/firmware/efi/efivars
You should get some entries on the screen as shown. If nothing is listed on your screen, then it means you are using MBR and this guide won’t work for you in configuring up a dual boot setup.
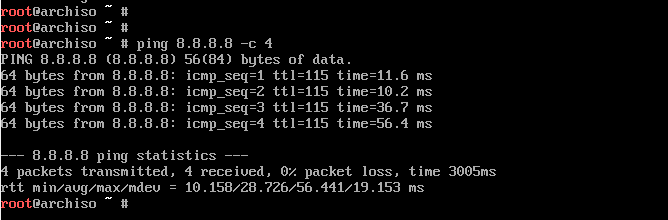
As you begin the installation, you might want to ensure that you have internet connectivity. Internet connectivity is crucial in setting time and date.
You can ping Google’s DNS as shown:
# ping 8.8.8.8 -c 4
You should get a positive reply as shown.
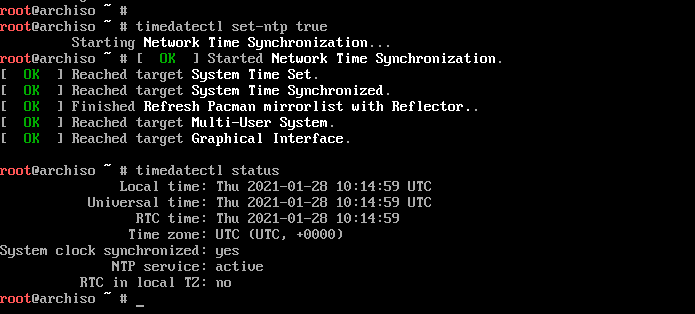
Step 4) Update time and date
Next, we are going to update the system time and date using the timedatectl command as shown.
# timedatectl set-ntp true
You can thereafter confirm the time and date using the command
# timedatectl status
Step 5) Create & format Linux partitions
Next, we are going to partition our hard drive and create some Linux partitions. An easy way of doing this is using the cfdisk utility. Run the command:
# cfdisk
This displays all the partitions available including Windows partitions.
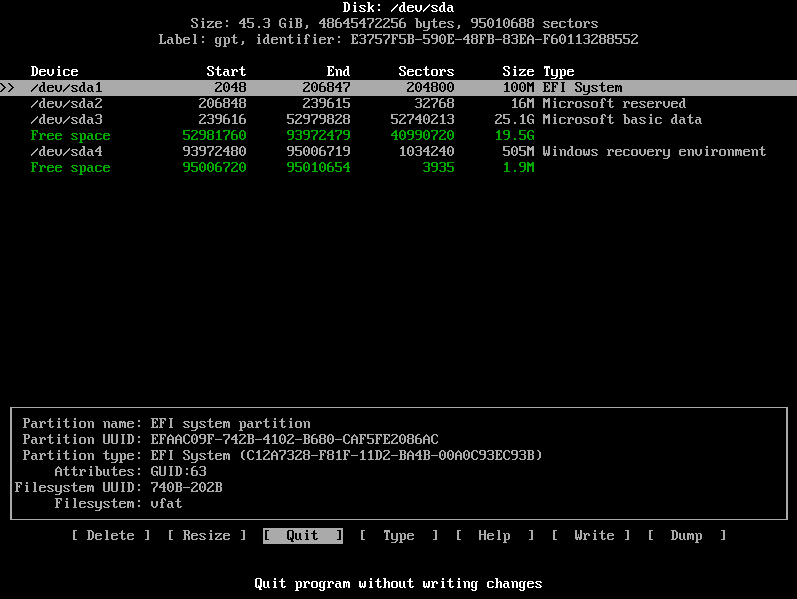
As you can see, we have some free space of 19.5G that we created earlier in step 1 from shrinking drive C on the Windows side. Using this partition, we shall create the following Linux partitions :
- Root partition / 12G
- swap partition 4G
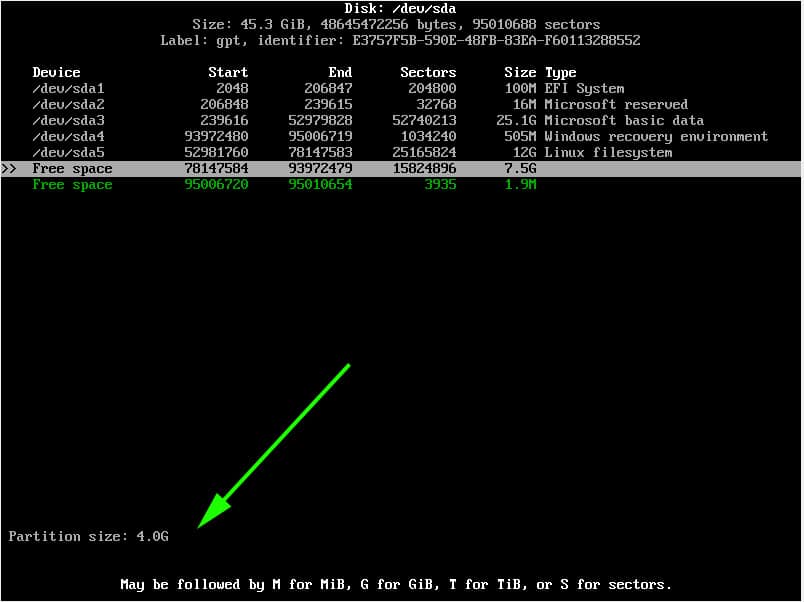
To achieve this, we will navigate to the free space with 19.5G just after /dev/sda3 volume and hit ENTER. We will then specify the volume as 12G for the root partition as shown below. Then hit ENTER.
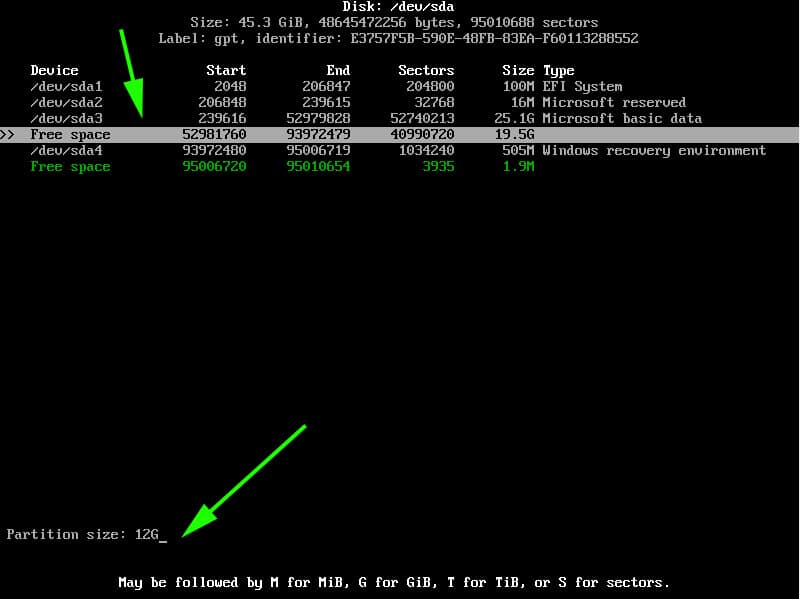
The root partition will be created with the Linux filesystem type as shown.
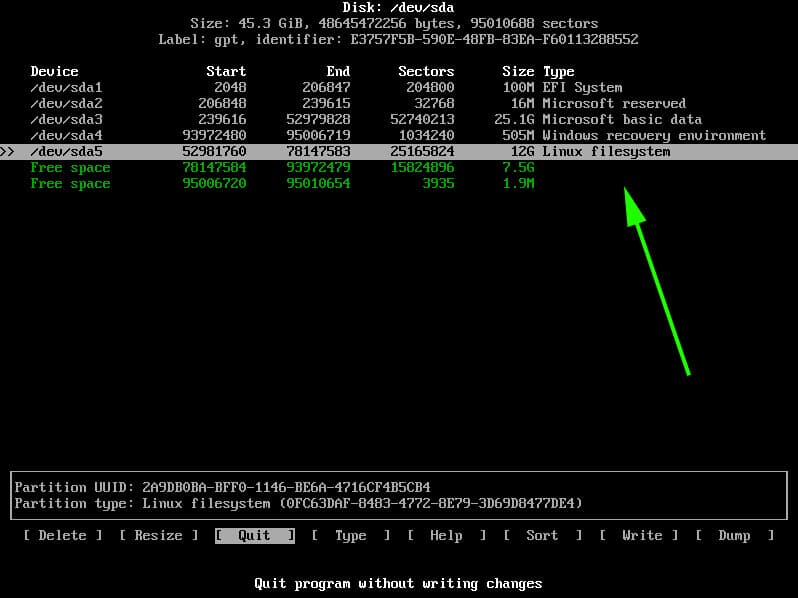
Next, we will create another partition for swap. Using the same method, we will proceed to the remaining free partition of 7G and select the ‘New’ option.
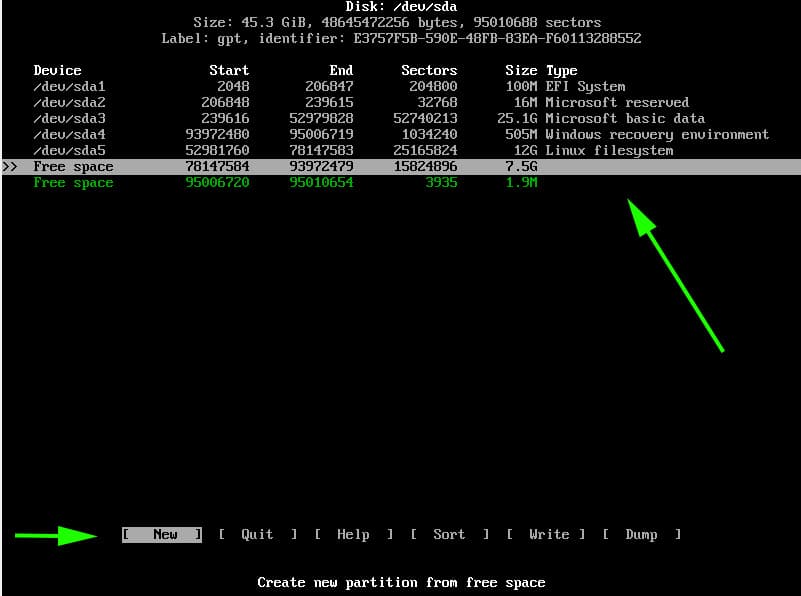
Specify the partition size as 4G
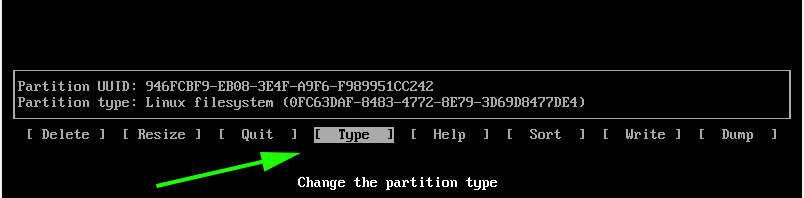
Since this will be our swap partition, we need to go the extra step and modify the partition type. Therefore, we will select the ‘type’ option and hit ENTER.
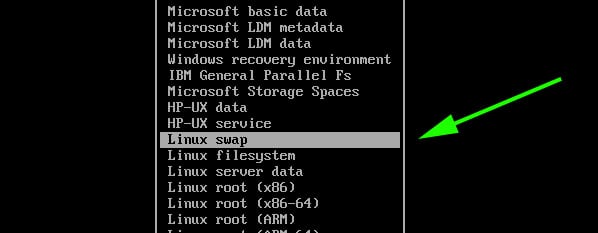
In the list that appears, select ‘Linux Swap’ and hit ENTER.
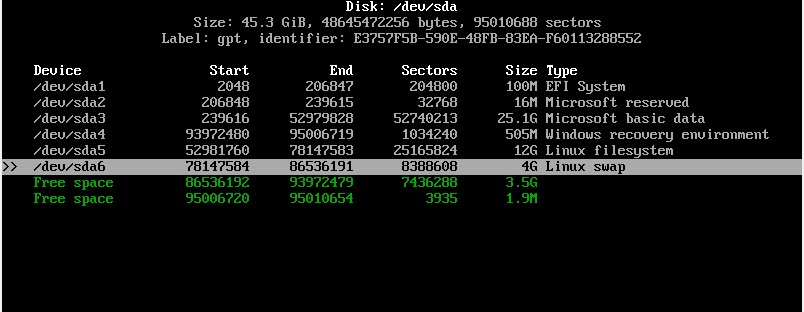
At this point, both the root and Linux swap partitions are created as seen from the partition table below.
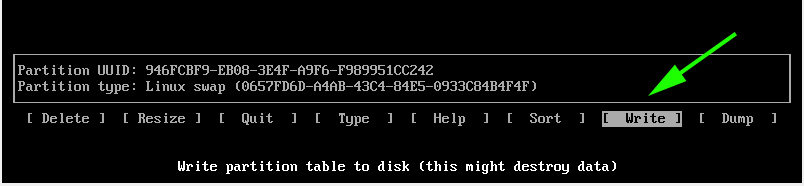
To save the partitions, select the ‘Write’ option and hit ENTER.
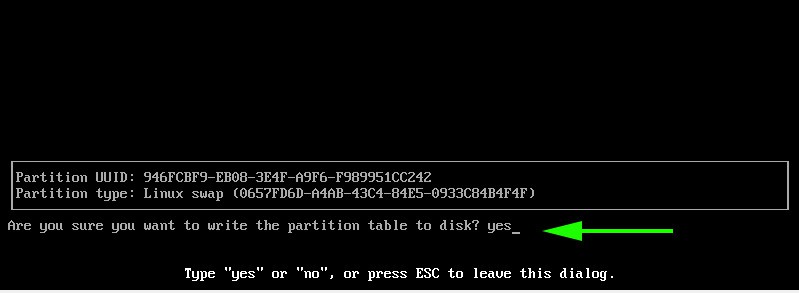
When prompted if you want to write the partition to disk, simply type ‘yes’ and hit ENTER.
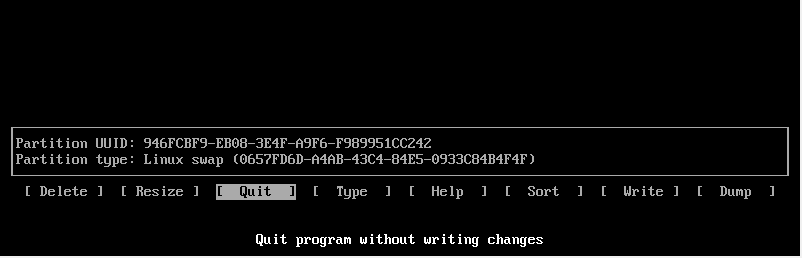
To exit cfdisk utility, select the ‘Quit’ option and hit ENTER.
Step 6) Format and mount the partitions
For the partitions to become usable and available for use, we need to format them and later mount them.
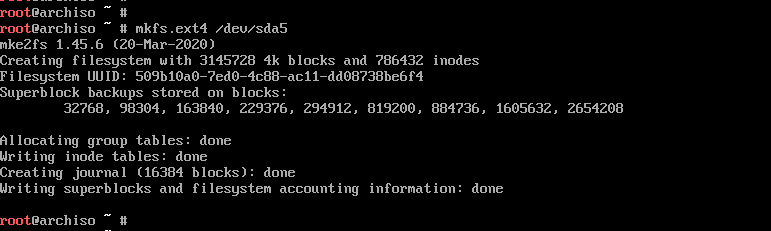
To format the root partition, run the command:
# mkfs.ext4 /dev/sda5
For swap partition, use the command:
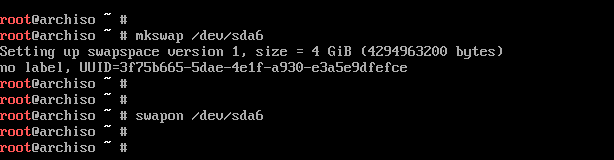
# mkswap /dev/sda6
Then enable swap using the swapon command shown:
# swapon /dev/sda6
Next, mount the root partition to the /mnt directory
# mount /dev/sda5 /mnt
Additionally, we are going to create a directory for the EFI partition on which we will mount the Windows EFI system which , in our case is located on the /dev/sda1 partition.
# mkdir /mnt/efi
Then mount the EFI partition on the EFI mount point.
# mount /dev/sda1 /mnt/efi

Step 7) Install base system and other required Linux firmware packages
Next, we are going to install the central packages for our Linux system including the base and Linux-firmware packages.
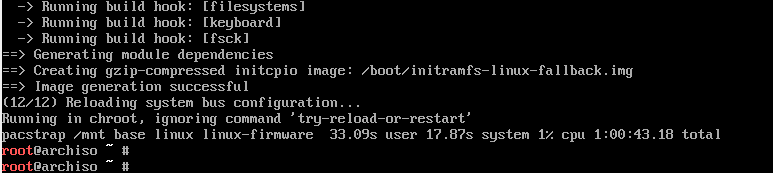
# pacstrap /mnt base linux linux-firmware

This is going to take quite some time. At this point, you can take a much-deserved break and head out for a stroll and grab some coffee. When the installation is successful, you should get the following output.
Step  Generate fstab file
 Generate fstab file
The next step will be to generate the fstab file on the /mnt directory as follows.
# genfstab -U /mnt >> /mnt/etc/fstab
Step 9) Setup timezone
After generating the ftab file, navigate to the newly created root filesystem
# arch-chroot /mnt
You can verify that you are in the root filesystem using the command as shown.
# ls
Time zone information is found in the /usr/share/zoneinfo/ directory. To set your timezone, create a symbolic link to the /etc/localtime
Path.
# ln -sf /usr/share/zoneinfo/US/Pacific /etc/localtime
Next, sync the hardware clock using the command:
# hwclock --systohc
Step 10) Set up locale
The locale determines the system language, currency format, numbering and date on your system. This information is contained in the /etc/locale.gen file. So, open the file using the vim editor.
# vim /etc/locale.gen
NOTE: To install the vim editor, use the pacman command as follows:
# pacman -Sy vim
Once you have accessed the file, scroll and uncomment your preferred locale. In this case, we have decided to go with en_US.UTF-8 UTF-8
Save and exit the file. Next generate the locale configuration using the command.
# locale-gen

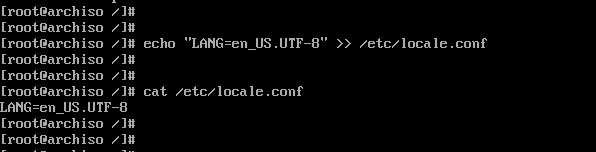
Next, create a new locale configuration file and save the locale as shown.
# echo "LANG=EN_US.UTF-8" > /etc/locale.conf
Step 11) Set up hostname
Next, we are going to configure the hostname of our Arch System. First, create a new file and specify the hostname as shown.
# echo linuxtechi > /etc/hostname

Afterwards, modify the /etc/hosts file as follows.
# echo "127.0.1.1 linuxtechi" >> /etc/hosts
Step 12) Install netctl Network Manager
To use the internet once the installation is complete and upon a reboot, we need to install a network manager. In this example we wil install the netctl network manager as follows
# pacman -Sy netctl
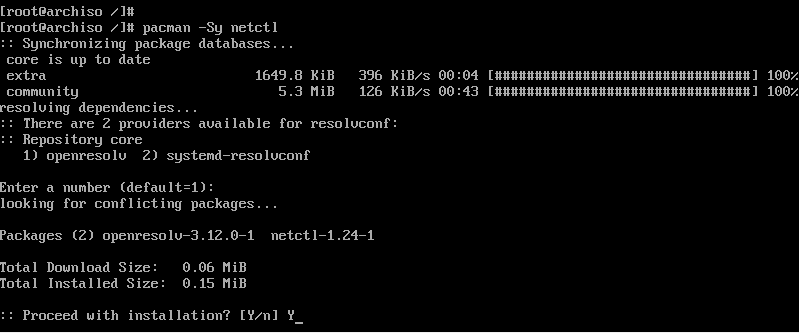
During the installation some optional dependencies for netctl are listed. We are going to install the following dependencies. These are:
- dhcpcd – For DHCP support
- wpa-supplicant – For wireless networking
- ifplugd – For wired connections networking
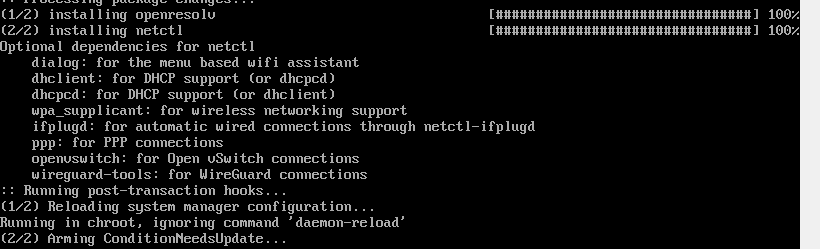
These dependencies will help you set up networking without a problem when you next boot in to Arch Linux.
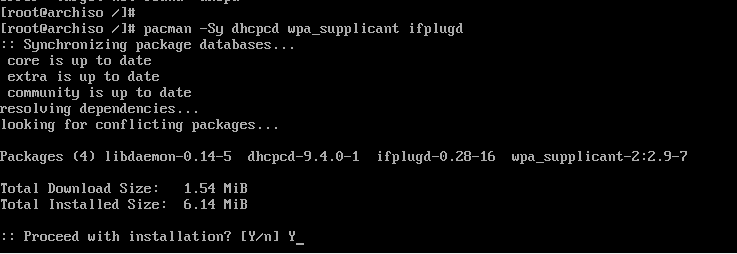
To install the optional dependencies, run the command below:
# pacman -Sy dhcpcd wpa-supplicant ifplugd
Step 13) Create a regular user
Next, we will create a regular user called linuxtechi and place him in the wheel group as follows.
# useradd -G wheel -m linuxtechi
The next step will be to assign a password to the user.
# passwd linuxtechi

Step 14) Install GRUB bootloader
We are getting close to the finish line. In this step, we will install the grub bootloader to enable us boot into our Arch Linux system upon a reboot.
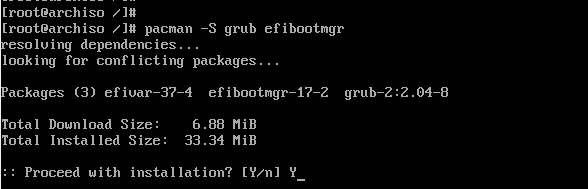
We will install the grub bootloader package alongside the efi boot manager package since we are using the UEFI mode.
# pacman -S grub efibootmgr
Next, install the os-prober package which will enable Arch Linux to detect the Windows operating system.
# pacman -S os-prober

Then install grub on the EFI directory as shown.
# grub-install --target=x86_64-efi --efi-directory=/efi --bootloader-id=GRUB

And install a grub configuration file as shown.
# grub-mkconfig -o /boot/grub/grub.cfg
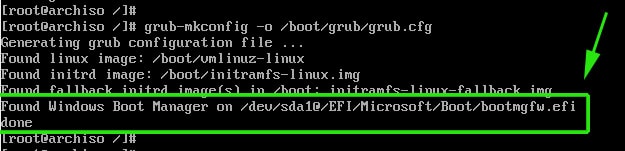
The last line is an indication that Arch has detected the presence of Windows Boot manager on /dev/sda1 partition. Perfect!
The finally, set a password for the root user as shown.
# passwd

Then exit and reboot your system.
# exit
# reboot
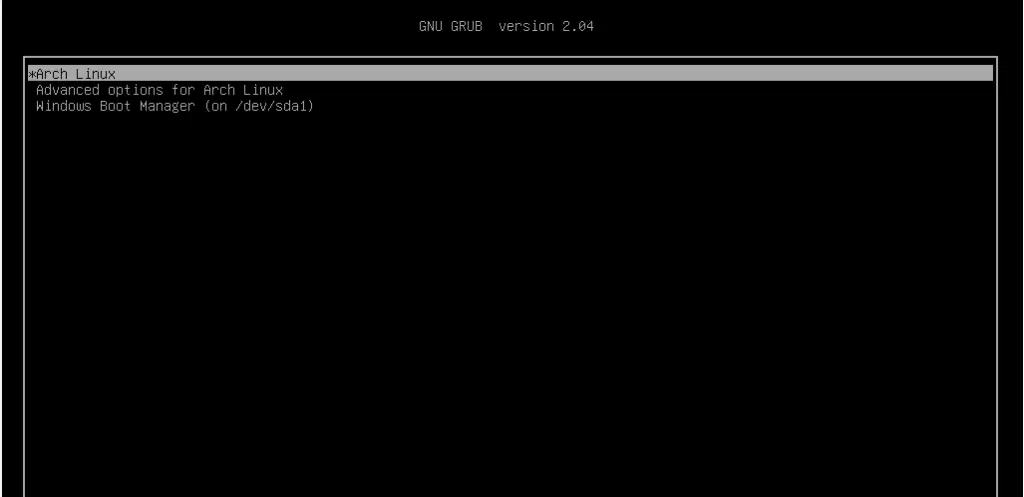
Step 15) Boot into Arch Linux
When booting, the GRUB bootloader will display various options including booting into Arch Linux, which is the first option, and also booting into Windows which is the last option in my case.
Log in as your regular user as shown

Step 16) Post Installation tasks
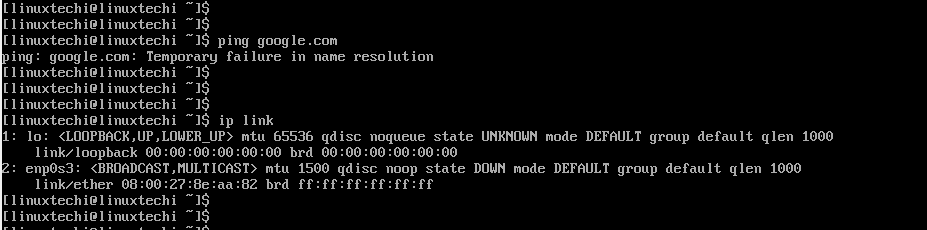
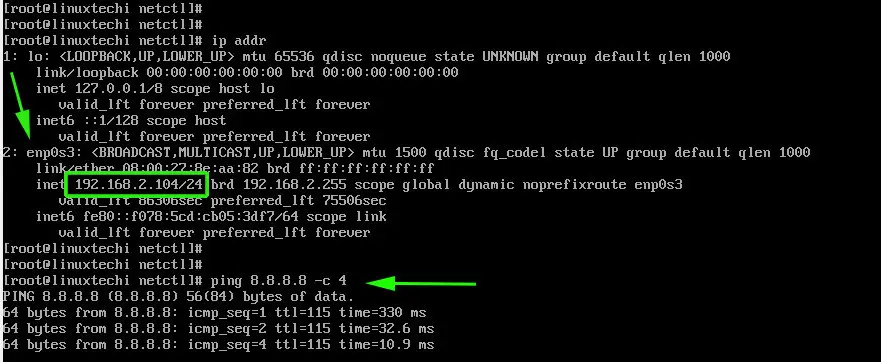
One of the things I noted when I logged in is that I do not have any internet connection. This is an issue caused by the default dhcp profile settings which need to be modified to accommodate the network interface attached to the Arch Linux system.
To find the interfaces attached run the command:
$ ip link
The output confirms that our network interface is enp0s3
We need to modify the ethernet-dhcp file in the /etc/netctl/examples/ path and edit out network interface.
But first, lets copy the file to the /etc/netctl directory.
Switch to the root user
# su
Copy the ethernet-dhcp file to the /etc/netctl directory.
# cp /etc/netctl/examples/ethernet-dhcp /etc/netctl/custom-dhcp-profile
Next, navigate to the /etc/netctl directory.
# cd /etc/netctl
Use the vim editor to edit the file.
# vim custom-dhcp-profile
The interface attribute is set to eth0.
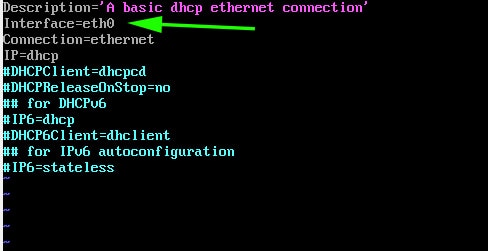
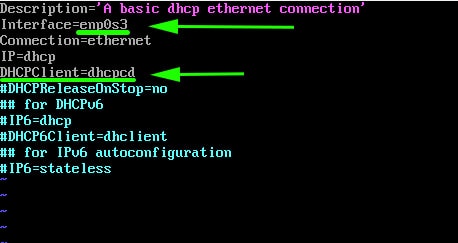
However, as we saw earlier, our network interface is enp0s3. Therefore, modify it to enp0s3. Additionally, uncomment the line starting with the DHCPClient parameter.
DHCPClient=dhcpcd
This enables the system to accept IP addresses using the dhcp service.
Save and exit the configuration file. Next, enable the custom dhcp profile.
# netctl enable custom-dhcp-profile

And finally enable the dhcp service.
# systemctl enable dhcpcd.service

Your interface should now pick an IP address from the router and you should have an internet connection.
You can install an X windows system as shown,
$ sudo pacman -S xorg xorg-server
Then install a display manager. For example, to install GNOME, run:
$ sudo pacman -S gnome
Then start and enable gdm service
$ sudo systemctl start gdm
$ sudo systemctl enable gdm
This brings us to the end of this lengthy topic. Hopefully, you are now in a position to Dual boot Arch Linux with Windows on UEFI system.
Read Also : How to Create and Configure Sudo User on Arch Linux
1. Pre-Installation Preparation
Before touching partitions, back up any important files from your Windows system. Verify that Windows is installed in UEFI mode: in Windows press Win+R, run msinfo32, and ensure BIOS Mode is “UEFI” (Installing And Setting Up Arch Linux to Dual Boot Alongside Window 10 · GitHub). Also confirm Windows uses GPT, not MBR, in Disk Management. Next, disable “Fast Startup” in Windows (via Control Panel → Power Options) because it hibernates the disk and can block Linux from mounting it (Is it necessary to disable Fast Boot in Windows to dual boot with linux(EFISTUB)? — Unix & Linux Stack Exchange). In your PC’s UEFI/BIOS settings, disable Secure Boot if possible (this avoids bootloader signature issues) and Fast Boot (if present, to ensure the USB can boot).
Download the Arch Linux ISO from the official site and create a bootable USB. For example, use a tool like Rufus on Windows: select the ISO, set the partition scheme to GPT and file system to FAT32, and flash it (Installing And Setting Up Arch Linux to Dual Boot Alongside Window 10 · GitHub). This makes the USB UEFI-bootable. When done, reboot and enter your firmware’s boot menu (often by pressing a key like F12, F10, or Esc during startup) and choose the USB under UEFI devices (Installing And Setting Up Arch Linux to Dual Boot Alongside Window 10 · GitHub).
2. Booting Arch Linux in UEFI Mode
Boot the USB in UEFI mode. You should land at an Arch Linux prompt (typically as the root user, no password). If needed, set your keyboard layout (e.g. loadkeys us for US layout) and verify network connectivity next.
3. Internet Connection (Wi-Fi)
If you have a wired connection, it usually connects automatically via DHCP. Test it with ping -c 3 archlinux.org. For Wi-Fi, run:
rfkill unblock wifi
iw dev        # identify your wireless interface name (e.g. wlan0)
wifi-menu wlan0   # (or your interface name) to select and connect to a network
Enter fullscreen mode
Exit fullscreen mode
After connecting, verify with ping -c 3 archlinux.org. A working connection is required for package installation (Installing And Setting Up Arch Linux to Dual Boot Alongside Window 10 · GitHub).
4. Disk Partitioning
WARNING: Be careful not to delete your Windows partitions. You may have already shrunk the Windows partition from Windows Disk Management to make free space. If not, reboot into Windows, open Disk Management (diskmgmt.msc), right-click the Windows (C:) partition, and choose Shrink Volume to free up at least ~20–50 GB (20000–50000 MB) for Arch (Installing And Setting Up Arch Linux to Dual Boot Alongside Window 10 · GitHub).
Back in Arch’s live environment, list disks with fdisk -l to identify your drive (e.g. /dev/sda). Use cfdisk (or fdisk/gdisk) to partition. Select your disk (e.g. /dev/sda) and a GPT label:
cfdisk /dev/sda
Enter fullscreen mode
Exit fullscreen mode
In the cfdisk menu, create new partitions in the free space:
-
EFI System Partition (ESP): If Windows is already in UEFI mode, an EFI partition (around 100–500 MB, FAT32) should exist (often
/dev/sda1). We will reuse that for the bootloader. If not present, create a new small (e.g. 500 MB) FAT32 partition and set its type to “EFI System” (How to Install Arch Linux: A Beginner’s Practical Guide). -
Swap Partition: Create a Linux swap partition. For example, if you have 8 GB RAM, make 8–12 GB here. After selecting “New”, accept the defaults to start at free space and enter the size (e.g.
12G), then set its type to “Linux swap” (How to Install Arch Linux: A Beginner’s Practical Guide). - Root Partition: Use the remaining space to create an ext4 root partition. Again select “New”, accept the remaining free space, and set the type to “Linux filesystem” (ID 8300) (How to Install Arch Linux: A Beginner’s Practical Guide).
Write the changes (“Write” in cfdisk) and confirm. Then quit cfdisk (How to Install Arch Linux: A Beginner’s Practical Guide).
5. Format and Mount Partitions
Format each partition to its filesystem:
mkfs.fat -F32 /dev/sda1     # Format EFI partition as FAT32 (if newly created; skip if reusing Windows EFI)
mkswap /dev/sda2            # Format swap partition
swapon /dev/sda2            # Enable swap
mkfs.ext4 /dev/sda3         # Format root partition as ext4
Enter fullscreen mode
Exit fullscreen mode
(Adjust /dev/sdXN numbers to match your EFI, swap, and root partitions.) Format and activate swap as shown (How to Install Arch Linux: A Beginner’s Practical Guide); format root as ext4 (How to Install Arch Linux: A Beginner’s Practical Guide).
Next, mount the new root partition and EFI partition (bootloader space). For example:
mount /dev/sda3 /mnt       # Mount the root partition
mkdir -p /mnt/boot/efi     # Create a mount point for EFI
mount /dev/sda1 /mnt/boot/efi  # Mount the EFI (ESP) here
Enter fullscreen mode
Exit fullscreen mode
(This assumes /dev/sda1 is the EFI; use the correct device.) These commands are analogous to those shown in the guide (How to Install Arch Linux: A Beginner’s Practical Guide). Verify with lsblk that /mnt is your root and /mnt/boot/efi is your EFI.
6. Install the Base System
Install the core Arch system packages using pacstrap:
pacstrap /mnt base linux linux-firmware
Enter fullscreen mode
Exit fullscreen mode
This installs the base filesystem, the Linux kernel, and firmware for common devices (Comprehensive Arch Linux Installation Guide | Liquid Web). You can also add packages like base-devel or a text editor here (e.g. nano) as needed.
7. Configure the New System
Generate an fstab file so the system knows where to mount partitions on boot:
genfstab -U /mnt >> /mnt/etc/fstab
Enter fullscreen mode
Exit fullscreen mode
Review it with cat /mnt/etc/fstab to ensure it lists your root and EFI partitions correctly (Comprehensive Arch Linux Installation Guide | Liquid Web).
Now enter the new system environment with arch-chroot:
arch-chroot /mnt
Enter fullscreen mode
Exit fullscreen mode
You are now effectively “root” in your installed system. All following commands apply inside the new Arch system.
Timezone and Clock
Set your timezone, for example for New York:
ln -sf /usr/share/zoneinfo/America/New_York /etc/localtime
hwclock --systohc
Enter fullscreen mode
Exit fullscreen mode
This links the appropriate zoneinfo file and generates /etc/adjtime (Comprehensive Arch Linux Installation Guide | Liquid Web) (Comprehensive Arch Linux Installation Guide | Liquid Web). Replace the path with your region/city.
Locale
Edit /etc/locale.gen, uncomment your locale (e.g. en_US.UTF-8 UTF-8), then run:
locale-gen
echo LANG=en_US.UTF-8 > /etc/locale.conf
Enter fullscreen mode
Exit fullscreen mode
These commands (and uncommenting the locale) are shown in the guide (Comprehensive Arch Linux Installation Guide | Liquid Web) (Comprehensive Arch Linux Installation Guide | Liquid Web). This sets the system language.
Hostname and Hosts
Set a hostname by creating /etc/hostname with your chosen name. For example:
echo "archpc" > /etc/hostname
Enter fullscreen mode
Exit fullscreen mode
Then edit /etc/hosts and add lines:
127.0.0.1   localhost
::1         localhost
127.0.1.1   archpc.localdomain   archpc
Enter fullscreen mode
Exit fullscreen mode
Replace archpc with your hostname as shown (Comprehensive Arch Linux Installation Guide | Liquid Web).
Root Password and Initramfs
Set the root password:
passwd
Enter fullscreen mode
Exit fullscreen mode
Enter a secure password when prompted (Comprehensive Arch Linux Installation Guide | Liquid Web). Then rebuild the initial ramdisk:
mkinitcpio -P
Enter fullscreen mode
Exit fullscreen mode
This ensures the boot image is up-to-date (most tutorials include this step).
Create a Regular User (optional but recommended)
Create a normal user for daily use and add it to the “wheel” group (for sudo). For example:
useradd -m -G wheel -s /bin/bash username
passwd username
Enter fullscreen mode
Exit fullscreen mode
Give that user a password. Then install and enable sudo by editing /etc/sudoers with EDITOR=nano visudo and uncommenting the line %wheel ALL=(ALL) ALL.
8. Install the Bootloader (GRUB)
Install GRUB with UEFI support so you can boot Arch (and Windows). First, install the packages:
pacman -S grub efibootmgr os-prober
Enter fullscreen mode
Exit fullscreen mode
Here, os-prober helps detect Windows. Now install GRUB to the EFI directory and generate its config:
grub-install --target=x86_64-efi --efi-directory=/boot/efi --bootloader-id=GRUB
grub-mkconfig -o /boot/grub/grub.cfg
Enter fullscreen mode
Exit fullscreen mode
These commands create the GRUB UEFI entry (How to Install & Configure Arch Linux on UEFI Systems) (How to Install & Configure Arch Linux on UEFI Systems). If everything works, /boot/grub/grub.cfg will be generated and should include menu entries for both Arch and Windows. (If Windows is not listed, ensure os-prober was installed and re-run grub-mkconfig.)
9. Install KDE Plasma and SDDM
If you want a graphical desktop, install KDE Plasma and its apps. For a full set:
pacman -S plasma-meta kde-applications-meta
Enter fullscreen mode
Exit fullscreen mode
This pulls in the KDE desktop environment and standard KDE apps (How to Install Arch Linux: A Beginner’s Practical Guide). You may also install a graphical display server (xorg) if not already installed.
Enable the SDDM display/login manager (default for KDE) and networking (using NetworkManager, since you used NetworkManager earlier):
systemctl enable sddm
systemctl enable NetworkManager
Enter fullscreen mode
Exit fullscreen mode
This ensures KDE’s login screen and network service start at boot (How to Install Arch Linux: A Beginner’s Practical Guide). (You could also use dhcpcd or another network service if you prefer.)
10. Finalize and Reboot
Exit the chroot, unmount partitions, and reboot:
exit
umount -R /mnt
reboot
Enter fullscreen mode
Exit fullscreen mode
Remove the USB drive when the system shuts down. On reboot, you should see the GRUB menu offering Arch Linux and Windows. Select Arch to boot into your new system with KDE. Log in as your new user or root (depending on setup) and enjoy Arch Linux! (How to Install Arch Linux: A Beginner’s Practical Guide).
Common Pitfalls: Be careful not to overwrite the Windows partitions. Always confirm device names (/dev/sdX) before formatting. If GRUB doesn’t show Windows, ensure os-prober is installed and rerun grub-mkconfig. Disabling Fast Startup in Windows is essential; otherwise Linux will refuse to mount the Windows drive (Is it necessary to disable Fast Boot in Windows to dual boot with linux(EFISTUB)? — Unix & Linux Stack Exchange). Ensure your firmware is booting in UEFI mode (not legacy) for both OSes, or the dual-boot will fail.
Sources: Steps adapted from the official Arch Wiki and community guides (Comprehensive Arch Linux Installation Guide | Liquid Web) (How to Install Arch Linux: A Beginner’s Practical Guide) (How to Install Arch Linux: A Beginner’s Practical Guide) (How to Install & Configure Arch Linux on UEFI Systems) (How to Install Arch Linux: A Beginner’s Practical Guide), including Windows preparation notes (Is it necessary to disable Fast Boot in Windows to dual boot with linux(EFISTUB)? — Unix & Linux Stack Exchange) (Installing And Setting Up Arch Linux to Dual Boot Alongside Window 10 · GitHub).