
Могу поспорить, многие из вас не слышали о WordPad. Если вы слышали о нем, вы не использовали его, или вы просто забыли о его существовании. Почему? Что ж, если нам нужен базовый текстовый редактор, мы используем Блокнот. Если нам нужен продвинутый текстовый редактор, мы используем Microsoft Word. Но где — то по середине, с более широкими возможностями, чем скромный блокнот, но меньшими возможностями, чем могучий Word, стоит Wordpad — который совершенно бесплатен!
WordPad – текстовый редактор с основными параметрами форматирования, и он входит в состав всех версий ОС, начиная с Windows 95 и заканчивая Windows 10. WordPad всегда был там, но практически никогда не используется. В этой статье, давайте разберемся, как использовать Wordpad в Windows 10 и сбросить настройки WordPad, если что — то пойдет не так.
Ниже представлены несколько советов, которые помогут освоить WordPad.
WordPad в Windows 10
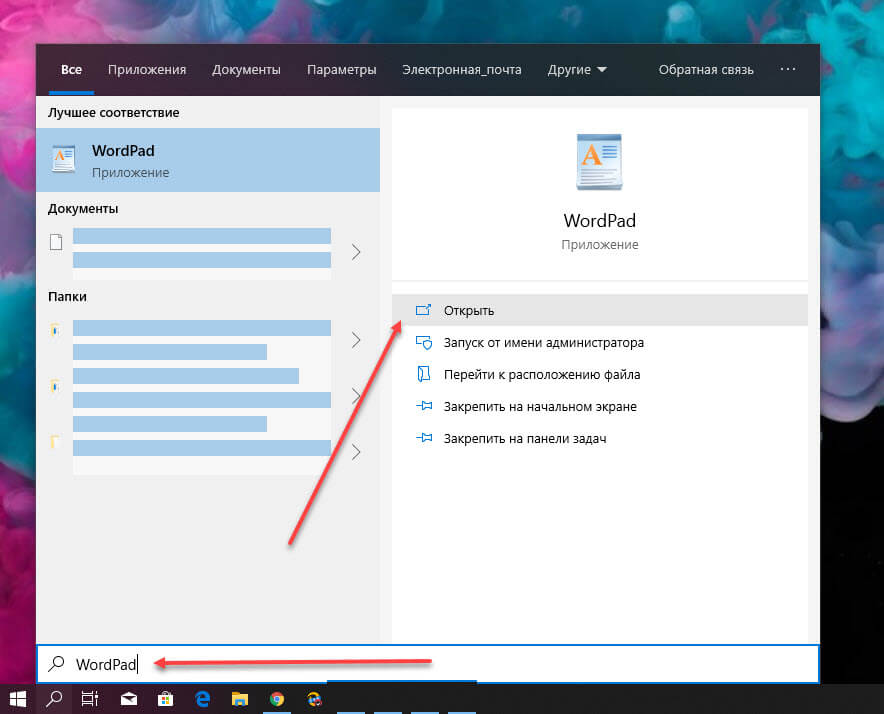
Чтобы использовать Wordpad в Windows 10, введите «WordPad», в строку поиска на панели задач и нажмите на полученный результат. Это позволит открыть WordPad.
Также, вы можете также использовать команду Выполнить.
Нажмите Win + R, и напишите в строке write.exe или wordpad.exe и нажмите Enter.
Исполняемый файл Wordpad — wordpad.exе, и он находится в следующем месте:
C:\Program Files\Windows NT\Accessories
Ярлык программы можно найти в следующих местах:
C:\ProgramData\Microsoft\Windows\Start Menu\Programs\Accessories
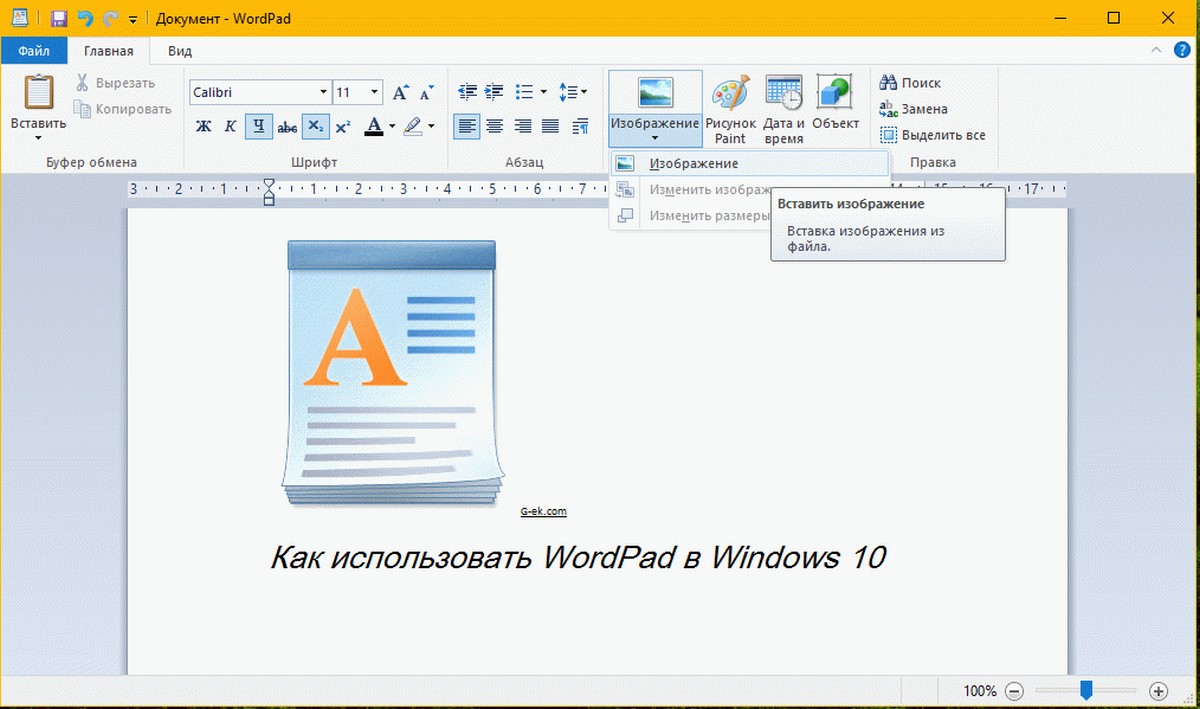
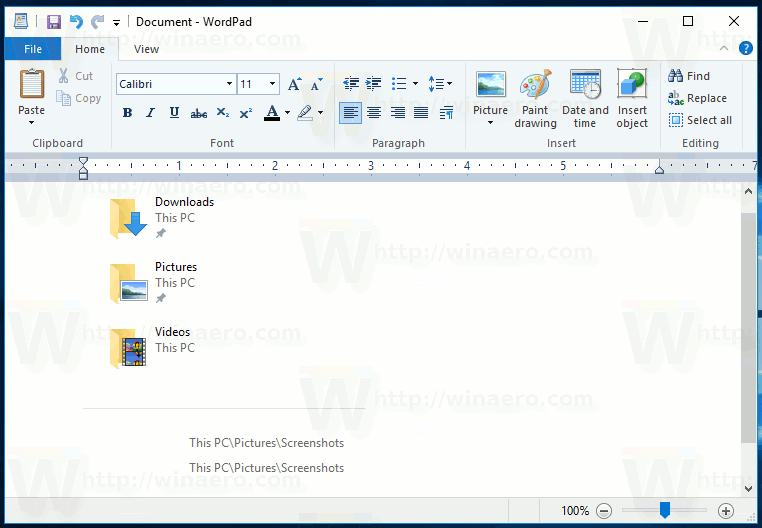
Wordpad позволяет создавать, редактировать, сохранять, открывать, просматривать и печатать текстовые документы. Вы можете использовать полужирный шрифт, подчеркивание и курсив, форматирование изменить цвет и размер шрифта, создавать маркированные списки, вставлять изображения, и многое другое. Просто поиграйте с помощью простого меню ленты.
WordPad, наряду с другими встроенными инструментами, в настоящее момент доступны в Магазине Windows в качестве универсального приложения. Теперь вы можете загрузить текстовый редактор Wordpad из Магазина Windows и легко открывать и редактировать документы созданные в microsoft Word.
Какое расширение файла для Wordpad?
Wordpad использует расширение файла .rtf или Rich Text Format, для сохранения файлов по умолчанию. Но он может сохранять документы в .docx (Office Open XML), .odt (Open Document), .txt (текст).
Как удалить WordPad с помощью приложения «Параметры»
Поскольку вы можете использовать MS Office бесплатно с помощью Интернет или купить подписку на Office 365, или другие решения для обработки текста, такие как Документы Google, большинство пользователей больше не используют WordPad. В результате вместо полного удаления приложения Microsoft делает его дополнительной функцией, которую можно удалить или переустановить с помощью приложения «Параметры».
Используйте эти шаги для удаления редактора WordPad из Windows 10:
Шаг 1: Откройте «Параметры» нажав сочетание клавиш Win I.
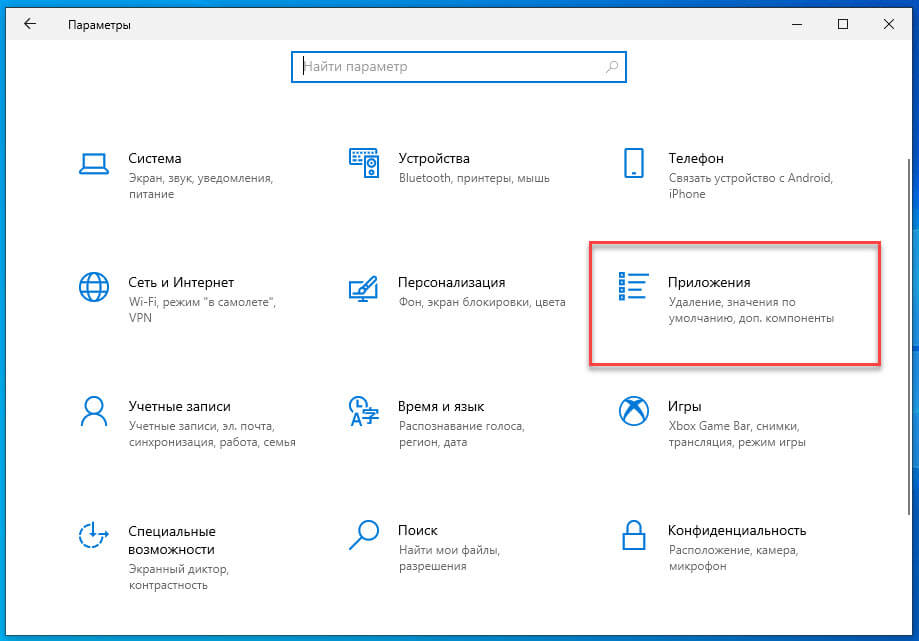
Шаг 2: Перейдите в группу настроек «Приложения».
Шаг 3: В левой части окна нажмите «Приложения и возможности».
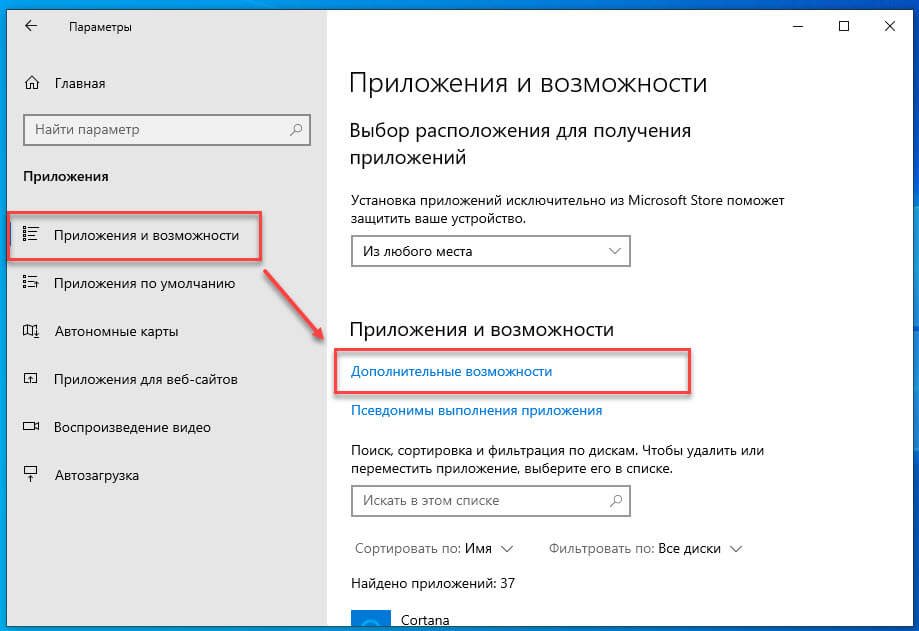
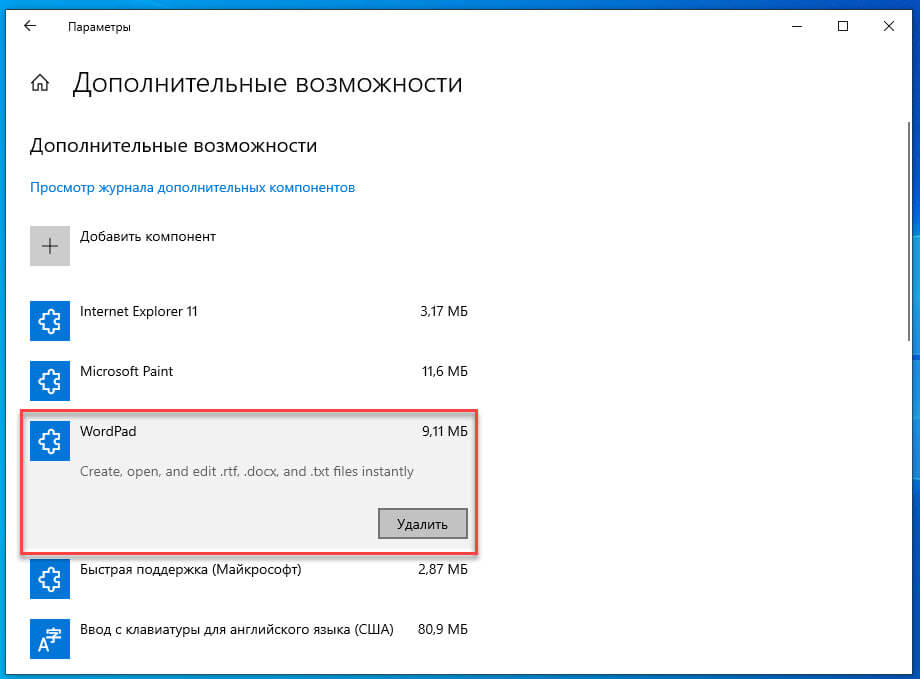
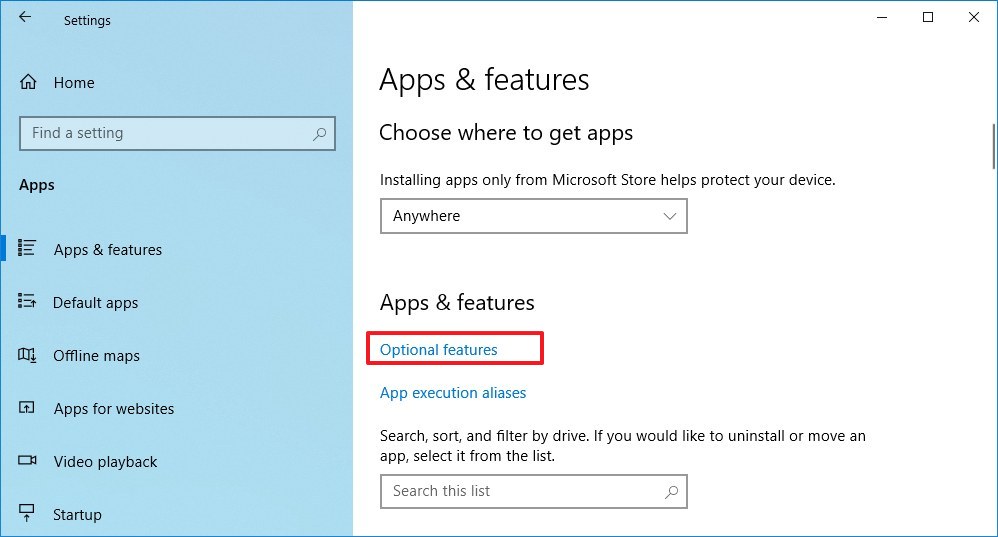
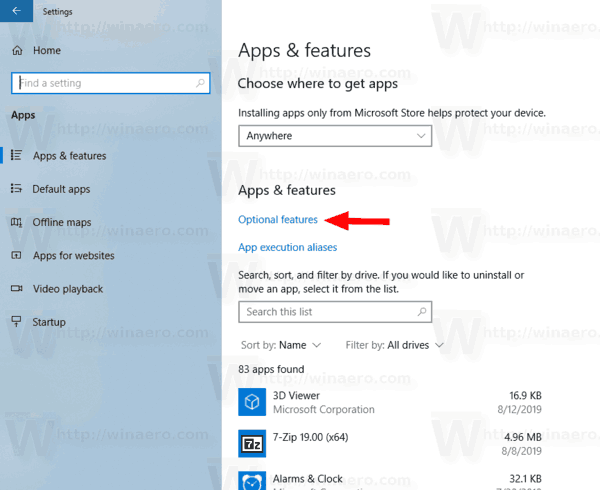
Шаг 4: В разделе «Приложения и возможности» выберите параметр «Дополнительные возможности».
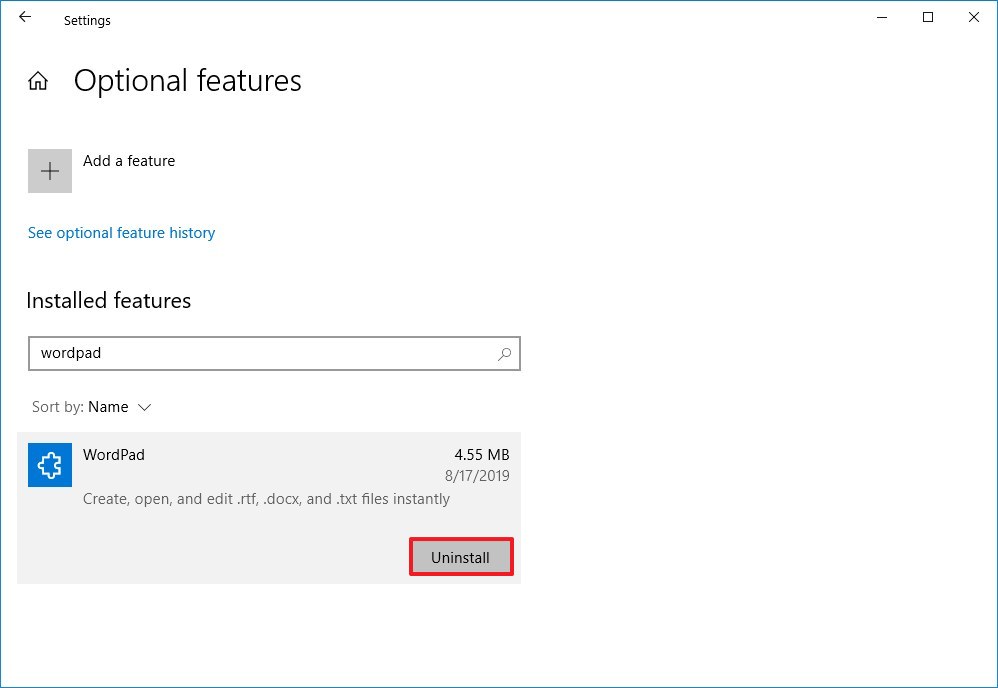
Шаг 5: Выберите элемент WordPad и нажмите кнопку Удалить.
Шаг 6: Перезагрузите компьютер.
После выполнения этих шагов основное приложение для обработки текста будет удалено с вашего компьютера.
Как установить WordPad с помощью приложения «Параметры»
Используйте эти шаги для установки WordPad с использованием дополнительных функций в Windows 10:
Шаг 1: Откройте «Параметры» нажав сочетание клавиш Win I.
Шаг 2: Перейдите в группу настроек «Приложения».
Шаг 3: В левой части окна нажмите «Приложения и возможности».
Шаг 4: В разделе «Приложения и возможности» выберите параметр «Дополнительные возможности».
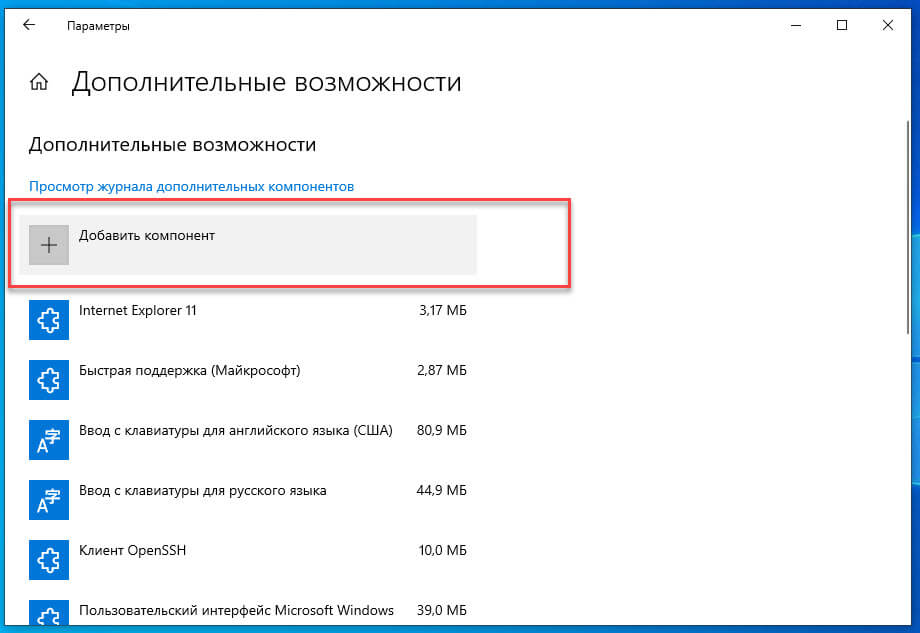
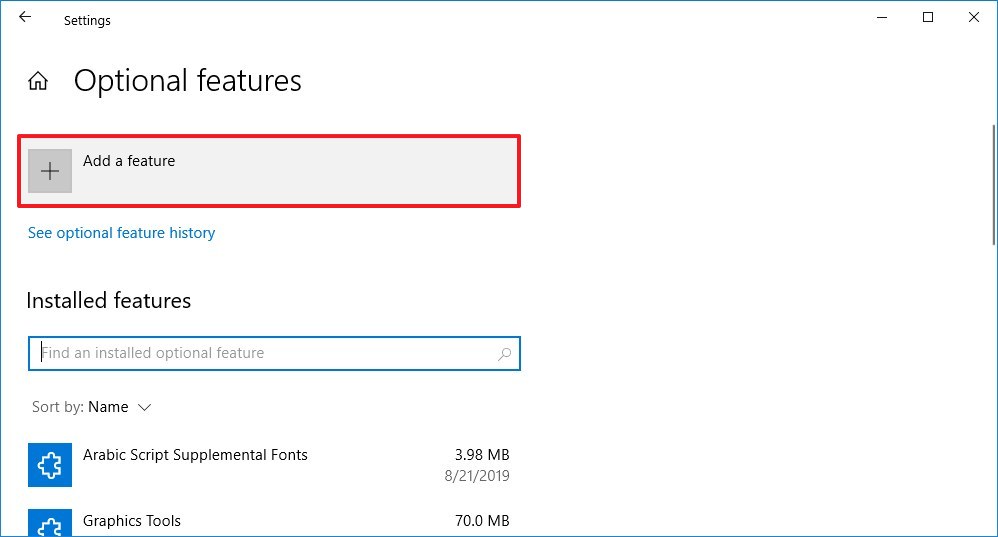
Шаг 5: Нажмите кнопку «Добавить компонент».
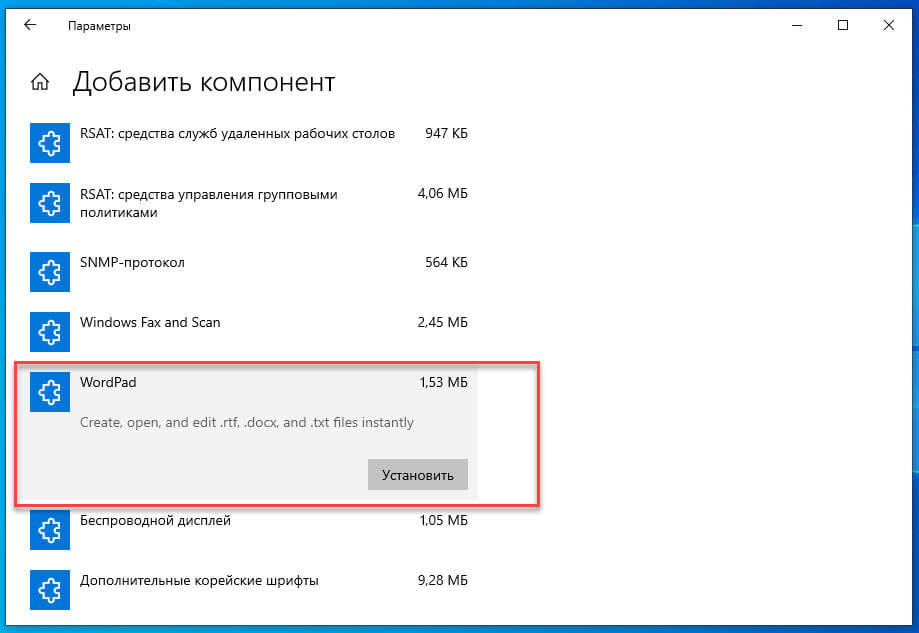
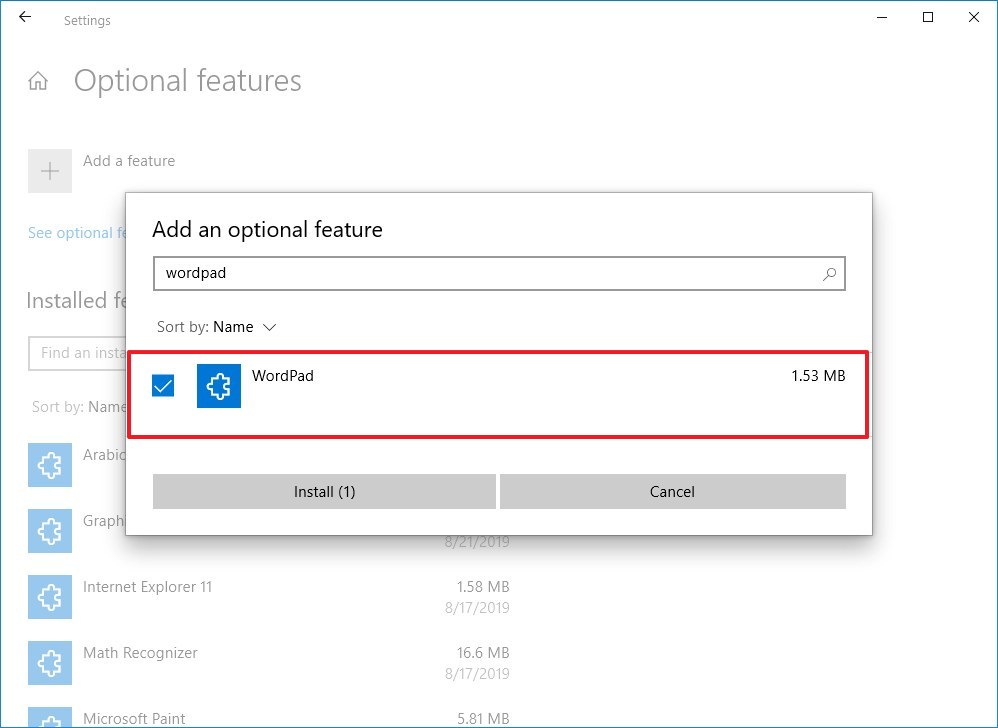
Шаг 6: Выберите элемент WordPad.
Шаг 7: Нажмите кнопку Установить.
После выполнения приложение WordPad будет установлено на вашем устройстве.
В случае, если вы можете найти параметры для установки или удаления, скорее всего, вы не используете версию Windows 10 (20H1), в которой WordPad является дополнительной функцией.
Как вернуть настройки WordPad по умолчанию?
Теперь давайте посмотрим, как сбросить настройки по умолчанию для WordPad в ОС Windows 10. Но прежде чем начать, вы можете создать точку восстановления системы или резервную копию реестра.
Сброс настроек WordPad с помощью реестра Windows
- Нажмите сочетание клавиш Win + R и в окне Выполнить введите Regedit, чтобы открыть редактор реестра.
- Перейдите к следующему разделу:
HKEY_CURRENT_USER\SOFTWARE\Microsoft\Windows\CurrentVersion\Applets\Wordpad
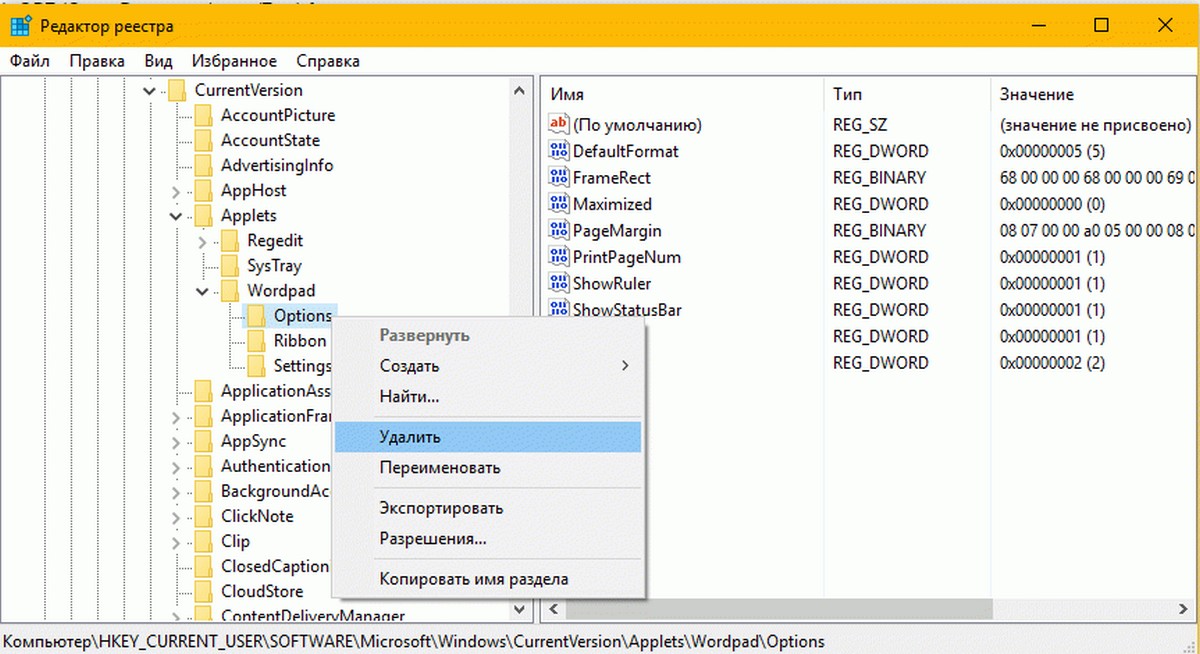
- В левой панели, найдите раздел «Options», и Удалите его.
Теперь, когда вы открываете Wordpad, вы увидите его с настройками по умолчанию.
Дайте нам знать, используете вы Wordpad или нет – в комментариях ниже.
В Windows 10 WordPad — это приложение для обработки текстов, которое существует уже давно, и оно было разработано, чтобы предложить пользователям базовые функции для редактирования или создания текстовых документов в случае, если Office не был доступен на вашем устройстве.
Однако, поскольку вы можете использовать Office бесплатно через Интернет или подписку на Office 365, или другие решения для обработки текста, такие как Документы Google, большинство людей больше не пользуются WordPad. В результате вместо полного удаления приложения Microsoft теперь делает его дополнительной функцией, которую можно удалить или переустановить с помощью приложения «Настройки».
В этом руководстве вы узнаете, как удалить (и установить) приложение WordPad в Windows 10 (20H1).
Используйте эти шаги для удаления WordPad из Windows 10:
- Откройте Настройки.
- Нажмите на приложения.
- Нажмите на приложения и функции.
- В разделе «Приложения и функции» выберите параметр « Дополнительные функции».

- Выберите элемент WordPad.
- Нажмите кнопку Удалить.

- Перезагрузите компьютер.

После выполнения этих шагов основное приложение для обработки текста будет удалено с вашего компьютера.
После выполнения этих шагов основное приложение для обработки текста будет удалено с вашего компьютера.
Как установить WordPad с помощью настроек
Используйте эти шаги для установки WordPad с использованием параметров дополнительных функций в Windows 10:
- Откройте Настройки.
- Нажмите на приложения.
- Нажмите на приложения и функции.
- В разделе «Приложения и функции» выберите параметр «Дополнительные функции».
- Нажмите кнопку Добавить функцию.
- Проверьте опцию WordPad.

- Нажмите кнопку Установить.
После выполнения этих шагов приложение WordPad будет установлено на вашем устройстве.
В случае, если вы можете найти параметры для установки или удаления, скорее всего, вы не используете версию Windows 10 (20H1), которая делает WordPad дополнительной функцией.
Просмотров: 602
Table of Contents
If you have a Windows 10 PC and have been dying to uninstall WordPad. Follow along as this article guides you through several different methods you can use to remove WordPad from your PC. A relatively useless program/app preinstalled on Windows 10.
How to Get Dark Mode For WhatsApp on Windows 10. (WhatsApp Dark Mode Windows Client)
Windows 10 has undergone a lot of changes since it was first released back in 2014 and while most of them have been decent, it has taken until now for WordPad to finally become a removable program/app. Although most people probably don’t really notice WordPad on their system, it does occasionally get in the way when Microsoft Word is also installed.
If you’ve been waiting for this day for as long as I have, follow along as we guide you through all of the current known ways to remove WordPad from Windows 10. And if you need it reinstalled, how to reinstall WordPad on your Windows 10 computer.
Related: How to Fix Corsair VOID PRO WIRELESS Not Working After Updating ICUE to 3.19.120. (Corsair Wireless Headset Not Working After Update)
The first thing to note about removing WordPad from Windows 10 is the build number of your system. You need to be on Windows 10 Build 18963 or newer. If you aren’t, you won’t be able to perform any of the following removal steps successfully. If you aren’t sure how to check your build number right-click the start menu icon, then click System. This will bring up a new window listing all your Windows specifications including your Build Number
Uninstall WordPad On Windows 10 From Settings.
To remove WordPad using Settings, open Settings, navigate to Apps > Apps & Features. Click on Optional Features in the centre, then on the next page click WordPad. Finally, click Uninstall and simply wait for the process to complete and you will be WordPad free!

Reinstall WordPad On Windows 10.
To reinstall WordPad using Settings, open Settings, navigate to Apps > Apps & Features and click the Optional Features link in the centre, then click Add a Feature, find and mark the checkbox next to it, and click Install. Windows will now reinstall WordPad on your computer.
Install/Uninstall WordPad On Windows 10 Using DISM.
If you would rather install or uninstall Wordpad using Command Prompt and DISM you can also do so. To do this open Command Prompt (as Admin), then copy and paste the command that suits your needs into Command Prompt and press Enter.
Uninstall WordPad:
dism /Online /Remove-Capability /CapabilityName:Microsoft.Windows.WordPad~~~~0.0.1.0.
Reinstall WordPad:
dism /Online /Add-Capability /CapabilityName:Microsoft.Windows.WordPad~~~~0.0.1.0.
Once the command finishes, you’ll have either installed or uninstalled WordPad on Windows 10.
On a Side Note…
If you are also having some issues with the calculator app on Windows 10 not opening or crashing during use, make sure you check out the following guide which will show you several different steps you can to take resolve the issue
How to Fix Calculator Not Working On Windows 10. (Windows 10 Calculator Broken)

On Windows 10, WordPad is a word processing application that has been around for a long time, and it was designed to offer users basic functionalities to edit or compose text documents in the case that Office was not available on your device.
However, since you can use Office for free online or using an Office 365 subscription, or other word processing solutions, such as Google Docs, most people don’t have much use for WordPad anymore. As a result, instead of removing the app completely, Microsoft is now making it an optional feature, which you can uninstall or reinstall using the Settings app.
In this guide, you’ll learn the steps to uninstall (and install) the WordPad app on Windows 10 (20H1).
- How to uninstall WordPad app using Settings
- How to install WordPad app using Settings
How to uninstall WordPad using Settings
How do I uninstall WordPad from Windows 10? Use these steps:
-
Open Settings on Windows 10.
-
Click on Apps.
-
Click on Apps & features.
-
Under the “Apps & features” section, click on the Optional Features option.

Apps & features settings, Optional features option -
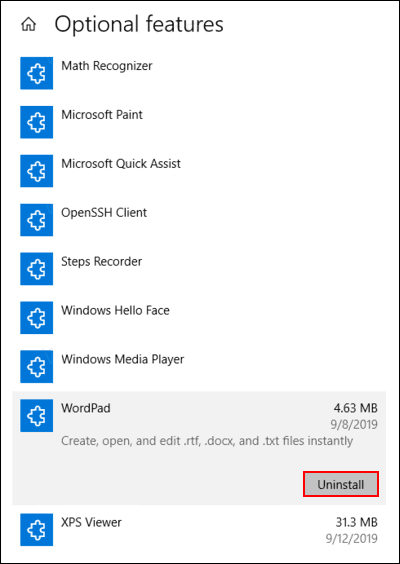
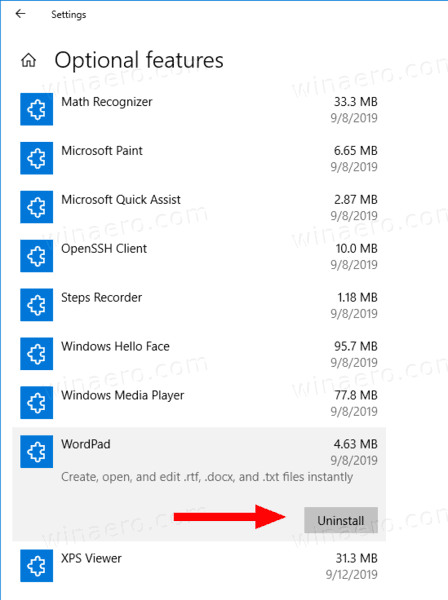
Select the WordPad item.
-
Click the Uninstall button.

Uninstall WordPad from Windows 10 20H1 -
Restart your computer.


Once you complete the steps, the basic word processing app will be removed from your computer.
How to install WordPad using Settings
To install WordPad using the Optional features settings, use these steps:
-
Open Settings.
-
Click on Apps.
-
Click on Apps & features.
-
Under the “Apps & features” section, click on the Optional Features option.
Apps & features settings, Optional features option -
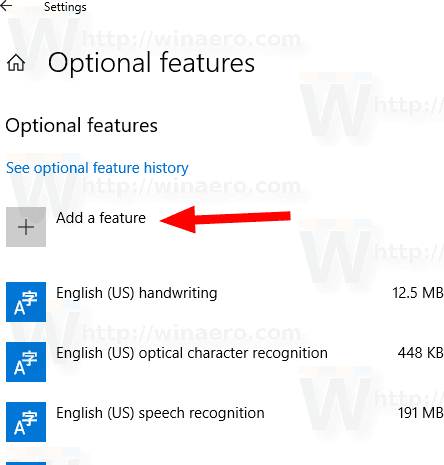
Click the Add a feature button.
Optional features settings, add a feature option -
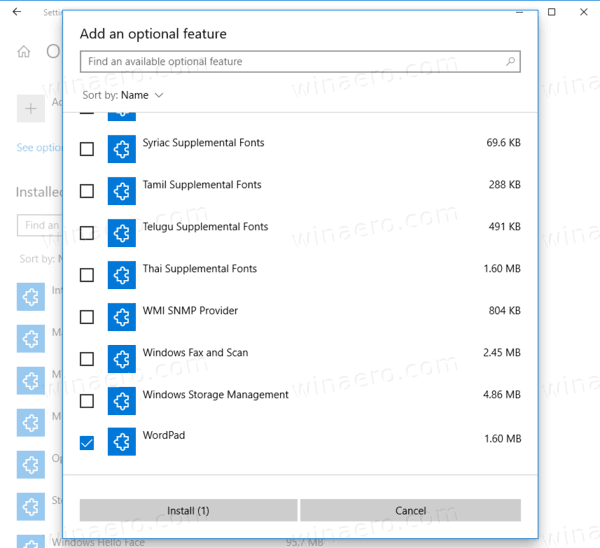
Check the WordPad option.

Install WordPad on WIndows 10 20H1 -
Click the Install button.


After you complete the steps, the WordPad app will be installed on your device.
In the case that you can’t find settings to install or uninstall, it’s likely that you’re not running the version of Windows 10 (20H1) that makes WordPad an optional feature.
Mauro Huculak is a
Windows How-To Expert and founder of
Pureinfotech
(est. 2010). With over 21 years as a technology writer and IT Specialist,
Mauro specializes in Windows, software, and cross-platform systems such as Linux, Android, and macOS.
Certifications:
Microsoft Certified Solutions Associate (MCSA),
Cisco Certified Network Professional (CCNP),
VMware Certified Professional (VCP),
and
CompTIA A+ and Network+.
Mauro is a recognized Microsoft MVP and has also been a long-time contributor to Windows Central.
You can follow him on
YouTube,
Threads,
BlueSky,
X (Twitter),
LinkedIn and
About.me.
Email him at [email protected].
Skip to content
How to Uninstall or Install WordPad in Windows 10
Starting at least with Build 18963, Windows 10 lists both Paint and WordPad apps on the optional features page. This means that both apps can be uninstalled. Here’s how to uninstall WordPad in Windows 10.
WordPad is a very simple text editor, more powerful than Notepad, but still less feature rich than Microsoft Word or LibreOffice Writer. It is good for creating a simple text document without complicated formatting.
Tip: You might be interested in learning WordPad’s keyboard shortcuts.
If you are interested in removing the WordPad app, you can use the Settings app or DISM. Here’s how it can be done.
- Open Settings.
- Navigate to Apps > Apps & features.
- Click on the Optional features link on the right.

- On the next page, click on the WordPad entry in the list.

- Click on the Uninstall button.
You are done. This will uninstall the WordPad app.
Later, you can restore it as follows.
To Install WordPad in Windows 10,
- Open Settings.
- Navigate to Apps > Apps & features.
- Click on the Optional features link on the right.
- On the next page, click on the button Add a feature.

- Find the WordPad app in the list on the next page, and tick the checkbox next to its name.

- Click on the Install button.
You are done.
Alternatively, you can install or uninstall WordPad in WIndows 10 using DISM.
Install or Uninstall WordPad with DISM
- Open an elevated command prompt.
- To uninstall the Paint app, run the command
dism /Online /Remove-Capability /CapabilityName:Microsoft.Windows.WordPad~~~~0.0.1.0. - To restore (install) Microsoft Paint, run the command
dism /Online /Add-Capability /CapabilityName:Microsoft.Windows.WordPad~~~~0.0.1.0. - You are done.
This way, you can quickly remove or restore the classic WordPad app if you have a reason for that.
That’s it.
Articles of interest.
- Manage Optional Features in Windows 10
Support us
Winaero greatly relies on your support. You can help the site keep bringing you interesting and useful content and software by using these options:
If you like this article, please share it using the buttons below. It won’t take a lot from you, but it will help us grow. Thanks for your support!