
Введение
В статье описан процесс удаления и повторной установки Windows Live Essentials.
Дополнительная информация
Удаление Windows Live Essentials
Чтобы удалить программы Windows Live, выполните следующие действия в зависимости от используемой операционной системы.
Windows 7 или Windows Vista
-
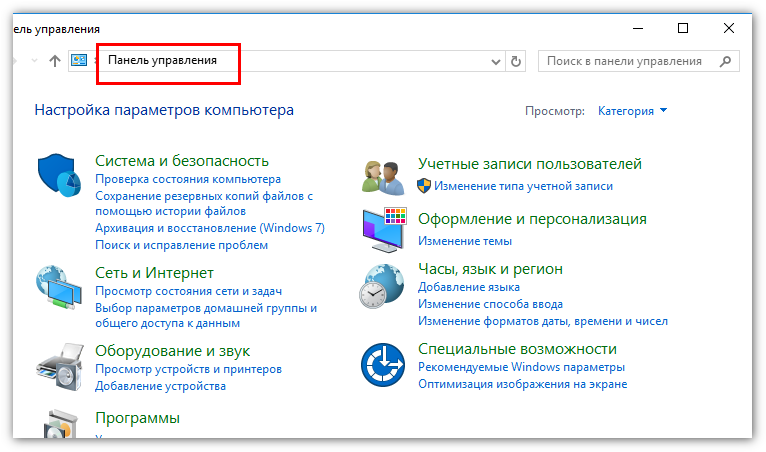
Нажмите кнопку Пуск , а затем выберите пункт Панель управления.
-
В разделе Программы нажмите Удалить программу.
-
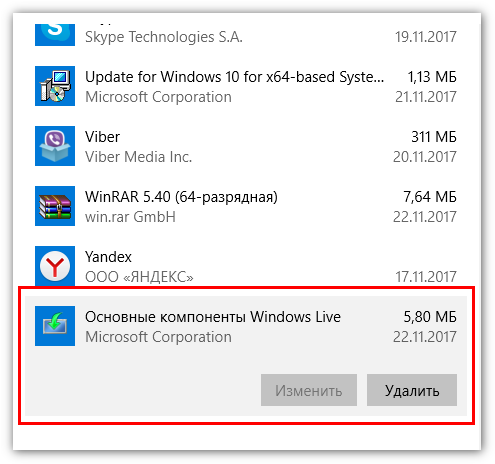
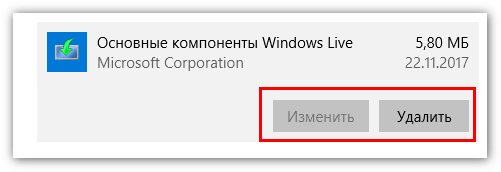
В списке Удалить или изменить программу нажмите Основные компоненты Windows. и затем Удалить/Изменить.
-
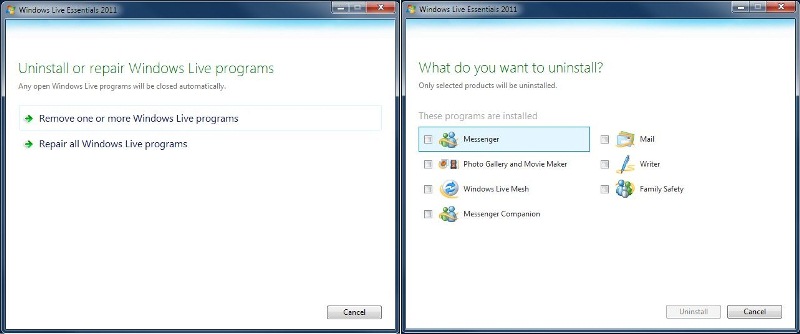
Нажмите Удалить одну или несколько программ Windows Live.
-
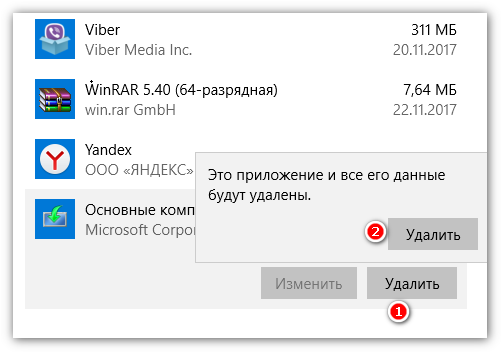
Выделите программы, которые нужно удалить, и нажмите кнопку Удалить.

Примечание Чтобы полностью удалить Windows Live Essentials, выберите все программы Windows Live.
Windows XP
-
В меню Пуск выберите Панель управления и дважды щелкните элемент Установка и удаление программ.
-
В списке Установленные программы выберите Windows Live Essentials и нажмите Удалить.
-
Нажмите Удалить одну или несколько программ Windows Live.
-
Выделите программы, которые нужно удалить, и нажмите кнопку Удалить.
Примечание Чтобы полностью удалить Windows Live Essentials, выберите все программы Windows Live.
Переустановка Windows Live Essentials
Чтобы получить последнюю версию Windows Live Essentials, посетите веб-сайт корпорации Майкрософт:
Windows Live Essentials 2011
Нужна дополнительная помощь?
Нужны дополнительные параметры?
Изучите преимущества подписки, просмотрите учебные курсы, узнайте, как защитить свое устройство и т. д.
Загрузить PDF
Загрузить PDF
Если вам не нравится Windows Live Messenger, и есть желание переключиться на другую программу обмена мгновенными сообщениями, тогда данная статья объяснит процесс деинсталляции Windows Live Messenger.
-

Нажмите на кнопку «Пуск» (Start), а затем кликните по вкладке «Панель управления» (Control Panel).
-
Щелкните по ссылке «Добавление и удаление программ» (Add or Remove Programs).
-
Прокрутите список вниз, пока не увидите пункт «Основные компоненты Windows Live» (Windows Live Essentials). После нажмите на кнопку «Удалить» (Remove). Затем выполните следующую цепочку действий: «Деинсталлировать» (Uninstall) > «Далее» (Next) > «Messenger» > «Продолжить» (Continue).
Реклама


-

Нажмите на кнопку «Пуск» (Start), а затем кликните по вкладке «Панель управления» (Control Panel).
-
Нажмите на объединяющую ссылку «Удаление программы» (Uninstall a program), расположенную под категорией «Программы» (Program) либо, если у вас настроен «классический вид» (classic view), дважды щелкните по вкладке «Программы и компоненты» (Programs and Features).
-

Прокрутите список вниз, пока не увидите пункт «Основные компоненты Windows Live» (Windows Live Essentials). После нажмите на кнопку «Удалить» (Remove). Затем выполните следующую цепочку действий: «Деинсталлировать» (Uninstall) > «Далее» (Next) > «Messenger» > «Продолжить» (Continue).
Реклама


Советы
- Деинсталляция Windows Live Messenger не приведет к удалению вашего аккаунта в Messenger.
- Вам, возможно, придется удалить другие программы Windows Live.
Реклама
Предупреждения
- Не удаляйте Windows Live Messenger, просто стерев папку «Windows Live» в «Program Files» (в частности /Program Files/Windows Live).
Реклама
Что вам понадобится
- Windows Live Messenger
Об этой статье
Эту страницу просматривали 4261 раз.
Была ли эта статья полезной?
Если вы видите это сообщение, значит, произошла проблема с загрузкой файлов в стилей (CSS) нашего сайта. Попробуйте сбросить кэш браузера (Ctrl+F5).
Если это не поможет, а вы находитесь в регионе, где возможны ограничения интернет-трафика с российских серверов — воспользуйтесь VPN.
|
Что будет, если полностью удалить все программы Виндовс Лайв? Можно ли удалить Виндовс Лайв, это не вредно для системы? Как удалить все компоненты Windows Live полностью вручную? удалить это все можно так же как и любую другую программу. в списке программ ищи «основные компоненты Windows Live». Игорь Тер более года назад Если вы не пользуетесь каким-либо из приложений из состава Windows Live, то вы можете спокойно удалить его без каких-либо последствий для функционирования операционной системы. Однако, если вы пользуетесь каким-либо из приложений Windows Live, то перед удалением необходимо убедиться, что вы не храните важную информацию в этих приложениях, которые могут быть удалены вместе с Windows Live. Знаете ответ? |
Need Space in PC or only want to remove or uninstall Disable windows live On PC ( Windows 7, 8, 10, and Mac )? but how to, after it still having files in C: drive? If the application run on the pc, windows 7, 8, & 10 so you can uninstall using Control Panel or CMD Or If this applicaion run in Mac so you know that how to uninstall in MAC. With this article, you will able to delete or kick out all of those files also after uninstalling the Disable windows live.
Are you bored, or tired of using Disable windows live? Now, wanna kick-off this software from your PC ( Windows 7, 8, 10, and Mac )? There is no condition to follow up before installing, so, you can remove it without getting any confusion about it.
There are 10 methods that users can adapt if they want to uninstall Disable windows live :
Method #1
- Go to Start Menu, then click on the Control Panel.
- In Control Panel, under programs, go through the list of the ones that are installed on your computer
- Right-click on Disable windows live, and then click on uninstall a program
- Follow the prompt on the screen, and you will get to see a progress bar that will take you to remove the Disable windows live from the computer.


Method #2
The second method involves uninstaller.exe, through which Disable windows live can be uninstalled. Just follow the instructions below to execute this step:
- Go to the installation folder of Disable windows live.
- Find a file that is named uninstall.exe or unins000.exe
- Double click on the file, and then follow the instructions that appear on the screen.


Method #3
The third method involves System Restore. For those who don’t know, System Restore is a utility, which helps the user restore their system to its previous state. System Restore removes all those programs, which interfere with the operation and performance of the computer.


If you have created a system restore point before you installed Disable windows live, then you can use this software to restore the system, and remove such unwanted programs. However, before you do so, make sure that you save all the important data.Follow the steps below to know more from this method:
- Close all the files and programs, which are currently running on your PC
- Open Computer from the desktop, and then select Properties
- System Window will open
- On the left side and click on System Protection
- System Properties will open.
- Then do click on the option of System Restore, and a new window will again open.
- Now, choose the ‘different restore point’ option, and click on Next.
- You have to select a date and time from the given options; when you select a date, the drivers that you installed after the chosen date won’t work.
- Click on Finish and then Confirm the ‘Restore Point’ on the screen.
- When you click Yes to confirm, the Disable windows live would be uninstalled.
Method #4
If you have an antivirus, then you can use it to uninstall Disable windows live.There is much malware or Disable windows live software in the computer applications that we download nowadays. They have become very difficult to remove from the system, like Trojan and spyware.
- If you cannot remove Disable windows live with the above methods.
- It means that there is malware or Disable windows live in it, and only a good antivirus can be used for removing it.
You can either download Norton Antivirus or AVG antivirus, as these are reputable software and will surely remove the malware, Disable windows live on the system.

Method #5
If you want to uninstall Disable windows live, then you can do so using Command Displayed in the Registry. A registry is a place where all the settings of Windows, along with information, are stored. This also includes the command to uninstall a software or program.
You can try this method with Disable windows live as well, but it is a very risky method. If you make any mistake and delete the wrong information, then the system is most likely to crash. It would become difficult for you to bring it back from deletion.

To execute this method, To follow the steps given below:
- Hold Windows + R together, and then Run command
- When the command box opens, type Regedit in the box and then click on OK
- You have to navigate and find the registry key for the Disable windows live
- You will see an uninstall string on the next window; double click on it, and also copy ‘Value Data’
- Again hold Windows + R keys, and run the Command; paste the value data that you just copy and click on OK
Follow what comes on the screen and then uninstall Disable windows live.
Method #6
The seventh method is to uninstall the Disable windows live using a third-party uninstaller.
At times, those who don’t have any knowledge of computer language, won’t be able to manually uninstall the software fully.
Many files occupy the hard disk of the computer, so it is best to use third-party software to uninstall them.

Method #7
There are some codes that users can type into the command prompt, and they would be able to uninstall the Disable windows live. For example, if they want to remove the package, then just type.
sudo apt-get remove Disable windows live
If you want to uninstall Disable windows live and its dependencies as well, then type:
sudo apt-get remove –auto-remove Disable windows live
For those who don’t know, some of the dependencies of Disable windows live are GCC-5, libc6, libgcc1, Disable windows live dev, and gc++-5.

Method #8
If the user wants to remove the configuration and data files of Disable windows live, then they need to run the following code on the Command Prompt:
sudo apt-get purge Disable windows live

Method # 9
It depends on you that are you willing to kick-out the data or you want to remove the configuration data or data files, along with the dependencies, then the following code is most likely to work for you:
sudo apt-get auto-remove -purge Disable windows live

To uninstall Disable windows live on mac because anytime we need space or only want to remove from pc due to some viruses and also many problems which are needed to remove or uninstall from pc.
So I will show you some steps of uninstalling Disable windows live on the mac so follow my this step or method if you have still confusion so you may contact with us for uninstall of Disable windows live on pc or mac.
How to Uninstall Disable windows live on Mac?
For uninstalling Disable windows live on the mac so as I told you that there is a simple method to uninstall apps on mac. As there are installed some apps on your Mac and now you want to remove or uninstall from your pc successfully and want to install some other apps on my mac so follow my these steps to uninstall Disable windows live on mac.
Method #1
In method 1, you have to open mac on your pc as I’m showing in the image follow the images to uninstall Disable windows live on your mac.

In the image, there is a Disable windows live app on your mac dashboard and now we have to uninstall it from our mac we will uninstall this app and will remove it in of mac now double-click-on-app showing in the image.

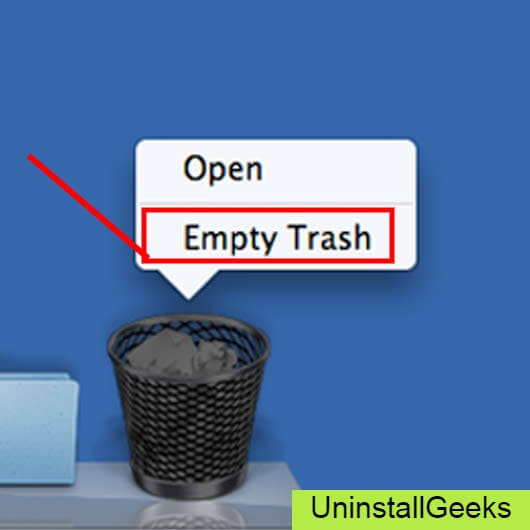
Now you double-clicked on the app mac will ask that are you sure to uninstall Disable windows live click on the Delete button so go to Trash of mac to uninstall completely from mac. Showing in image trash bin click on trash bin and go inside there will be Disable windows live which we had to delete before so have to uninstall completely from mac.

Not right-click on trash to remove all data or app which we had uninstalled before seeing in the image. Click on Empty Trash the whole data which is in the trash will auto remove successfully.
Now we uninstalled Disable windows live on the mac so as you see that how to uninstall or remove any app on the mac so if you liked this so share once. This method doesn’t require any antivirus or uninstaller software from them we are to uninstall.
I described only a simple method of uninstalling Disable windows live on mac. This method more people are using but some people take it is too hard uninstalling in mac but in this step, anyone can understand this simple method.
How To Install?
For those who don’t know much about Disable windows live, they might lean more towards uninstalling it. These Disable windows live create an environment, where users can create a high GPU-accelerated application. If you want to install this Disable windows live, then make sure that your system is compatible with it.
Firstly, verify that the system you are using has a Disable windows live capable GPU, and then download the Disable windows live. Install it, and then test that the software runs smoothly on the system. If it doesn’t run smoothly, then it could be because its communication with the hardware is corrupted.


Conclusion
There are other methods of uninstalling the Disable windows live as well as in pc or windows, but these could be difficult for those, who don’t have much technical expertise. Execute these methods, and they will surely work. These methods don’t require the user to have much knowledge of the technical side of an operating system. They can follow simple steps and uninstall Disable windows live.
На сегодняшний день сотни тысяч пользователей по всему миру пользуются операционной системой Виндоус – продуктом корпорации Microsoft. Каждая из выпущенных версий ОС предполагает наличие утилит, которые занимают много места, тормозят функционирование, но эксплуатируются редко, а иногда не используются вовсе.
Перечень таких «якорей» нередко включает редактор для видео, поэтому у юзеров часто возникает вопрос: «Как удалить киностудию Windows?».
Содержание
- Как стереть Киностудию Windows Live
- Удаление видеоредактора в Windows 7 или версии Vista
- Процесс удаления Windows Live с XP
Как стереть Киностудию Windows Live
Процесс ликвидации ПО Windows Live достаточно незатруднителен, не требует особых навыков, знаний. Чтобы качественно стереть стандартную платформу для обработки клипов, следует выполнить несколько этапов.
Наиболее практичный способ очистки персонального устройства от ненужных элементов происходит через соответствующий блок, расположенный в меню панели управления. Тщательное соблюдение пошаговой инструкции не только освободит память ПК, но обеспечит последующую корректную работу операционной системы.
ОБРАТИТЕ ВНИМАНИЕ! Если не получается стереть редактор при соблюдении всех перечисленных ниже этапов, необходимо проверить, не используется ли какая-то ее составляющая во время уничтожения. Например, просмотр фотографий через «Фотоальбом» как утилиту полностью, так и отдельные ее элементы невозможно удалить с ПК.
Удаление видеоредактора в Windows 7 или версии Vista
Чтобы максимально качественно ликвидировать редактор видео Виндовс на компьютере с установленной версией ОС Виста или 7 без критических последствий для ПК, следует выполнить несколько шагов:
- Нажать кнопку «Пуск» на командной строке.
- Во всплывшем окне выбрать раздел «Панель управления».
- В блоке «Программы и компоненты» выбрать пункт «Удаление программы».
- В меню «Удаление и изменение программы» нажать на блок «Компоненты Windows Live».
- Клик на кнопку «Удалить/Изменить» и выбрать команду «Удаление одной или нескольких программ Виндовс Лайф».

- Отметка элементов, от которых нужно избавиться, и нажатие «Uninstall».
Внимание! Для максимально корректной работы системы после уничтожения видеоредактора необходимо отметить все элементы данной утилиты.
Процесс удаления Windows Live с XP
На вопрос: «Как удалить киностудию Windows Live с компьютера с установленной ОС XP?» отвечает следующая инструкция:
- Запуск меню «Пуск».
- Выбор раздела «Панель управления».

- Двойной клик на пункте «Установка и удаление программ».
- Выбор блока «Компоненты» и нажатие кнопки удалить.
- Во всплывшем окне выбор пункта «Удаление одной или нескольких программ Windows Live».
- Отметка на подлежащих удалению составляющих программного обеспечения и нажатие «Uninstall».

Внимание! Для корректного завершения уничтожения программного обеспечения, систему требуется перезагрузить после выполнения всех пунктов, прописанных в пошаговой инструкции.