
Quick Tips
- Deleting old Windows update files conveniently frees up storage space without removing your data.
- Delete old Windows update files only if your computer is functioning smoothly, and you don’t plan to revert to the previous version.
- The easiest way to remove old Windows update files is through the Settings app.
Method 1: Delete Old Windows Update Files via Settings
The Storage section of the Settings app provides a detailed breakdown of all temporary files on your PC, including old Windows update files. Here’s how to access it to delete old copies of Windows updates.
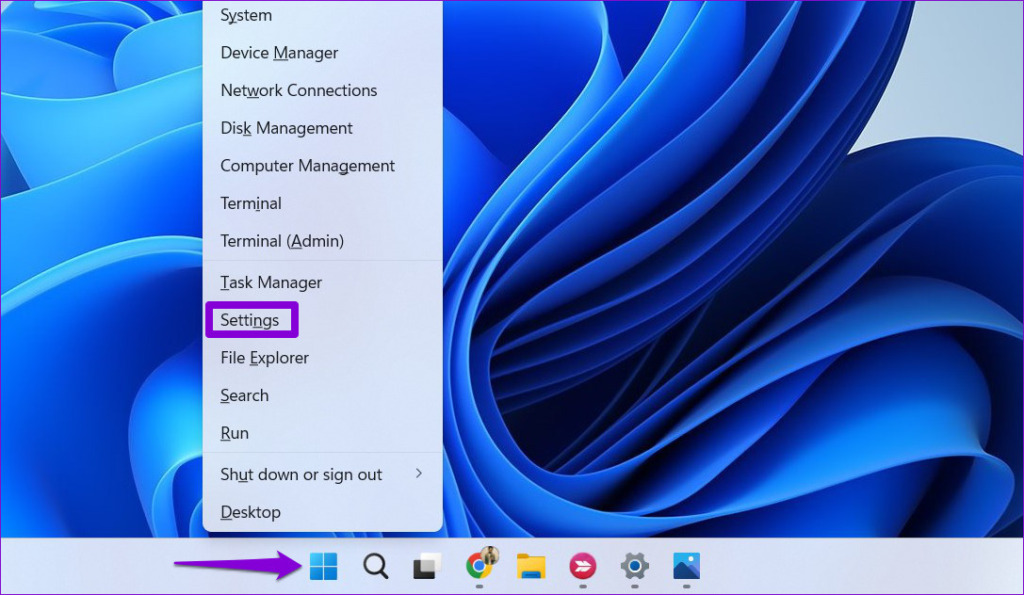
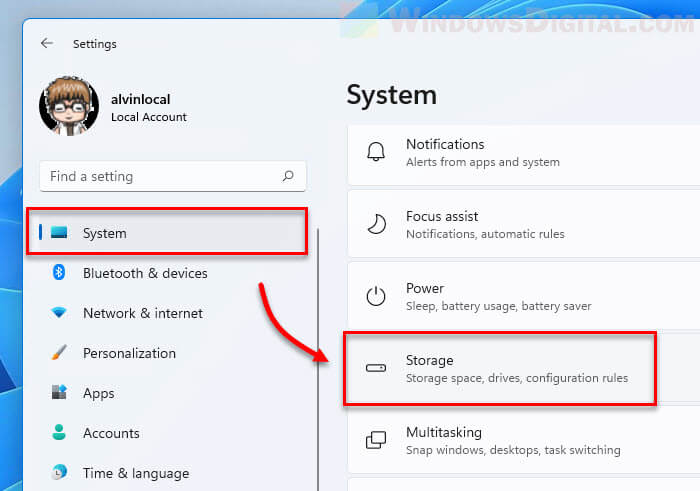
Step 1: Right-click on the Start icon and select Settings from the list.
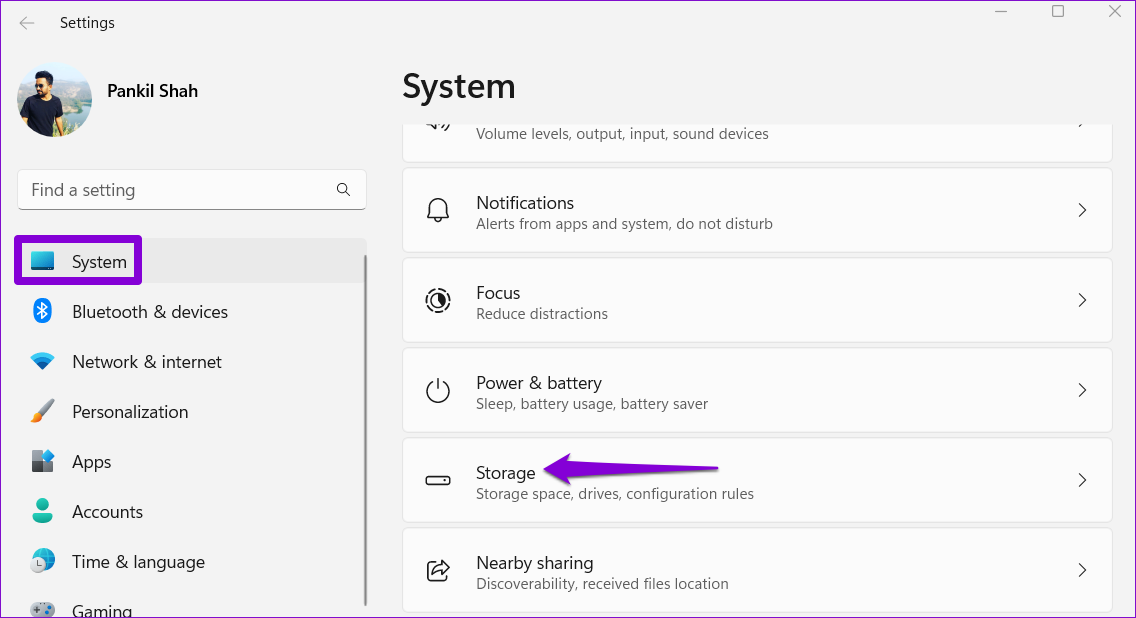
Step 2: Head to System > Storage.
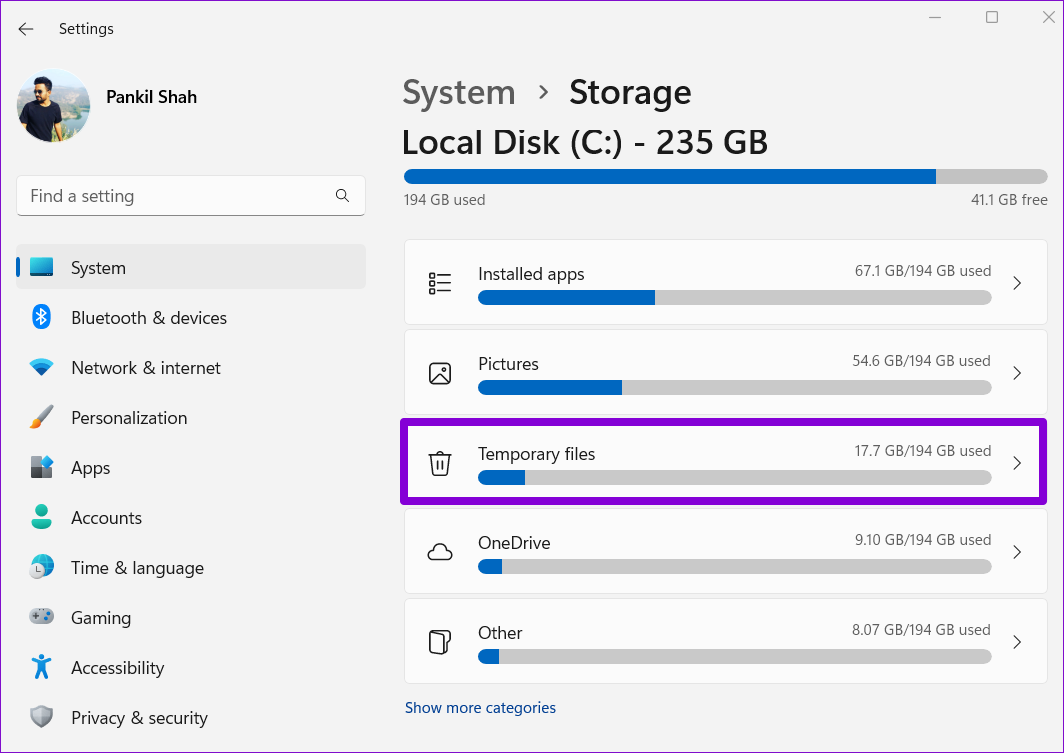
Step 3: Click on Temporary files.
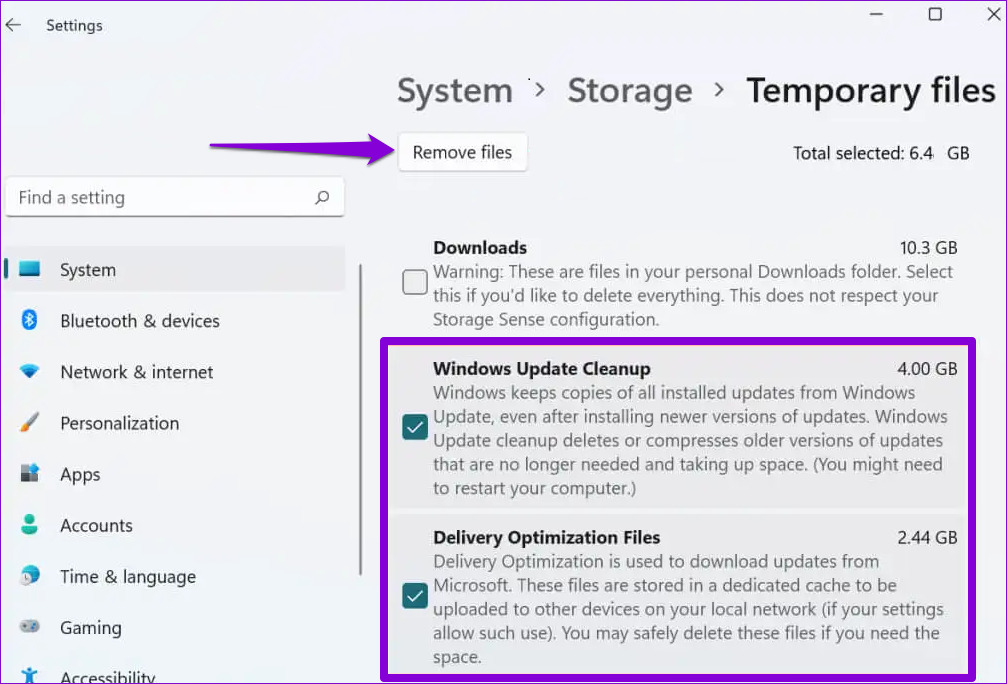
Step 4: Check the boxes for Windows Update Cleanup and Delivery Optimization Files. Uncheck everything else.
Step 5: Once done, click the Remove files button at the top.
Wait for Windows to delete the selected files and free up the storage space.
Method 2: Delete Old Windows Update Files With Disk Cleanup
Disk Cleanup is a handy Windows tool that allows you to free up valuable storage space on your PC by deleting unnecessary files. You can also use it to delete old Windows update files. Here’s how.
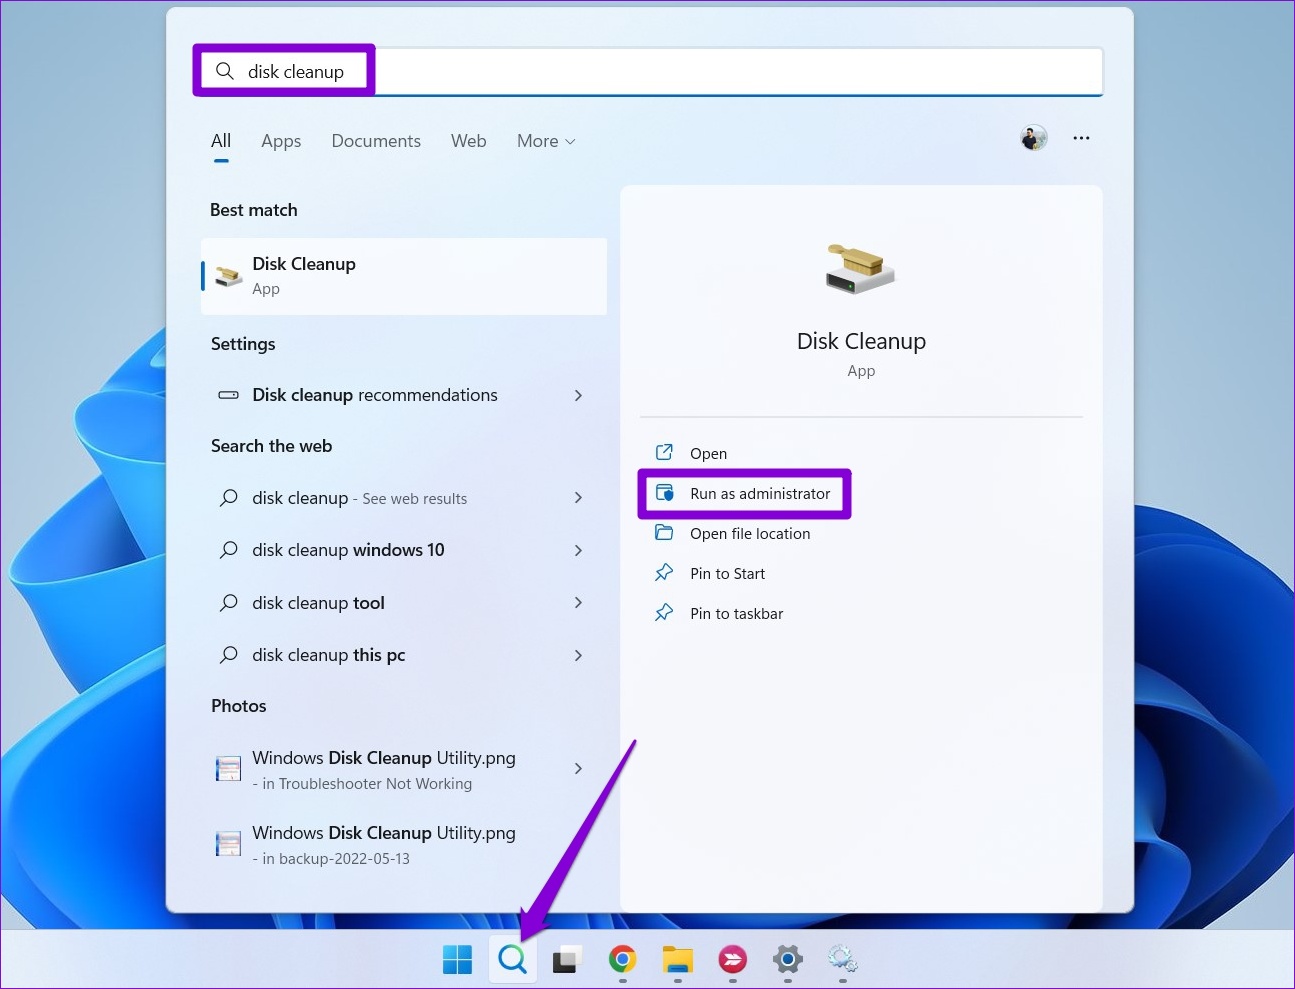
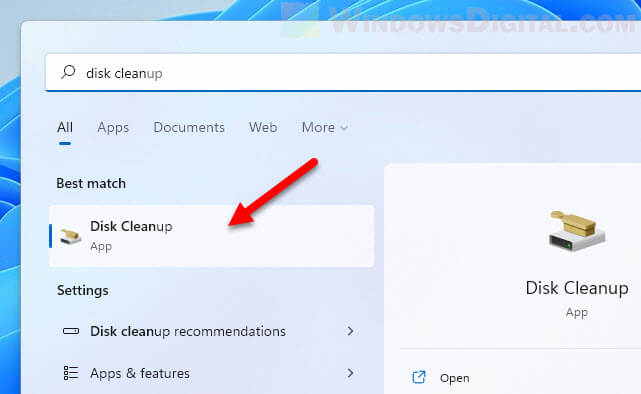
Step 1: Click on the search icon on the taskbar, type disk cleanup, and select Run as administrator.
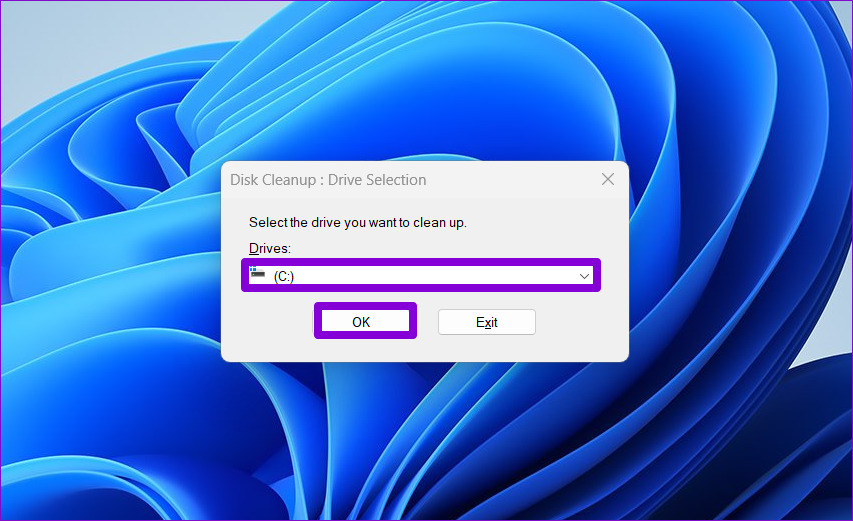
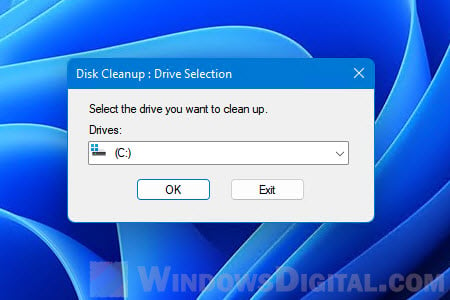
Step 2: Use the drop-down menu to select your primary drive and click OK.
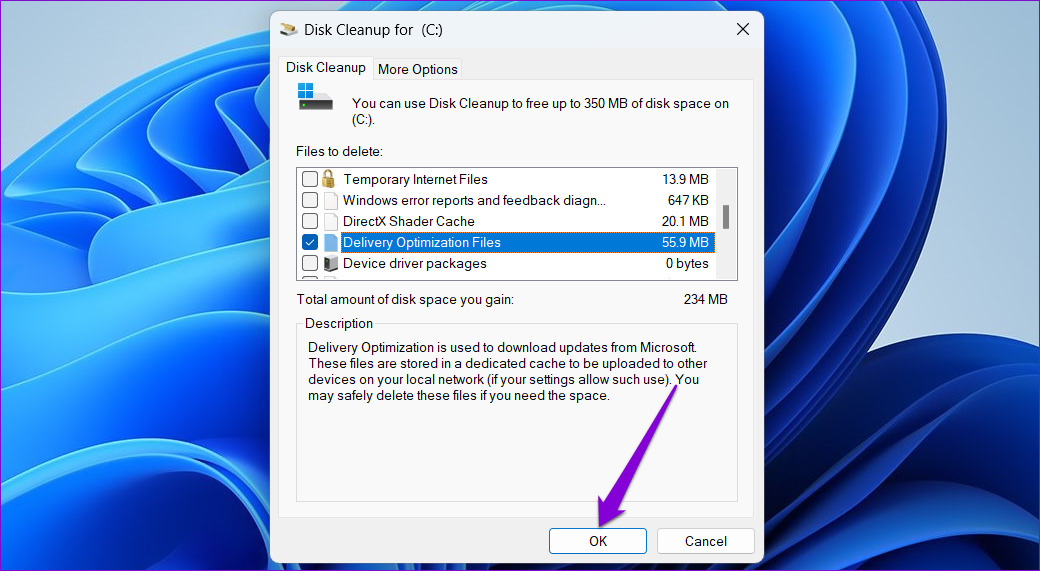
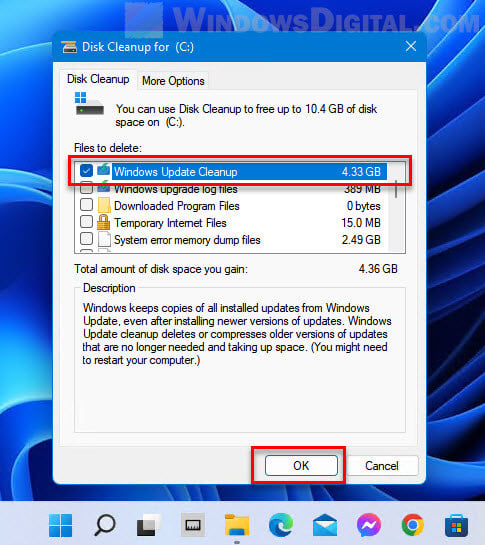
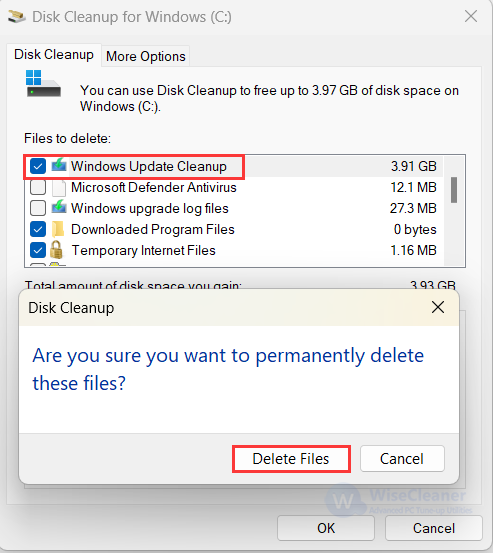
Step 3: Check the boxes for Windows Update Cleanup and Delivery Optimization Files. Then, click OK.
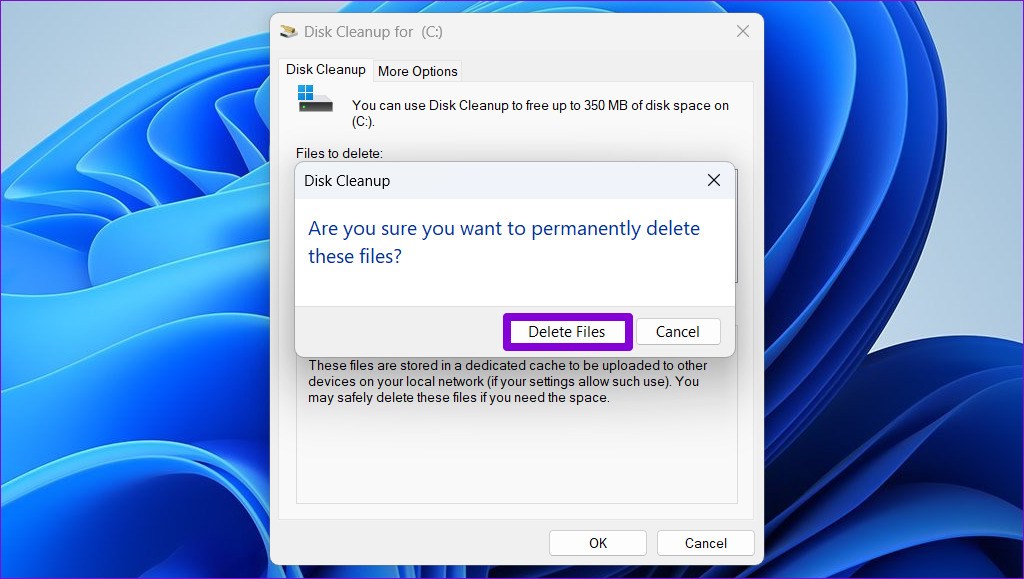
Step 4: Choose Delete Files to confirm.
Method 3: Delete Old Windows Update Files From SoftwareDistribution Folder
Windows stores all the downloaded update files in the SoftwareDistribution folder. Occasionally, these files remain when the Windows Update process gets stuck or fails to complete. After Windows installs the updates, you can safely delete the files from the SoftwareDistribution folder to free up storage space.
To do this, first stop the Windows Update service by following the steps below.
Step 1: Click the search icon on the taskbar, type services in the box, and press Enter.

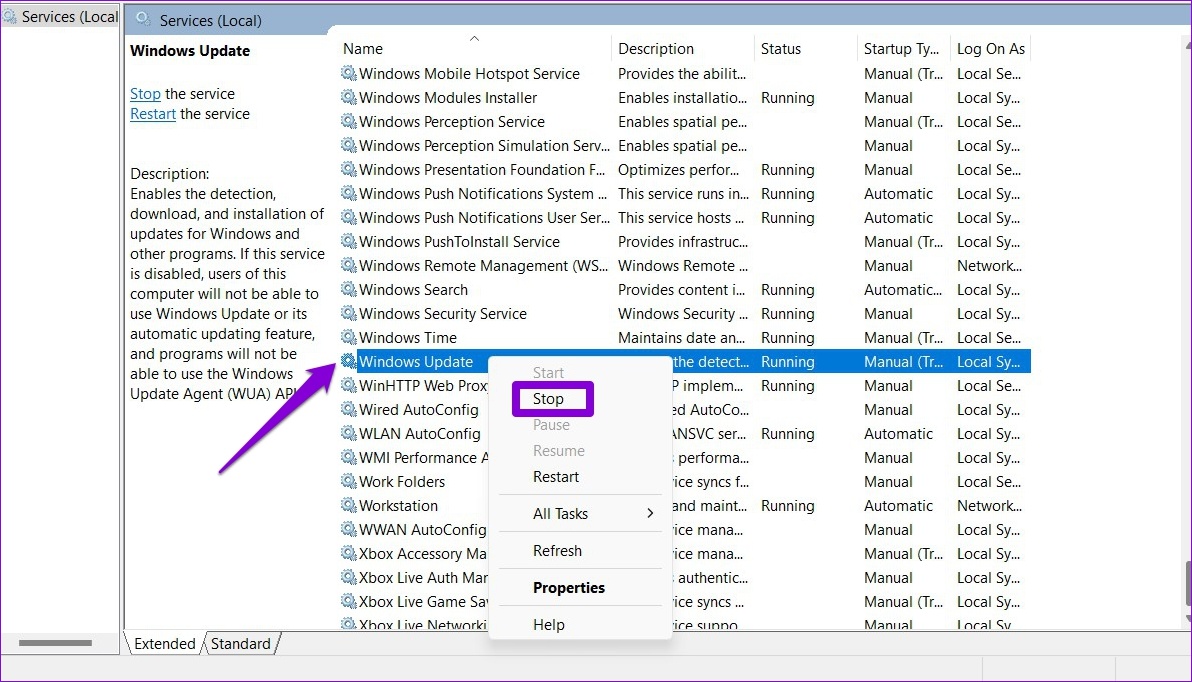
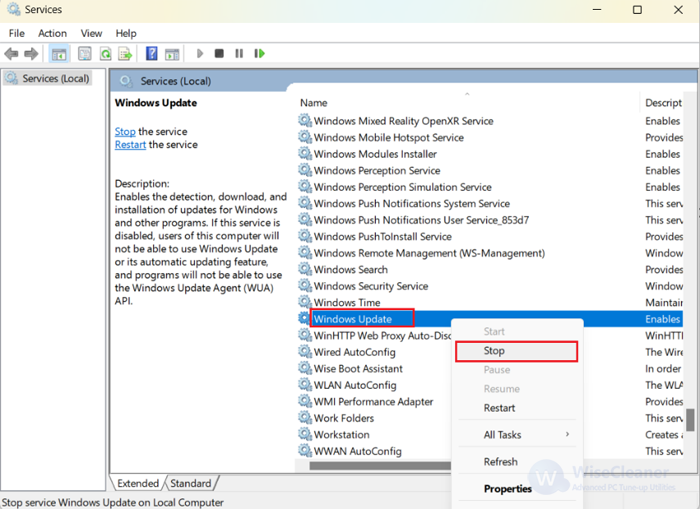
Step 2: Scroll down to locate Windows Update service, right-click on it, and select Stop.
After the Windows Update service stops, you can use the following steps to delete old Windows update files from the SoftwareDistribution folder.
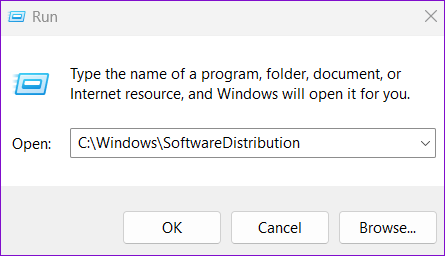
Step 1: Press the Windows key + R to open the Run dialog box.
Step 2: Type C:\Windows\SoftwareDistribution in the text field and press Enter.
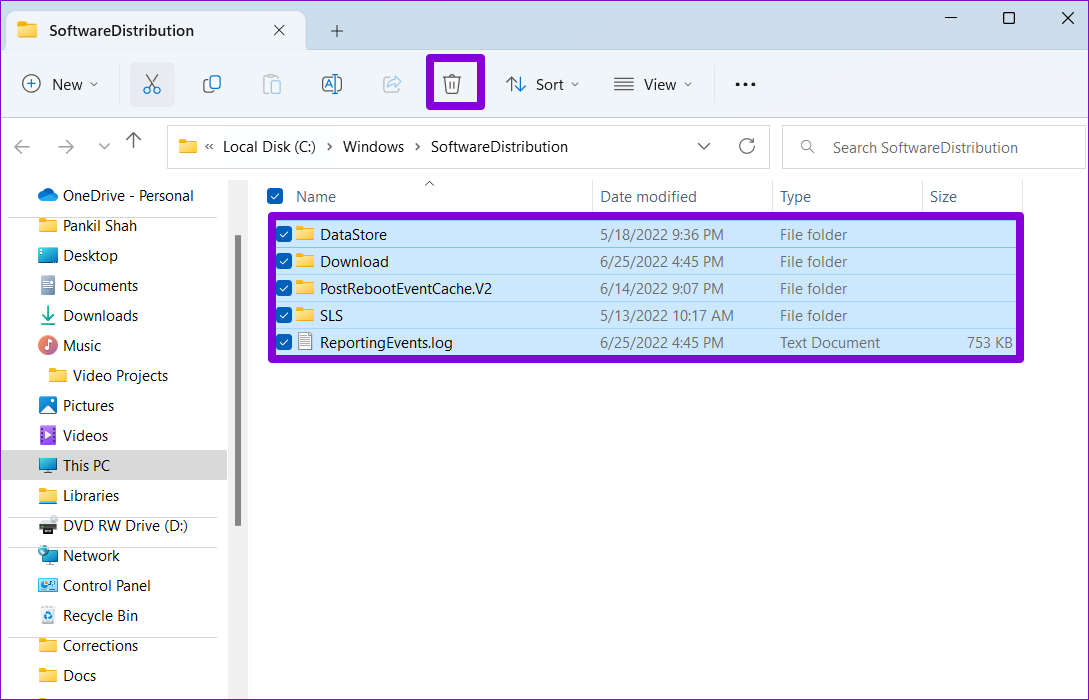
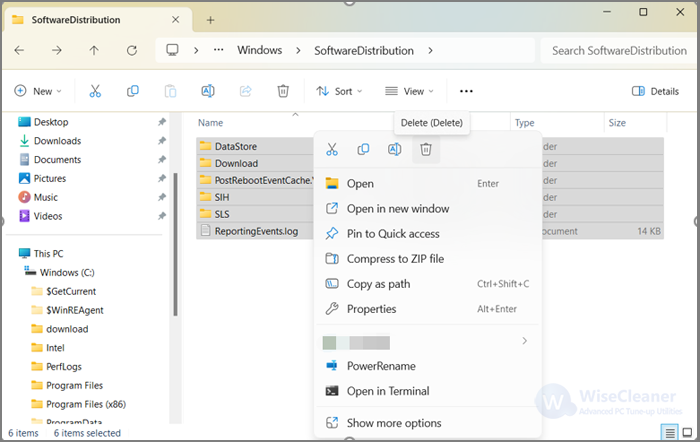
Step 3: Select all files in the SoftwareDistribution folder and click on the trash icon at the top to delete them.
After you delete the folder, open the Services window again (check the steps above) and start the Windows Update service.

Was this helpful?
Thanks for your feedback!
The article above may contain affiliate links which help support Guiding Tech. The content remains unbiased and authentic and will never affect our editorial integrity.
Windows Update is a necessity and a norm if you use Windows operating system such as Windows 11. It keeps your Windows up to date with the latest security patches, driver updates, features updates, etc. from Microsoft. Windows Update runs automatically to check your computer for updates on a regular basis.
When Windows Update runs, it will first check if there is any update your computer needs to install. If there is any, it will automatically download the updates to a folder that specifically stores downloaded Windows Update files. It will then install the updates using the downloaded files from the folder.
Windows will not clear the downloaded update files automatically even after installing the updates. These updates that you no longer need can accumulate and take up disk space. Eventually, you will need to run disk cleanup to clear the update files, or manually delete the Widows Update files through File Explorer, if you want to free some space on your system drive.
Deleting the Windows Update files is also often an effective solution to fix Windows Update related issues such as Windows 11 Update Stuck at 0% or 100%, etc. After the downloaded update files are deleted (which could be the culprit of the problem), Windows Update can start afresh to re-check for updates and download them all over again.
This guide will show you (3 methods) how to delete Windows Update files manually in Windows 11 via File Explorer, or clear the update files using Disk Cleanup or Storage settings.
Also see: How to Restart Windows Update Service on Windows 11
Delete Windows Update Files manually in Windows 11
In Windows 11, Windows Update stores downloaded update files in a folder called SoftwareDistribution (no space) in the Windows directory on your system drive. System drive (usually the C: drive) is where your Windows was installed.
In short, you can find the downloaded Windows update files in C:\Windows\SoftwareDistribution directory. This is where Windows stores temporary update files downloaded by Windows Update.
To manually delete the Windows Update files in Windows 11, open File Explorer or This PC and navigate to the C:\Windows\SoftwareDistribution directory. Select all the files in the folder and delete them.
Suggested Guide: How to Clean C: Drive in Windows 11
Clean up Windows Update files using Disk Cleanup
Another method to delete the downloaded Windows Update files in Windows 11 is to use the Disk Cleanup tool. There is an option to clear the copies of installed updates from Windows Update in Disk Cleanup.
To clear Windows update files using Disk Cleanup, follow the steps below.
- Search for Disk Cleanup via Start and open it.

- When you are prompted to select a drive you want to clean up, select your system drive – the drive where your Windows was installed, in most cases, the C: drive.

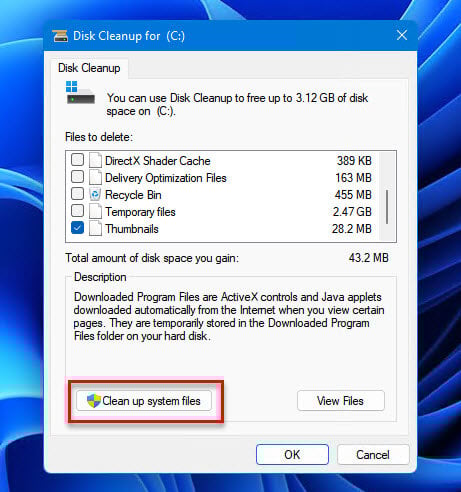
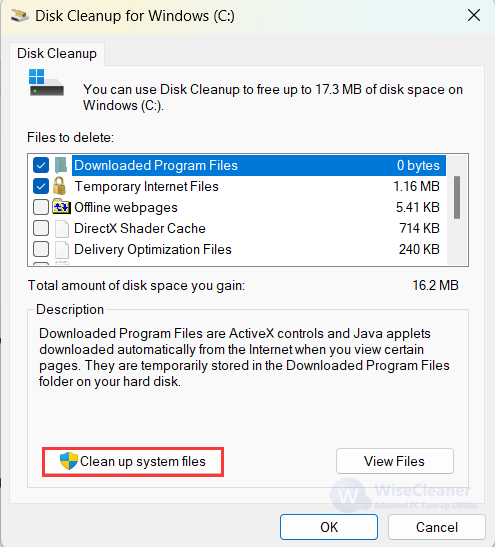
- After a short while of calculating the files, Disk Cleanup will show you the files you can delete. However, the system files will not be listed yet. You will need to click the “Clean up system files” for it to also calculate and include the system files. This action requires administrator rights.

- Next, once Disk Cleanup has done calculating the files you can delete, select “Windows Update Cleanup” in the Files to delete section, and then click OK to proceed the cleanup.

Delete downloaded updates via Storage settings
Optionally, you can use the Storage settings instead of Disk Cleanup to delete the downloaded Windows Update files in Windows 11. To remove the Windows Update files using storage settings, follow the steps below.
- Press Win + i to open Settings in Windows 11.
- On the left pane, select System, and then select Storage on the right.

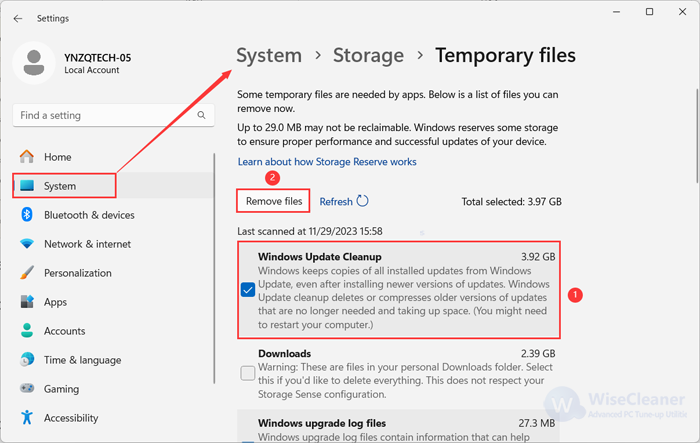
- In Storage settings, it may take a while for Windows to calculate the files and the disk space they took. Once calculated, select the Temporary files category.

- Next, select the checkbox for “Windows Update Cleanup” and, optionally, any other temp files you want to delete. Then, click the Remove files button to remove the selected files.


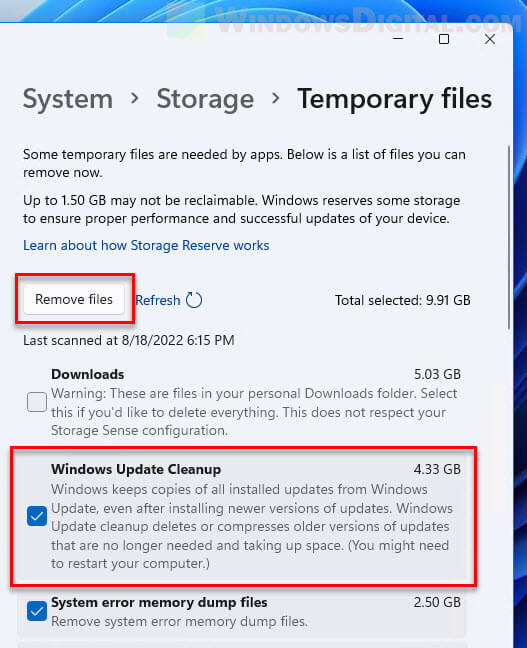
Doing so will delete the copies of all installed updates from Windows Update, freeing up a significant amount of disk space, depending on how long since you last cleared the Windows Update files.
Windows Update runs automatically to check if there is any update your computer needs to install. If any, it will download the updates to a folder to prepare for the installation. However, the Windows update files in the folder will not be removed automatically after installation. So, it’s necessary to remove them manually.
This post will introduce three ways to clear these updates to help users free up some space:
Method 1. Clear Windows updates via System Settings
Users can clean up Windows update files from Storage in System Settings within several steps.
1. Press Win + i to open Settings
2. Click on System in the left panel and find Storage in the right panel.
3. Tap on Storage -> Temporary Files to find the item of Windows Update Cleanup.
4. Check the item and click the Remove files button to delete it.
Method 2. Remove Windows updates from Disk Cleanup
As a built-in maintenance utility, Disk Cleanup can clear unnecessary files to free up disk space on a computer’s hard drive.
1. Press Win + S to open the search window.
2. Type in Disk Cleanup to search. Then open it.
3. Select the system drive (usually C:) and click OK to go on.
4. The opening window of Disk Cleanup will show users the files can be deleted. However, the Windows update files will not be listed there, therefore, users need to tap on the Clean up System files button to find them.
5. Calculating for a while, the Windows Update Cleanup item is displayed in the list. Now you can check it and click OK and Delete Files buttons step by step to delete.
Method 3. Delete Windows updates in SoftwareDistribution Folder
Windows Update saves downloaded files in a folder named SoftwareDistribution under the Windows directory. In some cases, to wipe out the Windows update files, users need to delete the contents of this folder. Users can navigate to the folder and delete its contents in File Explorer. Here is how to do it.
1. Press Win +S to open the search window and enter Services to open it.
2. Find the service named Windows Update, right-click on it, and select the Stop option.
3. Open File Explorer and find the SoftwareDistribution folder based on this path: C:WindowsSoftwareDistribution.
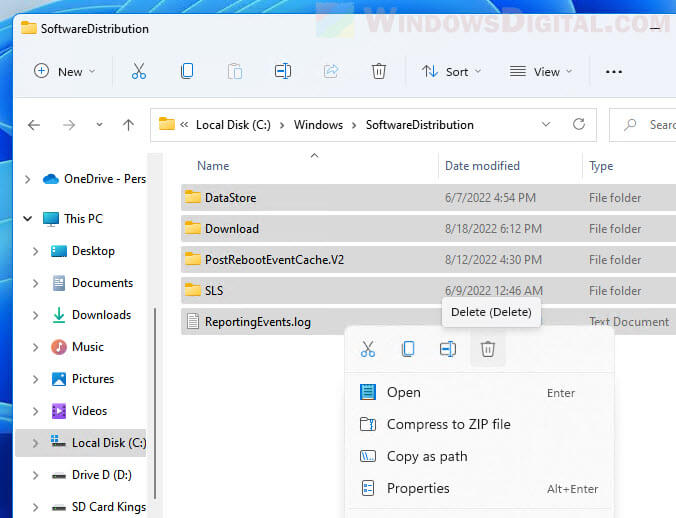
4. Select all of them, right-click, and tap on delete to clear.
Finally, do not forget to get back to the Services window and enable the Windows Update service. The same steps to right-click on it and select the Start option.
This should clear up update files and help you regain space or troubleshoot update-related issues on Windows 11. Remember that the next time Windows Update runs, it will recreate the SoftwareDistribution folder and download any necessary update files again. Perform these steps carefully, ensuring not to delete files outside of the specified locations, as it could affect system stability.
Conclusion
Some of the updates released by Microsoft are designed to fix one specific problem, yet some of those update files unknowingly cause another problem. So, deleting them can avoid bringing risks and insecurity to the computer. These methods above can help users get rid of Windows update files and they are not complicated to master.
Applies ToWindows 11 Windows 10
If you’ve recently installed a Windows Update and the update is causing your device to have errors or other issues, uninstall the update to try to resolve the issue.
Uninstall an update from Settings
-
Select Start > Settings > Windows Update . Under Related settings, select Update history> Uninstall updates or use the following shortcut:View update history
Note: In Windows 10, you can access from Update & Security > Windows Update > View your update history > Uninstall updates
-
From the list, select update you want to remove, and then select Uninstall.
Note: Some updates cannot be uninstalled.
Uninstall an update from Windows RE
If you can’t access Windows and you want to uninstall an update, you can do so from Windows RE. Here are the steps:
-
Access the Windows Recovery Environment.
-
Once in Windows RE, select Troubleshoot > Advanced options > Uninstall Updates.
-
Select either Uninstall latest quality update or Uninstall latest quality update.
Need more help?
Want more options?
Explore subscription benefits, browse training courses, learn how to secure your device, and more.
Вы можете удалить ожидающие установки обновления в Windows 11, очистив содержимое папки «Download» в каталоге «SoftwareDistribution», которая содержит файлы необходимые Центру обновления Windows для установки новых обновлений.
В Windows 11 обновления могут не устанавливаться в следствии ошибок, проблем совместимости или поврежденных .CAB файлов. Если накопительное обновление во время установки вызывает проблемы или у вас есть информация что обновление \ патч вызывает проблемы, вы можете удалить ожидающие обновления, чтобы повторно загрузить файлы или предотвратить попытку их установки системой.
В данном руководстве вы узнаете, как легко удалить ожидающие установки обновления в Windows 11.
Как удалить загруженные и ожидающие установки обновления в Windows 11
Чтобы удалить ожидающие обновления Windows 11, выполните следующие действия:
Шаг 1: Откройте проводник в Windows 11 с помощью значка на панели задач или нажав сочетание клавиш Win E.
Шаг 2: Введите, или скопируйте и вставьте следующий путь в адресную строку проводника и нажмите Enter:
C:\Windows\SoftwareDistribution\Download
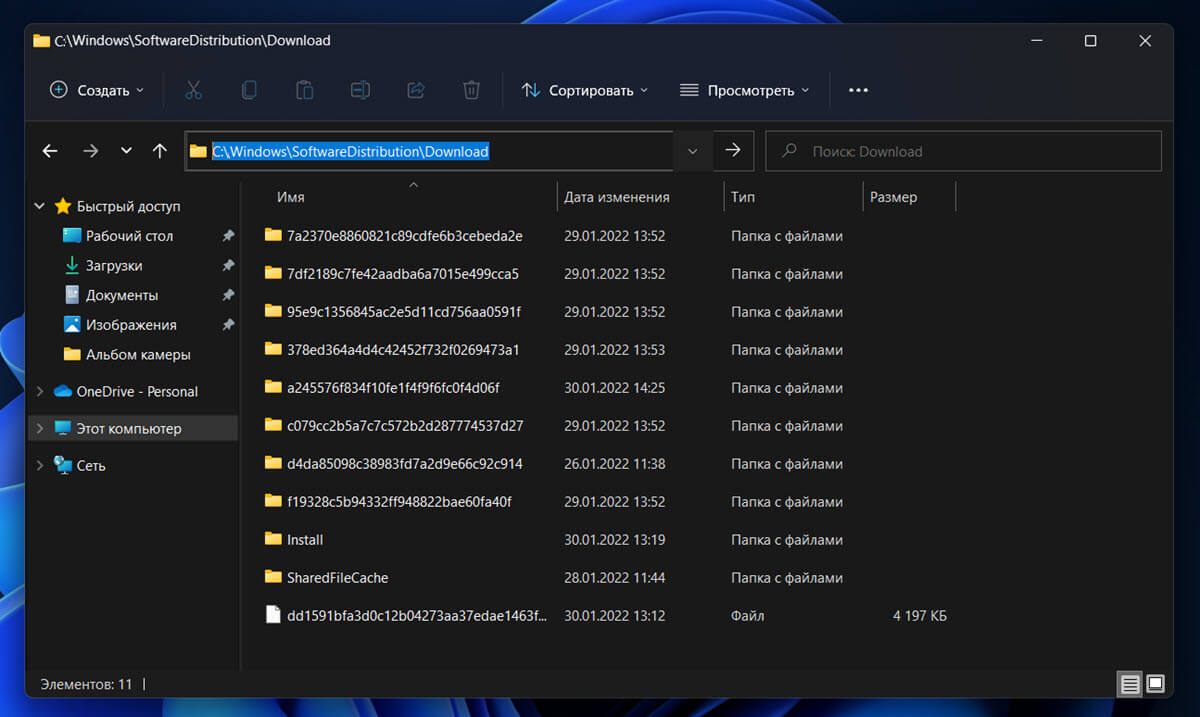
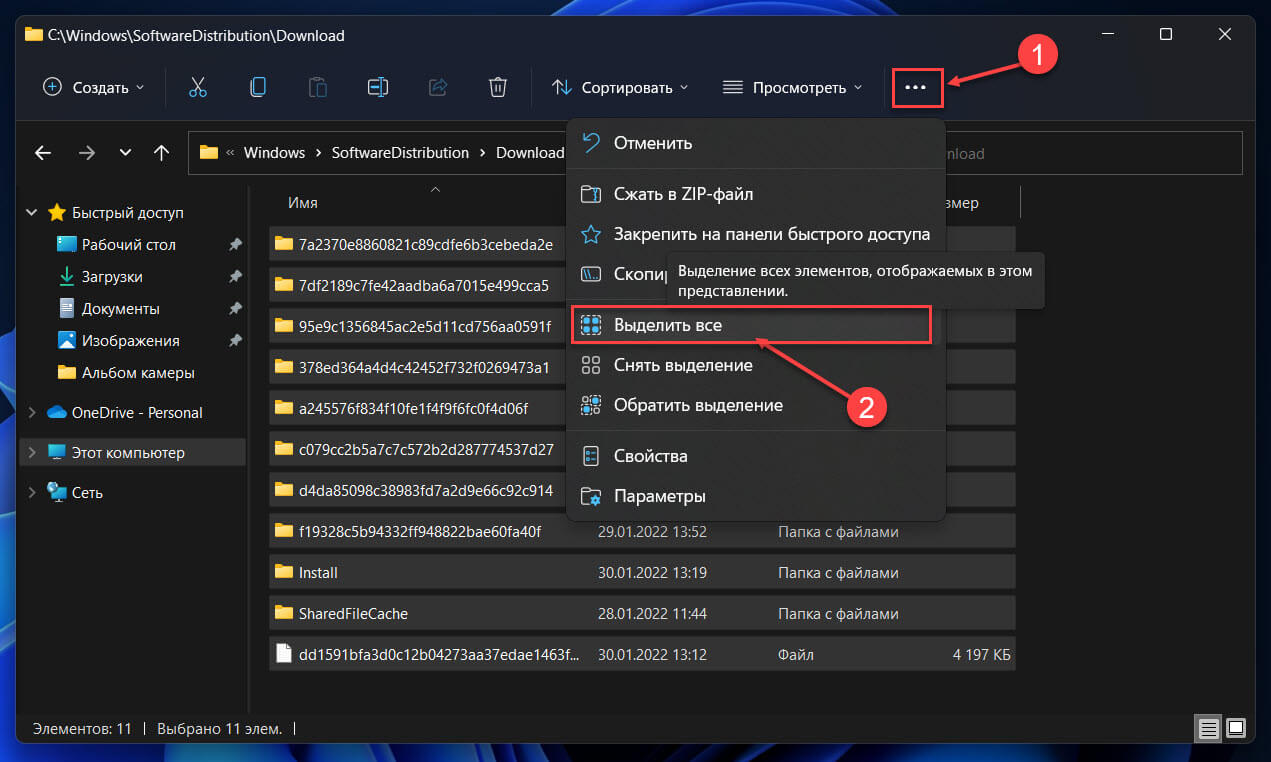
Шаг 3: В папке «Download» выделите все папки и файлы нажав клавиши Ctrl A или выберите опцию «Выделить все» в меню «Подробнее» (...три точки).
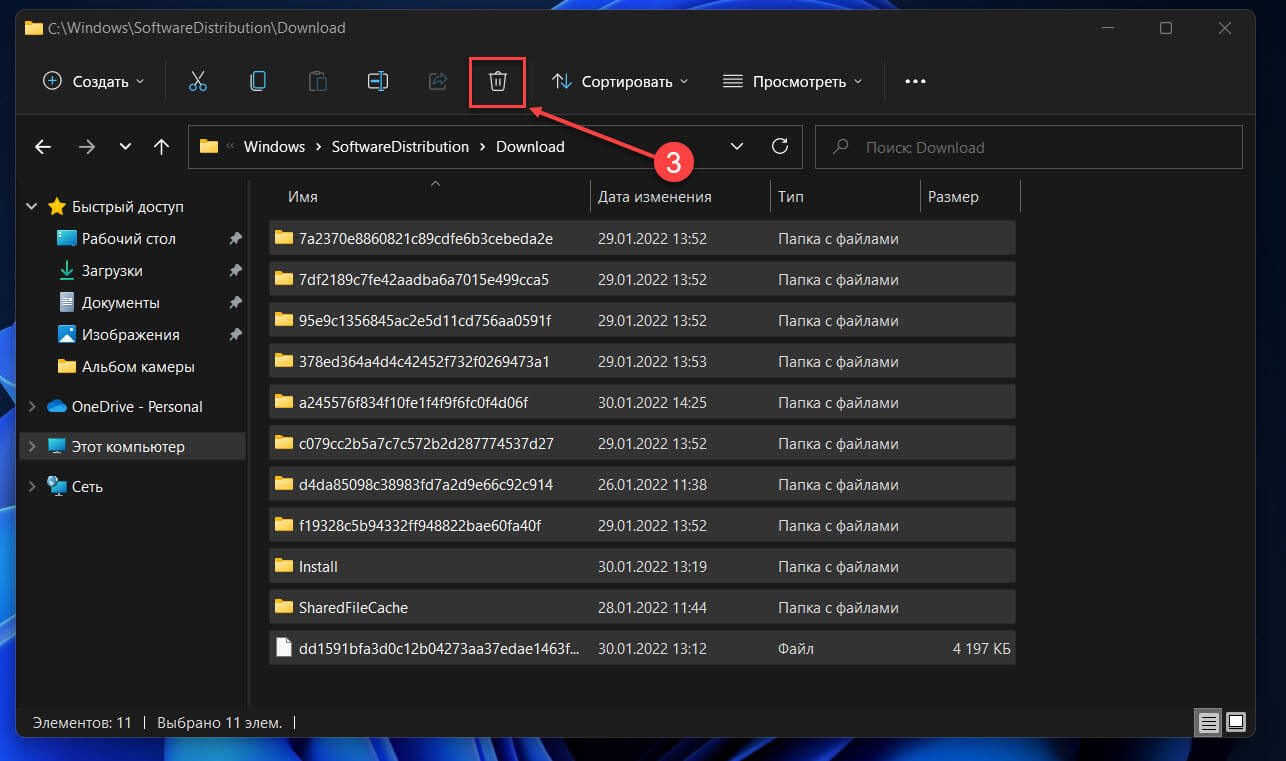
Шаг 4: После чего, нажмите кнопку «Удалить», чтобы удалить обновления ожидающие установки в Windows 11.
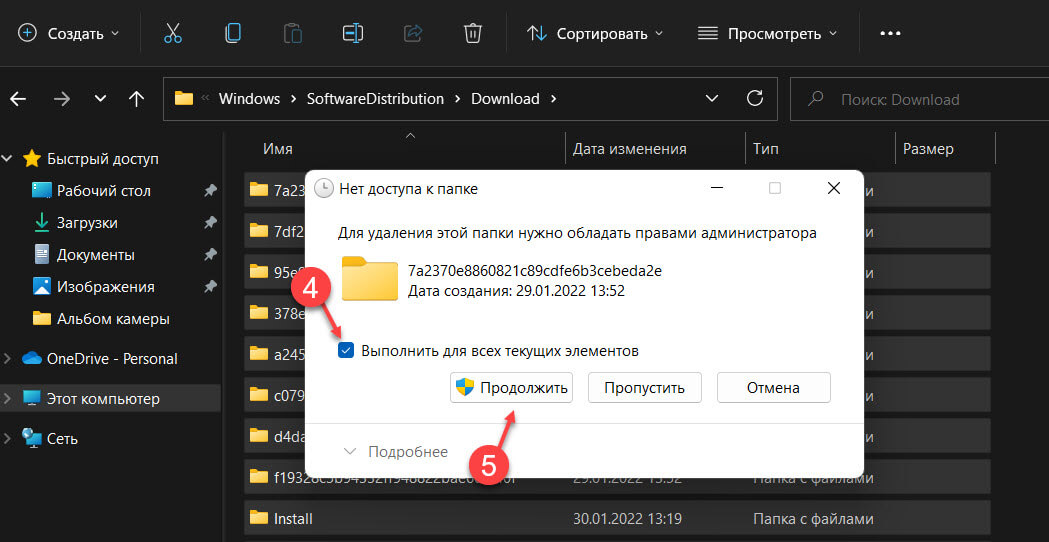
Шаг 5: Если вы получите запрос на разрешение для удаления файлов, установите флажок «Выполнить для всех текущих элементов» и нажмите кнопку «Продолжить».
Все! После выполнения этих шагов файлы доступных обновлений будут удалены с вашего устройства.
Если вам нужно заблокировать конкретное обновление, после удаления файлов используйте инструмент «Показать или скрыть обновления», чтобы предотвратить повторную загрузку пакетов Центром обновления Windows.