
What is SEARCHERBAR?
SEARCHERBAR detected as PUP.AD.SEARCHERBAR.
The main purpose of SEARCHERBAR is to display ads on your PC and to hijack your browser by changing its settings.
Today we will find out what is SEARCHERBAR, how it works and how to delete SEARCHERBAR from your computer.
SEARCHERBAR usually infiltrates your computer while being downloaded in a bundle with a popular hacked programs or while being included in downloaded file with a bunch of other trojans.
SEARCHERBAR causes the great problems for you, such as replacing your browser starting page with malicious one, browser search redirecting, changing security settings and allowing popup advertisements to show up.
SEARCHERBAR virus accomplishes this tasks by registering virus process in startup or by automatically launching malicious sites.
You have 2 ways to remove SEARCHERBAR:
Why I recommend you to use an automatic way?
- You know only one virus name: «SEARCHERBAR», but usually you have infected by a bunch of viruses.
The UnHackMe program detects this threat and all others. - UnHackMe is quite fast! You need only 5 minutes to check your PC.
- UnHackMe uses the special features to remove hard in removal viruses. If you remove a virus manually, it can prevent deleting using a self-protecting module. If you even delete the virus, it may recreate himself by a stealthy module.
- UnHackMe is small and compatible with any antivirus.
- UnHackMe is fully free for 30-days!
Here’s how to remove SEARCHERBAR virus automatically:
STEP 1: Install UnHackMe (1 minute)
STEP 2: Scan for malware using UnHackMe (1 minute)
STEP 3: Remove SEARCHERBAR virus (3 minutes)
So it was much easier to fix such problem automatically, wasn’t it?
That is why I strongly advise you to use UnHackMe for remove SEARCHERBAR redirect or other unwanted software.
How to remove SEARCHERBAR manually:
STEP 1: Check all shortcuts of your browsers on your desktop, taskbar and in the Start menu. Right click on your shortcut and change it’s properties.
You can see SEARCHERBAR or another web site at the end of shortcut target (command line). Remove it and save changes.
In addition, check this command line for fake browser’s trick.
For example, if a shortcut points to Google Chrome, it must have the path:
C:\Program Files (x86)\Google\Chrome\Application\chrome.exe.
Fake browser may be: …\Appdata\Roaming\HPReyos\ReyosStarter3.exe.
Also the file name may be: “chromium.exe” instead of chrome.exe.
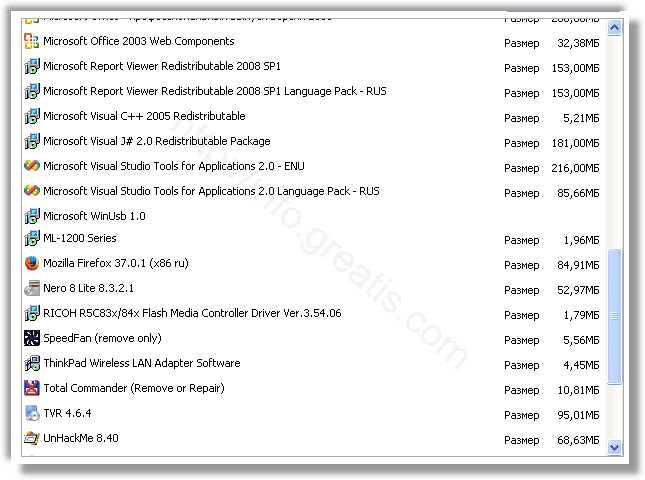
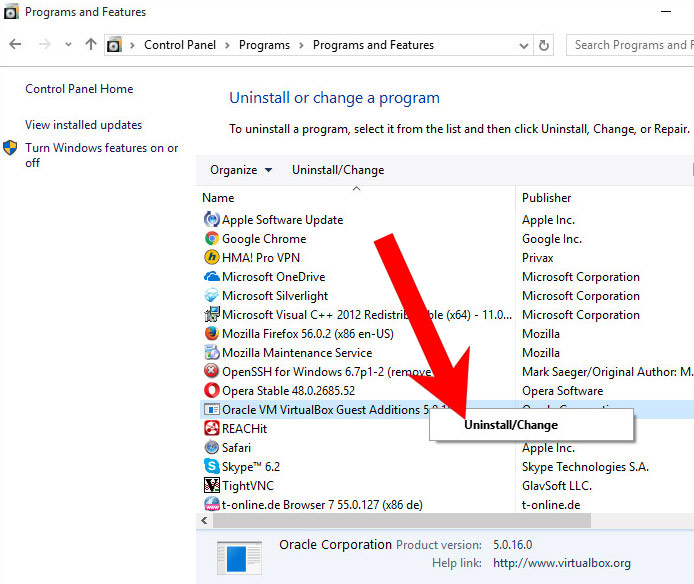
STEP 2: Investigate the list of installed programs and uninstall all unknown recently installed programs.
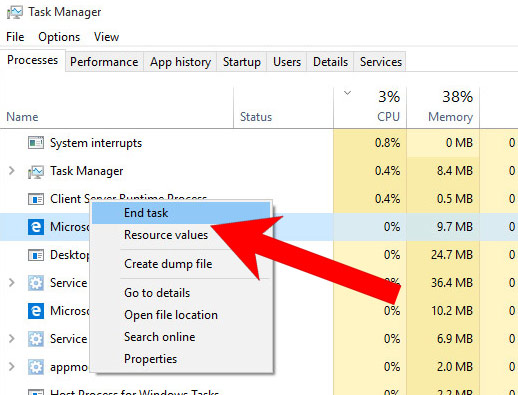
STEP 3: Open Task Manager and close all processes, related to SEARCHERBAR in their description. Discover the directories where such processes start. Search for random or strange file names.
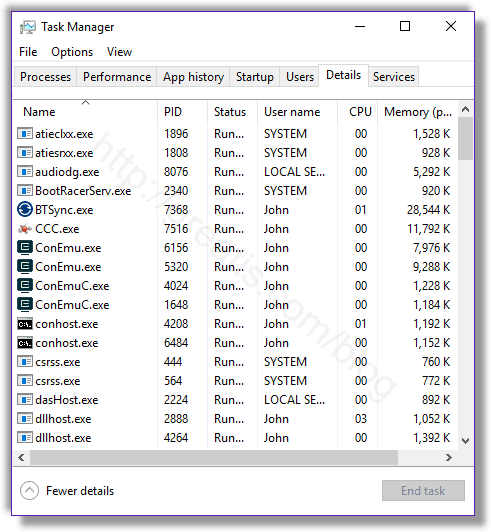
Remove SEARCHERBAR virus from running processes
STEP 4: Inspect the Windows services. Press Win+R, type in: services.msc and press OK.
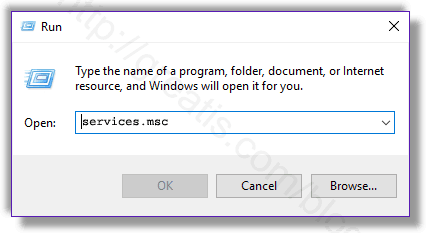
Remove SEARCHERBAR virus from Windows services
Disable the services with random names or contains SEARCHERBAR in it’s name or description.
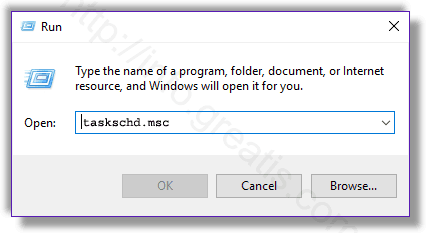
STEP 5: After that press Win+R, type in: taskschd.msc and press OK to open Windows Task Scheduler.
Delete any task related to SEARCHERBAR. Disable unknown tasks with random names.
STEP 6: Clear the Windows registry from SEARCHERBAR virus.
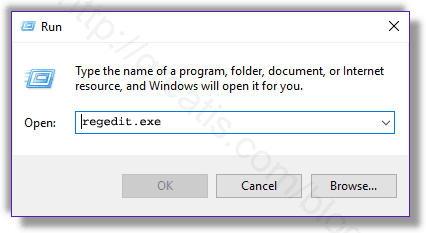
Press Win+R, type in: regedit.exe and press OK.
Remove SEARCHERBAR virus from Windows registry
Find and delete all keys/values contains SEARCHERBAR.
STEP 7: Remove SEARCHERBAR from Google Chrome.
STEP 8: Remove SEARCHERBAR from Internet Explorer.
Set Internet Explorer Homepage
STEP 9: Remove SEARCHERBAR from Mozilla Firefox.
Change Firefox Home Page
STEP 10: And at the end, clear your basket, temporal files, browser’s cache.
But if you miss any of these steps and only one part of virus remains – it will come back again immediately or after reboot.
✔Advanced Anti-Malware Protection ✔Blocks Harmful Websites ✔Custom Malware Fixes Just For You
*Source of claim SH can remove it. Trial w/Credit card, no charge upfront; full terms.
SearcherBar is a potentially unwanted browser-redirecting app that can get installed inside Chrome, Edge, Firefox and other popular browsers. SearcherBar is designed to change the settings of the affected browsing program and then start causing frequent redirects to its sponsors’ sites.

If SearcherBar has gotten installed inside your browser, you will notice various changes inside the browser as soon as you start a new online session. The most obvious modifications would be the replacement of the homepage and the new-tab page addresses. Also, the search engine that your browser uses by default when conducting your online searchers would also probably be replaced by SearcherBar. The purpose of all those alterations in the settings of your browser is to make it easier for the unwanted app to get you redirected to a number of preset sites. The owners of those sites pay the developers of SearcherBar a commission for the site-promoting service provided by the browser-redirecting app. The more users have this application on their computers, the greater the exposure the promoted sites would get, which, in turn, results in a greater profit for the creators of SearcherBar.
What is a browser hijacker and why you should remove it
A browser hijacker is any type of software that gets installed in the browser and tries to flood it with ads, redirects, or other advertising materials with the goal to promote certain products, services, or sites in order to generate profit, while at the same time not providing the user with any useful functions that can compensate for its advertising activities.
Many people think that browser hijacker apps are as harmful as Trojan viruses, Spyware, Ransomware, or other hazardous forms of malware. However, this isn’t quite true – most hijackers (including SearcherBar) are mostly harmless to the system. Their activities do not damage anything in the computer they are installed. However, users still need to understand that keeping such an app installed in their PCs could potentially lead to some security issues. Again, the hijacker isn’t specifically designed to expose your machine to harm, but this may still happen as a by-product of the activities of the advertising software.
The main security hazard related to browser hijackers comes from their incessant generation of ads and page-redirects to different sites. The creators of most apps like SearcherBar and Top Captcha Solver don’t really care about the quality of the sites, services, or products their apps advertise as long as the ads bring them profits. In theory, this means that a hijacker may get you redirected to websites that spread Ransomware, Spyware, Trojans and other viruses, as long as those sites pay their commissions to the hijacker’s creators. Also, hackers oftentimes “steal” otherwise legitimate online ads and turn them into tools for spreading Ransomware and Trojans and if any of the browser hijacker’s ads have been stolen in this way, you could get your computer attacked by malware. That is why we strongly recommend that you check out the removal guide we have included on this page and try to complete all of its steps in order to remove the aggressively-advertising browser hijacker.
SUMMARY:
| Name | SearcherBar |
| Type | Browser Hijacker |
| Danger Level | Medium (nowhere near threats like Ransomware, but still a security risk) |
| Symptoms | Changes in different aspects of the browser is what typically indicates the presence of a hijacker. |
| Distribution Method | The creators of these apps oftentimes use file bundles to get their software installed on more systems. |
| Detection Tool |
We tested that SpyHunter successfully removes SearcherBar* and we recommend downloading it. Manual removal may take hours, it can harm your system if you re not careful, and SearcherBar may reinstall itself at the end if you don’t delete its core files. |
Remove SearcherBar
If you have a Windows virus, continue with the guide below.
If you have a Mac virus, please use our How to remove Ads on Mac guide.
If you have an Android virus, please use our Android Malware Removal guide.
If you have an iPhone virus, please use our iPhone Virus Removal guide
Some of the steps will likely require you to exit the page. Bookmark it for later reference.
Reboot in Safe Mode (use this guide if you don’t know how to do it).
WARNING! READ CAREFULLY BEFORE PROCEEDING!
Press CTRL + SHIFT + ESC at the same time and go to the Processes Tab (the “Details” Tab on Win 8 and 10). Try to determine which processes are dangerous.

Right click on each of them and select Open File Location. Then scan the files with our free online virus scanner:
Each file will be scanned with up to 64 antivirus programs to ensure maximum accuracy
This scanner is free and will always remain free for our website’s users.
This file is not matched with any known malware in the database. You can either do a full real-time scan of the file or skip it to upload a new file. Doing a full scan with 64 antivirus programs can take up to 3-4 minutes per file.
Drag and Drop File Here To Scan
Analyzing 0 s
Each file will be scanned with up to 64 antivirus programs to ensure maximum accuracy
This scanner is based on VirusTotal’s API. By submitting data to it, you agree to their Terms of Service and Privacy Policy, and to the sharing of your sample submission with the security community. Please do not submit files with personal information if you do not want them to be shared.
After you open their folder, end the processes that are infected, then delete their folders.
Note: If you are sure something is part of the infection – delete it, even if the scanner doesn’t flag it. No anti-virus program can detect all infections.
Hold together the Start Key and R. Type appwiz.cpl –> OK.

You are now in the Control Panel. Look for suspicious entries. Uninstall it/them.
Type msconfig in the search field and hit enter. A window will pop-up:
Startup —> Uncheck entries that have “Unknown” as Manufacturer or otherwise look suspicious.
Hold the Start Key and R – copy + paste the following and click OK:
notepad %windir%/system32/Drivers/etc/hosts
A new file will open. If you are hacked, there will be a bunch of other IPs connected to you at the bottom. Look at the image below:
If there are suspicious IPs below “Localhost” – write to us in the comments.
Open the start menu and search for Network Connections (On Windows 10 you just write it after clicking the Windows button), press enter.
- Right-click on the Network Adapter you are using —> Properties —> Internet Protocol Version 4 (ICP/IP), click Properties.
- The DNS line should be set to Obtain DNS server automatically. If it is not, set it yourself.
- Click on Advanced —> the DNS tab. Remove everything here (if there is something) —> OK.
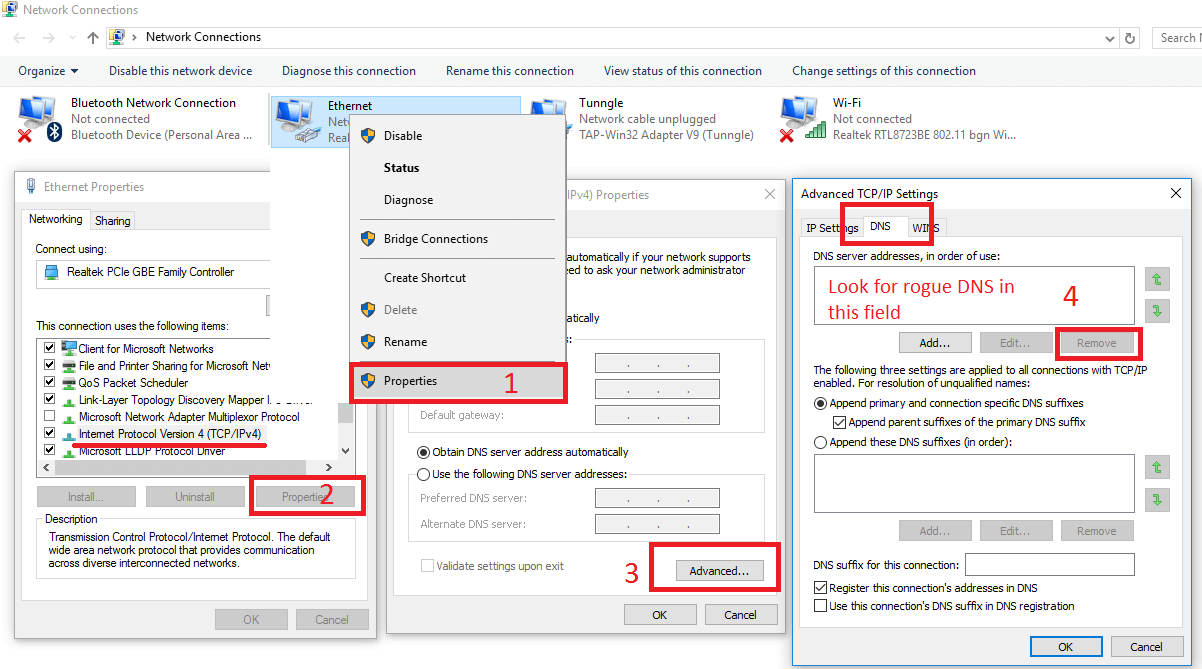
- After you complete this step, the threat will be gone from your browsers. Finish the next step as well or it may reappear on a system reboot.
Right click on the browser’s shortcut —> Properties.
NOTE: We are showing Google Chrome, but you can do this for Firefox and IE (or Edge).
Properties —–> Shortcut. In Target, remove everything after .exe.
Remove SearcherBar from Internet Explorer:
Open IE, click —–> Manage Add-ons.
Find the threat —> Disable. Go to —–> Internet Options —> change the URL to whatever you use (if hijacked) —> Apply.
Remove SearcherBar from Firefox:
Open Firefox, click ——-> Add-ons —-> Extensions.

Remove SearcherBar from Chrome:
Close Chrome. Navigate to:
C:/Users/!!!!USER NAME!!!!/AppData/Local/Google/Chrome/User Data. There is a Folder called “Default” inside:

Rename it to Backup Default. Restart Chrome.
Type Regedit in the windows search field and press Enter.
Inside, press CTRL and F together and type the threat’s Name. Right click and delete any entries you find with a similar name. If they don’t show up this way, go manually to these directories and delete/uninstall them:
- HKEY_CURRENT_USER—-Software—–Random Directory. It could be any one of them – ask us if you can’t discern which ones are malicious.
HKEY_CURRENT_USER—-Software—Microsoft—-Windows—CurrentVersion—Run– Random
HKEY_CURRENT_USER—-Software—Microsoft—Internet Explorer—-Main—- Random
If the guide doesn’t help, download the anti-virus program we recommended or try our free online virus scanner. Also, you can always ask us in the comments for help!
SEARCHERBAR is belong to potential unwanted programs (PUP) that hijacks web browser and aggressively displays annoying ads to people. It can enter your PC when you install free software, so you need to be very careful what you agree to install in the process. If you do not deselect hidden options, SEARCHERBAR will be installed silently. Once installed in your computer, it can destroy your browser setting and break your windows registry. Meanwhile, they can present web search results laced with sponsored links or various other unwanted links.

hijacks web browser to redirect users
Besides, SEARCHERBAR can redirect you to other malicious websites, in most instances, when you type the special URL in your browsers, to your surprise, they will redirect you to other pages, which are really annoying. Thus, in these page different pop-ups, banners, search suggestions, sponsored link advertisements have been displayed. Obviously, SEARCHERBAR are objective to trying their best to attracting you to their domains, in this case, the creators of SEARCHERBAR to make money. More severely, it is used to collect sensitive information, such as banking data, various logging and passwords. That is the reason why this malware infection should not be left unattended. As you can see, SEARCHERBAR are bad to your computer, and they should be removed as soon as possible.
How to Remove SEARCHERBAR? (Windows + Mac OS)
Section A – SEARCHERBAR Removal Steps For Windows OS
(NOTE – Please bookmark this page first, because some steps will require you to restart your web browser or computer.)
Step 1. End malicious process run by SEARCHERBAR and related malware.
1. Hit Ctrl + Shift + Esc keys at the same time to open Windows Task Manager:

2. Find malicious process related with SEARCHERBAR or malware, and then right-click on it and click End Process or End Task.

Step 2. Uninstall malicious programs related with SEARCHERBAR.
Press “Win + R ” keys together to open the Run screen;

Type control panel in the Run window and click OK button;

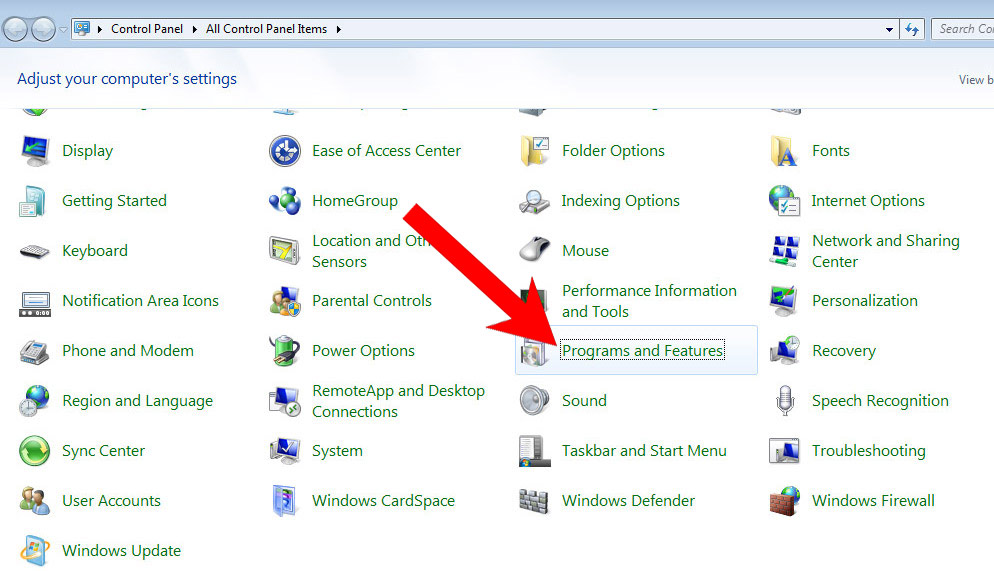
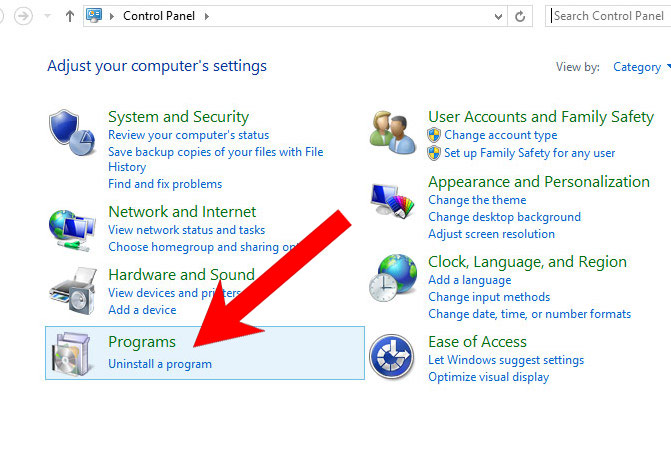
In Control Panel, click Uninstall a program under Programs;

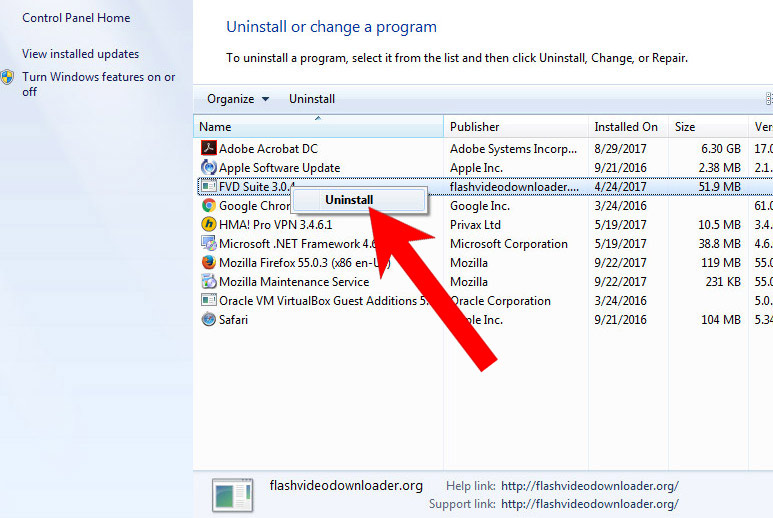
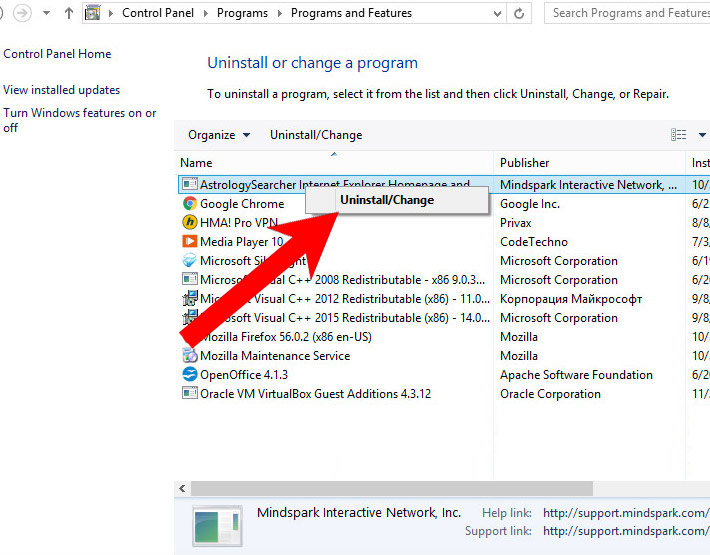
Look for malicious app related with SEARCHERBAR; Right-click on the malicious program and click Uninstall.

Step 3. Delete extension installed by SEARCHERBAR and related malware.
Chrome
On Chrome
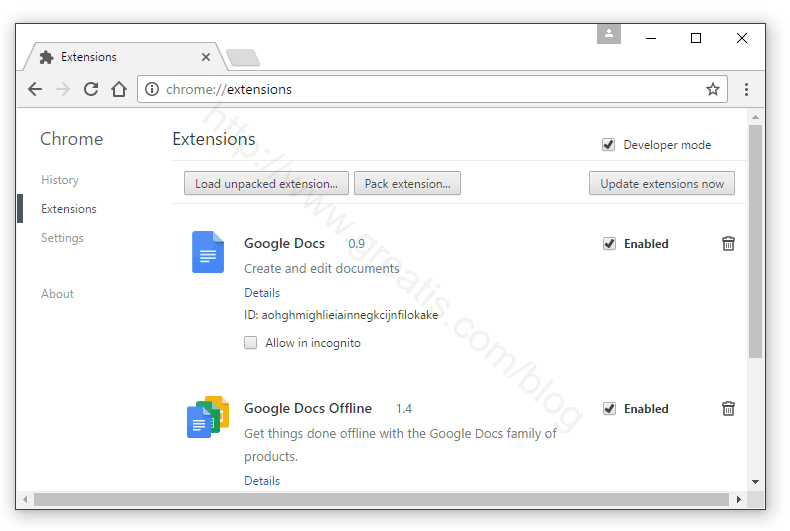
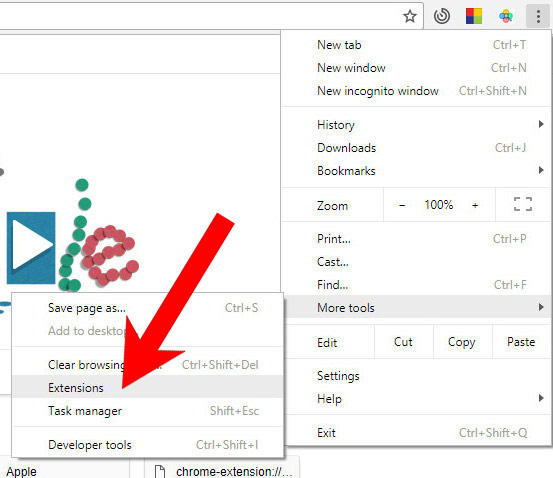
Click the Chrome menu button >> Click Tools >> Select Extensions:

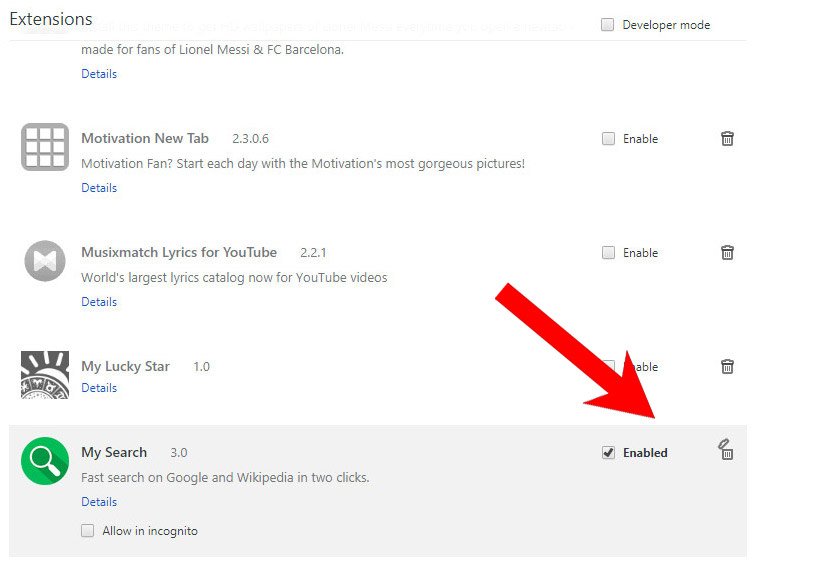
Find extension that may be related with SEARCHERBAR or potential threat >> Click the trash can icon to delete them.

Microsoft Edge
On Microsoft Edge
Start Edge: Click the More (…) button ahe tog right corner and click Extensions:

Select the extensions you want to remove and click Remove:


Firefox
On Firefox
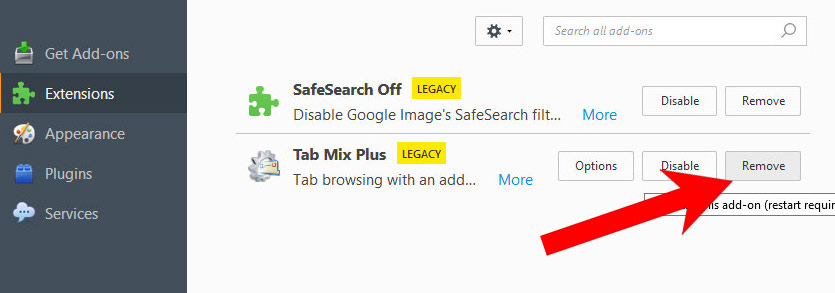
Click the menu button and choose Add-ons. The Add-ons Manager tab will open.

In the Add-ons Manager tab, select the Extensions panel >> find extension that may be related with SEARCHERBAR or potential threat >> Click Remove button.

IE
On Internet Explorer
Open the IE, click the Tools button , and then click Manage add-ons.

Choose Toolbars and Extensions on left side of the window >> Find extension that may be related with SEARCHERBAR or potential threat>> Click Disable button

Step 4. Remove malicious files created by SEARCHERBAR or related malware.
1. Hit Windows + R keys at the same time to open Run window and input a regedit and click OK:

2. In the Registry Editor, hit Windows key + F key together to open Find window → Enter virus name → Press Enter key to start search.

3. When the search is completed, right click the folders related with SEARCHERBAR and click Delete button:

Please Read This Before You Remove Registry Files
PLEASE Be Carefully, Do Not Delete Healthy Registry Entries, Or Your Computer May Be Damaged.
If you are not able to determine which regsitry files are malicious, we recommend downloading SpyHunter Anti-malware to scan entire system and find out all malicious files. It can avoid mistakes and may reduce the cleanup time from hours to minutes.
Download SpyHunter For Windows (Free Trial)
Free Remover allows you, subject to a 48-hour waiting period, one remediation and removal for results found. Read our EULA, Privacy Policy, Cookie Policy . See more Free SpyHunter Remover details.
Step 5. Reset Web Browsers to remove Hijackers Brought by SEARCHERBAR.
Chrome
Reset Chrome:
- Click the Chrome menu button, represented by three horizontal lines;
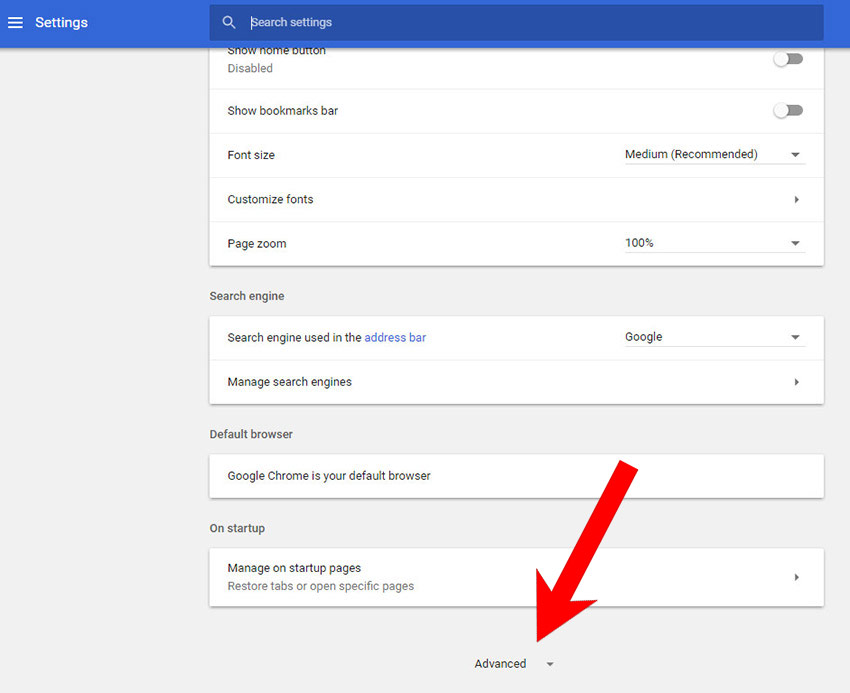
- Click Settings when the drop-down menu appears;
- In the Settings screen, scroll to the bottom of the page and click on the “Advanced” link;
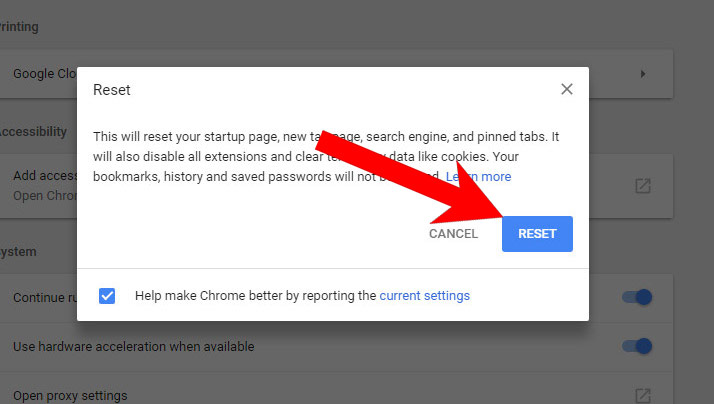
- Click on the “Reset settings to their original defaults” button.
- A confirmation dialog appears, click on the “Reset Settings” button.
Edge
Reset Microsoft Edge:
- Click on Microsoft Edge’s main menu button, represented by three horizontal dots;
- Click on “Settings“ button when the drop-down menu appears;
- Click on “Reset Settings”On the left side of the window;
- Click on “Restore settings to their default values”
- Click on the “Reset” button in the new confirmation window that opens.
Firefox
Reset Firefox:
- Click the menu button of firefox, represented by three horizontal lines;
- Click on “Help“ button when the drop-down menu appears;
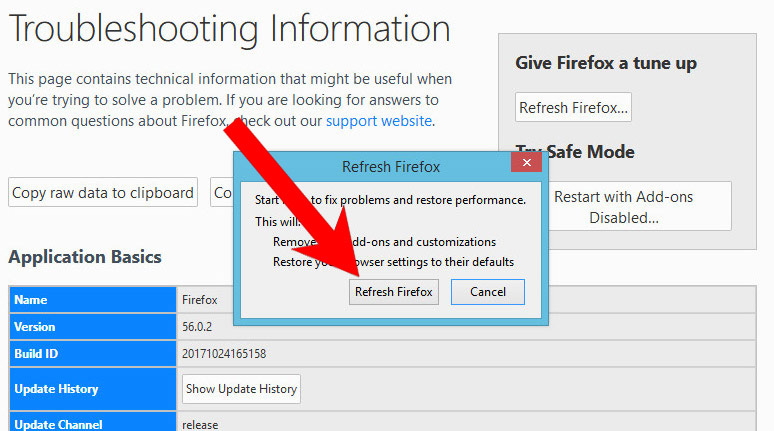
- Click on “Troubleshooting Information“ from the Help menu;
- Click the “Refresh Firefox” button in the upper-right corner of the “Troubleshooting Information” page.
- Click on the “Refresh Firefox” button in the new confirmation window that opens.
IE
Reset IE :
- Open Internet Explorer, click on the gear icon in the upper-right part of your browser, then select “Internet Options“.
- Now select the “Advanced” tab, then click on the “Reset” button
- In the “Reset Internet Explorer settings” section, select the “Delete personal settings” checkbox, then click on the “Reset” button.
NOTE – If the steps above doesn’t help, please rescan entire infected PC with Spyhunter anti-malware and let it help you fix all problems.
Section B – SEARCHERBAR Removal Steps For Mac OS
Step 1 – Remove nasty extension and browser hijacker related with SEARCHERBAR or malware.
Chrome
– Click the setting button “≡” at the top right of the browser window, choose “More Tools” and choose “Extensions“.

– Click the “trash can icon” button to remove extension related with SEARCHERBAR or malware:

Safari
Safari:
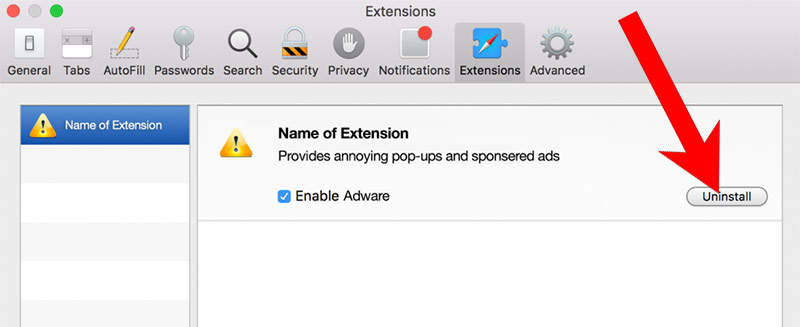
– Choose Safari > Preferences

– On the ‘Extensions’ tab, find out the extension related with adware or hijacker and click Uninstall or Disable

Firefox
Mozilla Firefox:
– Click the settings button (three horizontal bars) in the top-right corner and then select ‘Add-ons’.

– Click “Extensions” tab under Add-on Manager page to view the extensions.
– Find the suspicious add-on you want to disable and click its “Disable” button.
– If you want to delete an extension entirely, click “Remove.”

Malicious browser extensions hijack your Google Search and redirect you to unwanted websites. To get rid of related search hijacker, you need to delete core files of SEARCHERBAR and related malware. We recommend downloading SpyHunter Mac Antimalware to remove all malicious apps and hijacker for you. This may save you hours and ensure you don’t make mistakes that harm your system
Download SpyHunter For Mac (Free Trial)
Free Remover allows you, subject to a 48-hour waiting period, one remediation and removal for results found. Read our EULA, Privacy Policy, Cookie Policy . See more Free SpyHunter Remover details.
Step 2 – Uninstall harmful Apps related with SEARCHERBAR or malware
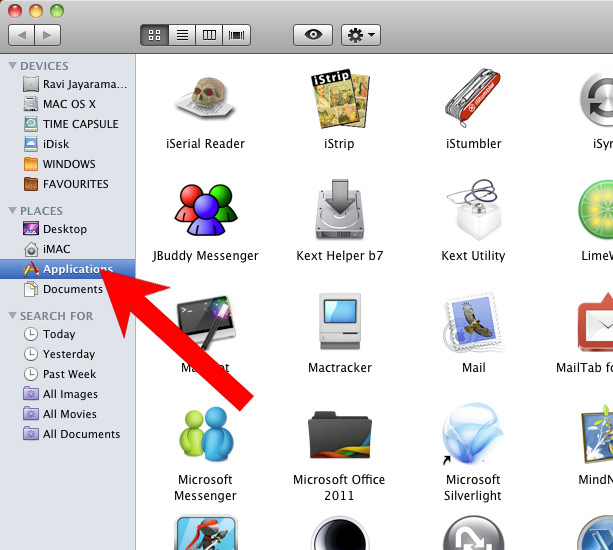
– Open Finder at the Dock

– Select Applications and find out suspicious apps related with SEARCHERBAR , then right click on the app and click Move to Trash:

– Right click on Trash icon to select Empty Trash

Step 3 – Remove malicious files generated by SEARCHERBAR or malware from your Mac
Malware geneates lots of malicious files and folders on infected Mac, to avoid SEARCHERBAR reinstalling itself, you need to find out and remove all malicious files:
1. Click the Finder icon from the menu bar >> choose “Go” then click on “Go to Folder“:

2. In the Go to Folder… bar, type “/Library/LaunchAgents” and click Go:

3. In LaunchAgents folder, search for any recently-added suspicious files and move them to the Trash.

Here are some examples of files generated by malware:
“installmac.AppRemoval.plist”, “com.genieo.completer.download.plist” “com.genieoinnovation.macextension.plist” “com.genieo.engine.plist” “com.adobe.fpsaud.plist” , “myppes.download.plist”, “mykotlerino.ltvbit.plist”
4.Repeat the process on the following folders:
~/Library/LaunchAgents

/Library/Application Support

/Library/LaunchDaemons

Step 4 – Download SpyHunter Antimalware For Mac to Scan For Malicious Apps and Files.
Lots of Malware keep generating malicious files on infected computer deeply, thus it’s quite difficult for common computer users to find out and remove all harmful items related with SEARCHERBAR. Meanwhile, there will be possibility that users remove core system files by mistake and then the entire computer will be harmed seriously.
To avoid the risks, We recommend all users downloading SpyHunter Antimalware For Mac, a professional automatic malware removal tool which keeps your Mac away from virus and malware attack and avoid online spam and phishing websites and protect your privacy and files well.
1. Click Download button here to download SpyHunter For Mac:
Download SpyHunter For Mac (Free Trial)
(Free Remover allows you, subject to a 48-hour waiting period, one remediation and removal for results found. Read itsEULA, Privacy Policy See more Free SpyHunter Remover details.)
2. Double-click SpyHunter-1.2-15-7043-Installer.dmg to install Spyhunter For Mac:
3. Once SpyHunter For Mac is installed, run a scan and register its full version to remove all malicious objects on your Mac.

4. In case SEARCHERBAR is still infecting your Mac, Submit a Support Ticket and the support agent will conact to help you.

If SearcherBar has received set up in your browser, you will discover several alters in the browser once you initiate a new on the internet session. The clearest changes would be the substitute of the home web page and the new-tab website addresses. Also, the search web page that your browser implements by default when carrying out your internet searchers would on top of that most likely be altered by SearcherBar. The objective of all these kinds of changes in the mode of your browser is to set up it simpler for the unnecessary app to get you led to a quantity of preset websites. The owners of those web pages pay the publishers of SearcherBar a commission for the website-exhibiting service supplied by the browser-directing app. The etc. people have this program on their machines, the wiser the leak the advertised pages would get, which, in turn, causes a wiser revenue for the publishers of SearcherBar.
What is a hijacker and why it’s vital to uninstall it
Download Removal Toolto remove SearcherBar
A hijacker is any kind of software which gets setup in the browser and attempts to fill it with commercial ads, leads, or other advertisement-supported materials with the intention to advertise certain goods, functions, or web pages so as to generate revenue, regardless of the fact that simultaneously not displaying the user with any beneficial operates which can compensate for its advertisement-supported processes.
A load of people assume that hijacker applications are as malign as Trojan malware, malicious software, Ransomware, or other dangerous formats of malware threats. However, this isn’t pretty valid – a majority of attackers (which include SearcherBar) are generally innocuous to the machine. Their movements don’t wreck anything in the device they are set up. However, people regardless must know that keeping such an app set up inside their devices may potentially result in some defense obstacles. Again, the browser hijacker isn’t specially meant to subject your device to damage, but this may regardless transpire as a by-piece of the behaviour of the promotional tools.
The primary security risk connected with browser attackers comes from their incessant generation of advertisements and portal-directs to various pages. The makers of the biggest part of applications like SearcherBar and Top Captcha Solver don’t genuinely care about the value of the web pages, functions, or pieces their applications promote whilst the ads bring them income. In theory, this shows that a browser hijacker could get you directed to pages that are distributed Ransomware, malware, Trojans and other malware, whilst these pages pay their commissions to the intruder’s makers. Also, cyber crooks as generally “steal” otherwise decent online advertisements and turn them onto applications for circulating Ransomware and Trojans and if one of the browser hijacker’s ads have been stolen that way, you may receive your machine contaminated by viruses. In other words why we firmly suggest you to look at the elimination guidelines we have added on this website and attempt to execute all of its steps so as to eliminate the aggressively-advertising-supported hijacker.
Download Removal Toolto remove SearcherBar
Learn how to remove SearcherBar from your computer
- Step 1. SearcherBar Removal from Windows
- Step 2. Delete SearcherBar from browsers
Step 1. SearcherBar Removal from Windows
a) Windows 7/XP
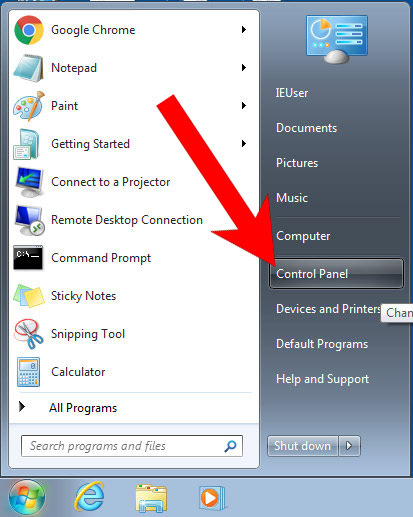
- Press on the Start icon.

- Control Panel → Programs and Features.

- Find the program you want to delete and press Uninstall.

b) Windows 8
- Right-click on the start icon (lower left corner).

- Select Control Panel.
- Click Programs and Features.

- Find and remove all unwanted programs.

c) Windows 10
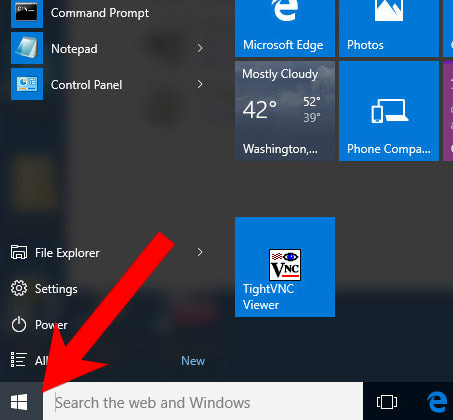
- Open Start menu and click on the magnifying glass (next to the shut down button).
- Type in Control Panel.
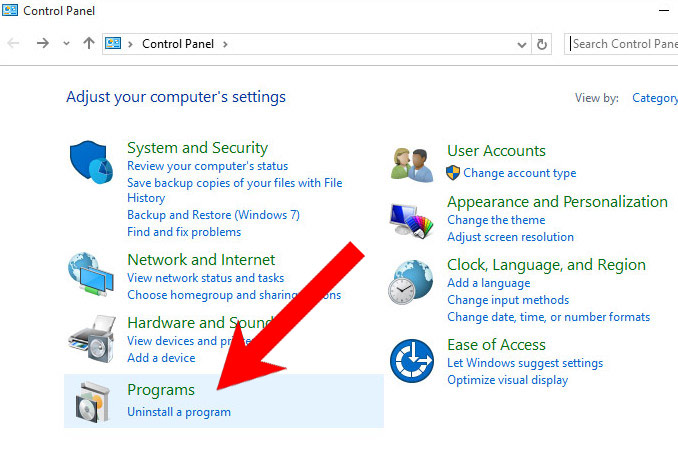
- Control Panel → Programs and Features.

- Find and remove all unwanted programs.

d) Mac OS X
- Open Finder and press Applications.

- Check all suspicious programs you want to get rid of.
- Drag them to the trash icon in your dock (Alternatively, right-click on the program and press Move to Trash).

- After you move all the unwanted programs, right-click on the trash icon and select Empty Trash.

Step 2. Delete SearcherBar from browsers
a) Remove SearcherBar from Microsoft Edge
Reset Microsoft Edge (Method 1)
- Open Microsoft Edge.
- Press More located at the top right corner of the screen (the three dots).
- Settings → Choose what to clear.
- Check the boxes of the items you want removed, and press Clear.
- Press Ctrl + Alt + Delete together.
- Choose Task Manager.
- In the Processes tab, find the Microsoft Edge process, right click on it, and press Go to details (or More details if Go to details is not available).

- Right-click on all Microsoft Edge processes, and choose End task.
(Method 2)
Before you proceed with this method, backup your data.
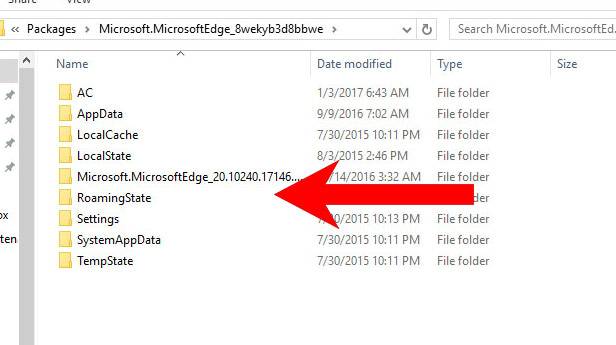
- Go to C:\Users\%username%\AppData\Local\Packages\Microsoft.MicrosoftEdge_xxxxxxxxxx.
- Select all the folders, right-click on them and press Delete.

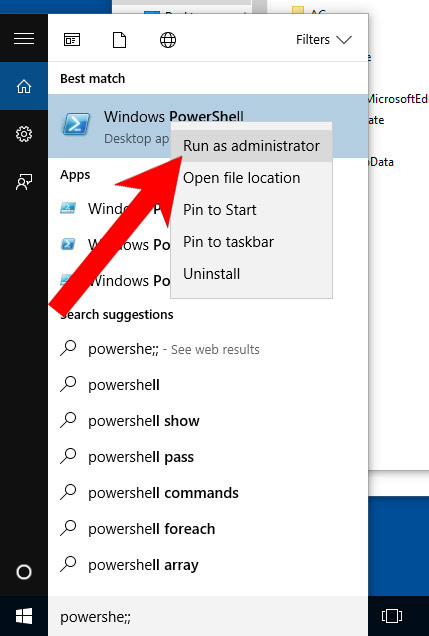
- Press the start button, and type in Windows PowerShell in the search box.
- Right-click on the result, and select Run as administrator.

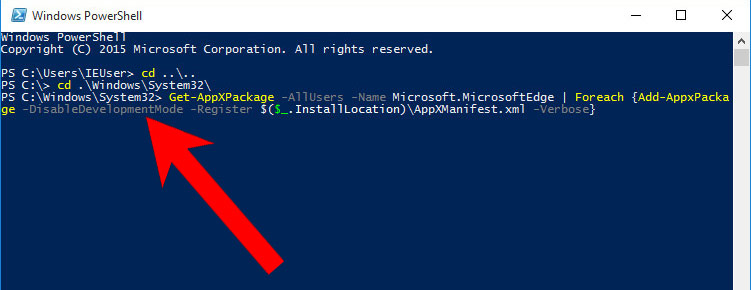
- In Administrator: Windows PowerShell, paste
Get-AppXPackage -AllUsers -Name Microsoft.MicrosoftEdge | Foreach {Add-AppxPackage -DisableDevelopmentMode -Register $($_.InstallLocation)\AppXManifest.xml -Verbose}
under PS C:\WINDOWS\system32> and tap Enter.
- The issue should be gone now.
b) Remove SearcherBar from Internet Explorer
- Open Internet Explorer and press on the Gear icon.
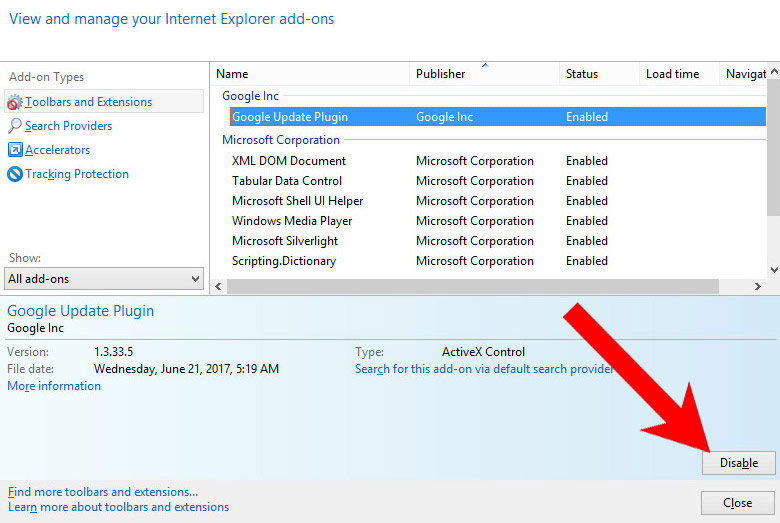
- Select Manage add-ons, and then Toolbars and Extensions.
- Find and disable all suspicious extensions.

- Close the window.
c) Restore your homepage on Internet Explorer
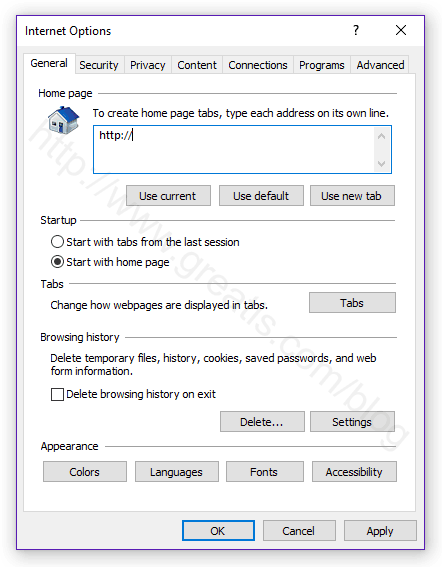
- Open Internet Explorer and press on the Gear icon.
- Internet Options → General tab. Delete the homepage URL and type in your preferred one.
- Press Apply.
d) Reset Internet Explorer
- Open Internet Explorer and press on the Gear icon.
- Internet Options → Advanced tab.

- At the bottom, you will see a Reset button. Press that.
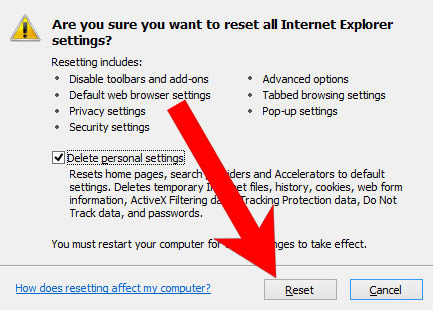
- In the window that appears, check the box that says Delete personal settings.

- Press Reset.
- Click OK to exit the window.
- Restart your browser.

e) Remove SearcherBar from Google Chrome
- Open Google Chrome and press the menu icon on the right, next to the URL field.
- Choose More tools and Extensions.

- Remove suspicious extensions by clicking the Trash icon next to them.

- If you are not certain about an extension, you can disable it by unchecking the box that says Enabled. If you later decide to keep it, simply check the box again.
Download Removal Toolto remove SearcherBar
* WiperSoft scanner, available at this website, only works as a tool for virus detection. More data on WiperSoft. To have WiperSoft in its full capacity, to use removal functionality, it is necessary to acquire its full version. In case you want to uninstall WiperSoft, click here.
f) Restore your homepage on Google Chrome
- Open Google Chrome and press the menu icon on the right, next to the URL field.
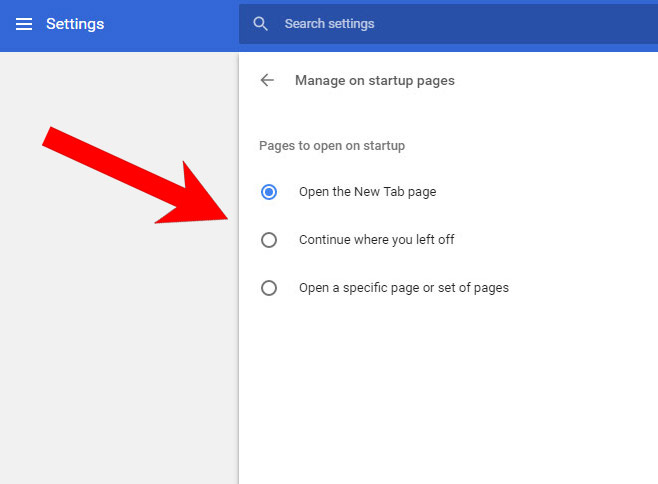
- Choose Settings.
- In the window that appears, under On startup, there will be a Set pages option. Press on that.
- Remove the set website, and type in the one you prefer to be your homepage. Press OK.

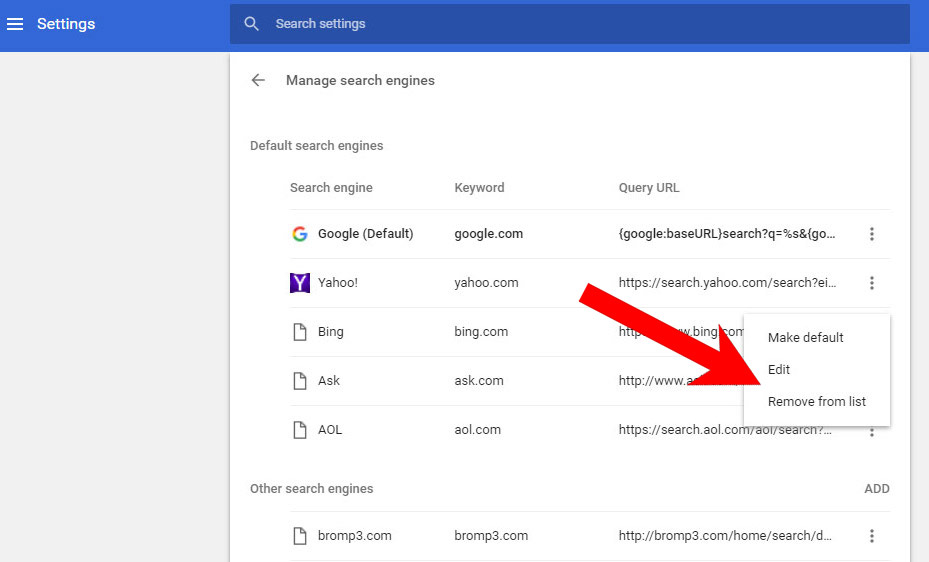
- In Settings, under Search, there is a Manage search engines option. Select that.

- Remove all search engines except the one you want to use. Click Done.
g) Reset Google Chrome
- Open Google Chrome and press the menu icon on the right, next to the URL field.
- Choose Settings.
- Scroll down and press on Show advanced settings.

- Find and press the Reset button.

- In the confirmation window that appears, press Reset.
h) Remove SearcherBar from Mozilla Firefox
- Open Mozilla Firefox and access the menu by clicking on the three bars on the right of the screen.
- Select Add-ons.
- Select the Extensions tab, and remove all questionable extensions.

- If you are not certain about an extension, you can disable it by clicking Disable. If you later decide to keep it, simply press Enable.
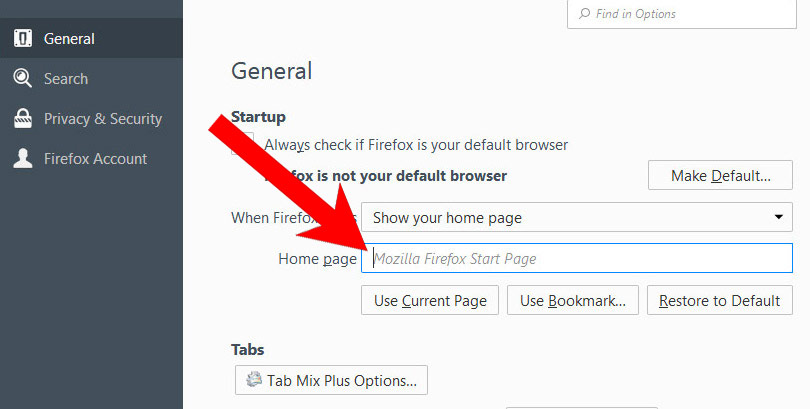
i) Restore your homepage on Mozilla Firefox
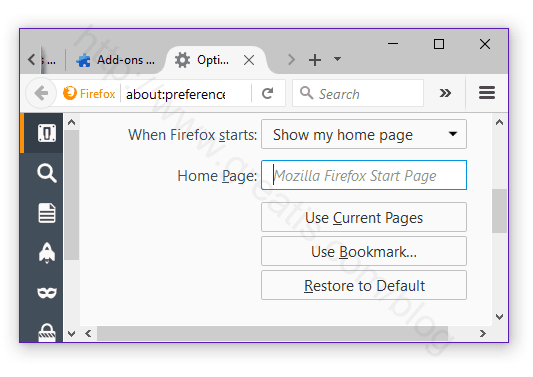
- Open Mozilla Firefox and access the menu by clicking on the three bars on the right side of the screen.
- Select Options.
- In General, click Restore to Default below the Home Page field.

j) Reset Mozilla Firefox
- Open Mozilla Firefox and access the menu by clicking on the three bars on the right of the screen.
- Press the question mark at the bottom of the menu.
- Select Troubleshooting Information.
- Select the Refresh Firefox option.

k) Remove SearcherBar from Safari (for Mac)
- Open Safari.
- Select Preferences (can be accesses by pressing on Safari at the top of your screen).
- Choose the Extensions tab.
- Uninstall all questionable extensions.

- If you are not certain about an extension, you can disable it by unchecking the box that says Enabled. If you later decide to keep it, simply check the box again.
l) Reset Safari
If you are using the Yosemite, El Capitan or the Sierra versions, the option to reset Safari with one click is not available. Thus you will have to clear the history and empty the caches in separate steps.
- Open Safari.
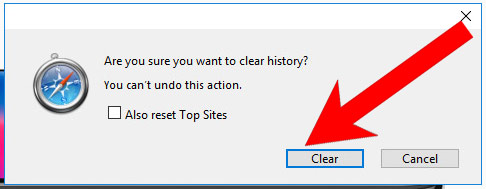
- Select Clear History (can be accesses by pressing on Safari at the top of your screen).
- Choose from what time you want the history deleted, and press Clear History.

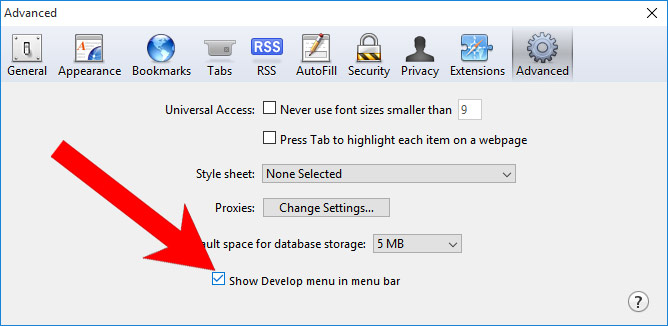
- Press on Safari at the top of the screen and select Preferences.

- Select the Advanced tab and check the box next to Show Develop menu in menu bar.
- Select Develop (from the menu bar at the top of the screen).

- Press Empty Caches.
If for some reason you are unable to remove the extensions or reset your browsers, it may be a good idea to obtain anti-spyware software and have it deal with the problem.
Удалить Secure Search Bar из Google Chrome, Mozilla Firefox, Internet Explorer
- Что такое Secure Search Bar
- Скачать утилиту для удаления Secure Search Bar
- Удалить Secure Search Bar вручную
- Удалить Secure Search Bar из Google Chrome
- Удалить Secure Search Bar из Mozilla Firefox
- Удалить Secure Search Bar из Internet Explorer
- Удалить Secure Search Bar из Windows 10
- Удалить Secure Search Bar из Windows 8/8.1
- Удалить Secure Search Bar из Windows 7
- Сбросить настройки браузеров
- Получить проффесиональную поддержку
- Читать комментарии
Информация об угрозе
Название угрозы:Secure Search Bar
Исполяемый файл:(randomname).dll
Тип угрозы:Toolbars
Затронутые ОС:Win32/Win64 (Windows XP, Vista/7, 8/8.1, Windows 10)
Затронутые браузеры:Google Chrome, Mozilla Firefox, Internet Explorer, Safari
Secure Search Bar устанавливается на ваш компьютер вместе с бесплатными программами. Этот способ можно назвать «пакетная установка». Бесплатные программы предлагают вам установить дополнительные модули (Secure Search Bar). Если вы не отклоните предложение установка начнется в фоне. Secure Search Bar копирует свои файлы на компьютер. Обычно это файл (randomname).dll. Иногда создается ключ автозагрузки с именем Secure Search Bar и значением (randomname).dll. Вы также сможете найти угрозу в списке процессов с именем (randomname).dll или Secure Search Bar. также создается папка с названием Secure Search Bar в папках C:\Program Files\ или C:\ProgramData. После установки Secure Search Bar начинает показывать реламные баннеры и всплывающую рекламу в браузерах. рекомендуется немедленно удалить Secure Search Bar. Если у вас есть дополнительные вопросы о Secure Search Bar, пожалуйста, укажите ниже. Вы можете использовать программы для удаления Secure Search Bar из ваших браузеров ниже.
Наша служба тех. поддержки удалит Secure Search Bar прямо сейчас!
Обратитесь в нашу службу технической поддержки с проблемой связанной с Secure Search Bar. Опишите все обстоятельства заражения Secure Search Bar и его последствия. Команда предоставит вам варианты решения этой проблемы бесплатно в течении нескольких часов.
Подать запрос в тех. поддержку
Описание угрозы и инструкции по удалению предоставлены аналитическим отделом компании Security Stronghold.
Здесь вы можете перейти к:
- Техническое описание угрозы Secure Search Bar.
- Инструкции по удалению Secure Search Bar вручную.
- Скачать утилиту для удаления Secure Search Bar.
Как удалить Secure Search Bar вручную
Проблема может быть решена вручную путем удаления файлов, папок и ключей реестра принадлежащих угрозе Secure Search Bar. Поврежденные Secure Search Bar системные файлы и компоненты могут быть восстановлены при наличии установочного пакета вашей операционной системы.
Чтобы избавиться от Secure Search Bar, необходимо:
- (randomname).dll
Предупреждение: нужно удалить только файлы с именами и путями указанными здесь. В системе могут находится полезные файлы с такими же именами. Мы рекомендуем использовать утилиту для удаления Secure Search Bar для безопасного решения проблемы.
- (randomname)
no information
Предупреждение: если указано значение ключа реестра, значит необходимо удалить только значение и не трогать сам ключ. Мы рекомендуем использовать для этих целей утилиту для удаления Secure Search Bar.
Удалить программу Secure Search Bar и связанные с ней через Панель управления
Мы рекомендуем вам изучить список установленных программ и найти Secure Search Bar а также любые другие подозрительные и незнакомы программы. Ниже приведены инструкции для различных версий Windows. В некоторых случаях Secure Search Bar защищается с помощью вредоносного процесса или сервиса и не позволяет вам деинсталлировать себя. Если Secure Search Bar не удаляется или выдает ошибку что у вас недостаточно прав для удаления, произведите нижеперечисленные действия в Безопасном режиме или Безопасном режиме с загрузкой сетевых драйверов или используйте утилиту для удаления Secure Search Bar.
Windows 10
- Кликните по меню Пуск и выберите Параметры.
- Кликните на пункт Система и выберите Приложения и возможности в списке слева.
- Найдите Secure Search Bar в списке и нажмите на кнопку Удалить рядом.
- Подтвердите нажатием кнопки Удалить в открывающемся окне, если необходимо.
Windows 8/8.1
- Кликните правой кнопкой мыши в левом нижнем углу экрана (в режиме рабочего стола).
- В открывшимся меню выберите Панель управления.
- Нажмите на ссылку Удалить программу в разделе Программы и компоненты.
- Найдите в списке Secure Search Bar и другие подозрительные программы.
- Кликните кнопку Удалить.
- Дождитесь завершения процесса деинсталляции.
Windows 7/Vista
- Кликните Пуск и выберите Панель управления.
- Выберите Программы и компоненты и Удалить программу.
- В списке установленных программ найдите Secure Search Bar.
- Кликните на кнопку Удалить.
Windows XP
- Кликните Пуск.
- В меню выберите Панель управления.
- Выберите Установка/Удаление программ.
- Найдите Secure Search Bar и связанные программы.
- Кликните на кнопку Удалить.
Удалите дополнения Secure Search Bar из ваших браузеров
Secure Search Bar в некоторых случаях устанавливает дополнения в браузеры. Мы рекомендуем использовать бесплатную функцию «Удалить тулбары» в разделе «Инструменты» в программе Spyhunter Remediation Tool для удаления Secure Search Bar и свяанных дополнений. Мы также рекомендуем вам провести полное сканирование компьютера программами Wipersoft и Spyhunter Remediation Tool. Для того чтобы удалить дополнения из ваших браузеров вручную сделайте следующее:
- Запустите Internet Explorer и кликните на иконку шестеренки в верхнем правом углу
- В выпадающем меню выберите Настроить надстройки
- Выберите вкладку Панели инструментов и расширения.
- Выберите Secure Search Bar или другой подозрительный BHO.
- Нажмите кнопку Отключить.
Предупреждение: Эта инструкция лишь деактивирует дополнение. Для полного удаления Secure Search Bar используйте утилиту для удаления Secure Search Bar.
- Запустите Google Chrome.
- В адресной строке введите chrome://extensions/.
- В списке установленных дополнений найдите Secure Search Bar и кликните на иконку корзины рядом.
- Подтвердите удаление Secure Search Bar.
- Запустите Firefox.
- В адресной строке введите about:addons.
- Кликните на вкладку Расширения.
- В списке установленных расширений найдите Secure Search Bar.
- Кликните кнопку Удалить возле расширения.
Сбросить настройки поиска и домашней страницы в браузерах
Secure Search Bar заражает ваши браузеры, а именно подменяет настройки поиска домашней страницы и новой вкладки в браузерах Google Chrome, Mozilla Firefox и Internet Explorer. Мы рекомендуем вам использовать бесплатную функцию Сбросить настройки браузеров в меню Инструменты в Spyhunter Remediation Tool, чтобы сбросить настройки всех установленных браузеров. Учтите, что перед этим необходимо деинсталлировать все программы связанные с Secure Search Bar и удалить все файлы созданные этими программами. Для сброса настроек вручную и восстановления домашний страницы выполните следующие действия:
- Если вы используете Windows XP, кликните Пуск, и кликните Выполнить. В окне Запуск введите «inetcpl.cpl» без кавычек, и нажмите Enter.
- Если вы используете Windows 7 или Windows Vista, кликните Пуск. В окне поиска введите «inetcpl.cpl» без кавычек, и нажмите Enter.
- Выберите вкладку Дополнительно.
- Кликните кнопку Сброс…, которая расположена ниже.
- Отметьте галочку Удалить личные настройки и кликните кнопку Сброс.
- После завершения, кликните Закрыть в окне Сброс параметров настройки Internet Explorer.
Предупреждение: В случае если это не срабатывает, используйте бесплатную функцию Сбросить настройки браузеров в разделе Инструменты в Spyhunter Remediation Tool.
- Зайдите в папку с установленным Google Chrome: C:\Users\»имя пользователя»\AppData\Local\Google\Chrome\Application\User Data.
- В папке User Data, найдите файл Default и переименуйте его в DefaultBackup.
- Запустите Google Chrome и будет создан новый файл Default.
- Таким образом настройки будут сброшены.
Предупреждение: Эта опция может не сработать если ваш Google Chrome использует синхронизацию с другим компьютером. В этом случае используйте функцию Сбросить настройки браузеров в разделе Инструменты в Spyhunter Remediation Tool.
- Откройте Mozilla Firefox.
- Кликните на иконку с тремя горизонтальными линиями и затем на иконку вопросительного знака и выберите Информация для решения проблем.
- Кликните на кнопку Сбросить Firefox.
- После завершения процедуры Firefox создаст резервную папку на рабочем столе. Нажмите Завершить.
Предупреждение: Используя эту функцию вы также сбросите все запомненые пароли к сайтам. Если вы этого не хотите используйте функцию Сбросить настройки браузеров в разделе Инструменты в Spyhunter Remediation Tool.
Следующее описаниее: Bigslide.ru »
« Вернуться в каталог