

This tutorial will show you how to remove a included folder or drive from a library for your account in Windows 11.
Windows 7 introduced libraries, which provide users with a single, coherent view of their files even when those files are stored in different locations. Libraries can be configured and organized by a user and a library can contain folders that are found on the user’s computer and also folders that have been shared over a network. Libraries present a simpler view of the underlying storage system because, to the user, the files and folders in a library are displayed in one single view location, no matter where they are actually physically stored.
In File Explorer, users interact with libraries in ways similar to how they would interact with other folders. Libraries are built upon the legacy known folders (such as Camera Roll, Documents, Music, Pictures, Saved Pictures, and Videos), and these known folders are automatically included in the default libraries and set as the default save location.
References:

Windows Libraries — Win32 apps
Windows 7 introduces libraries, which provide users with a single, coherent view of their files even when those files are stored in different locations.
docs.microsoft.com
Windows Libraries
All about Windows Libraries, which are containers for users’ content, such as Documents and Pictures.
docs.microsoft.com
Removing an included folder or drive from a library does not delete the folder/drive or the contents of the folder/drive.
Here’s How:
1 Open Libraries in File Explorer (Win+E).
2 Perform one of the following actions: (see screenshots below)
- Select the library (ex: «Pictures») you want to remove a folder or drive from, click/tap on the See more (3 dots) button on the command bar, and click/tap on Properties.
- Right click or press and hold on the library (ex: «Pictures») you want to remove a folder or drive from, and click/tap on Properties.

3 Select the included folder location you want to remove, and click/tap on Remove. (see screenshot below)

4 Click/tap on OK to apply. (see screenshot below)
That’s it,
Shawn Brink
Related Tutorials
- Add or Remove Libraries in Navigation Pane of File Explorer in Windows 11
- Create New Library in Windows 11
- Include Folder or Drive in Library in Windows 11
- Change Default Save Locations for Libraries in Windows 11
- Change Order of Library Locations in Windows 11
- Restore Default Settings of Library in Windows 11
- Change Icon of Library in Windows 11
- Restore Default Libraries in Windows 11
- Add or Remove Libraries Desktop Icon in Windows 11
Last edited:
-
-
#2
I was never a of fan of Libraries, so I just show and use Quick Access folders. Is there any benefit to using Libraries, instead?

-
- OS
- Windows 11
- Computer type
- Laptop
- Manufacturer/Model
- Microsoft 15″ Surface Laptop 4
- CPU
- AMD Ryzen 7
- Memory
- 8GB
- Graphics Card(s)
- AMD Radeon
- Hard Drives
- 512GB WD SSD
- Internet Speed
- 384 Mbps per attached network device
- Browser
- MS Edge
- Antivirus
- Windows Defender
-
- Operating System
- Windows 11
- Computer type
- PC/Desktop
- Manufacturer/Model
- Dell XPS 8950
- CPU
- 12th Gen Intel(R) Core(TM) i9-12900K, 3200 Mhz, 16 Core(s), 24 Logical Processor(s)
- Memory
- 32 GB DDR5
- Graphics card(s)
- NVIDIA GeForce GTX 1660 Ti
- Monitor(s) Displays
- 32″ Samsung
- Mouse
- Logitech MX Master 3 (BT)
- Keyboard
- Arteck (BT)
- Internet Speed
- 990 Mbps
- Browser
- MS Edge/Floorp
- Antivirus
- Windows Defender/Malwarebytes
-
-
#3
I was never a of fan of Libraries, so I just show and use Quick Access folders. Is there any benefit to using Libraries, instead? [ATTACH type=»full»
Hello dwall,
It really depends on your usage.
Quick access is basically just a place to quickly open recent and pinned locations from. Think shortcuts.
A library is basically a way to access the files from different locations in one place instead.
-
- OS
- Windows 11 Pro for Workstations
- Computer type
- PC/Desktop
- Manufacturer/Model
- Custom self build
- CPU
- Intel i7-8700K 5 GHz
- Motherboard
- ASUS ROG Maximus XI Formula Z390
- Memory
- 64 GB (4x16GB) G.SKILL TridentZ RGB DDR4 3600 MHz (F4-3600C18D-32GTZR)
- Graphics Card(s)
- ASUS ROG-STRIX-GTX1080TI-O11G-GAMING (11GB GDDR5X)
- Sound Card
- Integrated Digital Audio (S/PDIF)
- Monitor(s) Displays
- 2 x Samsung Odyssey G75 27″
- Screen Resolution
- 2560×1440
- Hard Drives
- 1TB Samsung 990 PRO M.2,
4TB Samsung 990 PRO M.2,
8TB WD MyCloudEX2Ultra NAS
- PSU
- Seasonic Prime Titanium 850W
- Case
- Thermaltake Core P3 wall mounted
- Cooling
- Corsair Hydro H115i
- Keyboard
- Logitech wireless K800
- Mouse
- Logitech MX Master 3
- Internet Speed
- 1 Gbps Download and 35 Mbps Upload
- Browser
- Google Chrome
- Antivirus
- Microsoft Defender and Malwarebytes Premium
- Other Info
- Logitech Z625 speaker system,
Logitech BRIO 4K Pro webcam,
HP Color LaserJet Pro MFP M477fdn,
CyberPower CP1500PFCLCD
Galaxy S23 Plus phone
-
- Operating System
- Windows 11 Pro
- Computer type
- Laptop
- Manufacturer/Model
- Surface Laptop 7 Copilot+ PC
- CPU
- Snapdragon X Elite (12 core) 3.42 GHz
- Memory
- 16 GB LPDDR5x-7467 MHz
- Monitor(s) Displays
- 15″ HDR
- Screen Resolution
- 2496 x 1664
- Hard Drives
- 1 TB SSD
- Internet Speed
- Wi-Fi 7 and Bluetooth 5.4
- Browser
- Chrome and Edge
- Antivirus
- Windows Defender
-
-
#4
Huh, I thought Libraries were simply a collection of default folder shortcuts already made and that you could add to
-
- OS
- Windows 11
- Computer type
- Laptop
- Manufacturer/Model
- Microsoft 15″ Surface Laptop 4
- CPU
- AMD Ryzen 7
- Memory
- 8GB
- Graphics Card(s)
- AMD Radeon
- Hard Drives
- 512GB WD SSD
- Internet Speed
- 384 Mbps per attached network device
- Browser
- MS Edge
- Antivirus
- Windows Defender
-
- Operating System
- Windows 11
- Computer type
- PC/Desktop
- Manufacturer/Model
- Dell XPS 8950
- CPU
- 12th Gen Intel(R) Core(TM) i9-12900K, 3200 Mhz, 16 Core(s), 24 Logical Processor(s)
- Memory
- 32 GB DDR5
- Graphics card(s)
- NVIDIA GeForce GTX 1660 Ti
- Monitor(s) Displays
- 32″ Samsung
- Mouse
- Logitech MX Master 3 (BT)
- Keyboard
- Arteck (BT)
- Internet Speed
- 990 Mbps
- Browser
- MS Edge/Floorp
- Antivirus
- Windows Defender/Malwarebytes
-
-
#5
Huh, I thought Libraries were simply a collection of default folder shortcuts already made and that you could add to
A library would be more of a collection of symbolic links or junction points to access from to the source locations.
You can include any folder(s) you want in a library.
Basically, a library is just a way to access different included locations in one place the same way as if accessed directly from the sources.
-
- OS
- Windows 11 Pro for Workstations
- Computer type
- PC/Desktop
- Manufacturer/Model
- Custom self build
- CPU
- Intel i7-8700K 5 GHz
- Motherboard
- ASUS ROG Maximus XI Formula Z390
- Memory
- 64 GB (4x16GB) G.SKILL TridentZ RGB DDR4 3600 MHz (F4-3600C18D-32GTZR)
- Graphics Card(s)
- ASUS ROG-STRIX-GTX1080TI-O11G-GAMING (11GB GDDR5X)
- Sound Card
- Integrated Digital Audio (S/PDIF)
- Monitor(s) Displays
- 2 x Samsung Odyssey G75 27″
- Screen Resolution
- 2560×1440
- Hard Drives
- 1TB Samsung 990 PRO M.2,
4TB Samsung 990 PRO M.2,
8TB WD MyCloudEX2Ultra NAS
- PSU
- Seasonic Prime Titanium 850W
- Case
- Thermaltake Core P3 wall mounted
- Cooling
- Corsair Hydro H115i
- Keyboard
- Logitech wireless K800
- Mouse
- Logitech MX Master 3
- Internet Speed
- 1 Gbps Download and 35 Mbps Upload
- Browser
- Google Chrome
- Antivirus
- Microsoft Defender and Malwarebytes Premium
- Other Info
- Logitech Z625 speaker system,
Logitech BRIO 4K Pro webcam,
HP Color LaserJet Pro MFP M477fdn,
CyberPower CP1500PFCLCD
Galaxy S23 Plus phone
-
- Operating System
- Windows 11 Pro
- Computer type
- Laptop
- Manufacturer/Model
- Surface Laptop 7 Copilot+ PC
- CPU
- Snapdragon X Elite (12 core) 3.42 GHz
- Memory
- 16 GB LPDDR5x-7467 MHz
- Monitor(s) Displays
- 15″ HDR
- Screen Resolution
- 2496 x 1664
- Hard Drives
- 1 TB SSD
- Internet Speed
- Wi-Fi 7 and Bluetooth 5.4
- Browser
- Chrome and Edge
- Antivirus
- Windows Defender
-
-
#6
Well, I am not seeing the benefit of using them over my currently using Quick Access for my most used locations as they seem to provide the same service and would be a bit redundant.
-
- OS
- Windows 11
- Computer type
- Laptop
- Manufacturer/Model
- Microsoft 15″ Surface Laptop 4
- CPU
- AMD Ryzen 7
- Memory
- 8GB
- Graphics Card(s)
- AMD Radeon
- Hard Drives
- 512GB WD SSD
- Internet Speed
- 384 Mbps per attached network device
- Browser
- MS Edge
- Antivirus
- Windows Defender
-
- Operating System
- Windows 11
- Computer type
- PC/Desktop
- Manufacturer/Model
- Dell XPS 8950
- CPU
- 12th Gen Intel(R) Core(TM) i9-12900K, 3200 Mhz, 16 Core(s), 24 Logical Processor(s)
- Memory
- 32 GB DDR5
- Graphics card(s)
- NVIDIA GeForce GTX 1660 Ti
- Monitor(s) Displays
- 32″ Samsung
- Mouse
- Logitech MX Master 3 (BT)
- Keyboard
- Arteck (BT)
- Internet Speed
- 990 Mbps
- Browser
- MS Edge/Floorp
- Antivirus
- Windows Defender/Malwarebytes
-
-
#7
Well, I am not seeing the benefit of using them over my currently using Quick Access for my most used locations as they seem to provide the same service and would be a bit redundant.
I’d use whatever works best for you.
-
- OS
- Windows 11 Pro for Workstations
- Computer type
- PC/Desktop
- Manufacturer/Model
- Custom self build
- CPU
- Intel i7-8700K 5 GHz
- Motherboard
- ASUS ROG Maximus XI Formula Z390
- Memory
- 64 GB (4x16GB) G.SKILL TridentZ RGB DDR4 3600 MHz (F4-3600C18D-32GTZR)
- Graphics Card(s)
- ASUS ROG-STRIX-GTX1080TI-O11G-GAMING (11GB GDDR5X)
- Sound Card
- Integrated Digital Audio (S/PDIF)
- Monitor(s) Displays
- 2 x Samsung Odyssey G75 27″
- Screen Resolution
- 2560×1440
- Hard Drives
- 1TB Samsung 990 PRO M.2,
4TB Samsung 990 PRO M.2,
8TB WD MyCloudEX2Ultra NAS
- PSU
- Seasonic Prime Titanium 850W
- Case
- Thermaltake Core P3 wall mounted
- Cooling
- Corsair Hydro H115i
- Keyboard
- Logitech wireless K800
- Mouse
- Logitech MX Master 3
- Internet Speed
- 1 Gbps Download and 35 Mbps Upload
- Browser
- Google Chrome
- Antivirus
- Microsoft Defender and Malwarebytes Premium
- Other Info
- Logitech Z625 speaker system,
Logitech BRIO 4K Pro webcam,
HP Color LaserJet Pro MFP M477fdn,
CyberPower CP1500PFCLCD
Galaxy S23 Plus phone
-
- Operating System
- Windows 11 Pro
- Computer type
- Laptop
- Manufacturer/Model
- Surface Laptop 7 Copilot+ PC
- CPU
- Snapdragon X Elite (12 core) 3.42 GHz
- Memory
- 16 GB LPDDR5x-7467 MHz
- Monitor(s) Displays
- 15″ HDR
- Screen Resolution
- 2496 x 1664
- Hard Drives
- 1 TB SSD
- Internet Speed
- Wi-Fi 7 and Bluetooth 5.4
- Browser
- Chrome and Edge
- Antivirus
- Windows Defender
-
-
#8
Is is possible to also stop folders from appearing in libraries again? The new Media Player in Windows 11 always starts indexing the OneDrive folder for music because that folder gets added to the Music library even after being removed from it. That happens after every restart of the machine.
-
- OS
- Windows 11
- Computer type
- PC/Desktop
- CPU
- AMD Ryzen 7 2700X, OctalCore, AM4
- Motherboard
- Gigabyte X470 Aorus Ultra Gaming
- Memory
- Corsair Vengeance LPX, 4x8GB
- Graphics Card(s)
- Gigabyte GeForce GTX 1070 8GB
- Sound Card
- Realtek ALC1220 @ AMD K17
- Monitor(s) Displays
- Zowie XL LCD, BenQ RL2455HM
- Screen Resolution
- 1080p
- PSU
- Corsair TX650M 650W
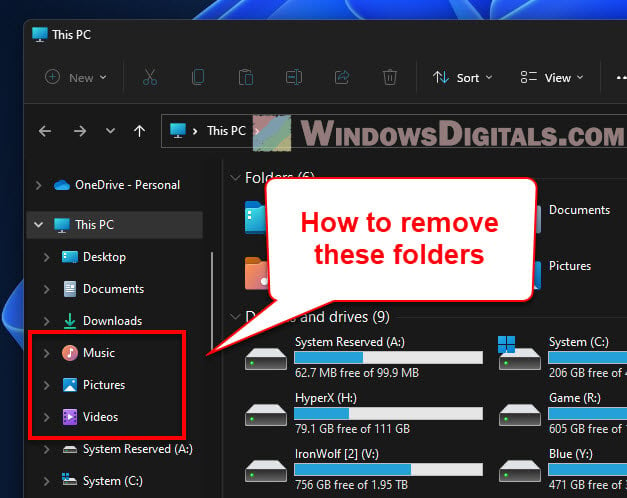
If you’re using Windows 11 or Windows 10, you would have surely noticed that when you open the File Explorer or “This PC”, you will see some folders like “Music”, “Pictures”, and “Videos” on the left pane. These shortcuts are meant for you to quickly access to these folders, but they can sometimes get in the way or you just don’t like them listed on the quick access area. In this guide, we’ll show you just how to remove them from the left pane of the File Explorer.
Also see: How to disable recent files and frequent folders in Windows 11
Use our registry hack
We’ve put together some .reg files that you can use to remove the Music, Pictures, or Videos folder from “This PC” on Windows 11 and Windows 10 64-bit. After you run these registry files, the folder will vanish from both the left and right sides of “This PC”. Here’s a simple guide on how to use our registry trick to remove the folder from This PC.
Before we start, please be warned that messing with your computer’s registry can be very risky if you’re not sure what you’re doing. You should back up your registry or create a restore point before you make any changes at all.
- Download our “Remove Music, Pictures and Videos from This PC” registry hack.
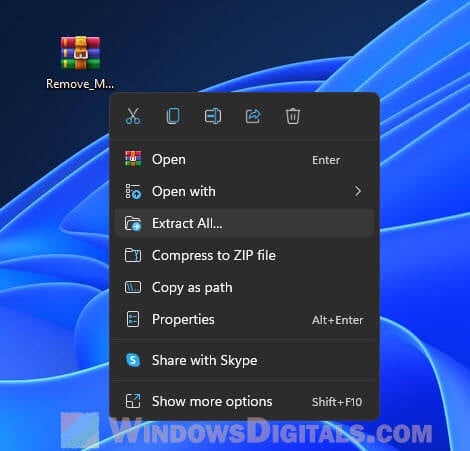
- Unzip the file.

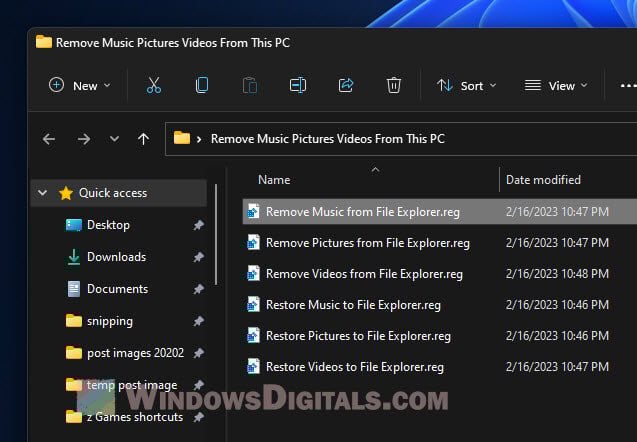
- Open the registry hack for the folder you wish to remove. Say you want to get rid of the Music folder from This PC, run the “Remove Music from File Explorer.reg” file.

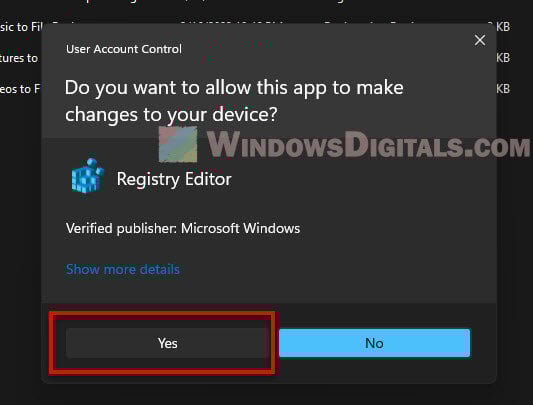
- If a User Account Control window pops up asking for confirmation, click Yes to continue.

- The Registry Editor will then warn you about making changes. Click Yes to go ahead.

- Open or refresh File Explorer or This PC. The Music folder will be gone.
- If you want to get rid of other folders like Pictures or Videos, just run the specific .reg files for those folders.

Suggested read: How to preview files, images, and videos in File Explorer on Windows 11
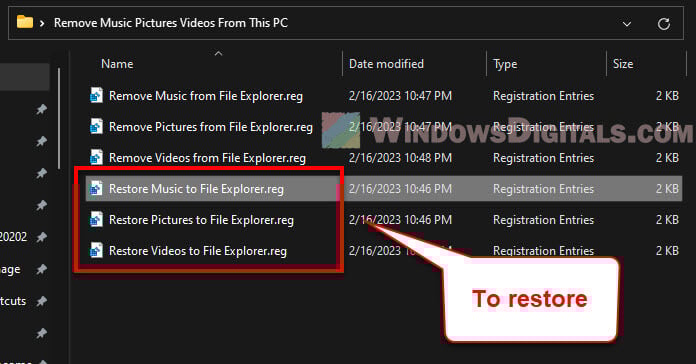
Restoring the folders
If you change your mind and want those folders back in the left pane in “This PC,” you can find the restore .reg files in the zip you downloaded. Just run those files, and like magic, the folders will be back. For instance, if you removed the Music folder from This PC, running the “Restore Music to File Explorer.reg” file will bring the Music folder back to This PC.
Remove other folders from the left pane in This PC
If your goal is to clear out all folders from the left pane in This PC or File Explorer on Windows 11 or Windows 10, just follow these steps:
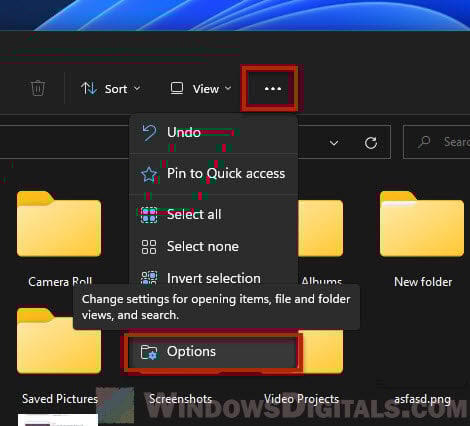
- Open File Explorer by clicking the folder icon on the taskbar or pressing Win + E.
- Hit the three-dots option icon in the File Explorer menu.
- Press the “Options” button.

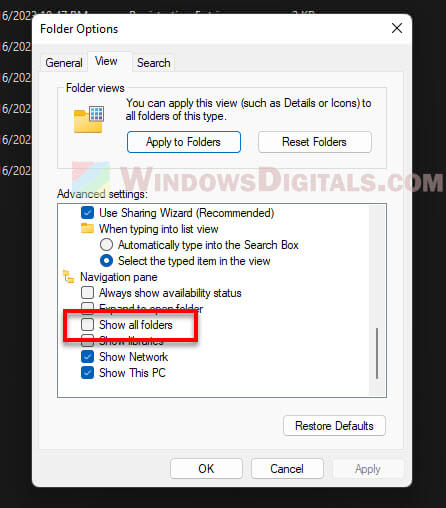
- In the Folder Options dialog, go to the “View” tab.
- Look for the “Show all folders” option and uncheck it.

- Hit “Apply” and then “OK” to save your changes.
Remove pinned folders from Quick access
If there are folders like Desktop, Downloads, Documents, or any you’ve pinned to Quick access that you want to remove from the left pane in This PC, you can just unpin them. Here’s how:
- Open File Explorer or This PC.
- Click on Quick access in the left pane.
- Right-click on the folder you wish to remove.
- Choose Unpin from Quick access.

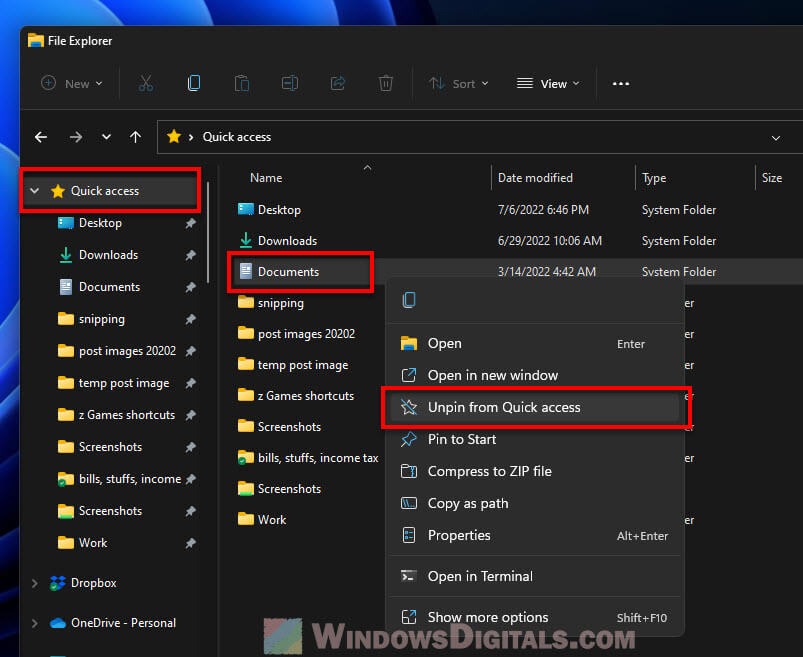
Doing so will remove the folder from the Quick access area, and it won’t show under Quick access in the left pane of This PC anymore.
Check your Windows version
Before you start using the registry hack, make sure you’re running a 64-bit version of Windows 11 or 10. These instructions are designed for these versions. You can quickly check your system information to see which version you have.
Understand what you’re doing
If you decided to run our registry fix, it’s a good idea to understand what changes it will make. This can help prevent surprises down the line. If you’re not comfortable making these changes, you might want to ask someone more experienced for help, or use another way to change the behavior of File Explorer.
В Проводнике Windows последних версий присутствует функциональность, которой мало кто пользуется — Библиотеки. Однако, если знать об этой возможности, можно найти её полезные применения.
В этой инструкции о том, как включить показ библиотек в Проводнике Windows 11/10, настроить имеющиеся и создать собственные библиотеки.
Включение библиотек в Проводнике
Библиотеки в Windows представляют собой инструмент для доступа к содержимому сразу нескольких папок из одного расположения: например, настроив нужным образом библиотеку с изображениями вы можете открыть её и увидеть файлы из выбранных вами папок с изображением в одной «виртуальной» папке: тем, кто знаком с «Галереями» на смартфонах Android, концепция должна быть знакомой.
По умолчанию «Библиотеки» скрыты в Проводнике Windows 11 и 10 (но видны в диалоге сохранения файлов). Для того, чтобы включить их отображение, можно выполнить следующие шаги:
- Нажмите правой кнопкой мыши в пустом месте панели слева Проводника.
- Отметьте пункт «Показать библиотеки».

- В результате библиотеки будут отображаться в нижней части панели слева.

Несмотря на то, что стандартные библиотеки имеют те же имена и значки, что папки пользователя «Документы», «Изображения», «Музыка» — это не то же самое, для них есть дополнительные возможности.
Настройка
Настройка имеющихся библиотек выполняется путем следующих действий:
- Нажмите правой кнопкой мыши по нужной библиотеке и выберите пункт «Свойства» в контекстном меню.

- В открывшемся окне свойств библиотеки вы можете добавить папки (или удалить их), содержимое которых будет в неё включено, выбрать вариант оптимизации отображения, включить или отключить показ в области навигации Проводника. Для системных библиотек также доступно восстановление значений по умолчанию.

- Кнопа «Задать папку для сохранения» позволяет установить папку библиотеки, в которую по умолчанию будет производиться сохранение файлов при сохранении в соответствующую библиотеку.


Выполнив необходимые настройки, нажмите «Ок» для их применения.
Создание собственных библиотек
При желании вы не ограничиваться существующими системными библиотеками, а создать собственные:
- Откройте раздел «Библиотеки» в Проводнике, нажмите правой кнопкой мыши в пустом месте правой панели и выберите «Создать» — «Библиотека».

- Укажите имя библиотеки.

- Откройте свойства созданной библиотеки (правый клик — свойства).
- Добавьте нужные папки, выберите папку для сохранения (по умолчанию — первая добавленная), установите значок, выберите вариант оптимизации библиотеки и нажмите «Ок».


Готово, ваша библиотека создана. Если зайти в неё, вы увидите содержимое всех выбранных вами папок в одном расположении:

По умолчанию файлы будут сгруппированы по папкам, но, если вам это не требуется — группировку и другие параметры отображения библиотеки можно настроить в контекстном меню «Вид».
Доступ к библиотеке не обязательно выполнять только из Проводника: вы можете перенести её значок оттуда на рабочий стол мышью, чтобы создать ярлык (который затем можно закрепить на панели задач), либо нажать по нему правой кнопкой мыши и закрепить его в меню «Пуск».
Если вы захотите удалить библиотеку, сделать это можно прямо в разделе «Библиотеки», так же, как и с любым другим файлом или папкой. При этом сами папки, которые включены в библиотеку, затронуты не будут.
Подводя итог, Библиотеки — одна из тех функций Windows, которая большинством пользователей оказывается незамеченной, хотя может оказаться удобной и эффективной для организации доступа к файлам и папкам для некоторых из них.
When you download an application from the Microsoft Store on Windows, every device connected to the account can see the list of added applications through My Libraries. Not only that, but the worst part is that even when the application is uninstalled, you can still see its name in the list. While it appears to be a minor issue, it is quite a huge flaw that bothers a lot of users.
Do you know the reason behind it? Microsoft’s App Store does not allow removing applications from the My Libraries section. Yes, it is pretty irritating to see that you can install an application from the store and check out the list of installed applications, but you can’t remove them from the library then and there.
If this flaw bothers you and you want a quick workaround, this is just the post you were looking for. By the end of this one, you can find a workaround for this error and hide or remove apps from My Libraries in the Windows store without any hassle.
Let’s get started!
Why Does Microsoft Store Keep Uninstalled Apps in My Libraries
The reason behind keeping a list of removed applications in the My Libraries section is to offer convenience to the user. This means the user can re-install an application when required. The feature is a common one among almost every application store, including the Apple AppStore and Google PlayStore. However, the way of display is what bothers a user.
Ideally, an App Store should be able to both install and uninstall applications. However, the Windows store’s flaw is that it cannot remove applications. The My Libraries section in the Microsoft store keeps a complete record of what applications you have installed or had on your system. The applications you removed from the PC are still listed by default.
For users for whom MS Store is the go-to place to sort applications, this flaw becomes a headache as they cannot identify which application is still on the system and which is not. Sure, it is visible if an application is installed or not, but the anxiety that a listed application may trigger is surreal.
How to Remove Apps from My Libraries in the Windows Store
There are multiple effective ways to resolve the issue discussed above. Some workarounds will help sort the applications, and the advanced ones will help handle the situation. We need to address two flaws here. The first is that the Microsoft Store cannot remove the application, and the other is that the Library section keeps showing the uninstalled apps in the app list.
Below, we have listed effective methods for addressing both issues: removing apps from the device and accessing the Microsoft App Store’s My Libraries.
Method 1 – Uninstall the Application Without Traces
Usually, the application data or the history that this application was installed allows the information to be accessed in the first place. Uninstalling is, unfortunately not an integrated option available in the Library section of Windows. However, that does not mean you can not uninstall the application from your device.
You have two ways to uninstall the application. The first one is the traditional method that involves the following steps –
Step 1 – Press Windows + I to open the System settings.
Step 2 – Look for Apps in the left panel of the opened Window.

Step 3 – Go to Apps, and click on Installed Apps.

Step 4 – You may find all the apps in the opened list. Click on the options (dots) parallel to the app information to find the option to uninstall.

Step 5 – Remove the app from the PC by following the directions on the screen after you have clicked on uninstall.
This is a basic method so that chances of leaving traces of uninstalled applications are more. Therefore, to remove the application completely from the device, we recommend using the Uninstall Manager module available in Advanced System Optimizer. Here’s how that works –
Step 1 – Download and Install Advanced System Optimizer
Step 2 – Click on Regular Maintenance from the left panel in the Advanced System Optimizer.

Step 3 – In the Regular Maintenance, you may find Uninstall Manager and other important tools.

Step 4 – Open the Uninstall Manager, which will gather all the information about the installed applications on your PC. Click on the Software List to find out what apps are available on your PC.

Step 5 – Select the application you want to delete from the list and click on Uninstall button in the right-hand corner.

Once you click the Uninstall, the process will begin.
This method effectively removes the application and gives you a better user experience. Not to mention, the tool can uninstall an app more efficiently, leaving no residue whatsoever.
Method 2 – Set the View to Show Installed Products Only
This is more than a fix; it is a workaround for removing apps from My Libraries. While the store tends to keep all the installed and uninstalled applications listed together, an option allows you to sort the list differently.
Here’s how you can set a view that only shows installed applications in the library –
Step 1- Go to the start menu and open Microsoft Store
Step 2 – In the Microsoft Store, go to the Library using the button in the bottom left corner.
Step 3 – In the opened list of products, you may find a sort button with a drop-down in the top right corner for your Window. Click on it to find the Show Installed Apps Only option.
Step 4 – Mark the option by clicking on it, and you will have a sorted list of apps that only show the currently installed applications.
This will sort the shown list and show only the installed products on your device. This can help increase the visibility of all your applications on your PC.
Limitations of Microsoft Store Rectified
If you plan to uninstall the applications only and are not bothered by the list, you can use Apps and Features from system settings to get rid of them. You can also use the Control Panel to remove/uninstall an application. However, all the apps removed from the PC will still appear in your Library unless you switch the view to installed apps only.
The inability to uninstall an application from the Windows store is indeed a lack of must-have feature for many users. Also, creating a cluttered view of both installed and uninstalled applications is a UX flaw that must be fixed to give the users a better experience.
Unfortunately, even after several complaints, the issue is still not resolved, and there are hardly any ways to get rid of the app kist from My Libraries. The concern is not limited to a few of us, as there is a complete thread that you can follow. We hope this post gives you a solution until the Microsoft experts resolve these errors.
Both these methods might have solved the problem you were facing with the My Libraries section of the Windows Store. If you have any other queries, feel free to reach out via the comments section, and we will be more than happy to assist.
That’ll be all for this one. Good luck!
Recommended :
Fixed: Local Security Authority Protection Off – Your Device May Be Vulnerable
5 Fixes for the ‘The Local Device Name is Already in Use’ Error on Windows
Can’t Remove a Bluetooth Device On Windows 11/10? Time To Fix It