
NVIDIA GeForce Experience может быть полезной программой: для целей автоматического обновления драйверов видеокарты, записи экрана (не знали? — об этой функции можно прочитать здесь), установки различных параметров для разных игр. Но нужна она не всем.
В этой инструкции подробно о том, как удалить NVIDIA GeForce Experience с компьютера, а также, если необходимо, удалить игры из списке GeForce Experience, не удаляя самой программы.
- Как полностью удалить NVIDIA GeForce Experience
- Как удалить игры из GeForce Experience
Как полностью удалить NVIDIA GeForce Experience с компьютера или ноутбука
Для удаления программы с компьютера можно использовать стандартные средства Windows 10, 8.1 или Windows 7, а затем, при необходимости удалить оставшиеся папки программы (вместо способа, описанного далее, вы можете использовать специальные программы-деинсталляторы).
Шаги, необходимые для удаления выглядят следующим образом:
- Откройте Панель управления (в Windows 10 для этого можно использовать поиск в панели задач) и перейдите в пункт «Программы и компоненты» или «Удаление программы».
- В списке установленных программ найдите NVIDIA GeForce Experience и нажмите «Удалить/Изменить».

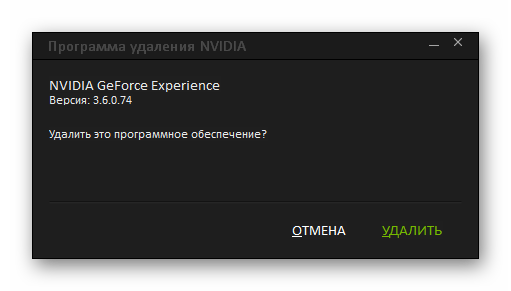
- Подтвердите удаление программы.

- Некоторые остатки программы можно удалить в папках C:\Users (Пользователи)\имя_пользователя\AppData\Local\NVIDIA Corporation и C:\Program Files (x86)\NVIDIA Corporation, но это не всегда может быть безопасно, так как не все они связаны именно с GeForce Experience (кроме одноименной папки в AppData), некоторые имеют отношение к другим компонентам драйверов NVIDIA.
- Перезагрузите компьютер.


На этом NVIDIA GeForce Experience будет полностью удалена с вашего компьютера.
Как удалить игры из GeForce Experience
Если вам требуется удалить игры из списка GeForce Experience, переустановка программы в этом не поможет. Вместо этого выполните следующие шаги:
- Нажмите клавиши Win+R, введите services.msc и отключите все службы NVIDIA.
- В папке
C:\Users (Пользователи)\Имя_пользователя\AppData\Local\NVIDIA\NvBackend
удалите (а лучше переместите в другое расположение, чтобы их можно было легко восстановить) файлы
journalBS.jour.dat
journalBS.jour.dat.bak
journalBS.main.xml
journalBS.main.xml.bak
- Перезапустите компьютер.
- В результате список игр в NVIDIA GeForce Experience должен оказаться пустым.


Надеюсь, инструкция была полезной. Ну а если остаются вопросы — задавайте их в комментариях, я постараюсь ответить.
-
Home
-
News
- How Can You Uninstall GeForce Experience on Windows 10?
By Stella | Follow |
Last Updated
GeForce Experience can bring you some convenience. But, if you don’t have good user experience, you may consider uninstalling GeForce Experience from your Windows 10 computer. In a situation like this, do you know how to uninstall NVIDIA GeForce Experience? If the traditional method doesn’t work, are there other methods that can perform a GeForce Experience uninstallation. You can find these answers in this MiniTool post.
What Is GeForce Experience?
GeForce Experience is a utility that comes along with the graphics drivers for all NVIDIA GeForce GTX graphics cards.
It has multiple functions. For example, you can use it to automatically check for and install updates for the driver software for the GPU, optimize graphics settings for games to enjoy their optimum graphics performance. Besides, it also enables you to stream and share the things you do on your computer with others.
All in all, GeForce Experience makes your life easier and enrich your user experience.
Why Do You Want to Uninstall GeForce Experience?
Nothing is perfect all the time. GeForce Experience is not an exception. At times, you can discover that GeForce Experience brings you a bad experience. For example, you may find that GeForce Experience takes much computer resource usage including RAM and processor bandwidth usage. Some of you may don’t like to be interrupted by this software.
Due to the bad user experience, you don’t like to use it and you even want to uninstall NVIDIA GeForce Experience from your Windows 10 computer. But, do you know how to remove GeForce Experience from Windows 10?
In this post, we will show you 5 methods to perform a GeForce Experience uninstallation. You can select one method that is suitable for your actual situation.
How to Uninstall GeForce Experience?
- Uninstall GeForce Experience via Control Panel
- Uninstall GeForce Experience via Apps & features
- Uninstall GeForce Experience in the installation directory of GeForce Experience
- Uninstall GeForce Experience via System Restore
- Install and uninstall GeForce Experience
How to Uninstall GeForce Experience?
Method 1: Uninstall GeForce Experience via Control Panel
The normal way to remove a program from your computer is to use the Control Panel. You can also use this method to uninstall NVIDIA GeForce Experience. Here is a guide:
- Click the search box and input control panel.
- Select the first search result to open Control Panel.
- Click Programs and Features.
- You will access the Uninstall or change a program interface where you can see all the applications that you have installed on your computer. Then, you need to scroll down to find the NVIDIA GeForce Experience application.
- Right-click on NVIDIA GeForce Experience and then select Uninstall from the pop-out menu.
Windows will begin to uninstall NVIDIA GeForce Experience. You need to follow the on-screen wizard to confirm the uninstallation operation and then wait until the whole installation process ends.
Method 2: Uninstall GeForce Experience via Apps & Features
- Click the search box and type add or remove programs.
- Select the first search result and you will directly Apps & features.
- Scroll the list of the programs and find NVIDIA GeForce Experience.
- Click it and select Uninstall to remove NVIDIA GeForce Experience from your computer.
However, if this method doesn’t work for you, you can try the next method.
Method 3: Uninstall GeForce Experience in the Installation Directory
You need to open the installation directory of GeForce Experience and then find the file that is named as uninstall.exe. Then, you can click it to uninstall GeForce Experience.
Method 4: Uninstall GeForce Experience via System Restore
You can also perform a system restore to revert your computer to a point when GeForce Experience was not installed on your computer. However, this method may cause some data loss issues. You can read this article to know what you should do when you want to perform a system restore: What Is System Restore Point and How to Create It?
Method 5: Install and Uninstall GeForce Experience
If all the above methods don’t work for a GeForce Experience uninstallation, you can try the following steps to complete the work:
- Open File Explorer.
- Go to C:\Program Files (x86)\NVIDIA Corporation\.
- Find and delete the folder that is named as GeForce Experience.
- Go to the NVIDIA official site to download the latest version of GeForce Experience. Then, you need to install it on your computer.
- You can try the first four methods to uninstall NVIDIA GeForce Experience. This time, the operation should be effective.
Bottom Line
When you want to uninstall GeForce Experience from your Windows computer, you can just try the methods mentioned in this article to do the job. There should be an available method. If you have any related issues, you can let us know in the comment.
About The Author
Position: Columnist
Stella has been working in MiniTool Software as an English Editor for more than 8 years. Her articles mainly cover the fields of data recovery including storage media data recovery, phone data recovery, and photo recovery, videos download, partition management, and video & audio format conversions.
Все способы:
- Последствия удаления
- Процесс удаления
- Способ 1: Стороннее ПО
- Способ 2: Стандартное удаление
- Способ 3: Удаление через «Пуск»
- Способ 4: Нестандартный метод
- Дополнительно
- Заключение
- Вопросы и ответы: 11
При всей своей полезности, NVIDIA GeForce Experience далеко не всем пользователям приходится по нутру. На это у каждого есть свои причины, однако все сводится к тому, что программу приходится удалять. Следует разобраться, как это сделать, а главное – чем чреват отказ от этой программы.
Скачать последнюю версию NVIDIA GeForce Experience
Последствия удаления
Сразу стоит поговорить о том, что будет, если удалить GeForce Experience. Список факторов, которые стоит учитывать при удалении, сложно не назвать существенным:
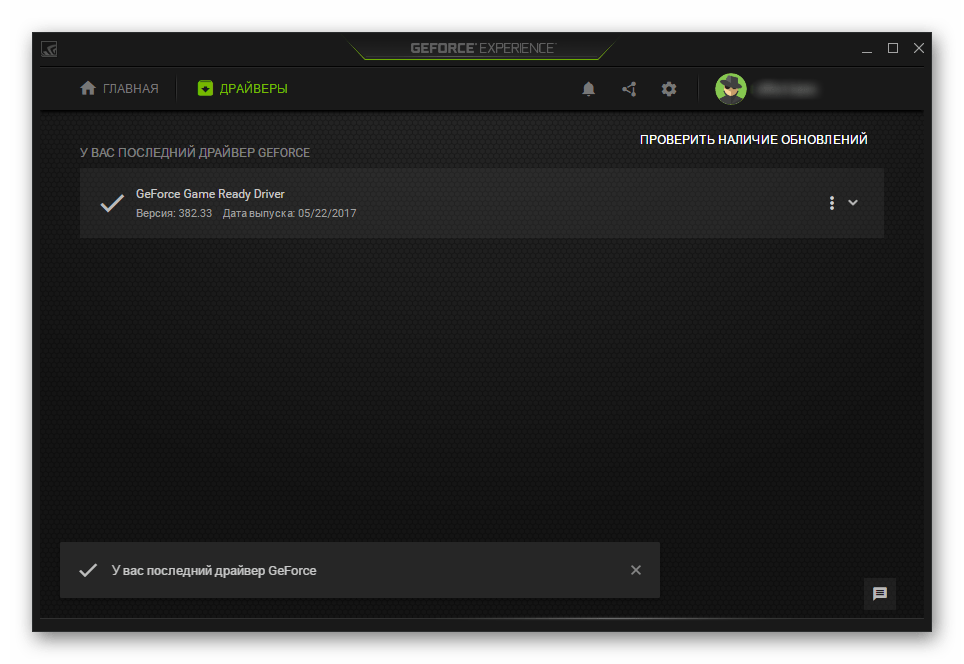
- Главная функция программы – скачивание и обновление драйверов для видеокарты пользователя. Без GF Experience это придется делать самостоятельно, регулярно посещая официальный сайт компании NVIDIA. Учитывая, что многие новые игры сопровождаются выпуском соответствующих драйверов, без которых процесс развлечения может быть испорчен тормозами и низкой производительностью, это может оказаться очень серьезной проблемой.
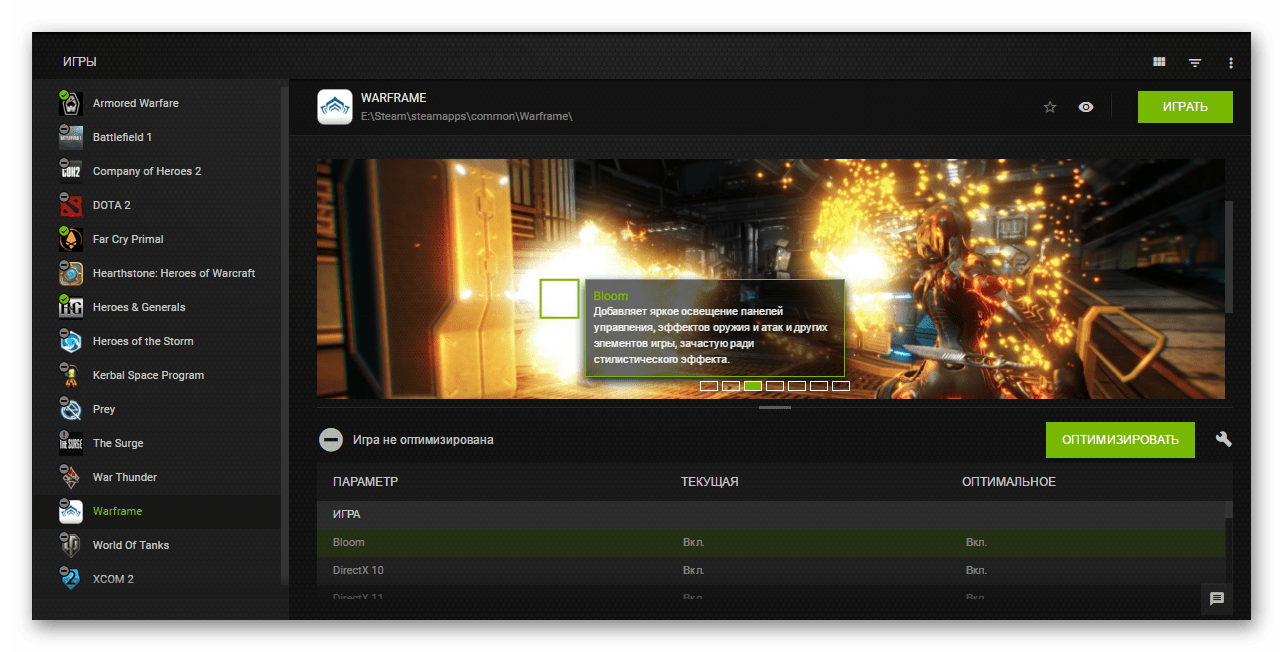
- Наименьшая потеря – это отказ от функции настройки графических параметров компьютерных игр. Система автоматически адаптирует все игры под характеристики данного компьютера, чтобы добиться либо производительности в 60 fps, либо просто максимально возможной. Без этого пользователям придется настраивать все вручную. Многие считают эту функцию неэффективной, поскольку система понижает качество картинки в целом, а не интеллектуальным способом.
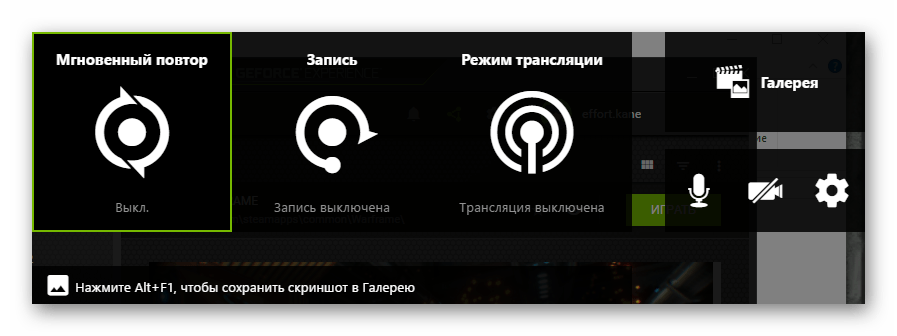
- Пользователь откажется от работы с сервисами NVIDIA Shadowplay и NVIDIA SHIELD. Первый предоставляет специальную панель для работы с играми – запись, оверлей с производительностью и так далее. Второй дает возможность производить трансляцию игрового процесса на другие устройства с поддержкой этой функции.
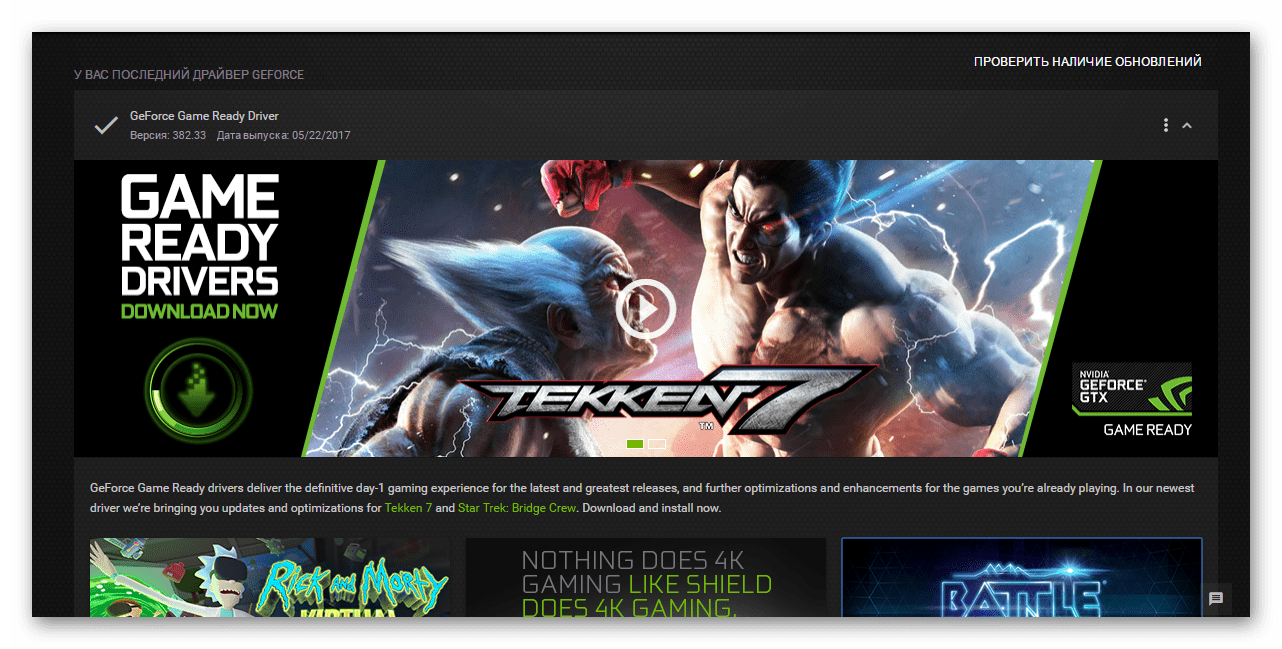
- Также в GeForce Experience можно узнать новости об акциях, новинках компании, различных разработках и так далее. Без этого за такой информацией придется отправляться на официальный сайт NVIDIA.
Как итог, если отказ от вышеперечисленных возможностей устраивает, можно приступать к удалению программы.
Процесс удаления
Удалить GeForce Experience можно следующими способами.
Способ 1: Стороннее ПО
Для удаления как GF Experience, как и любых других программ, можно использовать всевозможные сторонние программы, которые имеют соответствующую функцию. Например, можно использовать CCleaner.
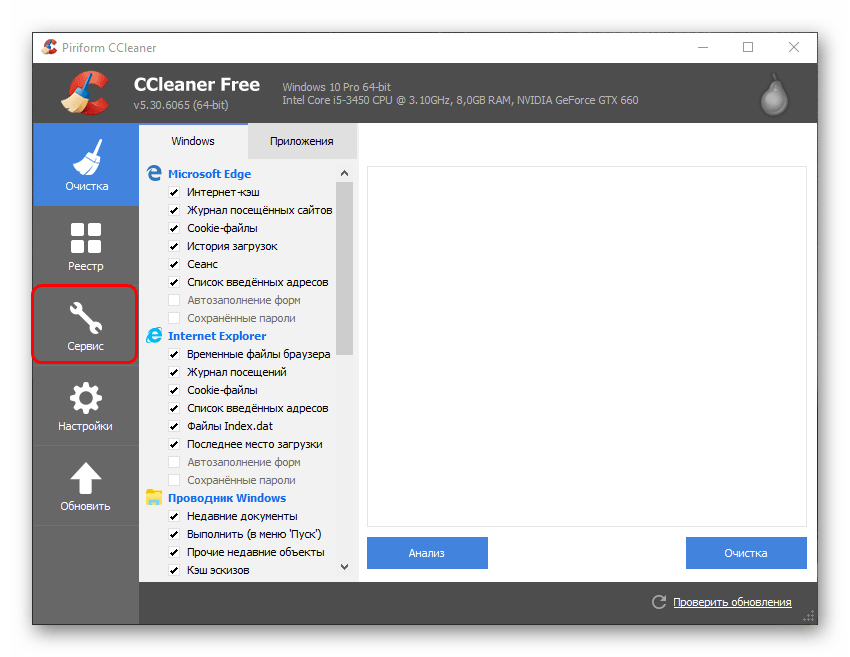
- В самой программе нужно перейти в раздел «Сервис».
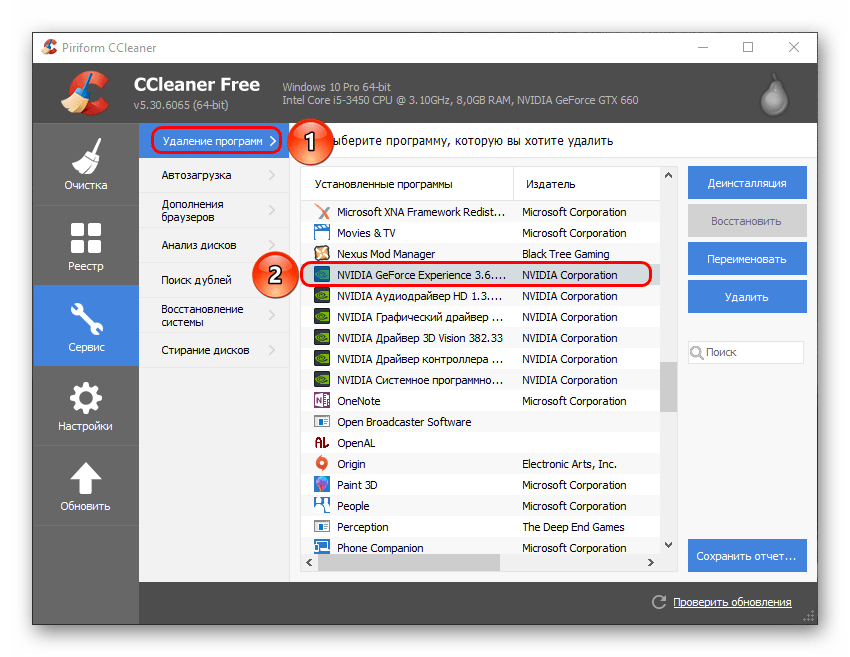
- Здесь нас интересует подраздел «Удаление программ». Обычно этот пункт по умолчанию включен. При этом справа появится список всех установленных на компьютере приложений. Здесь следует отыскать «NVIDIA GeForce Experience».
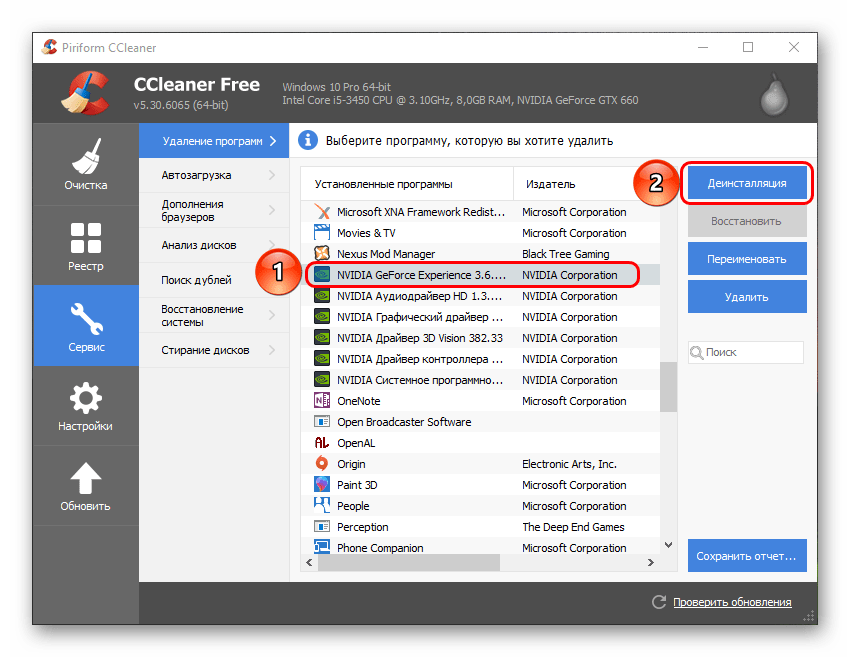
- Теперь нужно выбрать эту программу и нажать на кнопку «Деинсталляция» справа от списка.
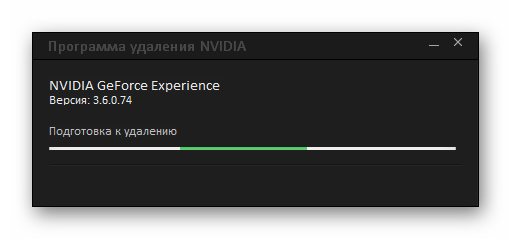
- После этого начнется подготовка к удалению.
- В конце останется только подтвердить, что пользователь согласен избавиться от этой программы.
Преимуществом такого подхода является дополнительный функционал подобных программ. Например, CCleaner после удаления предложит очистить оставшиеся от ПО ненужные файлы, что является более эффективным способом удаления.
Способ 2: Стандартное удаление
Обыкновенная процедура, которая обычно не доставляет никаких проблем.
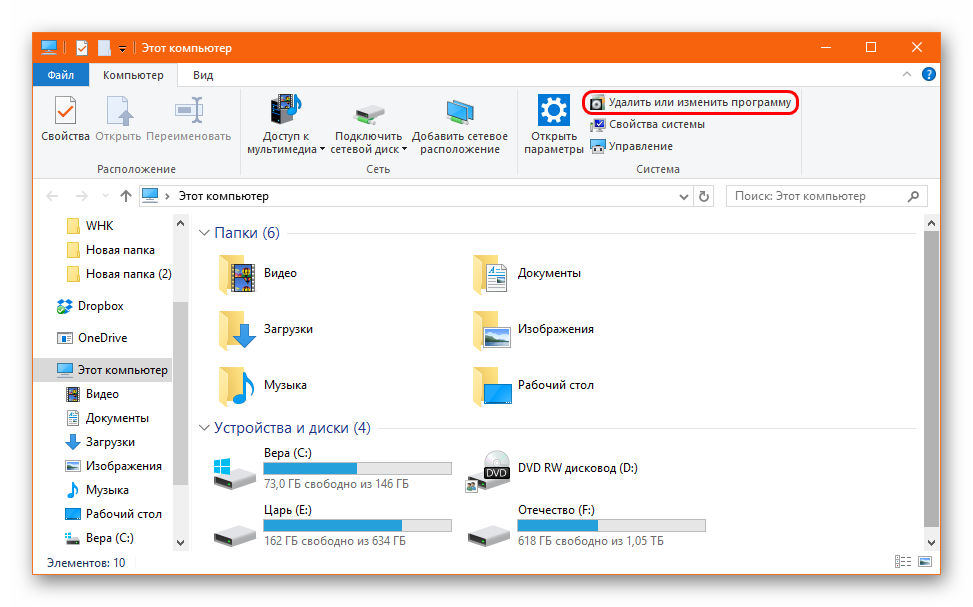
- Для этого нужно отправиться в «Параметры» системы. Лучше всего это делать через «Этот компьютер». Здесь в шапке окна можно увидеть кнопку «Удалить или изменить программу».
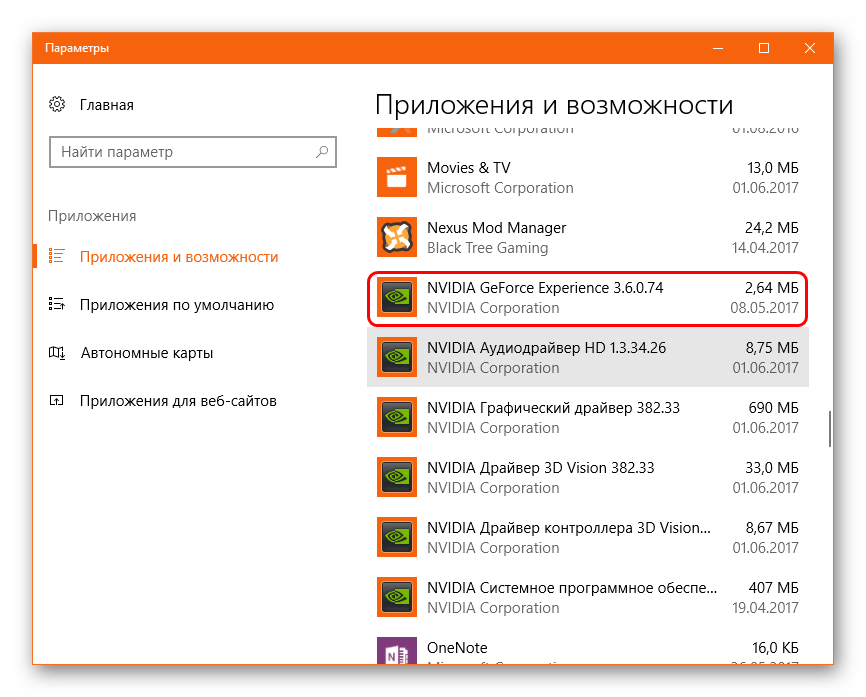
- После ее нажатия система автоматически откроет раздел «Параметров», где производится удаление всех установленных программ. Здесь следует отыскать GeForce Experience.
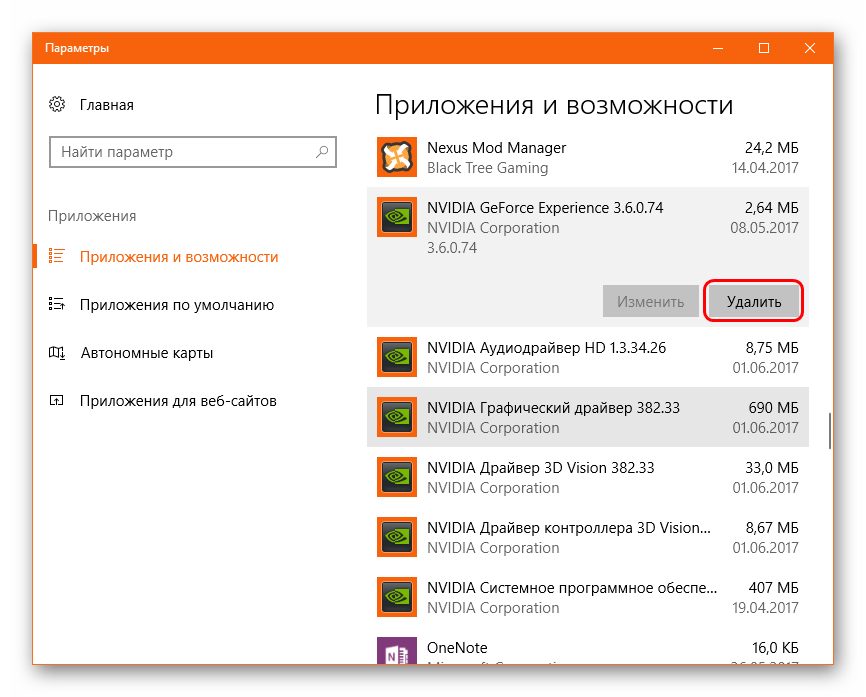
- После нажатия на этот вариант появится кнопка «Удалить».
- Остается выбрать этот пункт, после чего необходимо подтвердить удаление программы.
После этого программа будет удалена. В более ранних версиях обычно весь пакет ПО от NVIDIA был связан и удаление GF Exp влекло за собой удаление и драйверов. Сегодня такой проблемы нет, так что все остальное программное обеспечение должно остаться на месте.
Способ 3: Удаление через «Пуск»
Точно так же можно сделать, используя панель «Пуск».
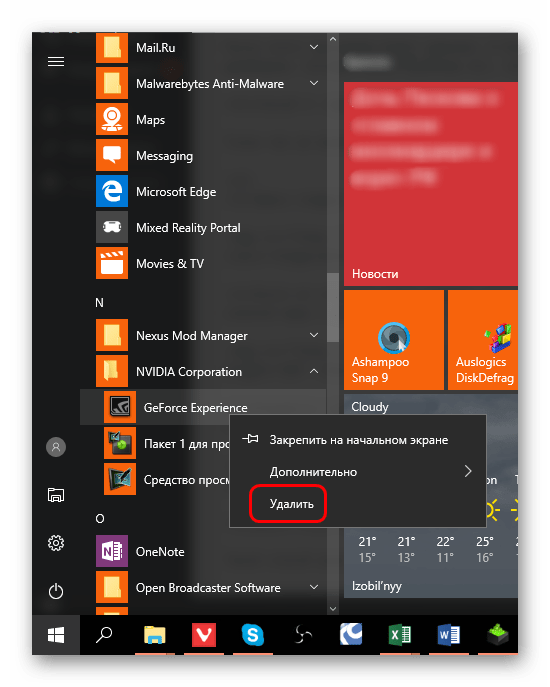
- Здесь следует найти папку «NVIDIA Corporation».
- После ее открытия можно увидеть несколько вложений. Самым первым обычно как раз идет GeForce Experience. Нужно щелкнуть на программе правой кнопкой мыши и выбрать вариант «Удалить».
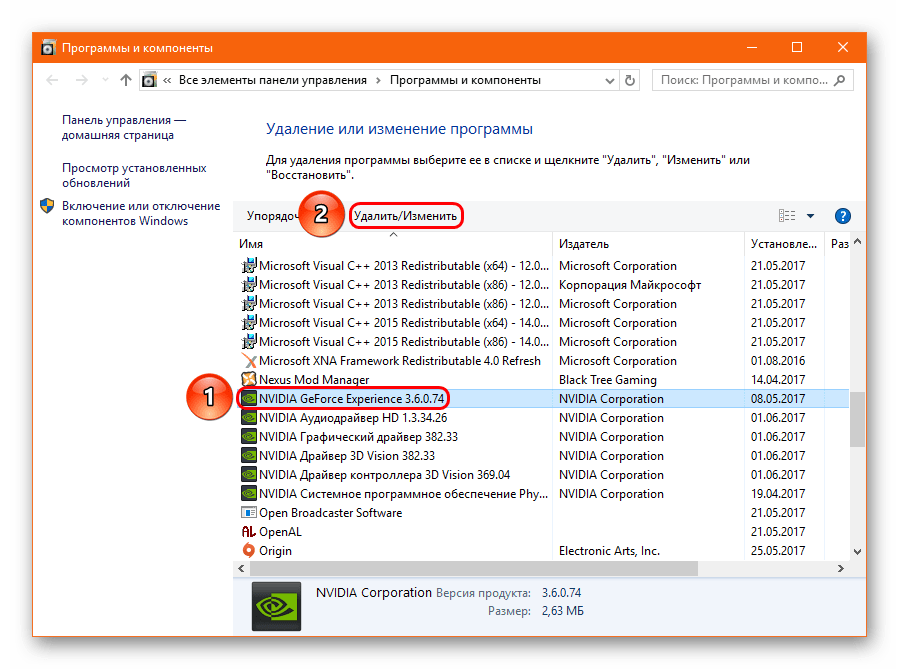
- Откроется окно раздела «Программы и компоненты» традиционной «Панели управления», где точно так же нужно найти требуемый вариант. Остается выбрать его и нажать вверху окна вариант «Удалить/изменить программу».
- Далее снова нужно следовать указаниям Мастера удаления.
Такой способ может подойти в том случае, если в «Параметрах» данная программа не отображается по тем или иным причинам.
Способ 4: Нестандартный метод
Многие пользователи сталкиваются с тем, что ни в «Параметрах», ни в «Панели управления» процесс удаления не отображает данную программу. В такой ситуации можно пойти нестандартным путем. Обычно в папке с самой программой файла для деинсталляции по какой-то причине нет. Так что можно просто удалить эту папку.
Само собой, предварительно следует завершить процесс выполнения задачи, иначе система будет отказывать в удалении папки с исполняемыми файлами. Для этого следует нажать на иконку программы на панели уведомлений правой кнопкой мыши и выбрать вариант «Выход».
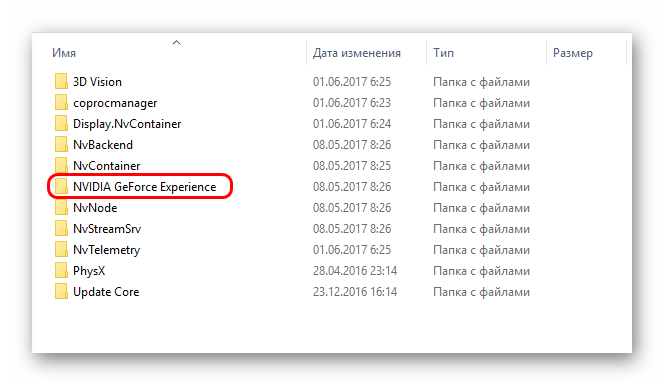
После этого можно удалить папку. Она расположена по пути:
C:\Program Files (x86)\NVIDIA Corporation\
Название у нее соответствующее – «NVIDIA GeForce Experience».
После удаления папки программа перестанет автоматически запускаться при включении компьютера и больше не будет беспокоить пользователя.
Дополнительно
Несколько сведений, которые могут быть полезны при удалении GeForce Experience.
- Есть вариант не удалять программу, а просто не давать ей работать. Но важно знать, что в таком случае придется при каждом запуске компьютера вручную выключать GF Exp. Попытка удалить ее из автозагрузки ничем не увенчается – процесс самостоятельно добавляется туда в автоматическом режиме.
- При установке драйверов от NVIDIA установщик также предлагает установить и GeForce Experience. Раньше ПО устанавливалось автоматически, теперь у пользователя есть выбор, можно просто снять соответствующую галочку. Так что следует не забывать об этом, если программа не нужна на компьютере.
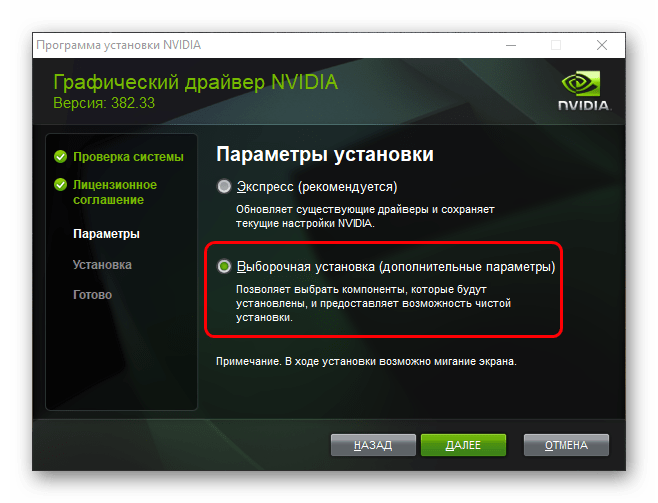
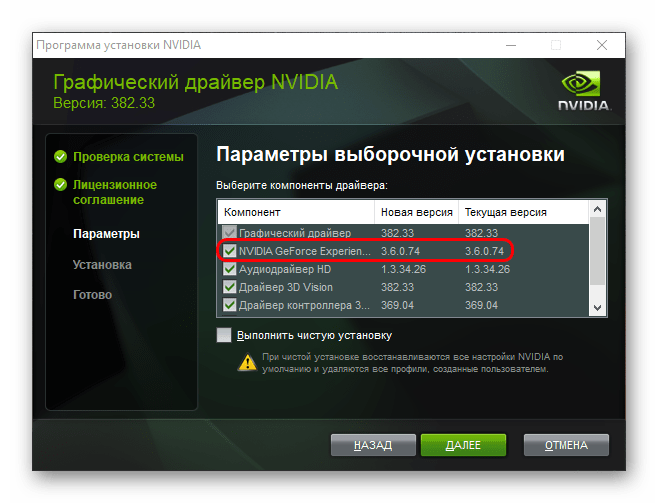
Для этого при установке следует выбрать «Выборочная установка», чтобы перейти в режим настройки ПО, которое будет устанавливаться.

Теперь можно видеть пункт об установке NVIDIA GeForce Experience. Остается просто снять галочку, и программа не будет установлена.
Заключение
Нельзя не согласиться, что плюсы от программы существенные. Но если пользователь не нуждается в указанных выше функциях, а программа лишь доставляет дискомфорт нагрузкой на систему и прочими неудобствами, то лучше всего действительно ее удалить.
Наша группа в TelegramПолезные советы и помощь
It’s really hard to say that the Nvidia GeForce Experience is causing a lot of problems in your gaming performance.
But don’t worry I have the right solution for you. And I promise that you won’t be facing any performance issues for this app anymore.
And in this post, I’ll be talking about the problems caused by the GeForce experience, what are the reasons behind this, and also how to uninstall GeForce Experience.
But the more important question is:
Want to know the best part?
You’ll have an FPS increment after following the full process I’ve described below.
What is the Nvidia GeForce Experience?

Well, Nvidia GeForce Experience is a utility app for your graphics card. The main features of this app are:
- Upgrading the drivers of your GPU from time to time automatically.
- Optimize the game settings according to your PC’s compatibility.
- Capturing awesome screenshots of your gameplay using hotkeys.
- Screen recording at a good resolution.
- Showing FPS(Frames per second) in games.
If you are facing error code 0x0001 or 0x003 on Geforce experience then here’s the fix.
Nvidia is a very reliable company for most gamers across the world. Nvidia releases driver updates regularly and they are most of the time effective.
GeForce Experience is also a good app to easily update drivers and optimize games.
But the main problem is:
This app constantly fails to perform its task perfectly.
Moreover, this app occupies a good amount of your gaming RAM and bandwidth.
It gets worse:
When your games become slow and stutter a lot only for this app.
Your question might be why does this happen?
The answer is a little bit frustrating.
Nvidia releases driver updates regularly for the graphics card. But they don’t upload updates for this app often.
Another reason is that Nvidia has released a lot of graphics cards. They mostly send updates that are related to game optimization for only the new series cards.
It’s sad but true that:
This is a kind of cruel marketing strategy. If people don’t buy new graphics cards and remain happy with the older ones once then it’ll be hard for the company to run that smoothly.
Then what’s the point in having all those fancy gaming gears if you don’t get the performance!
In short:
If you aren’t the person who buys new graphics cards just after they are released then this app is not for you.
The one question left is:
How to Update Nvidia graphics card drivers
You might be wondering:
Why am I asking you to uninstall such a useful app?
The simple answer:
You’ll have to download the updates from their official site. You can subscribe to their email service which will help you to get notified whenever a new update is released for your graphics card.
In the case of game optimization, it’s the best way that you test the quality and performance of your games by setting different graphics settings and trying them out by yourself, and finally choosing the one that suits best with your PC’s configuration.
Follow our guide to fix can’t install Windows 11 on SSD.
How to uninstall Nvidia GeForce Experience
Uninstalling GeForce Experience is a very easy process.
Here are the steps for uninstalling GeForce Experience:
- Type Control Panel and press Enter.
- Open the control panel you’ll see an option named Programs. Below that you will find a place where it’s written Uninstall a program. Now you’ll see a list of programs where you may find several programs named with GeForce Experience.

- Right-click on the name of each program separately and hit the uninstall button. If it asks for any permission then you’ll give it by clicking ok/yes/continue. After each program is uninstalled you’ll need to click the button named finish to complete the task.
I’ve provided an easier way to do it in windows 10 below:

pro tip: Here I wrote a troubleshooting guide on Error code 0x0001 & 0x0003 for your NVIDIA GeForce Experience Software (If you encounter the problem then read this fix)
How to uninstall Nvidia GeForce Experience in Windows 10
In windows 10 it’s easier to uninstall any program.
So here are the steps to uninstall the GeForce gaming experience:
- Go to the windows start menu by hitting the windows key or clicking on the Windows icon in the taskbar.
- Click on the settings button.
- Find a section named Apps. Open it. You’ll see a list of apps here and you’ll find the GeForce Experience apps too.
- Click on the app names and you will see an uninstall button.
- Give permission to uninstall and continue.
- Click finish when it’s done.
Pro Tip: Here’s an easy tutorial on how to keep your PC cool while gaming.
Final Thoughts
Nvidia has provided more than 300 games to be optimized with GeForce Experience but still this app isn’t worth the usage of ram and bandwidth.
For the hardcore gamer, there should be zero tolerance when it comes to the performance sector.

Yes, you can’t let your Expensive gaming PC perform badly for a simple app like this. So, you shouldn’t compromise this matter and take it lightly.
The bottom line?
You should uninstall the app until Nvidia makes it fully compatible with your gaming components.
Steven Arends
Steven Arends is a computer science graduate and tech enthusiast with over 10 years of experience in the field. He has a vast collection of computer hardware and loves exploring the latest advancements. As a contributing author to 10Scopes, Steven shares his expertise to make the world of technology more accessible and easier to understand for all readers.
Managing your Nvidia GeForce Experience app can be essential for optimizing your gaming and graphics performance. Whether you’re troubleshooting an issue or simply starting fresh, this guide will walk you through the process of uninstalling and reinstalling the Nvidia GeForce Experience app on Windows 10 and Windows 11.
Key Takeaways:
- Simple Uninstallation Process: Learn how to uninstall Nvidia GeForce Experience using built-in Windows tools.
- Alternative Uninstallation Method: Discover how to use Revo Uninstaller to remove stubborn installations.
- Reinstallation Steps: Follow clear instructions to reinstall the Nvidia GeForce Experience app.
Method 1: Using Windows Apps & Features
- Access Apps & Features:
- Right-click on the Start button and select Apps & Features (Windows 10) or Installed Apps (Windows 11).

- Locate Nvidia GeForce Experience:
- Scroll through the list of installed apps until you find Nvidia GeForce Experience.

- Uninstall the App:
- Click on Nvidia GeForce Experience and select Uninstall.
- Confirm the action by clicking Uninstall again to begin the process.

Method 2: Using Revo Uninstaller
If the standard uninstallation method doesn’t work, you can use Revo Uninstaller.
- Download Revo Uninstaller:
- Open your browser, go to Google, and search for Revo Uninstaller.
- Visit the official Revo Uninstaller website and download the portable version.

- Extract and Run Revo Uninstaller:
- Once downloaded, extract the file from the zip folder and run the Revo Uninstaller.

- Uninstall Nvidia GeForce Experience:
- Locate Nvidia GeForce Experience in the list, select it, and click Uninstall.
- Make sure to create a system restore point, then continue with the uninstallation.

- Clean Up Leftover Files:
- After uninstallation, scan for leftover files, select all, and delete them.

Reinstalling Nvidia GeForce Experience on Windows 10 & 11
Method 1: Via Nvidia Graphics Driver Installation
- Install or Update Nvidia Drivers:
- During the driver installation, select the option to install Nvidia GeForce Experience.
- For detailed instructions, refer to my guide on installing Nvidia drivers.

Method 2: Separate Installation
- Download the Installer:
- Search for Nvidia GeForce Experience on Google and visit the official Nvidia website.
- Navigate to the GeForce Experience download page and click Download Now.

- Run the Installer:
- Open the downloaded file, agree to the terms, and start the installation.

- Log In and Set Up:
- After installation, log in or create a new account, verify your email, and complete the setup.

Conclusion
Managing your Nvidia GeForce Experience app is a straightforward process, whether you’re uninstalling it to resolve issues or reinstalling it to take advantage of new features. Following these steps will ensure that you have the most up-to-date and functioning version of the software on your system.
Frequently Asked Questions (FAQ)
How do I know if Nvidia GeForce Experience is installed correctly?
If the app launches without errors and allows you to update drivers or optimize games, it’s installed correctly.
What should I do if I encounter issues during the installation?
Ensure your graphics card drivers are up-to-date or consult Nvidia’s support page for specific errors.
Can I reinstall Nvidia GeForce Experience without reinstalling the drivers?
Yes, you can install the app separately by downloading it directly from Nvidia’s website.
Why would I need to uninstall Nvidia GeForce Experience?
Uninstallation might be necessary if you’re experiencing bugs or if a fresh installation is needed for new features.
Is Revo Uninstaller safe to use?
Yes, Revo Uninstaller is a trusted third-party tool that safely removes software and residual files.