
Table of Contents
- Manual Removal
- Conclusion
In this post, we’ll learn how to uninstall Node and NPM on Windows.
The first thing you should do is clear your NPM cache. This is a good idea to do before you uninstall Node as it will remove any information that Node has cached about your dependencies.
To clear your NPM cache, run the following command:
BASH
npm cache clean --force
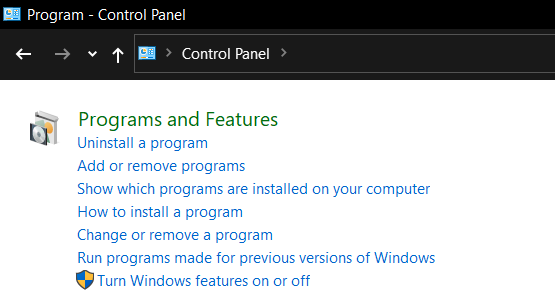
From there, go to your Control Panel. You can do this by searching for Control Panel in the search bar.
Once there, select the Programs and Features option.
Then, find and select Node.js and click the Uninstall button.
This will begin the uninstallation process.
After this has finished, restart you computer so the changes can take effect.
Once you’ve restarted your computer, you should be able to run the following command to confirm that Node and NPM have been uninstalled:
BASH
node -v
npm -v
If your system cannot recognize or find these commands, then it means you’ve successfully uninstalled Node and NPM on your Windows system.
Manual Removal
If after running the above commands, you still see the Node and NPM commands return a valid version, then might need to manually remove them.
To do so, remove everything in the following directories:
BASH
C:\Program Files (x86)\Nodejs
C:\Program Files\Nodejs
C:\Users\{Username}\AppData\Roaming\npm
C:\Users\{Username}\AppData\Roaming\npm-cache
Or if you prefer to use the %appdata% environment variable, you can use these directories:
BASH
C:\Program Files (x86)\Nodejs
C:\Program Files\Nodejs
%appdata%\npm
%appdata%\npm-cache
Once again, restart your computer so the changes can take effect.
Conclusion
We’ve seen how to uninstall Node and NPM on Windows.
Hopefully, you able to complete these steps successfully and uninstall Node and NPM from your Windows system!
To learn more about web development, founding a start-up, and bootstrapping a SaaS, follow me on X!
Last Updated :
07 Jun, 2024
We can remove the nodejs from window by uninstalling it from the programs list. Node.js is a popular JavaScript runtime used for building server-side applications. However, there may come a time when you need to remove Node.js from your Windows system completely. Whether it’s due to a corrupted installation, needing to install a different version, or simply not needing it anymore, here’s a comprehensive guide to uninstall Node.js from your Windows machine.
Steps to Completely Remove Node.js from Windows
Step 1: Whenever we install a package with the command npm install <package name>, npm stores the cache inside the user file system. The default directory where the cache data is stored on Windows is %AppData%/npm-cache. So, we need to clean the cache first. The cache can be cleaned by using the following command.
npm cache clean --force
Step 2: After that, you can verify the cache by using the below command:
npm cache verify
Step 3: Now open the control panel in the computer. Search for Program and features. Under the program and features click on Uninstall a program. Now search for Node.js and uninstall it.

Step 4: Restart your computer or kill all node-related processes from Task Manager.
Step 5: Look for folder in your computer and if they are present remove them. The folders and files may or may not exist in your computer depending on various factors like installed version or CPU architecture.
- C:\Program Files (x86)\Nodejs
- C:\Program Files\Nodejs
- C:\Users\{User}\AppData\Roaming\npm or open run and type appdata and click ok and open roaming there you will find npm.
- C:\Users\{User}\AppData\Roaming\npm-cache or open run and type appdata and click ok and open roaming there you will find npm-cache.
- C:\Users\{User}\.npmrc
- C:\Users\{User}\package.json
- C:\Users\{User}\package-lock.json
- C:\Users\{User}\AppData\Local\Temp\npm-*
Step 6: After that check the environment path variables and make sure no references to npm or Node.js exist.
Step 7: If Node.js is still not uninstalled then open the command prompt and type the below command:
where node
Step 8: If Node.js is not uninstalled the command will output the location of Node.js. Go to that location and uninstall the directory.

Step 9: Restart the computer. Node.js is now completely uninstalled.
Conclusion
By following these steps, you should have completely removed Node.js and npm from your Windows system. This thorough process ensures that no residual files or environment variables are left behind, which is especially important if you plan to reinstall Node.js or switch to a different version. If you encounter any issues during the removal process, restarting your computer and repeating the steps can help resolve them.

Node.js is an essential runtime for JavaScript, and npm (Node Package Manager) is its package manager. However, there are times when you need to completely uninstall and reinstall Node.js and npm, whether due to version conflicts, broken installations, or upgrading to a newer version.
This guide will cover three different methods to uninstall and reinstall Node.js and npm on Windows, macOS, and Linux.
🛠 Method 1: Uninstall & Reinstall Node.js and npm Manually
If you installed Node.js via the official installer or a package manager other than nvm or brew, you’ll need to manually remove it.
🔹 Windows (Manual Uninstallation)
Uninstall Node.js
- Open Control Panel → Programs → Programs and Features.
- Find Node.js in the list.
- Click Uninstall and follow the prompts.
Remove npm Cache & Environment Variables
- Delete the global npm modules:
   rd /s /q "%AppData%\npm"
   rd /s /q "%AppData%\npm-cache"
Enter fullscreen mode
Exit fullscreen mode
- Remove Node.js from System Environment Variables:
- Press
Win + R, typesysdm.cpl, and hit Enter. - Go to the Advanced tab and click Environment Variables.
- Under System Variables, find
NODE_PATH, select it, and click Delete. - Look for
Path, edit it, and remove any reference to Node.js.
- Press
Verify Node.js Removal
Run the following in PowerShell or CMD:
node -v
npm -v
Enter fullscreen mode
Exit fullscreen mode
If it returns "command not found", Node.js has been successfully removed.
🔹 macOS (Manual Uninstallation)
Remove Node.js and npm
- Open Terminal and run:
   sudo rm -rf /usr/local/bin/node
   sudo rm -rf /usr/local/include/node
   sudo rm -rf /usr/local/lib/node_modules
Enter fullscreen mode
Exit fullscreen mode
- Remove npm cache:
   rm -rf ~/.npm
   rm -rf ~/.node-gyp
Enter fullscreen mode
Exit fullscreen mode
- If you installed Node.js using the
.pkgfile, you can also remove it via:
sudo rm -rf /usr/local/lib/dtrace/node.d
Enter fullscreen mode
Exit fullscreen mode
Verify Uninstallation
node -v
npm -v
Enter fullscreen mode
Exit fullscreen mode
If they are no longer recognized, Node.js is fully removed.
🔹 Linux (Manual Uninstallation)
Remove Node.js and npm
- Run the following command:
sudo apt-get remove --purge nodejs npm
Enter fullscreen mode
Exit fullscreen mode
- Clean up global npm packages:
   sudo rm -rf /usr/local/lib/node_modules
   rm -rf ~/.npm
Enter fullscreen mode
Exit fullscreen mode
Verify Uninstallation
node -v
npm -v
Enter fullscreen mode
Exit fullscreen mode
🛠 Method 2: Uninstall & Reinstall Node.js via Homebrew (macOS & Linux)
If you installed Node.js via Homebrew, you can easily uninstall and reinstall it.
🔹 Uninstall Node.js using Homebrew
- Open Terminal and run:
brew uninstall node
Enter fullscreen mode
Exit fullscreen mode
- Clean up leftover files:
brew cleanup
Enter fullscreen mode
Exit fullscreen mode
Verify Node.js Removal
node -v
npm -v
Enter fullscreen mode
Exit fullscreen mode
If Node.js is not found, it has been successfully removed.
🔄 Reinstall Node.js using Homebrew
To reinstall:
brew install node
Enter fullscreen mode
Exit fullscreen mode
After installation, verify:
node -v
npm -v
Enter fullscreen mode
Exit fullscreen mode
🛠 Method 3: Uninstall & Reinstall Node.js using nvm (Node Version Manager) (My Personal Preference)
If you installed Node.js using nvm, this is the easiest way to manage multiple Node.js versions.
The link to the source code can be found here: nvm-sh/nvm.
🔹 Uninstall Node.js using nvm
- Open Terminal (or PowerShell for Windows).
- Run the following command:
nvm uninstall <version>
Enter fullscreen mode
Exit fullscreen mode
Replace <version> with the installed Node.js version. You can check installed versions with:
nvm ls
Enter fullscreen mode
Exit fullscreen mode
- To completely remove
nvm(optional), delete its directory:
rm -rf ~/.nvm
Enter fullscreen mode
Exit fullscreen mode
🔄 Reinstall Node.js using nvm
- First, make sure
nvmis installed:
curl -o- https://raw.githubusercontent.com/nvm-sh/nvm/v0.40.1/install.sh | bash
Enter fullscreen mode
Exit fullscreen mode
If you are like me and have some problems with the PATH of your nvm installation, run the following command (from the source repository):
   export NVM_DIR="$([ -z "${XDG_CONFIG_HOME-}" ] && printf %s "${HOME}/.nvm" || printf %s "${XDG_CONFIG_HOME}/nvm")"
   [ -s "$NVM_DIR/nvm.sh" ] && \. "$NVM_DIR/nvm.sh" # This loads nvm
Enter fullscreen mode
Exit fullscreen mode
- Reload your shell configuration:
   source ~/.zshrc  # For macOS/Linux (zsh users)
   source ~/.bashrc  # For Linux/macOS (bash users)
Enter fullscreen mode
Exit fullscreen mode
- Install the latest LTS version of Node.js:
nvm install --lts
Enter fullscreen mode
Exit fullscreen mode
- Verify installation:
   node -v
   npm -v
Enter fullscreen mode
Exit fullscreen mode
🎯 Summary of Uninstallation & Reinstallation Methods
| Method | Windows | macOS | Linux |
|---|---|---|---|
| Manual | Control Panel → Remove Node.js, delete cache |
rm -rf Node files |
apt-get remove |
| Homebrew | ❌ Not available | brew uninstall node |
brew uninstall node |
| nvm | nvm uninstall <version> |
nvm uninstall <version> |
nvm uninstall <version> |
🚀 Which Method Should You Use?
- For beginners: Use the manual method (Control Panel for Windows, Terminal for macOS/Linux).
-
For developers: If you installed Node.js via
brew, use Homebrew for easy management. -
For advanced users: Use
nvmif you frequently switch between Node.js versions easily.
💡 Final Thoughts
Now you know how to completely uninstall and reinstall Node.js and npm using three different methods across Windows, macOS, and Linux. Using nvm is generally the best option for developers as it allows you to switch between different Node.js versions easily.
Let me know if you run into any issues! 🚀
TL;DR
- Manual Method: Control Panel (Windows), Terminal (macOS/Linux).
-
Homebrew:
brew uninstall node(macOS/Linux). -
nvm:
nvm uninstall <version>,nvm install --lts.
Here at IOFLOOD, as part of our server management duties, we often encounter the need to streamline software configurations and dependencies. Due to this, we have designed a guide on how to uninstall Node.js and npm, two commonly used tools in our server environments. By providing step-by-step instructions, we aim to simplify the process for our customers, enabling them to efficiently remove these components when necessary, whether for cleanup or troubleshooting purposes.
Uninstalling Node.js and npm is about more than just cleaning; it’s about setting the stage for new growth and possibilities. To this end, this guide will walk you through the steps to uninstall Node.js and npm effectively, ensuring a clean slate for your future projects. We’ll cover everything from the basic commands to more nuanced steps for a thorough uninstallation.
So let’s get started with uninstalling npm!
TL;DR: How Do I Uninstall Node.js and npm?
Uninstalling Node.js and npm involves removing the Node.js software and deleting the npm directories. For Linux/macOS users, you can quickly do this with a command such as
sudo apt-get remove nodejs npmorsudo rm -rf /usr/local/bin/npmin the terminal. And for Windows users, the process involves using the ‘Add or Remove Programs’ feature.
Here’s a quick command for Linux/macOS users:
sudo apt-get remove nodejs npm
And for Windows users, navigate to ‘Add or Remove Programs’ and uninstall Node.js.
This TL;DR section provides a snapshot for quickly uninstalling Node.js and npm, but there’s more to it, especially if you want to ensure a clean and complete removal. Continue reading for detailed instructions, platform-specific tips, and troubleshooting advice.
Table of Contents
- Uninstall Node.js and npm: The Basics
- Deep Clean: Removing Residual Files
- Alternative Uninstall Methods
- Troubleshooting Uninstallation Issues
- Understanding Node.js and npm
- Next Steps After Uninstallation
- Wrapping Up: Uninstalling Node.js and npm
Uninstall Node.js and npm: The Basics
Embarking on the journey to uninstall Node.js and npm from your system? Whether you’re on Windows, macOS, or Linux, this beginner-friendly guide has got you covered. Let’s dive into the step-by-step instructions to ensure you can remove Node.js and npm without leaving any traces behind.
Windows: Uninstall Node.js and npm
For Windows users, the process is straightforward thanks to the ‘Add or Remove Programs’ feature.
1. Open the Start Menu and search for ‘Add or Remove Programs’.
2. Scroll to find Node.js in the list and select ‘Uninstall’.
After uninstalling Node.js, it’s crucial to also remove any residual npm packages and cache to ensure a complete cleanup.
rd /s /q %UserProfile%\AppData\Roaming
pm
rd /s /q %UserProfile%\AppData\Roaming
pm-cache

# Output:
# This command does not produce an output but deletes the npm and npm-cache directories.
macOS and Linux: Uninstall Node.js and npm
On macOS and Linux, the process involves using the terminal.
For macOS users:
sudo rm -rf /usr/local/lib/node_modules
sudo rm -rf /usr/local/bin/node
sudo rm -rf /usr/local/bin/npm
For Linux users, the command might vary slightly based on the distribution. A common command is:
sudo apt-get purge nodejs npm

# Output:
# 'Reading package lists... Done
# Building dependency tree
# Reading state information... Done
# The following packages will be REMOVED:
#   nodejs npm
# 0 upgraded, 0 newly installed, 2 to remove and 0 not upgraded.
# After this operation, XX MB disk space will be freed.'
These commands remove the Node.js and npm installations, along with their directories. It’s important to also consider clearing the npm cache and any global packages installed. For a thorough cleanup, ensure you also delete the global npm package directory, often found in /usr/local/lib/node_modules for macOS and Linux users.
Clearing npm Cache
Regardless of your operating system, clearing the npm cache is a crucial step in completely removing npm from your system.
npm cache clean --force

# Output:
# 'Cache cleaned.'
This command forcefully clears the npm cache, removing any stored data from your system and ensuring that no remnants of npm remain. It’s an essential step for a fresh start or before installing a different version of Node.js and npm.
Deep Clean: Removing Residual Files
After uninstalling Node.js and npm using the basic steps, it’s time to ensure no residual files are left lurking in your system. These leftovers can take up unnecessary space or cause conflicts with future installations. Let’s explore how to locate and remove these remnants for a truly clean system.
Locate and Delete npm Cache and Global Packages
Even after uninstallation, npm cache and global packages might still reside on your computer. Here’s how you can find and remove them, ensuring a comprehensive cleanup.
Finding and Clearing npm Cache
The npm cache is a repository for the packages that npm accesses and stores temporarily. Over time, this cache can grow significantly. Here’s how to find and remove it:
npm cache verify

# Output:
# Cache verified: X items, Y MB
This command helps you verify the current state of the cache, including its size and the number of cached items. After verifying, you can proceed to clear it:
npm cache clean --force

# Output:
# Cache cleaned.
The --force flag is necessary because, by default, npm prevents cache cleaning to avoid potential data loss. This command removes all cached data, ensuring that no outdated or unnecessary package data remains.
Removing Global npm Packages
Global npm packages are installed system-wide and can remain after Node.js and npm are uninstalled. To list global npm packages:
npm list -g --depth=0

# Output:
# /usr/local/lib
# ├── package-name@version
This command lists all global packages installed on your system. To remove them, you can use the npm uninstall -g command followed by the package name. Here’s an example:
npm uninstall -g package-name

# Output:
# removed 1 package in Xs
Removing global packages ensures that no unnecessary packages linger, which could interfere with future installations or take up valuable disk space.
Manual Cleanup of Residual Directories
After using commands to remove npm and Node.js, some directories might still exist. Manually checking and removing these directories is crucial for a complete cleanup. Common locations include /usr/local/lib/node_modules for Node.js and /usr/local/bin for npm binaries. Use your system’s file explorer or terminal to navigate and delete these directories.
By following these advanced steps, you ensure a thorough removal of Node.js and npm from your system, paving the way for a clean environment for future projects.
Alternative Uninstall Methods
When the standard uninstallation commands don’t cut it, or you’re looking for a smoother, more automated process, alternative methods come into play. These approaches can vary from using third-party uninstaller tools to leveraging package managers like Homebrew on macOS. Let’s dive into these methods, weighing their benefits and potential drawbacks.
Third-Party Uninstaller Tools
Third-party uninstaller tools can provide a more comprehensive cleanup than the built-in uninstallation process. These tools often scan for residual files and directories that manual or command-line uninstallations might miss.
However, it’s essential to choose a reputable uninstaller to avoid introducing malware or other unwanted software onto your system. Research and select a tool with positive reviews and a strong track record.
Using Homebrew on macOS
For macOS users, Homebrew is a beloved package manager that can also manage uninstallations. If you installed Node.js and npm via Homebrew, uninstalling is straightforward with a single command:
brew uninstall node

# Output:
# Uninstalling /usr/local/Cellar/node/XX.X.X... (X,XXX files, XX.XMB)
# node XX.X.X has been uninstalled!
This command removes Node.js and npm, including all the files and directories associated with the installation. The output confirms the successful uninstallation, listing the number of files and the total space reclaimed.
Pros and Cons
Pros:
– Third-party tools and package managers like Homebrew can automate the uninstallation process, making it more thorough and less time-consuming.
– They can help remove residual files and directories, ensuring a cleaner system.
Cons:
– Third-party tools carry a risk of malware, especially if not carefully selected.
– These methods may require additional software installations, which might not be ideal for users seeking minimalism.
In summary, while alternative uninstallation methods can offer a more automated and comprehensive cleanup, they come with their own set of considerations. Whether you opt for a third-party tool or a package manager like Homebrew, ensure you’re using reputable software to maintain your system’s integrity and security.
Troubleshooting Uninstallation Issues
Navigating the uninstallation of Node.js and npm can sometimes lead you into murky waters. Let’s shine a light on common issues you might encounter and how to address them, ensuring a smooth and complete removal process.
Permission Errors During Uninstallation
One of the most common hurdles is encountering permission errors, especially when using commands that require administrative or superuser privileges.
If you’re on Linux or macOS and face permission issues, prefixing your command with sudo can grant the necessary permissions:
sudo npm uninstall -g npm

# Output:
# up to date in 0.05s
# fixed 0 of 0 vulnerabilities
This command attempts to uninstall npm globally with superuser permissions. The output indicates that the operation was successful, with no vulnerabilities remaining.
Ensuring Complete Uninstallation
After running the standard uninstallation commands, it’s crucial to verify that Node.js and npm are indeed fully removed from your system. A quick way to check is to use the version check commands:
node -v
npm -v

# Output:
# bash: node: command not found
# bash: npm: command not found
The expected output should indicate that both commands are not found, signifying that Node.js and npm are no longer installed on your system.
Incomplete Uninstallation Fixes
If you still find traces of Node.js or npm after uninstallation, revisiting the manual removal of residual files and directories is advisable. Ensure you’ve deleted the npm cache, global npm packages, and any Node.js binaries lingering in system paths.
Verification Steps
Finally, to doubly ensure that Node.js and npm have been eradicated:
- Restart your computer to clear any system caches.
- Open your terminal and rerun the version check commands.
By addressing these common issues and considerations, you can navigate the uninstallation process more confidently, ensuring that Node.js and npm are thoroughly removed from your system. This paves the way for a clean environment, free from potential conflicts or errors in future installations.
Understanding Node.js and npm
Before diving into the specifics of uninstallation, it’s crucial to grasp what Node.js and npm are and the roles they play in development environments. This foundational knowledge will illuminate why and when their uninstallation becomes necessary.
What is Node.js?
Node.js is an open-source, cross-platform JavaScript runtime environment that allows developers to run JavaScript on the server-side. It’s designed to build scalable network applications, making it a staple in web development, especially for real-time applications.
The Role of npm
npm, which stands for Node Package Manager, is the default package manager for Node.js. It facilitates the management of packages (libraries, tools, and frameworks) that enhance the functionality of Node.js applications. npm simplifies the process of sharing, updating, and using code across projects.
Why Uninstall?
Uninstallation of Node.js and npm might be necessary for several reasons:
- Upgrading to a Newer Version: To ensure compatibility or leverage new features, developers might need to uninstall an older version before installing a newer one.
- Switching Development Environments: Moving to a different development environment or runtime might require the removal of Node.js and npm.
- Resolving Conflicts: Sometimes, conflicting versions of Node.js or npm can cause issues in projects. Uninstalling can help reset the environment.
- System Cleanup: Regular maintenance or the desire to declutter the development environment might lead to uninstallation.
Understanding these components and their significance in the development process highlights the importance of knowing how to uninstall them properly. Whether it’s for an upgrade, a clean slate, or resolving conflicts, the ability to uninstall Node.js and npm effectively is a valuable skill for any developer.
Next Steps After Uninstallation
With Node.js and npm successfully uninstalled, you’ve set the stage for new beginnings. Whether you’re aiming for a cleaner development environment, exploring alternative JavaScript runtimes, or planning to reinstall Node.js for a fresh start, there’s a path forward. Let’s explore some actionable next steps and resources to guide you on your journey.
Exploring Alternative JavaScript Runtimes
If you’re curious about what lies beyond Node.js, several alternative JavaScript runtimes offer unique features and capabilities. For instance, Deno, created by the original creator of Node.js, focuses on security and supports TypeScript out of the box. Another option is Electron, perfect for building cross-platform desktop apps with web technologies.
Reinstalling Node.js: A Fresh Start
Reinstalling Node.js can be the next step for many, especially if the uninstallation was part of an upgrade process. When reinstalling, consider using nvm (Node Version Manager) to manage multiple Node.js versions. This tool simplifies switching between versions and managing dependencies.
nvm install node

# Output:
# Downloading and installing node vXX.X.X...
# Now using node vXX.X.X (npm vX.X.X)
This command installs the latest version of Node.js, allowing you to start anew with the latest features and security updates. nvm also makes it easy to switch back if you need an older version for specific projects.
Cleaning Up the Development Environment
After uninstallation and before moving forward, take a moment to clean up your development environment. This can involve organizing project directories, reviewing installed software, and ensuring your development tools are up to date. A clean environment reduces clutter and can improve overall productivity.
Further Resources for Node.js and npm Mastery
To deepen your knowledge and skills, here are three carefully selected resources:
- Node.js Official Website – The best place to start for official documentation, news, and resources.
-
npm Documentation – Guides and documentation to master npm, from basic usage to advanced package management.
-
The Node.js Handbook – A free, comprehensive guide covering everything from Node.js basics to advanced concepts.
These resources provide a wealth of information for both beginners and experienced developers, offering guides, tutorials, and insights into best practices for working with Node.js and npm.
Wrapping Up: Uninstalling Node.js and npm
In this comprehensive guide, we’ve navigated the process of uninstalling Node.js and npm, ensuring your development environment remains clean and up-to-date. The journey to maintain a tidy workspace is akin to gardening; it requires regular attention and care to foster growth and innovation.
We began with the basics, providing step-by-step instructions for Windows, macOS, and Linux users. We explored how to remove Node.js and npm using simple commands and delved into the importance of also clearing out global npm packages and cache to avoid future conflicts.
Moving to more advanced techniques, we discussed manually removing residual files and directories that might linger after a standard uninstallation. This ensures a thorough cleanup, leaving no trace of Node.js and npm behind.
For those seeking alternative methods, we explored the use of third-party uninstaller tools and package managers like Homebrew for macOS users. Each approach offers its pros and cons, from automated processes to potential risks associated with third-party software.
| Method | Pros | Cons |
|---|---|---|
| Standard Commands | Direct, usually effective | May leave residuals |
| Third-Party Tools | Comprehensive cleanup | Risk of malware |
| Package Managers | Automated, convenient | May require additional setup |
As we conclude this guide, remember that uninstalling Node.js and npm is just the beginning. Whether you’re upgrading to a newer version, switching development environments, or simply decluttering, a clean slate opens up a world of possibilities for your projects.
We hope this guide has equipped you with the knowledge and tools needed for a successful uninstallation. Continue exploring, learning, and growing in your development journey. Happy coding!
By Filip on 04/19/2024
Learn how to completely uninstall Node.js and npm from your Windows system, including removing leftover files and environment variables, for a clean slate.
Table of Contents
- Introduction
- Step-by-Step Solution
- Code Example
- Additional Notes
- Summary
- Conclusion
- References
Introduction
This guide provides a comprehensive walkthrough on how to completely uninstall Node.js and npm from your Windows system. It covers using the Control Panel, clearing the npm cache, manually deleting leftover files, checking environment variables, and restarting your computer. Additional notes address using package managers and troubleshooting potential issues.
Step-by-Step Solution
Here’s how to completely remove Node.js and npm from your Windows system:
1. Uninstall via Control Panel:
- Open the Control Panel on your Windows machine.
- Navigate to Programs and Features (or Add/Remove Programs in older versions).
- Locate Node.js in the list of installed programs.
- Select Node.js and click Uninstall.
- Follow the on-screen instructions to complete the uninstallation process.
2. Clear npm cache:
Even after uninstalling, some leftover files might remain. Let’s clear the npm cache:
- Open a command prompt or terminal window.
- Type the following command and press Enter:
This command forcefully clears the npm cache, removing any remaining packages or data.
3. Manually delete remaining files (Optional):
For a thorough cleanup, you can manually delete the following directories:
- C:\Program Files\nodejs
- C:\Users[Your Username]\AppData\Roaming\npm
- C:\Users[Your Username]\AppData\Roaming\npm-cache
Note: Replace [Your Username] with your actual Windows username.
4. Check environment variables (Optional):
- Right-click on This PC or My Computer and select Properties.
- Go to Advanced system settings and click on Environment Variables.
- Under System variables, look for any entries related to Node.js or npm (e.g., NODE_PATH).
- If found, select the entry and click Delete.
5. Restart your computer:
After completing the above steps, restart your computer to ensure all changes take effect.
Additional Notes:
- If you used a package manager like Chocolatey to install Node.js, you can use the corresponding uninstall command (e.g.,
choco uninstall nodejs). - If you encounter any issues during the uninstallation process, refer to the resources mentioned at the beginning of this guide for further troubleshooting.
By following these steps, you should have successfully removed Node.js and npm from your Windows system. You can now proceed with a fresh installation or explore other development tools.
Code Example
This code snippet demonstrates how to use JavaScript in conjunction with Node Version Manager (nvm) to manage multiple Node.js versions on a system. While not directly uninstalling Node.js, it provides a way to switch between different versions, achieving a similar outcome. The code defines functions to execute shell commands and switch between Node.js versions using nvm. This allows for flexibility in development environments where different projects may require specific Node.js versions.
While the provided instructions are for manual uninstallation steps on Windows, there’s no direct JavaScript code involved in the process. Uninstalling software like Node.js typically involves system-level operations and interacting with the Windows Control Panel or package managers.
However, let’s explore how you might use JavaScript to achieve similar results in a different context:
Scenario: Managing Node.js versions with nvm (Node Version Manager)
nvm is a popular tool for managing multiple Node.js versions on a single machine. Here’s how you can use JavaScript along with nvm to switch between Node.js versions, which indirectly achieves a similar outcome to uninstalling and reinstalling:
const { exec } = require('child_process');

// Function to execute shell commands
function runCommand(command) {
  return new Promise((resolve, reject) => {
    exec(command, (error, stdout, stderr) => {
      if (error) {
        reject(error);
      } else {
        resolve(stdout.trim());
      }
    });
  });
}

// Example usage:
async function switchNodeVersion(version) {
  try {
    // Check if the version is installed
    const installedVersions = await runCommand('nvm ls');
    if (!installedVersions.includes(version)) {
      console.log(`Installing Node.js version ${version}`);
      await runCommand(`nvm install ${version}`);
    }

    // Use the specified version
    console.log(`Using Node.js version ${version}`);
    await runCommand(`nvm use ${version}`);
  } catch (error) {
    console.error('Error:', error);
  }
}

// Example: Switch to Node.js version 14.18.0
switchNodeVersion('14.18.0');
Explanation:
-
Import
exec: We import theexecfunction from thechild_processmodule to execute shell commands. -
runCommandFunction: This helper function executes a given shell command and returns a Promise that resolves with the command’s output. -
switchNodeVersionFunction:- It takes a Node.js version as input.
- It checks if the version is already installed using
nvm ls. - If not installed, it uses
nvm installto install the version. - Finally, it uses
nvm useto switch to the specified version.
Remember: This example requires having nvm installed and configured on your system.
Limitations:
- This approach doesn’t truly «uninstall» Node.js versions; it manages them within nvm.
- It’s specific to using nvm and may not be applicable to other package managers or environments.
Additional Notes
-
Global Packages: If you’ve installed global packages using npm, you might want to list them before uninstalling using
npm list -g --depth=0. This can help you decide whether to reinstall them later. - Project Dependencies: If you have projects that rely on specific Node.js or npm versions, make sure to note those versions before uninstalling. This will ensure you can recreate the correct environment later.
- Registry Configuration: In some cases, you might have modified the npm registry configuration (e.g., using a private registry). Remember to back up or document these settings if you plan to restore them after reinstallation.
- Third-Party Tools: If you’ve used any third-party tools related to Node.js or npm (e.g., task runners, build tools), consider their compatibility with the new Node.js version you might install.
- Backup Important Data: As with any software uninstallation, it’s a good practice to back up any important data or projects before proceeding. This ensures you don’t lose any critical information during the process.
Summary
| Step | Action | Description |
|---|---|---|
| 1 | Uninstall via Control Panel | Remove Node.js using the Programs and Features (or Add/Remove Programs) option. |
| 2 | Clear npm cache | Use the command npm cache clean --force in a terminal to remove leftover npm data. |
| 3 | Manually delete remaining files (Optional) | Delete directories associated with Node.js and npm, including C:\Program Files\nodejs, C:\Users\[Your Username]\AppData\Roaming\npm, and C:\Users\[Your Username]\AppData\Roaming\npm-cache. |
| 4 | Check environment variables (Optional) | Remove any Node.js or npm related entries from the System variables under Environment Variables. |
| 5 | Restart your computer | Reboot the system to ensure all changes take effect. |
Conclusion
By following the outlined steps, you can effectively remove Node.js and npm from your Windows system. This process involves using the Control Panel, clearing the npm cache, manually deleting remaining files (optional), checking environment variables (optional), and restarting your computer. Remember to consider additional factors such as global packages, project dependencies, registry configurations, third-party tools, and data backups to ensure a smooth uninstallation process. Whether you’re preparing for a fresh installation or exploring alternative development tools, these instructions provide a clear roadmap for successfully uninstalling Node.js and npm from your Windows environment.
References
-

How to completely remove node.js from Windows ? — GeeksforGeeks | A Computer Science portal for geeks. It contains well written, well thought and well explained computer science and programming articles, quizzes and practice/competitive programming/company interview Questions.
-
How to uninstall Node.js? Remove Node.js from your system … | There is no restriction on the type of programming language used for writing server-side code. Some of the popular examples include PHP, Ruby, C#, Python, and Javascript. Out of all these, Javascript is very much popular because of its beginner-friendliness and being able to be used both on the client-side and server-side as well. As
- javascript — How do I completely uninstall Node.js, and reinstall from … | Jun 24, 2012 … First: · To recap, the best way (I’ve found) to completely uninstall node + npm is to do the following: · go to /usr/local/include and delete any …
- How to completely remove node js from Windows | Edureka … | I removed my prior version of node.js (0.8.11), then downloaded and installed the current version, 0.10 … . I’m using a 64-bit version of Windows 7.
- need help to fix a problem with a corrupted version of node nvm … | I researched a lot on the subject, but I couldn’t find a viable solution to my problem, I’m setting up a development environment by NVM I installed node 8.9.0, I managed to install the NPM package …
- Chocolatey Uninstall NodeJS Windows 8 — Super User | Jan 22, 2015 … 2 Answers 2 · Ensure you are on the more recent version of choco (0.9.9.x series) · choco uninstall npm -dvyaf · choco uninstall nodejs.
-
[BUG] npm install will randomly hang forever and cannot be closed … | Is there an existing issue for this? I have searched the existing issues This issue exists in the latest npm version I am using the latest npm Current Behavior When running npm install it will some…
-
Is there a way to uninstall all node and npm instances from your … | Posted by u/sharemypenguins — 41 votes and 10 comments
- Sharepoint development framework environment setup. Yeoman … | Following the guide https://docs.microsoft.com/en-us/sharepoint/dev/spfx/set-up-your-development-environmentmade sure of all the prerequisites but as I follow..
