
Компонент .NET Framework является одним из самых важных для работы программ в Виндовс, однако в некоторых случаях он начинает работать некорректно. Для устранения проблем этот софт нужно удалить, и сегодня мы расскажем вам, возможно ли это сделать в Виндовс 10.
Строго говоря, в Виндовс 10 невозможно полностью удалить рассматриваемый компонент. Дело в том, что начиная с восьмой версии редмондской ОС, .NET Framework плотно интегрирован в систему, но можно его отключить через управление системными элементами либо воспользоваться утилитой восстановления.
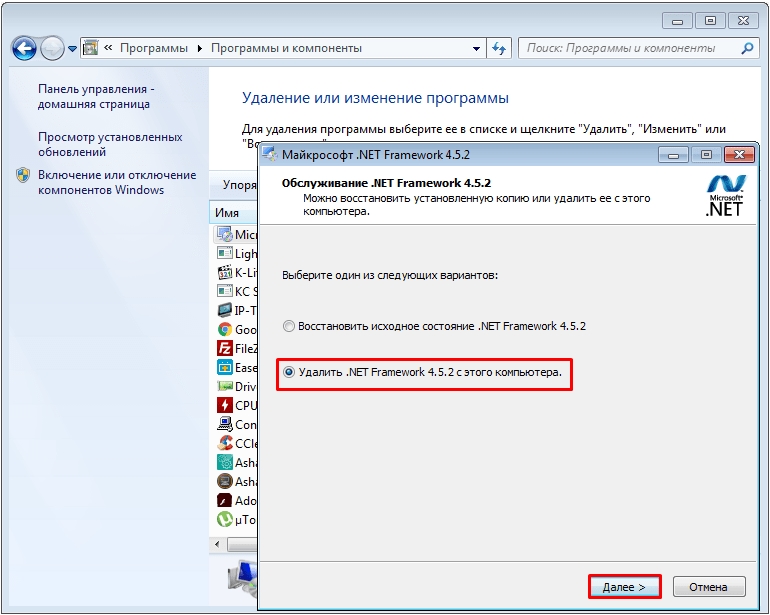
Способ 1: «Программы и компоненты»
Для отключения НЕТ Фреймворк нужно открыть средство «Программы и компоненты». Проще всего это сделать через «Панель управления».
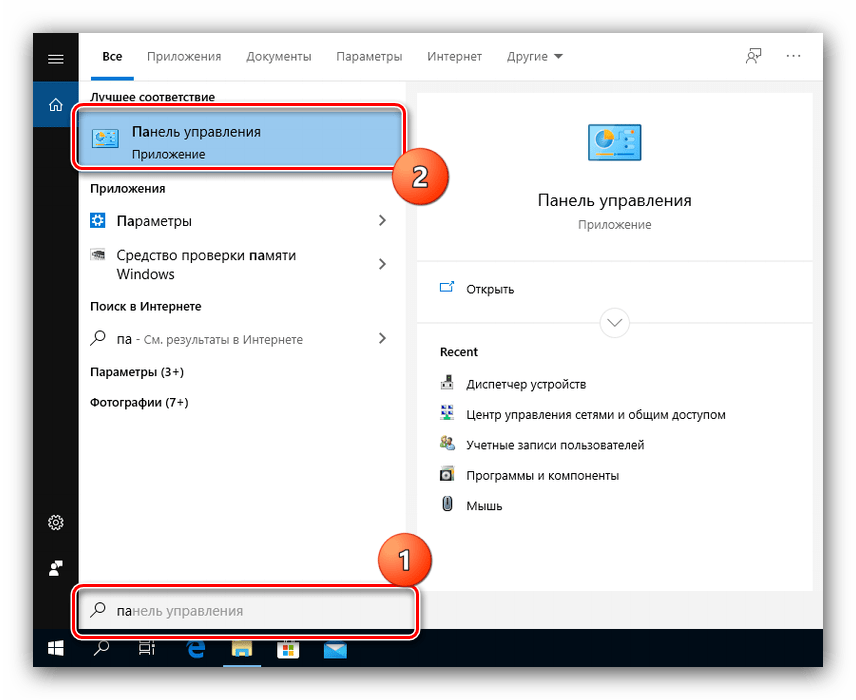
- Напишите в «Поиске» запрос
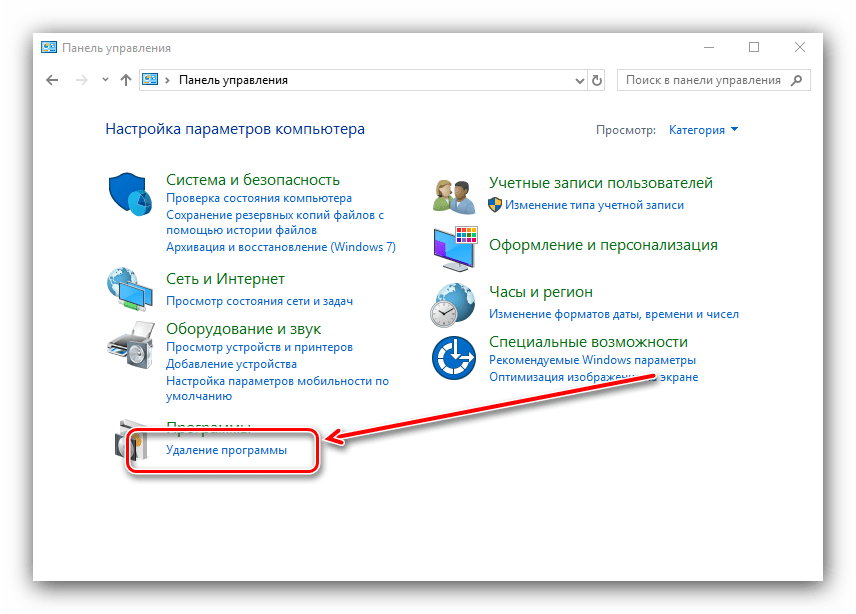
панель управления, затем кликните по подходящему результату. - Выберите пункт «Удаление программ».
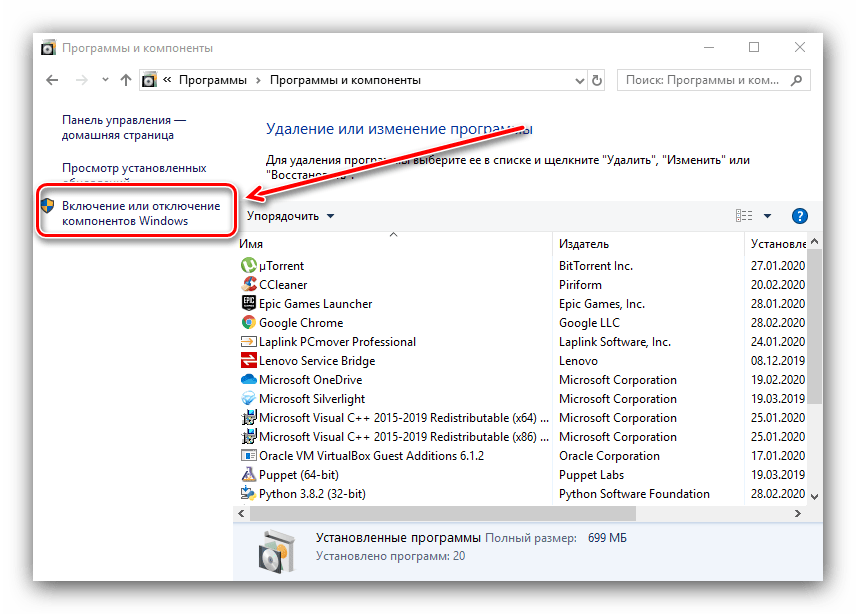
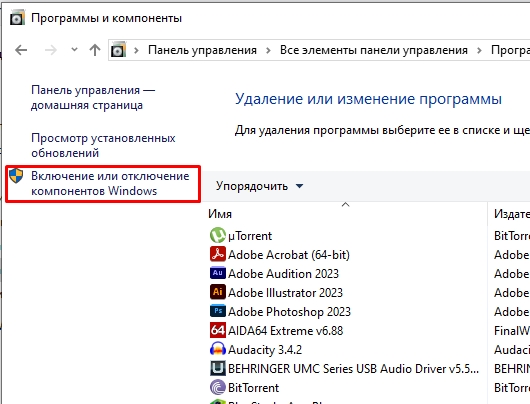
- После запуска менеджера установленного ПО кликните по ссылке «Включение или отключение компонентов Windows». Обратите внимание, что для доступа к этой опции у вашей учётной записи должны быть права администратора.

Подробнее: Получение прав администратора в Windows 10
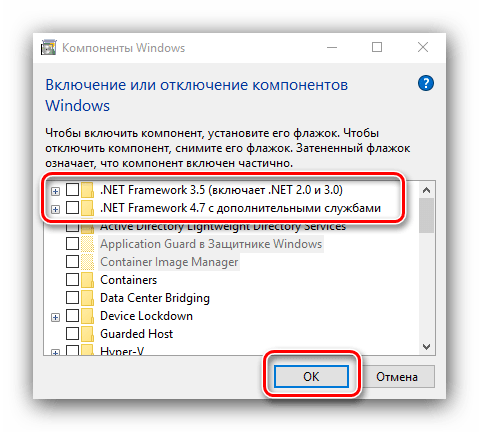
- Найдите в списке компонентов записи, связанные с .NET Framework, и снимите с них отметки. Убедитесь, что чекбоксы напротив нужных позиций пусты, после чего кликните «ОК».
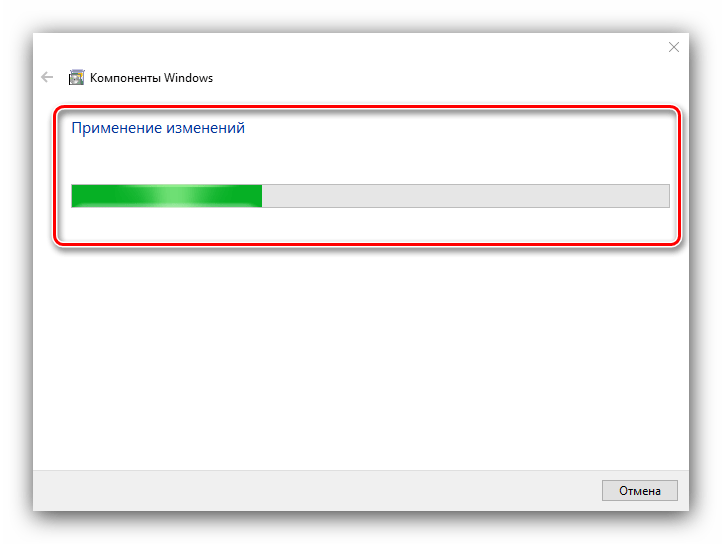
- Подождите некоторое время, пока система удалит отмеченные компоненты, после чего перезагрузите компьютер.
Способ 2: NET Framework Repair Tool
Чтобы устранить проблемы с рассматриваемым компонентом, его необязательно удалять – компания Microsoft выпускает специальную утилиту, позволяющую ликвидировать возможные сбои.
Скачать NET Framework Repair Tool с официального сайта
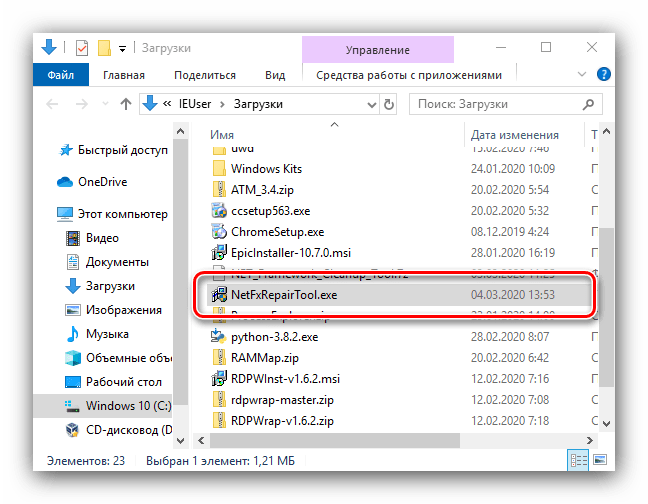
- Утилиту не нужно устанавливать, просто запустите исполняемый файл.
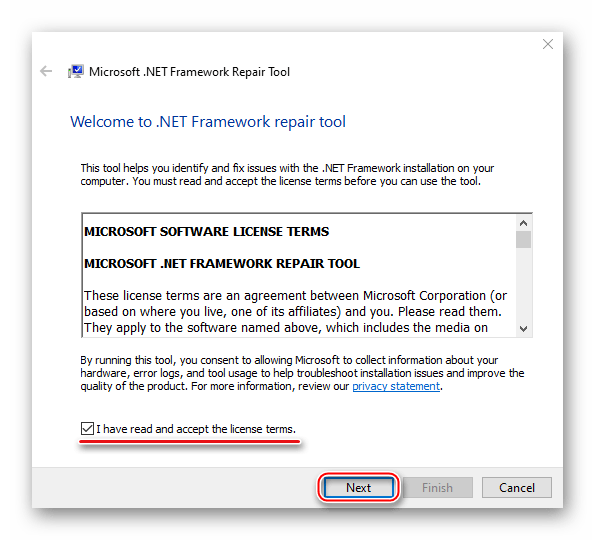
- В стартовом окне примите лицензионное соглашение, затем кликните «Next».
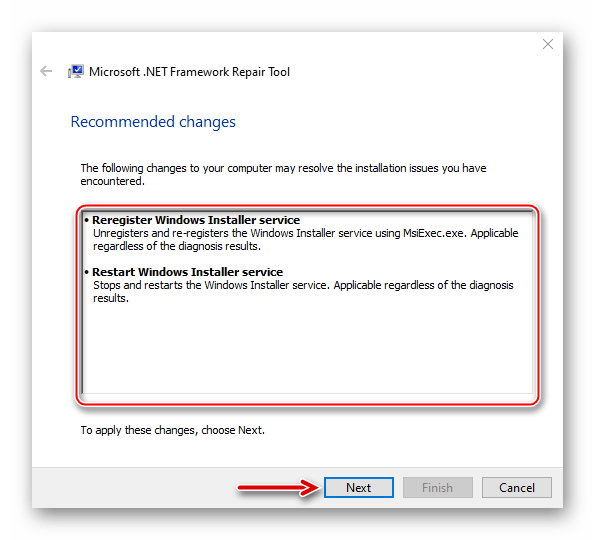
- Подождите, пока средство проведёт сканирование на наличие проблем. Если таковые будут найдены, оно предложит их устранить.
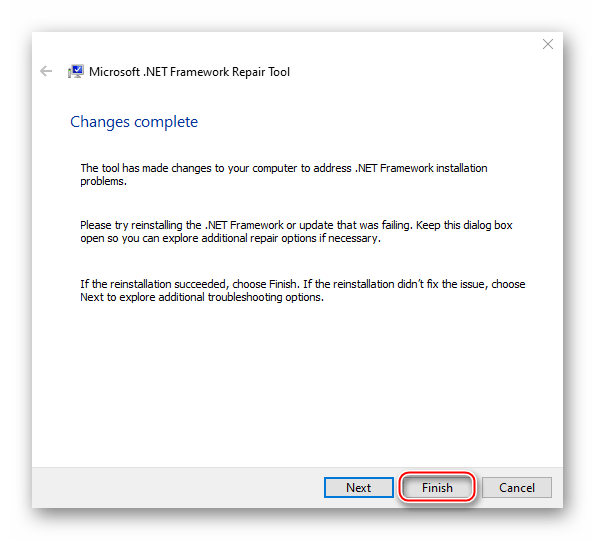
- Дождитесь завершения выполнения процедуры. Далее нажмите «Finish» и перезагрузите компьютер.
Мы ознакомили вас с существующими методами устранения проблем с .NET Framework в Windows 10. Как видим, полноценно удалить это ПО не получится, однако сбои в его работе вполне возможно убрать.
Наша группа в TelegramПолезные советы и помощь

Remove the .NET runtime and SDK
Take the challenge
Uninstalling the .NET Framework may seem daunting, but with a little guidance, it becomes a manageable task. The key is to understand the reasons behind the uninstallation and to follow the steps diligently. Whether your goal is to free up space, resolve software conflicts, or simply update to a newer version, taking on this challenge can streamline your system’s performance and ensure a cleaner environment for future installations.
Should I remove a version?
Deciding whether or not to remove a specific .NET Framework version can be tricky. Compatibility with existing applications is the primary concern. Some applications may require a particular version to function correctly. Consulting with application documentation or reaching out to support channels can provide clarity. Keeping the latest version while removing obsolete ones can help maintain system integrity without compromising functionality.
Determine what is installed
Before proceeding with the uninstallation, it’s imperative to identify which .NET Framework versions are installed on your system. This can be achieved through the Control Panel on Windows or using command-line tools such as dotnet --list-sdks for .NET SDKs. Accurate identification ensures that you do not unintentionally remove necessary components, preserving the stability of your applications.
Uninstall .NET
The uninstallation process involves navigating to the Programs and Features section of the Control Panel, locating the .NET Framework version, and selecting ‘Uninstall.’ Following the prompts will guide you through the removal. For .NET SDKs, commands such as dotnet sdk uninstall <version> can be used. Keeping a backup of essential data and creating a restore point is advisable before making significant changes.
Visual Studio dependency on .NET SDK versions
Visual Studio relies heavily on particular .NET SDK versions to compile and run projects. Removing these versions without consideration can lead to project errors and reduced functionality within Visual Studio. Therefore, it is crucial to check which SDK versions are required for your ongoing projects and ensure they remain intact, avoiding unnecessary disruption to your development workflow.
Remove the NuGet fallback directory
The NuGet fallback directory stores packages that the .NET SDK can use if they are not found in the default package source. Removing this directory can free up significant space but should be done with caution. Ensuring that all necessary packages are available in your projects can prevent build issues. The directory is typically located in the global packages folder, and its contents can be deleted manually.
Additional resources
For those encountering difficulties or seeking further guidance, a wealth of resources is available online. Microsoft’s official documentation provides comprehensive guides, while community forums and tech blogs offer practical advice and troubleshooting tips. Leveraging these resources can make the uninstallation process smoother and more intuitive, ensuring that you achieve your objectives with minimal hassle.
How to Uninstall .NET Framework from Windows 10?
Uninstall using Control Panel
Accessing the Control Panel offers a straightforward method for removing the .NET Framework from your system. Navigate to the «Programs and Features» section, where you can find a list of all installed programs. Scroll through this list until you locate the .NET Framework. Right-click on it and select «Uninstall.» Follow the on-screen prompts to complete the process. This method is user-friendly and doesn’t require advanced technical skills, making it accessible for the average user.
Uninstall using PowerShell
For those who prefer a command-line approach, PowerShell provides an efficient way to uninstall the .NET Framework. Open PowerShell with administrative privileges and execute the following command:
Get-WmiObject -Class Win32_Product | Where-Object { $_.Name -like "Microsoft .NET Framework*" } | ForEach-Object { $_.Uninstall() }
This command searches for all instances of the .NET Framework installed on your system and uninstalls them. PowerShell’s scripting capabilities make it a powerful tool for managing software installations and removals.
Uninstall using Command Prompt
The Command Prompt is another viable option for removing the .NET Framework. Open the Command Prompt with administrative rights and run the following command:
wmic product where "name like 'Microsoft .NET Framework%'" call uninstall
This command queries the system for any installed versions of the .NET Framework and initiates the uninstallation process. The Command Prompt provides a direct and efficient way to manage system software, particularly for users comfortable with text-based commands.
Uninstall using Third-Party Uninstallers
- Download and install a reputable third-party uninstaller such as Revo Uninstaller or IObit Uninstaller.
- Open the uninstaller and allow it to scan your system for installed programs.
- Locate the .NET Framework in the list of installed software.
- Select the .NET Framework and choose the option to uninstall.
- Follow any additional prompts to fully remove the software from your system.
Third-party uninstallers often provide more thorough removal processes, ensuring that leftover files and registry entries are also deleted, which can help maintain system performance and stability.
Verify Uninstallation
Check Registry
Navigating through the Windows Registry provides a more in-depth approach to ensure that the .NET Framework is thoroughly uninstalled. The registry holds crucial configuration settings and system information that can sometimes retain remnants of uninstalled software. To access the registry, use the Run dialog (Win + R), type regedit, and press Enter. Once inside the Registry Editor, locate the subkeys under HKEY_LOCAL_MACHINE\SOFTWARE\Microsoft\NET Framework Setup\NDP. Deleting these entries must be done with caution, as improper changes can affect system stability. Ensuring that these keys are removed can help prevent potential conflicts with future installations of the .NET Framework.
Check Program Files
After uninstalling the .NET Framework through the Control Panel, remnants may still lurk in the system directories. A manual sweep through the Program Files directory is a prudent step. Navigate to C:\Program Files and C:\Program Files (x86), and look for folders related to the .NET Framework. Deleting these folders ensures that no residual files interfere with new installations or system performance. Additionally, checking the C:\Windows\Microsoft.NET directory can reveal leftover files that might have been overlooked by the uninstaller. This meticulous process helps maintain a clean and efficient operating system environment.
Few Frequently Asked Questions
Users often have several questions when it comes to uninstalling the .NET Framework. One common query is whether removing the framework will affect other installed applications. It’s important to know that many applications rely on specific versions of the .NET Framework to function correctly. Another frequent question is about the best method to uninstall the framework—whether through the Control Panel or using specialized uninstaller software. While the Control Panel method is straightforward, specialized tools can ensure a more thorough removal. Lastly, users often ask about reinstalling the framework after uninstallation. Reinstallation typically involves downloading the desired version from the official Microsoft website and following the installation instructions. Addressing these questions can help users make informed decisions about managing their .NET Framework installations.
ВНИМАНИЕ! Внимательно прочтите вступление.
Всем привет! И у нас разбор очередного вопроса из письма, который звучит так – как удалить NET Framework в Windows 10 или 11. На самом деле сделать это напрямую невозможно (в новых версиях винды). Ранее на сайте Microsoft существовала утилита «NET Framework Cleanup Tool», которая удаляла нужные пакеты из системы, но сейчас её там нет. По крайней мере ссылки для скачивания нерабочие. Поэтому мы будем использовать другие варианты.
Для старых версий – возможно отключение через компоненты. Если же у вас есть проблема с какой-то определенной версией NET Framework, то её нужно переустановить. Не путайте NET Framework с какими-то программами – это компонент, поэтому его НЕ нужно удалять перед обычной установкой.
Содержание
- Просто переустановка
- Отключить .NET Framework
- Для старых версий Windows
- Видео
- Задать вопрос автору статьи
Просто переустановка

Смотрите, если у вас возникает какая-то проблема с одной из версий .NET Framework, то лучше её просто переустановить. В таком случае идет перезапись старых файлов и восстановление поломанных компонентов пакета. Скачать их можно по ссылке ниже:
Скачать .NET Framework
Если вы не знаете, какая именно версия вызывает проблему при запуске программы или игры, то просто скачиваем и устанавливаем всё что там есть.
Читаем – почему игра не запускается.
В этой главе мы поговорим про то, как отключить .NET Framework в Windows 10 и 11. В особенности поговорим про версию 3.5, с которой иногда возникают проблемы.
Читаем – что делать если при запуске игры, вы видите черный экран.
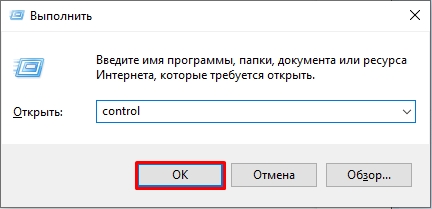
- Зажимаем клавиши:
+ R
- Вводим:
control
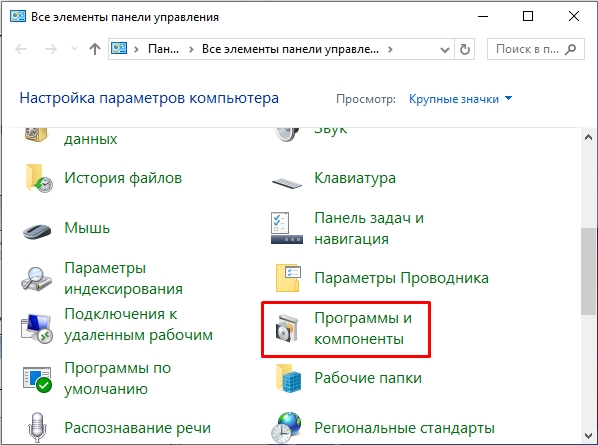
- Заходим в «Программы и компоненты».
- Слева нажмите по ссылке «Включение или отключение компонентов Windows».
Для старых версий Windows
Итак, для старых версий Windows можно удалить Microsoft .NET Framework из раздела «Панели управления». Давайте я покажу, как это можно сделать.
Читаем – как повысить FPS в играх.
ПРИМЕЧАНИЕ! На новых версиях Windows 10 и 11 это сделать невозможно – используем вариант с переустановкой.
Проделываем шаги 1-3 из второй главы, чтобы попасть «Программы и компоненты». Далее в списке приложений находим NET Framework, кликаем по нему правой кнопкой мыши и выбираем команду «Удалить». В Windows 7 и 8 можно это сделать без каких-то проблем.
Видео
-
Home
-
News
- How to Uninstall and Reinstall .NET Framework? Answered Here
By Anna | Follow |
Last Updated
Can you completely remove .NET Framework and then reinstall it? Some people will encounter troubles when using .NET Framework and that will need you to repair or even uninstall .NET Framework. To finish this procedure, you can read this article on MiniTool and get what you want.
What Is .NET Framework?
Some people may have little knowledge about .NET Framework so we will have an introduction to it first.
.NET Framework, developed by Microsoft, is an open-source platform designed especially for building Windows-based applications. For its free powerful functions for commercial use, .NET Framework become an essential part to create custom Windows-specific applications around the world.
There are some main features and advantages of .NET Framework you can think of:
- It includes its own set of developer tools and class libraries.
- It is an open-source software development platform free for commercial use.
- It works with a variety of popular programming languages and the built apps can support a variety of platforms, including desktop, mobile, web, and servers.
Tips:
Experience a faster system with MiniTool System Booster – your solution to effortless program uninstallation.
MiniTool System Booster TrialClick to Download100%Clean & Safe
To uninstall .NET Framework and reinstall it, please go to the next part.
How to Uninstall and Reinstall .NET Framework?
If you encountered some issues with .NET Framework and you want to reinstall it, you need to remove .NET Framework first, but this method may be not suitable for every Windows.
It is recommended to try to repair .NET Framework and to run the System File Checker before you start the removal, then you can try the following steps to uninstall and reinstall .NET Framework.
Way 1
Step 1: Type control panel in Search to open it and go to Programs and Features.
Step 2: Click Turn Windows features on or off from the left side and click on the + symbol next to .NET Framework 4.8 Advanced Services.
Step 3: Then uncheck the box next to ASP .NET 4.8 and click the OK button to save the changes.
Step 4: Close the window and restart your computer to go to Control Panel and repeat the above steps to re-check the box next to ASP .NET 4.8.
When you do that, Windows may download an update for your .NET framework. If that succeeds, a message will pop up to tell you the result, but the method is just not useful for all Windows; if you fail, please try others.
Way 2
Step 1: Open your Control Panel and go to Programs and Features.
Step 2: Then please locate all that start with Microsoft .NET and right-click on them one by one to uninstall them. Be careful, you’d better start the removal from the latest version and make sure no leftover files.
Way 3
If the above two methods are useless, the last resort is to download and install the .NET uninstall tool. This tool will help you to remove .NET SDKs and runtimes from a system. Please download the tool from this page and on this GitHub repository, you can find the source codes.
To remove .NET Framework with the .NET uninstall tool, please follow the steps.
Step 1: Enter this command – dotnet-core-uninstall list to list the installed .NET SDKs and runtimes that can be removed.
Step 2: Enter the following commands to display the .NET SDKs and runtimes that will be removed based on the options provided.
- dotnet-core-uninstall dry-run
- dotnet-core-uninstall whatif commands
Step 3: Then enter this command – dotnet-core-uninstall remove to uninstall .NET SDKs and Runtimes.
After the removal, then you can go to re-download and reinstall .NET Framework, please read this article to get the detailed steps: Microsoft .NET Framework 4.8 Download & Install for Windows 11/10.
Note:
Do you want to have a backup of data? Then MiniTool ShadowMaker can satisfy this. You can doenload and install this program and back up your important data.
MiniTool ShadowMaker TrialClick to Download100%Clean & Safe
Bottom Line:
This article has given you a detailed and comprehensive guide to uninstalling .NET Framework and some methods to repair .NET Framework have been presented. Hope this article is useful for you.
About The Author
Position: Columnist
Anna is an editor of the MiniTool Team. She worked in this big family since her graduation. Her articles mainly focus on data backup and recovery, disk cloning, and file syncing, committed to resolving the data loss issues users may encounter on their PCs. Besides, more related computer articles are shared here. In her leisure time, she enjoys reading and watching movies. Travel can also be a good choice for her.