
Если на вашем компьютере или ноутбуке был предустановлен антивирус McAfee (Total Protection или другой) или он установился «сам» после тех или иных ваших действий, не исключено, что вы захотите удалить его. Однако, не всегда это проходит гладко: особенно при некоторых ошибках при удалении.
В этой инструкции подробно о том, как полностью удалить McAfee с компьютера или ноутбука средствами системы и с помощью официальную утилитой удаления продуктов McAfee, а также о частых причинах того, что антивирус не удаляется. Схожая тема: Как полностью удалить Аваст с компьютера.
Простое удаления McAfee средствами Windows и о том, почему это может не получаться
Антивирус McAfee и другие продукты разработчика легко удаляются через панель управления — программы и компоненты. Самые частые причины проблем с полным удалением McAfee:
- Использование сторонних программ-деинсталляторов. Они могут быть полезны при удалении других программ, но для антивирусов их лучше не использовать, во всяком случае до использования официального деинсталлятора и перезагрузки компьютера. Причина: удаление антивируса — это процесс из более чем одного этапа и после того, как отработал официальный деинсталлятор, очищать данные и остатки не нужно и иногда вредно. Завершение удаления антивируса проходит после обязательной перезагрузки компьютера. А сторонние деинсталляторы часто начинают делать это до реального завершения удаления (то есть до перезагрузки), что и приводит к проблемам.
- Иногда пользователь, использовав удаление McAfee в панели управления, не выполняя перезагрузку (причем требуется именно перезагрузка, а не завершение работы и включение, это может оказаться важным в Windows 10), начинает удалять папки, оставшиеся от антивируса или сразу устанавливать новый (который сообщит, что у вас уже установлен McAfee и не установится). Этого делать не нужно, сначала перезагрузка для завершения удаления.
Таким образом, если учесть описанные выше моменты, обычно удалить McAfee можно, используя следующие шаги:
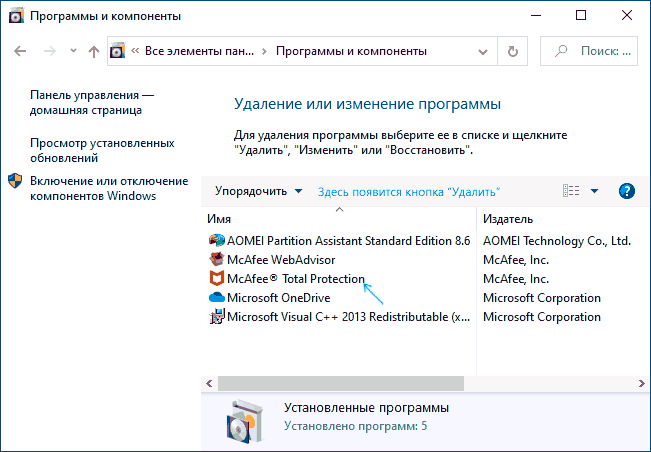
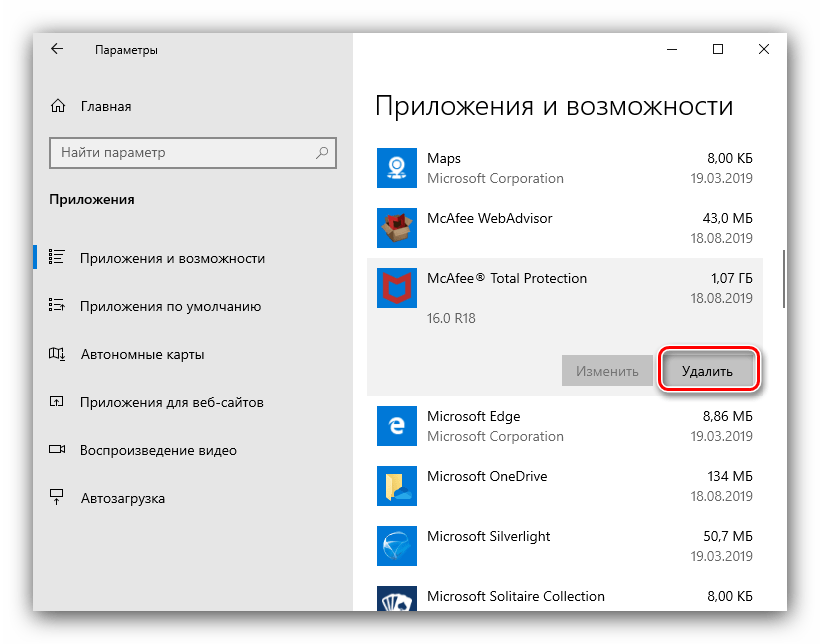
- Зайти в панель управления (в Windows 10 для этого можно использовать поиск в панели задач), открыть пункт «Программы и компоненты», выбрать нужный продукт McAfee и нажать «Удалить» или «Удалить/Изменить». Если у вас отображается несколько продуктов, выберите «основной», например, McAfee Total Protection.

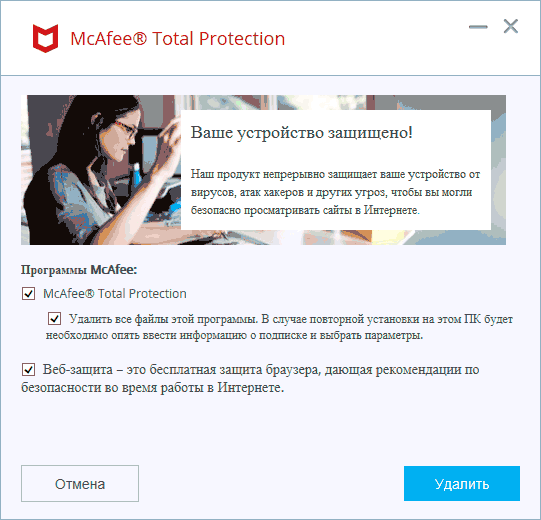
- Пройдите все шаги удаления, отметив, что нужно удалить всё, что есть на компьютере.

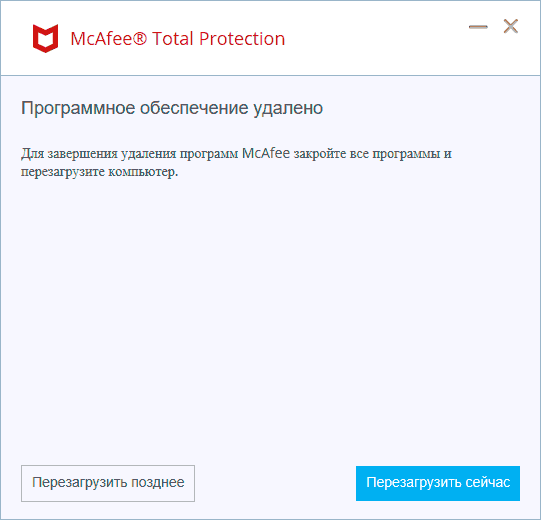
- После завершения процесса обязательно выполните перезагрузку Windows. И после этого уже можно при необходимости вручную удалять папки антивируса.
Как правило, если вы используете этот метод, не начнете манипулировать папками или «автоматической очисткой хвостов» до перезагрузки, то удаление пройдет успешно. Если же не получилось, используем второй метод, с помощью официальной утилиты удаления McAfee.
Среди рекомендаций по удалению на официальном сайте McAfee, если описанный выше метод не работает — использовать встроенную системную учетную запись Администратор.
Как полностью удалить McAfee с помощью McAfee Consumer Product Removal (MCPR)
В случае возникновения проблем при удалении McAfee с компьютера Windows 10, 8.1 и Windows 7 вы можете использовать официальную утилиту McAfee Consumer Product Removal которая полностью удаляет все продукты McAfee. В идеале — запускать утилиту в безопасном режиме, но обычно работает и без этого:
- Скачайте McAfee Consumer Product Removal (к сожалению, на официальном сайте больше не доступно, но можно найти на сторонних сайтах).
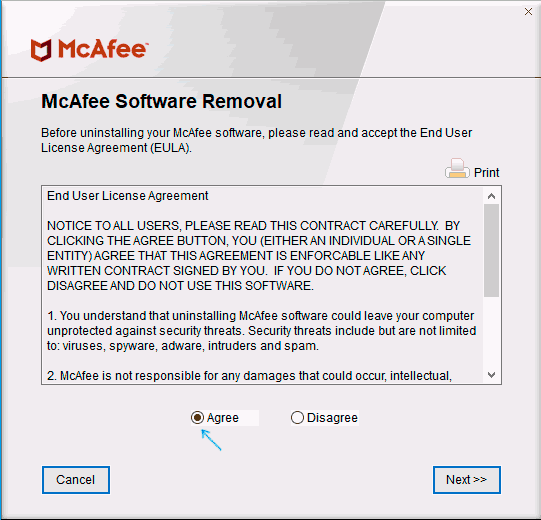
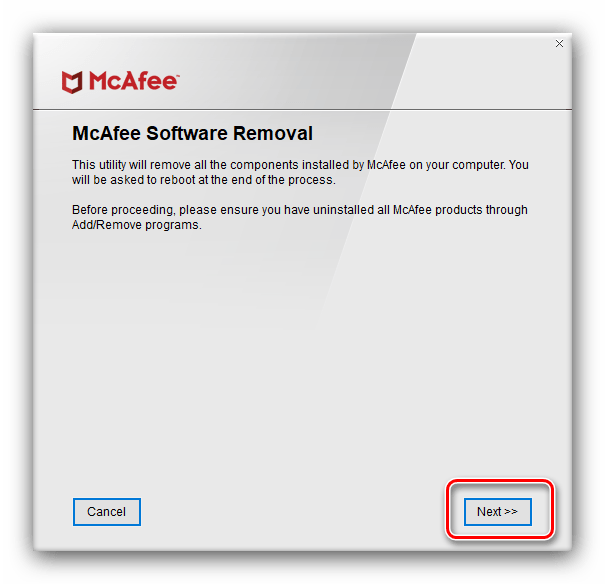
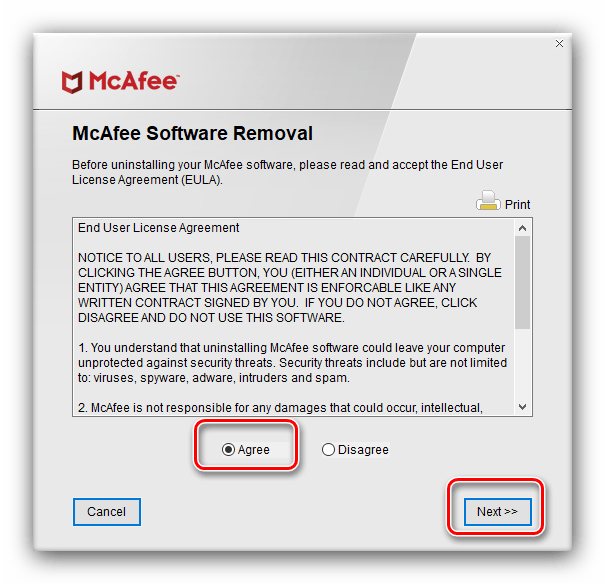
- Запустите утилиту, нажмите «Next» в главном окне, где вам сообщат о том, что будут полностью удалены все продукты McAfee, а в следующем окне подтвердите согласие с условиями (выбрать пункт «Agree»).
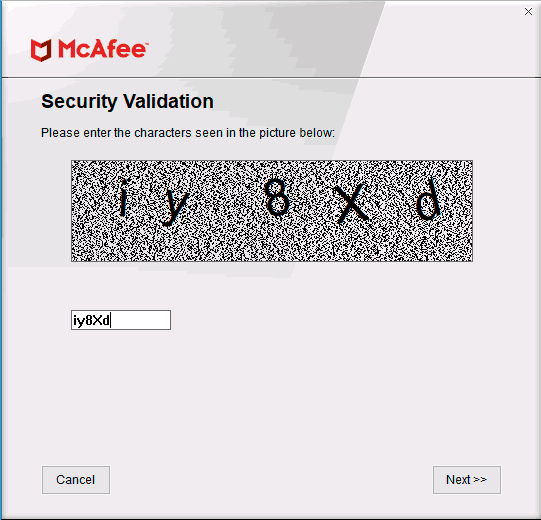
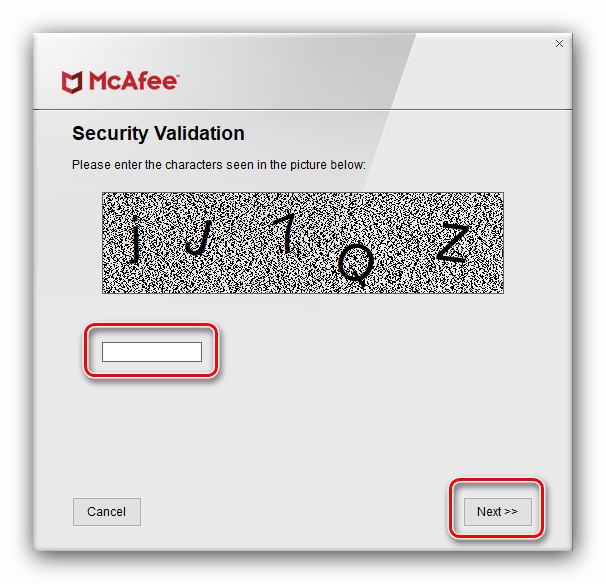
- Введите код подтверждения удаление. Внимание: в этом коде заглавные и строчные буквы отличаются.
- Дождитесь завершения процесса удаления.
- Обязательно выполните перезагрузку компьютера.

На этом McAfee будет удален с вашего компьютера или ноутбука.
Обратите внимание: если после различных неуспешных попыток удалить McAfee у вас перестала срабатывать и фирменная утилита, причиной может быть, что файлы установки и записи в реестре были попорчены вашими действиями. Тогда возможным решением может быть — заново установить тот же антивирус McAfee, перезагрузить компьютер, а уже потом использовать утилиту для удаления.
На этом всё. Надеюсь, в вашем случае всё прошло успешно, и вы окончательно избавились от McAfee на своем устройстве.
McAfee is famous for its digital protection tools that keep PCs safe from viruses and other types of malicious attacks. Ever since Intel bought them, McAfee Antivirus comes under Security division of Intel. McAfee LiveSafe is one of their famous programs used to secure sensitive information and increase digital privacy. However, over the years they have developed a negative reputation and have felt behind because of fierce competition. It is quite difficult to get rid of McAfee from your PC and many users can’t uninstall McAfee LiveSafe. If you are also dealing with the same problem, you are at the right place. We bring to you a perfect guide that will teach you how to uninstall McAfee LiveSafe windows 10.

Table of Contents
McAfee is a popular software but with several issues that are pushing the users to search for how to uninstall McAfee LiveSafe. Here are some of them:
- It consumes loads of CPU memory.
- It takes up a lot of disk space.
- It supports Ads.
- It has average virus and malware detection when compared to other antivirus companies.
Firstly, it is important that you activate your McAfee subscription before uninstalling it to secure the right to use it again without buying a new one. Follow the steps given on their official website to do so. This is only applicable to those users who had McAfee LiveSafe pre-installed on their PC. Now let us look at the methods to learn how to uninstall McAfee LiveSafe Windows 10.
Note: Make a backup of any important data linked with McAfee LiveSafe before using these methods.
Method 1: Using Control Panel
Control Panel allows us to change and monitor the settings of various programs on Windows PC. It is used to uninstall many apps and may work for uninstalling McAfee LiveSafe. Follow the steps to do so.
1. Press the Windows key, type control panel, and click on Open.

2. Set View by as Large icons, then click on Programs and Features.

3. Locate and right-click on McAfee LiveSafe and select Uninstall. Confirm prompts, if any appear.

4. Wait for the Uninstallation process to complete and after that restart the PC.
Check if you have managed to uninstall McAfee LiveSafe.
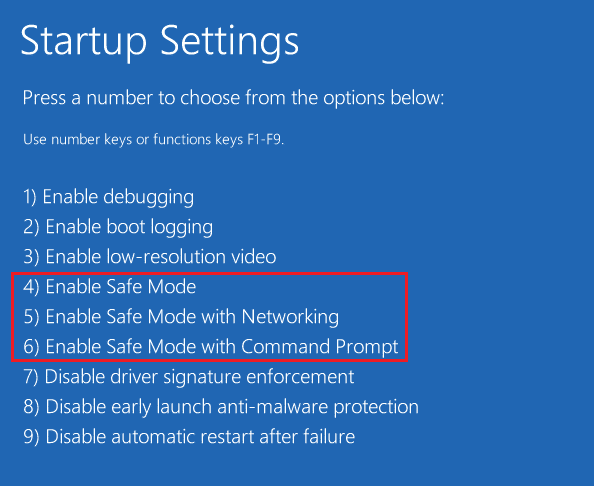
Method 2: Uninstalling McAfee LiveSafe In Safe Mode
If you still can’t uninstall McAfee LiveSafe, you can try uninstalling it in Safe Mode. Only try this method if all other methods have failed. Booting your PC in Safe Mode is a common method to troubleshoot and diagnose issues related to Operating System. To boot the PC in Safe Mode, follow our guide to Boot to Safe Mode in Windows 10. Once you are in Safe Mode, follow all the steps shown in Method 1 and uninstall McAfee LiveSafe using Control Panel. Check if you are able to uninstall McAfee LiveSafe now.
Also Read: 10 Best Free Antivirus Software for Android in 2022
Method 3: Using Windows PowerShell
Windows PowerShell is a management program that can be used to perform tasks automatically and alter settings of various programs using command lines. It is used to uninstall apps and by executing a few simple commands you can uninstall McAfee LiveSafe using it. Here is how you can do it.
1. Press the Windows key and type PowerShell and click on Run as Administrator.

2. Type the given command and hit Enter key.
Get-AppxPackage -AllUsers | Select Name, PackageFullName

3. After the command is executed you will see a list of programs in two columns: Name and PackageFullName.

4. Locate McAfee LiveSafe under the Name column and copy its PackageFullName under the PackageFullName column by selecting it and pressing Ctrl+C keys.
5. Scroll down and when the list is finished and type the following command but replace PackageFullName with PackageFullName of McAfee LiveSafe that you copied in the previous step.
Remove-AppxPackage -package PackageFullName

6. Press the Enter key and wait for the command to be executed. After that exit Windows PowerShell.
7. Finally, reboot the PC, thencheck if McAfee LiveSafe is uninstalled or not.
Also Read: Fix Virus Definition Failed in Avast Antivirus
Method 4: Using McAfee Consumer Product Removal Tool
Some users can’t uninstall McAfee LiveSafe using Control Panel as it shows Navigation to this webpage was canceled error. In that case, you can use McAfee Official Product Removal (MCPR) tool to uninstall McAfee LiveSafe fairly easily. Follow the steps below to do so.
Note: Make sure you have the latest version of McAfee LiveSafe and that you are using a newly downloaded MCPR and not any previous MCPR.
1. Download the McAfee Consumer Product Removal tool from the official site.

2. Go to your downloads folder and double-click on MCPR.exe. Click yes or confirm, when prompted.
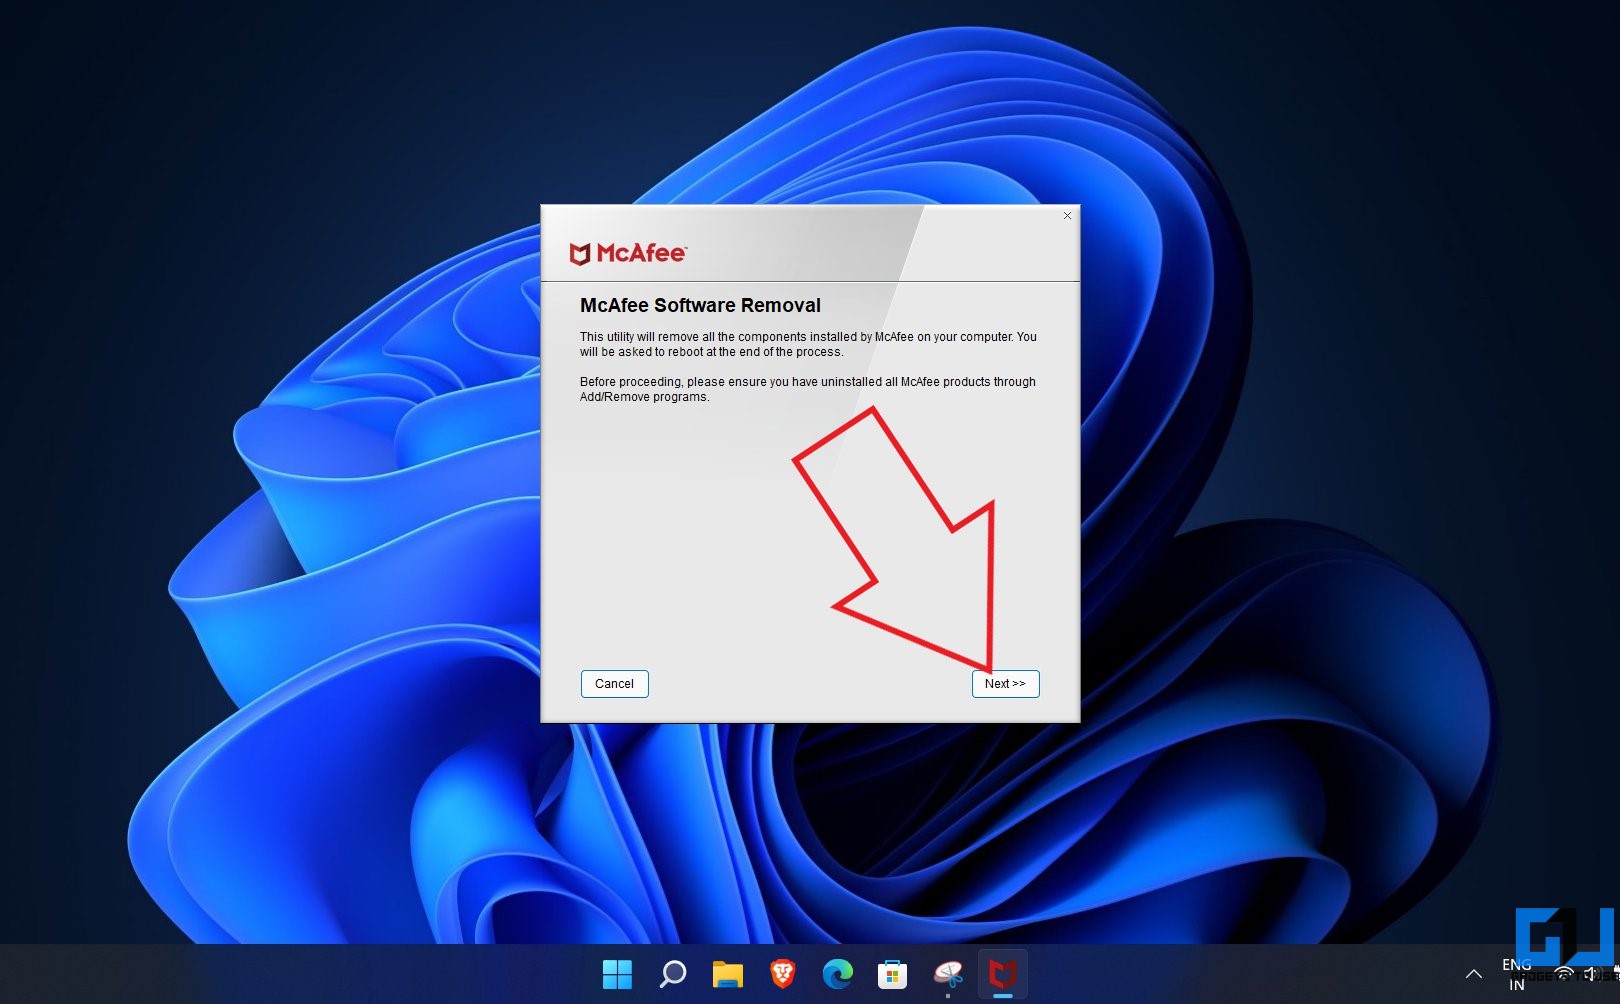
3. Once MCPR opens, click on the Next>> button.

4. Select Agree under End User License Agreement and click on Next>> button.

5. In Security Validation, enter the security code in the text box and click on Next>> button.

6. Now Uninstallation process will begin under Remove McAfee Products and you will see the preparing uninstallation… message. Wait for process to complete.

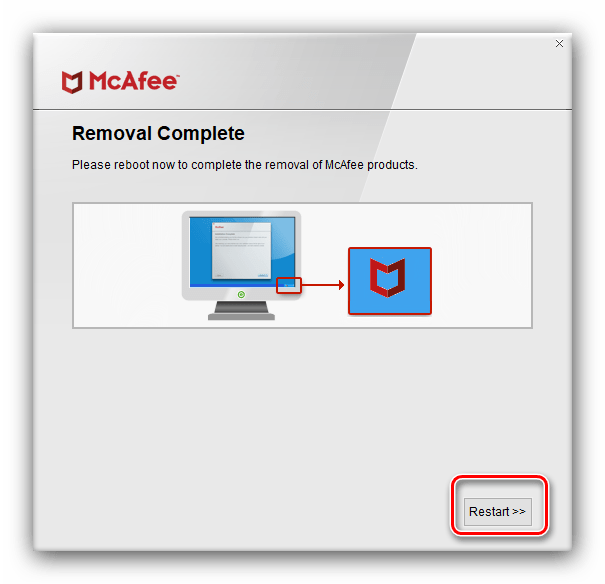
7. Once the Removal Complete page appears, click on the Restart>> button and confirm any prompts that appear. Your PC will restart.

Now you know how to uninstall McAfee LiveSafe windows 10.
Frequently Asked Questions (FAQs)
Q1. Is McAfee LiveSafe similar to McAfee?
Ans. Yes, McAfee LiveSafe comes under McAfee. While McAfee Total Protection is used for scanning viruses and malware, McAfee LiveSafe is designed to protect your identity and secure your data across devices.
Q2. Is McAfee LiveSafe free?
Ans. If you are a new user, you will get a 30-day free trial. After it expires, you will have to choose a paid plan to continue using the services of McAfee LiveSafe.
Recommended:
- How to Play Classic Minecraft on Browser
- 25 Best Free Web Crawler Tools
- 26 Best Free Malware Removal Tool
- How to Install Software Without Admin Rights
We hope that this guide was helpful and you were able to understand how to uninstall McAfee LiveSafe. Let us know which method worked for you the best. If you have any queries or suggestions then feel free to drop them in the comments section.
Все способы:
- Варианты удаления антивируса McAfee
- Способ 1: McAfee Removal Tool
- Способ 2: Revo Uninstaller
- Способ 3: Uninstall Tool
- Способ 4: Advanced Uninstaller PRO
- Способ 5: CCleaner
- Способ 6: Системные средства
- Заключение
- Вопросы и ответы: 1
При установке новой антивирусной системы у пользователей периодически возникают трудности. Чаще всего это связано с неполным удалением предыдущего защитника, так как при деисталляции подобной программы стандартными средствами Виндовс все равно остаются различные хвосты, которые в дальнейшем и вызывают проблемы. Для удаления программы полностью используются различные дополнительные методы. Рассмотрим, как применить их в отношении защитника McAfee.
Варианты удаления антивируса McAfee
На сегодняшний день существует три основных способа деинсталляции рассматриваемого антивирусного продукта: посредством официальной утилиты-чистильщика, сторонними средствами или же системными инструментами.
Способ 1: McAfee Removal Tool
Разработчик рассматриваемого антивируса выпустил специальную утилиту для удаления собственных продуктов. Пользовается ею следует по такому алгоритму:
Скачать McAfee Removal Tool
- Скачиваем и запускаем установщик, после чего в окне с приветствием нажимаем «Next».
- Принимаем условия лицензионного соглашения и продолжаем.
- Вводим надпись с картинки. Обратите внимание, что здесь нужно учитывать регистр, то есть если буква большая, так и пишем.
- Далее начинается процесс автоматического удаления всех продуктов McAfee. По его окончании нажмите «Restart» для завершения процедуры.
Утилита McAfee Removal Tool представляет собой оптимальное решение нашей сегодняшней задачи.
Способ 2: Revo Uninstaller
Первый из сторонних деинсталляторов, который мы хотим рассмотреть – Revo Uninstaller. С помощью этого приложения процедура удаления МакАфи Антивируса становится элементарной задачей.
Скачать Revo Uninstaller
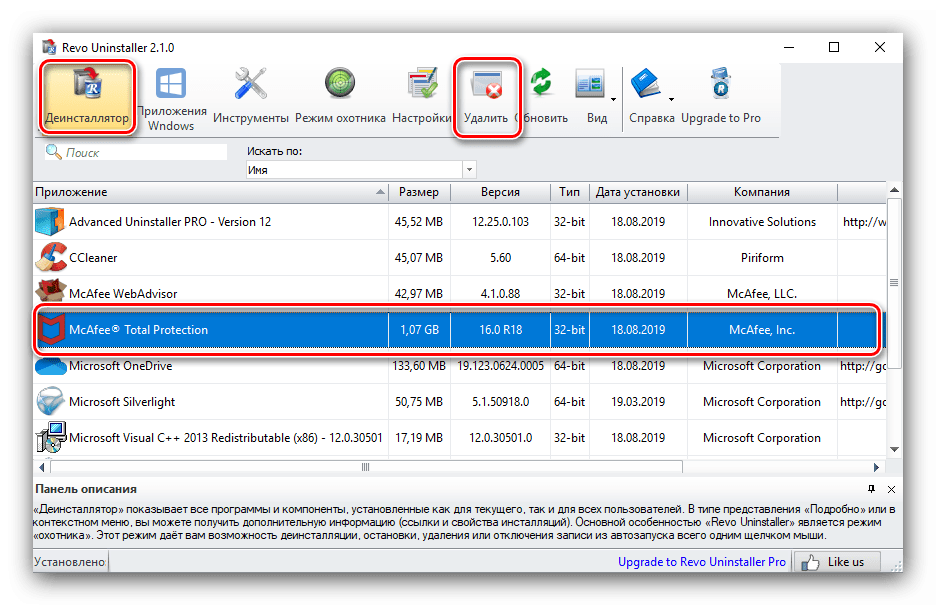
- После запуска приложения найдите в списке позицию McAfee, отметьте и кликните «Удалить» в панели инструментов.
- Через некоторое время появится окошко обычной деинсталляции антивируса. Нажмите в нём «Удалить».
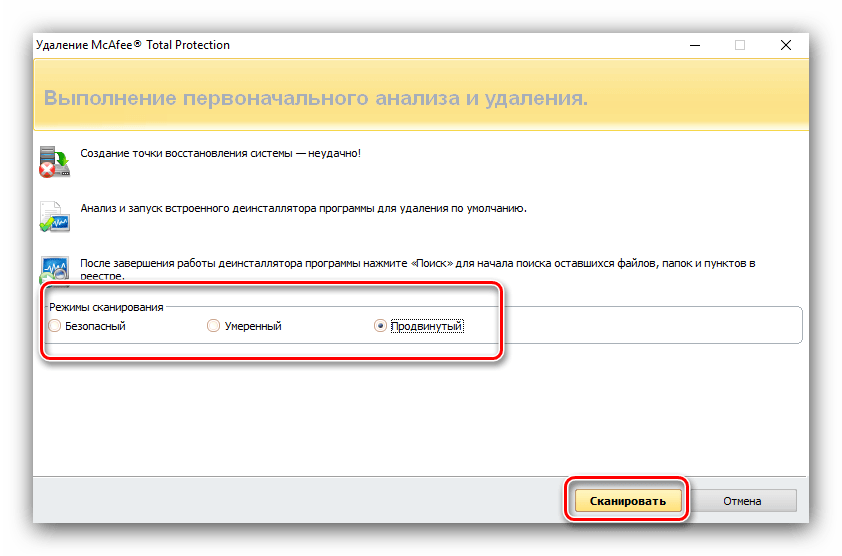
- По завершении деинсталляции воспользуйтесь сканером приложения – глубину проверки установите в положение «Продвинутый», затем жмите «Далее».
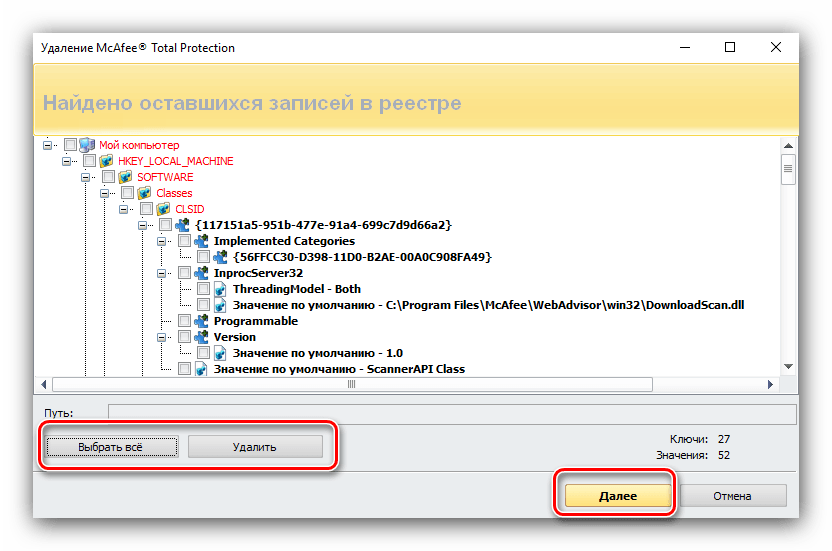
- Подождите, пока сканирование завершится. Программа первыми отображает найденные записи в реестре – выберите нужные (либо используйте кнопку «Выделить всё»), после чего удаляйте их.

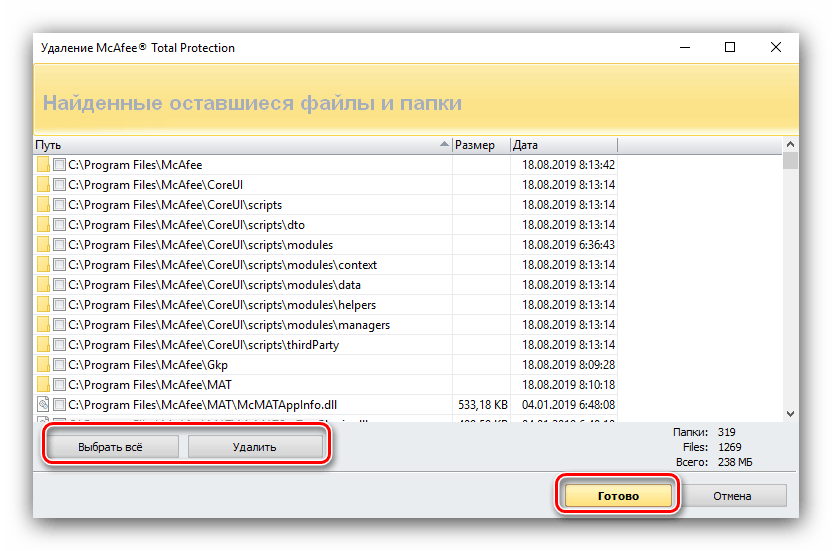
Процедура для обнаруженных файлов точно такая же.
- По завершении работы закрывайте Revo Uninstaller и перезагружайте компьютер.

Работа с Рево Унинсталер очень проста, а потому справится с ней и новичок.
Способ 3: Uninstall Tool
Второе стороннее решение, полезное при удалении антивируса McAfee – программа Uninstall Tool.
Скачать Uninstall Tool
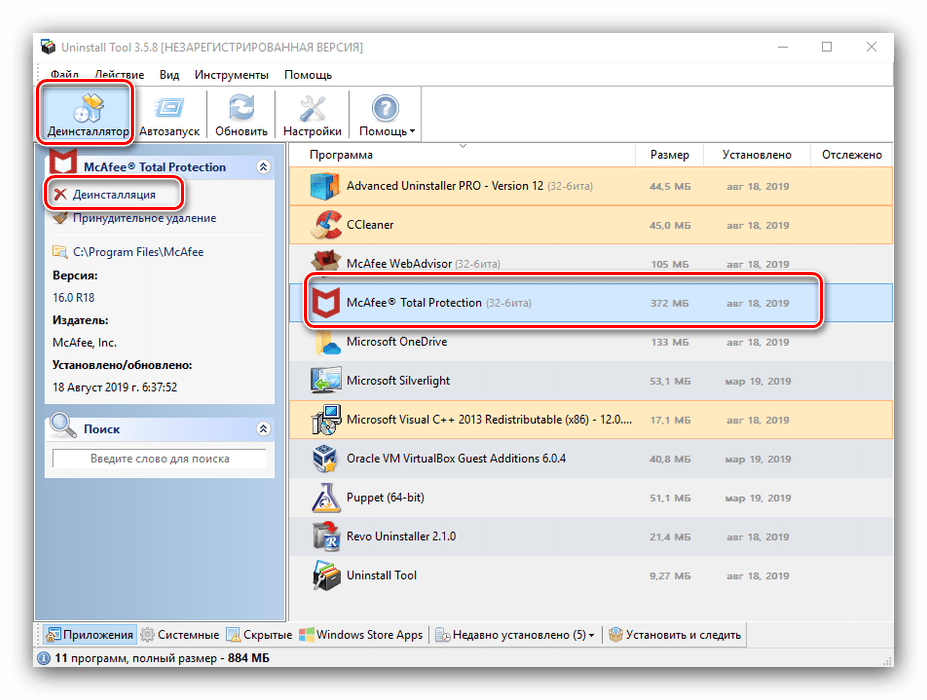
- Запустите деинсталлятор, затем выберите удаляемое приложение и воспользуйтесь кнопкой «Деинсталляция» в панели инструментов слева.
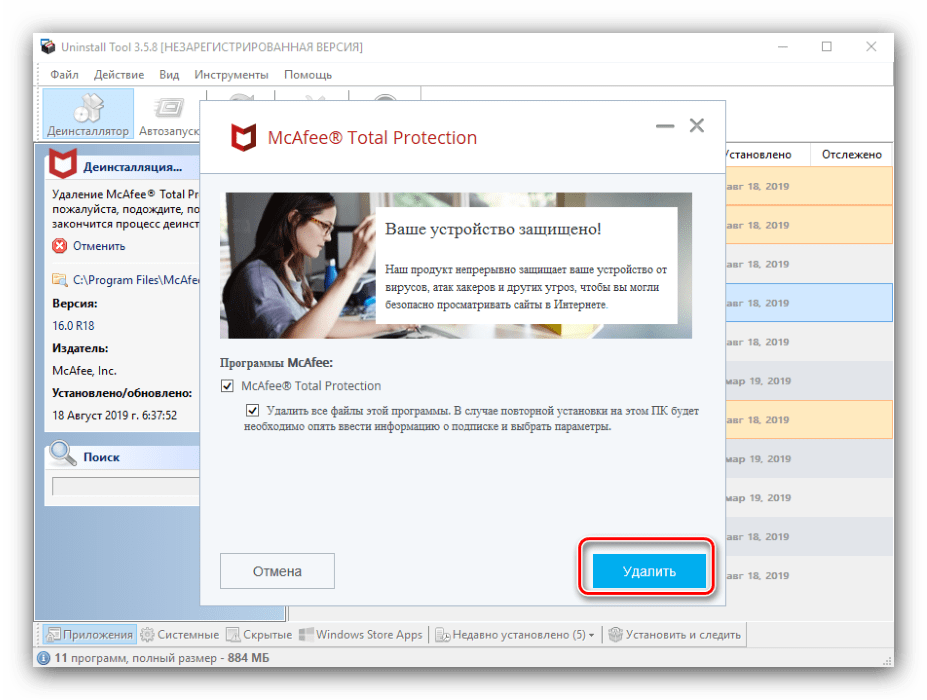
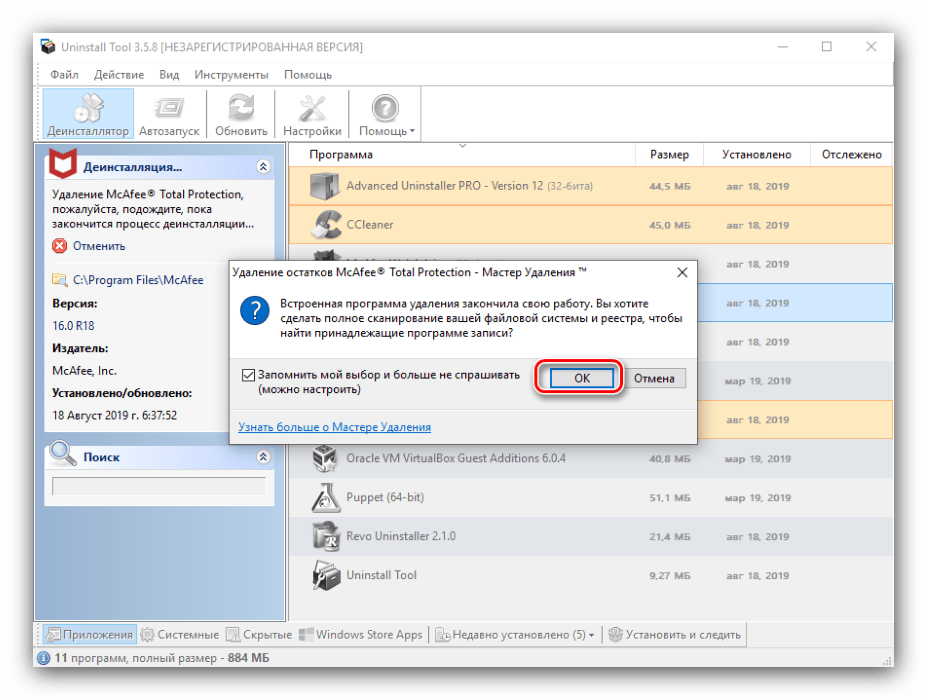
- Как и в случае с другими деинсталляторами, запустится Мастер по удалению антивируса – следуйте его инструкциям.
- После завершения работы Мастера появится предложение удалить «хвосты», соглашаемся.
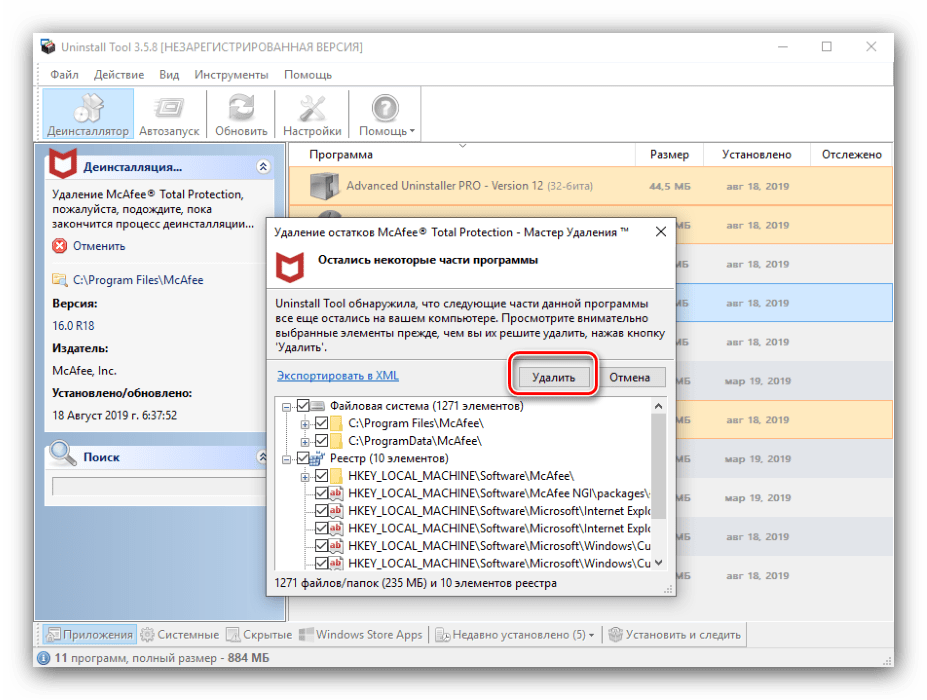
- Сканирование займёт некоторое время, после чего появится отдельное окошко с найденными остаточными данными. Отметьте нужные и удалите.

Важно! Опция удаления остатков доступна только в коммерческой версии приложения!
- Далее закройте Унинстал Тул и выполните перезагрузку компьютера.
Пользоваться Uninstall Tool не сложнее, чем упомянутым ранее Рево Унинсталер, однако эта программа платная, а свободный вариант ограничен в возможностях.
Способ 4: Advanced Uninstaller PRO
Третий представитель класса сторонних деинсталляторов, которым под силу удалить антивирус МакАфи – Advanced Uninstaller PRO.
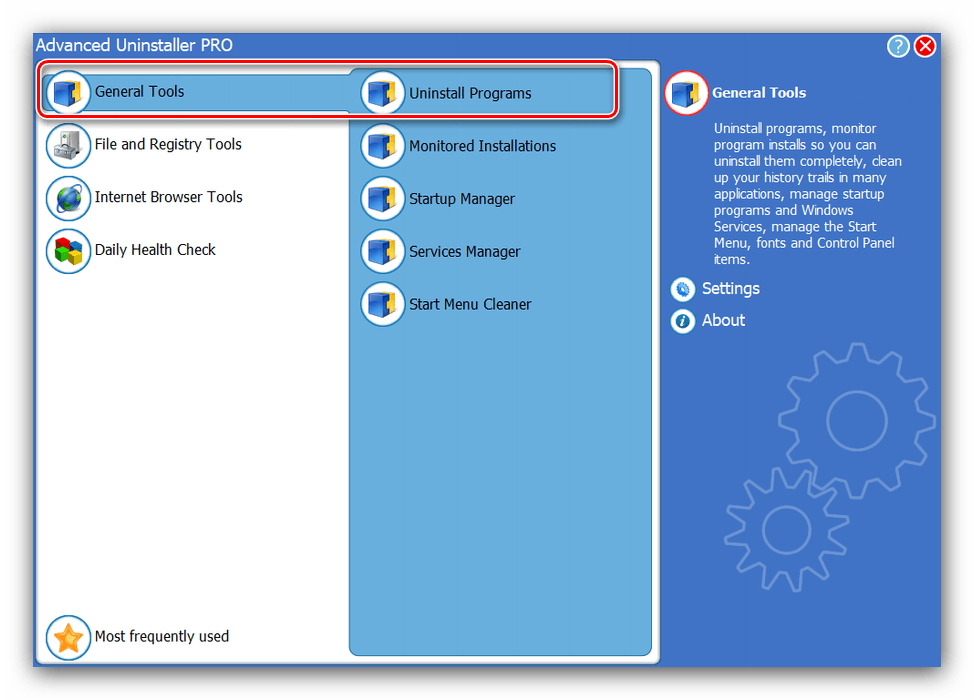
- Запустите программу и откройте встроенное средство для деинсталляции – оно расположено внутри раздела «General Tools» и называется «Uninstall Programs».
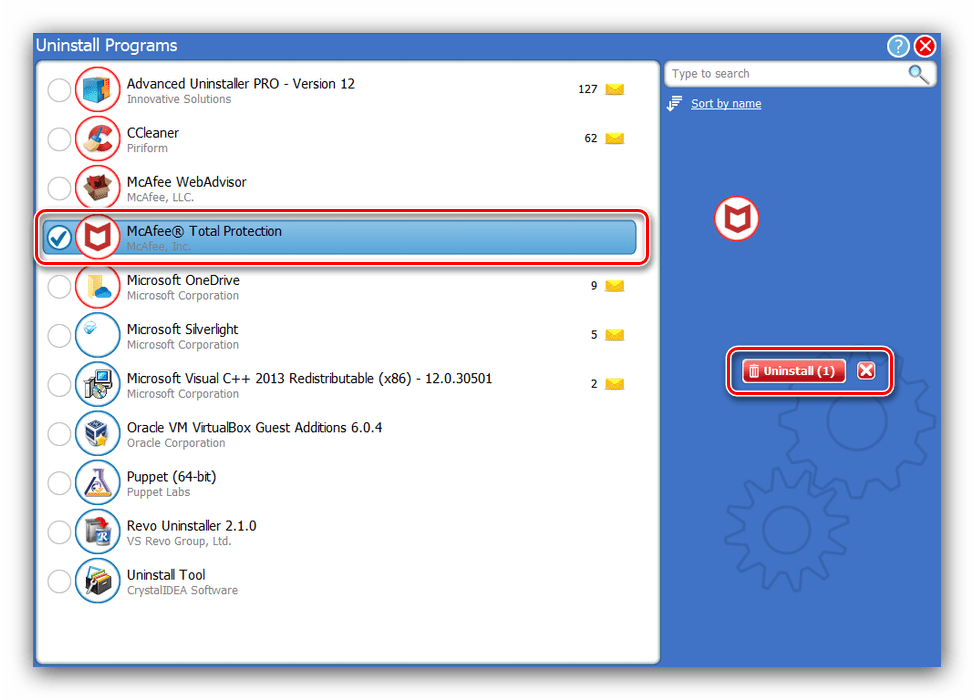
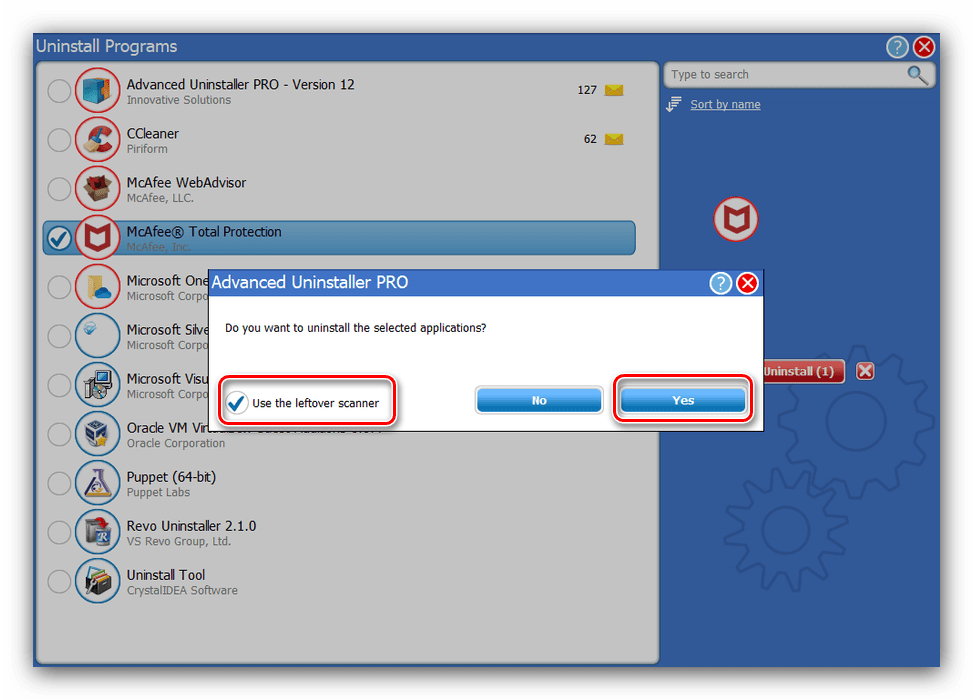
- Перед вами появится список софта, установленного на компьютере и распознанного программой. Поставьте галочку напротив позиции «McAfee», затем найдите в правой части окна элемент «Uninstall» и нажмите на него.

В появившемся окошке отметьте пункт о сканировании после инсталляции, затем нажмите «Yes».
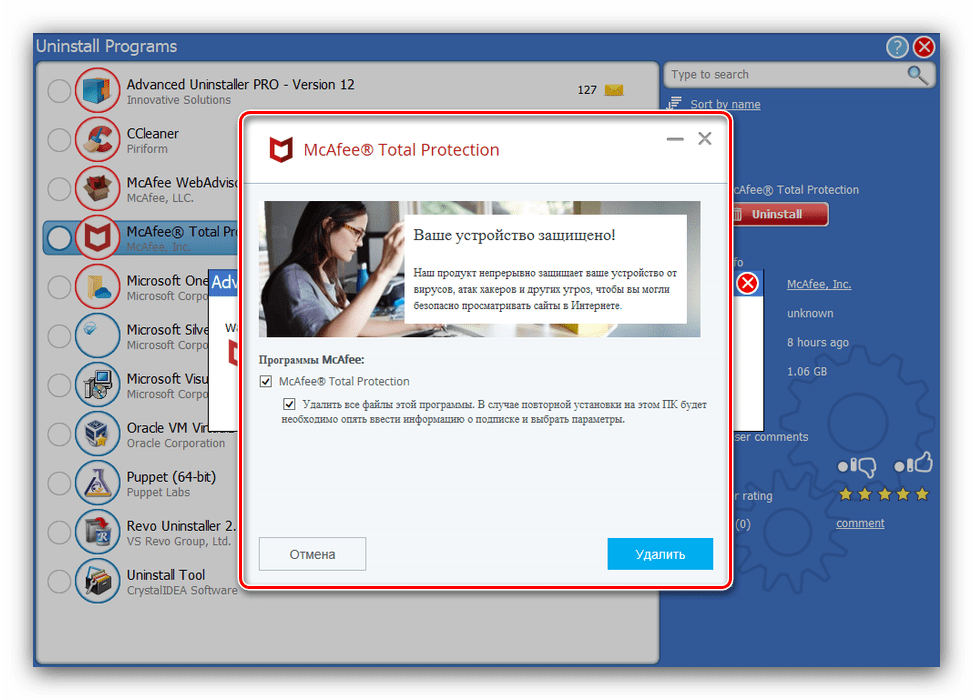
- Будет запущен уже знакомый нам по предыдущим методам стандартный деинсталлятор – используйте его для удаления основных данных антивируса.
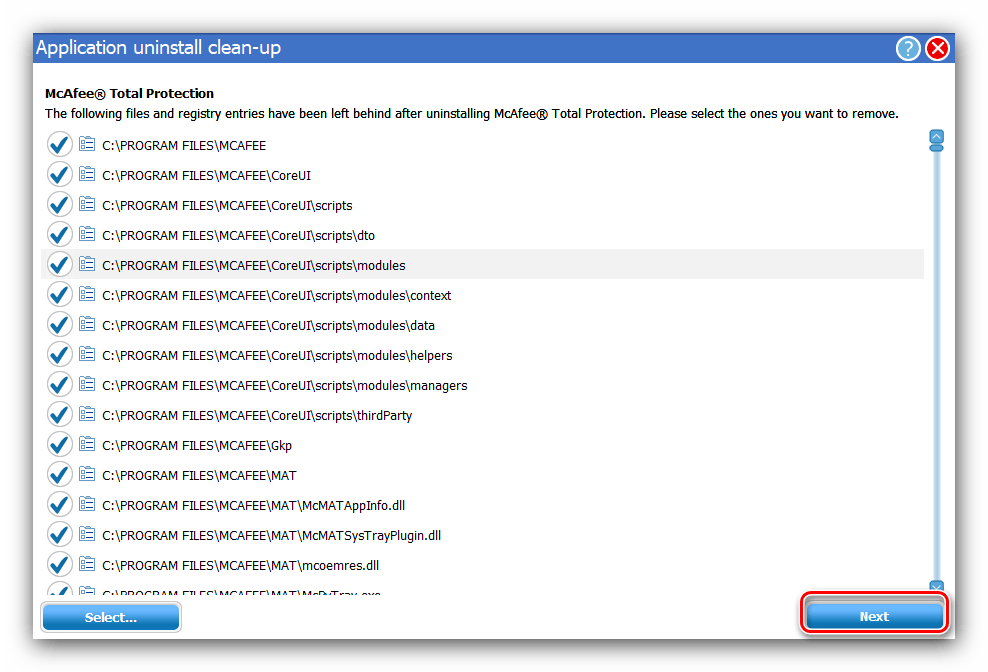
- Поиск оставшегося мусора начнётся автоматически. По его окончании будет предложено выбрать данные, которые больше не нужны. Проделайте это и нажмите «Next».
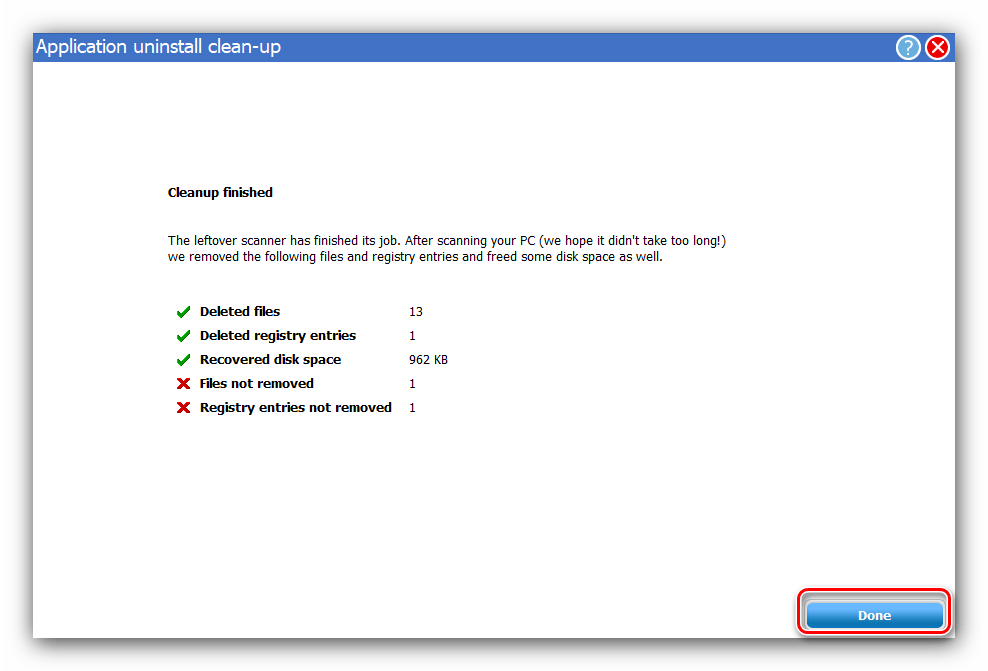
- Далее нажмите «Done», закройте программу и перезагрузите ваш ПК или ноутбук.
Работать с Advanced Uninstaller PRO несложно, но может вызвать трудности отсутствие русской локализации.
Способ 5: CCleaner
В приложении CCleaner также есть встроенное средство удаления, способное деинсталлировать МакАфи, а дополнительный функционал программы поможет убрать остаточную информацию.
Скачать CCleaner
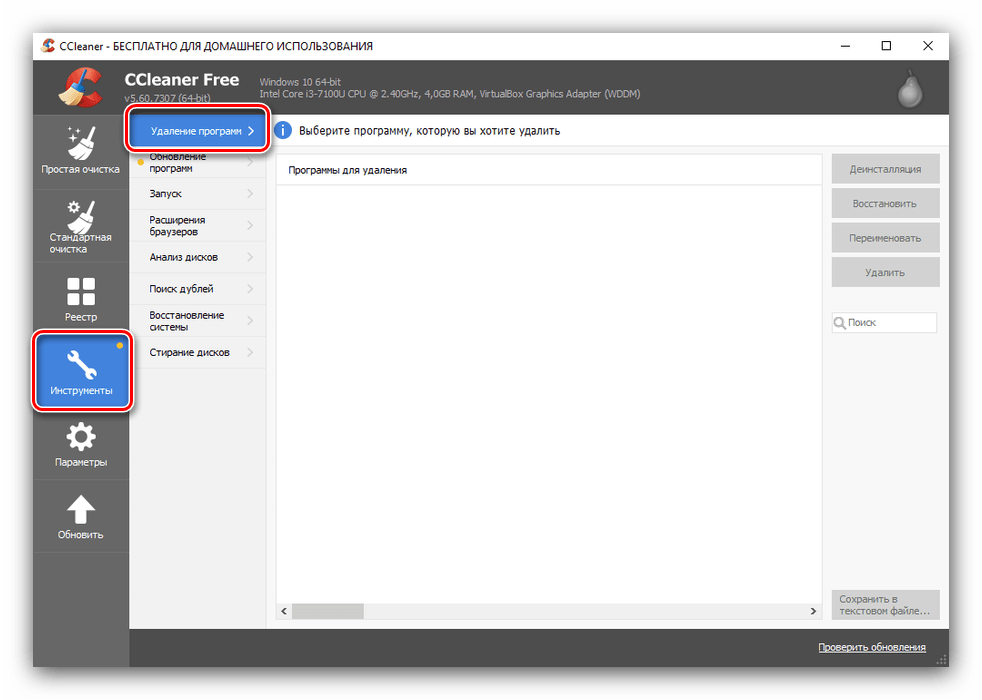
- Доступ к средству деинсталляции можно получить на вкладке «Инструменты», позиция «Удаление приложений».
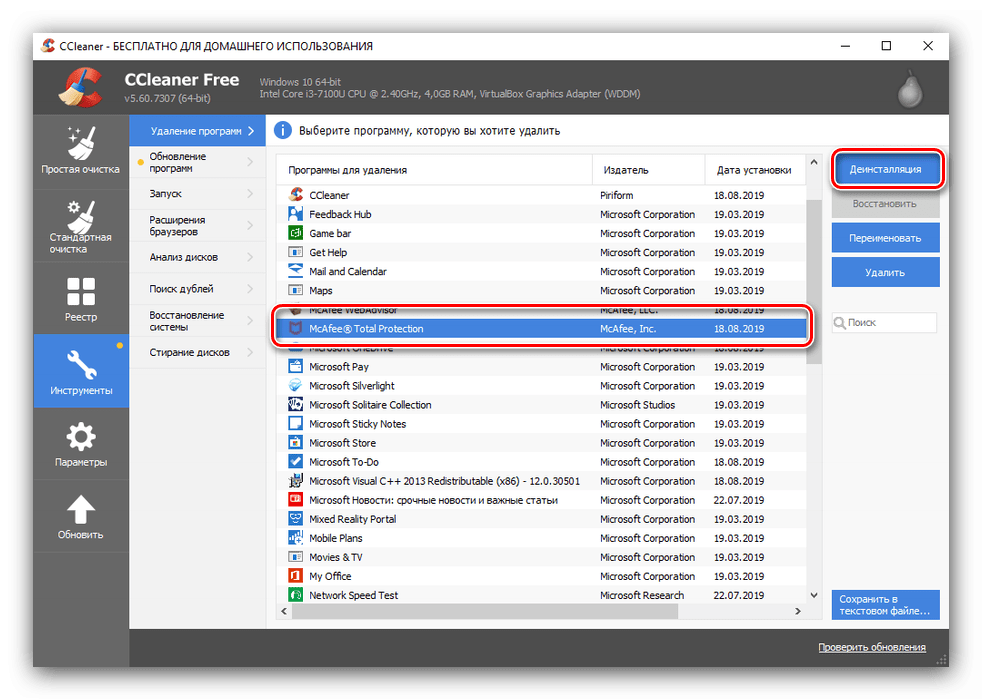
- Алгоритм работы похож на другие деинсталляторы – выделите приложение из списка, нажмите на кнопку «Деинсталляция», расположенную в блоке справа.
- Стирание основных файлов приложения происходит посредством встроенного в McAfee деинсталлятора.
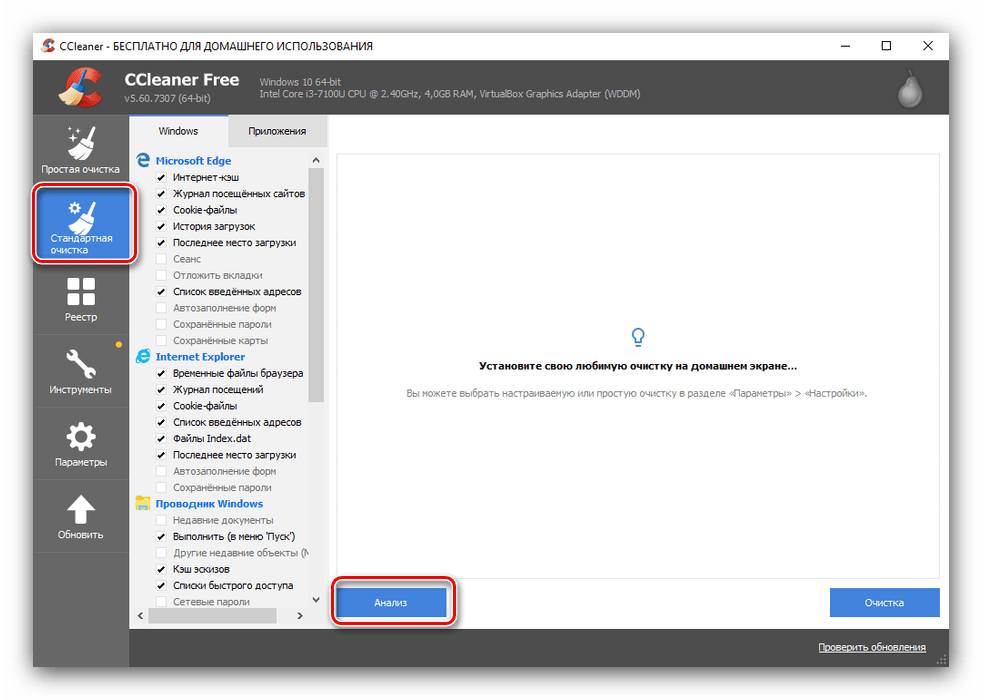
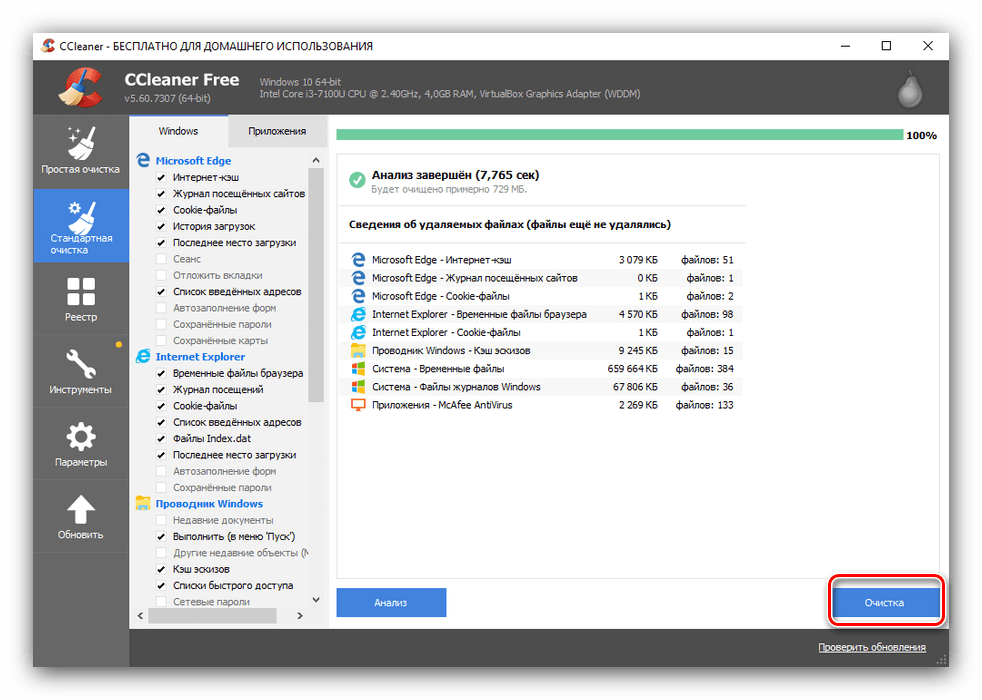
- Далее откройте раздел «Стандартная очистка». В нём найдите кнопку «Анализ» и нажмите на неё.

Теперь нажмите «Очистка».
- По окончании процедуры закрывайте CCleaner. Дополнительно может потребоваться перезагрузка.

Как видим, СиКлинер тоже вполне удачно справляется с поставленной задачей.
Способ 6: Системные средства
Порой все вышеперечисленные методы недоступны по тем или иным причинам. В таких случаях можно воспользоваться системными инструментами Виндовс, такими как «Программы и компоненты» или «Параметры» в десятой версии.
«Программы и компоненты»
Универсальный метод заключается в использовании стандартной оснастки, доступной во всех актуальных версиях Windows.
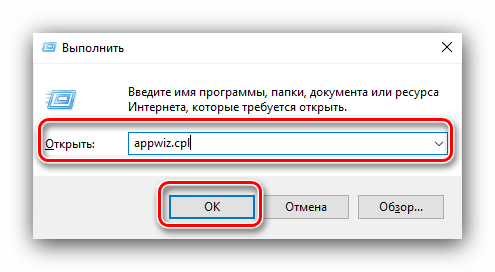
- Откройте средство «Выполнить», нажав сочетание клавиш Win+R, и пропишите в нём команду
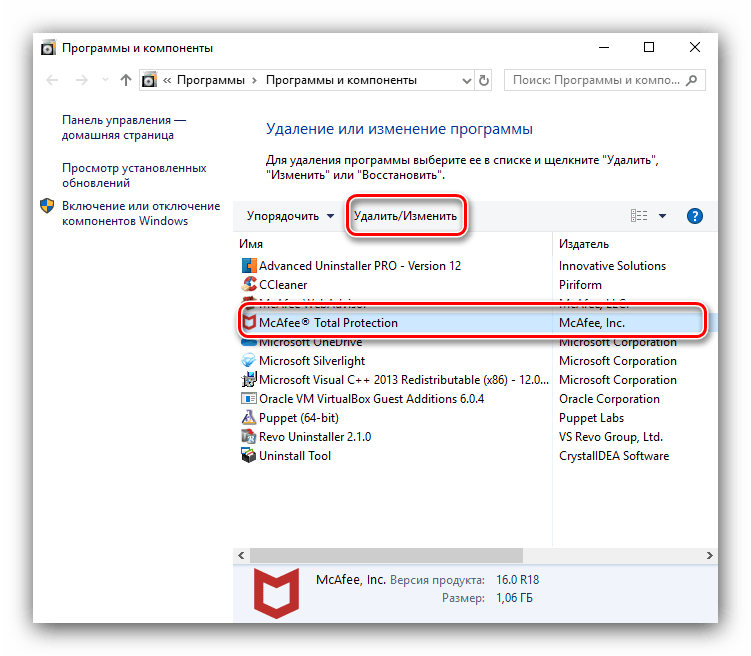
appwiz.cpl. - После запуска оснастки найдите McAfee, отметьте соответствующую позицию и нажмите «Удалить».
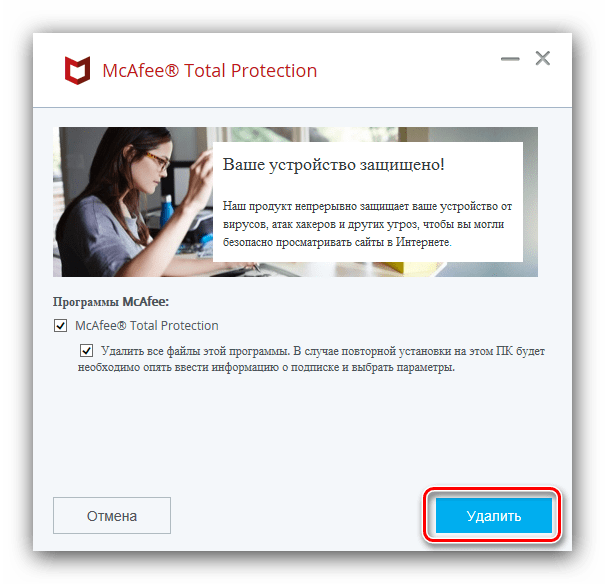
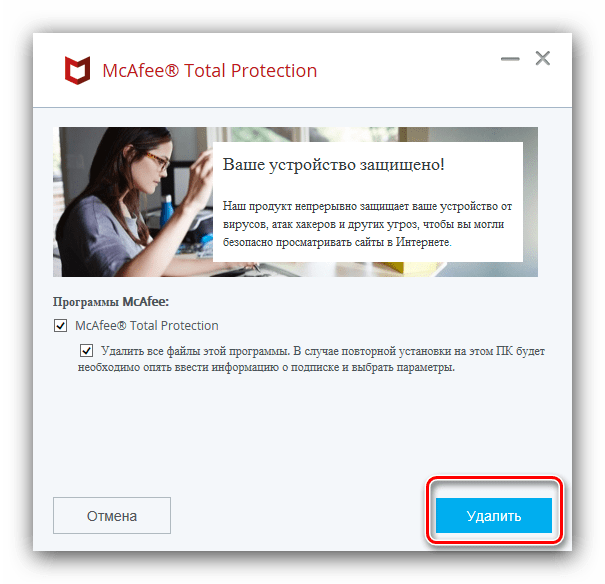
- Запустится деинсталлятор программы – поставьте все галочки, затем кликните «Удалить».
- Проведите процедуру, следуя инструкциям на экране, после чего перезагрузите компьютер и переходите к очистке реестра.

«Параметры»
Для Windows 10 доступен альтернативный менеджер приложений, который открывается через «Параметры».
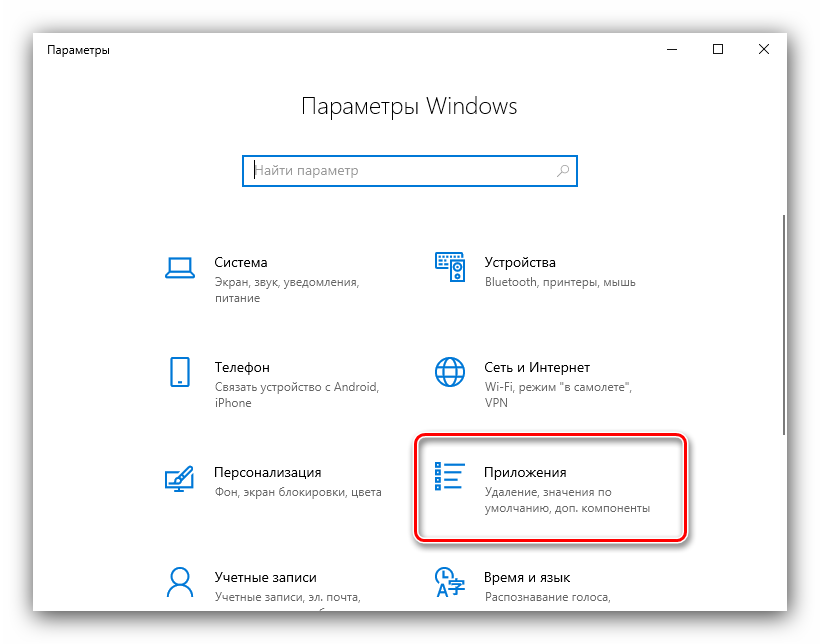
- Вызовите меню «Параметров» комбинацией клавиш Win+I, затем перейдите к пункту «Приложения».
- Как и в случае с «Программами и компонентами», появится список инсталлированного софта. Выберите в нём McAfee и нажмите на появившуюся кнопку «Удалить».

Подтвердите желание деинсталлировать ПО.
- Запустится деинсталлятор, удалите с его помощью основные компоненты программы.
- Перезагрузите компьютер и переходите к следующему этапу.

Очистка реестра
После ручного удаления любого антивируса желательно почистить реестр. Делается это следующим образом:
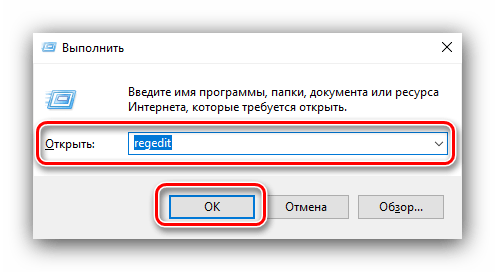
- С помощью инструмента «Выполнить» откройте «Редактор реестра»: запустите оснастку, введите в неё код
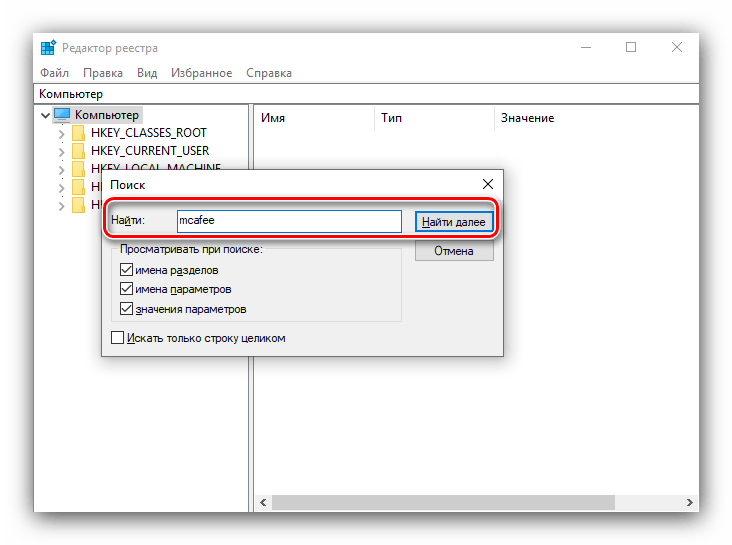
regeditи нажмите «ОК». - В запущенном «Редакторе…» нажмите F3, введите в поисковую строку запрос
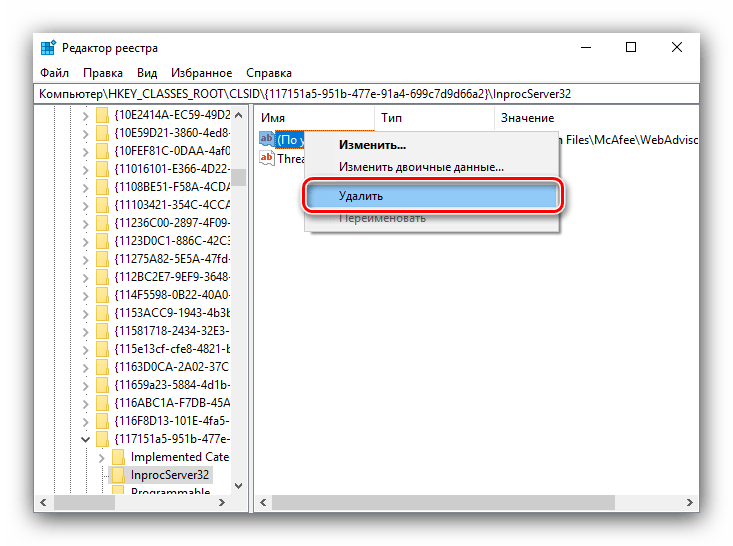
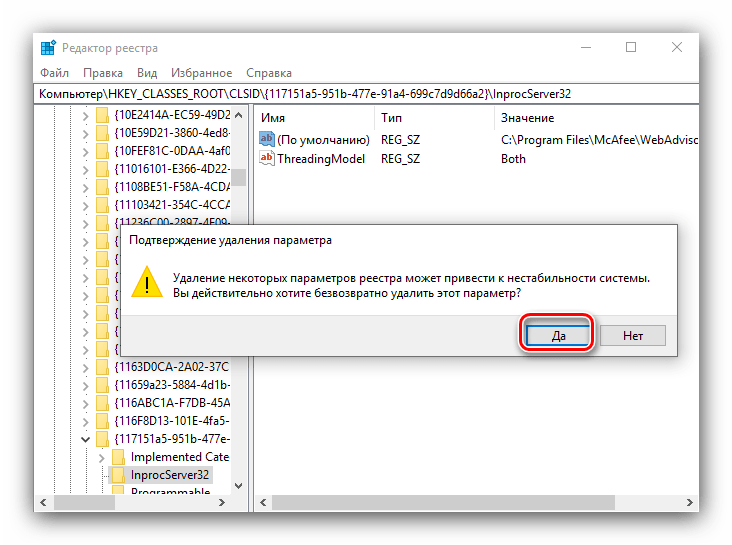
mcafeeи кликните «Найти далее». - Найденную запись выделите, нажмите правую кнопку мыши и выберите пункт «Удалить».

В окне подтверждения нажмите «Да».
- Снова нажмите F3 и повторяйте действия из предыдущего шага, пока в реестре не останется связанных с МакАфи записей. После этого закройте «Редактор реестра» и перезагрузите компьютер.
Заключение
Мы познакомились с оптимальными методами полного удаления антивируса McAfee с компьютера. Как видим, к процедуре следует подходить со всей серьёзностью.
Наша группа в TelegramПолезные советы и помощь
Are you finding yourself unable to uninstall McAfee Livesafe from Windows 11 or 10? This antivirus is quite popular among users but its removal is no less than a challenge.
The free version of this tool causes vulnerabilities like trialware after the expiration of the trial period. In addition, in most of Windows 10 Laptops, whether it is Dell, Lenovo, Dell, Asus this antivirus comes pre-installed which users might not like.
Ways to Uninstall McAfee Livesafe From Windows 10
McAfee uninstall stuck commonly when you try to remove the tool from Programs & Features, the traditional method on Windows 11 or 10.
We will guide you here with the ways to force McAfee to uninstall dividing the process into 3 parts. All you need is to follow the instructions carefully for a successful antivirus removal.
- Part-1: From Apps and features in Settings Application
- Part-2: Using MCPR tool
- Part-3: Remove Traces and leftovers of the McAfee Livesafe antivirus
Part-1: Using Apps & features in Settings Application
For Preinstalled devices
If you have either of Dell, Lenovo and Asus Laptops powered with Windows 11/10 pre-install with McAfee antivirus then you will have to first activate it for the dismissal. Don’t worry because you will not need to pay for the subscription.
If you haven’t got pre-installed and downloaded on your own instead, then directly follow the next method – “Uninstall McAfee Livesafe using Apps & features”.
Step-1: Open the software and select Your subscription.
Step-2: Click on Edit profile and go to the McAfee site through automatic navigation.
Step-3: It is the time to register on Mcafee, so type your Email address and choose Next.
Step-2: Give a password according to the suggestion here and click on Next. Now your software is activated.
For both users (Preinstalled or Post-installed) – Uninstall McAfee Livesafe using Apps & features
Step-1: On Start Menu, click the small gear icon to access the Settings program. Else, you can also launch the same pressing Win+I hotkeys.
Step-2: Click on Apps.
Step-3: Scroll down and find McAfee Livesafe in the right pane. Click on it. You will see an extended view where two options namely Modify and Uninstall are available. Select Uninstall.
Step-4: Check both the following options –
1. McAfee LiveSafe
2. Remove all files for this program. If you reinstall on this PC, you will need to enter your subscription information and choose your settings again.
Now click on Remove on the dialog “Remove McAfee” in order to wipe out the tool.
Step-5: Once the uninstallation ends up, select Restart Now.
The task is not accomplished yet. You have to visit its official website to get “McAfee Consumer Products Removal Tool” (viz. MCPR). This is an essential utility in order to remove McAfee entirely from your system. Let’s see the guidelines to do further:
For general software or applications follow – How to Uninstall Software From Windows 10 After Creators Update.
Part-2: Using MCPR tool
Step-1: Download the official MCPR tool. Extract MCPR.zip, access, and double-click the .exe file.
Step-2: Select Yes on the User account control pop up and click Next on Mcafee Software Removal interface.
Step-3: Select Agree on the End user license agreement and again click on Next.
Step-4: Fill up the captcha box correctly and then select Next.
MCPR will detect the installed program all by itself on your computer as well as trigger the uninstallation.
It might take a couple of good minutes to finish the process. Be a little patient and wait until it completes and restart the Windows 10 system once MCPR finishes the Uninstallation. Before proceeding to Reboot, finish or save your pending task to avoid losing any important item.
Part-3: Remove Traces and leftovers of the McAfee Livesafe Antivirus
For a complete elimination, you need to delete its traces and leftovers from registry entries and system files. Before starting we recommend taking backup of your Registry so that you could revive the same in case of a misoccurance. You can follow – How to Import and Export Registry Editor on Windows 10.
You can read our another article for the same circumstance – How to Remove Traces of Uninstalled Programs in Registry on Windows 10 or 11.
From Registry Editor
Step-1: Click on the Search icon from the taskbar, write regedit and then hit Enter.
Step-2: Select OK from the UAC warning prompt.
Step-3: After the registry editor appears, navigate to
Computer\HKEY_CURRENT_USER\Softwareand
Computer\HKEY_LOCAL_MACHINE\SOFTWAREStep-4: Look for the keys termed as or having the prefix McAfee in both of the strings.
Step-5: Once you find it, right-click on them and select Delete successively.
From System files
Step-1: Open Run dialog (Win+R), type Command %programfiles%, and press Enter. Locate all the folders having the name Macefee and delete them.
Step-2: In the same way, type %appdata% and Hit Enter. Find the items titled Mcafee and remove them.
Delete Temp and recent files
Step-1: Copy each of the following commands in sequence, paste into the Run box and press Enter every time
%temp%
recent
temp
Step-2: As the folders open, select all the items and delete them. Follow the same for all the 3 shortcut commands.
To wipe out the items without effort see – How to Delete Temp Files at Every Startup in Windows 11 or 10.
In this way, you will successfully Uninstall McAfee Livesafe From Windows 10 and 11.
The important thing is you can uninstall the other segments of this antivirus using the same ways. So if you have McAfee Total Protection or McAfee Windows Security there will be nothing change in the procedure. The only difference is you will find the other name in Apps & features area, registry keys, and system files.
Winding Up
We have discussed the entire procedure to uninstall McAfee Livesafe From Windows 11 or 10 and delete the tool and its residuals. Windows 11 and 10 comprise a convincing built-in anti-malware tool Windows Defender. This is so effective and strong that you really don’t need a third-party tool to defend against malware. At last, With proper application of each step, you will be able to remove it and can have a hassle-free time with Windows 11/10.
Quick Answer
- Once the Windows boots in safe mode, go to the Apps section and uninstall McAfee LiveSafe normally.
- It usually comes preinstalled on a lot of Windows machines, thanks to the deal with the manufacturer.
- You may get the “Navigation to this webpage was cancelled” error while trying to uninstall McAfee LiveSafe from the control panel.
McAfee is a popular antivirus program that comes preloaded on many Windows desktops and laptops. That said, you don’t have to use it mandatorily, and it can be removed easily. However, some people have been facing trouble while trying to uninstall the McAfee LiveSafe component on their devices. Therefore, in this article, let’s look at three easy ways to uninstall and remove McAfee LiveSafe on your Windows PC completely.
Related | How to Quickly Reset Windows 11 Without Losing Files
Can’t Uninstall Mcafee Livesafe? Here’s How to Remove It on Windows
What is McAfee LiveSafe? It is one of the antivirus products in McAfee’s security suite that offers protection against viruses, online threats, and ransomware. It usually comes preinstalled on a lot of Windows machines, thanks to the deal with the manufacturer.
If you don’t want to use McAfee, be it for any reason, you can uninstall it through Settings > Apps & features or Control Panel > Uninstall a Program. Unfortunately, this method may not work for LiveSafe, although it works for other related components.
McAfee LiveSafe “Navigation to this Webpage Was Cancelled” Error
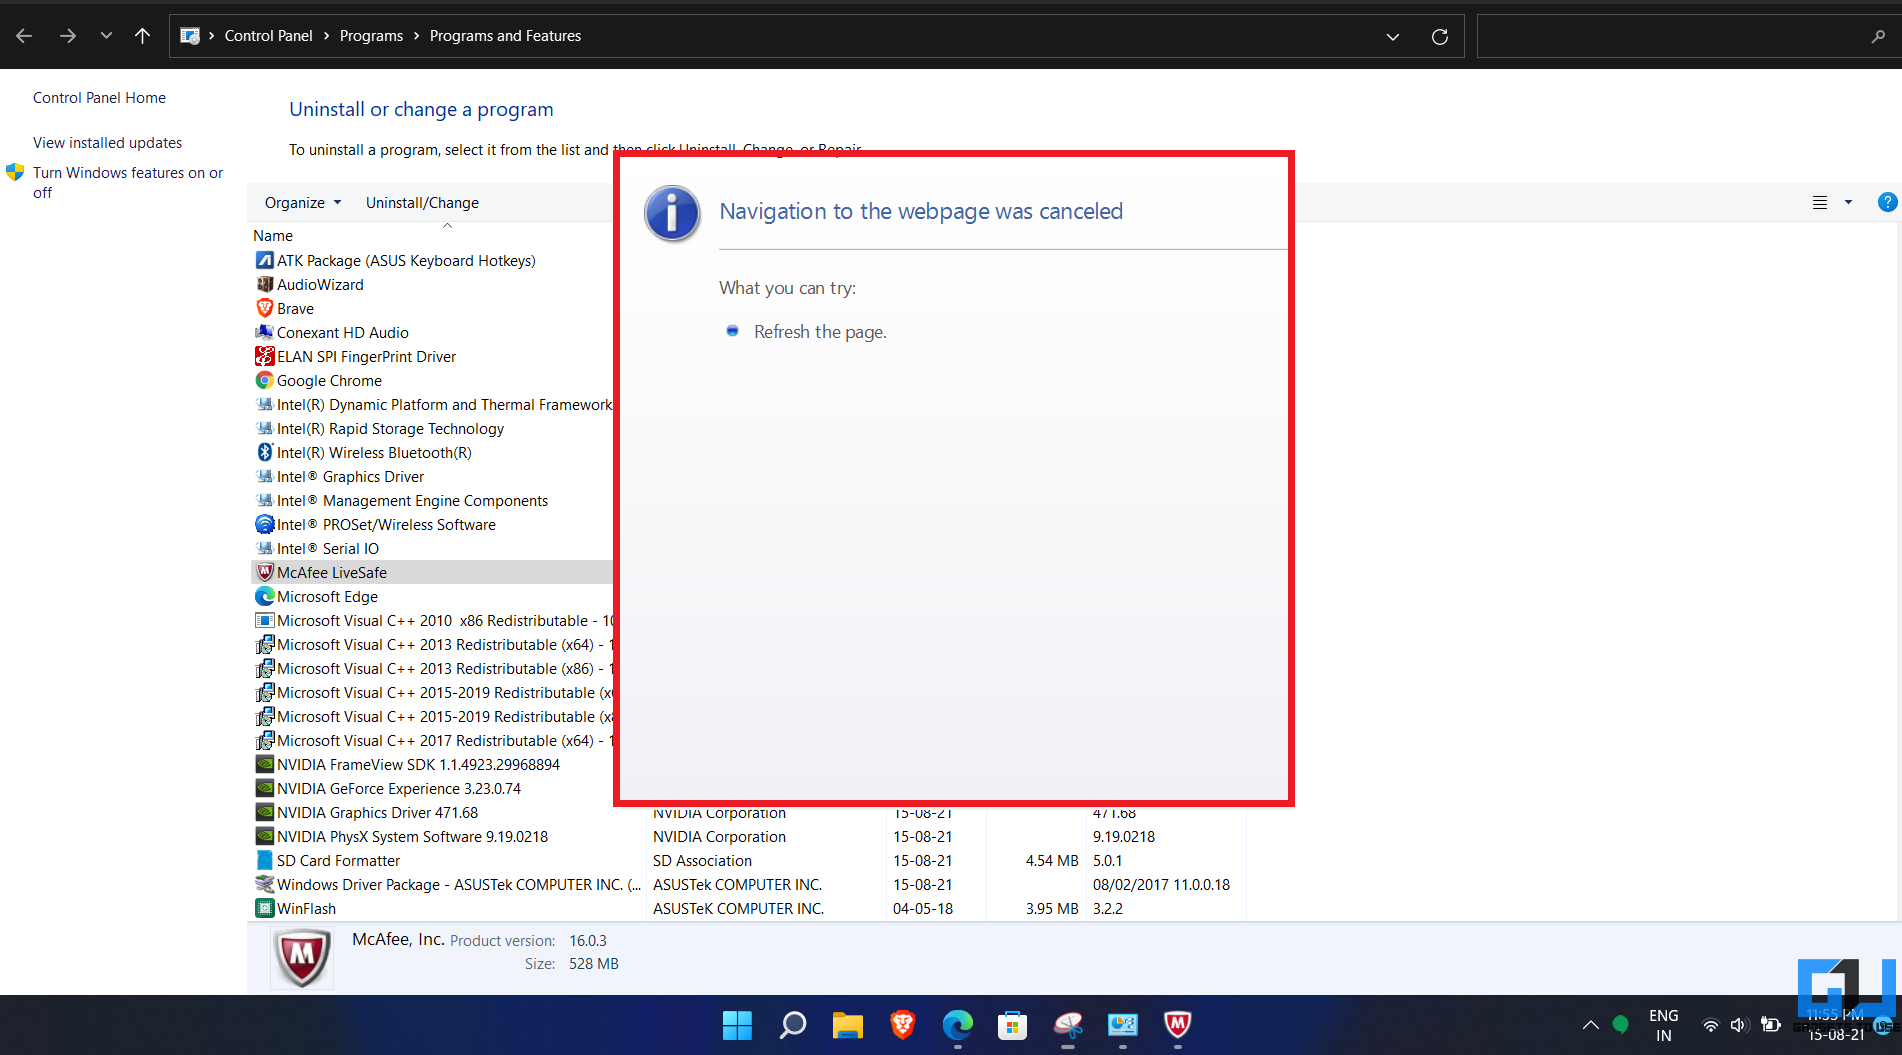
You may get the “Navigation to this webpage was cancelled” error while trying to uninstall McAfee LiveSafe from the control panel. While it could be for various reasons, you don’t have to waste your time fixing the error. You can uninstall the software using the other methods given below.
1. Using McAfee Removal Tool
The McAfee Consumer Product Removal (MCPR) tool is the official uninstaller for the antivirus. You can use it to remove all the McAfee components from your device, as follows.
- To begin with, download the MCPR tool from the McAfee Website.
- Once downloaded, open and allow it to run.
- On the McAfee Software Removal screen, tap Next.

- Then select Agree and again click on Next.
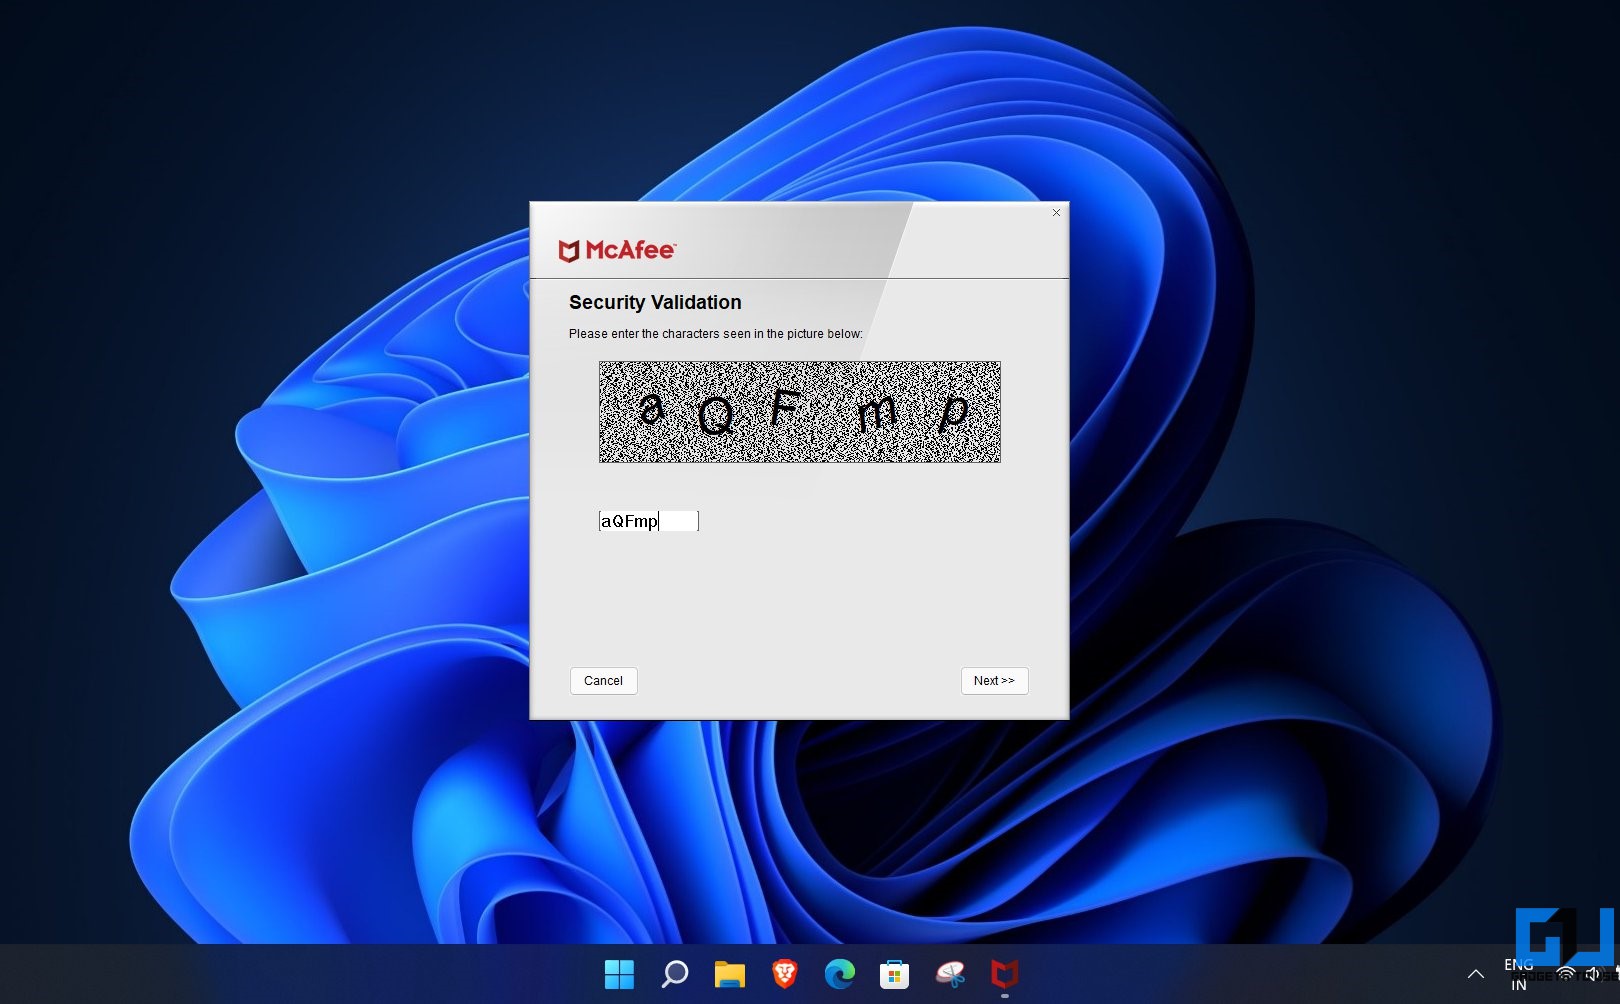
- Enter the captcha for security validation when prompted and hit Next.
- Please wait for it to uninstall McAfee from your computer.

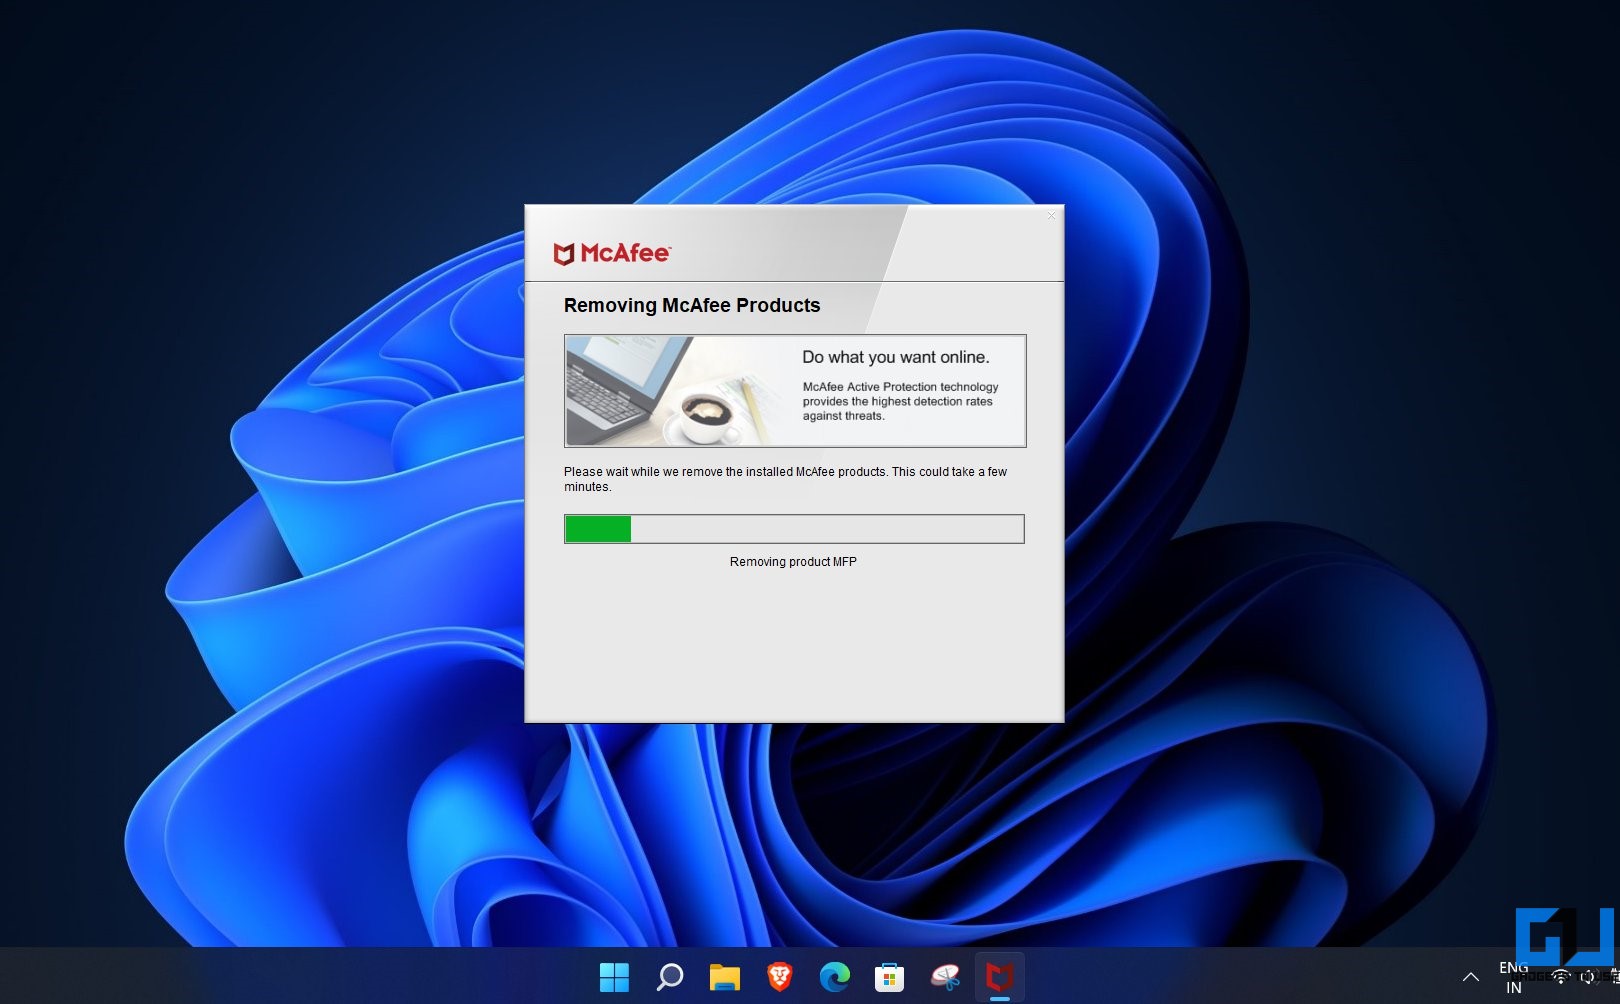
Once the removal is successful, restart your PC. If the uninstaller gets stuck for too long, proceed with the other method below.
2. Using Revo Uninstaller
- Download Revo Uninstaller portable version from here.
- Once downloaded, extract the zip file.
- Then, double-click on RevoUPort.exe to open the app.
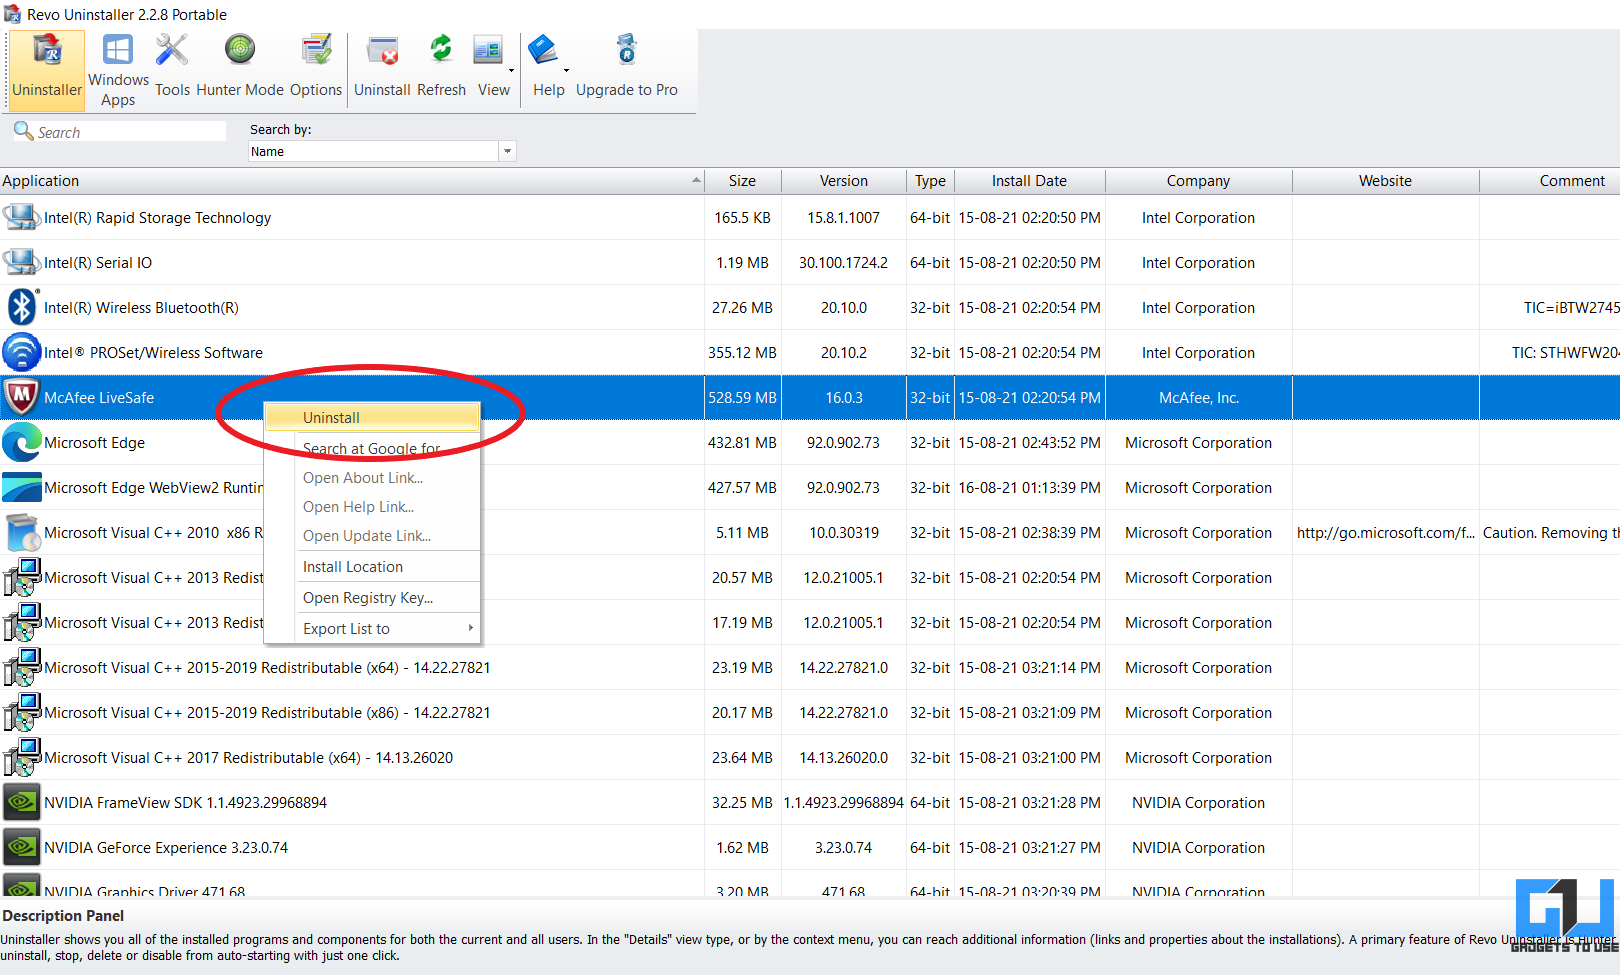
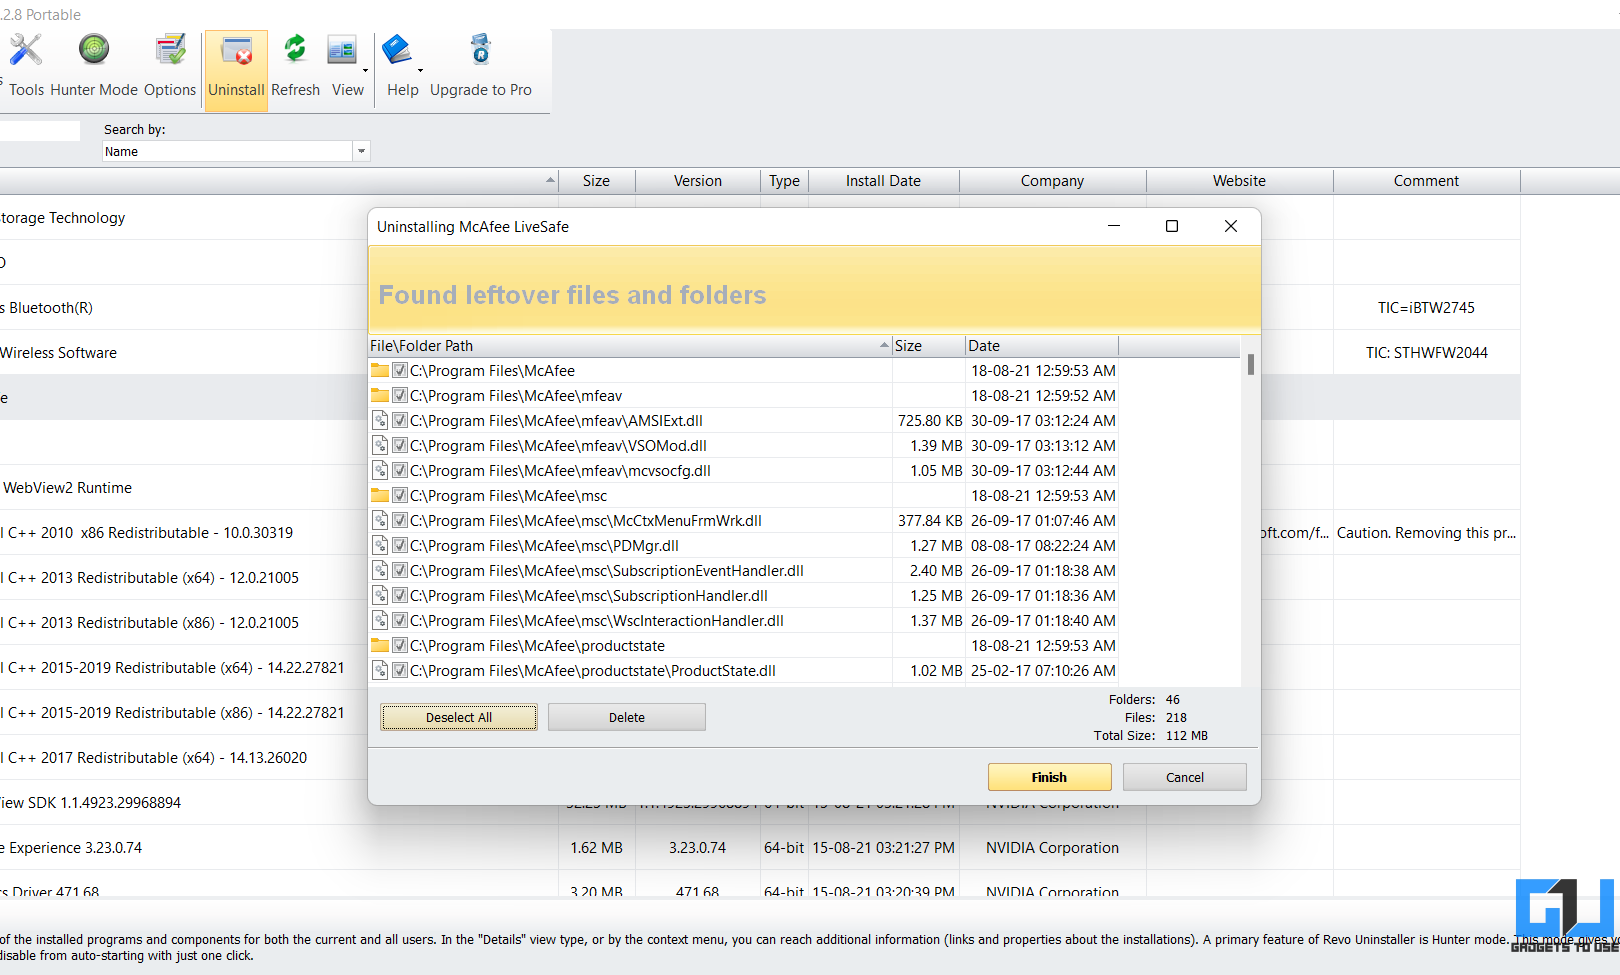
- In the list of apps, right-click McAfee LiveSafe and click on Uninstall.

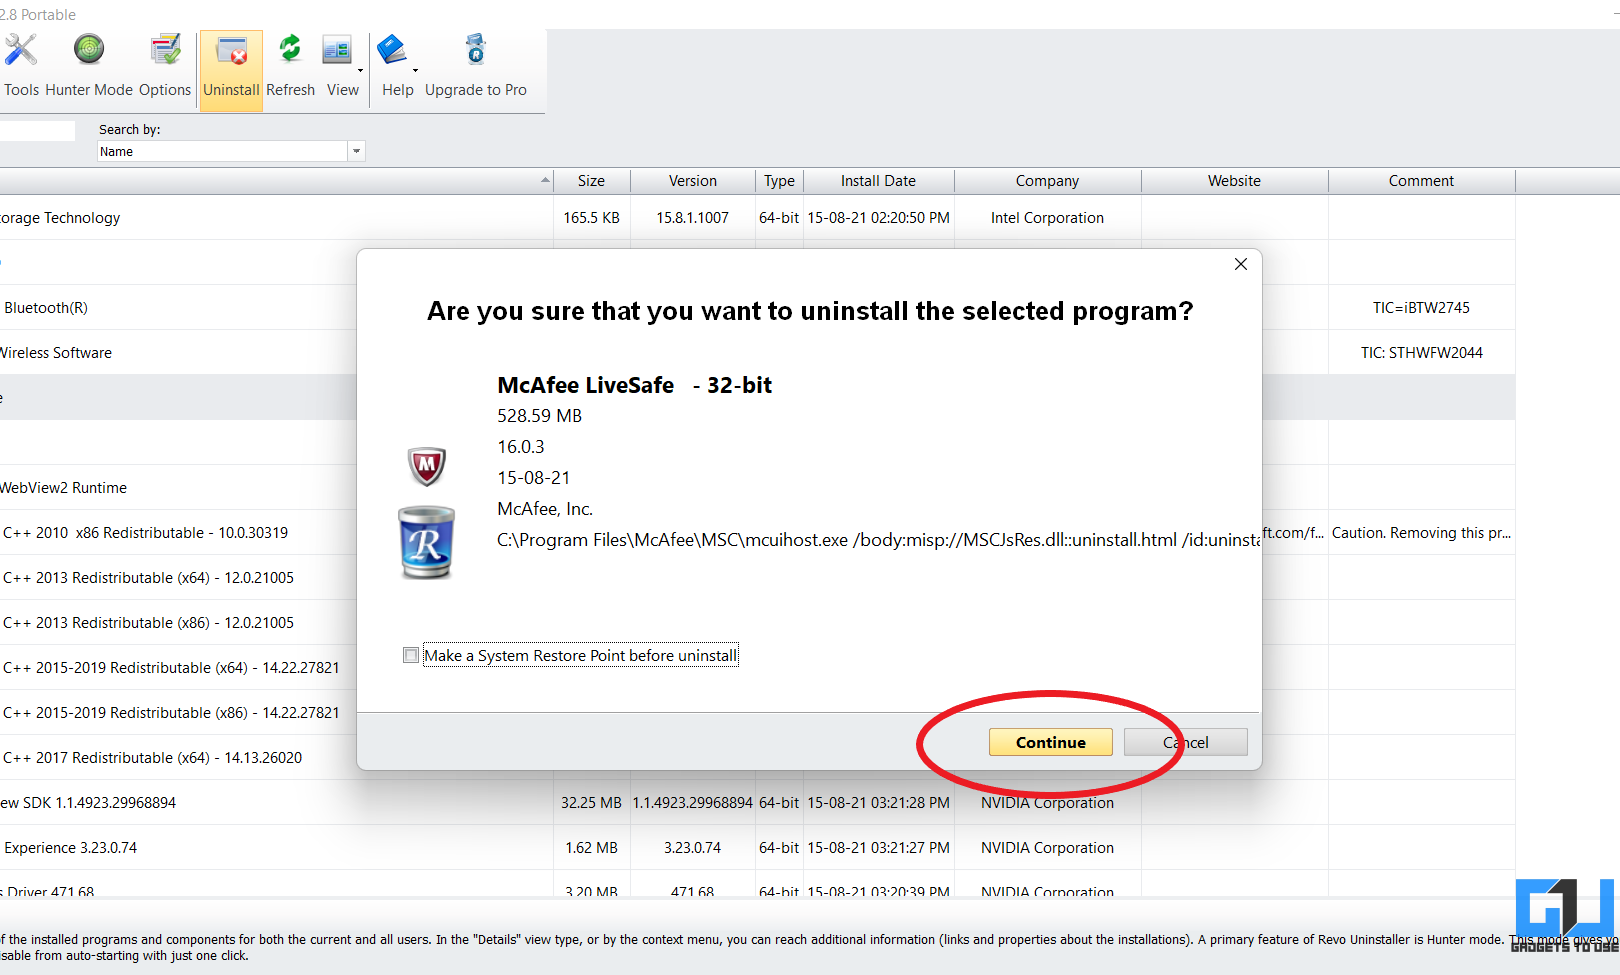
- Select Continue.
- On the next page, select and delete leftover registry items if you want to (delete only the McAfee-related files).
- Then, select and delete all the leftover files and folders.
- Finally, click on Finish to complete the removal.

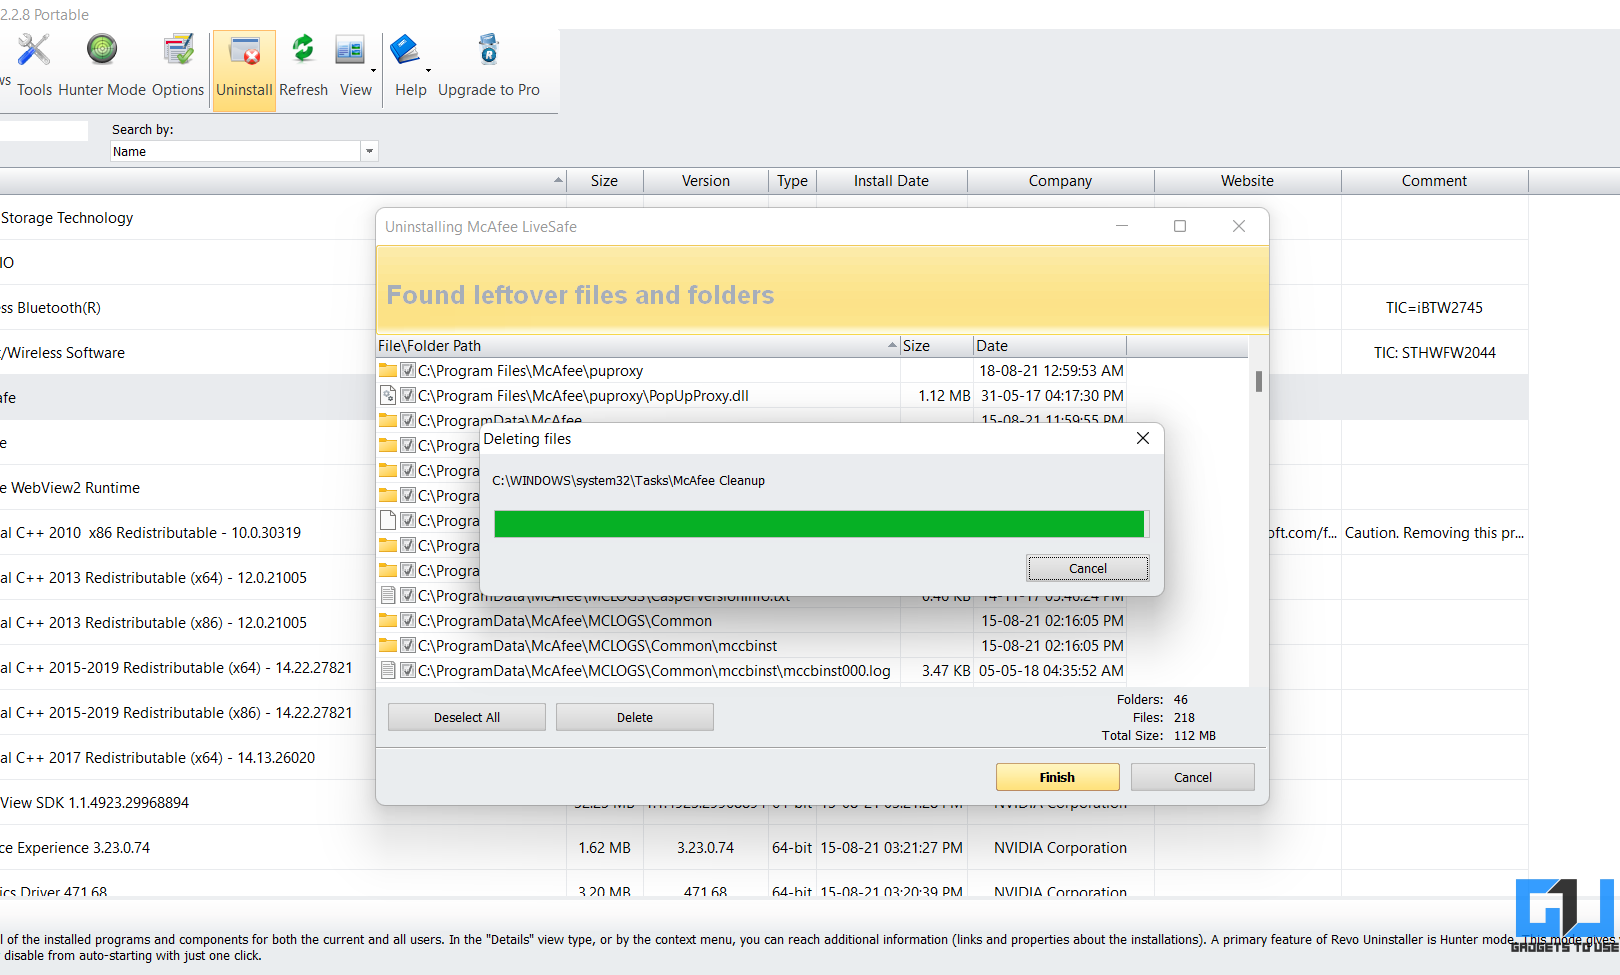
Once done, refresh the list, and McAfee would be gone. You’ll no longer find it on your computer.
3. Uninstall McAfee LiveSafe in Safe Mode
The above methods should be enough for most users. However, if you don’t want to use any extra tool, you can try uninstalling McAfee LiveSafe in safe mode.
- Press Win + R on your keyboard to open Run.
- Type and enter MSConfig.

- Once the System Configuration window opens, go to the Boot tab.
- Here, check the box for Safe Boot. Under it, tap the radio button for the Minimal option.

- Click OK and confirm to restart in safe mode.

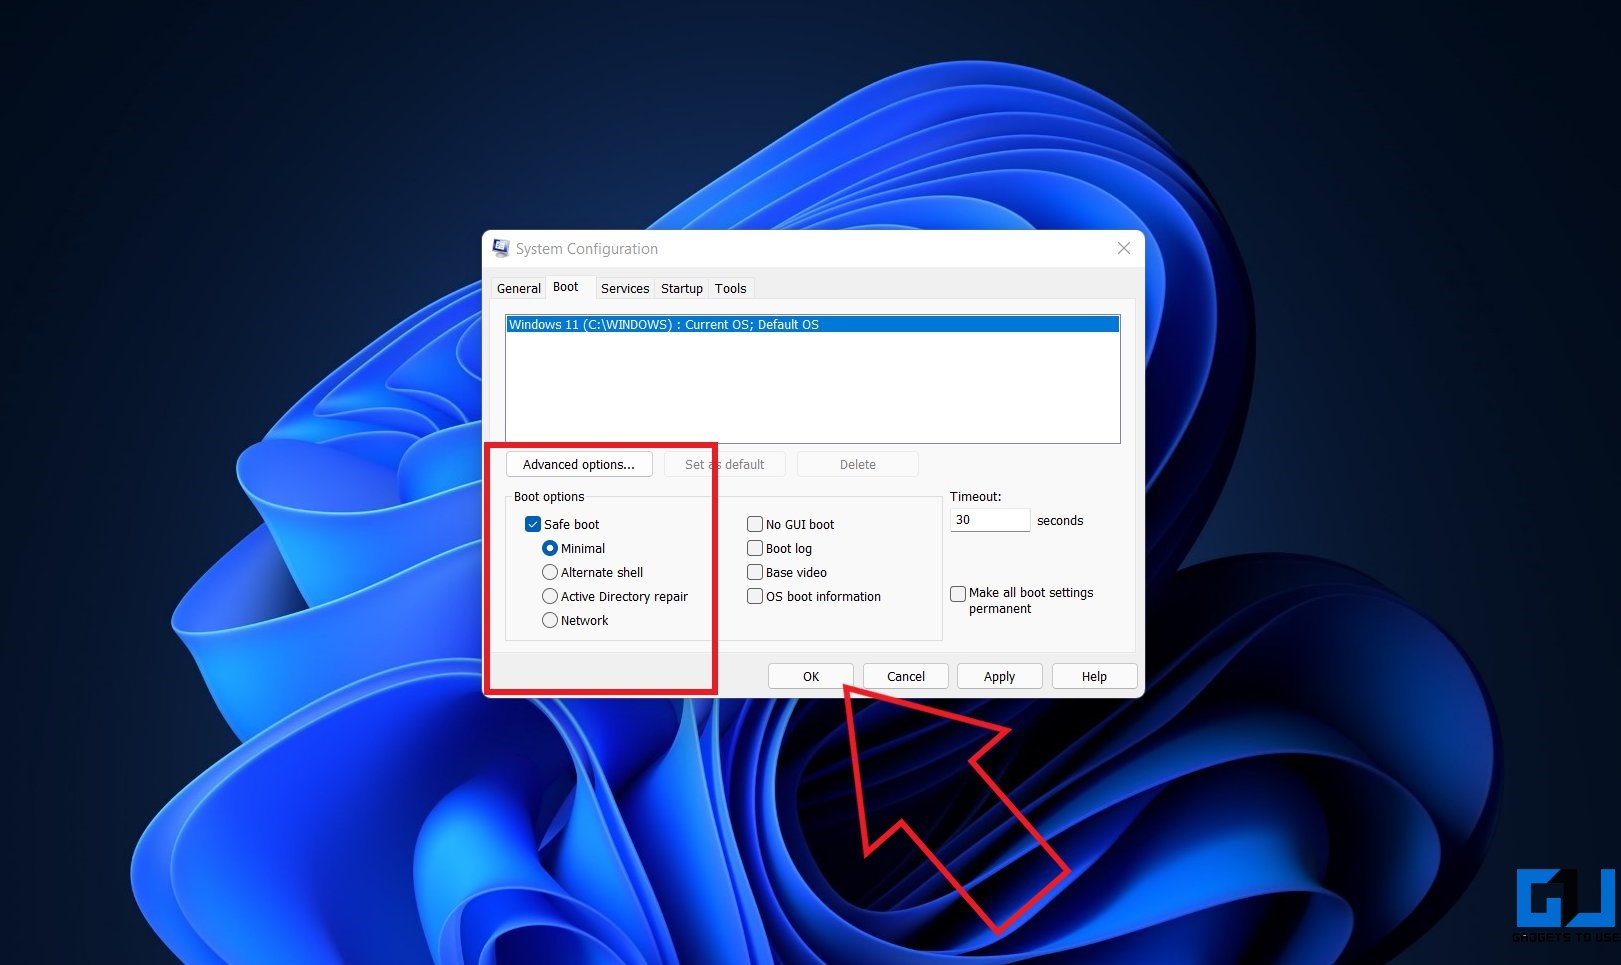
Once the Windows boots in safe mode, go to the Apps section and uninstall McAfee LiveSafe normally. It should get removed without any issues. You can then open MSconfig again to disable the safe boot option and reboot normally.
Delete Leftover Files
After uninstalling, McAfee might leave leftover files behind on your computer. Delete all the files by going to C:\Program Files\McAfee. That’s it, your PC is now completely free of McAfee or any related files.
Wrapping Up
These were some quick ways to uninstall and remove McAfee LiveSafe from any Windows machine. I hope this helps you delete it without running into any errors. In my case, I used the Revo Uninstaller. Anyways, do let me know what worked for you in the comments below. Stay tuned for more such articles.
You can also follow us for instant tech news at Google News or for tips and tricks, smartphones & gadgets reviews, join GadgetsToUse Telegram Group or for the latest review videos subscribe GadgetsToUse Youtube Channel.
Was this article helpful?
YesNo