
Все способы:
- Удаляем айТюнс с компьютера
- Способ 1: Программы-деинсталляторы
- Способ 2: «Программы и компоненты»
- Способ 3: «Параметры» (Windows 10)
- Заключение
- Вопросы и ответы: 3
iTunes – популярный медиакомбайн, который позволяет синхронизировать Apple-устройства с компьютером, организовывать удобное хранение медиатеки, передавать и слушать музыку, смотреть видео и многое другое. Если у вас возникли проблемы с работоспособностью этой программы или пропала необходимость ее использования, самым логичным решением будет полное удаление, о чем мы и расскажем сегодня.
Удаляем айТюнс с компьютера
На компьютерах, работающих под управлением Windows 10, iTunes может быть установлен двумя способами – с помощью Microsoft Store или исполняемого файла, загруженного с официального сайта Apple. Второй вариант, который для предыдущих версий ОС является единственным доступным, подразумевает немного иной, более сложный алгоритм деинсталляции, так как вместе с основной программой на ПК устанавливаются и дополнительные компоненты, от которых тоже потребуется избавиться. Все это подробнее рассмотрим далее.
Способ 1: Программы-деинсталляторы
Большинство компьютерных приложений в процессе своей работы оставляют немало следов в операционной системе, и таковыми являются как файлы на диске, так и записи в системном реестре. Если вы хотите полностью избавиться от следов iTunes, лучше всего воспользоваться для этих целей одной из специализированных программ-деинсталляторов. В качестве наглядного примера мы обратимся за помощью к небезызвестному CCleaner, вы же можете выбрать любое другое решение из представленной по ссылке ниже статьи.
Скачать программу CCleaner
Подробнее: Программы для удаления программ
iTunes из Microsoft Store
Если вы устанавливали айТюнс из Магазина приложений для Виндовс 10, удалить его не составит труда – никаких следов и дополнительных компонентов после такой программы не остается.
Читайте также: Установка Microsoft Store в Windows 10
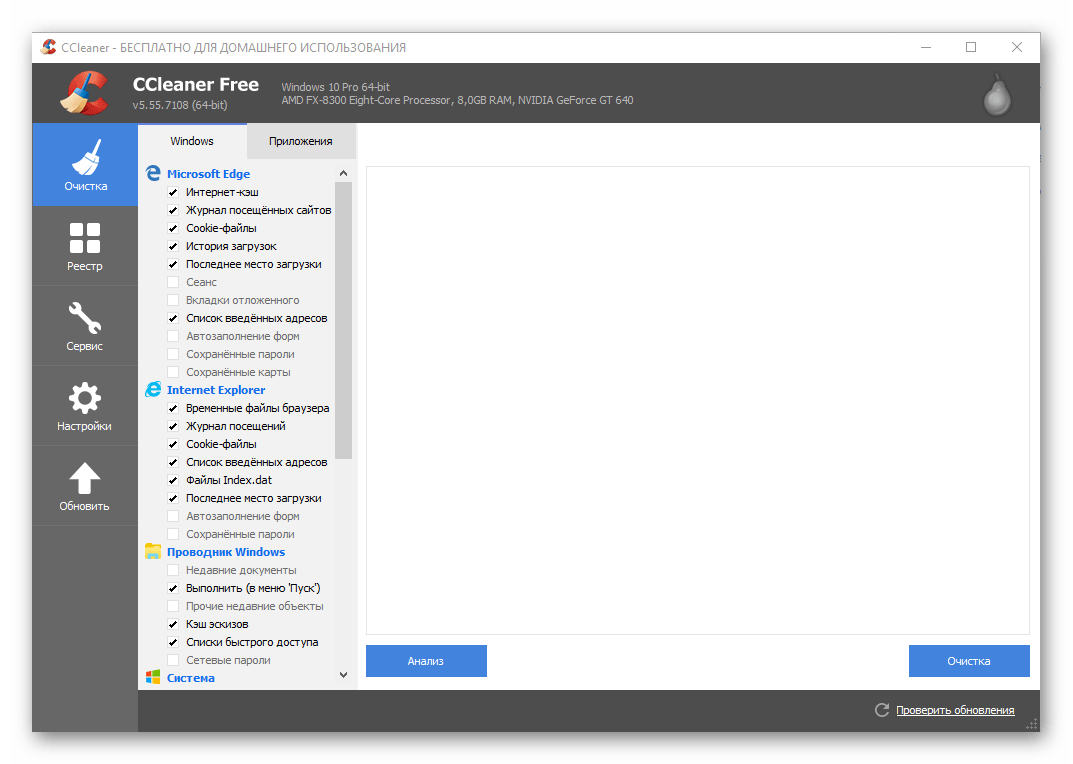
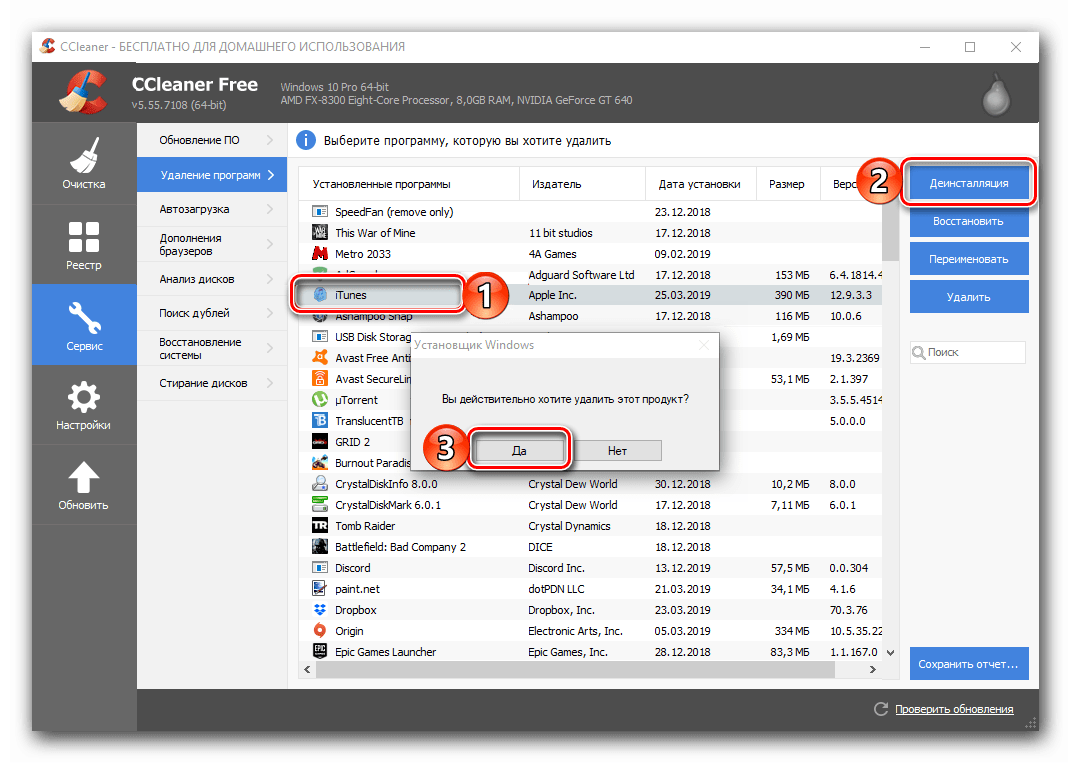
- Запустите CCleaner и перейдите на его боковой панели во вкладку «Сервис», а затем выберите пункт «Удаление программ».
- Найдите в отобразившемся перечне iTunes, выделите его нажатием левой кнопки мышки (ЛКМ) и воспользуйтесь кнопкой «Деинсталляция».
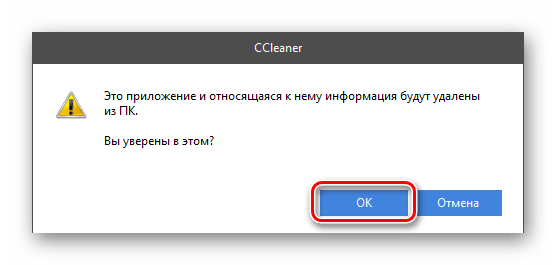
- Подтвердите свое намерение удалить программу, нажав «ОК» во всплывающем окне.

Никаких дополнительных действий от вас не потребуется.
iTunes с официального сайта
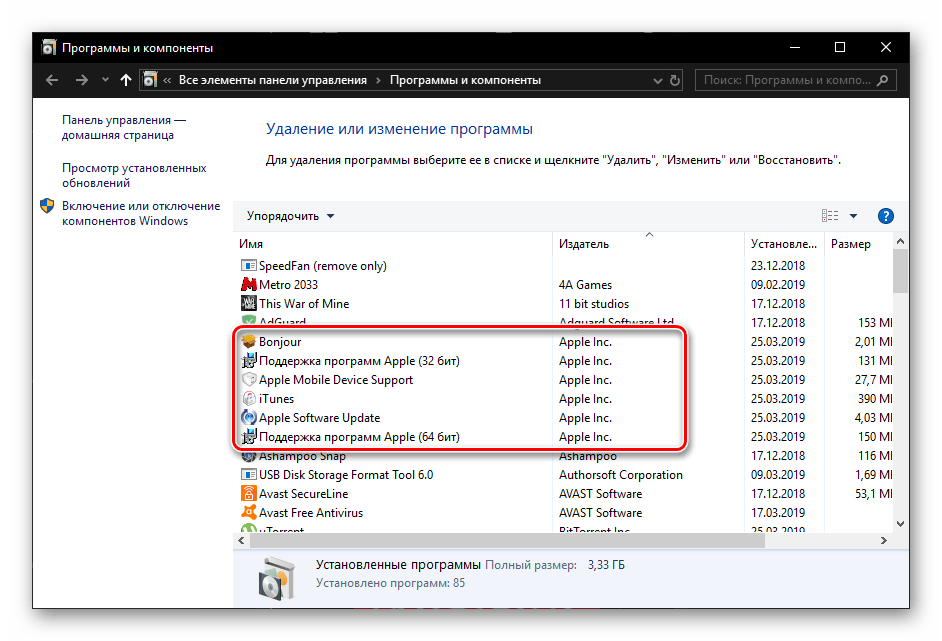
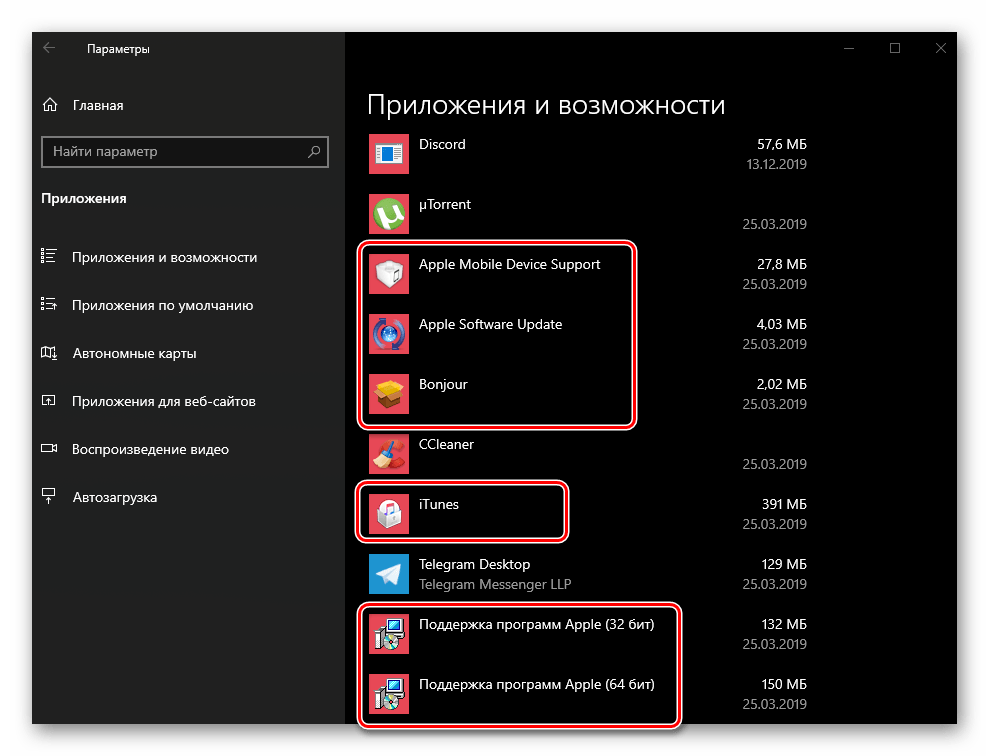
Если же установка айТюнс осуществлялась традиционным способом, посредством скачанного с официального сайта файла, в вашей системе будет присутствовать еще пять (иногда меньше) программных компонентов, которые тоже потребуется удалить.
- Apple Mobile Device Support;
- Apple Software Update;
- Bonjour;
- Поддержка программ Apple (32-бит);
- Поддержка программ Apple (64-бит).
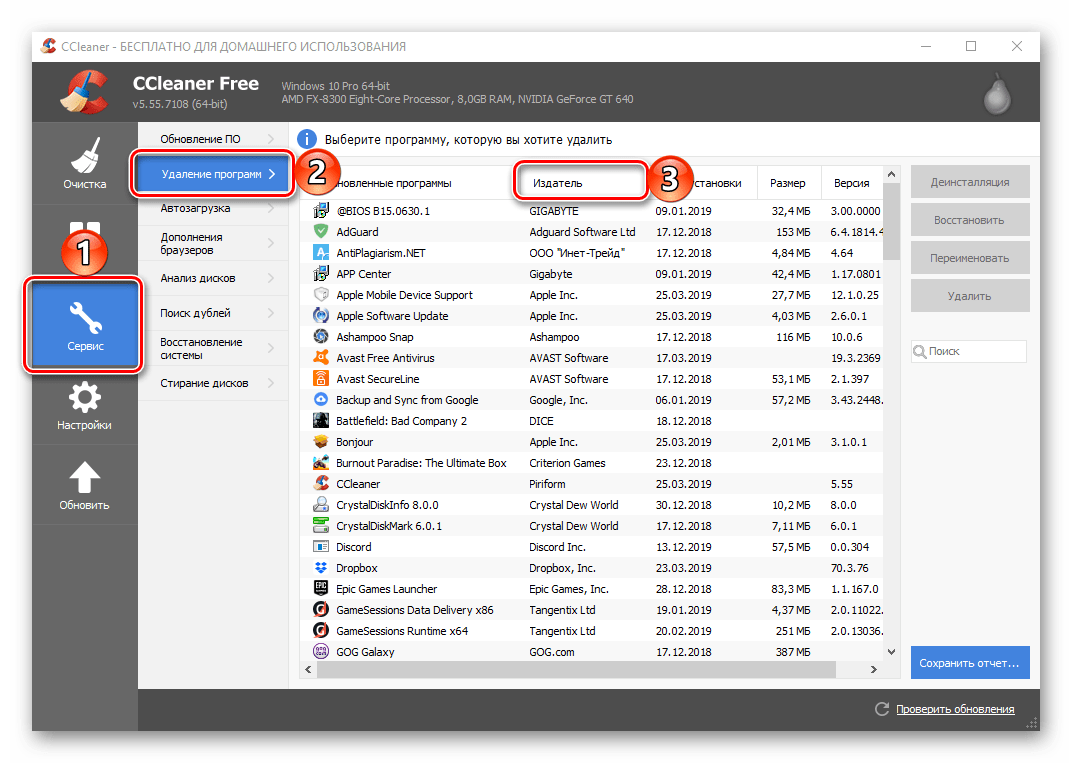
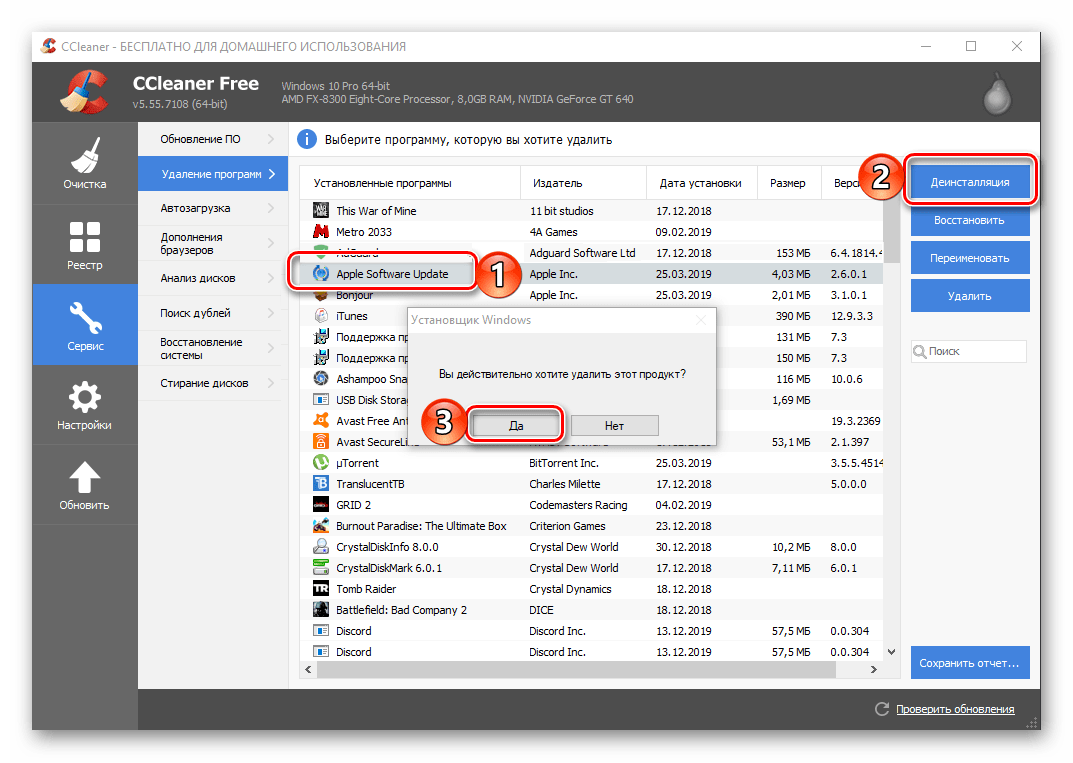
- Откройте раздел «Удаление программ» в СиКлинере и упорядочьте перечень представленных в данном окне элементов по их издателю. Для этого нажмите по одноименной вкладке на верхней панели.
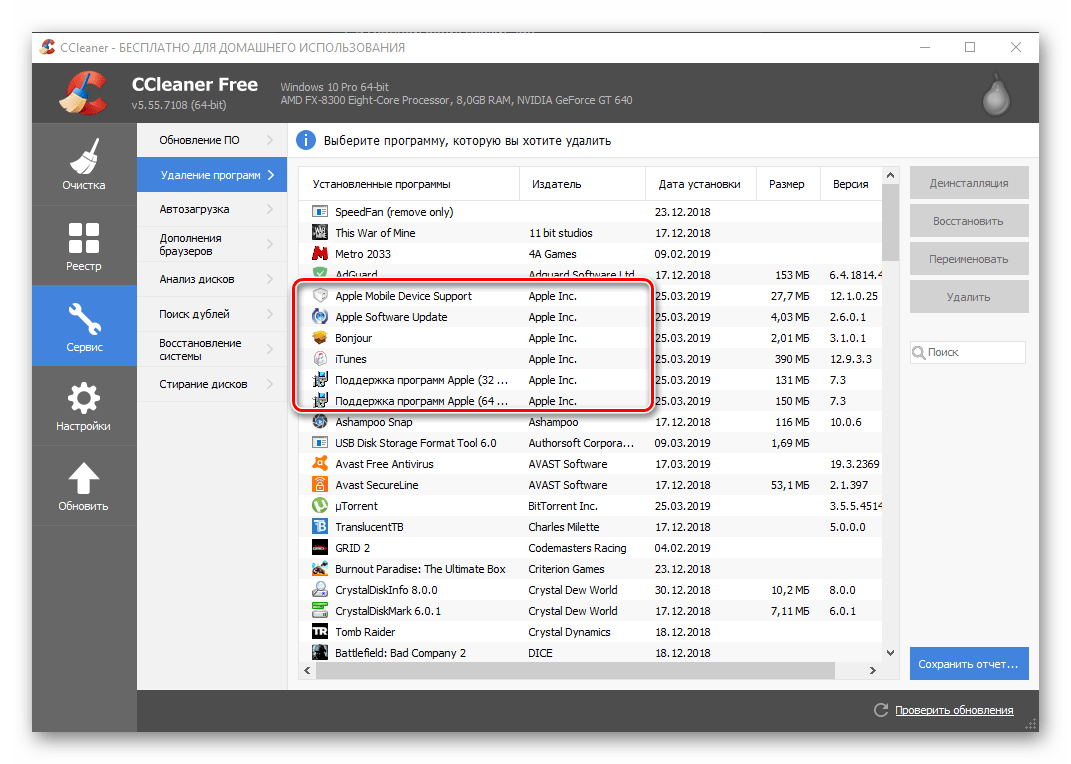
- Поочередно деинсталлируйте все программы, издателем которых является Apple (это указано справа от их названия).

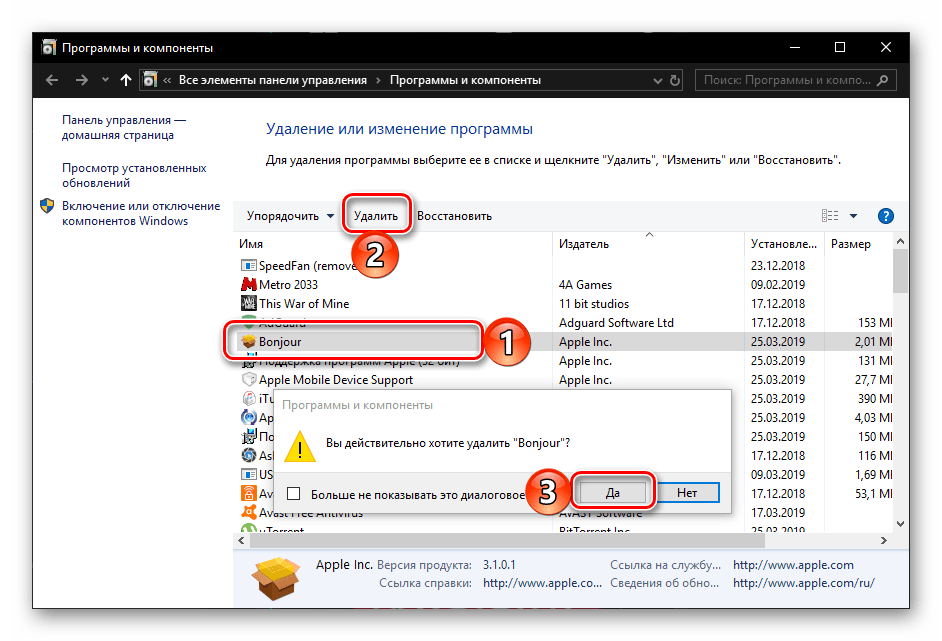
При этом iTunes нужно удалять в последнюю очередь, поэтому начать можно с Apple Mobile Device Support,

а далее просто действуйте в порядке очереди.

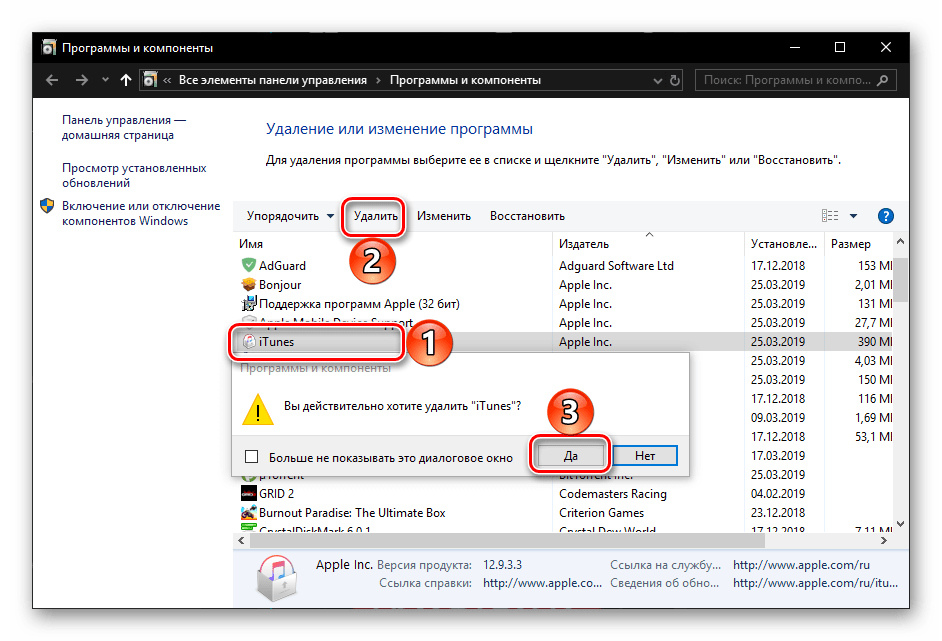
Только после того, как вы избавитесь от всего дополнительного ПО, выполните «Деинсталляцию» айТюнс.
- Для того чтобы избавиться от всех следов, которые могли оставить продукты Apple в операционной системе, выполните очистку последней от мусора, воспользовавшись представленным по ссылке ниже пошаговым руководством.

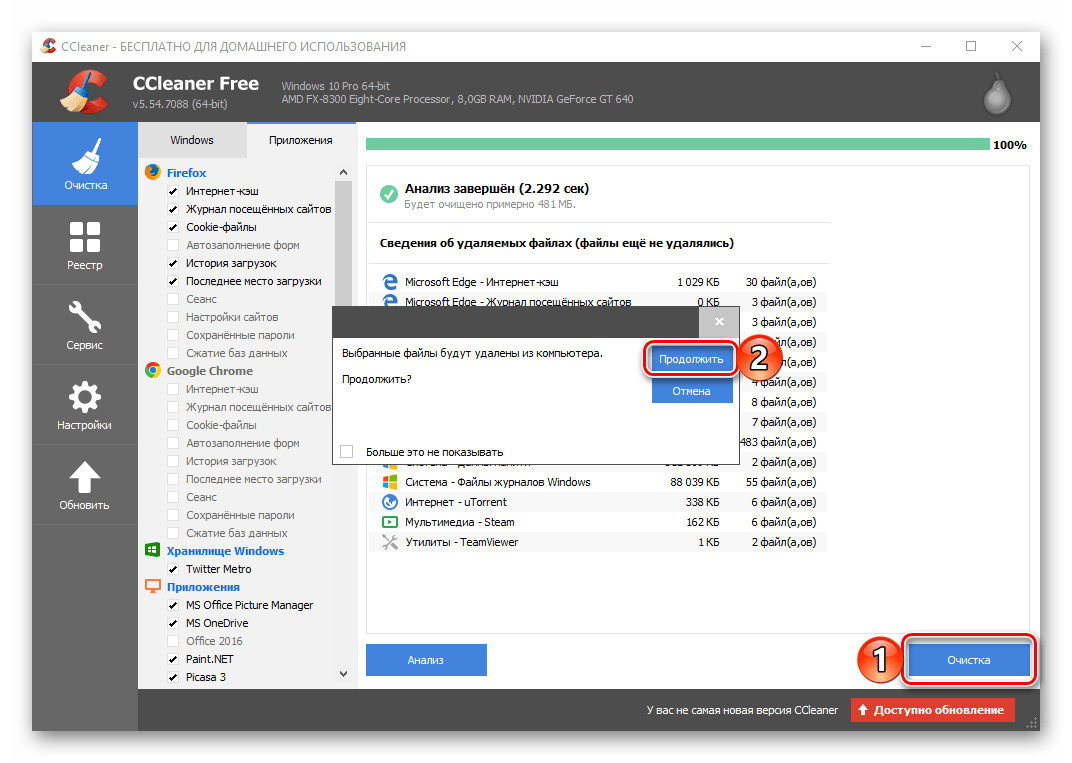
Подробнее: Очистка системы от мусора с помощью программы CCleaner
Способ 2: «Программы и компоненты»
В каждой версии ОС Windows есть стандартный деинсталлятор, и его вполне можно использовать для удаления iTunes.
Примечание: Описанным ниже способом невозможно удалить iTunes, который был установлен из Microsoft Store в Windows 10 – приложения из магазина попросту не отображаются в данном разделе операционной системы.
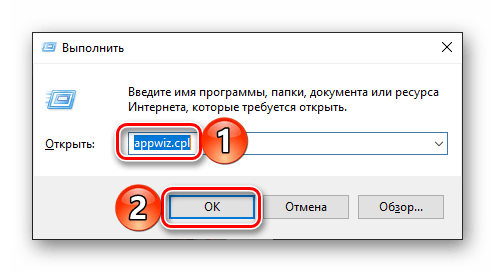
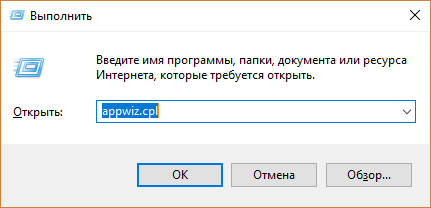
- Запустите «Программы и компоненты». Проще всего это сделать через окно «Выполнить» (нажатие клавиш «WINDOWS+R» для вызова), в которое нужно ввести представленную ниже команду и нажать «ОК» или «ENTER».
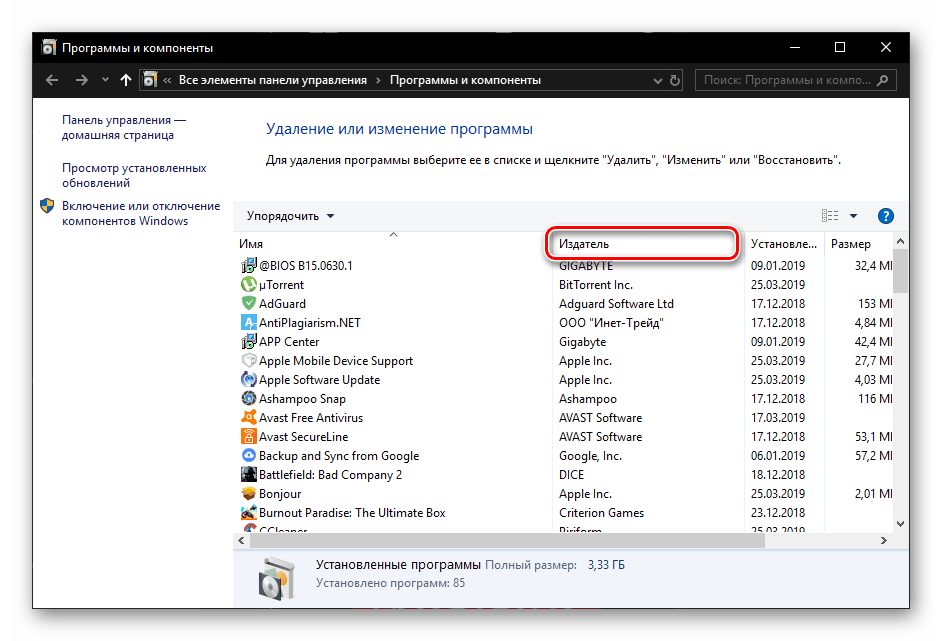
appwiz.cpl - Для того чтобы найти в списке установленных программ iTunes и все дополнительные программные компоненты от Apple, нажмите по расположенной на верхней панели кнопке «Издатель» — это упорядочит все элементы списка по данному критерию.
- Поочередно удалите все программы от Apple Inc,

выделяя их кликом ЛКМ и далее нажимая по кнопке «Удалить» на верхней панели.
Последним деинсталлируйте айТюнс. Во всплывающих окнах с запросом на подтверждение удаления ПО просто нажимайте по кнопке «Да».
Способ 3: «Параметры» (Windows 10)
Если вы – пользователь десятой версии Виндовс и предпочитаете для решения тех или иных задач по обслуживанию ОС задействовать ее стандартные средства, для удаления айТюнс в таком случае можно и нужно обратиться к разделу «Параметры».
iTunes из Microsoft Store
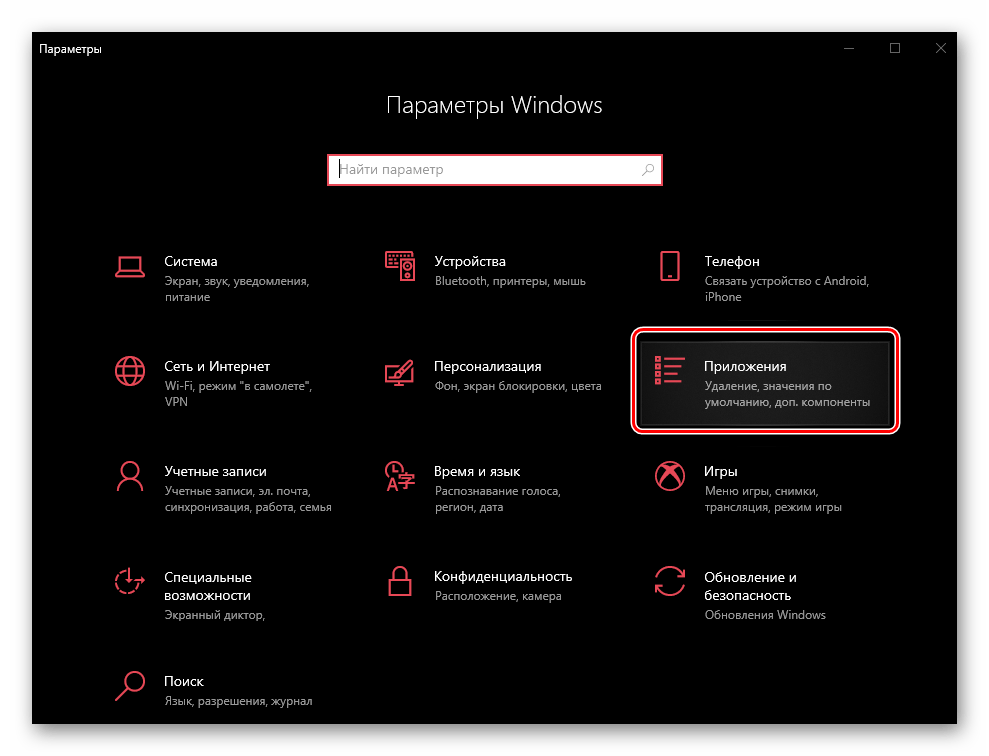
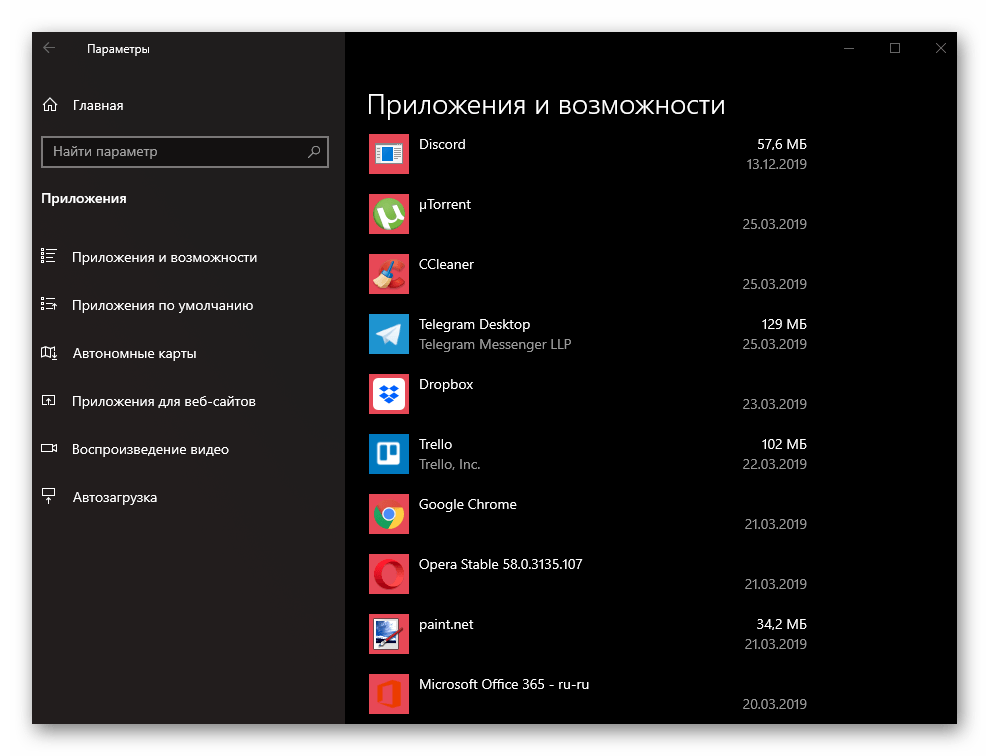
- Воспользуйтесь клавишами «WINDOWS+I», чтобы открыть «Параметры» операционной системы, и перейдите к разделу под названием «Приложения».
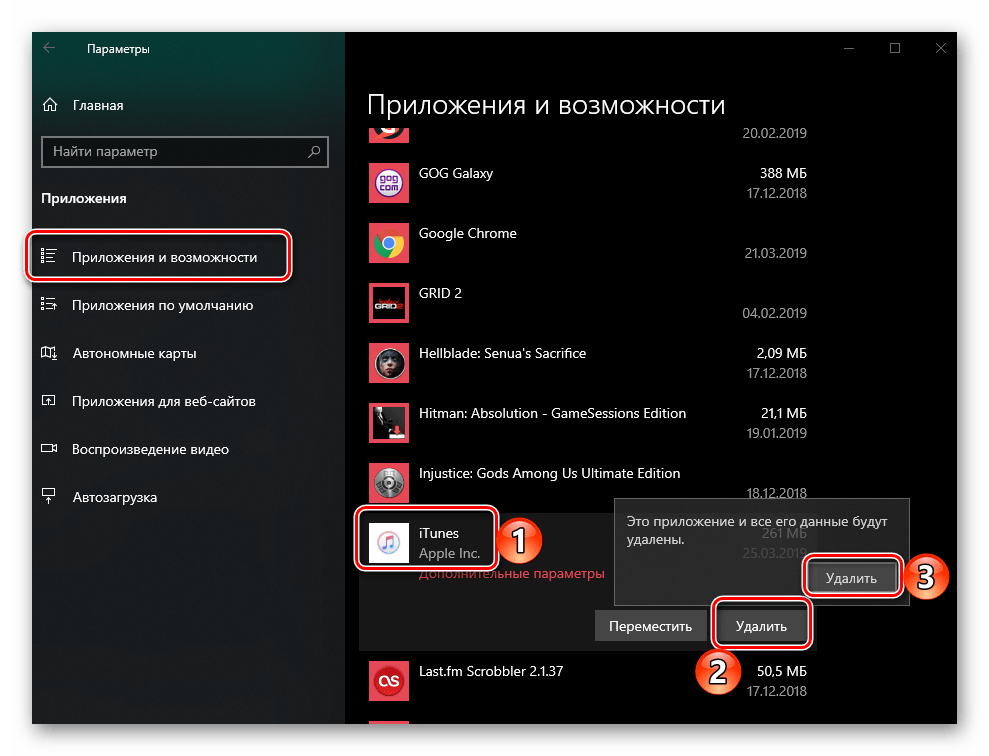
- Пролистайте список «Приложения и возможности» немного вниз и найдите в нем iTunes. Кликните ЛКМ по этому элементу, а затем дважды нажмите по кнопке «Удалить».
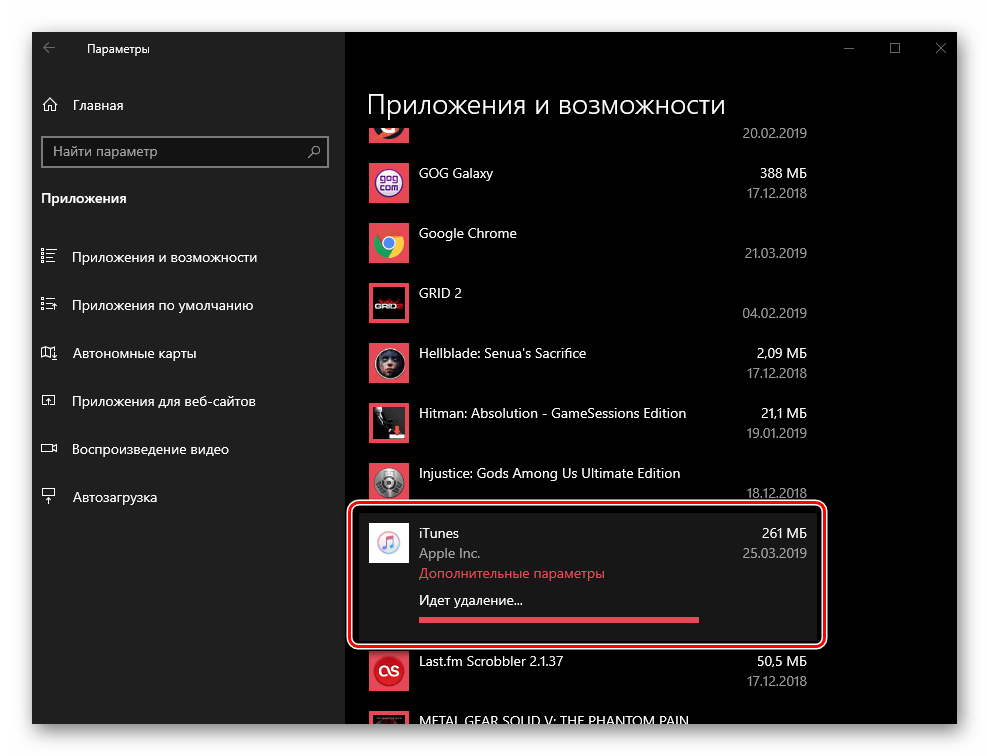
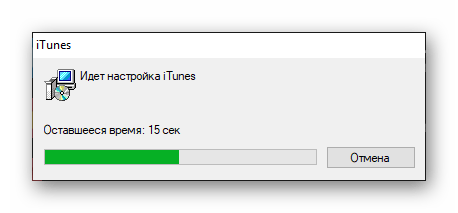
- Спустя несколько секунд программа будет удалена с вашего компьютера.
iTunes с официального сайта
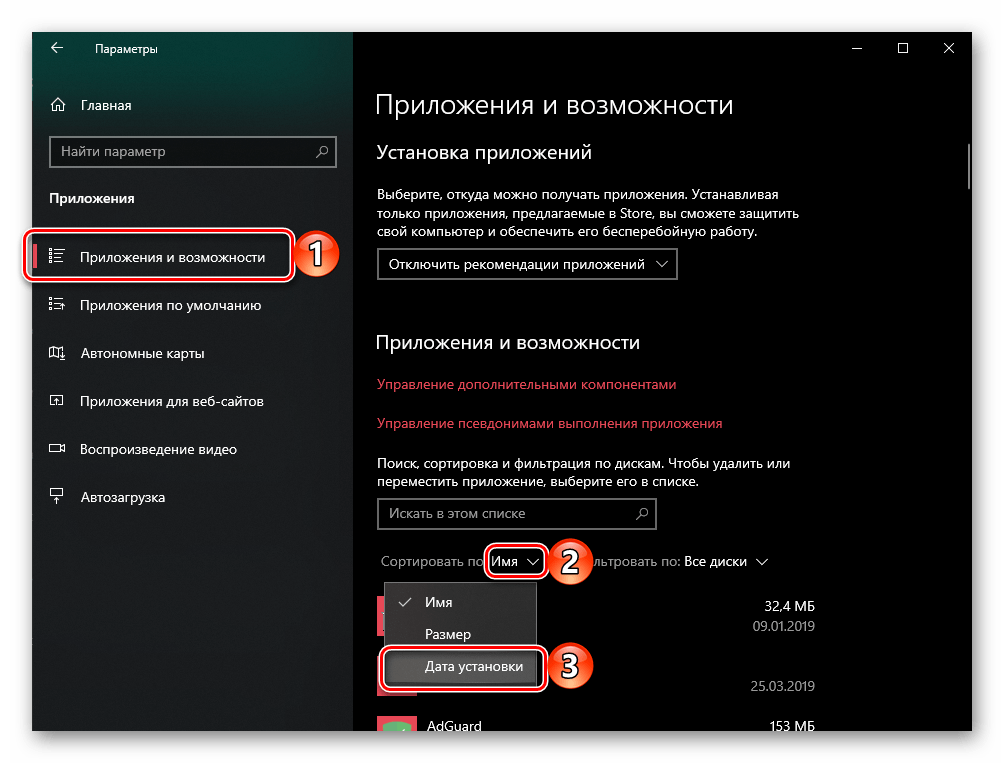
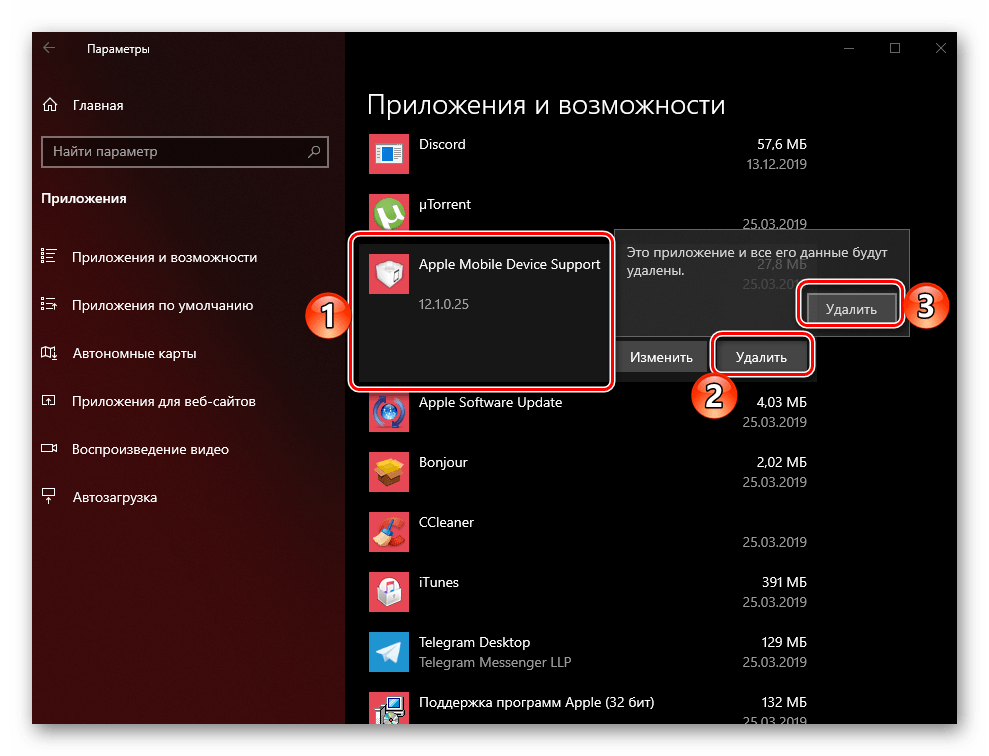
- Повторите действия из первого пункта выше, а затем во вкладке «Приложения и возможности» упорядочьте список представленных там программ по дате их установки. Для этого просто выберите соответствующий пункт в выпадающем списке «Сортировать по:».
- Такая сортировка поможет нам увидеть вместе все программные компоненты от Эппл, которые установлены на компьютере, после чего можно будет легко удалить как каждый из них, так и непосредственно сам айТюнс.

Примечание: Список всех продуктов от Apple Inc, которые требуется деинсталлировать, указан в части «iTunes с официального сайта» первого способа настоящей статьи.
Для этого просто кликните ЛКМ по первой программе в списке, а затем дважды нажмите «Удалить».
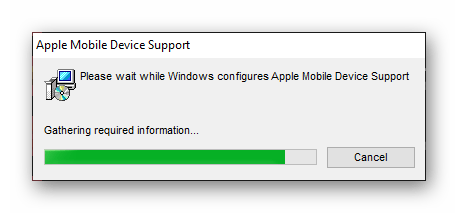
Дождитесь завершения процедуры удаления, после чего перейдите к следующему элементу в списке.
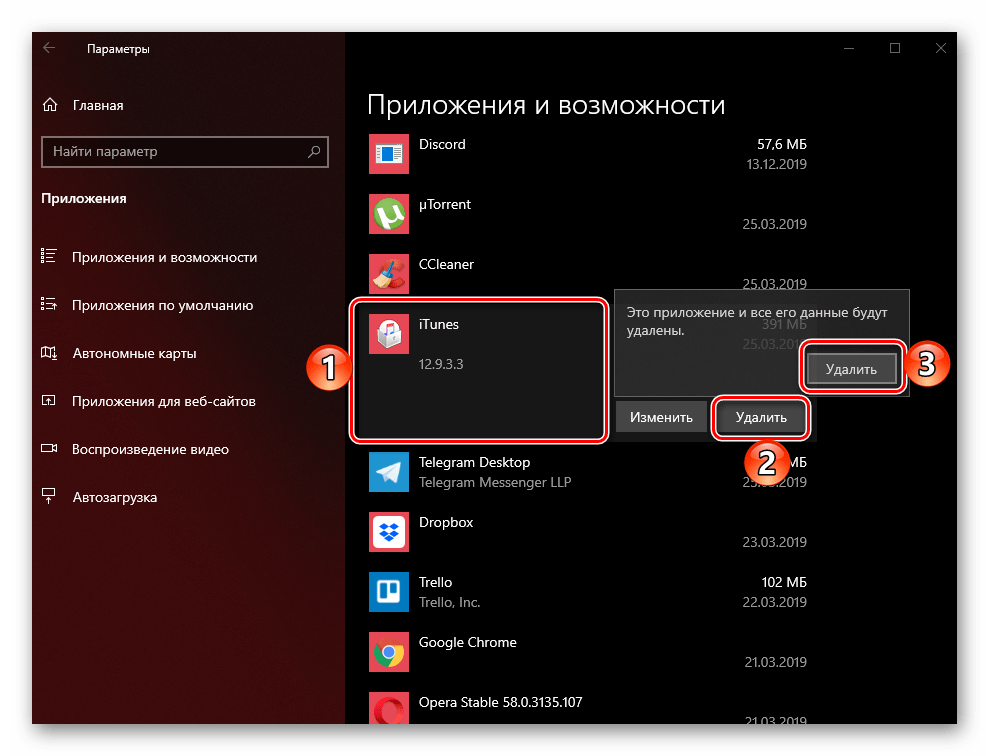
- В последнюю очередь удалите iTunes.
Обычно этот процесс занимает около одной минуты,

зато по его завершении вы избавитесь от всех продуктов Apple и оставленных ими в операционной системе следов.
Читайте также: Установка и удаление программ в Windows 10
Заключение
Полное удаление iTunes в среде ОС Windows практически ничем не отличается от аналогичной процедуры с любыми другими программами, а единственный нюанс заключается в необходимости самостоятельной деинсталляции дополнительных продуктов от Apple.
Наша группа в TelegramПолезные советы и помощь
For general advice see Troubleshooting issues with iTunes for Windows updates.
The steps in the second box are a guide to removing everything related to iTunes and then rebuilding it which is often a good starting point unless the symptoms indicate a more specific approach. When reinstalling right click on the downloaded setup file and use run as administrator. It may also help to temporarily disable any non-Microsoft anti-virus.
Review the other boxes and the list of support documents further down the page in case one of them applies.
The further information area has direct links to the current and recent builds in case you have problems downloading, or want to revert to an older version if the current one won’t work properly for you at the moment. Links to the most recent builds are now at the bottom of the page.
Your library and device backups should be unaffected by these steps but there are links to backup and recovery advice should it be needed.
tt2
How to Uninstall iTunes on Windows 11: A Detailed Guide
In today’s digital age, managing music libraries can be both rewarding and frustrating, especially when dealing with software that can be complex and cumbersome. For many users, iTunes has been the standard music management application for years. However, with the release of Windows 11, some users may wish to uninstall iTunes for various reasons, such as switching to a different application, troubleshooting problems, or simply freeing up disk space. In this article, we’ll explore the complete process of uninstalling iTunes from Windows 11, ensuring that the task is straightforward and painless.
Understanding iTunes and Its Components
Before diving into the uninstallation process, it is essential to have a basic understanding of what iTunes is and the various components it installs on your system. iTunes is not merely a standalone application but a suite of tools that includes features for syncing devices, managing media, and purchasing content from the iTunes Store. When you install iTunes, it may also install related components, including:
- Apple Software Update: Helps keep Apple software up to date.
- Apple Mobile Device Support: Essential for using Apple devices like iPhones and iPads with your computer.
- Bonjour: A network discovery service used by iTunes for device detection in the local network.
- iCloud for Windows: Allows users to access iCloud services.
Uninstalling iTunes will often include removing these components to ensure a clean slate, especially if you plan on replacing it with alternative solutions.
Preparing for Uninstallation
Before you begin, there are a few steps you should take to prepare for the uninstallation:
-
Backup Your Data: If you use iTunes to manage your music library, back up your library and any other vital data. You could export your playlists or create a copy of your music files to an external drive or a cloud service.
-
Close iTunes: Ensure that iTunes and any other Apple software are closed. You can check the system tray and task manager to make sure no Apple-related tasks are running.
-
Log in as Administrator: Make sure you are logged in to an account with administrative privileges. This can help avoid permission issues during uninstallation.
Uninstalling iTunes from Windows 11
Method 1: Using the Settings App
Windows 11 features an intuitive Settings app that makes it easier to manage applications. Here’s how to uninstall iTunes using the Settings app:
-
Open the Settings App: Click on the Start button (Windows icon) or press the Windows key on your keyboard. Then, select the “Settings” option (cogwheel icon).
-
Navigate to Apps: In the Settings menu, click on «Apps» in the sidebar to access the Apps & Features settings.
-
Search for iTunes: Scroll through the list of applications or enter “iTunes” in the search bar to quickly locate the application.
-
Uninstall iTunes: Once you find iTunes, click on it to reveal the “Uninstall” button. Click on “Uninstall,” and a confirmation dialog will appear. Click “Uninstall” again to proceed.
-
Follow the Uninstallation Wizard: The iTunes uninstallation wizard will launch. Follow the on-screen prompts to complete the process. If prompted to uninstall related components, confirm that you want to remove them as well.
Method 2: Using the Control Panel
For users who prefer the traditional way of managing software, the Control Panel can be an effective method for uninstalling applications, including iTunes.
-
Open Control Panel: Right-click on the Start button and select “Run.” In the Run dialog, type “control” and press Enter to open the Control Panel.
-
Go to Programs: In the Control Panel window, click on “Programs” and then “Programs and Features.”
-
Locate iTunes: Scroll through the list of installed programs to find iTunes. You may also use the search feature in the top right corner of the window.
-
Uninstall iTunes: Right-click on iTunes and select “Uninstall” from the context menu. Confirm the action if prompted.
-
Complete the Uninstallation Wizard: Like with the Settings app method, a wizard will guide you through the uninstallation process. Follow the on-screen instructions to finish the removal.
Removing Additional Apple Components
After uninstalling iTunes, it’s a good practice to remove any leftover Apple components to ensure that your system is free from unnecessary clutter. Here’s how to proceed:
-
Check for Related Components: After you uninstall iTunes, you will typically see additional Apple components like Apple Software Update, Apple Mobile Device Support, and Bonjour still installed. Repeat the uninstallation process for each of these applications through the Settings app or Control Panel.
-
Delete iTunes Library Files: If you want to completely remove all traces of iTunes from your system, you’ll want to delete your iTunes library files. To do this:
- Navigate to
C:Users[YourUserName]MusiciTunes. - Delete the entire iTunes folder or move it to another location if you wish to keep a backup.
- Navigate to
-
Remove iTunes Folder in AppData: You may also want to remove iTunes-related files stored in the AppData folder:
- Press
Windows + Rto open the Run dialog, type “%appdata%”, and hit Enter. - Look for any folders related to Apple or iTunes and delete them.
- Press
Troubleshooting Uninstallation Issues
If you encounter any issues while trying to uninstall iTunes, consider the following troubleshooting tips:
-
Use Apple’s Support Toolkit: Apple provides a dedicated uninstaller tool that can help remove iTunes and its associated components. Visit Apple’s official website and download the tool for Windows.
-
Restart Your Computer: Sometimes, simply restarting your computer can resolve any lingering issues caused by background processes that may interfere with the uninstallation.
-
Ensure Administrator Rights: Verify that you have administrator rights for your user account. Lack of adequate privileges can impede the uninstallation process.
-
Use Safe Mode: Boot your computer in Safe Mode to reduce the number of running processes. Try uninstalling iTunes while in Safe Mode if you’re facing stubborn issues.
-
Check for Software Conflicts: Occasionally, other software installed on your system may conflict with the iTunes uninstallation process. Temporarily disable any antivirus or security software and attempt the uninstallation again.
Conclusion
Uninstalling iTunes from Windows 11 doesn’t have to be a complicated endeavor. With the methods outlined in this guide, you can successfully remove iTunes and any associated components with relative ease. Whether you’re looking to troubleshoot software issues or switch to a different music management application, this comprehensive approach ensures that you are well-equipped to handle the task.
Remember, before you start the uninstallation process, it’s essential to back up your data, especially your music library and playlists. With the right preparation and execution, you can free up space on your system, reduce clutter, and transition smoothly to whatever alternative solution you have chosen.
After uninstalling, the world of music management awaits you, with various applications available that may better fit your needs. Diving into these alternatives may provide a refreshing experience free from iTunes’ complexities, allowing you to enjoy your music the way you want.
In recent years, smartphones have relied less and less on local music and video, and iPhones and other Apple devices no longer need iTunes to be set up. iTunes had become something of a bloated monster, so much so that many desktop users have done away with it altogether to increase their performance, and simply have one less thing to deal with. If you want to fall in the latter category, ere’s how to get rid of iTunes in Windows and MacOS.
Uninstalling iTunes in Windows
In Windows 8 or later, press the Start button or Windows key, then begin typing “add or remove programs.” Then, click on the link that appears, and in the Settings menu, scroll down until you find “iTunes.” Click “Uninstall,” then “Uninstall” again to begin the process. In Windows 7 or earlier, click the Start button and find the Control Panel. Afterward, click “Programs and Features” and located iTunes in the list. Right-click the entry and click “Uninstall.”

Follow the on-screen prompts in the pop-up windows to uninstall iTunes. The process will take several minutes. You may need to click “Yes” on Windows’ User Access Control dialog to continue. Don’t worry about any music you may have added to your iTunes library — the installation process won’t remove any music files.
Once you’ve finished the process above, repeat it for any other Apple programs on your computer, including Apple Application Support, Apple Mobile Device Support, Apple Software Update, and Bonjour (which is also made by Apple). You can also remove the Apple Computer folder in your Roaming folder — in Users>(your username)>AppData>Roaming — but this is optional. A reboot after you’re finished is recommended.
Windows Media Player remains the standard music program on Windows, and third-party music and video players can still play any non-DRM files in your digital library.
Uninstalling iTunes in MacOS
Every Mac computer that Apple sells comes with iTunes pre-installed, and the operating system considers it mandatory, so it can’t be uninstalled without a few extra steps. It is possible to do it from the Explorer window, however, or the Terminal command line tool. Just keep in mind that you’ll need to be an Administrator on your computer and enter the appropriate password in order to do so.
First, go to the Applications folder, then right-click on the shortcut for iTunes.app and click “Get Info.” Click the lock icon on the bottom of the window, enter your administrator password, and click “Sharing and Permissions” to expand the menu.

Click the menu item next to “everyone,” and under “Privilege,” select “Read & Write.” Close the Get Info window, then simply click and drag the iTunes.app icon into the Trash icon in your dock.
Alternately, iTunes can be uninstalled from the Terminal. To do so, open Terminal and navigate to the Applications folder. Then, type “sudo rn -rf iTunes.app” and your Administrator password. Once entered, iTunes will be removed from the folder.
Removing iTunes from OS X won’t affect any of your music files or other media, though you’ll no longer have access to iTunes purchases or rentals from your Mac. Ordinary media files, meaning those without Digital Rights Management locks, can still be played through Quicktime or other third-party programs.
Removing other files and re-installing iTunes
Users may want to remove the music and videos in their libraries to make space on their storage drives. Media files are among the largest that can be stored on personal computers, and removing them can make space for new programs or other libraries. Removing iTunes won’t affect those files — they need to be deleted or backed up manually from the Music folder, or any other folder that was added to the Library while iTunes was active. Once completed, don’t forget to empty the Recycle Bin (in Windows) or Trash (in MacOS) to permanently remove the files.
Thankfully, iTunes is no longer necessary for setting up or managing an iOS devices, but if you’d like access to the iTunes store again on your computer, you can re-download the program directly from Apple. Double-click the installer file and follow the on-screen prompts that appear to re-install the program.
-
Computing
There’s so much more to macOS Sequoia than just Apple Intelligence

You can’t talk about macOS Sequoia without talking about Apple Intelligence. That’s a shame. Because between the delayed rollout and more limited scope, it’s not the main reason to go out and install macOS Sequoia today, despite the fact that some of the new Apple Intelligence features just became available to check out in the public beta.
Don’t get me wrong, an improved version of Siri, better search, and some AI-powered writing tools are all neat, but there’s actually a lot more substantial features in Sequoia than just those.
Read more
-
Computing
The macOS Sequoia update just launched. Here’s why you should install it

The macOS Sequoia update is finally here, bringing iPhone Mirroring, Safari updates, window tiling, and the new Passwords app to Mac. As promised, there are no Apple Intelligence features in this update, but they will start rolling out from next month.
iPhone Mirroring is the most exciting thing coming with this update, allowing you to check your messages, notifications, and apps without switching devices. The feature makes a lot of sense as the one time we truly don’t need our phones is when we’re already using a computer. Instead of taking your hands off the keyboard to pick up your iPhone, you can simply access it on your Mac like a phone-shaped app.
Read more
-
Computing
A new malware threat to macOS adds to the data-stealing surge

If you still think Macs are inherently safe from malware, think again.
Mac users have another threat to worry about. Cthulhu Stealer, a new Mac malware threat, tries to steal sensitive data such as passwords and cryptocurrency wallets, Cado Security reports in a blog post. The malware threat disguises itself as authentic software to gather login credentials.
Read more
Иногда, у пользователей Windows могут возникнуть проблемы с синхронизацией в приложении iTunes. Для решения, достаточно перезапустить программу. Но в некоторых случаях это не помогает. Остается одно – переустановка приложения. Поэтому, в рамках данной статьи вы узнаете, как удалить айтюнс с компьютера полностью.
Как удалить?

Деинсталляцию приложения проведем через стандартную утилиту Windows:
- Нажмите комбинацию клавиш Win+R для вызова строки “Выполнить”.
- Напишите команду
appwiz.cpl
и нажмите ОК.

- Найдите приложение iTunes и нажмите “Удалить”. Подтвердите процесс, нажав “Да”.

- Ожидайте некоторое время.
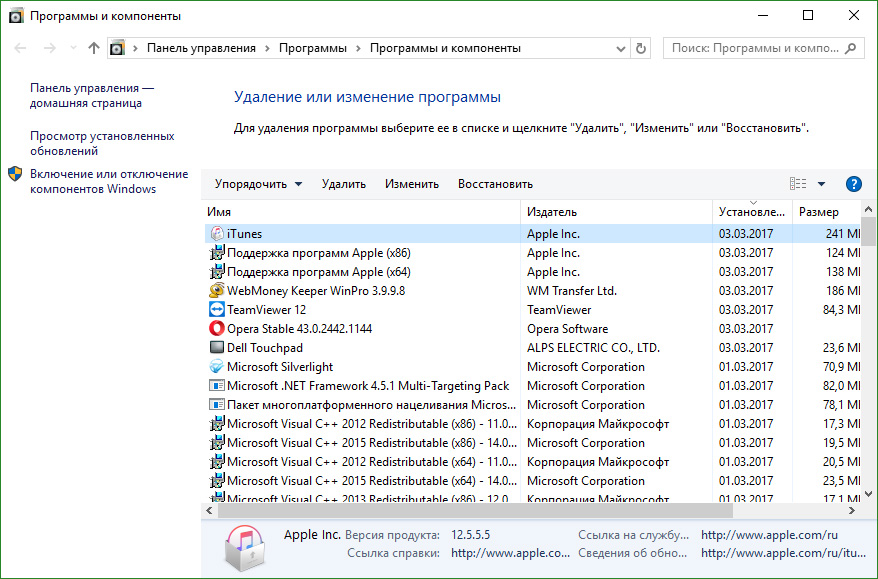
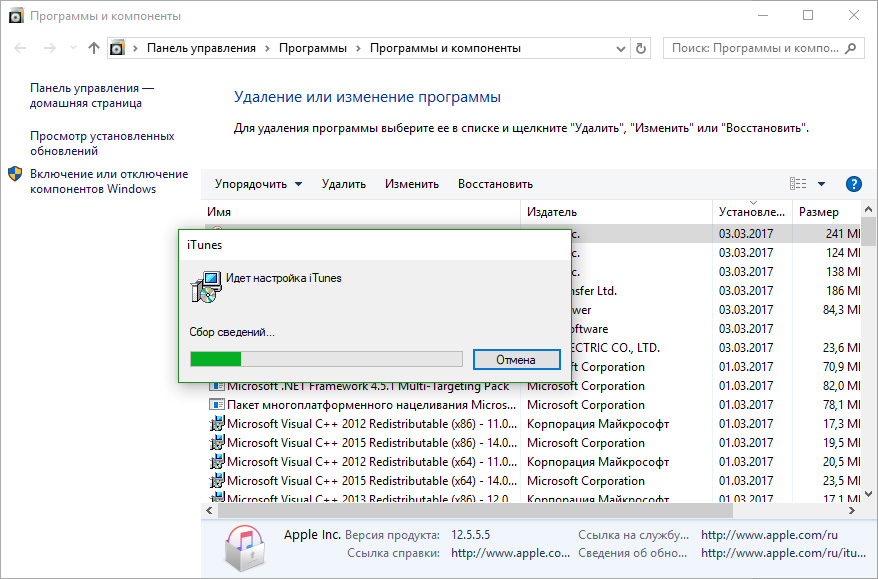
- Дополнительно, на вашем ПК могут быть установлены другие продукты Apple, которые взаимосвязаны. Проверьте ваш компьютер на их наличие и также удалите:
- Поддержка программ Apple (x86, x64).
- Apple Software Update.
- Apple Mobile Device Support.
- Bonjour.
- Apple Application Support.
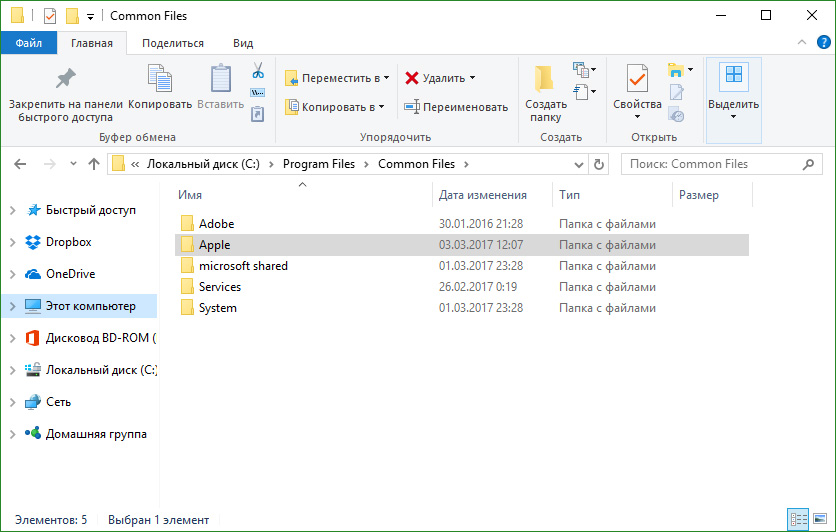
- Также очистите остатки, после удаления ПО
C:\Program Files\Bonjour
C:\Program Files\Common Files\Apple\
C:\Program Files\iTunes\
C:\Program Files\iPod\

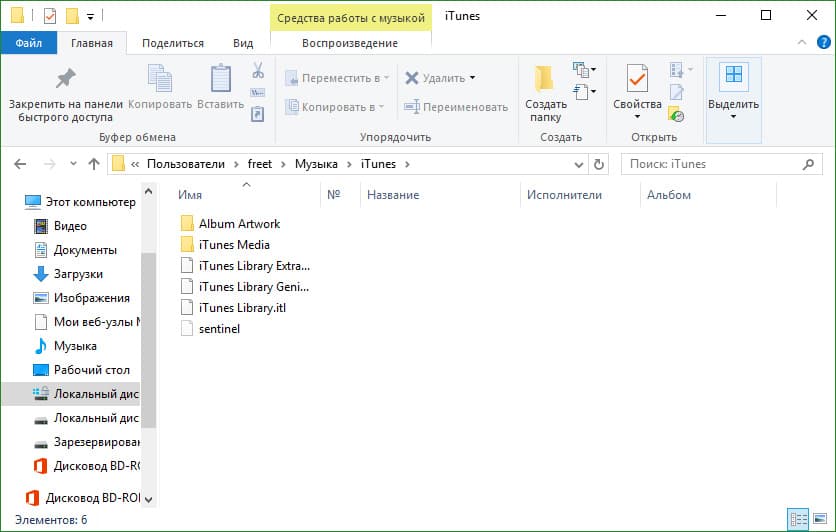
- Откройте библиотеку
C:\Пользователи\Имя пользователя\Музыка\iTunes
и очистите ее содержимое (можно перенести в другое место).
- Перезагрузите компьютер (это обязательно).
После этого, можете вновь установить iTunes со всеми необходимыми программами.