
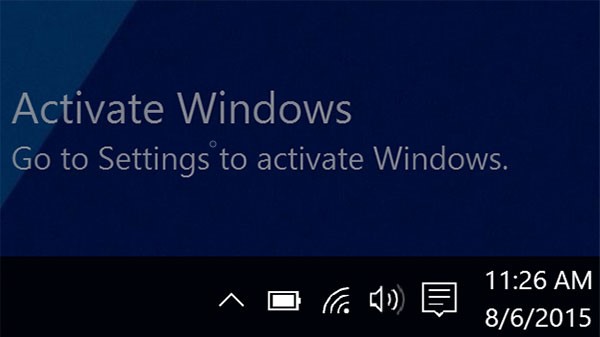
Водяной знак «Активировать Windows 10 — перейдите в настройки, чтобы активировать Windows» появляется при окончании срока лицензии, при вводе ключа не от нужной версии или при использовании пиратского ключа. Сообщение можно убрать в реестре, специального скрипта, командной строки и т.д.
Причины появления водяного знака активации
Основные причины
- срок действия лицензии на компьютере истек;
- введен ключ, полученный из онлайн-источников, который уже используется;
- использован ключ от несравнимой версии Windows, например ключ от Professional Edition введен в версии Home Edition.
Убрать водяной знак активации Windows через Regedit
После активации Windows 10 нажмите «Пуск», в открывшемся окне введите «Regedit» и нажмите Enter (вам будет предложено UAC*, нажмите «Да»)

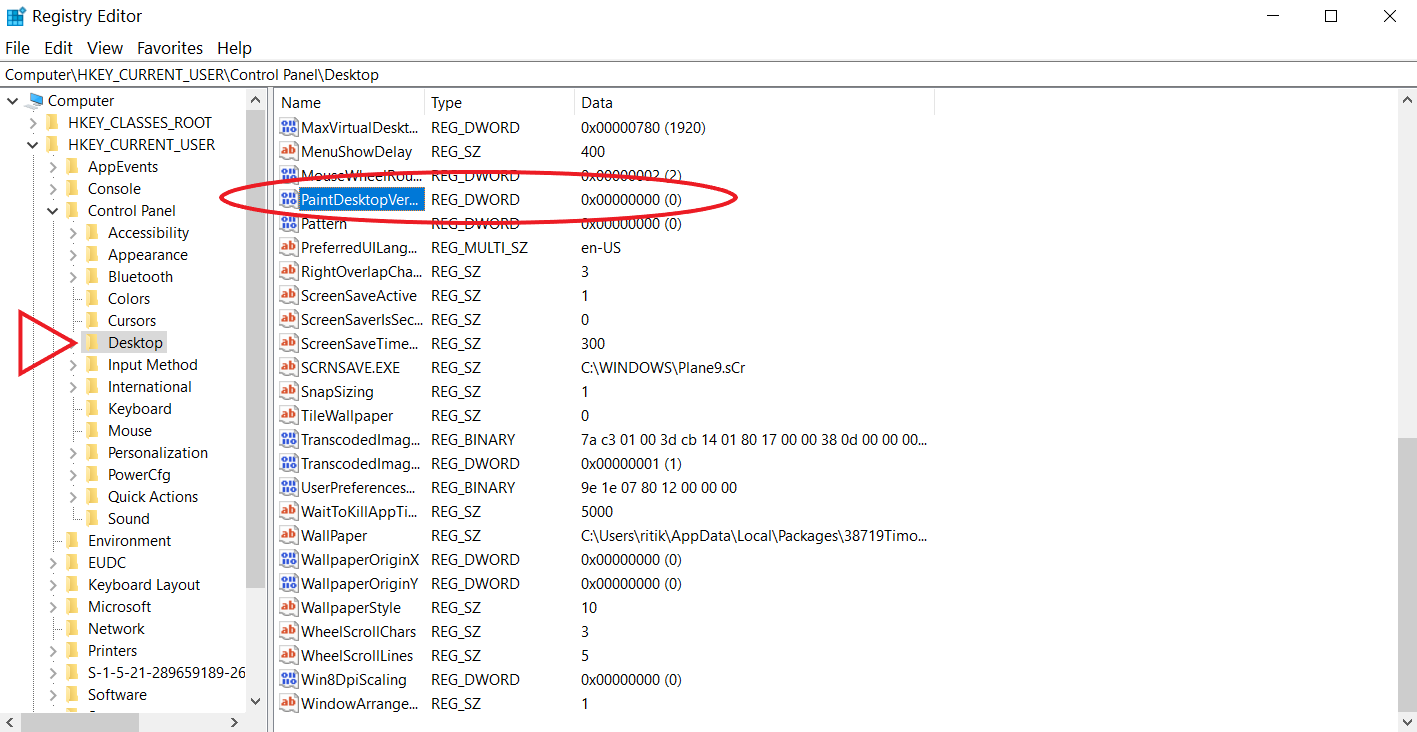
Перейдите в «HKEY_CURRENT_USER — нажмите на Панель управления — Рабочий стол».
В папке «Desktop» прокрутите вниз, чтобы найти «PaintDesktopVersion», и дважды щелкните по нему, чтобы открыть.
Убедитесь, что выбрано шестнадцатеричное число, и измените значение параметра на «0». Затем нажмите «ОК», чтобы сохранить изменения как убрать надпись активации на компьютере.

Закрываете редактор реестра и перезагружаете компьютер. Благодаря таким действиям следующий вопрос как убрать надпись активация удален.
Убрать водяной знак активации Windows с помощью специальных возможностей
Используем опцию Windows 10 Ease of Access.
Нажимаем на меню, находим «Панель управления», запускаем приложение.
Переходим в «Центр возможностей» компьютера об активации Windows.

На следующем экране нужно нажать «Оптимизация изображений на экране».
Прокручиваем вниз до нижней части экрана, и устанавливаем флажок водяного знака с «Удалить фоновые изображения (по возможности)».

Нажимаем «ОК» и нажимаем перезагрузку компьютера.
Водяной знак активации должен исчезнуть и решиться как убрать надпись активации.
Убрать водяной знак активации Windows, можно отключив советы
Заходим в «Пуск» и нажимаем «Настройки (кнопка в виде шестеренки)».
Переходим в систему и нажимаем «Уведомления и действия».
Отключаем параметр «Показывать приветствие Windows после обновлений и получать советы, рекомендации и предложения при использовании Windows» и нажать применить.

Убрать водяной знак можно с помощью центра поддержки
Запускаем «Поиск» и вводим запрос «Центр безопасности».

Второй раздел бокового меню.

Снимаем галочку со строки «Активация Windows».

Уведомление исчезнет через некоторое время, но проблема как убрать надпись активации решена не будет — система останется нелицензионной и неполноценной строка слияния.
Отключение водяного знака активации Windows с помощью скрипта
Открываем блокнот, скопируем и вставляем приведенный ниже текст в него.
@echo offtitle Activate Windows 7 / 8 / 8.1 / 10 for FREE!&cls&echo =====================================&echo #Copyright: MSGuides.com&echo =====================================&echo.&echo autoactivationoff reg #Supported products:&echo – Windows 7 Professional&echo – Windows 7 Professional N&echo – Windows 7 Professional E&echo – Windows 7 Enterprise&echo – Windows 7 Enterprise N&echo – Windows 7 Enterprise E&echo – Windows 8 Core&echo – Windows 8 Core Single Language&echo – Windows 8 Professional&echo – Windows 8 Professional N&echo – Windows 8 Professional WMC&echo – Windows 8 Enterprise&echo – Windows 8 Enterprise N&echo – Windows 8.1 Core&echo – Windows 8.1 Core N&echo – Windows 8.1 Core Single Language&echo – Windows 8.1 Professional&echo – Windows 8.1 Professional N&echo – Windows 8.1 Professional WMC&echo – Windows 8.1 Enterprise&echo – Windows 8.1 Enterprise N&echo – Windows 10 Home&echo – Windows 10 Home N&echo – Windows 10 Home Single Language&echo – Windows 10 Home Country Specific&echo – Windows 10 Professional&echo – Windows 10 Professional N&echo – Windows 10 Education N&echo – Windows 10 Education N&echo – Windows 10 Enterprise&echo – Windows 10 Enterprise N&echo – Windows 10 Enterprise LTSB&echo – Windows 10 Enterprise LTSB N&echo.&echo.&echo ====================================&echo Activating your Windows… & cscript //nologo c:\windows\system32\slmgr.vbs /ipk FJ82H-XT6CR-J8D7P-XQJJ2-GPDD4 >nul&cscript //nologo c:\windows\system32\slmgr.vbs /ipk MRPKT-YTG23-K7D7T-X2JMM-QY7MG >nul&cscript //nologo c:\windows\system32\slmgr.vbs /ipk W82YF-2Q76Y-63HXB-FGJG9-GF7QX >nul&cscript //nologo c:\windows\system32\slmgr.vbs /ipk 33PXH-7Y6KF-2VJC9-XBBR8-HVTHH >nul&cscript //nologo c:\windows\system32\slmgr.vbs /ipk YDRBP-3D83W-TY26F-D46B2-XCKRJ >nul&cscript //nologo c:\windows\system32\slmgr.vbs /ipk C29WB-22CC8-VJ326-GHFJW-H9DH4 >nul&cscript //nologo c:\windows\system32\slmgr.vbs /ipk BN3D2-R7TKB-3YPBD-8DRP2-27GG4 >nul&cscript //nologo c:\windows\system32\slmgr.vbs /ipk 2WN2H-YGCQR-KFX6K-CD6TF-84YXQ >nul&cscript //nologo c:\windows\system32\slmgr.vbs /ipk NG4HW-VH26C-733KW-K6F98-J8CK4 >nul&cscript //nologo c:\windows\system32\slmgr.vbs /ipk XCVCF-2NXM9-723PB-MHCB7-2RYQQ >nul&cscript //nologo c:\windows\system32\slmgr.vbs /ipk GNBB8-YVD74-QJHX6-27H4K-8QHDG >nul&cscript //nologo c:\windows\system32\slmgr.vbs /ipk 32JNW-9KQ84-P47T8-D8GGY-CWCK7 >nul&cscript //nologo c:\windows\system32\slmgr.vbs /ipk JMNMF-RHW7P-DMY6X-RF3DR-X2BQT >nul&cscript //nologo c:\windows\system32\slmgr.vbs /ipk M9Q9P-WNJJT-6PXPY-DWX8H-6XWKK >nul&cscript //nologo c:\windows\system32\slmgr.vbs /ipk 7B9N3-D94CG-YTVHR-QBPX3-RJP64 >nul&cscript //nologo c:\windows\system32\slmgr.vbs /ipk BB6NG-PQ82V-VRDPW-8XVD2-V8P66 >nul&cscript //nologo c:\windows\system32\slmgr.vbs /ipk GCRJD-8NW9H-F2CDX-CCM8D-9D6T9 >nul&cscript //nologo c:\windows\system32\slmgr.vbs /ipk HMCNV-VVBFX-7HMBH-CTY9B-B4FXY >nul&cscript //nologo c:\windows\system32\slmgr.vbs /ipk 789NJ-TQK6T-6XTH8-J39CJ-J8D3P >nul&cscript //nologo c:\windows\system32\slmgr.vbs /ipk TX9XD-98N7V-6WMQ6-BX7FG-H8Q99 >nul&cscript //nologo c:\windows\system32\slmgr.vbs /ipk 3KHY7-WNT83-DGQKR-F7HPR-844BM >nul&cscript //nologo c:\windows\system32\slmgr.vbs /ipk 7HNRX-D7KGG-3K4RQ-4WPJ4-YTDFH >nul&cscript //nologo c:\windows\system32\slmgr.vbs /ipk PVMJN-6DFY6-9CCP6-7BKTT-D3WVR >nul&cscript //nologo c:\windows\system32\slmgr.vbs /ipk W269N-WFGWX-YVC9B-4J6C9-T83GX >nul&cscript //nologo c:\windows\system32\slmgr.vbs /ipk MH37W-N47XK-V7XM9-C7227-GCQG9 >nulecho ————————————&echo.&echo.&set i=1:serverif %i%==1 set KMS_Sev=kms7.MSGuides.comif %i%==2 set KMS_Sev=kms8.MSGuides.comif %i%==3 set KMS_Sev=kms9.MSGuides.comif %i%==4 goto notsupportedcscript //nologo c:\windows\system32\slmgr.vbs /skms %KMS_Sev% >nulcscript //nologo c:\windows\system32\slmgr.vbs /ato | find /i “successfully” && (echo.& echo ====================================== & echo. & choice /n /c YN /m “Would you like to visit my blog [Y,N]?” & if errorlevel 2 exit) || (echo The connection to the server failed! Trying to connect to another one… & echo Please wait… & echo. & echo. & set /a i+=1 & goto server)explorer “https://productkey.net”&goto halt:notsupportedecho ======================================&echo.&echo Sorry! Your version is not supported.:haltpause >nul
В блокноте раздел «Файл», нажимаем «Сохранить как» и называем файл «windows10.cmd». Сохраняем файл на рабочем столе.

Нажимаем правой кнопкой мыши наш файл и выбираем «Запуск от имени администратора».
Перезагружаем компьютер, чтобы активировать Windows.
Убрать водяной знак активации в Windows PowerShell
-
- Нажимаем сочетание клавиш «Win + X». Выбираем «Windows PowerShell (администратор)».
-
- Вставляем команду «slmgr /renew» и дальше нужно нажать Enter.

- Перезагружаем систему.
Для избавления от водяного знака активации Windows используем CMD
В поиске Виндовс указываем «командная строка». Нажимаем «командная строка» и «Запуск от имени администратора».

Вставьте команду
«bcdedit -set TESTSIGNING OFF»
и нажмите на запуск её выполнения.

После завершения операции ОС выведет соответствующее уведомление.
Убрать водяной знак активации Windows в сторонних приложениях
Можно воспользоваться отдельными программами для решения проблемы как убрать надпись активация.
Универсальное средство отключения водяных знаков (Winaero)
-
- Загрузите «Universal Watermark Disabler» и установите его.

-
- Приложение запустится, а затем автоматически выйдет из системы.
- Снова войдите в ПК.
- Теперь водяной знак должен быть удален.
Убрать готовность об активации через KMSAuto
-
- Загрузите KMSAuto и установите его.
- Откройте программу, нажмите «Активировать Windows».

- Как только это будет сделано, ваш компьютер перезагрузится.
- Когда снова войдете в систему, Windows будет активирована, и водяной знак активации исчезнет.
Quick Answer
- If you don’t have a product key and want the watermark to disappear, it can be done using a couple of methods stated below.
- In that case, you can keep the batch file on your homescreen and tap it once every time you turn on your PC.
- If you have a valid Windows 10 product key, you can activate and remove the Activate Windows watermark.
Are you seeing the “Activate Windows; Go to Settings to activate Windows” watermark on your computer’s homescreen? Well, do not worry, we’ve got your back. Here are the top three ways to permanently remove the Activate Windows watermark on Windows 10 PC.
Remove ‘Activate Windows’ Watermark from Windows 10
Why Do You See Activate Windows Watermark?
The ‘Activate Windows’ watermark indicates that the copy of the Windows on your computer hasn’t been activated yet or its license has expired. If you have a valid Windows 10 product key, you can activate and remove the Activate Windows watermark.
However, you can’t just use the keys available online which have already been used by others. Instead, you’ll have to buy the key from Microsoft Official Store, Amazon, or any authorized sales channel. Some third-party sellers sell keys for cheap, but it isn’t something that we recommend.
Another reason for the watermark could be a different Windows version. For instance, you bought the product key for Windows 10 Professional but installed Windows 10 Home Edition instead. So, make sure this isn’t the reason in your case.
Activated vs. Unactivated Windows
There aren’t any major differences between activated and unactivated versions of Windows. That said, apart from the watermark and “Activate Windows” notifications, you get limited personalization options, including wallpapers and themes.
Furthermore, the unactivated version will only download critical updates. Stuff like optional updates, extra services, and apps from Microsoft usually bundled with an activated copy will be blocked. Other than that, the system will run just fine.
Ways to Remove Activate Windows Watermark Permanently
If you don’t have a product key and want the watermark to disappear, it can be done using a couple of methods stated below.
Method 1: Using Registry Editor
- Press Windows + R to open run.
- Type “Regedit” and press Enter or OK.

- Once the Registry Editor opens, click Files > Export and save it as a backup.
- Click on HKEY_CURRENT_USER and then on Control Panel.

- Now, tap on Desktop.
- On the right, scroll down and click the PaintDesktopVersion key.

- Double click on it and change the value from 1 to 0.
- Click OK to save changes.

- Close Registry Editor and restart your computer.
Method 2: Kill the Process to Remove Watermark
If the Regedit method above doesn’t work for you, you can use the notepad method, as follows:
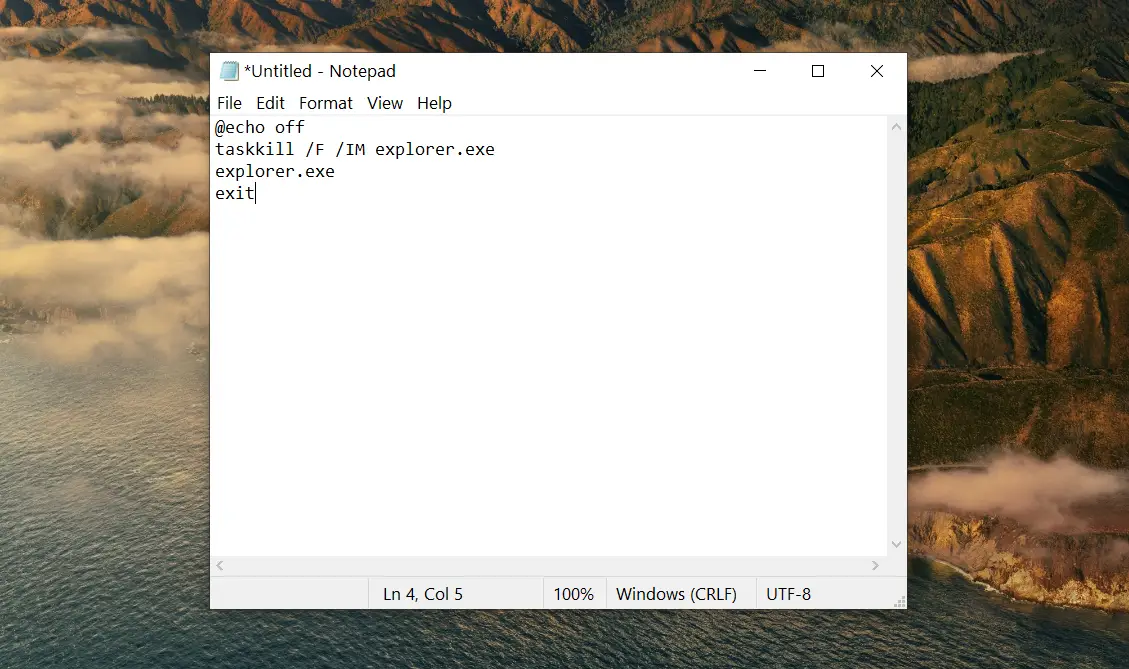
- Open the Notepad on your computer. You’ll find it in the Start menu.

- Copy and paste the following, as shown in the screenshot below:

@echo off
taskkill /F /IM explorer.exe
explorer.exe
exit - Click File on the menu bar and then tap Save as.

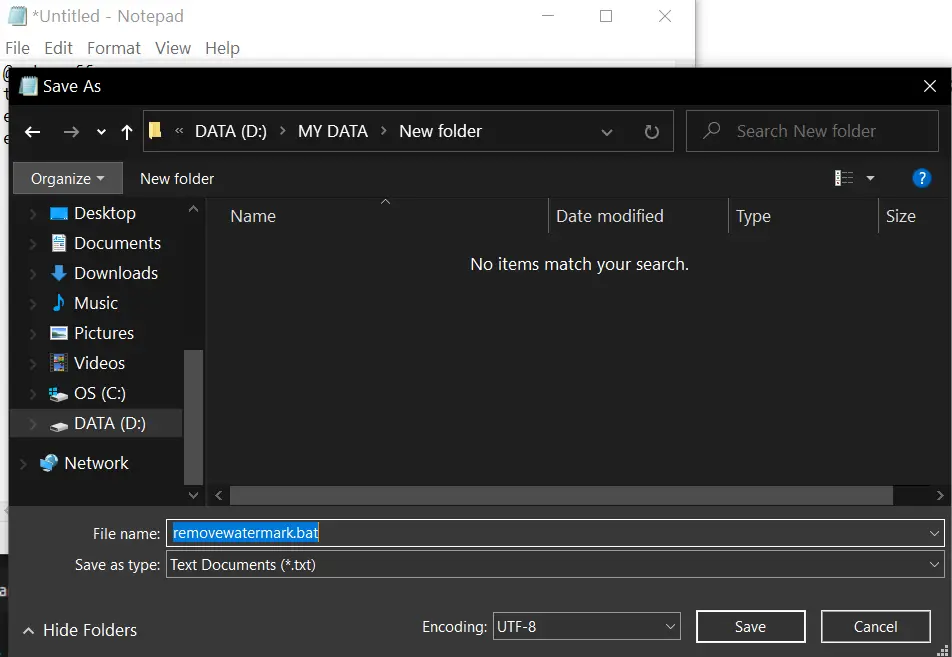
- While saving the file, click on save as all files and name it “xyz.bat.” Make sure that the extension is .bat.
- Now, go to the location where you saved the file.
- Double-click the batch file to run it on your computer.

Once you execute the batch file, the activation message will be gone from your screen. However, note that it’ll re-appear once you restart your computer. In that case, you can keep the batch file on your homescreen and tap it once every time you turn on your PC.
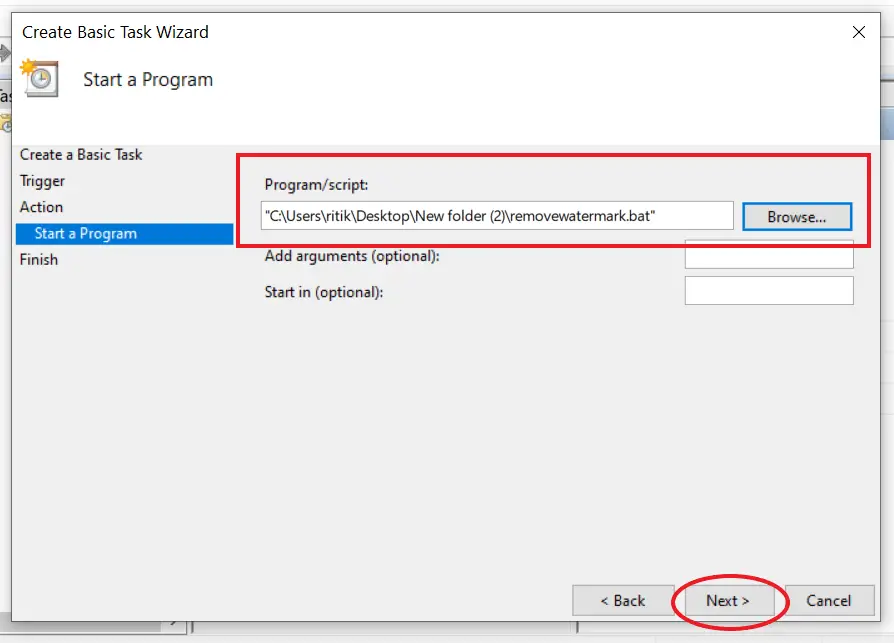
You can also make the batch file run automatically on startup by using Task Scheduler on Windows. This way, the watermark won’t re-appear after reboot. To do it:
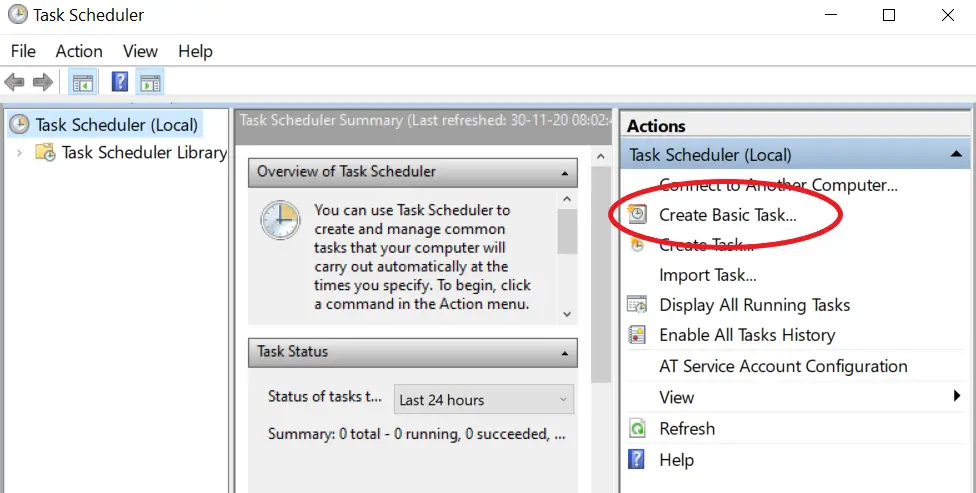
- Search for Task Scheduler in Start Menu. Open it.

- Click on “Create Basic Task” under Actions at the right.

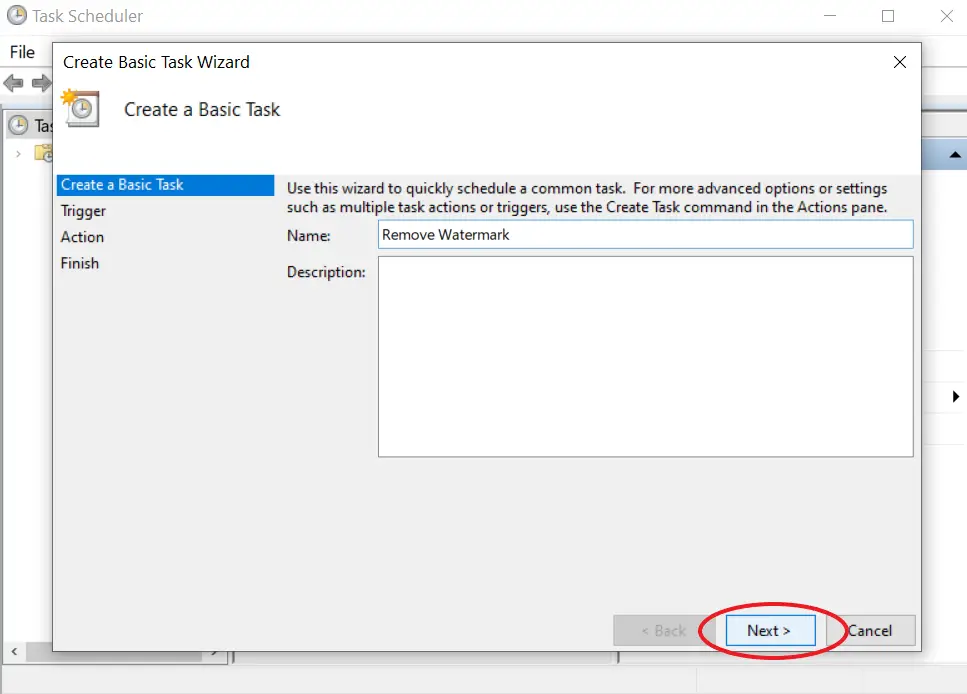
- Name the task and proceed further.

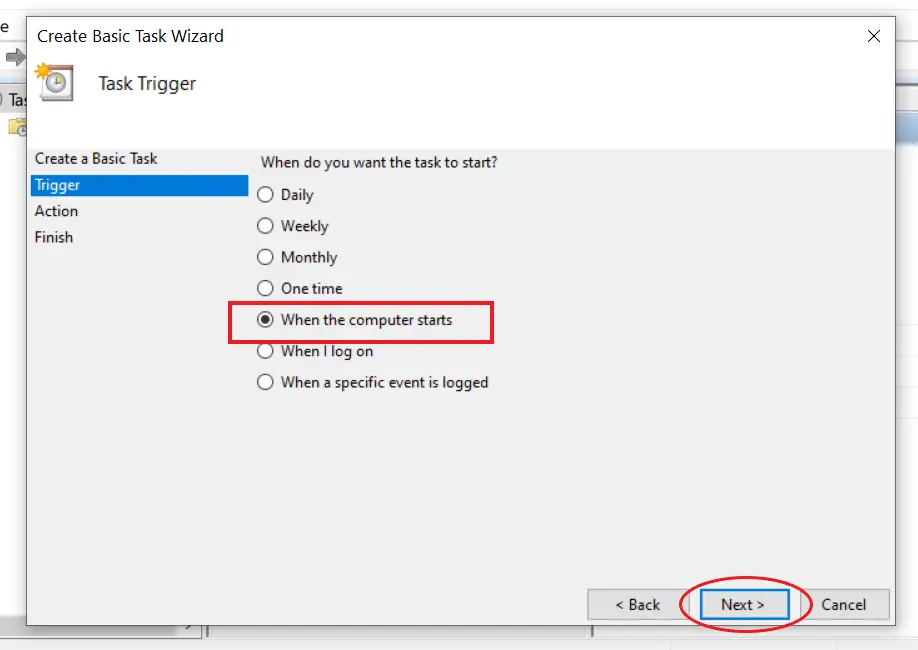
- Now, select “When the computer starts” and click Next.

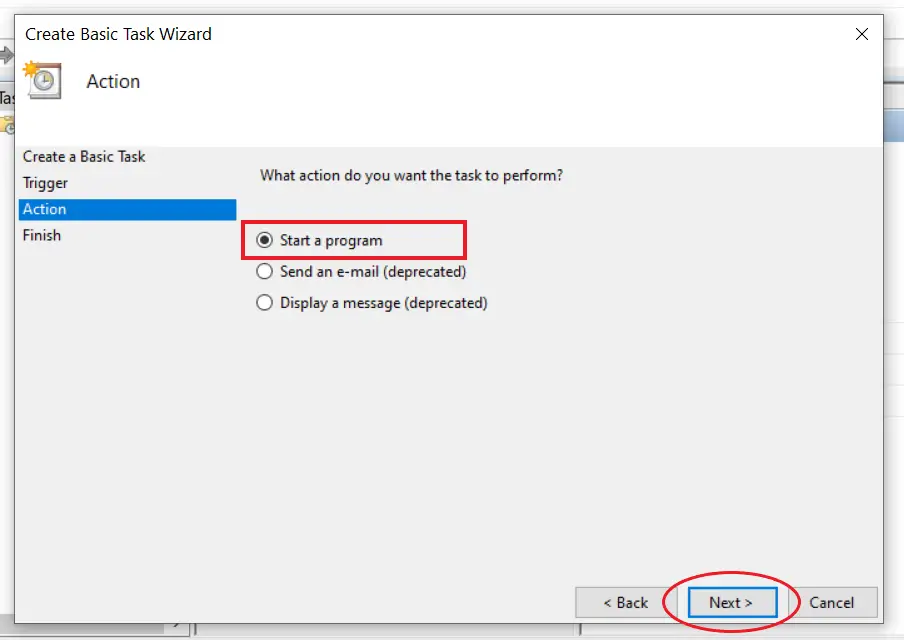
- Choose “Start a program” and press Next.

- Click Browse and select the ‘removewatermark.bat’ file.
- Then tap ‘Open’ and press ‘Next.’

- Click ‘Finish’ to schedule the task.

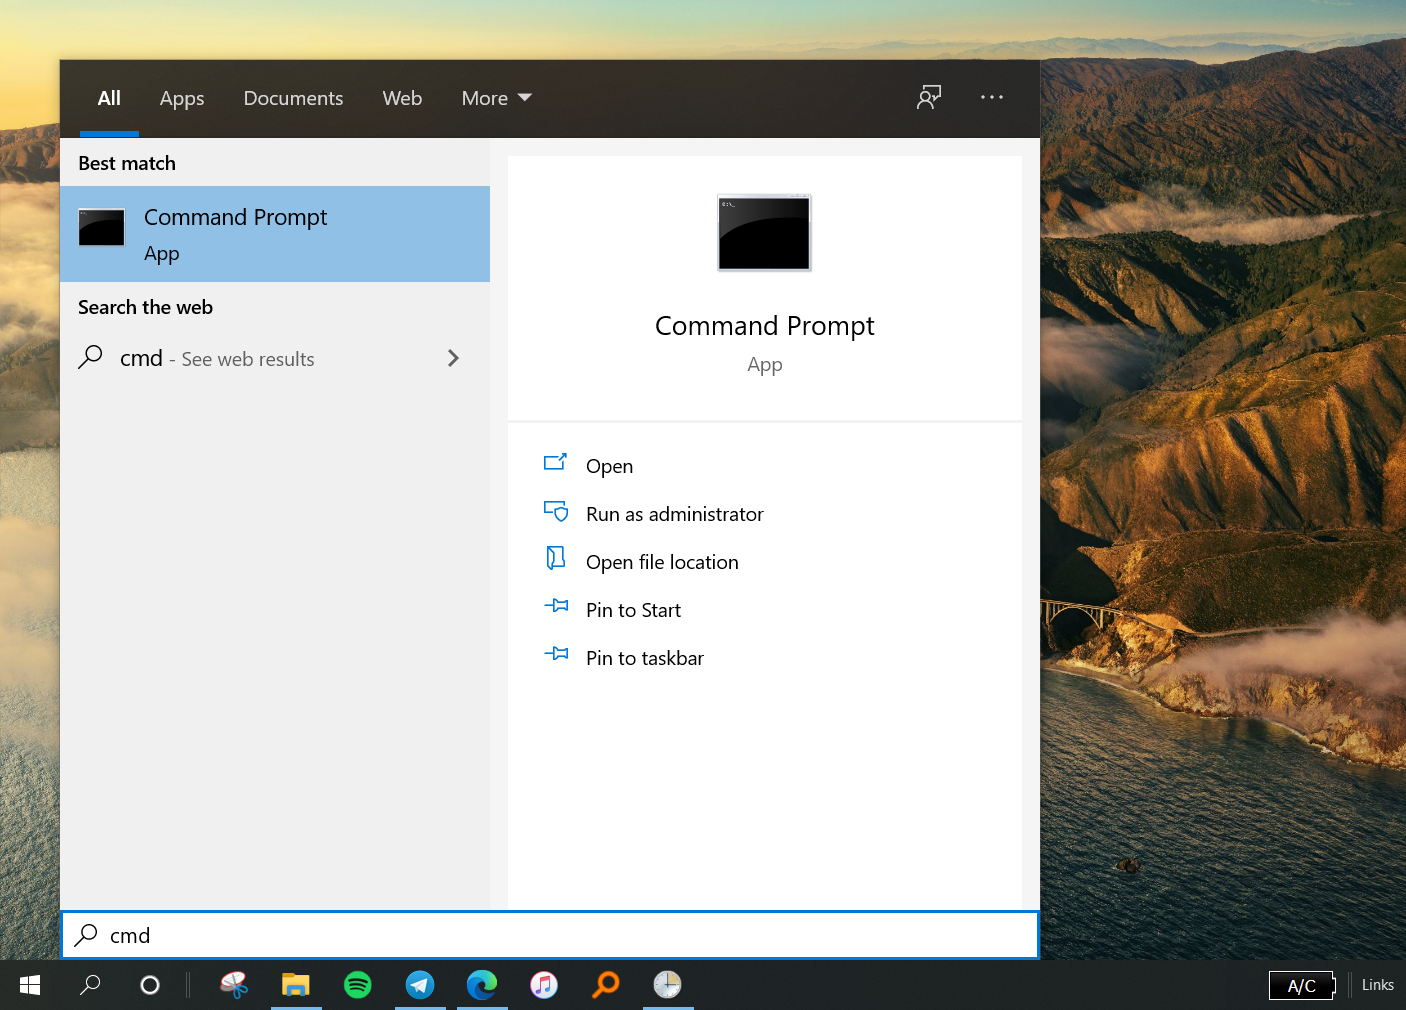
Method 3: Using Command Prompt
If your Windows computer has test mode enabled, it’ll cause the Activate Windows watermark to appear on your screen. You can disable the test mode using some simple commands in CMD, as follows:
- Open the Start menu and type ‘CMD’ in the search bar.

- Right-click on Command Prompt and tap Run as administrator.
- In the CMD window, type bcdedit -set TESTSIGNING OFF and press Enter.

- You’ll see the message, “The operation completed successfully.”
- Now restart your computer.

Wrapping Up
I hope that you’re now able to remove the Activate Windows watermark on your Windows 10 PC. The registry editor method should work well for most of the users. Yet, do let me know which method worked for you. Feel free to reach out via comments in case of any related doubts or queries.
Also, read- 6 Different Ways to Open the Device Manager on Windows 10
Was this article helpful?
YesNo
You will notice an Activate Windows 10 watermark at the bottom-right corner of your desktop screen if you are using a trial version of Windows 10 or a copy whose license has expired. It will also get in between the work you are doing and thus, is very irritating. Though it is a small thing, it is recommended to remove it. But, before doing so, first of all, you should know why this watermark appears, and what is this Windows activation?

Table of Contents
What is Windows Activation?
Windows 10 can be installed on any PC or laptop and its version can be upgraded to a newer version but this does not activate the operating system. The operating system gets updated only when it is verified that you are using a genuine Windows. So, if you want to activate your Windows 10, you can:
- Either use a product key that you will get if you have purchased the Windows 10 license from Microsoft or from a retailer or if you have taken a PC or desktop which has an in-built Windows 10.
- Or use a digital license key that you will need if you have upgraded Windows 10 from lower versions like Windows 7 or Windows 8.1. In such a case you will not require a product key.
If you have not activated your Windows 10 and if you do not have a product key or a digital license, you cannot activate your Windows 10. And thus, you can not remove the Activate Windows 10 watermark from the desktop.
However, if you have a product key, then you can directly remove that watermark by simply entering a valid 25-digit product key.
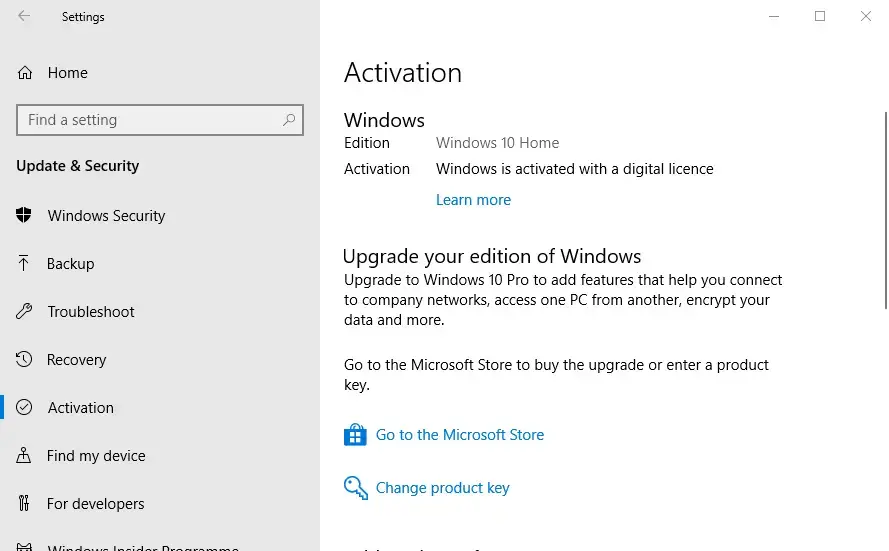
To activate Windows using the product key, follow these steps:
1. Search for Settings in Windows Search then click on the top search result.
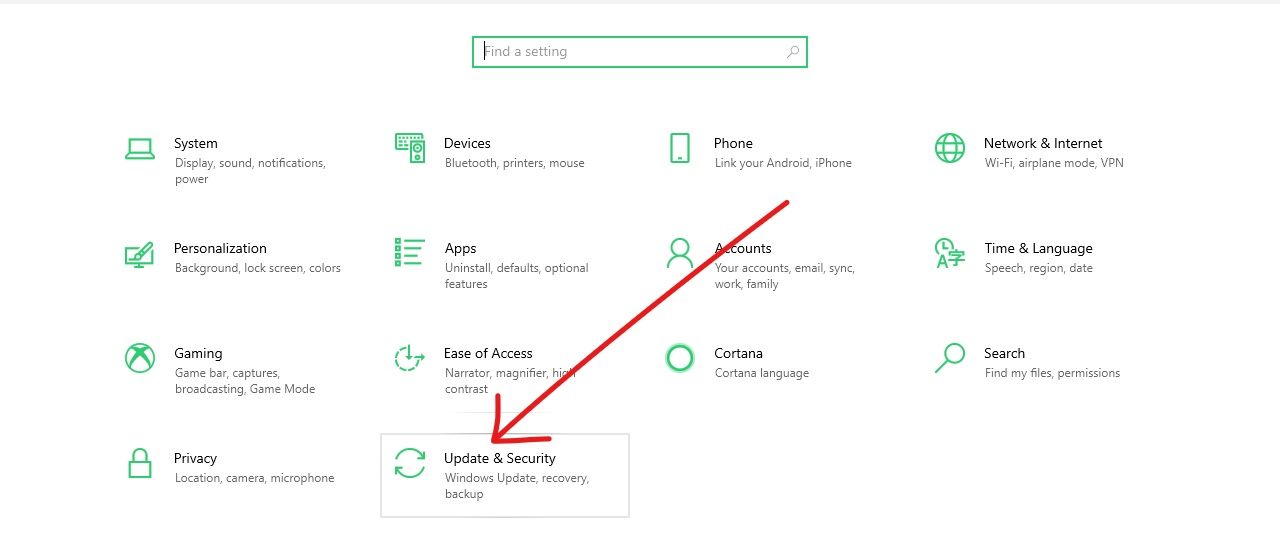
2. Click on the Update & Security options.
3. Choose the Activation option from the menu at the left panel.
4. Click on the Change product key options.

5. Enter a valid 25-digit product key.

6. Click on the Next button.
After completing the above steps, if you have entered a valid product key, the Windows 10 should get activated and the watermark should disappear.
If you do not have a product key or a digital license, there are other several methods to remove the watermark permanently. A few of such methods have been discussed below.
Also Read: 3 Ways to Check if Windows 10 is Activated
Method 1: Removing the Activate Windows 10 watermark using a Batch file
You can remove the Activate Windows 10 watermark by creating a custom batch file or the .bat file by using the Notepad.
To create a batch file or the .bat file, follow these steps:
1. Open the Notepad.
2. Type the below commands in the new Notepad file.
@echo off
Taskkill  /F /IM explorer.exe
explorer.exe
exit

3. Click on the File option available at the top left corner and choose Save A. from the menu to save the above batch file.
4. Choose a location to save the file.
5. In the File name, enter Remove_watermark.bat, and from the drop-down menu next to the Save As Type field, choose the All files option.
Note: The extension “.bat” is very important.

6. Click on the Save button to save the batch file.
7. Now, visit the folder where you have saved the batch file then right-click on the batch file and chooses the Run as administrator option from the menu.
8. The batch file will start running. A command window will open up for a moment and then will close instantly.
9. When the batch file execution is done, restart your computer.
After the computer restarts, the watermark saying Activate Windows 10 will be removed completely.
Method 2: Removing the Activate Windows 10 watermark using the Registry
You can also remove the Activate Windows 10 watermark from your computer by editing the Windows registry. This method is for only advanced users. Editing anything in the registry may cause some serious issues if you do not know what you are doing.
However, to use the registry method to, follow these steps:
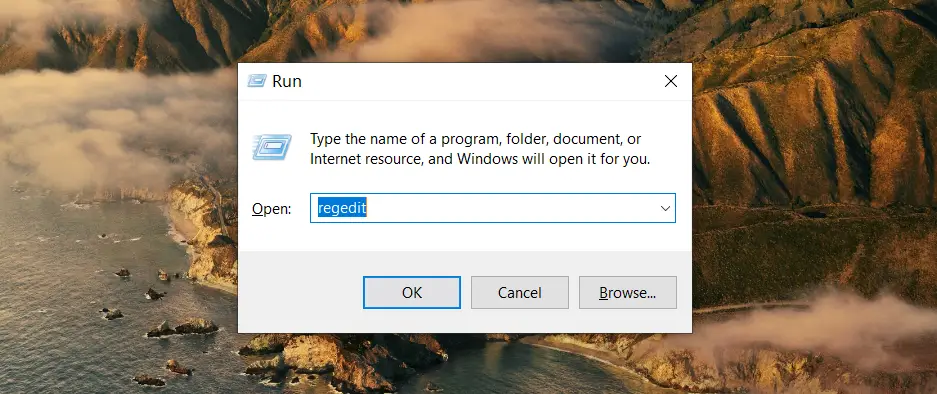
1. Open the Run dialog box from the search bar or by pressing the Windows + R shortcut key.
2. Now type regedit and hit Enter to open Registry Editor.
3. Click on the Yes button when asked for confirmation.
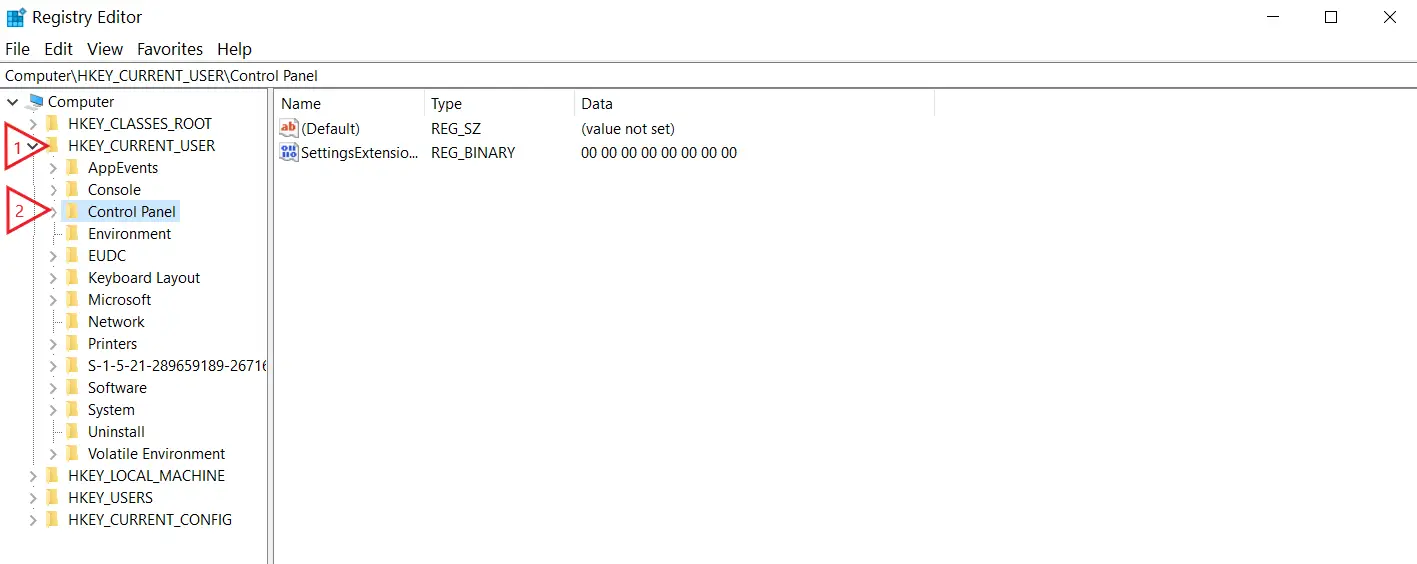
4. Navigate to the below path:
Computer\HKEY_CURRENT_USER\Control Panel\Desktop

5. On the right side, scroll down and reach to the PaintDesktopVersion option.

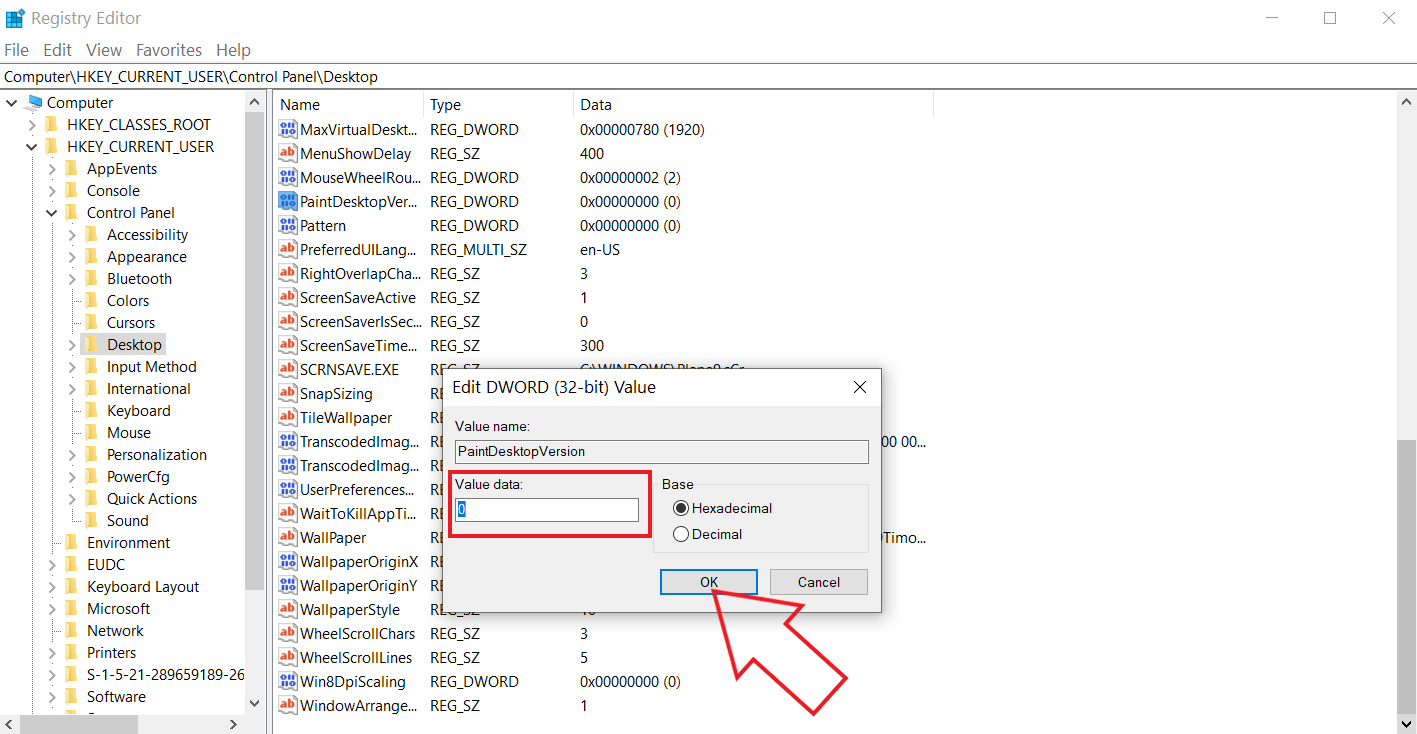
6. Double click on the PaintDesktopVersion option and in the Value data field, change the value from 1 to 0.

7. Click on the OK button.
8. Close the Registry Editor and restart your computer.
After the computer restarts, the watermark saying Activate Windows 10 will disappear from your desktop’s screen.
Method 3: Disable the Windows 10 tips
To disable the Windows 10 tips, follow the below steps:
1. Open the Settings.
2. Click on the System.
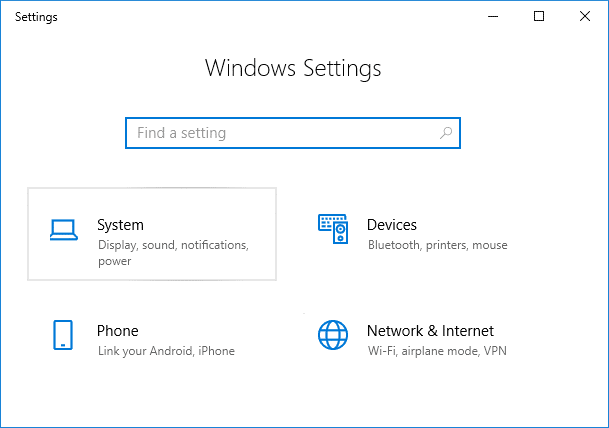
3. Click on the Notifications & actions option from the left-hand side menu.
4. Scroll down and look for all the options available under the Notifications.
5. Uncheck “Show me the Windows welcome experience after updates and occasionally when I sign in to highlight what is new and suggested” and “Get tips, tricks, and suggestions as you use windows” option.

6. Restart your computer.
After the computer restarts, the watermark saying Activate Windows 10 will no longer appear at your desktop.
Method 4: Try the universal watermark disabler
If none of the above methods are working, you can use a third-party tool called the universal watermark disabler. It is the best tool to remove the Activate Windows 10 watermark from the desktop.

In order to use the tool, download this tool, and open it. A dialog box will appear. Choose Install from the options. This will sign you out from the computer. Sign in again and once you will sign in, the Activate Windows 10 watermark will be removed from your desktop.
Method 5: Purchase a new Windows 10 key
If the above third-party tool also failed to remove the Activate Windows 10 watermark, then you will have to buy a new Windows 10 key. You can easily purchase a new Windows 10 key if you have never purchased any key or you have no issues with the business activation.
To purchase a new Windows 10 key, follow these steps:
1. Open the Settings.
2. Click on the Update & Security option.
3. Choose the Activation option from the menu at the left panel.
4. The screen below will appear.

5. Click on Go to the Store option.
6. Here, depending on your version that you have installed, Windows 10 home or Windows 10 pro, you will be able to purchase the Windows 10 key.
After purchasing the key, enter it into the product key option and your Activate Windows 10 watermark will get removed from the desktop.
Method 6: Review the enterprise activation to remove the activate Windows 10 watermark
This problem commonly occurs when your Windows was activated from a business server. So, if it loses its contact with that server, the activate Windows 10 watermark will appear.
To reconnect it and remove the watermark, follow these steps:
1. Open the Settings.
2. Click on Update & Security.
3. Choose the Activation option from the menu that appears.
You will see a message: We can’t activate Windows on this device because we can’t connect to your organization’s activation server. Now, you simply have to reconnect your system to that business server, either physically or by using the company’s VPN.
Recommended:
- How to Rename Multiple Files in Bulk on Windows 10
- 4 Ways To Remove ByteFence Redirect Completely
Hopefully, using any of the above methods, you will be able to permanently remove the annoying Activate Windows 10 watermark from the desktop.
![How to Get Rid of the Activate Windows Watermark [Windows 10 PC Activation Message Removal]](https://www.freecodecamp.org/news/content/images/size/w2000/2021/12/activate.png)
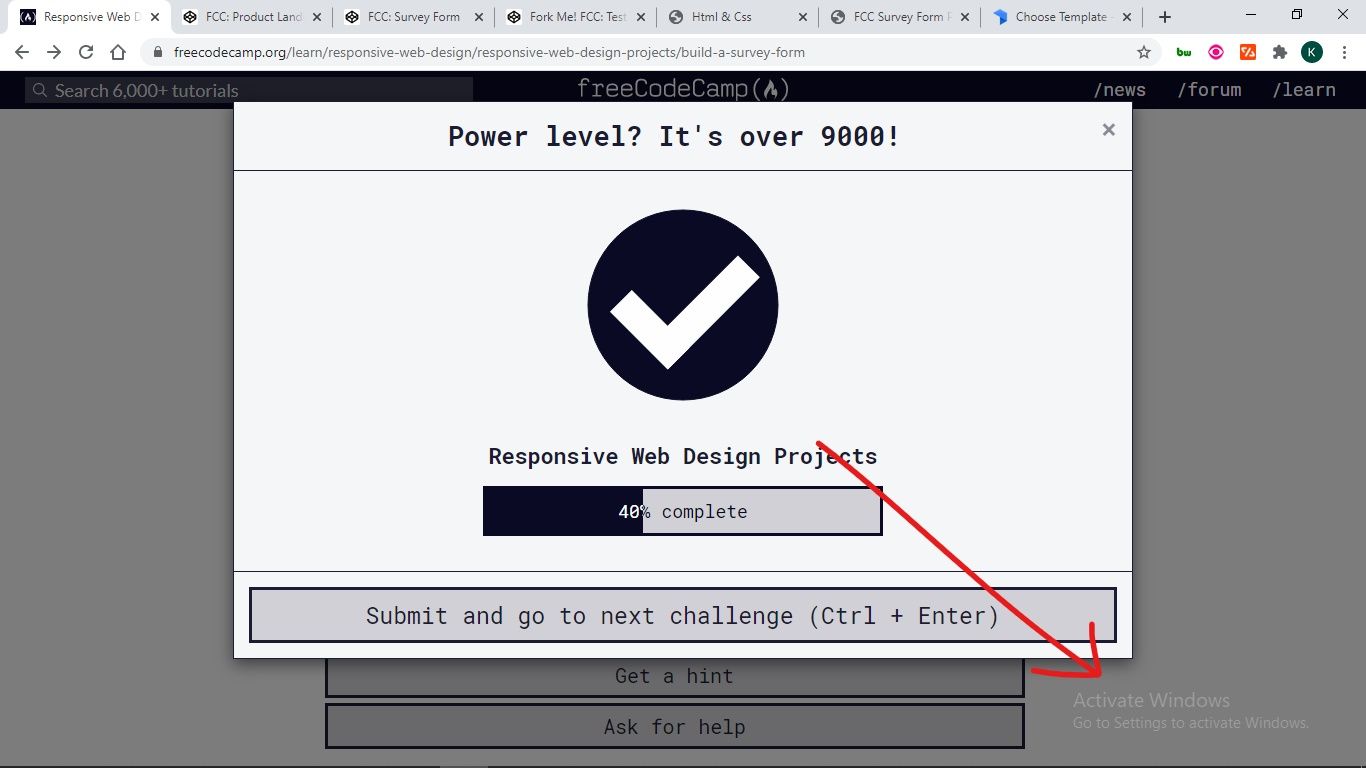
If you’re a Windows user, you might have seen the «Activate Windows» message that displays over every other thing – including your cursor. I guess they gave it a z-index of infinity.
This message gets displayed when you use a Windows OS that has an invalid or expired license. This keeps you from being able to personalize your desktop or get updates for Windows Defender – now Windows Security. You will also be unable to install Microsoft Office.
If this is the case, you can remove the watermark because it could have a negative effect on visual hierarchy and might be embarrassing if you’re taking screenshots or recording your desktop.
This happened to me when I was using freeCodeCamp for my first round of 100DaysOfCode.
In this article, I will show you 4 ways you can remove the Activate Windows watermark on your Windows 10 PC.
Some of the tweaks only remove the message but not the underlying problems, so you should pay attention to the last one, which will remove the message and activate your Windows as well.
Table of Contents
- How to Get Rid of the Activate Windows Watermark with PowerShell
- How to Get Rid of the Activate Windows Watermark with Notepad
- How to Get Rid of the Activate Windows Watermark by Using the Registry
- How to Get Rid of the Activate Windows Watermark with a Product Key
- Conclusion
PowerShell enables you to directly interact with your Windows OS with scripts.
There’s a PowerShell script you can execute that’ll eventually get rid of the Activate Windows message.
To execute the script, follow the steps below.
Step 1: Press WIN (Windows logo key) + S on your keyboard.
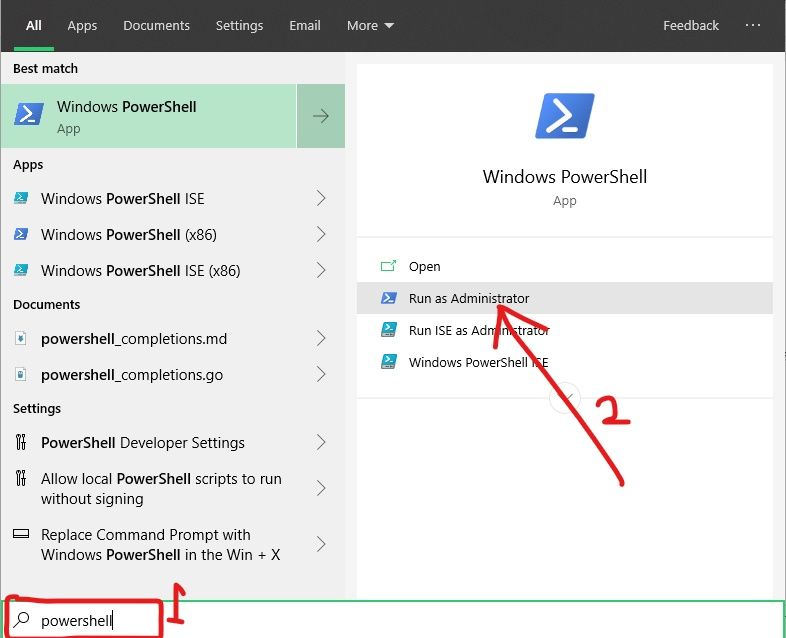
Step 2: Search for «powershell». You have to execute the script as an administrator, so click on «Run as Administrator» on the right.
Step 3: Type in «slmgr /renew» (without quotes) and hit ENTER.

Step 4: Restart your PC.
If you’ve made several tweaks with third-party apps in order to activate Windows, this fix might not work for you. If it doesn’t work for you, try the next one.
How to Get Rid of the Activate Windows Watermark with Notepad
As simple as Notepad looks to everyone, you can use it to remove the Activate Windows watermark. In fact, this way is one of the most popular to get rid of the message.
You can use Notepad to get rid of the message with the simple steps below.
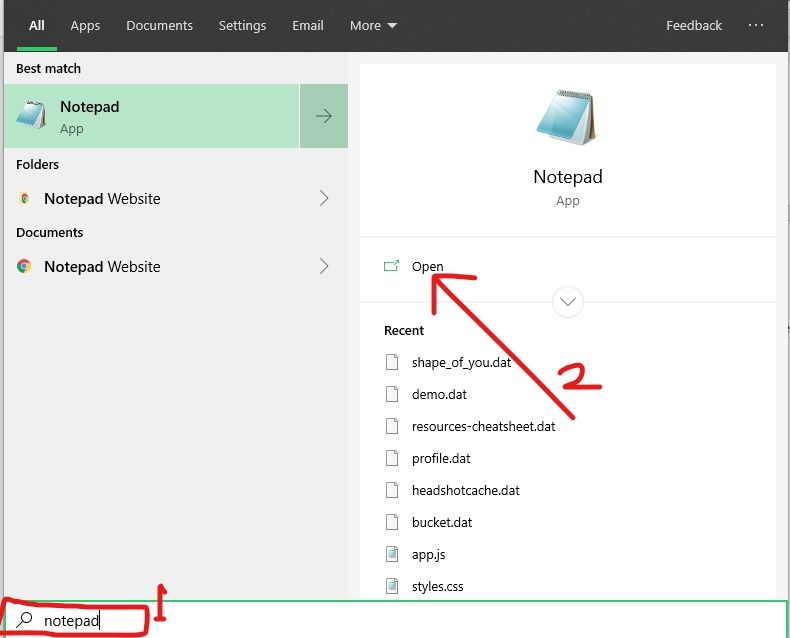
Step 1: Hit the WIN button on your keyboard and search for Notepad. Click Open on the right or the Notepad search result to launch the app.
Step 2: Make sure you’re working with a new, untiled file. Paste in the script below:
@echo off

taskkill /F /IM explorer.exe

explorer.exe

exit
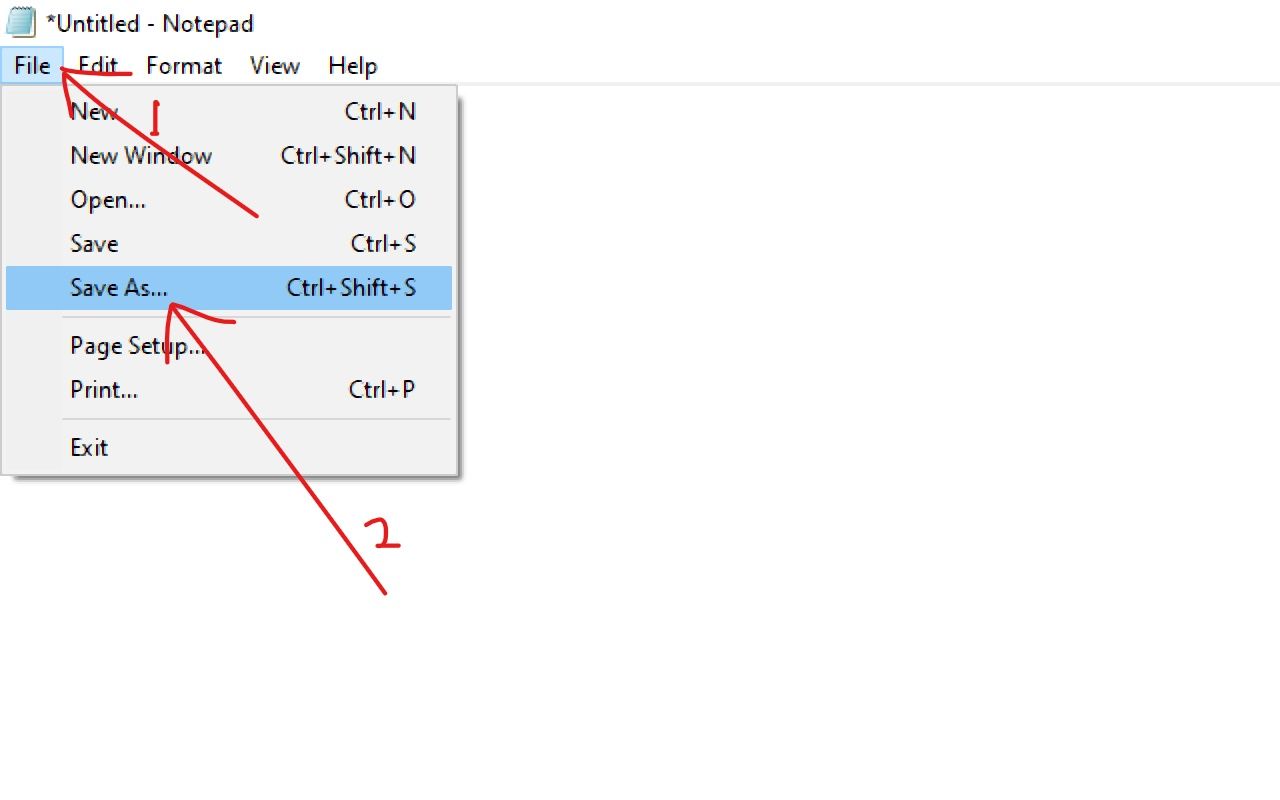
Step 3: Click File in the menu and select «Save as».
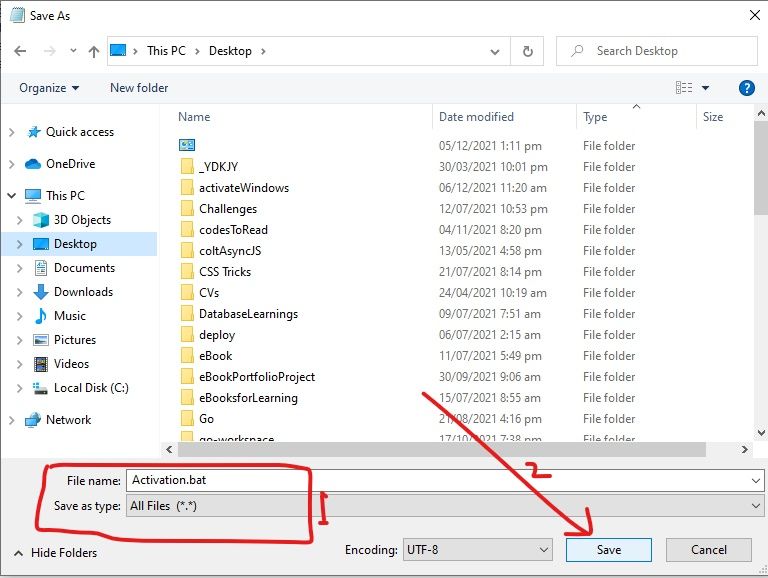
Step 4: Name the file «Activation.bat» and select «All files» as the format. Then save the file to any location you want.
Step 5: Locate the file and right-click on it, then select «Run as Admissions».

The script will be executed quickly and will refresh your computer.
Step 6: Restart your PC.
How to Get Rid of the Activate Windows Watermark by Using the Registry
Windows 10 registry lets you make deeper changes that have significant effects on your computer.
You can get rid of the Activate Windows watermark by making a less complicated modification in the Registry, as done below.
Step 1: Right-click on Start and select Run.
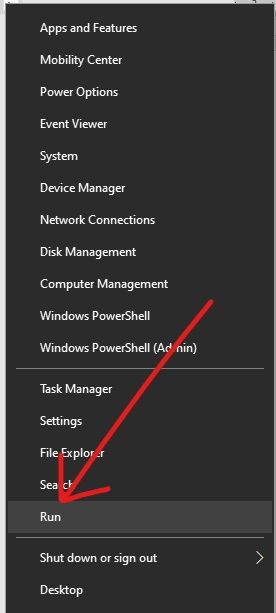
Step 2: Type in «regedit» (without quotes) into the Run dialogue and hit ENTER.

Step 3: Expand HKEY_CURRENT_USER, Control Panel, and then click Desktop.
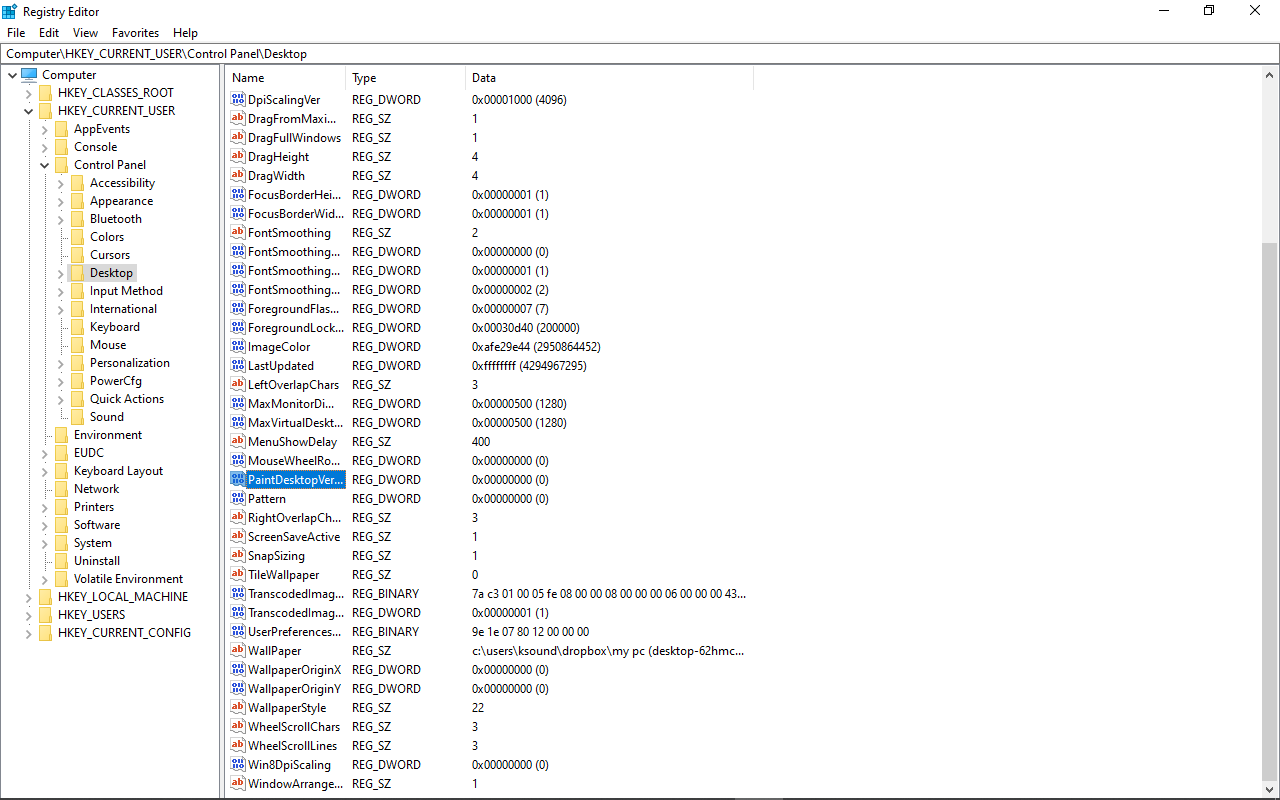
Step 4: Locate PaintDesktopVersion and double-click on it.
Step 5: Change the value from 1 to 0 and click Ok.
Step 6: Restart your computer.
How to Get Rid of the Activate Windows Watermark with a Product Key
The best way to get rid of the Activate Windows watermark is to do what the message says — activate Windows.
You can activate Windows with a product key you have to buy from Microsoft.
The steps below will help you use your product key to activate Windows:
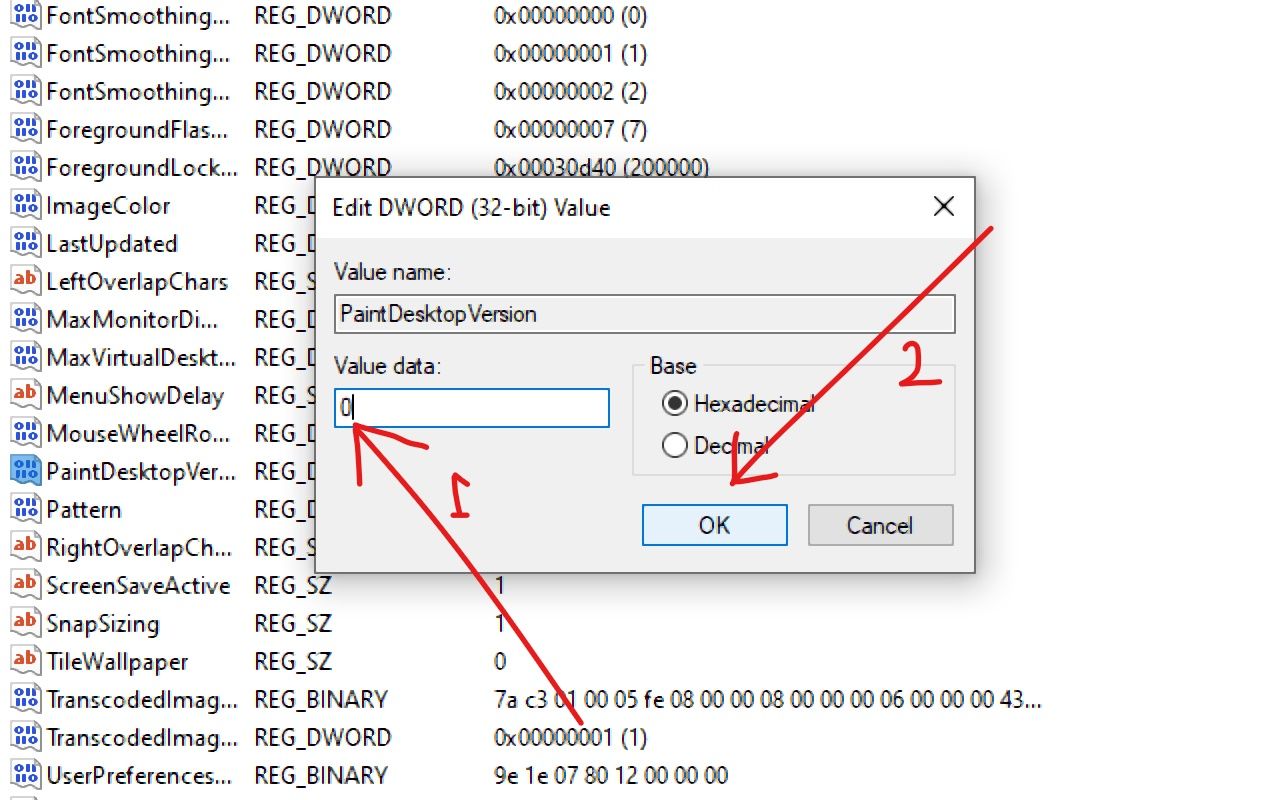
Step 1: Click on Start and select Settings.
Step 2: Choose Updates and Security from the menu tiles.
Step 3: Switch to the Activation tab on the left and click on Change product key.

Step 4: Enter your 24-character alphanumeric product key and click Next.

Windows will get activated as long as the product key is correct.
Conclusion
I hope these ways to get rid of the Activate Windows watermark help you out.
If you find this article helpful, make sure to share it with your friends and family.
Thank you for reading.
Learn to code for free. freeCodeCamp’s open source curriculum has helped more than 40,000 people get jobs as developers. Get started
Похожие новости
Инструкция по активации Windows 10
Инструкция по активации Windows 10 Активация позволит подтвердить подлинность вашей …
Читать подробнее
Инструкция по активации Microsoft Office через учетную запись
Инструкция по активации Microsoft Office Активация Microsoft Office позволяет подтвердить …
Читать подробнее
Понравилась статья?
Поделись!
Уведомление о том, что копия Виндовс не активирована указывает на использование нелегальной версии ОС. На пиратке не удастся применить персонализацию, загружать обновления системы и изменять некоторые параметры. Наличие уведомления в правом нижнем углу негативно влияет на имидж пользователя Виндовс. Если делаете запись экрана и открываете ее для просмотра другим лицам или показываете проект с использованием личного ноутбука, ваши собеседники будут знать, что вы предпочитаете не платить за ПО и используете пиратскую версию.
Существует два способа удалить водяной знак внизу экрана. Первый способ – легальный. Пользователь может купить электронный ключ данного продукта и активировать систему. Именно этот способ мы и рекомендуем использовать.
Второй способ включает в себя несколько нелегальных методов, которые или отстрачивают появление надписи, или обманывают сервера Майкрософт, чтобы она и не появлялась.
Содержание
- 1. Как убрать надпись активация Windows?
- 2. Как убрать оповещение и уведомление активация Windows?
- 3. Что делать, если вылезла активация Windows
Как убрать надпись активация Windows?
Если вас раздражает надпись о необходимости активировать систему, можете убрать ее с помощью специальной программы.
Какую утилиту обычно используют?
- Universal Watermark Disabler (UWD) – бесплатная программа для устранения назойливого уведомления системы. Приостановите встроенный защитник Виндовс (Аваст, Касперский и другой антивирус). Скачайте архив с установочным файлом, кликните на «Install». После запуска программы и завершения процесса добавьте утилиту в список исключений антивируса и перезагрузите компьютер. При повторном включении надоедливую надпись вы уже не увидите.
- WCP Watermark Editor тоже помогает обойти навязчивое оповещение. Скачайте и запустите программу. Поставьте галочку возле пункта «Remove all watermark». Примените новые настройки и перезагрузите ПК, когда процесс завершен.
Перечисленные программы предназначены только для удаления надписи. После их использования проблемы с установкой обоев рабочего стола и другие ограничения, наложенные на пиратские версии ОС, могут сохраниться.
Для активации системы потребуются другие программы. Самой популярной считается утилита KMSAuto Net. У нее понятный русскоязычный интерфейс, работа в автоматическом режиме, возможность создать задачу на повторение процедуры (активация может слететь). Программа работает с сервером КМС.
Как убрать оповещение и уведомление активация Windows?
Можно использовать как стандартные возможности системы, так и программы сторонних разработчиков, созданные для обманной проверки подлинности Виндовса. Далее перечислим популярные варианты борьбы с навязчивым сообщением:
- Через реестр. Для открытия реестра нажмите комбинацию кнопок Win+R, а затем впишите «regedit» в появившемся окне. Затем откройте проводник и впишите этот путь в поисковой строке: HKEY_LOKAL_MACHINE/SOFTWARE/Microsoft/WindowsNT/CurrentVersions/Software ProtectionPlatform/ Activation. В открывшейся папке найдите документ «Мануал». Кликните на него правой кнопкой мыши и в новом маленьком окне впишите значение 1 вместо 0. После перезагрузки системы оповещение об активации не будет вас беспокоить.
- Через командную строку. Войдите в меню «Пуск» и найдите раздел «Стандартные Виндовс». Кликните на вариант «Командная строка». Впишите такую команду: slmgr/ upk и кликните на Enter.
- С помощью стороннего активатора. Такая утилита использует сервер KMS, чтобы активировать Виндовс и как следствие – удалить навязчивое сообщение системы. В зависимости от способа использования, активаторы бывают стандартными или портативными. Во втором случае не нужно устанавливать программу на ПК, достаточно только сделать запуск с правами администратора. Среди стандартных программ пользователи отмечают: KMSAuto Net, Re-Loader, Microsoft Toolkit. Портативными активаторами называют следующие программы: AAct Portable, KMSAuto LITE Portable. На время использования любого активатора нужно отключать антивирус, что довольно рискованно.
Работа сторонней утилиты построена так, что пользователь может выполнить активацию, нажав одну кнопку. Таким образом мы убираем надпись, но не отключаем загрузку обновлений системы. Приложение обманывает сервера разработчика, деля вид, что копия ОС проверена и одобрена.
Однако, Майкрософт защищает свой лицензионный программный продукт, поэтому может отключить такую активацию, в результате чего водяной знак появляется снова.
Что делать, если вылезла активация Windows
Активация – это процесс подтверждения лицензии Windows. Уведомление о необходимости ее пройти появляется, если используете пробную версию дольше разрешенного срока или работаете на пиратской версии ОС.
Если вылезла активация Виндовс, можете купить электронный ключ и подтвердить лицензию на свою копию системы. Так сможете использовать ОС без ограничений в виде водяного знака и черного экрана рабочего стола.
Также существуют нелегальные способы устранения этой ситуации. Пользователь может:
- Полностью заблокировать обновления системы или только те, которые отвечают за проверку подлинности. Например, находим пункт КВ971033 в списке обновлений и удаляем его с компьютера.
- Вписать специальную команду через CMD (slmgr/upk).
- Использовать сторонний активатор для подтверждения подлинности системы обманом серверов Майкрософт.
Но как бы вам не хотелось удалить надпись навсегда, она может всплыть снова. Устранить проблему позволит повторное использование активатора или покупка электронного ключа с последующей активацией.