
Do you remember those days when using Windows XP and Vista operating systems? We used to install a third-party tool to change the desktop background automatically. With the launch of Windows 7, Microsoft added a new function, a desktop background slideshow. That feature allows you to change the desktop background automatically at a specific time interval. Earlier, we were using third-party tools to decorate our Windows desktops and give them an outstanding look. With this feature’s help, you can configure your PC to rotate the desktop background automatically at a predefined time interval.
The Desktop Background Slideshow feature is still available in Windows 10. It allows you to select many wallpapers and enable the desktop slideshow feature. Automatically desktop background changing is possible every minute, 10 minutes, 30 minutes, 1 hour, or every day. By configuring the time intervals, you can see different wallpapers automatically after specific time intervals. Every time you turn on your PC, you will get different sceneries on your computer.
On Windows 7 desktop slideshow feature was easily accessible through the classic personalization window. However, on Windows 10, this feature has moved to the new Settings app.
In this gearupwindows post, I will guide you on the following topics:-
- Enable Desktop Background Slideshow
- Disable Desktop Background Slideshow
How to Enable Desktop Background Slideshow in Windows 10?
To enable the desktop background slideshow on Windows 10 PC, perform the following steps:-
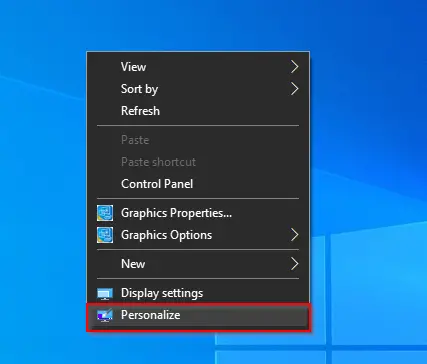
Step 1. Right-click on the free space of the Windows 10 Desktop and select Personalize option. The Personalization section opens.
Step 2. Under the Personalization, click the Background tab from the left side pane.

Step 3. On the right side pane, select the Slideshow option from the drop-down menu of the Background section to enable the desktop background slideshow feature.
Step 4. Once you perform the above steps, the desktop slideshow feature is enabled. Now, click the button “Browse” under “Choose albums for your slideshow,” and then select the folder with several pictures you want to see as desktop background.

Step 5. From the selected folder, Desktop Background Slideshow functionality will use all pictures to decorate your desktop background.
Note: You can add or remove the images on the selected folder at any time you wish. It will not stop the Desktop Background Slideshow functionality of Windows 10. Further, Windows 10 will use only those images as Desktop Background Slideshow available in the root of the selected folder. Desktop Background Slideshow does not recognize Sub-folder pictures.
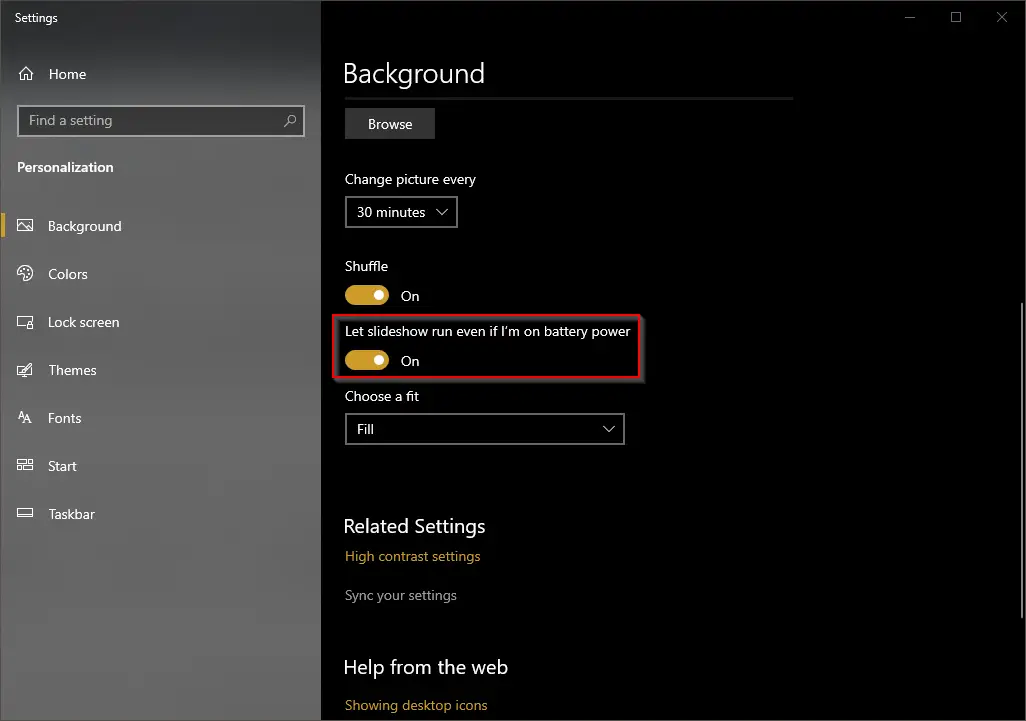
Step 6. Finally, choose the time interval for automatically changing the desktop background on Windows 10 and choose a fit for desktop wallpaper. Windows 10 rotates the background every 30 minutes with the default configuration, but you can change this value to 1 minute, 10 minutes, 1 hour, 6 hours, or 1 day.
Also, the desktop wallpaper slideshow feature automatically turns off when on battery. If you prefer to automatically change the desktop background when your PC runs on battery, turn the toggle On next to the “Let slideshow run even if I’m on the battery power” option.
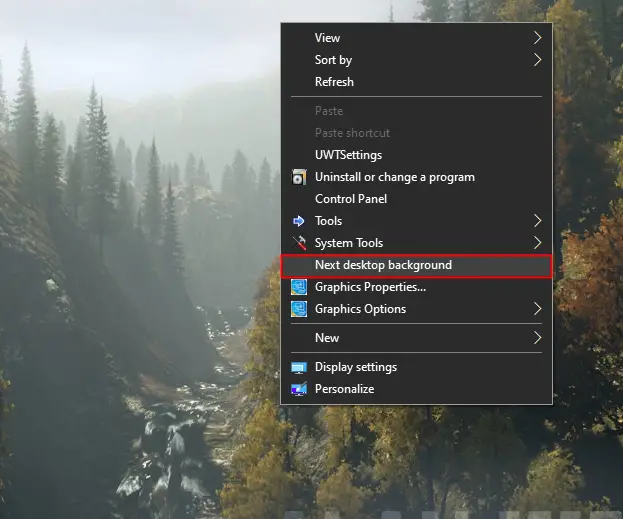
Quick Tips: When the desktop background slideshow feature is turned ON, you can quickly switch to the next background in the queue by right-clicking on the desktop and selecting the Next desktop background option.
How to Disable Desktop Background Slideshow in Windows 10?
To disable the desktop background slideshow on Windows 10 PC, perform the following steps:-
Step 1. Right-click on the free space of the Windows 10 Desktop and select Personalize option. The Personalization section opens.
Step 2. Under the Personalization, click the Background tab from the left side pane.
Step 3. On the right side pane, select the Picture or Solid color from the drop-down menu of the Background to stop the desktop background slideshow feature.

That’s all!!! You can close the Settings app now.
Once you complete the above steps, depends upon the selection, a static picture or solid color will set a desktop background.
We always like to keep attractive desktop background on our PC. Desktop background Slide Show on the PC is not a new feature and makes the desktop look more beautiful. But sometimes users might not like to have the slide show on PC as it sucks battery and slows down PC Speed a bit. If you are a Windows 10 user and disable desktop background slide show then follow the tips we are writing here to enable or disable.
Enable or Disable Desktop Background Slide Show on Windows 10
Through Power Options
1. Write Control Panel in the Start menu Search box and click on Control Panel in Search result.
2. Click Power Options link in Control Panel.
3. Tap on Change plan settings link which resides just beside your chosen power plan.
4. Hit on Changed advanced power settings link to open the new window entitled Power Options.
5. Double Click Desktop background settings to expand it downward and open a new option named Slide Show.
6. Double click on Slide Show. You find here links Paused or Available in On Battery and Plugged conditions.
7. Here you need to change the setting as per your need. If you want to enable Desktop background slide show then change both links to available and if you want to disable change the links to Paused.if you need to customize it according to the power whether it is electric power or battery you can do this from here.
8. If you need to customize it according to the power whether it is electric power or battery you can do this from here.
On battery – Paused to disable Slide Show.
On battery – Available to Enable Slide show.
Plugged in – Paused to disable Slide Show.
Plugged in – Available to Enable Slide Show.
Finally, click on Apply and OK.
Now you can sign-out and sign-in to save the changes which you have done on your Windows 10 PC and enjoy it.
Through Settings
Nowadays, Windows 10 facilitates to Enable furthermore Disable Desktop Background SlideShow pretty snugly via Settings.
Step 1 – Gently press the pair of Win & I keys to bring the Settings interface on the screen.
Step 2 – Locate Personalization and execute a click on it.
Step 3 – Navigate to the right-hand side, click on the Drop down just underneath Background and choose Slideshow.
Step 4 – Hit Browse button right underneath the headline Choose albums for your slideshow.
Step 5 – Once Select folder window comes, click the location where you accumulate beautiful photos and hit Choose this folder.
Step 6 – If you prefer to disable Slideshow then choose another option in the Drop down.
Step 7 – To determine the frequency of Slideshow pictures click the drop down below Change picture every. Choose a favorable time interval for the transposition of the photos.
Step 8 – If you like to Shuffle the Slideshow Pictures, pull the slider below Shuffle in the forward direction.
Step 9 – Do you Allow Slideshow when on battery power? If yes then pull the toggle under the concerned heading towards On.
Step 10 – Subsequently, locate the heading Choose a fit and click the drop down. Pick out the fit from the choices Fill, Fit, Stretch, Tile, Center, Span.
Once you apply these settings, you will view the Slideshow as per your preferences.
-
Windows
На домашнем компьютере два монитора, поставил разные обои. Но винда определяет их как слайд-шоу. Как мне отключить слайд-шоу чтобы на этих двух мониторах были только статичные обои?
-
Вопрос задан
-
2146 просмотров
Комментировать
Подписаться
1
Простой
Комментировать
Решения вопроса 1
@Slayer_nn Куратор тега Windows
Гугол, памаги!
Электропитание>Параметры конкретной схемы>Параметры фона рабочего стола> слайд шоу>приостановлено
-
Можно выбрать только одно фото, у меня стоят две синергичные картинки и я хочу чтобы они не менялись по истечению таймера
-
Yan
@Slayer_nn Куратор тега Windows
Электропитание>Параметры конкретной схемы>Параметры фона рабочего стола> слайд шоу>приостановлено
Пригласить эксперта
Ваш ответ на вопрос
Войдите, чтобы написать ответ
Похожие вопросы
-
Показать ещё
Загружается…
Минуточку внимания
A Slideshow is a series of still pictures displayed on your desktop background or when your computer is inactive. You can easily set a picture folder as your desktop background slideshow, screensaver slideshow, or lock screen slideshow. If you want to customize the Slideshow settings on Windows 11/10 further, here is a full guide.
Where is the Slideshow option in Windows 11?
The Slideshow option from your desktop background is present inside the Personalization settings on your Windows 11 PC. You can open your Settings app and then move to Personalization > Background to access slideshow settings. To know details on how you can access and change slideshow settings, check out this post.
Here are the basic steps to customize the desktop background image slideshow settings on your Windows 11/10 PC:
- Open the Settings app.
- Go to the Personalization tab.
- Click on the Background option.
- Tap on the Personalize your background drop-down option.
- Select Slideshow.
- Customize slideshow settings accordingly.
Let us discuss the above steps in detail!
First, press the Win+I hotkey to launch the Settings app and then move to the Personalization tab from the left-side pane. You can also right-click on your desktop and choose the Personalize option from the context menu to open the Personalization settings.
Now, click on the Background option from the right-side pane. Then, press the drop-down button associated with the Personalize your background option and choose the Slideshow option.
You can now select the picture album that you want to set as the background image slideshow on your desktop. Click on the Browse button and then select the source picture folder for your slideshow.

After that, you can configure various slideshow settings. You can set up the time after which every picture will be refreshed and changed. For that, click on the Change picture every drop-down option and set the time to 1 minute, 10 minutes, 30 minutes, 1 hour, 6 hours, or 1 day.
Besides that, you can enable or disable options like Shuffle the picture order and Let slideshow run even if I’m on battery power as per your requirement.
Once done, you can close the Settings app and the image slideshow will be displayed as per your customizations.
Read: Desktop Background Slideshow not working in Windows.
How to set up Screensaver slideshow on Windows 11/10?
If you want to change the settings of your screensaver slideshow on Windows 11/10, use the below steps:
- Click on the search option.
- Search and open Screen Saver Settings.
- Choose Photos from the Screen Saver drop-down.
- Press the Settings button.
- Select the source picture folder.
- Set up slideshow speed and shuffle picture options.
- Click on the Save button.
Firstly, open the Windows Search option and then type screensaver in the search box. From the search results, click on the Change screen saver option. This will open up the Screen Saver Settings window.
Now, click on the drop-down menu button present below the Screen saver option and choose the Photos option.
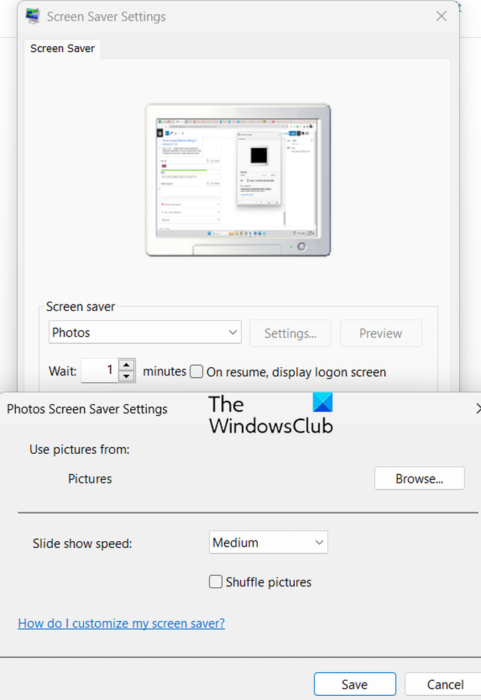
After that, press the Settings button and click on the Browse button to select the source image folder that you want to use as a screensaver slideshow. You can then change the slideshow speed to Slow, Medium, or Fast. If you want to shuffle the slideshow images, you can enable the Shuffle pictures checkbox. Else, leave it unchecked. And, press the Save button to apply new changes.
Once done, you can preview the screensaver slideshow by clicking on the Preview button. If it looks fine, click on the Apply > OK button and close the window.
Read: How to enable Wallpaper Slideshow in Windows?
How to change lock screen slideshow settings in Windows 11/10?
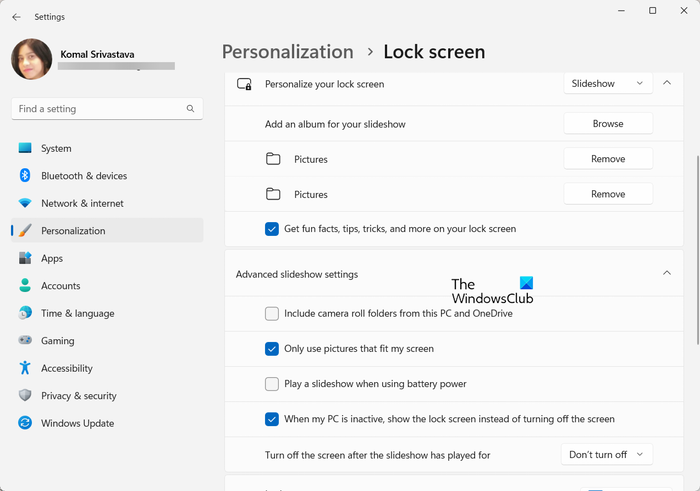
You can also configure your lock screen slideshow settings on Windows 11/10. For that, open Settings and go to the Personalization > Lock screen option. After that, set the Personalize your lock screen option to Slideshow and it will allow you to set various lock screen slideshow settings. These settings include Only use pictures that fit my screen, Play a slideshow when using battery power, Turn off the screen after the slideshow has played for, etc.
TIP: This post will help you if the Lock Screen slideshow is not working on Windows. You can use Registry or Group Policy to enable or disable Slideshow.
How do I enable slideshow in Windows 11 Photos?
The Slideshow feature in the Photos app in Windows 11 is removed now. However, users can still enable the slideshow function in the Photos app using its Legacy version. Download and install the Microsoft Photos Legacy app from Microsoft Store and open it. Go to its Album tab, add the source image folder, open the folder, right-click on the first image, and press the Slideshow option from the context menu. It will start a slideshow on your screen.
So, this is how you can set up your desktop background slideshow as well as screensaver slideshow settings on a Windows 11/10 PC.
Now read: Lock Screen slideshow not working in Windows.
Если вы видите это сообщение, значит, произошла проблема с загрузкой файлов в стилей (CSS) нашего сайта. Попробуйте сбросить кэш браузера (Ctrl+F5).
Если это не поможет, а вы находитесь в регионе, где возможны ограничения интернет-трафика с российских серверов — воспользуйтесь VPN.
|
Для чего разработана эта функция, что делает при работе Windows 10, как аппаратно отключить? Функция в составе Windows 10 «Windows: Spotlight» предназначена для автоматической загрузки и установки на экран блокировки изображений. На этих изображениях можно увидеть различные пейзажи, исторические достопримечательност Отключить функцию «Windows: Spotlight» («Windows: Интересное») можно тремя способами:
Знаете ответ? |