
Отключение или удаление OneDrive
Если вы просто не хотите использовать OneDrive, самое простое решение заключается в том, чтобы удалить связь с ней. См. инструкции ниже.
Отмена связи OneDrive с компьютера
Разрыв связи OneDrive с компьютером не приведет к потере файлов и данных. Вы всегда сможете получить доступ к файлам, выполнив вход в систему на сайте OneDrive.com.
Windows 10/11
-
Выберите облако OneDrive в области уведомлений, чтобы отобразить всплывающее окно OneDrive.
-
Нажмите значок справки и параметров OneDrive , а затем выберите Параметры.
-
Перейдите на вкладку Учетная запись.
-
Выберите Удалить связь с этим компьютером, а затем Удалить связь с учетной записью.
macOS
-
Щелкните значок облака OneDrive вверху в строке меню, нажмите Справка и параметры, чтобы открыть меню, и выберите Параметры.
-
Перейдите на вкладку Учетная запись.
-
Щелкните Удалить связь с этим компьютером Mac.
Скрытие или удаление OneDrive
В некоторых версиях Windows также можно скрыть или удалить OneDrive. Кроме того, вы можете удалить мобильное приложение OneDrive на устройствах с Android и iOS.
Приложение OneDrive входит в состав некоторых версий Windows, поэтому удалить его невозможно. Но вы можете скрыть его и отменить синхронизацию, чтобы оно оставалось скрытым. Для этого отключите все параметры OneDrive и удалите папку OneDrive в проводнике.
Отмена связи с OneDrive.
-
Выберите облако OneDrive в области уведомлений, чтобы отобразить всплывающее окно OneDrive.
-
Нажмите значок справки и параметров OneDrive , а затем выберите Параметры.
-
Перейдите на вкладку Учетная запись.
-
Выберите Удалить связь с этим компьютером, а затем Удалить связь с учетной записью.
Скрыть OneDrive.
-
Откройте проводник, щелкните правой кнопкой мыши OneDrive, а затем выберите пункт Свойства.
-
На вкладке Общие рядом с пунктом Атрибуты установите флажок Скрытый. Это действие скроет OneDrive в проводнике.
-
Снова нажмите и выберите Выйти из OneDrive. При этом значок OneDrive будет удален из области уведомлений.
Удаление OneDrive с компьютера не приведет к потере файлов и данных. Вы всегда сможете получить доступ к файлам, выполнив вход в систему на сайте OneDrive.com.
Windows 10/11
-
Нажмите кнопку Пуск, введите в поле поиска запрос «Программы» и выберите в списке результатов пункт Установка и удаление программ.
Открытие установленных приложений
-
В разделе Приложения и функции найдите и выберите Microsoft OneDrive, а затем нажмите кнопку Удалить. Если будет предложено ввести пароль администратора или подтвердить операцию, введите пароль или подтвердите выполняемое действие.
Windows 8.1
-
Приложение OneDrive входит в состав Windows 8.1 и Windows RT 8.1, и его невозможно удалить.
Windows 7 или Windows Vista
Важно: С 1 января 2022 года мы прекращаем поддержку определенных классических приложений OneDrive в операционных системах Windows 7, 8 и 8.1. Дополнительные сведения.
-
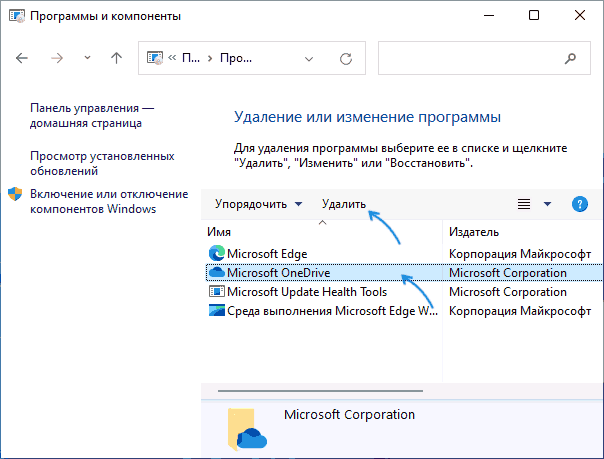
Нажмите кнопку Пуск. В поле поиска введите Добавить программы, а затем в списке результатов выберите Программы и компоненты.
-
Выберите Microsoft OneDrive, а затем нажмите кнопку Удалить. При появлении запроса на ввод пароля администратора или подтверждение введите пароль или подтвердите выполняемое действие.
Устройства с Android
-
Откройте список приложений.
-
Коснитесь и удерживайте значок OneDrive , чтобы отобразить меню.
-
Удалите приложение.
Устройства с iOS
-
Перейдите на начальный экран, а затем коснитесь значка приложения OneDrive и удерживайте его.
-
Коснитесь элемента X, который появится в левом верхнем углу значка приложения.
macOS
-
Просто перетащите приложение OneDrive в корзину.
Дополнительные сведения
Как отменить отправку или прекратить скачивание в OneDrive
Нужна дополнительная помощь?
Нужны дополнительные параметры?
Изучите преимущества подписки, просмотрите учебные курсы, узнайте, как защитить свое устройство и т. д.
In this tutorial, I will cover different methods to remove OneDrive from File Explorer on Windows 11. When you implement any of these methods, OneDrive doesn’t appear in the navigation pane in File Explorer.
On Windows 11, when you open the file explorer, you’ll notice the OneDrive icon in the sidebar just under the ‘Quick Access‘ section. Whether you are using OneDrive or not, you will see this option in the File Explorer’s sidebar.
In the screenshot below, you can see the OneDrive Personal icon in File Explorer on Windows 11. The OneDrive icon appears in the sidebar, pushing down the other files that you have pinned under quick access.


If you haven’t linked your Windows 11 with a Hotmail account, and you don’t intend to use the OneDrive app, I will show you how to get rid of it from the File Explorer.
Keep in mind that even if OneDrive is no longer visible in File Explorer, you can still access your OneDrive files using the new OneDrive app or web interface if you decide to continue using the service.
Table of Contents
Ways to remove OneDrive from Windows 11 File Explorer
You can use the following methods to hide the OneDrive icon from the navigation pane of the Windows 11 file explorer:
- Windows Registry
- Windows Settings
- Group Policy (GPO)
In this article, I will cover all the methods. You can use the method that suits you.
Method 1: Remove OneDrive from File Explorer via Windows Settings
When you uninstall the OneDrive app from Windows 11, you automatically get rid of its entries from the File Explorer. Use this method only if you are not using OneDrive as your cloud storage.
Note: You won’t lose files or data by uninstalling OneDrive from your computer. You can always access your files by signing in to OneDrive.com.
To uninstall the OneDrive app, sign in to a Windows 11 PC. Click Start and launch the Settings app. Now select Apps > Installed Apps. Type “OneDrive” in the search box, and now you’ll find the Microsoft OneDrive app listed in the search results.

Next to the OneDrive app, click on the three horizontal dots and choose Uninstall.

After the OneDrive app is uninstalled, open File Explorer on Windows 11. Now you’ll notice that OneDrive doesn’t show up in the File Explorer navigation pane.
Note: If you want the OneDrive app back on your Windows 11 PC, you can download and install it from the Microsoft Store.

Method 2: Remove OneDrive from File Explorer using Local Group Policy Editor
On Windows 11, you can customize OneDrive’s settings, including hiding it from the File Explorer, using the Local Group Policy editor. The Local Group Policy Editor is accessible on Windows 11 Pro and Enterprise editions, whereas it is disabled on Home editions.
The GPO method is useful for anyone who wants to hide OneDrive from the navigation pane without having to uninstall the OneDrive app. This method is also useful when you intend to hide OneDrive from file explorer on multiple computers in an Active Directory domain.
On Windows 11, press Win + R to open the Run dialog box. Type gpedit.msc in the text box and click OK to open the Local Group Policy Editor.
Navigate to Computer Configuration > Administrative Templates > Windows Components > OneDrive. Right-click the policy “Prevent the usage of OneDrive for file storage” and choose Edit.

The policy setting “Prevent the usage of OneDrive for file storage” lets you prevent apps and features from working with files on OneDrive.
When you enable this policy, the following changes are expected:
- Users can’t access OneDrive from the OneDrive app or file picker.
- Windows Store apps can’t access OneDrive using the WinRT API.
- OneDrive doesn’t appear in the navigation pane in File Explorer.
- OneDrive files aren’t kept in sync with the cloud.
- Users can’t automatically upload photos and videos from the camera roll folder.
If you disable or do not configure this policy setting, apps and features can work with OneDrive file storage.
Enable this policy setting by choosing Enabled. Click Apply and OK. Close the Local Group Policy Editor.

After performing the above steps, launch the File Explorer on your Windows 11 PC. The OneDrive is removed from the sidebar.
Method 3: Remove OneDrive from File Explorer using Registry
The Windows Registry stores configuration settings for all the applications on the Windows operating system. Before you use this method, I recommend that you back up the registry and save it to a file. If something goes wrong, you can use this file to restore.
To remove the OneDrive from the navigation pane in the file explorer, you can use the registry method. First, press Windows + R on your keyboard, type “regedit“, and click OK to launch the registry editor.
Next, navigate to the following path in the registry editor:
Computer\HKEY_CLASSES_ROOT\CLSID\{018D5C66-4533-4307-9B53-224DE2ED1FE6}
In the right pane, right-click on System.IsPinnedToNameSpaceTree DWORD and select Modify.

- System.IsPinnedToNameSpaceTree = 0, OneDrive is disabled in the file explorer navigation pane.
- System.IsPinnedToNameSpaceTree = 1, OneDrive is enabled in the file explorer navigation pane.
In the Value data field, type 0 and click OK.

In the registry editor, navigate to the below-mentioned registry path:
Computer\HKEY_CURRENT_USER\Software\Microsoft\Windows\CurrentVersion\Explorer\Desktop\NameSpace\{018D5C66-4533-4307-9B53-224DE2ED1FE6}
Now, in the left pane, right-click on the folder {018D5C66-4533-4307-9B53-224DE2ED1FE6} and select Delete to remove the entry.

Read Next
- Set PowerShell Execution Policy using Intune and GPO
- 6 Ways to Enable Memory Integrity on Windows 11
- Disable Command Prompt using Group Policy (GPO)
- Fix Windows Update Error 0x80070643
- How to Change your PIN in Windows 11
Still Need Help?
If you need further assistance on the above article or want to discuss other technical issues, check out some of these options.
В Windows 11 программа облачного хранилища OneDrive предустановлена по умолчанию и находится в автозагрузке. Если вы не используете эту утилиту, разумным будет удалить её.
В этой инструкции подробно о том, как полностью удалить OneDrive из Windows 11, а также о том, как убрать OneDrive из автозагрузки или отключить возможность использования этого облачного хранилища, даже если соответствующая программа установлена.
Полное удаление OneDrive из Windows 11
Если вам требуется полностью удалить OneDrive, в этом нет ничего сложного: достаточно использовать встроенные средства удаления программ. Стандартные шаги будут следующими:
- Откройте Параметры Windows 11 и перейдите в раздел «Приложения».
- Откройте пункт «Приложения и возможности».
- В списке найдите пункт «Microsoft OneDrive», нажмите по трем точкам справа и выберите «Удалить» в меню.

- Подтвердите удаление OneDrive.

Также можно использовать удаление в Панели управления:
- Откройте Панель управления Windows 11.
- Перейдите в пункт «Установка и удаление программ».
- Выберите Microsoft OneDrive в списке и нажмите «Удалить».

Для полного завершения удаления следует перезагрузить компьютер или ноутбук.
Как убрать OneDrive из автозагрузки
Если вы не хотите полностью удалять OneDrive, но требуется отключить автозапуск программы, сделать это можно следующим образом:
- Откройте Параметры и перейдите в пункт «Приложения».
- Выберите пункт «Автозагрузка».

- Отключите автозагрузку для OneDrive.
- Ещё один способ — открыть вкладку «Автозагрузка» в диспетчере задач Windows 11 и отключить автозагрузка для OneDrive там выбрав соответствующий пункт и нажав кнопку «Отключить».


Как отключить OneDrive, не удаляя его
В Windows 11 предусмотрена политика, позволяющая отключить использование OneDrive (значок в области уведомлений также не будет появляться) без удаления. Если у вас установлена Windows 11 Pro, используйте следующие шаги:
- Нажмите клавиши Win+R на клавиатуре, введите gpedit.msc и нажмите Enter.
- Запустится редактор локальной групповой политики. В нем перейдите в раздел Конфигурация компьютера — Административные шаблоны — Компоненты Windows — OneDrive.
- Дважды нажмите мышью по пункту «Запретить использование OneDrive для хранения файлов», установите значение «Включено» и примените настройки.


Если у вас Windows 11 Домашняя, то gpedit.msc запустить не получится. Вместо этого вы можете использовать следующий метод:
- Нажмите клавиши Win+R на клавиатуре, введите regedit и нажмите Enter.
- В открывшемся редакторе реестра перейдите к разделу
HKEY_LOCAL_MACHINE\SOFTWARE\Policies\Microsoft\Windows\OneDrive
(создайте подраздел при его отсутствии — правый клик по «папке» Windows — Создать — Раздел).
- Внутри этого подраздела создайте параметр DWORD с именем DisableFileSyncNGSC и установите значение 1 для него: нажмите правой кнопкой мыши в правой панели редактора реестра — Создать — Параметр DWORD 32-бита, задайте имя параметра, дважды нажмите по нему и установите значение 1.


В случае, если у вас остались вопросы, касающиеся OneDrive в Windows 11 — задавайте их в комментариях, я постараюсь помочь.
Пользователи теперь могут удалить облачное хранилище OneDrive. Вот как это сделать.
Редактор новостей Hi-Tech Mail

Компания Microsoft разрешила отказаться от своего облачного хранилища OneDrive в операционных системах Windows 10 и 11. Информация об изменениях появилась на сайте техподдержки.
На странице сказано, что теперь можно удалить или отключить OneDrive, если пользователю не нужен этот сервис. Сделать это можно с помощью нескольких простых действий.
Чтобы отменить связь хранилища с компьютером, нужно нажать на значок OneDrive в области уведомлений. Появится всплывающее окно, после чего следует нажать на значок справки и параметров, а после щелкнуть на «Параметры». Во вкладке «Учетная запись» под данным об аккаунте следует выбрать «Удалить связь с этим компьютером» и подтвердить действие.

Также можно скрыть OneDrive. Для этого нужно открыть проводник, нажать правой кнопкой мыши на OneDrive и зайти в свойства. Во вкладке «Общие» возле пункта «Атрибуты» необходимо отметить галочкой пункт «Скрытый». Затем в настройках нужно щелкнуть на «Выйти из OneDrive», после чего иконка приложения исчезнет из области уведомлений.
Чтобы полностью удалить облачное хранилище в Windows 10 или 11, следует нажать «Пуск», ввести в поле поиска «Программы» и выбрать «Установка и удаление программ». В разделе «Приложения и функции» надо выбрать Microsoft OneDrive и щелкнуть на «Удалить». Если система запросит пароль администратора, его необходимо ввести.

Ранее Microsoft анонсировала отказ от поддержки приложений на Android. В Windows 11 больше нельзя будет открыть мобильные программы.
In today’s digital world, cloud storage solutions have become an integral part of how we manage and share our files. Microsoft’s OneDrive has been one of the most popular options for users looking to store their files online. However, there may be instances where you prefer not to see OneDrive in File Explorer, or perhaps you’ve decided to use a different cloud solution. Fortunately, Windows 11 provides a straightforward way to unlink or remove OneDrive from your system. This article will guide you step by step on how to achieve this.
Understanding OneDrive in Windows 11
OneDrive is Microsoft’s cloud storage service that seamlessly integrates with Windows 11, allowing users to easily access and manage their files. When OneDrive is installed, its folder appears automatically in File Explorer, making cloud storage quickly accessible. However, not everyone finds the need for this service, and some may find it to be more of an inconvenience than a benefit.
Reasons to Remove OneDrive
There are various reasons why you might want to unlink or remove OneDrive from File Explorer:
- Preference for Local Storage: Some users prefer to store their files locally rather than in the cloud.
- Alternative Cloud Services: If you’re using other cloud storage services like Google Drive, Dropbox, or iCloud, having OneDrive present may lead to confusion.
- Performance Issues: An active OneDrive client can consume system resources, affecting performance for users with limited hardware capabilities.
- Privacy Concerns: Some users may have concerns regarding data being stored off-site, preferring to keep their documents on their local machines.
What Does Unlinking Mean?
Unlinking OneDrive in Windows 11 means disconnecting it from your account. After unlinking, your files remain on your computer, but any changes made in those files will no longer sync with the cloud. Meanwhile, entirely removing OneDrive means uninstalling the application from your device, ultimately removing it from File Explorer.
Step-by-Step Guide to Unlinking OneDrive
Step 1: Backup Your Files
Before making changes, it’s a good practice to ensure all your important files are backed up. If you are subtracting OneDrive because you are switching to another service, make sure you’ve copied your data to that service or another location.
Step 2: Unlink OneDrive Through Settings
-
Open Settings: Click on the Start menu (Windows icon) located on the taskbar, or press the Windows key on your keyboard. Type «Settings» and select the Settings app from the results.
-
Access Accounts: In the Settings window, navigate to the Accounts section found on the left.
-
Select OneDrive: Scroll down and find the OneDrive option. Click on it to view OneDrive settings.
-
Unlink This PC: Here, you will see the option to Unlink this PC. Click on this button. A prompt will appear, asking you to confirm the decision. Click Unlink account.
-
Finish Unlinking: Once you’ve confirmed, OneDrive will be unlinked from your PC. Your files will remain on your local drive, but they will no longer automatically sync with the OneDrive cloud.
Step 3: Remove OneDrive from File Explorer
Though unlinking OneDrive from your account ensures your files are no longer synced, OneDrive’s folder may still appear in File Explorer. To remove it completely, follow these additional steps.
Using Group Policy Editor (For Windows 11 Pro and Enterprise)
-
Open Group Policy Editor: Press the Windows + R keys to open the Run dialog. Type
gpedit.mscand hit Enter. -
Navigate to OneDrive Settings: In the Group Policy Editor, navigate to:
Computer Configuration -> Administrative Templates -> Windows Components -> OneDrive. -
Disable OneDrive: Look for the policy labeled Prevent the usage of OneDrive for file storage. Double-click it, select the Enabled option, and then click OK.
-
Restart Your PC: For changes to take effect, you may need to restart your computer. After the reboot, OneDrive should no longer appear in File Explorer.
Using the Registry Editor (For Windows 11 Home)
For those using a Home edition of Windows 11 without the Group Policy Editor, you can accomplish the same task using the Registry Editor.
-
Open Registry Editor: Press Windows + R again, type
regedit, and press Enter. -
Navigate to the Key: Follow the path:
HKEY_CLASSES_ROOTCLSID. -
Find OneDrive’s Class ID:
You will need to locate the OneDrive class ID. This can often be found by searching for «OneDrive» directly withinHKEY_CLASSES_ROOTCLSID. -
Delete the OneDrive Key: Once you find the relevant OneDrive Class ID, right-click on it and select Delete.
-
Confirm Deletion: Confirm the deletion when prompted. After that, exit Registry Editor.
-
Restart Your PC: To finalize your changes, restart your computer. OneDrive should now no longer be visible within File Explorer.
Step 4: Uninstalling OneDrive
If you want to go a step further and remove OneDrive entirely from your system, you can uninstall it through the following process:
-
Open Settings: Access the Settings app again by pressing the Windows key and typing «Settings.»
-
Go to Apps: Select the Apps section from the menu.
-
Installed Apps: Click on Installed apps (or Apps & Features) to see a list of installed applications.
-
Locate OneDrive: Scroll down until you find Microsoft OneDrive.
-
Uninstall: Click on the three dots next to OneDrive, and select Uninstall. A prompt will appear to confirm; click Uninstall again.
-
Follow the Prompts: Follow any additional prompts to complete the uninstallation.
-
Check File Explorer: Once uninstalled, check File Explorer to ensure that OneDrive no longer appears in the sidebar.
Conclusion
Removing OneDrive from File Explorer in Windows 11 can help streamline your experience, especially if you prefer alternative storage solutions or simply wish to declutter your interface. By unlinking, using the Group Policy or Registry Editor, and potentially uninstalling the application, you can ensure that OneDrive is no longer part of your file management routine.
Transitioning away from cloud services like OneDrive may seem daunting at first, but it can ultimately lead to a more tailored desktop environment that meets your specific needs. Remember to manage your files carefully during this process to avoid any unintended data loss, and always keep backups of important information.
While OneDrive offers many advantages, including automatic backups and easy file sharing, it’s essential to weigh those benefits against your individual preferences and requirements. Fortunately, Windows 11 allows for flexibility in this regard, empowering users to create an experience that best serves them. Enjoy your preferred workspace free of unnecessary clutter!